If you got an error code of 0x80072EE2 while trying to download a Windows 10 update then it could be that something is blocking the Windows Update service on your Windows 10 PC and is preventing it from connecting to the Microsoft server. In addition, the error code 0x80072EE2 also indicates “ERROR_INTERNET_TIMEOUT” and together with this message, you might also see a message as Windows Update encountered an unknown error or you might also find it hard to search for new updates. So in this post, you will be guided on how you can fix the Windows Update error code 0x80072EE2. Make sure to follow the steps below carefully.
Option 1 – Restart your computer and try installing the Updates again
You can restart your computer and then try installing the updates once again. There are instances when a simple restart resolves Windows Update errors. Aside from that, it would also be better if you make sure that your internet connection is working and that it’s stable. And so after you restart your computer, check for updates once again and see if you’re still getting the error or not.
Option 2 – Run the Windows Update Troubleshooter
Running the built-in Windows Update troubleshooter is one of the things you can first check out as it is known to automatically resolve any Windows Update errors like error code 0x80072EE2. To run it, go to Settings and then select Troubleshoot from the options. From there, click on Windows Update and then click the “Run the troubleshooter” button. After that, follow the next on-screen instructions and you should be good to go.
Option 3 – Try to disable your antivirus program
Disabling the antivirus program or any security software installed in your computer is always a good idea you can try when the Windows Update process does not go smoothly. So before you try updating your computer again, make sure to disable the antivirus or security program and once the Windows Update is done, don’t forget to enable the antivirus program back again.
Option 4 – Try to restart the Background Intelligent Transfer Service
The Background Intelligent Transfer Service or BITS is a part of the Windows Update service and is the one that manages the background download of Windows Update, as well as scans for new updates and so on. And if Windows Update is experiencing some problems, you can try restarting BITS but make sure that you have admin privileges to do so.
- Tap the Win + R keys to open the Run dialog box.
- Next, type “services.msc” in the field and hit Enter to open Windows Services.
- From the list of Services, look for the Background Intelligent Transfer Service and double-click on it to open Properties.
- After that, you need to set the Startup type to “Automatic (Delayed Start) and click on Apply.
- Now click the Stop button to stop BITS and then click the Start button to restart the service.
- Click OK to save the changes made and then restart your PC.
Option 5 – Try installing the updates in a Clean Boot State
It could be that some third-party application is the one that’s causing the problem so it’s best if you put your computer in a Clean Boot state. During this state, you can start the system with a minimum number of drivers and startup programs that will surely help you in isolating the root cause of the issue.
- Log onto your PC as an administrator.
- Type in MSConfig in the Start Search to open the System Configuration utility.
- From there, go to the General tab and click “Selective startup”.
- Clear the “Load Startup items” check box and make sure that the “Load System Services” and “Use Original boot configuration” options are checked.
- Next, click the Services tab and select the “Hide All Microsoft Services” check box.
- Click Disable all.
- Click on Apply/OK and restart your PC. (This will put your PC into a Clean Boot State. And configure Windows to use the usual startup, just simply undo the changes.)
- After that, try to install the Windows app again.
Note: If you are able to install the app without any trouble at all then it means that the error is caused by some third-party application on your computer. You need to look for the culprit and uninstall it once you found it.
Option 6 – Run Microsoft’s online troubleshooter
Running Microsoft’s online troubleshooter might also help you fix the Windows update error code 0x80072EE2. This online troubleshooter is known to help in fixing Windows Update errors, it scans your computer for issues that might be causing the problem and then fixes them automatically.

 As previously announced by Google feature to quickly delete the last 15min of browsing history via one button is rolling out now.
For now, only Apple users will be available to use this feature but the Android update is scheduled for later this year, a strange move by Google but it is what it is.
For anyone who is unfamiliar with this feature, basically, Google wants a quick way to remove the last 15min of browsing history as a supposedly stated request to make deleting browsing history much easier.
Google came up with this idea so you can keep the previous history intact but remove just 15min time frame, no additional explanation was given on why 15 but I presume it is some round number that came up as the middle one with research, read telemetry info.
Using quick delete requires being signed into Search with a Google account. Users can access the option by simply tapping on the avatar icon to access the settings then choosing "Delete last 15 minutes."
As previously announced by Google feature to quickly delete the last 15min of browsing history via one button is rolling out now.
For now, only Apple users will be available to use this feature but the Android update is scheduled for later this year, a strange move by Google but it is what it is.
For anyone who is unfamiliar with this feature, basically, Google wants a quick way to remove the last 15min of browsing history as a supposedly stated request to make deleting browsing history much easier.
Google came up with this idea so you can keep the previous history intact but remove just 15min time frame, no additional explanation was given on why 15 but I presume it is some round number that came up as the middle one with research, read telemetry info.
Using quick delete requires being signed into Search with a Google account. Users can access the option by simply tapping on the avatar icon to access the settings then choosing "Delete last 15 minutes." 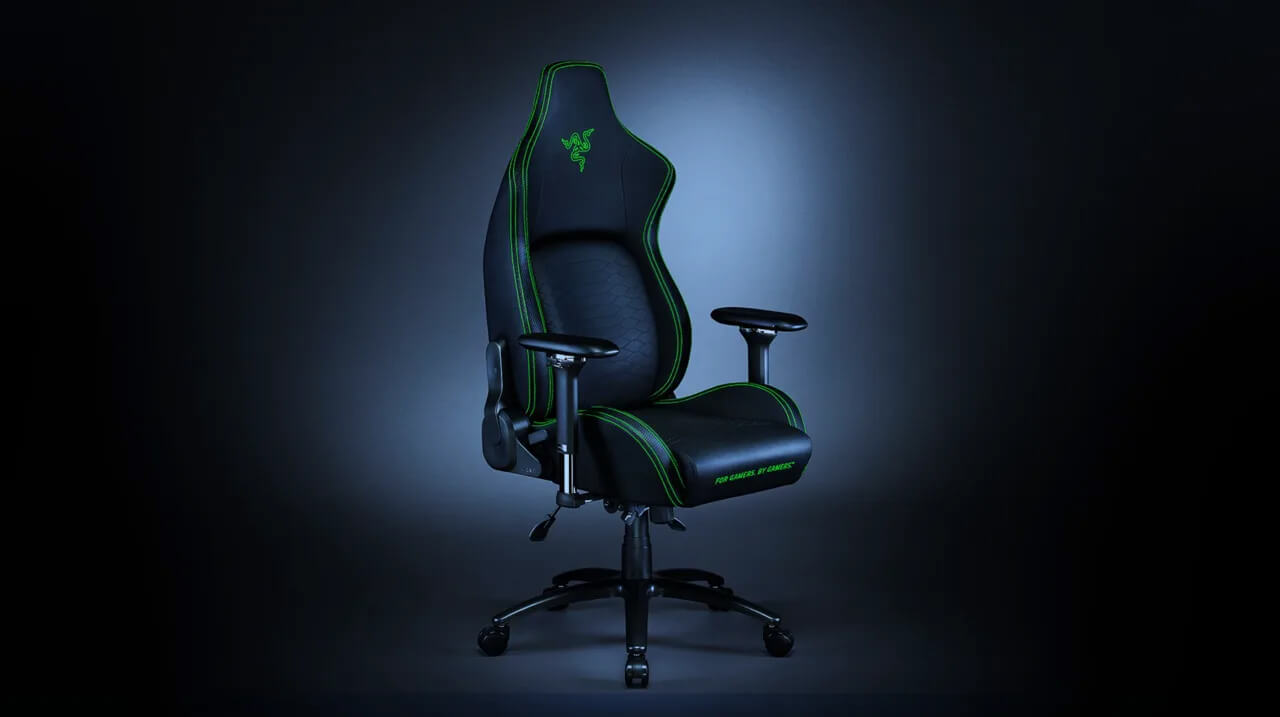 It seems that last few days we were riding some Razer bandwagon but rest assured that we are not sponsored by them in any way, truth is that simply they come up with some interesting accessories which I believe are worth covering.
Gaming Chair itself comes in two colors, fully black and green black combination and it is not really an entry-level chair if we are talking about price. The chair itself is around 600USD depending on the distributor and considering that price range it is placed in more top cream of gaming chairs but it is worth every dime.
It seems that last few days we were riding some Razer bandwagon but rest assured that we are not sponsored by them in any way, truth is that simply they come up with some interesting accessories which I believe are worth covering.
Gaming Chair itself comes in two colors, fully black and green black combination and it is not really an entry-level chair if we are talking about price. The chair itself is around 600USD depending on the distributor and considering that price range it is placed in more top cream of gaming chairs but it is worth every dime.
 How to switch
 Conclusion