Fix oobesettings error inside Windows 11

oobesettingsOobesttings error is the blue screen of death error caused by some faulty settings inside the Windows registry. The good news is that this is not a hard error to fix and if by any chance you are one of the unfortunate people getting this dreaded annoying error, please do keep reading because we have several things that you can do in order to eliminate this issue from your computer.
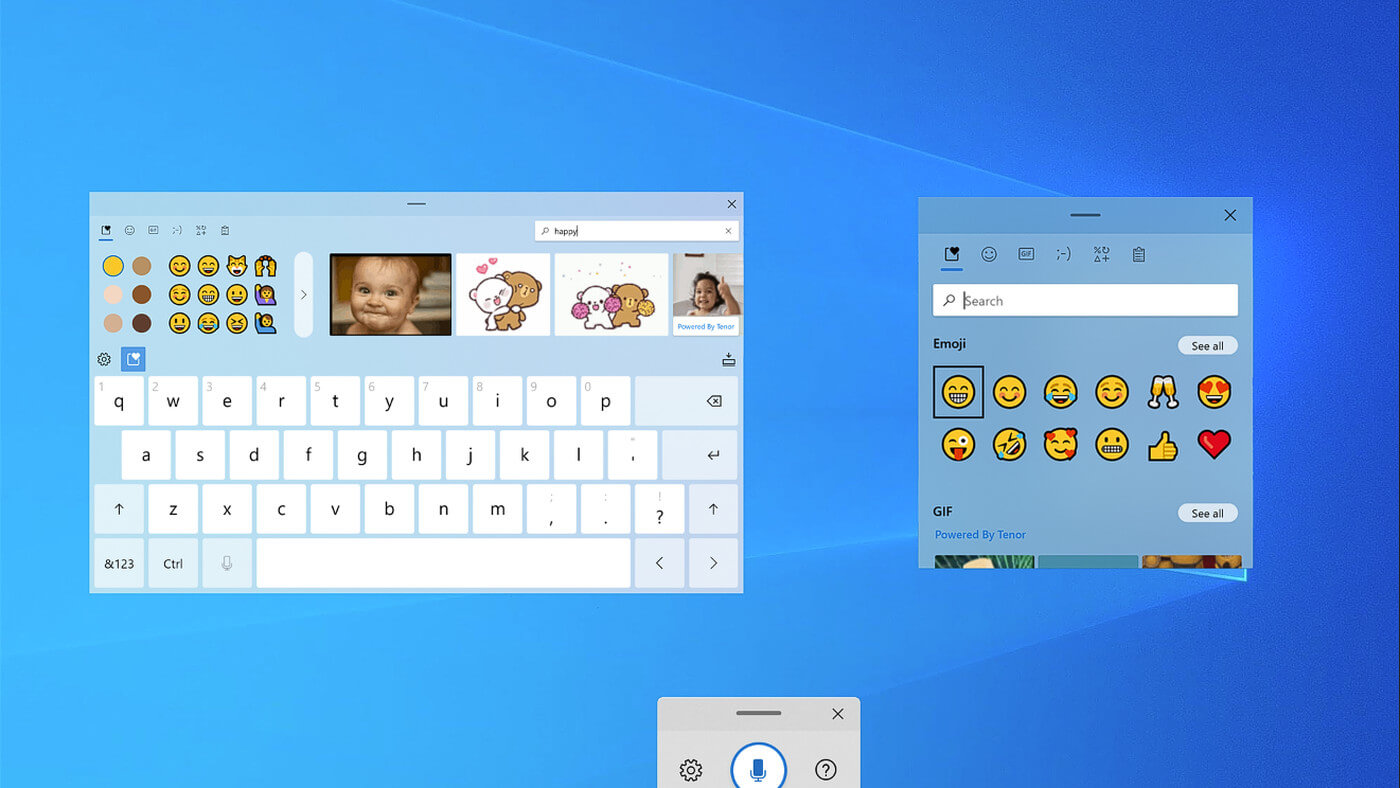
Reboot your system

This is the easiest and straightforward solution and can work sometimes since if the system has not been properly rebooted in a while memory could be filled with various processes and it can trigger oobesettings error. A simple restart of the system can solve the issue by decluttering files and emptying memory.

Scan and repair with SFC

If rebooting the system was not helpful and sadly you still receive an error then let's scan and repair system files by using Windows built-in tool SFC. In order to use this, we will have to run the command prompt in elevated administrator mode. Follow instructions closely.
First click on the search icon on the taskbar and type in CMD
The command prompt will show as a search result, on the right side click on Run as administrator.
Once it opens type in following command: sfc /scannow and press ENTER
Wait for the process to finish completely and restart your device after.

Repair the system registry

If the SFC scan has not repaired the issue then we will move to the next solution that involves repairing the system registry itself. Please note that you need to follow step-by-step for provided instructions since playing with the system registry can cause some serious issues if not done properly and can even render the system unstable. That being said, let's begin:
Press ⊞ WINDOWS + R to open Windows run dialog
Type inside regedit and press ENTER
Inside registry editor locate the following key: HKEY_LOCAL_MACHINE/SYSTEM/CurrentControlSet/Control/Session Manager/ Memory Management. and click on it to see properties
Inside the properties right-click on CommitLimit value and choose delete. Confirm with yes.
Close registry editor and reboot your computer.

Reset Windows 11

If even clearing key inside the registry editor has not helped next step would be to reset the system itself.
Press ⊞ WINDOWS + I to open Windows settings and click on System on the left.
Inside on the right part click on Recovery
In recovery click on the button next to Reset this PC that says Reset PC
Choose between keep my files and remove everything (a better option is remove everything, but be sure that you have all your files on a separate drive backed up)
Choose between Cloud Download or Local reinstall.
Click on next to confirm choices and after that on Reset to start the reset process.
Follow onscreen instructions until it is fully done.

Do You Need Help with Your Device?

Our Team of Experts May Help
Troubleshoot.Tech Experts are There for You!
Replace damaged files
Restore performance
Free disk space
Remove Malware
Protects WEB browser
Remove Viruses
Stop PC freezing
GET HELP
Troubleshoot.Tech experts work with all versions of Microsoft Windows including Windows 11, with Android, Mac, and more.

Share this article:

You might also like

Error Code 0xc00000e9
If Error Code 0xc00000e9 appears on your screen, there is no cause to panic yet as there are different ways to fix this. Here, I will list down different methods to get your computer back on track:
  1. Check peripheral connections
  2. Check your SATA cables
  3. Check your hard drive
  4. Check your BIOS settings

Quick Fix 1. Check Peripheral Connections

  1. Turn off your computer.
  2. After the computer has been shut down, take off all the peripherals or the USB cables that are connected to your USB ports. This includes even the keyboard and the mouse. We just need to have only the monitor plugged in for this one.
  3. Turn on your computer and see if it starts as it normally does.
  4. If it does, try connecting back your external devices or peripherals one by one until you find the one that causes the error.
  5. Once you trace the device that’s causing the error, you will have to change its USB cable and update its driver to support your operating system.

Quick Fix 2. Check your SATA cables

It is possible that what causes a barrier between your operating system and your hard drive from communicating is the SATA cable used. For example, if you’re using an older SATA with a SATA III port, there might not be adequate support for the transfer of data from one another. Or, the problem might be a loose SATA cable which would still require you to buy a new one to replace your loose or damaged cable. To check if your SATA cables are causing the error, simply follow these steps:
  1. Turn off your computer.
  2. Carefully open its case.
  3. Check the hard drive and the SATA port where it’s connected.
  4. Try to use a newer cable and connect it to your SATA port. (If you used a SATA II cable, you can see if a SATA III cable is more compatible.)
  5. Replace your SATA cable with a newer one if Step 4 proves to be successful.

Quick Fix 3. Check your hard drive.

  1. Try to use a different hard drive and see if error code 0xc00000e9 still appears.
  2. If it works out just fine, then the problem might be physical damage to your hard drive and would need to be repaired depending on the case. Just simply take it to a technician and let him know about the issue.

Quick Fix 4. Check your BIOS settings

  1. Restart your computer.
  2. Once your computer starts, press and hold the ESC, F2, F12, or DEL key to go to BIOS settings.
  3. You will then be redirected to the BIOS Setup Utility screen. From here, go to Boot options.
  4. In the Boot Options, see if your first boot device is your hard drive. If it isn’t, press the arrow key to select the hard drive and move it to the top of the boot device list.
  5. Save the settings.
  6. Reboot your computer.
Note: If all the methods above do not work, the problem might be on your drivers and you might need to update them. You can update your driver in two ways: Manual driver update and Automatic driver update. You can find procedures online in updating your drivers.
Read More
How to Fix Error Code 0x8007232B

Error Code 0x8007232B (Code 0x8007232B) – What is it?

Error code 0x8007232B (Code 0x8007232B) is an error that occurs when you attempt to activate Windows Server 2008 or Windows Vista.

Common symptoms include:

  • Attempting to activate Windows 7, Windows 8, or Windows Server 2012 and you receive an error message.
  • The error message says: “Windows could not be activated. Key management services host could not be located in domain name system, please have your system administrator verify that a KMS is published correctly in DNS”
  • The error message says “The directory name, file name, or volume label syntax is incorrect”.

Error Causes

  • Error Code 0x8007232B occurs when you attempt to use media that is volume licensed to install: Windows 8, Windows 7, Windows Vista Enterprise, Windows Vista Business, Windows Server 2012, Windows Server 2008, Windows Server 2008 R2.
  • This error code also occurs when the activation wizard is unable to connect to a Key Management Service host computer.

Further Information and Manual Repair

Error code 0x8007232B can be seen when you are trying to activate windows, on several different operating systems. This problem can usually be easily corrected, but in the event that it can't, please contact a computer repair technician. When you try to install any of the previously mentioned Windows products, they use a generic product key to install the volume-based license software. If you do have a KMS host computer configuration and see these error codes, that means the correct DNS entries are not being seen on the computer. If there is not a KMS host computer setup, you need to do this setup, otherwise switch to a MAK product key method, and activate the volume license installation that way.

Method One:

Using a Multiple Activation Key as opposed to KMS activation

  1. Click the Start icon, click on All Programs, click on Accessories, right-click on Command prompt.
  2. Click on “Run as administrator”. Type in the password or provide confirmation if prompted for administrator password or confirmation.
  3. When asked for the command prompt, enter in the following and then hit the Enter buuton: slmgr -ipk xxxxx-xxxxx-xxxxx-xxxxx-xxxxx  Note: this placeholder represents the MAK product key.

Method Two:

Configure a KMS host server for the clients to activate against.

A KMS host server needs to be configured for the clients to activate against. When there are no KMS host servers configured near you, install and activate a KMS server key. After this, configure a computer on the network to host this KMS software and publish the Domain Name System (DNS) settings.

Method Three:

When the client cannot locate a KMS host on the network for activation:

1. Verify that your computer has the KMS host installed and activated by using a KMS key that is registered in DNS. You will follow these steps to do that:

  1. Click the Start button, click on All Programs, click Accessories, and then right-click on Command Prompt.
  2. Click on Run as Administrator. Type the password or provide confirmation if you are asked for an administrator password or for confirmation.
  3. In the command prompt box, type the following command and press ENTER: nslookup -type=all _vlmcs.tcp>kms.txt
  4. Then open the KMS.txt file generated by this command. The file will contain at least one entry that relays the SRV service location.

2.  A KMS host server registers a DNS SRV record once every 24 hours by default. You should check the registry to see if the KMS host server is registering with the DNS. Follow these steps to do so:

  1. Click on Start, type in regedit, and then press Enter.
  2. Locate HKEY_LOCAL_MACHINESOFTWAREMicrosoftWindowsNTCurrentVersionSL and then click on it.
  3. The KMS server does not register in DNS if the DisableDnsPublishing subkey is existing and has a value of 1. If this subkey is missing altogether, create a DWORD value called the DisableDnsPublishing. If the dynamic registration is suitable, the subkey value should be changed to 0. Right-click DisableDnsPublishing, click on Modify, enter 0 into the Value data box, and click OK.
Read More
Explanation of deep and dark WEB
Often when we connect to the internet were browsing indexed pages through some well-known search engine, usually Google. But beneath the so-called normal internet lurks deep and dark web. You might have heard of the deep web and dark web if you have some geeky friends and we are here to explain what exactly is the deep and dark web. The first thing to know is that the deep and dark web is not the same thing and they coexist separately from one another, you could say that beneath the deep web lies the dark web, yet another layer of the internet. So let us explore first the deep web. What is exactly a deep web?

Deep web, hidden web, or invisible web

as sometimes referenced are part of worldwide web not indexed by search engines, meaning that engines do not basically see and index content of deep web sites. The content of the deep web is hidden behind HTTP forms and includes many very common uses such as webmail, online banking, private or otherwise restricted access social-media pages and profiles, some web forums that require registration for viewing content, and services that users must pay for, and which are protected by paywalls, such as video on demand and some online magazines and newspapers. The content of the deep web can be located and accessed by a direct URL or IP address but may require a password or other security access to get past public website pages. While it is not always possible to directly discover a specific web server's content so that it may be indexed, a site potentially can be accessed indirectly (due to computer vulnerabilities). To discover content on the web, search engines use web crawlers that follow hyperlinks through known protocol virtual port numbers. This technique is ideal for discovering content on the surface web but is often ineffective at finding deep web content. For example, these crawlers do not attempt to find dynamic pages that are the result of database queries due to the indeterminate number of queries that are possible. It has been noted that this can be (partially) overcome by providing links to query results, but this could unintentionally inflate the popularity of a member of the deep web.

Dark WEB

The dark web is the World Wide Web content that exists on darknets: overlay networks that use the Internet but require specific software, configurations, or authorization to access. Through the dark web, private computer networks can communicate and conduct business anonymously without divulging identifying information, such as a user's location. The dark web forms a small part of the deep web, the part of the Web not indexed by web search engines, although sometimes the term deep web is mistakenly used to refer specifically to the dark web. The darknets which constitute the dark web include small, friend-to-friend peer-to-peer networks, as well as large, popular networks such as Tor, Freenet, I2P, and Riffle operated by public organizations and individuals. Users of the dark web refer to the regular web as Clearnet due to its unencrypted nature. The Tor dark web or Onionland uses the traffic anonymization technique of onion routing under the network's top-level domain suffix .onion.

Dark & Deep WEB difference

The dark web has often been conflated with the deep web, the parts of the web not indexed (searchable) by search engines. The dark web forms a small part of the deep web but requires custom software in order to access its content. This confusion dates back to at least 2009. Since then, especially in reporting on Silk Road, the two terms have often been conflated, despite recommendations that they should be distinguished. Darknet websites are accessible only through networks such as Tor ("The Onion Routing" project) and I2P ("Invisible Internet Project"). Tor browser and Tor-accessible sites are widely used among darknet users and can be identified by the domain ".onion". While Tor focuses on providing anonymous access to the Internet, I2P specializes in allowing anonymous hosting of websites. Identities and locations of darknet users stay anonymous and cannot be tracked due to the layered encryption system. The darknet encryption technology routes users' data through a large number of intermediate servers, which protects the users' identity and guarantees anonymity. The transmitted information can be decrypted only by a subsequent node in the scheme, which leads to the exit node. The complicated system makes it almost impossible to reproduce the node path and decrypt the information layer by layer. Due to the high level of encryption, websites are not able to track the geolocation and IP of their users, and users are not able to get this information about the host. Thus, communication between darknet users is highly encrypted allowing users to talk, blog, and share files confidentially.

Darknet

The darknet is also used for illegal activity such as illegal trade, forums, and media exchange for pedophiles and terrorists. At the same time, traditional websites have created alternative accessibility for the Tor browser in an effort to connect with their users. ProPublica, for example, launched a new version of its website available exclusively to Tor users.
Read More
Not enough USB controller resources Error
As you know, USB is now being widely used in all devices with USB A as the leading type with most devices based on it. Peripheral devices such as Pen Drives, External Hard disks, and many more also use a USB port. On the other hand, USB C is also coming up to be the next big standard in the computing world because of its high transfer speeds, wider compatibility as well as support for external Graphics Processing Units. However, just recently, USB 3.0 ports have been reported to cause the following error to pop up on Windows 10 computers every time a USB device is plugged in.
“Not enough USB controller resources. The controller does not have enough resources for this device.”
To fix this error, here are some guidelines you can check out. Make sure to follow them carefully.

Option 1 – Try to use a lower generation USB port

The first thing you can do is to try using a lower generation USB port as this issue mostly occurs when a device is connected to a USB 3,0 port. This means that you have to plug in your device to a USB 2.0 port and then see if it fixes the error or not. You can easily decipher a USB 3.0 port from a USB 2.0 port as the former is in blue.

Option 2 – Try to use a dock

You could also try to use a dock to resolve the error. Note that when too much power on laptops and notebooks are drawn from the USB ports and as a USB 3.0 port draws more power compared to a USB 2.0 port. Thus, if you plug in your USB storage device into a USB 2.0 port with the help of a dock, it should fix the problem.

Option 3 – Try disabling the xHCI Mode option in the BIOS

  • First, boot your computer into the BIOS.
  • Once your computer has booted, go to the Advanced tab.
  • Next, make sure that the entry for “xHCI Pre-boot mode” is set to Disabled under the USB Configuration section.
  • Now save the changes you’ve made and then restart your computer to Windows 10 and see if the error is now fixed.

Option 4 – Update or reinstall the Universal Serial Bus Controller driver

Since it could be a driver issue, you can try to update or reinstall the Universal Serial Bus Controller drivers using the Device Manager. Refer to the following steps:
  • First, click the Start button and type “device manager”.
  • Then click on the “Device Manager” from the search results to open it.
  • From there, look for the “Universal Serial Bus controllers” option and then right click on each one of the USB drivers, especially the Generic USB Hub driver, and then select the Update Driver from the menu.
  • Restart your PC and then click the “Search automatically for updated driver software” option.
Note: If updating the USB Controller drivers didn’t work, you can try to reinstall them instead.

Option 5 – Run the Hardware and Devices Troubleshooter

You could also run the Hardware and device Troubleshooter to try and fix the “Not enough USB controller resources” error.
  • The first thing you need to do is click on Start and then on the gear-like icon to pull up the window for Settings.
  • After opening Settings, look for the Update and Security option and select it.
  • From there, go to the Troubleshoot option located on the left-hand side of the list.
  • Next, select Hardware and Devices from the list and open the Troubleshooter and run it. Once it is doing its job, wait for it to complete the process and then restart the system.
  • After the system restarts, check if the problem’s now fixed. If not, refer to the next option given below.
Read More
Fix Windows Update Error Code 0x80246017
Updating your Windows 10 computer isn’t always as easy as it should be since there are times when you might encounter some errors along the way. One of these errors is the error code 0x80246017 that comes with the error message “WU_E_DM_UNAUTHORIZED_LOCAL_USER”. According to Microsoft, the cause of this particular Windows Update error is that “The download failed because the local user was denied authorization to download the content”. So if you got this error when you tried updating your computer, read on as this post will provide you some suggestions on how you can fix it. Before you troubleshoot the problem using the options given below, make sure that you are logged in as administrator. If you are already logged in as an administrator, follow each one of the options carefully.

Option 1 – Try to check the status of some Windows Update Services

  • Tap the Win + R keys to open the Run dialog box.
  • Next, type “services.msc” in the field and hit Enter or click OK to open Services.
  • From the list of Services, look for the following services and make sure that their Startup type is as follows:
    • Windows Update – Manual (Triggered)
    • Background Intelligent Transfer Service – Manual
  • After that, check if the Service status of the listed services above is set to Running. If they’re not, click on the Start button to start these services and then check if you can now enable the Windows Update service or not.

Option 2 – Try to grant Full Control of the System Volume Information directory

  • First, tap the Win + X key combination and then select Command Prompt (Admin) from the given menu.
  • After opening Command Prompt with admin privileges, type the following command and tap Enter to execute it:
c md.exe /c takeown /f "C:System Volume Information*" /R /D Y && icacls "C:System Volume Information*" /grant:R SYSTEM:F /T /C /L
  • Once the command is executed, it will run a batch of tasks and will show each one of their statuses on the command line window and once they’re done, exit Command Prompt.
  • Now restart your computer and see if it fixed the problem or not.

Option 3 – Try to disable your antivirus program or Firewall

Disabling the antivirus program or Firewall or any other security software installed in your computer is always a good idea you can try when the Windows Update process does not go smoothly. So before you try updating your computer again, make sure to disable the antivirus or security program and once the Windows Update is done, don’t forget to enable the antivirus program back again.

Option 4 – Try running the DISM tool

You can try running the Deployment Imaging and Servicing Management or DISM tool to fix the Windows Update error. Using this built-in tool, you have various options such as the “/ScanHealth”, “/CheckHealth”, and “/RestoreHealth”.
  • Open the Command Prompt with admin privileges.
  • Then type in the following commands and make sure to hit Enter right after you type each one of them:
    • Dism /Online /Cleanup-Image /CheckHealth
    • Dism /Online /Cleanup-Image /ScanHealth
    • exe /Online /Cleanup-image /Restorehealth
  • After that, wait until the process is finished and do not close the window as the process will probably take a couple of minutes.
  • Once it’s done, restart your computer.

Option 5– Run the Windows Update Troubleshooter

If the DISM tool didn’t work in fixing the error, you could also try running the Windows Update Troubleshooter as it could also help in fixing any issues related to Windows Update including the Windows Update error code 0x80246017. To run it, go to Settings and then select Troubleshoot from the options. From there, click on Windows Update and then click the “Run the troubleshooter” button. After that, follow the next on-screen instructions and you should be good to go.

Option 6 – Run Microsoft’s online troubleshooter

Running Microsoft’s online troubleshooter might also help you fix the Windows Update error code 0x80246017. This online troubleshooter is known to help in fixing Windows Update errors, it scans your computer for issues that might be causing the problem and then fixes them automatically.
Read More
Fix Communication with service process failed
This post will guide you in fixing the “Communication with service process failed” error in Windows 10. This error is related to the Intel Driver and Support Assistant application. Although this error does not reportedly cause any loss of functionality in the computer, however, it still indicates that there is something wrong with some of your driver modules. Intel has taken a bold step and combined its older modules into this new application (Intel Driver and Support Assistant) recently. This application enables users to scan their computers for any available updates from Intel. This is the main application of Intel and provides users a way to update their driver software automatically instead of manually updating it. However, with the recent reports submitted by some users, it seems that something is wrong with this application, and users to have to deal with the “Communication with service process failed” error. This error might be caused by several reasons, for one, it could be that the application is corrupted or incomplete in its nature which is possible since this is still a developing and newly released app. It could also be that there are other utilities or modules that conflict with the Intel software. Whichever the reason may be, you can try out the options given below to resolve the problem but before you proceed, make sure that you have an administrator account as well as an active and stable internet connection.

Option 1 – Disable DSATray in Startup

If you receive this error message every time you start your computer then this means that the application is not able to launch properly. Like pointed out, it could be that it is still incomplete in nature or it conflicts with other applications. Thus, you can try to disable the service from the startup and check if it fixes the problem.
  • Tap the Win + R keys to open the Run dialog box.
  • Then type “taskmgr” in the field and hit Enter to open the Task Manager.
  • After that, go to the Startup tab and look for the Intel Driver and Support Assistant app.
  • Right-click on the app and select Disable.
  • Restart your PC and check if the error is now fixed or not

Option 2 – Reinstall the Intel Driver and Support Assistant

If the first option did not work, you can try reinstalling the Intel Driver and Support Assistant app. To do so, follow these steps:
  • In the search box, type in “control” and then click on Control Panel (desktop app) among the search results.
  • After that, select Programs and Features from the list which will give you a list of all the programs installed on your computer.
  • From there, look for Intel Driver and Support Assistant and select it and then uninstall it.
  • After you have the app uninstalled, open your browser and go to Intel’s official website. From there, download the driver utility manually.
  • Once the download is finished, right-click on it and select “Run as administrator” and install the app on your PC with elevated access.
  • Restart your PC and then check if the error is now fixed.
Read More
Repair Error Code 0x80070715 in 3 Simple Steps

What is Error Code 0x80070715?

Seeing obscure error codes like 0x80070715 on the screen again and again can be annoying simply because you have no idea why it keeps popping up? What does it mean? Well, for beginners you don’t have to decode it, we’ll make it simple for you. This error code indicates missing .dll files in the system or a corrupt registry. Due to this, you get locked from accessing and running applications on your system.

Solution

Restoro box imageError Causes

This error occurs largely because of two reasons:
  1. Disk damage due to cluttered registry
  2. The system gets infected by malware or a virus(es)
The error code 0x80070715 creates hurdles in the functioning of the applications. If this error is not repaired immediately it can result in serious damages like system crash and failure.

Further Information and Manual Repair

Many people pay hundreds of dollars to technicians to resolve this issue on their systems. Is it worth it? Not exactly!

How about we tell you a time and a money-saving way to fix the error code 0x80070715 on your PC?

The best way to resolve this issue on your system in seconds and also for free is to install Restoro. This is an advanced, powerful, and multi-functional system repair and a PC optimizer tool. It is smoothly integrated with numerous performance-driven utilities like registry cleaner, privacy error detector (anti-virus), Active X and Class error, and system stability detector. With this helper, you can resolve not only the error code 0x80070715 but also other types of PC-related errors. Whether the cause of the error code 0x80070715 on your PC is malware or cluttering cluttered disk, Restoro can be used to resolve them all. Its powerful and intuitive registry cleaner scans the registry and repairs it successfully. It removes junk files, internet history, temporary internet files, invalid entries, and also the files from the uninstalled programs still saved in the system’s registry. It wipes out all the clutter on your hard disk and cleans it in seconds freeing up plenty of space. It repairs the registry resolving the error 0x80070715 quickly. Nonetheless, if the error 0x80070715 is triggered due to viral infection or malware it removes them too. By downloading unknown files, accessing malicious websites, and opening phishing emails viruses can enter your PC. You may not be aware of these until error code 0x80070715 pops on your screen. It is wise to remove viruses right away because these give hackers access to your system which often results in data breaches and exposes users to system security threats. Restoro also works as a powerful antivirus. All malware, spyware, and viruses affecting your PC are scanned with the help of the advanced built-in privacy error detector utility. This utility embedded in the system detects viruses and malware in your system and removes them from your system successfully. Restoro is an easy-to-use repair tool. It has a simple layout and a user-friendly interface. It is easy to navigate through the repair tool, scan for errors and repair them without any hassle. Users of all levels, novice and experienced can use this tool with ease. You don’t need to be technically sound to work around this tool. Here's how to Install and run Restoro PC Fixer: In addition to this, you can run it on any Windows version. It is compatible with practically all versions. No matter what the cause for error code 0x80070715 maybe, you don’t need to get into the nitty-gritty of it and find a specific tool to resolve the issue. All you have to do is install this multi-functional Restoro on your system. Here are the 3 simple steps that you need to follow for successful repair:
  1. Click here to install Restoro.
  2. Scan your PC
  3. Press the Repair Tab to fix the issue right away
To ensure your PC is error-free, registry clean and your system runs at its optimum speed, scan your PC with Restoro regularly.
Read More
T-Mobile Hack, 40 Million and more Impacted
T-MobileHacker group recently came up with claims that they have stolen data from 100 million T-Mobile customers. T-Mobile has responded with confirmation it has been compromised and that over 40 million records were stolen, among them are not just present customers, but anyone who has applied for T-Mobile service as well as past accounts.

What has been stolen?

Report from T-Mobile states that stolen records included first and last name, date of birth, social security number, driver’s license & ID information. The company said that it has “no indication that the data contained in the stolen files included any customer financial information, credit card information, debit or other payment information.” Not really a reassuring statement meaning that they really do not know, but even if the statement is true, already stolen information is as much if even not more damaging and devastating as payment information.

What T-Mobile is planning to do now?

It is stated that the hole used for the hack has been addressed and closed so no more data can be stolen. Considering people that had their personal information compromised, T-Mobile said it is planning to reach out to them and offer them two years of free identity protection through McAfee’s ID Theft Protection Service. Additionally, T-Mobile recommends postpaid customers change their PIN by going online into their T-Mobile account or calling T-Mobile customer service by dialing 611 on their phone. The company also recommends a feature called Account Takeover Protection that prevents unauthorized individuals from stealing a phone number and porting it out of T-Mobile. Finally, the company will publish a website “for one-stop information and solutions to help customers take steps to further protect themselves.”
Read More
How to get rid of DailyBibleGuide

Daily Bible Guide is a browser extension developed by Mindspark Inc. for Google Chrome Browser. This extension offers users a fast and easy way to find Bible passages, view daily verses, study the Bible and view the current weather. When installed, this extension changes your default search engine and your home page to MyWay.

When installed this extension gathers user browsing information such as visited websites, search queries, clicked links, and other information. This information is later used to better target ads.

While active, you may encounter additional unwanted ads and sponsored links throughout your browsing sessions. Daily Bible Guide was marked as a Browser Hijacker by several anti-virus scanners, and due to its information mining behavior, it is considered a security risk and it is not recommended to keep on your computer; being flagged for optional removal.

About Browser Hijackers

Browser hijackers (sometimes known as hijackware) are a kind of malware that alters internet browser settings without the computer owner’s knowledge or approval. These kinds of hijacks are rising at a worrying rate around the globe, and it could be actually nefarious and sometimes dangerous too. There are plenty of reasons why you might experience an internet browser hijack; but commercial, advertising, and marketing are definitely the key reasons for their creation. Generally, the idea would be to force users to visit particular sites which are looking to improve their site visitor traffic and produce higher advertisement revenue. While it might seem harmless, these tools were created by malicious individuals who always attempt to take full advantage of you, so that they could make money from your naivety and distraction. Furthermore, hijackers can make the entire infected system vulnerable – other destructive malware and viruses will grab these opportunities to intrude into your computer effortlessly.

Signs of browser hijacker infection

The typical symptoms that signify having this malware on your computer are: home page is modified; you find new unwanted favorites or bookmarks added, typically directed to ad-filled or porn websites; the default search engine is modified; discover new toolbars which you did not add; you may see random pop-ups start occurring frequently; your internet browser has instability issues or exhibits frequent errors; you cannot visit specific websites like home pages of antivirus software.

So how does a PC get infected with a browser hijacker?

Browser hijackers attack computer systems via malicious email attachments, downloaded infected files, or by visiting infected sites. They sometimes are included with toolbars, add-ons, BHO, plugins, or browser extensions. A browser hijacker can also come bundled up with some free application that you inadvertently download to your computer, compromising your internet security. A good example of a popular browser hijacker is the most recent Chinese malware named “Fireball”, which has infected 250 million PCs throughout the world. It works as a hijacker but could be changed into a fully functioning malware downloader afterward. Browser hijackers will interrupt the user’s browsing experience significantly, keep track of the websites frequented by users and steal private information, cause difficulty in connecting to the net, and ultimately create stability problems, causing software programs and computers to crash.

Browser Hijacker Malware – Removal

Certain browser hijacking can be quite easily reversed by identifying and removing the corresponding malware program through your control panel. However, the majority of hijackers are extremely tenacious and need specialized tools to eradicate them. Additionally, manual removals require deep system knowledge and thus can be quite a difficult task for inexperienced computer users. Installing and running anti-malware programs on the affected computer could automatically delete browser hijackers and other malicious programs. Safebytes Anti-Malware features a cutting-edge anti-malware engine that will help you prevent browser hijacking in the first place, and clean up any pre-existing issues. In addition to anti-malware, a PC optimizer software, for example, Total System Care, will help you fix Windows registry errors, remove unwanted toolbars, secure online privacy, and stabilize software programs installed on the computer.

Malware Blocking Internet And All Antivirus Software? Do This!

Malware can cause a lot of damage to your PC. Some malware variants modify internet browser settings by including a proxy server or change the PC’s DNS settings. When this happens, you will be unable to visit some or all of the websites, and therefore not able to download or install the necessary security software to clear out the infection. If you’re reading this right now, you’ve perhaps recognized that virus infection is a reason behind your blocked internet connectivity. So how to proceed when you want to download and install an anti-malware program like Safebytes? Although this sort of issue will be difficult to get around, there are some steps you can take.

Install in Safe Mode

If the malware is set to run at Windows startup, then booting in safe mode should avoid it. Only minimal required programs and services are loaded when you start your PC into Safe Mode. You will have to do the following to remove malware in Safe mode. 1) At power-on/startup, press the F8 key in 1-second intervals. This will invoke the Advanced Boot Options menu. 2) Choose Safe Mode with Networking with arrow keys and press Enter. 3) As soon as this mode loads, you should have an internet connection. Now, obtain the malware removal program you want by using the browser. To install the software, follow the directions within the installation wizard. 4) Once the software is installed, let the scan run to eliminate viruses and other malware automatically.

Switch over to some other web browser

Web-based viruses could be environment-specific, aiming for a specific web browser or attacking particular versions of the web browser. If you are not able to download the security software using Internet Explorer, it means the virus may be targeting IE’s vulnerabilities. Here, you should switch to an alternate internet browser such as Chrome or Firefox to download the Safebytes application.

Create a portable USB antivirus for removing viruses

To effectively remove the malware, you should approach the issue of running an anti-malware program on the affected computer from a different perspective. To run anti-malware using a USB flash drive, follow these simple steps: 1) Download the anti-malware on a virus-free PC. 2) Mount the USB drive onto the same system. 3) Double-click the Setup icon of the anti-malware program to run the Installation Wizard. 4) Choose the drive letter of the USB drive as the location when the wizard asks you exactly where you would like to install the anti-virus. Do as instructed on the screen to finish off the installation process. 5) Now, transfer the flash drive to the infected PC. 6) Double click the Safebytes Anti-malware icon on the USB drive to run the application. 7) Run Full System Scan to detect and clean-up up all types of malware.

SafeBytes Anti-Malware - More Protection For You Personally

These days, an anti-malware tool can protect your computer from different kinds of online threats. But exactly how to select the best one among plenty of malware protection software that’s available on the market? You may be aware, there are many anti-malware companies and tools for you to consider. Some are worth your money, but many aren’t. You must be careful not to choose the wrong application, especially if you purchase a paid program. While thinking about the highly regarded software programs, Safebytes AntiMalware is undoubtedly the strongly recommended one. SafeBytes anti-malware is a powerful, very effective protection application designed to assist users of all levels of computer literacy in detecting and eliminating harmful threats out of their PC. Once you’ve got installed this tool, SafeByte's state-of-the-art protection system will make sure that absolutely no viruses or malware can seep through your computer.

SafeBytes anti-malware takes computer protection to a whole new level with its advanced features. Listed below are some of the great ones:

Anti-Malware Protection: This deep-cleaning anti-malware software goes much deeper than most antivirus tools to clean out your personal computer. Its critically acclaimed virus engine finds and disables hard to remove malware that hides deep inside your computer. Real-time Threat Response: Malware programs attempting to get into the computer are identified and stopped as and when detected by the SafeBytes real-time protection shields. It’ll inspect your personal computer for suspicious activity regularly and its unparalleled firewall shields your PC from illegal access by the outside world. “Fast Scan” Features: SafeBytes’s virus scan engine is among the fastest and most efficient in the industry. It's targeted scanning highly increases the catch rate for viruses which is embedded in various PC files. Web Protection: SafeBytes gives an instant safety rating to the web pages you are going to visit, automatically blocking dangerous sites and ensuring that you are certain of your safety while browsing the world wide web. Light-weight: SafeBytes is a lightweight and user-friendly antivirus and antimalware solution. As it uses very little computer resources, this tool leaves the computer’s power exactly where it belongs to: with you. 24/7 Guidance: SafeBytes provides 24/7 technical support, automatic maintenance, and software upgrades for the best user experience. To sum it up all, SafeBytes Anti-Malware offers great protection combined with very low system resource usage with both great malware prevention and detection. Malware trouble will become a thing of the past when you put this application to use. If you’re looking for the very best malware removal application out there, and when you don’t mind shelling out some money for it, opt for SafeBytes Anti-Malware.

Technical Details and Manual Removal (Advanced Users)

If you’d like to manually remove Daily Bible Guide without using an automated tool, it might be possible to do so by deleting the program from the Windows Add/Remove Programs menu, or in cases of browser extensions, going to the browsers AddOn/Extension manager and uninstalling it. You will probably also want to reset your internet browser. If you choose to manually remove the system files and Windows registry entries, utilize the following list to ensure that you know exactly what files to remove before performing any actions. Please remember that only experienced users should try to manually edit the system files simply because removing any single critical registry entry results in a major problem or even a PC crash. In addition, certain malicious programs have the capability to defend against its removal. It is advisable that you carry out the removal process in Safe Mode.
Files: Search and Delete: 2vauxstb.dll 2vbar.dll 2vbarsvc.exe 2vbprtct.dll 2vbrmon.exe 2vbrstub.dll 2vdatact.dll 2vdlghk.dll 2vdyn.dll 2vfeedmg.dll 2vhighin.exe 2vhkstub.dll 2vhtmlmu.dll 2vhttpct.dll 2vidle.dll 2vieovr.dll 2vimpipe.exe 2vmedint.exe 2vmlbtn.dll 2vmsg.dll 2vPlugin.dll 2vradio.dll 2vregfft.dll 2vreghk.dll 2vregiet.dll 2vscript.dll 2vskin.dll 2vsknlcr.dll 2vskplay.exe 2vSrcAs.dll 2vSrchMn.exe 2vtpinst.dll 2vuabtn.dll AppIntegrator64.exe AppIntegratorStub64.dll BOOTSTRAP.JS 2vffxtbr.jar CHROME.MANIFEST CREXT.DLL CrExtP2v.exe DPNMNGR.DLL EXEMANAGER.DLL Hpg64.dll LOGO.BMP NP2vStub.dll T8EXTEX.DLL T8EXTPEX.DLL T8HTML.DLL T8RES.DLL T8TICKER.DLL VERIFY.DLL s_pid.dat 2vEIPlug.dll 2vEZSETP.dll NP2vEISb.dll 00082350.exe files.ini Folders: %APPDATA%\DailyBibleGuide\ %PROGRAMFILES%\DailyBibleGuide\ %PROGRAMFILES%\DailyBibleGuideEI\ Registry: HKLM\SOFTWARE\Microsoft\Windows\CurrentVersion\Run\ Value: DailyBibleGuide Browser Plugin Loader Key HKLM\SOFTWARE\Microsoft\Windows\CurrentVersion\Run\ Value: DailyBibleGuide Search Scope Monitor Key HKCU\Software\DailyBibleGuide Key HKLM\SOFTWARE\DailyBibleGuide Key HKLM\SOFTWARE\MozillaPlugins\@DailyBibleGuide.com/Plugin Key HKLM\SOFTWARE\Microsoft\Windows\CurrentVersion\Uninstall\DailyBibleGuidebar Uninstall Internet Explorer Key HKLM\SOFTWARE\Microsoft\Windows\CurrentVersion\Uninstall\DailyBibleGuidebar Uninstall Firefox Key HKLM\SOFTWARE\Microsoft\Windows\CurrentVersion\Explorer\Browser Helper Objects\beea7fa9-d1f4-49a2-9b1f-6fb7a2d9bc2a Key HKLM\SOFTWARE\Microsoft\Windows\CurrentVersion\Explorer\Browser Helper Objects\0631bff0-6846-48ca-982d-d62d7f376e97 Key HKLM\SOFTWARE\Classes\DailyBibleGuide.XMLSessionPlugin Key HKLM\SOFTWARE\Classes\DailyBibleGuide.UrlAlertButton Key HKLM\SOFTWARE\Classes\DailyBibleGuide.ToolbarProtector Key HKLM\SOFTWARE\Classes\DailyBibleGuide.ThirdPartyInstaller Key HKHKLM\SOFTWARE\Classes\DailyBibleGuide.SkinLauncherSettings Key HKLM\SOFTWARE\Classes\DailyBibleGuide.SkinLauncher Key HKLM\SOFTWARE\Classes\DailyBibleGuide.SettingsPlugin Key HKLM\SOFTWARE\Classes\DailyBibleGuide.ScriptButton Key HKLM\SOFTWARE\Classes\DailyBibleGuide.RadioSettings Key HKLM\SOFTWARE\Classes\DailyBibleGuide.Radio Key HKLM\SOFTWARE\Classes\DailyBibleGuide.PseudoTransparentPlugin Key HKLM\SOFTWARE\Classes\DailyBibleGuide.MultipleButton Key HKLM\SOFTWARE\Classes\DailyBibleGuide.HTMLPanel Key HKLM\SOFTWARE\Classes\DailyBibleGuide.HTMLMenu Key HKLM\SOFTWARE\Classes\DailyBibleGuide.FeedManager Key HKLM\SOFTWARE\Classes\DailyBibleGuide.DynamicBarButton
Read More
Software review series: HWiNFO
HWiNFO (Hardware Information) is a professional hardware information and diagnostic tool supporting the latest components, industry technologies, and standards. It's targeted to recognize and extract the most possible amount of information about computer hardware which makes it suitable for users searching for driver updates, computer manufactures, system integrators, and technical experts too. Retrieved information is presented in a logical and easily understandable form and can be exported into various types of reports. System health monitoring and basic benchmarking available too. If you would like to read more helpful articles and tips about various software and hardware visit errortools.com daily.
Read More
1 2 3 171
Logo
Copyright © 2023, ErrorTools. All Rights Reserved
Trademark: Microsoft Windows logos are registered trademarks of Microsoft. Disclaimer: ErrorTools.com is not affiliated with Microsoft, nor claims direct affiliation.
The information on this page is provided for information purposes only.
DMCA.com Protection Status