Can not open and run EXE file in Windows is not a new issue and sadly it can still happen from time to time, luckily this step by step solution will help you to resolve this problem fast and effective in no time.
Try the below solutions in no particular order and I hope that you will solve the issue fast and be able to return to using the computer like it never happened
Run SFC scan
As the EXE file not opening issue lies in the Windows OS, the SFC tool will be able to identify the cause and fix this issue.
Press ⊞ WINDOWS + X and choose command prompt (admin)
in command prompt type: sfc /scannow
Press ENTER
Check registry and modify if needed
Sometimes value in the registry key is wrong and can cause this error, in order to check if this is the case, we will open the registry editor and find out
Press ⊞ WINDOWS + R to bring run dialog up
type in it: RegEdit and press ENTER In the left pane of the Registry Editor window, click on the HKEY_CLASSES_ROOT to expand the section
Scroll down to find out the .exe registry and click on it
Go to the right pane of the window and double-click on the Default and set the Value Data as exefile
Click on the OK button
Next, located the given in the window: HKEY_CLASSES_ROOT>exefile>shell>open>command Click on the “Command” in the left pane of the window In the right pane of the window double-click on the Default and set Value Data as “%1” %* Click on the OK button Restart your computer and check if the issue persists
Turn off Firewall and defender
If you have a firewall and antivirus active there might be a chance of a conflict and that firewall or antivirus is preventing the EXE file from starting, disable your firewall and anti-virus and try again to open the EXE file.
Turn off user account control
User account control can also like a firewall prevent some files from executing, go into accounts and turn off user account control to see if this might be an issue preventing you from opening the file.
You will notice the blurred background on the login screen right away when you start your Windows 10 computer that’s running the v1903 and up. This kind of blurred background is known as “Acrylic Blur Effect on Sign-in Screen”. This new feature delivers a beautiful experience to users by adding more focus to the login screen. However, no matter how nice this feature is and even if it only stays for less than a minute, not all users like it and if you’re one of these users, read on as this post will guide you in disabling the blurred background login screen in your Windows 10 computer.
Disabling the blurred background in the login screen can be done in two methods. The first one is via the Registry Editor and the second one is via the Group Policy Editor. Before you proceed, make sure that you are using an admin account and you must create a System Restore point first. Once you have that covered, follow the options provided below.
Option 1 – Disable the Blurred background in the login screen via Registry Editor
First, tap the Win + R keys to open the Run dialog box and type “Regedit” in the field, and hit Enter to open the Registry Editor.
After that, navigate to this registry path: KEY_LOCAL_MACHINESOFTWAREPoliciesMicrosoftWindowsSystem
Next, right-click on any empty space in the right pane and create a new DWORD (32 bit) and name it as “DisableAcrylicBackgroundOnLogon”.
Once you’ve created the DWORD, double click on it and set its value to 1 to disable it and 0 to enable it.
After you make the necessary changes, restart your computer. You won’t now see the blurred background on the login screen.
Note: No matter what option you select to change the background, it will stay blurred when you click on the login button. At the time of writing, there is no way to disable this feature in the Personalization section so the Registry Editor will have to suffice for now.
Option 2 – Disable the Blurred background in the login screen via Group Policy Editor
Tap the Win + R keys to open the Run utility and type “gpedit.msc” in the field and tap Enter to open the Group Policy Editor.
After that, navigate to this policy setting: Computer ConfigurationAdministrative TemplatesSystemLogon
From there, double click on the “Show clear logon background settings” and since its default value is “Not configured”, set it to “Disabled”. You will see the following description under this setting:
“This policy setting disables the acrylic blur effect on the logon background image.”
“If you enable this policy, the logon background image shows without blur.”
Now click on OK and then check the login screen.
Note: If you don’t configure or if you disable this policy, the logon background image adopts the acrylic blur effect. However, if it didn’t work, you have to restart your computer and then check.
Many times we were talking and writing here on Errortools.com about security, privacy, hacking, identity theft, etc. We tried to raise important security questions and I hope I have managed to at least shed some light and change maybe some bad behaviors for some, helping them embrace better routines about their security on their PC.
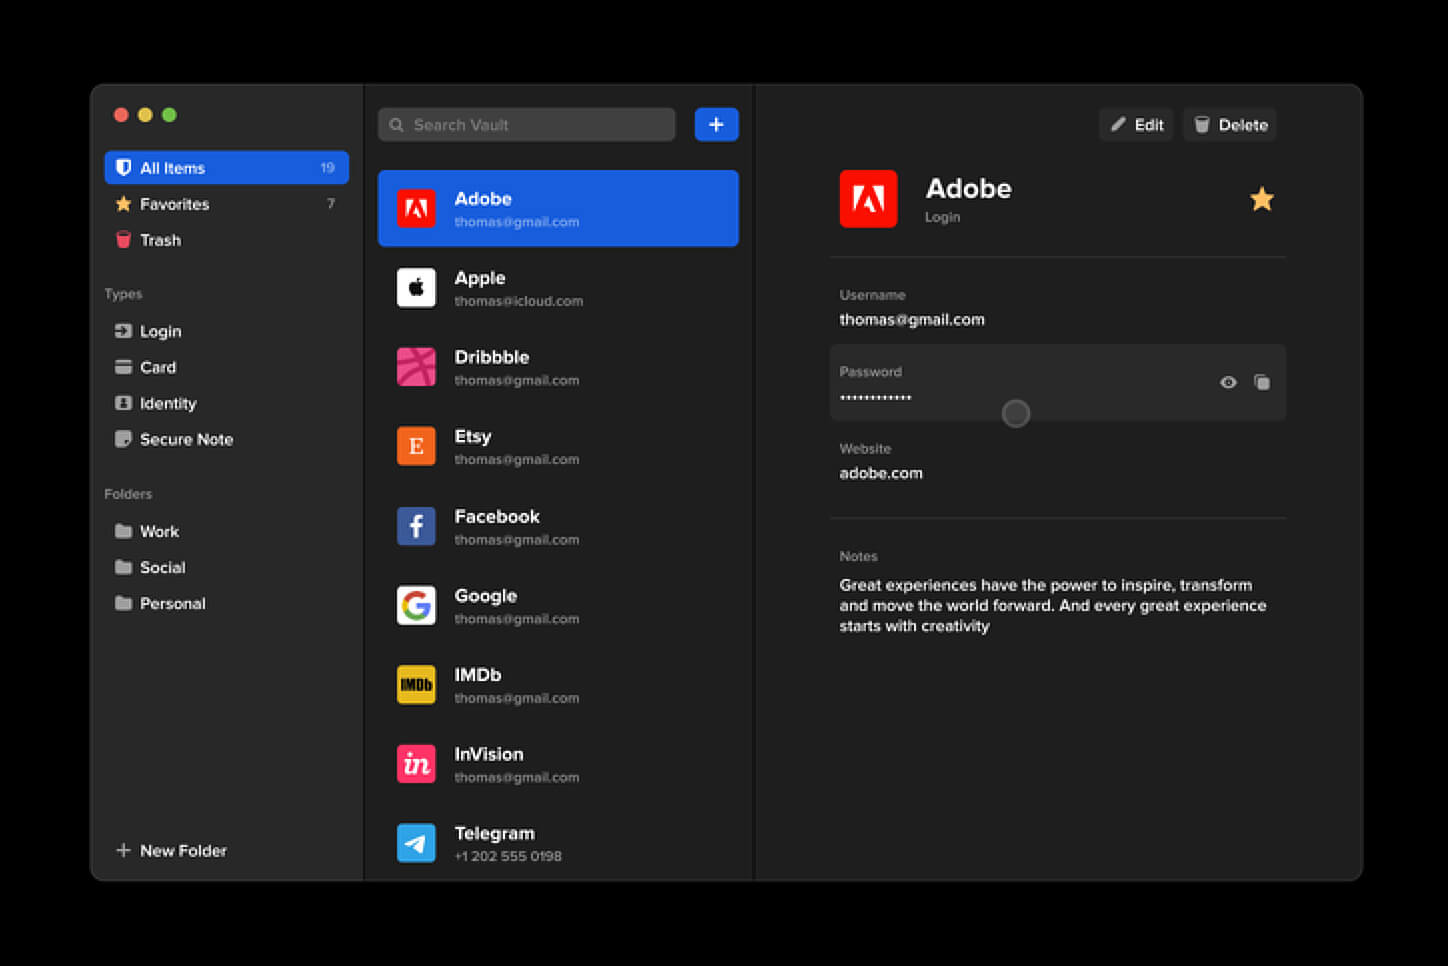
In this light, I will today present you with one neat and awesome piece of software, a password manager worth your time and money (if you want premium features): BitWarden.
What BitWarden offers?
The first thing that it offers is the completely free basic plan, granted BitWarden is not an open-source project nor completely free but it has an unlimited free basic plan that will cover 90% of user needs. There is also a free basic unlimited plan for Organizations letting you and one more user share files and other stuff via BitWarden making it a cool option if you need it.
Premium features offer you encrypted sharing of files, two-step login, 1GB file attachments (encrypted), Bitwarden Authenticator (TOTP), Vault Health Reports, Emergency Access, and Priority Support. The cost for all of these additional features is 10 USD per year for an individual plan or 40 USD per year for organizations where you will get an increase of maximum users from 2 to 6. Yes, you read that correctly, only 10 USD per YEAR for the whole set of features. Granted if you do not need any of them, enjoy the free version forever.
Besides very low premium cost BitWarden will offer you compatibility with all major browsers and devices including both Android and iOS platforms making it a great cross-platform solution to login and maintain your passwords anywhere with just one click.
Once installed all you need to do is set one master password and be very careful not to lose or forget this one, if you do all of your other generated passwords will be lost forever.
Features
Secure Password Sharing
Share your encrypted data quickly and easily, and only with the users or teams who need access
Cross-Platform Accessibility
Access critical data in your Bitwarden vault from any location, browser, and device
Cloud-Based or Self-Host
Get up and running in minutes in the cloud or you can self-host Bitwarden for complete data control
Security Audit & Compliance
Open source and third-party audited, Bitwarden complies with Privacy Shield, GDPR, CCPA regulations
Vault Health Reports
Access insightful reports to reveal weak, reused passwords, and other helpful data security metrics
Directory Sync
Our powerful Directory Connector streamlines user and group onboarding and keeps them in sync
Always-On Support
Our Customer Success agents are available to support you around the clock
Detailed Event Logs
Bitwarden creates audit trails to help you keep track of user and group access to sensitive data
Flexible Integrations
Unite your existing systems with Bitwarden using SSO authentication, Directory services, or powerful APIs
Conclusion
There are many password managers out there but via recommendation I have tried BitWarden and truth to be told, I really never felt the need to try anything else, it is great at what it does and it is moving forward with features and it is constantly updated and maintained.
All malware is detrimental and the magnitude of the damage will vary greatly depending on the type of infection. Some malware variants modify internet browser settings by adding a proxy server or modify the PC's DNS settings. When this happens, you'll be unable to visit certain or all the sites, and therefore not able to download or install the required security software to clear out the computer malware.
If you’re reading this article, chances are, you’re stuck with a virus infection that is preventing you from downloading and/or installing the Safebytes Anti-Malware program on your computer.
Refer to the instructions below to remove malware through alternate methods.
Method 1: Install Anti-Malware in Safe Mode with Networking
If the malware is set to load automatically when Microsoft Windows starts, entering safe mode may block the attempt. Since only the minimal applications and services start-up in safe mode, there are rarely any reasons for conflicts to happen. You will need to do the following to remove malware in Safe mode.
1) Tap the F8 key continuously as soon as your computer boots, however, before the large Windows logo or black screen with white texts come up. This would invoke the Advanced Boot Options menu.
2) Choose Safe Mode with Networking using arrow keys and press Enter.
3) When you are into this mode, you will have access to the internet once again. Now, utilize your web browser normally and download Safebytes Anti-Malware.
4) After installation, do a complete scan and allow the software to get rid of the threats it detects.
Method 2: Utilize An Alternate Internet Browser to Download Anti-Malware Software
Malicious program code may exploit vulnerabilities in a specific web browser and block access to all antivirus software sites. If you suspect that your Internet Explorer has been hijacked by computer malware or otherwise compromised by cybercriminals, the most effective plan of action is to switch to an alternate web browser such as Chrome, Firefox, or Safari to download your chosen security program - Safebytes Anti-Malware.
Download SafeBytes Anti-Malware for Malware Removal
Method 3: Install and Run Anti-Malware From a USB Drive
To effectively remove the malware, you might want to approach the problem of installing an antivirus software program on the affected computer from a different angle.
Adopt these measures to employ a flash drive to fix your infected computer.
1) Use another malware-free PC to download Safebytes Anti-Malware.
2) Plug the thumb drive into the uninfected computer.
3) Double click on the executable file to open the installation wizard.
4) Choose the drive letter of the USB drive as the place when the wizard asks you exactly where you would like to install the anti-virus. Follow activation instructions.
5) Now, transfer the thumb drive to the infected computer.
6) Double-click the antivirus program EXE file on the USB flash drive.
7) Click on the “Scan Now” button to start the malware scan.
If no other method of downloading and installing the antivirus software works, then you've no other option than to hit the last resort: a full Windows reinstallation, the only approach known to have a 100% rate of success at virus removal.
Windows 10 setup is a bit complicated which is why it’s uncommon to encounter errors along the way. One of these errors you can encounter when running Windows Setup is the error code 0x80070006. If you are trying to fix this error, you’ve come to the right place as this post will guide you on how to do so.
When you get the error code 0x80070006, you will see the following error message:
“Windows cannot install required files. Network problems may be preventing Windows from accessing the file. Make sure the computer is connected to the network and restart the installation. Error code: 0x80070006.”
As stated in the error message, this kind of error in Windows Setup is due to an unstable or unreliable network connection. Such problems can also be triggered by network hardware which includes the network adapters and the network routers. To fix this error, you need to check your internet connection and router or run the built-in network troubleshooter. You could also try using a different USB port or recreate a bootable USB drive as well as get a new Windows image file.
Option 1 – Try checking your internet connection and router
As mentioned, this Windows 10 setup error could be due to an unstable internet connection. To fix it, the first thing you have to do is to check the status of your internet connection and see if it is stable and has enough speed to run the setup. If it’s slow, then it’s no wonder that the setup process failed. To fix that, you can try to reboot your router from its admin panel or you can just turn it off manually and then turn it back on after a couple of seconds. In addition, you also have to check if it’s plugged in properly.
Option 2 – Try to run the Network Adapter troubleshooter
The next thing you can do is to run the Network Adapter troubleshooter. This built-in troubleshooter can help resolve any network issues. It can reset the adapters, remove cached settings, and many more. To run it, follow these steps:
Go to Settings > Update & security and from there select Troubleshoot.
Next, scroll down and select the “Network Adapter” option from the right pane.
Then click on the Run Troubleshooter” button.
After that, your computer will check for any possible errors and will pinpoint the root cause of the problem if possible.
Option 3 – Try to use a different USB port
You might want to check the integrity of the USB port where connected the device if you are using a bootable USB storage device to run the setup for Windows 10. All you have to do is switch the USB port or try to use another bootable USB device and see if it fixes the problem.
Option 4 – Try recreating the Windows 10 installation USB
Recreating the Windows 10 installation USB might help in fixing the problem. You can use a USB drive to do so but make sure that it has a great read-write speed. Follow the steps below to recreate Windows 10 installation USB”
Click this link and then click the Download Tool Now button.
Next, click the “Use the tool to create installation media (USB flash drive, DVD, or ISO file)…” option and follow the next given instructions on the screen.
Now select the ISO file option in step 5.
After that, you should now have an ISO file.
Next, go to the location where you’ve downloaded the ISO file.
Then right-click on the Windows 10 ISO file and select the Open with option and then select File Explorer.
Now click on “setup.exe” and follow the next instructions that appear on the screen. When asked, you have to select either Nothing (clean install) or Keep personal files only option. Take note that you must not select the “Keep personal files, apps, and Windows settings since it doesn’t really work.
Option 5 – Try getting a new Windows image file
If none of the four given options above worked, you might want to get a newer installation image using the Windows Media Creation tool. After that, create the bootable USB drive and once completed and then try to run the Windows 10 setup again.
Ever gotten an e-mail offer that seemed just a little bit too good to be true? Might’ve been a phishing attempt! These are everywhere and can come in many different forms.
So what’s phishing exactly, how can you detect it and how can you keep safe?
What is phishing?
Phishing (pronounced like fishing) is a type of cyberattack that tricks the user into trusting the source and revealing sensitive information. Fishing being the perfect analogy, the bait is a legitimate-looking site, e-mail or file and when you take a bite, your identity, banking information and much more can be revealed and stolen.
Credit: Anne Nygård on Unsplash
Some phishing attempts are incredibly obvious, others are super elaborate. Like with most types of malware, cybercriminals have become extremely well-versed in phishing and anyone can fall for it. To help you recognize and avoid it, we’ll take you through a couple of phishing types and give you tips on what to do if faced with them.
Phishing techniques
E-mail phishing
This is actually the most common type of phishing. A cybercriminal creates an e-mail containing stuff like attractive offers, legitimate-looking attachments or links and makes it appear as though it’s coming from a trusted source.
Credit: Justin Morgan on Unsplash
For example, it looks like it’s coming from your bank or your favorite retailer. The logo looks legit and the structure of the e-mail seems familiar, so you might get tricked into clicking on whatever clickable content is in it.
Unfortunately this exposes your device to malware that hands your data off to the hacker, who can decide what to do with it further.
SMS and social media phishing
Like the above example, you could be approached with lucrative offers or links via text messages or social media messages. Typically, the messages seem relevant to the user as they will be made to look like they’re related to apps or services you’re using.
Voice phishing
Voice phishing attacks are schemes that appear as though they’re coming from a credible number. Normally, you’ll get a call about something related to credit cards or taxes to get you into a state of worry, leading you to disclose personal information on the phone.
Spear phishing, whaling and BEC
Spear phishing normally targets specific individuals within a company who are likely to have access to sensitive data. Spear phishers spend time collecting information they can use to reach out to the individual looking as trustworthy as possible. They’ll typically lead with something relevant, for example mentioning an upcoming company event, and make a seemingly legitimate request.
Whaling is a more elaborate form of spear phishing, which targets people in even stronger positions such as executives or high-value individuals. The ultimate goal is to get them to transfer financial or other sensitive information that can be used to compromise the entire business.
Credit: Azamat E on Unsplash
BEC, or Business e-mail compromise, is a specific spear phishing technique carried out via e-mail. While there are many ways this is done, most commonly you’ll see instances where the phisher poses as a CEO or similar executive, or as a lower-level employee in specific positions (e.g. sales managers or financial controllers).
In the first situation, the impersonator reaches out to employees requesting them to transfer certain files or pay invoices. In the second situation, the phisher takes control of the employee’s e-mail account and sends false instructions to other employees in order to obtain data and information from them.
What can you do?
There are many ways you can be aware and spot a phishing attempt. Here are some tips:
Always check the sender’s address in your e-mails, even when they seem to come from a familiar source.
In any instance where payment information is requested, be very, very careful.
If you are receiving attachments you never asked for and definitely didn’t expect, better not click on them.
Beware of content that transmits a sense of urgency (sales deals, urgent updates to login credentials, etc.).
Bad spelling and grammar are usually a telltale sign of phishing.
Links that look shortened (e.g. Bit.ly) or just suspicious in general - if you have a bad feeling, do not click on them.
If you are receiving threats, you probably shouldn’t be clicking on anything in that message.
Always examine first-time senders in detail.
Block suspicious e-mail addresses, numbers and social media accounts.
If you are receiving a coupon for free stuff… You aren’t.
If you’re being asked to update your payment details by a service you use, such as Netflix, chances are it’s an impersonator.
Those are some of the ways to identify and prevent phishing attacks. However, sometimes phishers disguise themselves a little too well or a misclick happens and there you go - you’ve been exposed to malware.
Credit: FLY:D on Unsplash
This won’t happen if you invest in powerful protection software from the get-go, though. A good antivirus program like Bitdefender will keep you safe from becoming a victim of phishing scams. In fact, it will protect you from malicious attacks overall.
Be it your household or your business you’re concerned about, there are a bunch of different packages and options available, providing different kinds of cybersecurity services. That’s the only way you can ever really be sure you aren’t at risk of a digital attack.
Summary
Have you ever been targeted by phishers and didn’t know that’s what it was until you read this article? Many can relate. Protect yourself before it’s too late!
Things have stirred lately with Chinas ban on crypto mining and many used GPUs will flow the market probably. But should you buy a used GPU?
Short answer: NO, long answer: keep on reading to find out why.
GPU shortage and its cause
As you all know by now, we live sadly in a world struck by a global Pandemic. Due to this awful disease and measures taken against it, many people are either working from home or are at home making the manufacturing of new chips problematic while demand on the market has raised.
Throw into that mix crypto mining which has raised in popularity and you have, well today's market where we have GPU shortage.
Now with the latest news that China has banned the mining of cryptocurrency, there is to be expected that at some point in time mining cards used there will fit the market in the whole world.
Sadly even with a large quantity of GPUs that will become available, the overall price of cards will not be much lowered I am afraid since demand is still very high and many people would not want to purchase used mining cards and neither should you.
Be prepared for the worst scenario
Although this sounds very pessimistic and in most cases, it will not turn out to be true, you should always prepare yourself mentally that you might be in that lower percentage that will end up with a really bad GPU.
What has come up to be absolutely true when considering GPU that were mining is that if anything at all can be done to GPU in order to increase performance, it has been done. Miners want to optimize and almost every GPU if could be overclocked, it was overclocked.
Extensive mining also means that thermal paste has been dried and it is pretty useless at this point and there is a very high chance that fans and heat sinks will need much cleaning or even replacement raising the price of the card itself for mentioned paste, fans, and heat sinks.
There's no way to tell what the previous owner might have done with a graphics card when you're shopping online, so our advice is to assume the worst. Don't trust the seller to give truthful information. Any listing that says it was "never used for mining" at this point is probably a lie.
Age of the GPU matters
Date when GPU itself has manufactured really matters. Newer cards even if used extensively have been used for a much shorter period of time and are not so damaged were ones produced a few years ago have seen a lot of action.
Let’s say that you get RTX 3060, In the worst-case scenario it has been mining since late February of 2021 and basically, it is still under warranty so it should behave OK and put some good work in gaming even in that state.
On another hand, if we take for example GTX 1080Ti which is 4 years old GPU things start to change drastically. 4 years GPU could be worn out even if it was used just for extensive gaming sessions let alone for mining.
No return policy and seller rating
Most of the time you will run into a product that cannot be returned or no refunds policy. This should bring a red flag right away and deter you from purchase.
Sellers with the highest ratings are more trustworthy since many of them will not want to destroy their reputation but these will probably not even have these kinds of merchandise in their store.
Buying with a poor rating seller and no return policy on a product is just asking for trouble. And although some stores do have arbitration and will stand on the customer side there is no guarantee for that and it will take too much time to process.
If you really must buy a second-hand GPU
Of course in these troubled times sometimes due to malfunction or any other reason, there would not be another choice than to buy a second-hand GPU.
In this case, if there is no other option consider sellers with many positive ratings. If you can buy locally that would even be better or the best-case scenario would be if you could visually see and inspect GPU itself in order to see in what state it is.
Look for warranty stickers to see if they are thorn and the card has been tampered with. Also take a good look at screws, if they have scratches card has been opened, probably to replace fan or heating sinks which means that it has worked a lot.
Conclusion
It is very difficult to give the best possible advice on this situation since of GPU shortage, but I would much prefer a new GPU with lower performance than a hi-performance one which was mining.
There is various Blue Screen of Death errors that you can encounter as you use your Windows 10 computer and some of these Stop errors have something to do with the win32kbase.sys file. This post will guide you in fixing the BSOD errors related to the win32kbase.sys file.
A problem has been detected and Windows has been shut down to prevent damage to your computer. The problem seems to be caused by the following file: Win32kbase.sys.
Your PC ran into a problem and needs to restart. If you would like to know more, you can search online later for this error: win32kbase.sys.
The win32kbase.sys file is a Windows operating system Base Win32 Kernel Driver file located in the System32 folder so if it ends up getting corrupted or if it went missing, your computer will throw up Blue Screen error. To fix BSOD errors that have something to do with the win32kbase.sys file, here are some possible fixes that could help. Worry not for these possible fixes are not complicated.
Option 1 – Run the Check Disk or CHDSK utility
One of the first things you can try to resolve the win32kbase.sys Blue Screen error is running the CHKDSK utility. If your hard drive has issues with integrity, the update will really fail as the system will think that it’s not healthy and that’s where the CHKDSK utility comes in. The CHKDSK utility repairs hard drive errors that might be causing the problem.
Open Command Prompt with admin privileges.
After opening Command Prompt, execute the following command and hit Enter:
chkdsk /f C:
Wait for the process to be completed and then restart your computer.
Option 2 – Run SFC or System File Checker scan
System File Checker or SFC is a built-in command utility that helps in restoring corrupted files as well as missing files. It replaces bad and corrupted system files to good system files. To run the SFC command, follow the steps given below.
Tap Win + R to launch Run.
Type in cmd in the field and tap Enter.
After opening Command Prompt, type in sfc /scannow
The command will start a system scan which will take a few whiles before it finishes. Once it’s done, you could get the following results:
Windows Resource Protection did not find any integrity violations.
Windows Resource Protection found corrupt files and successfully repaired them.
Windows Resource Protection found corrupt files but was unable to fix some of them.
Restart your PC.
Option 3 – Try to run the DISM commands
You might want to repair potentially corrupted files in your system as having them could also trigger the win32kbase.sys Blue Screen error. To repair these corrupted system files, you can run the DISM commands:
Tap the Win + X keys and click on the “Command Prompt (Admin)” option.
After that, input each one of the commands listed below sequentially to execute them:
Dism /Online /Cleanup-Image /CheckHealth
Dism /Online /Cleanup-Image /ScanHealth
Dism /Online /Cleanup-Image /RestoreHealth
Once you’ve executed the commands given above, restart your computer and check if the dxgkrnl.sys Blue Screen error is now fixed.
Option 4 – Try to run the Blue Screen Troubleshooter
As you know, the Blue Screen troubleshooter is a built-in tool in Windows 10 that helps users in fixing Blue Screen errors related to the win32kbase.sys file. It can be found in the Settings Troubleshooters page. To use it, refer to these steps:
Tap the Win + I keys to open the Settings panel.
Then go to Update & Security > Troubleshoot.
From there, look for the option called “Blue Screen” on your right-hand side and then click the “Run the troubleshooter” button to run the Blue Screen Troubleshooter and then follow the next on-screen options. Note that you might have to boot your PC into Safe Mode.
If you have the HP printer, then you may come across this error. HP Printer Spooler not running errors does not mean there is anything wrong with your printer. It indicates printer driver issues.
Solution
Error Causes
There can be multiple causes behind the HP printer Spooler not running error code such as:
The poor or unsuccessful printer driver installation
Invalid registry entries
Though this is not a critical error code as it does not pose serious damage threats to your PC, however, it is advisable to resolve it as it can cause you a great deal of inconvenience especially if you want to take out printouts every now and then.
Further Information and Manual Repair
Here are some ways you can try to resolve HP Printer Spooler Not Running Error on your system:
1. Reinstall the HP Printer driver on Your System
Simply go to the control panel and then click on the Device Manager option
Once you click it you will see details pane with a list of devices. Now simply click on the printer, to reinstall the driver software.
Double click on it to open the properties dialog box
After that click on the driver tab and then click update driver
Once you update the driver, try using the Printer to see if it works. Sometimes you may come across a pop-up displaying the following message: ‘Driver installed correctly, Device is ready to use however, you may not see the printer under the printer’s pane. This triggers registry issues.
2. To resolve registry issues, install Restoro on your system.
This is a highly functional registry cleaner integrated with a powerful antivirus. It helps resolve registry issues, malware, and guarantees system optimization. This feature-filled tool is the answer to all your PC-related issues.
Restoro is a next-generation PC repair software that extends outstanding usability and helps PC users resolve errors efficiently.
Its simple navigation and user-friendly interface make it so easy to use that even novice users can also work around it and repair issues without any hassle or difficulty.
It’s a smart and intuitive in-built registry cleaner that wipes out all the unnecessary and obsolete files on your hard disk. This includes junk files, internet history, invalid registry keys, and files from the uninstalled old program versions.
Sometimes the files from the uninstalled programs hamper your ability to update new program versions thus leading to unsuccessful driver installation. Nonetheless, all such files are removed in seconds with this helper and you are then ready to reinstall the driver.
This registry cleaner cleans the clutter from your hard disk and optimizes your system's speed, lowering your PC boot time significantly. Total System Care can be used on all Windows versions
To fix the HP printer spooler not running error on your computer, simply click here to install Restoro. Run it to scan for the error and fix it in seconds. Once the issue is resolved, update the printer driver. You’ll see the driver will be updated successfully and the HP printer will also appear in the printer’s panel.
By installing Restoro on your system, you can also resolve several other issues like privacy errors triggered by malware and virus infections. With this tool, you will not have to download and run a separate anti-virus on your system.
If you encounter an error saying, “Invalid file handle” when you try to rename, copy, delete a file or other operations in your Windows 10 computer, then read on as this post will guide you in what you can do to fix it. This kind of error pops up when the operating system tries to carry out an operation on a folder or file using the following words:
When you rename or create a folder or file using the reserved words given above, you could encounter an error that says, “The specified device name is invalid”. This occurs since these words are Windows system reserved words that you can’t use, unlike any other words. Thus, if you have a folder or file which contains any of the reserved words on another computer that runs a non-Windows operating system and you try to copy or rename it Windows, then it’s no wonder why you’re getting this error message.
In such cases, you can always click on the Skip button to stop the operation. However, if there are various folders or files, you can just use the Command Prompt to carry out the task. All it takes is a simple command that will get rid of the folder as well as the files in it. How? Refer to the instructions given below.
Step 1: Tap the Win + R keys to open the Run utility.
Step 2: Next, type “cmd” in the field and then tap Enter to open Command Prompt.
Step 3: After opening Command Prompt, execute the following command:
rd \.file-folder-path /S /Q
Note: The “rd” command will remove the directory or the folder while the “\.” command will select the current computer. The “/S” command, on the other hand, helps you in removing all the sub-directories and the files that are in the CON folder. The “/Q” command is not really mandatory since it helps you remove everything silently without any confirmation message. For example, if you have a folder named “CON” located on your Desktop, the path will be like this “C:/Users/<username>/Desktop/CON”. In this case, the command should be like this:
rd \.C:Users<username>DesktopCON /S /Q
However, if the error pops up for a whole different reason, you could use the following command instead to remove the reparse point extended functionality. Once you’ve entered the given command below, you should now be able to delete the file.
Error code 0xd0000272 is an activation error code that occurs when Windows users are unable to activate their Windows operating system. This error code features common symptoms which include the following:
Inability to activate Windows 10 operating system
Message box with error code 0xd0000272
Solution
Error Causes
When error code 0xd0000272 occurs in Windows 10, it is usually due to issues related to the Windows activation servers. In such a case where the error code occurs due to an activation server that is temporarily unavailable, users may need to wait for a few hours until the activation server is available. Their copy of Windows will then be automatically activated. Once the activation process is not done accordingly, you might encounter other Windows 10 errors such as error code 0xc004f034.
Further Information and Manual Repair
As is the case with many activation error codes, Windows 10 users can perform several manual repair methods to determine the cause as well as fix the error code affecting their device. Instead of passively waiting to see if your activation error code will be fixed on its own, resolve error code 0xd0000272 through the manual repair methods available. Below are simple instructions that when followed can lead to your success.
Method One: Verify Internet Connection
Check Settings to verify if your machine is connected to the Internet. This is one of the causes of various error codes which affect Windows 10. Also, this manual method is a simple process that can help Windows users recognize or eliminate factors that may or may not be affecting their system. To check your Internet connection, follow the simple instructions below.
Step one: Click the Start button and select Settings
Step two: Select Network & Internet
Step three: Click the Status section of the Network & Internet tab
Once you’ve been able to verify an Internet connection or troubleshoot any issues related to your network, go to Update & security. Make an attempt to activate your system. If you are successful, you will be able to access all the features and benefits offered via your copy of Windows. However, move to the next manual method below if error code 0xd0000272 reoccurs.
Method Two: Run Windows Update Troubleshooter
Your inability to activate Windows 10 may be related to an issue with Windows Update. To verify whether or not Windows Update is functioning properly, run Windows Update Troubleshooter.
You’ll need to visit the Microsoft website to access their Windows Update Troubleshoot tool. Once you’ve downloaded the troubleshooter, run the tool. After running the tool, check if you are able to access Windows Update services as well as activate Windows 10. If the problem with error code 0xd0000272 persists, however, follow the instructions provided for manual repair method three detailed below.
Method Three: Disable Proxy Settings
Another option available to individuals experiencing error code 0xd0000272 in Windows 10 is to manually disable their machine’s proxy settings. After disabling the proxy settings, remember to open the Windows Update tab to complete the activation process. See the instructions provided below to disable proxy settings.
Step one: Press Windows key + R
Step two: Type control then click OK
Step three: Select Settings then go to Network & Internet
Step four: View connection settings
Step five: Click on the Network tab
Step six: Click Proxy -- turn off proxy
Once you have successfully disabled your proxy settings, open Windows Update. Select the activation option to access your copy of Windows 10. If you are unable to complete the activation process, however, contact a Windows repair technician.
Method Four: Use an Automated Tool
Error codes in Windows often occur due to poor maintenance of one’s PC. To improve your system and reduce your machine’s risk of experiencing error codes, download a powerful automated tool. This tool is both powerful and user-friendly, making its benefits accessible to even the most non-technical Windows users.

 Many times we were talking and writing here on Errortools.com about security, privacy, hacking, identity theft, etc. We tried to raise important security questions and I hope I have managed to at least shed some light and change maybe some bad behaviors for some, helping them embrace better routines about their security on their PC.
In this light, I will today present you with one neat and awesome piece of software, a password manager worth your time and money (if you want premium features): BitWarden.
Many times we were talking and writing here on Errortools.com about security, privacy, hacking, identity theft, etc. We tried to raise important security questions and I hope I have managed to at least shed some light and change maybe some bad behaviors for some, helping them embrace better routines about their security on their PC.
In this light, I will today present you with one neat and awesome piece of software, a password manager worth your time and money (if you want premium features): BitWarden.


 GPU shortage and its cause