Error Code 0xc00000e9

If Error Code 0xc00000e9 appears on your screen, there is no cause to panic yet as there are different ways to fix this. Here, I will list down different methods to get your computer back on track:

  1. Check peripheral connections
  2. Check your SATA cables
  3. Check your hard drive
  4. Check your BIOS settings

Quick Fix 1. Check Peripheral Connections

  1. Turn off your computer.
  2. After the computer has been shut down, take off all the peripherals or the USB cables that are connected to your USB ports. This includes even the keyboard and the mouse. We just need to have only the monitor plugged in for this one.
  3. Turn on your computer and see if it starts as it normally does.
  4. If it does, try connecting back your external devices or peripherals one by one until you find the one that causes the error.
  5. Once you trace the device that’s causing the error, you will have to change its USB cable and update its driver to support your operating system.

Quick Fix 2. Check your SATA cables

It is possible that what causes a barrier between your operating system and your hard drive from communicating is the SATA cable used. For example, if you’re using an older SATA with a SATA III port, there might not be adequate support for the transfer of data from one another. Or, the problem might be a loose SATA cable which would still require you to buy a new one to replace your loose or damaged cable. To check if your SATA cables are causing the error, simply follow these steps:

  1. Turn off your computer.
  2. Carefully open its case.
  3. Check the hard drive and the SATA port where it’s connected.
  4. Try to use a newer cable and connect it to your SATA port. (If you used a SATA II cable, you can see if a SATA III cable is more compatible.)
  5. Replace your SATA cable with a newer one if Step 4 proves to be successful.

Quick Fix 3. Check your hard drive.

  1. Try to use a different hard drive and see if error code 0xc00000e9 still appears.
  2. If it works out just fine, then the problem might be physical damage to your hard drive and would need to be repaired depending on the case. Just simply take it to a technician and let him know about the issue.

Quick Fix 4. Check your BIOS settings

  1. Restart your computer.
  2. Once your computer starts, press and hold the ESC, F2, F12, or DEL key to go to BIOS settings.
  3. You will then be redirected to the BIOS Setup Utility screen. From here, go to Boot options.
  4. In the Boot Options, see if your first boot device is your hard drive. If it isn’t, press the arrow key to select the hard drive and move it to the top of the boot device list.
  5. Save the settings.
  6. Reboot your computer.

Note: If all the methods above do not work, the problem might be on your drivers and you might need to update them. You can update your driver in two ways: Manual driver update and Automatic driver update. You can find procedures online in updating your drivers.
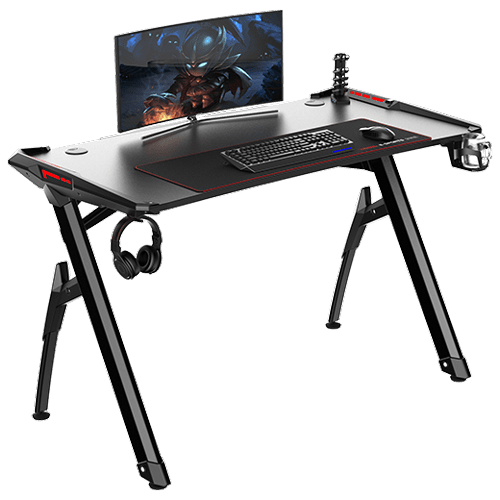
Do You Need Help with Your Device?

Our Team of Experts May Help
Troubleshoot.Tech Experts are There for You!
Replace damaged files
Restore performance
Free disk space
Remove Malware
Protects WEB browser
Remove Viruses
Stop PC freezing
GET HELP
Troubleshoot.Tech experts work with all versions of Microsoft Windows including Windows 11, with Android, Mac, and more.

Share this article:

You might also like

Why ActiveX Control May Damage Your Personal Computer
ActiveX Controls are plugins you may constantly come across when working with Internet Explorer. An illustration of these kinds of control is the MICROSOFT IE Flash Player. They frequently result into significant problems for the Computer, yet they're vital for IE to operate correctly. You shouldn't ever overlook that after you install Active Controls in your Personal Computer, you effectively provide them with access to other areas of your PC. The ActiveX Controls not only tracks your search routines, but in addition puts malicious software, which might possibly be hazardous to your Computer.

Solution

Restoro box imageError Causes

ActiveX Controls make your Internet Explorer work as required and are usually great and beneficial to your own Computer. Yet, they can function as a source of problems because of the following factors.
  • You should stop installing  ActiveX Controls from Un Trustworthy Resources
In the event they are installed by you from un trustworthy resources new threats are likely introduced by ActiveX Controls to your PC. One of the more regular types of ActiveX Controls worth necessary for installation is Flash Player. Yet, never be in a hurry to install these Controls from resources that you don't trust.
  • Limit The Number of ActiveX Controls You Install on your PC
Prevent installing java/oracle ActiveX controls, because of its weak security measures which could make your Personal Computer and any additional information there in, open to attacks. Limit to the variety of ActiveX Controls that you install on your PC as these could increase the vulnerability canvas on your computer.

Further Information and Manual Repair

You can manually fix any malfunction that springs up from ActiveX Controls. Yet, more than mending the harm, produce the setting that ensures you never have troubles from them to start with. Just how do you do that?

a) Stop installing or downloading ActiveX Controls from Un Trustworthy Sources

This has been mentioned above, but it's worth repeating because it's the most common reason behind ActiveX Controls malfunctions. You might anticipate that for this kind of obvious reason for ActiveX Controls malfunctions, PC consumers would be extra cautious, however that is never true.

b) Limit ActiveX Controls Softwares

You can restrict ActiveX controls from running automatically on your PC. To limit them, head to Tools in Internet Explorer, and choose Internet Options. Proceed to the Security tab, and select Customs level Browse completely down before you get to the area designated "ActiveX". Subsequently, mark "Prompt" under every choice that you encounter. But don't mark the choice indicated "Run ActiveX Controls and Plug-Ins", together with, "Script ActiveX Controls Marked Safe for Scripting". By performing the measures emphasized above, you happen to be in substance stating that, you will not permit any installation of ActiveX Controls, without express authorization by you. In this manner, you have better control over different forms of ActiveX Controls you permit to be installed, therefore reducing potential threats to your PC.
Read More
How to Fix Error Code 0x80060100 on Your PC

Error Code 0x80060100

Error Code 0x80060100 is an error that relates to the Windows Update process. It most commonly occurs when the Update process runs and cannot be completed, as the system appears to have necessary files corrupted or absent.

Common symptoms include:

  • Inability to begin the Windows Update process
  • Inability to complete the Windows Update process

While it can be frustrating when users are not able to complete their necessary updates for Windows 10, there are several solutions that are available to fix the problem at hand. Some of the methods that can be used are simple and accessible, even for beginners, while advanced methods of resolution are also available for users who are more confident in their abilities.

Error Code 0x80060100 appears on Windows 10 and earlier versions of the Windows operating systems. In most cases, the steps to resolve the problem remain the same, regardless of the system on which the error appears. This error code is also related to Error Code 0x800b0100, which appears in similar circumstances.

If the solutions below are not successful in resolving Error Code 0x80060100 on your machine, you may need to get in touch with a qualified repair technician who can assist you in the resolution of the issue at hand. Any repair technician used should be familiar with the needs of the Windows 10 update process.

Solution

Restoro box imageError Causes

The primary cause for the appearance of Error Code 0x80060100 on a Windows machine is that the Update files have had damage to them or are found to have elements missing that are necessary for the completion of the Update process.

Further Information and Manual Repair

If Error Code 0x80060100 has appeared on your Windows operating system as you are attempting to download, install, or run Windows Update, there are several steps that you can take to attempt to resolve the error. Some of these methods require advanced knowledge or skills, so if you are not confident in your ability to undertake the steps below, contact a qualified Windows repair technician to assist you in the process.

Here are the best ways to resolve Error Code 0x80060100:

Method One: Run the Troubleshooter for Windows Update

As you attempt to run the Windows Update process and experience difficulty, there is a tool that will usually appear on the screen called the Windows Update Troubleshooter. This process can scan the files being used for the update process and attempt to fix the errors on its own, retrieving or repairing any damaged files as it comes across them.

In most cases, this step on its own will resolve Error Code 0x80060100 on a computer. However, if you are still unable to run Windows Update after using the Troubleshooter, you may need to run a disk repair tool before proceeding.

Method Two: Restart Your Computer

In some cases, Error Code 0x80060100 can be resolved simply by restarting the computer that is affected by the error. Even if this step is not successful on its own, restarting after each of the other methods can allow necessary changes to take place and refresh the progress of the Windows Update process.

Method Three: Use the DISM Tool

This method requires some skill and knowledge of your operating system. To use this tool, follow the steps below:

  • Step One: From the right side of the screen, use your mouse to swipe inward and select the “Search” option.
  • Step Two: When the search box appears, enter in the words “command prompt".
  • Step Three: From the results that appear, right-click on the “Command Prompt” option, then choose the option to “Run as Administrator.” An administrator password may be required at this point.
  • Step Four: In the window that comes up, enter in the following words, hitting the “Enter” key after each:
    • Dism.exe /online /cleanup-image /scanhealth
    • Dism.exe /online /cleanup-image /restorehealth
  • Step Five: Type in “exit” to close the prompt window and hit the Enter key.
  • Step Six: Attempt to run the Windows 10 Update process again, restarting your computer as needed beforehand.

If the methods above are not successful in the resolution of Error Code 0x80060100, a qualified Windows repair technician may be able to assist you.

If you wish to always have at your disposal a utility tool to fix these Windows 10 and other related issues when they do arise, download and install a powerful automated tool.

Read More
An Easy Guide to Fixing Internal Error 2503

Internal Error 2503 - What is it?

Internal Error 2503 mostly pops up on Windows 8. It occurs when you try to uninstall or install software on Windows 8. The error code message may vary and displayed in different formats such as:
The installer has encountered an unexpected error installing this package. This may indicate a problem with this package. The error code is 2503. Called RunScript when not marked in progress The installer has encountered an unexpected error installing this package. This may indicate a problem with this package. The error code is 2503. Called Install Finalize when no installation is in progress

Solution

Restoro box imageError Causes

Some of the most common causes for internal error 2503 are:
  • Permission not granted to access the Windows Installer Folder
  • Viruses
  • Problems with Windows Installer

Further Information and Manual Repair

To repair this issue on your PC without any professional assistance, try the DIY methods given below:

Method 1

Internal error 2503 may occur when your account has limited privileges. You don’t have the privilege to use or access the Windows Installer folder. Your inability to access this folder hampers you from successfully install or uninstall the desired program on your PC. To gain access, you need to ensure you have permission.
  • For this navigate to the C:\windows folder. Here find the installer folder and then right-click and choose properties.
  • After that click on the security tab and check if the System and Administrator account has Full access permission.
  • For that make sure the system group option has ‘all’ selected to allow you full permission.

Method 2 - Re-register Windows Installer

Another alternative to resolve internal error 2503 is to re-register Windows Installer.
  • To do this, go to Start and click Run. Now type ‘msiexec /unreg’ in the Run box and then press enter.
  • Follow the same steps and now type ‘msiexec /regserver’ in the box and then press enter. This will resolve the issue.

Method 3 - Remove Viruses

If internal error 2503 is triggered by a viral infection on your PC, then it is advisable to download an antivirus and scan your entire system. Viruses are notorious for system failures and pose data security threats. If not removed timely, these malicious programs can damage your PC. To remove all viruses on your system, run an antivirus. An antivirus detects all malicious software programs including viruses, malware, adware, and spyware. Delete all the malicious files found right away. This will help resolve internal error 2503.
Read More
The Steam Autumn sale is coming!

Oh, gamers rejoice, the Steam autumn sale is just around the corner!!!

The sale starts on November 22nd and lasts until November 29th. A great deal for any gamer, especially for ones that have plenty on their wishlist. Speaking of wishlists now would be a good time to place some interesting titles on them so you can be notified about discounts on them.

If you by any chance are unavailable to participate in the Autumn sale, do not worry, Steam winter sale is coming on December 22nd and it will last until January the 5th so you can save for it.

The best tactic for sale is not to jump on the train right away, it is best to wait until a few days, maybe even until the last 2 days since some games can go even lower on discount in the last days of the sale. Also, there might be also some packages that include games you wish to buy but are packed with other ones in a bundle and even with a higher discount.

So get prepared for the upcoming sale and treat yourself to something nice!

steam sale
Read More
Couldn’t open PDF in Edge Error in Windows
As you know, Microsoft Edge is the default web browser in Windows 10 operating system. It is a built-in browser that replaced the ancient Internet Explorer for its performance and features. Aside from being the default web browser, it is also set as a default PDF viewer in Windows 10. So if you open a PDF file, it will be automatically opened in the Edge browser even if you have installed a PDF reader on your computer. However, some users recently reported getting an error that says, “Couldn’t open PDF in Edge, Something’s keeping this PDF from the opening” when they tried to open a PDF file or view an internet link that has a downloadable PDF file in the Edge browser. If you are one of these users, read on as this post will help you troubleshoot the problem and fix it. This kind of error mostly occurs if you have installed other PDF viewers on your computer. They could be interrupting Edge while it tries to open the PDF documents. To fix it, check if Microsoft Edge is set as the default PDF viewer or you could also try to clear its browsing cache. In addition, you could also reset or repair Edge. For detailed instructions, refer to the given options below.

Option 1 – Check if Microsoft Edge is set as the default PDF viewer

The first thing you can do is to check if Edge is set as the default PDF viewer. If it’s not, you have to set it as one to fix the problem.
  • Open Control Panel and go to Default Programs.
  • Then click on the “Associate a file type or protocol with a program” option.
  • Next, select the PDF file option and click on Change program.
  • After that, select Microsoft Edge in the pop-up window and then select the “Always use this app to open .pdf” option.
  • Now click the OK button to set Edge as the default PDF viewer and then check if you can now open the PDF file in the Edge browser.

Option 2 – Clear the browser cache of Microsoft Edge

  • Open Microsoft Edge.
  • Then click on the three horizontal dots to open the menu.
  • From there, click on Settings. And under Settings, click the “Choose what to clear” button under the Clear browsing data section.
  • Next, check all the checkboxes and then click the Clear button to clear the browsing data in the Edge browser.
  • Restart Edge.

Option 3 – Reset, repair or reinstall Microsoft Edge via Settings

You can reset, repair or reinstall the Edge browser through Settings. If none of it helped, you can try the following:
  • Open File Explorer and then go to this path – C:/Users/YourUsername/AppData/Local/Packages
Note: Before you type in the path in the Address bar, make sure that you put your user account name in place with the “YourUsername”.
  • Tap Enter to proceed.
  • Next, look for the folder named “MicrosoftEdge_8wekyb3d8bbwe” then right-click on it.
  • Click on Properties and uncheck the option “Read-only” under the General tab in the Properties window.
  • Click on Apply and then OK to save the changes made.
  • After that, look for the MicrosoftEdge_8wekyb3d8bbwe folder again and delete it. And if a prompt stating “Folder Access Denied” appears on your screen, just click on the Continue button to proceed – doing so will delete most of the content inside the folder except for the folder named “AC”.
  • Restart your PC.
  • Now all you have to do is to re-register Microsoft Edge using PowerShell. In the Start Menu, search “Windows PowerShell”.
  • Right-click on Windows PowerShell from the search results and select the “Run as administrator” option.
  • Type in this command in the PowerShell windows and tap Enter – Cd C:/Users/YourUsername
Note: Once again, make sure that you key in your user account name in place of “YourUsername.
  • After that, type in this command and tap Enter – Get-AppXPackage -AllUsers -Name Microsoft.MicrosoftEdge | Foreach {Add-AppxPackage -DisableDevelopmentMode -Register "$($_.InstallLocation)AppXManifest.xml" -Verbose}
  • Restart your PC.
Read More
Jailbreak Amazon Fire TV stick

Sometimes we need and want some apps that are not part of the official Amazon Appstore but having their Fire TV stick prevents us from installing anything that's not in their store, or does it?

amazon tv stick

You can quickly "jailbreak" given stick and unlock additional installations via different providers. Although the term jailbreaking is associated with illegal and hacker activities rest assured that in this case there is nothing illegal about this procedure and that you are entirely safe.

Jailbreaking process

In order to do this procedure firstly you will have to allow the installation of apps obtained from outside the Amazon Appstore. To do this open the settings menu on your Fire TV Stick and inside settings choose My Fire TV. On the My Fire TV page select Developer Options and inside select Apps From Unknown Sources. The prompt screen will open, choose Turn On to activate the option.

APK installation is enabled now and the next step is to download an app like Downloader that will allow you to get your favorite apps. Downloader is free to download manager fully available on the Amazon Appstore and with it, you can download any kind of file to your device including APKs.

Once installed open the Downloader app and type in the URL or search term in order to find your application of choice but please do get all of your APK from trusted sources in order to avoid exploits and getting malware.

Read More
How to Fix Error 80070103 in Windows 10

Error Code 80070103 –What is it?

Error code 80070103 affects Windows users who attempt to access the latest updates for hardware drivers using Windows Update. Windows 10 users who are affected by this error code will be unable to complete the upgrade process. This error code usually occurs due to the Windows Update attempts to download an incompatible version of a driver or a driver that is already downloaded on one’s device.

Solution

Restoro box imageError Causes

The cause of error code 80070103 in Windows 10 is usually easy to determine. This is due to the fact that the error code only affects users who attempt to access updates related to hardware drivers. In such cases, the error code will only occur if the Windows Update website or tool on your machine attempts to install a driver that is already present on one’s machine or the version of the driver is unsuitable for one’s machine due to lower compatibility.

Further Information and Manual Repair

Manual repair methods are very effective in helping Windows users fix problems related to error code 80070103 as well as other errors. These repair methods can usually be implemented by users with very limited technical skills. In some cases, however, you may need to contact a Windows repair technician, i.e. if you have problems following the manual repair method instructions provided or if the repair methods prove unsuccessful.

In the case of error code 80070103, the problem can be rectified by either hiding the update or reinstalling the hardware driver. Windows users can hide an update on the Windows Update website or via Windows Update within their machine’s Settings. However, users will need to contact their device manufacturer to reinstall hardware drivers in most instances. See below for further details regarding these manual repair methods.

Method One: Hide the Update

In the case where you are informed via an error message box that a driver, for instance, your graphics driver, is incompatible you may need to consider hiding the update to prevent error code 80070103 from reoccurring on your machine.

The incompatible issues will come about when the Windows Update website attempts to download a driver that is already on the device or one with a lower compatibility. When you hide the update, it is in essence, preventing Windows Update from offering this driver in the future. To complete this manual repair method, follow the steps below:

  • Step one: Visit the Microsoft Update site 
  • Step two: Select Custom on the Welcome page after completing the scan for the updates process
  • Step three: Select Hardware, Optional.
  • Step four: Open the second update for the graphics card, then select Don't show this update again check box.
  • Step five: Review and install updates.

You may also complete this process by opening Windows Update within your computer’s settings, then selecting the Optional update or available link. Once you’ve done this, you may then select the updates you would like to install and hide the update that has resulted in the occurrence of error code 80070103.

Method Two: Reinstall Hardware Driver

In the case where you need to install a hardware driver, you will need to contact the manufacturer of your device. Once you’ve contacted the manufacturer or visit the manufacturer’s official website, you can then install the latest device drivers manually. Read the instructions for the installation of the latest drivers carefully. This will ensure you avoid any problems and improve your chances of successfully fixing error code 80070103.

After you’ve contacted your device manufacturer and completed the process of reinstalling the hardware driver, check Windows Update to see whether or not error code 80070103 has been rectified. If the problem was related to your hardware driver and you successfully reinstalled the driver, the error code will not reoccur when you attempt to download the latest updates for your hardware drivers.

However, you may need to take another approach if this manual repair method fails to fix error code 80070103. For instance, consider getting help from a Windows repair technician who is equipped with the skills and expertise necessary to offer a detailed inspection of your machine. Though the error code is related to one’s drivers, the fact that a Windows error code occurred may mean that your system needs a thorough evaluation as other issues may be present.

Method Three: Download an Automated Tool

If you wish to always have at your disposal a utility tool to fix these Windows 10 and other related issues when they do arise, download and install a powerful automated tool.

Read More
How to Fix Windows 10 Error Code 0x80070008

Error Code 0x80070008 - What is it

Error Code 0x80070008 generally appears on machines running Windows 10, although it may sometimes also appear on earlier versions of the software, going all the way back to Windows 7, when the error was first introduced.

Common symptoms include:

  • Inability to complete the Windows 10 Update process fully
  • Machine running slowly
  • Messages about a lack of memory on the device in question

If Error Code 0x80070008 has appeared on your computer, there are several things that you can do in order to fix the error and be able to install updates as necessary. Most of these methods are simple enough to use, even for the most inexperienced users, but at least one of the methods may require advanced knowledge or comfort in changing your settings on a deeper level.

If you don’t feel comfortable in your ability to use the steps below to resolve Error Code 0x80070008, get in touch with a qualified technician who is experienced in memory issues and Windows 10 error code resolution to assist you.

Solution

Restoro box imageError Causes

There are three basic causes for Error Code 0x80070008. The first is that your machine may not have enough memory to finish the installation of an update. The second possible cause is that another program may be interfering with your machine’s ability to finish the update installation. Lastly, Error Code 0x80070008 can occur when a user has a lot of language packs, which may interfere with the ability to complete updates.

Further Information and Manual Repair

Because there are three different causes for Error Code 0x80070008, there are also three different methods to attempt to resolve the error. If you believe that the error may be caused by the number of language packs installed on your device, you should attempt method three first. Otherwise, use methods one and two first.

If you are not confident that you can do the steps below on your own to resolve Error Code 0x80070008, get in touch with a certified computer repair technician that is familiar with Windows 10 issues in order to fix the issue.

Here are the top three methods to resolve Error Code 0x80070008 on a machine running Windows 10:

Method One:  Run the Windows Update Troubleshooter

When Error Code 0x80070008 first appears on your computer, one of the first steps that you can take to resolve the issue is to open up the Windows Update module and click on the “Troubleshoot” tool. This will run a scan on the Windows Update tool to attempt to identify the root cause of the problem and to resolve it automatically for you.

If the troubleshooter finds a problem, simply follow the steps on the screen to resolve the error. In some cases, you may want to restart your computer after this process is complete before you attempt to run the Windows Update tool again.

Method Two:  Close All Programs Until Updates are Done

In some cases, a lack of memory on the machine can mean that running other programs while you are attempting to run Windows Update will cause the update process to fail. Closeout all of the programs that are running on the device, including any antivirus software or firewalls, before you run the update process. If this allows the Update process to run through to completion, you can then reactivate all of the programs that were running prior to the update.

Method Three:  Remove Unwanted Language Packs

This method generally applies to users who have an abundance of language packs installed on their machine, usually more than 20 in total, which may interfere with the update process. To remove unwanted language packs, follow these steps:

  • Step One: Open the Start Panel and select “Control Panel.”
  • Step Two: Find the setting for “Clock, Language, and Region” and choose “Region and Language.”
  • Step Three: Select the option for “Keyboards and Languages,” then under the settings for “Display language,” choose “install/uninstall languages” and select “uninstall display languages.”
  • Step Four: For any languages that you do not wish to keep, deselect them and choose “Next.” It may require several minutes for the process to complete.
  • Step Five: After the unwanted language packs have been removed from your computer, you can attempt to run Windows Update again. You may want to restart your computer first for maximum efficiency.

Method Four: Use An Automated Tool

If you wish to always have at your disposal a utility tool to fix these Windows 10 and other related issues when they do arise, download and install a powerful automated tool.

Read More
Fixing corrupted system files in Windows
Windows has a lot of built-in tools that help you fix tons of system-related issues. One of them is the System File Check which is the tool you can use to conveniently replace potentially corrupted or missing system files with good ones. But what happens when it does not work? Well, you’ve come to the right place as in this post, you will be guided on how you can replace a corrupted single Windows system file manually with a known good copy of the file if the System File Checker scan is not working. When you encounter this issue with the System File Checker, it will be unable to replace the corrupted system files and returns an error message instead. And so to fix and replace corrupted system files in your Windows 10 computer without the help of System File Checker, you can refer to the instructions provided below. Step 1: First, you need to open the log files listed below and identify which particular file has been corrupted:
  • %userprofile%Desktopsfcdetails.txt
  • Log %WinDir%LogsCBSCBS.log
Step 2: You will see all the details on the given log files. Once you find out the name and the path of the file, you have to take ownership of this corrupted system file. Step 3: To take ownership of the corrupted file, you need to pull up Command Prompt by tapping Win + R keys on your keyboard and then type “cmd” and tap Enter. Step 4: After opening Command Prompt, type and enter the command below to execute it:
takeown /f FileNameAndPath
Note: In the given command, “FileNameAndPath” represents the name and the path of the corrupted file. For instance, the corrupted file is named “wuapi.dll”, then you need to type “takeown /f C:/Windows/System32/wuapi.dll” Step 5: Next, you need to grant administrators full access & control to the corrupted file and you can do that via Command Prompt again. Step 6: In the elevated Command Prompt, type and enter the following command to execute it:
icacls FileNameAndPath /GRANT ADMINISTRATORS:F
Note: We’re going to use the wuapi.dll again as an example. So the command should be like this: icacls “C:/Windows/System32/wuapi.dll /grant administrators: F”. Step 7: Now all that’s left to do is replace the corrupted system file with a good copy from a trusted source. Once you have a copy, open an elevated Command Prompt again and execute the following command:
copy NewFileLocation FileNameAndPath
Note: In the command given above, the “NewFileLocation” is the location where you have saved the copy of the file. For instance, if you’ve saved it on your desktop, this is how it should look: “copy C:/Users/<username>/Desktop/wuapi.dll C:/windows/system32/wuapi.dll”
Read More
How to Resolve HP Printer Spooler Not Running Error

HP Printer Spooler Not Running - What is it?

If you have the HP printer, then you may come across this error. HP Printer Spooler not running errors does not mean there is anything wrong with your printer. It indicates printer driver issues.

Solution

Restoro box imageError Causes

There can be multiple causes behind the HP printer Spooler not running error code such as:
  • The poor or unsuccessful printer driver installation
  • Invalid registry entries
Though this is not a critical error code as it does not pose serious damage threats to your PC, however, it is advisable to resolve it as it can cause you a great deal of inconvenience especially if you want to take out printouts every now and then.

Further Information and Manual Repair

Here are some ways you can try to resolve HP Printer Spooler Not Running Error on your system: 1. Reinstall the HP Printer driver on Your System
  • Simply go to the control panel and then click on the Device Manager option
  • Once you click it you will see details pane with a list of devices. Now simply click on the printer, to reinstall the driver software.
  • Double click on it to open the properties dialog box
  • After that click on the driver tab and then click update driver
Once you update the driver, try using the Printer to see if it works. Sometimes you may come across a pop-up displaying the following message: ‘Driver installed correctly, Device is ready to use however, you may not see the printer under the printer’s pane. This triggers registry issues. 2. To resolve registry issues, install Restoro on your system. This is a highly functional registry cleaner integrated with a powerful antivirus. It helps resolve registry issues, malware, and guarantees system optimization. This feature-filled tool is the answer to all your PC-related issues. Restoro is a next-generation PC repair software that extends outstanding usability and helps PC users resolve errors efficiently. Its simple navigation and user-friendly interface make it so easy to use that even novice users can also work around it and repair issues without any hassle or difficulty. It’s a smart and intuitive in-built registry cleaner that wipes out all the unnecessary and obsolete files on your hard disk. This includes junk files, internet history, invalid registry keys, and files from the uninstalled old program versions. Sometimes the files from the uninstalled programs hamper your ability to update new program versions thus leading to unsuccessful driver installation. Nonetheless, all such files are removed in seconds with this helper and you are then ready to reinstall the driver. This registry cleaner cleans the clutter from your hard disk and optimizes your system's speed, lowering your PC boot time significantly. Total System Care can be used on all Windows versions To fix the HP printer spooler not running error on your computer, simply click here to install Restoro. Run it to scan for the error and fix it in seconds. Once the issue is resolved, update the printer driver. You’ll see the driver will be updated successfully and the HP printer will also appear in the printer’s panel. By installing Restoro on your system, you can also resolve several other issues like privacy errors triggered by malware and virus infections. With this tool, you will not have to download and run a separate anti-virus on your system.
Read More
1 2 3 171
Logo
Copyright © 2023, ErrorTools. All Rights Reserved
Trademark: Microsoft Windows logos are registered trademarks of Microsoft. Disclaimer: ErrorTools.com is not affiliated with Microsoft, nor claims direct affiliation.
The information on this page is provided for information purposes only.
DMCA.com Protection Status