Error 1310 is a fairly common type of error encountered by Windows users.
Error 1310 usually generates while a user is attempting to install Adobe Photoshop or some Adobe product on Windows. The message displayed to the user usually states: ‘Error 1310. Error writing to file. Verify you have access to that directory’. Once the error message appears, the installation process will be terminated.
Solution
Error Causes
While there are different conditions that may trigger this error, most likely, they are generated because of the lack of privileges a user has on a Windows log-on.
When this happens, the operating system doesn’t allow the user to access the installation files. Another reason Error 1310 may occur is that often users attempt to log on to the system and choose the ‘Only for me’ option rather than the recommended ‘Anyone who uses this computer’.
Because of this reason, the data is locked for all the other users.
Since Error 1310 can easily disrupt your workflow on the system and may also lead to annoying consequences, it is best advised to treat it as quickly as possible.
Further Information and Manual Repair
There are different solutions to resolve these errors that are briefly listed below as follows.
First and foremost, restart the installation by logging onto your computer from the administrator account. This error will most likely disappear because there is often a lack of privileges that will trigger it. When you will log on from the admin account, you will have access privileges and such errors will be rectified.
Fix any corrupt system files that exist on your system. If the file resides in the Windows directory, this error will be generated. Check if any of your system files are corrupt or damaged. If yes, make sure you repair and return them back to their original position.
This error is sometimes caused because of incorrect registry entries. If the setup program shows errors, it is possible that it is because the system is having problems retrieving data stored in the system registry.
Another way, this error can be avoided is to run the setup in compatibility mode. Compatibility issues are a common occurrence. However, when an installation is performed in the compatibility mode, one can easily steer clear of such errors.
Implement any of the solutions listed above and protect your system against Error 1310.
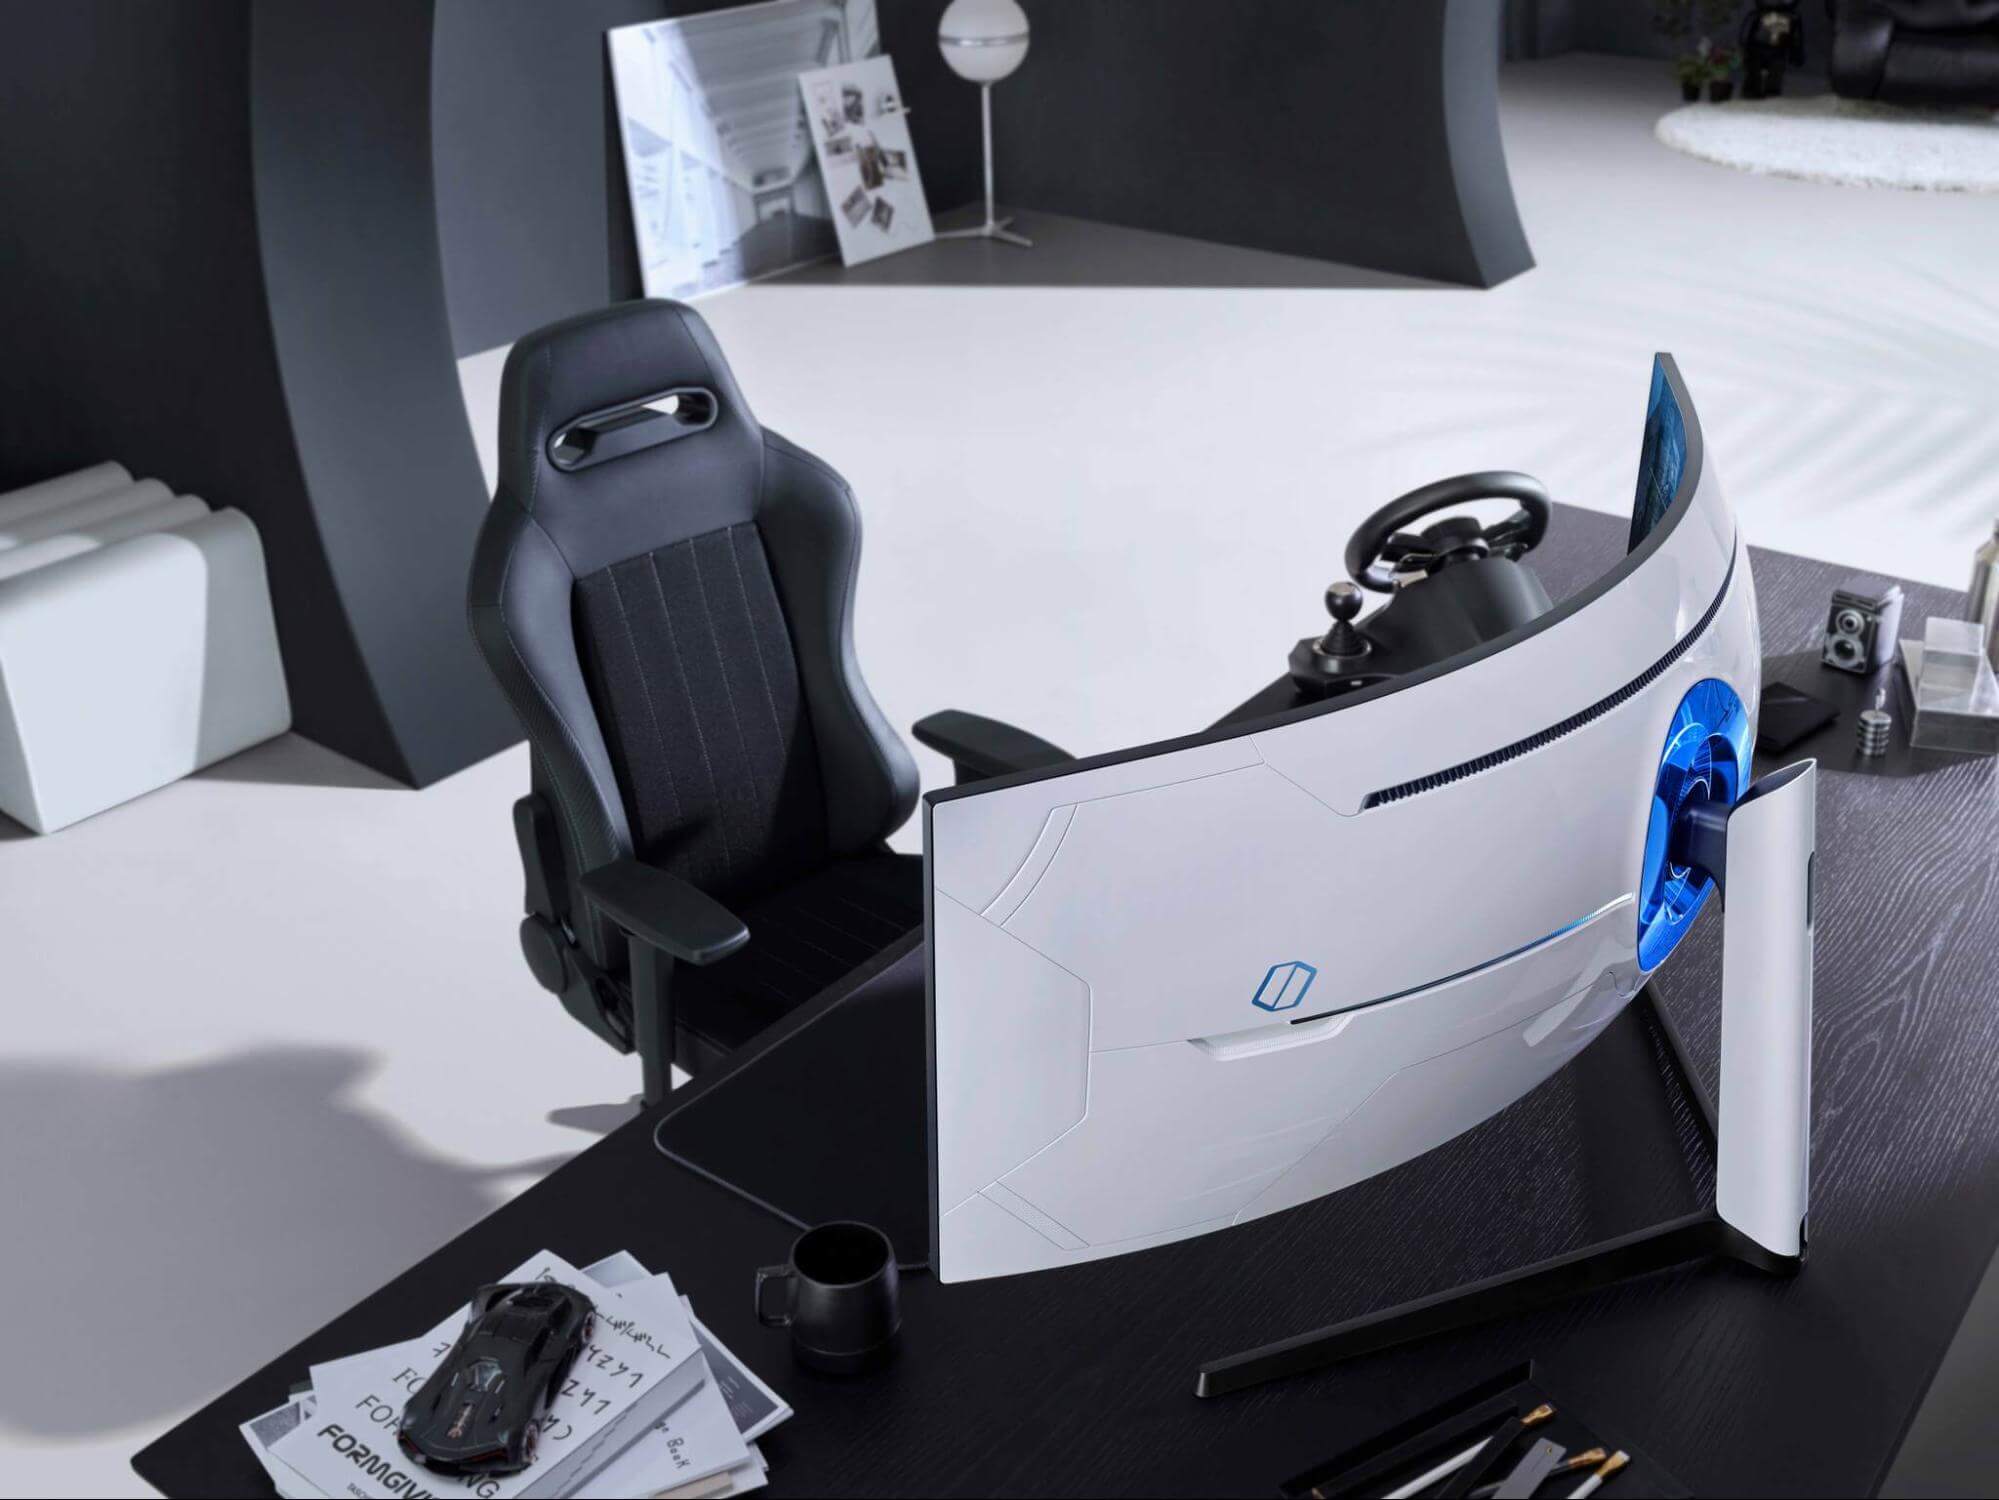
Odyssey Neo G9 is a successor to Odyssey G9 curved gaming monitor and it is aimed again at the gaming community with its specifications but of course, it can be used for work as well.
Gapping at a stunning $2500 USD price it is not really a cheap piece of hardware so it is normal to see what do you get for this kind of price and do features justify it, so let’s dive in.
Size and resolution
The first thing that you can notice about the screen is that it is big and curved, 49 inches big which is pretty big, and with it, I believe you can forget about using 2 or 3 screens because this single one will cover everything you need really.
Going as far as 5120 X 1440 resolution is the strange definition, basically, this is 5K which is kind of nice but I do not see the advantage. Sure it is larger than 4K, but for the price of $2500 I expected an 8K monstrosity so if the resolution is not the main price justification then what is? Let’s move on and find out.
Odyssey tech specs
The monitor comes with HDR and 240Hz refresh rate which is very nice and coupled with 1ms pixel response time, adaptive sync, and Variable Refresh Rate you get pretty good other tech specs.
All of this is very nice but the monitor's strongest selling point is Mini Led tech. Mini Led is a next-gen tech currently found only in high-end TVs. With this technology, monitors can produce truer blacks sort of speak thanks to a greater number of dimming zones.
Odyssey Neo G9 is rated at 2000 nits in the brightness values and local dimming zones go to stunning 2048. It comes also with Quantum HDR that supports 10+, Freesync, and G-Sync capability. In connection, the department monitor comes with a single display 1.4 port and two HDMI 2.1 ports. It also includes a headphone jack along with two USB 3.0 ports.
Conclusion
While the resolution of the monitor is nothing impressive for the given price, its size and the rest of the tech specs surely are. Now I will not lie, the price is still a little too high but if you could afford it easily I think you should.
System restore is usually the go-to tool when something goes bad in Windows, we fire it up and roll back Windows in the state when everything was working fine. But what if Windows does not want to boot? Can we use system restore in that case?
The answer to that question would be yes, yes we can.
Boot interrupt Windows 10 by starting your PC and as soon as you see the Windows logo; press and hold the power button to force a shutdown.
Repeat this 2-4 times and Windows will open up the Advanced Startup Options menu for you.
At the Advanced Startup Options screen, select Advanced Options.
Select Troubleshoot.
Under the Advanced options screen, select System Restore.
or if you prefer, use Windows USB installation.
Boot the faulty PC using the Windows 10 installation media.
The Windows Setup dialog box will appear.
Set the Time and currency format, Keyboard or input method, and the language to install.
Click Next.
Click on Repair your computer from the lower-left corner.
From the Choose an option screen, click on Troubleshoot.
Click Advanced Options in the Troubleshoot screen.
In the Advanced Options screen, click System Restore.
Windows will take some time to prepare System Restore. It may even restart your computer or device.
When System Restore is ready, you will be prompted to choose a user account to continue.
Select an account that is set as administrator on your Windows 10 computer or device.
At the next screen, change the keyboard layout if you want and then input the password for that account.
Error Code 1627 is a type of HP printer installation error. It usually occurs when you try to install an HP printer on your PC. The error code 1627 pop-up hampers your ability to install an HP printer successfully.
This error code is usually displayed in the following format:
Installation Error: Call to Driver Package Install returned error 1627 for package C:ProgramFilersHPHP deskjet 2510 seriesDriver storePipelinehpvplog.inf
Solution
Error Causes
Like every device installed on your PC, printers also need software called drivers to function on Windows Operating System.
Although Windows supports several computer devices since many drivers are already installed in Windows but there are some devices that do need additional software to get started and operate smoothly on Windows such as Hewlett-Packard HP printers.
Installing a Hewlett-Packard printer driver is slightly more time-consuming and complex than any other driver. Causes for HP printer installation usually include:
Driver issues
Bad Registry Keys
Though this is not a fatal error, it is still advisable to fix it right away to avoid inconvenience.
Further Information and Manual Repair
To resolve this error on your PC, you don’t necessarily have to hire a professional and spend hundreds of dollars in repair. The good news is that HP Installation error code 1627 is quite easy to fix. Here are some of the best and proven DIY methods to resolve error code 1627:
Method 1 - Uninstall and then Reinstall HP Printer Driver
HP printer installation errors can occur due to driver issues. If the driver is not installed properly or is outdated, you will never be able to install an HP printer on your PC successfully.
Therefore to solve this issue, first, make sure the driver used for printer installation is up to date. If it is outdated, then update it. On the other hand, if the printer driver is up to date but not installed properly then reinstall it. In both situations, first, you must uninstall the driver.
Uninstalling the previous installation will help you clean the system. Once the system is clean you can reinstall the HP drivers again.
To uninstall, go to the start menu and then the control panel. Now go to the Add/Remove program option and uninstall the driver. To activate changes, reboot your PC. Now install the updated version again.
Method 2 - Clean the Registry
If the printer software installation fails while updating, then this means the removal of the failed software was not successful. It may not show up in the Control Panel program list.
This means the entries of the failed software are still present in the registry of your PC. In this scenario, you need to clean the registry and remove the bad entries from there to successfully install the HP printer driver on your system.
Though this can be done manually this can be both time-consuming and slightly challenging if you are not technically sound. Therefore, to remove bad entries from the registry in seconds in just a few clicks download Restoro.
This is a user-friendly PC Repair Tool deployed with a powerful registry cleaner. The registry cleaner scans your entire PC, detects and removes all bad entries and files corrupting the registry right away.
Once the registry is cleaned, you can try installing the printer driver again. This is most likely to resolve the issue.
Click here to download Restoro.
Method 3: Locate and Install the Driver
As was pointed out, you might need to reinstall the printer driver again. Using DriverFIX, you'll be able to automatically update your computer system and install the drivers your computer needs to operate smoothly.
KMODE_EXCEPTION_NOT_HANDLED seems to be connected primarily to a third-party driver, e1d65x64.sys associated with the Intel(R) Gigabit adapter, NIC/Wired network NDIS (Network Driver Interface Specification) 6.x driver. Error is known to produce the dreaded blue screen of death or BSOD.
Most usually error is connected with gaming on Windows 10 computer and it manifests itself during gaming sessions.
If you are unlucky and you are faced with this unfortunate error we will be happy to try to help you and present with tips and tricks in order for you to find a solution for it.
Before you proceed with the provided solutions, be sure you have sufficient disk space on the Windows drive, run Disk Cleanup and then run CHKDSK.
1) Run the Blue Screen Online Troubleshooter
Open Control Panel, change the view setting to icons. Click Troubleshooting, and click “View all” in the tasks pane. Click “Blue Screen”. This opens the Blue Screen Troubleshooter.
2) Run Driver Verifier
Start a Command Prompt window by selecting Run as an administrator, and type verifier to open Driver Verifier Manager.
Select Create standard settings (the default task), and select Next. You can also choose to Create custom settings to select from predefined settings, or to select individual options. For more information, see Driver Verifier options and rule classes and Selecting Driver Verifier Options.
Under Select what drivers to verify, choose one of the selection schemes described in the following table.
Driver verifier table:
Option
Recommended use
Automatically select unsigned drivers
Useful for testing on computers that are running versions of Windows that do not require signed drivers.
Automatically select drivers built for older versions of Windows
Useful for testing driver compatibility with newer versions of Windows.
Automatically select all drivers installed on this computer
Provides maximum coverage in terms of the number of drivers that are tested on a system. This option is useful for test scenarios where a driver can interact with other devices or drivers on a system.
This option can also exhaust the resources available for Special Pool and some resource tracking. Testing all drivers can also adversely affect system performance.
Select driver names from a list
In most cases, you will want to specify which drivers to test.
Selecting all drivers in a device stack allows the Enhanced I/O Verification option to track objects and check compliance because an I/O request packet (IRP) is passed between each of the drivers in the stack, which allows for a greater level of detail to be provided when an error is detected.
Select a single driver if you are running a test scenario that measures system or driver performance metrics, or if you want to allocate the greatest number of resources available for detecting memory corruption or resource tracking issues (such as deadlocks or mutexes). The Special Pool and I/O Verification options are more effective when used on one driver at a time.
If you chose Select driver names from a list, select Next, and then select one or more specific drivers.
Select Finish, and then restart the computer.
3) Update network device drivers
Go to the official Intel website and try to find newer versions of drivers, if there are none perhaps you will need to revert back to the previous version.
4) Scan memory for issues
Run a memory test on your system, sometimes these errors can be traced back to a faulty RAM bank.
5) Stop over-clocking your PC
If you have overclocked your PC please reverse it back to its original state and see if that would solve the issue
6) Perform System Restore to the previous restore point
If none of the previous solutions have bared fruit, roll back to a previous restore point and that should solve the issue.
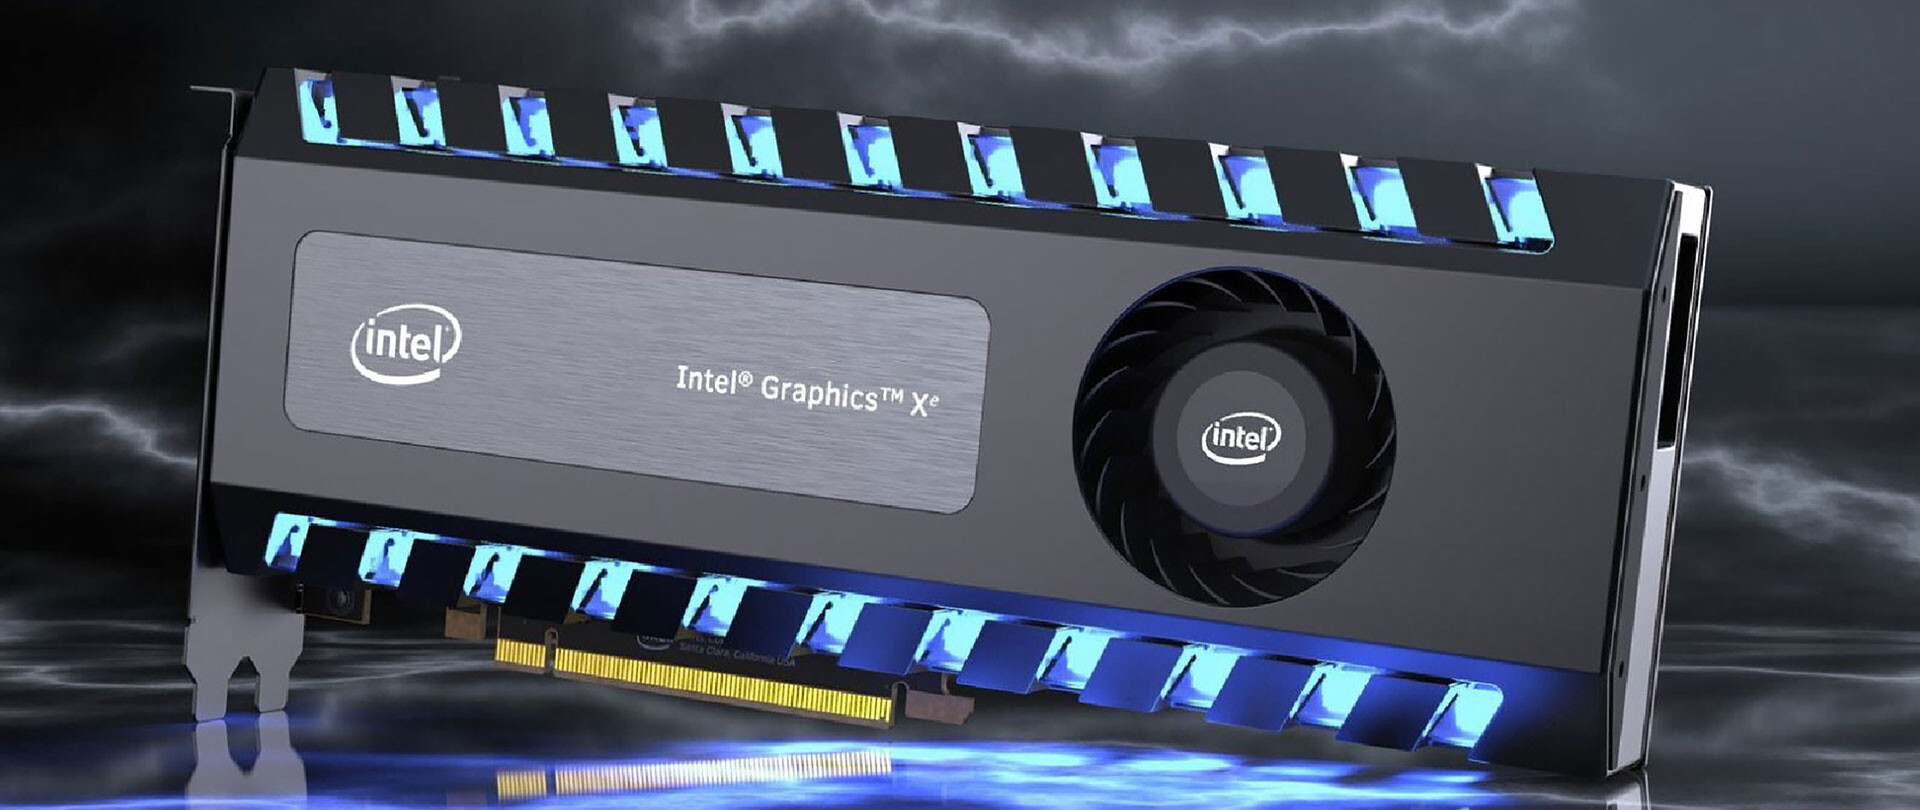
This is not the first time that Intel is trying to enter the GPU field but its adventures so far were, well let us agree not so good. All of that is hoping to be changed with the upcoming ARC GPU. The first generation of Arc graphics, code-named Alchemist and previously known as DG2, will support desktop PCs and laptops and is set to arrive in the first quarter of 2022.
Alchemist will have hardware-based Ray tracing and AI-driven supersampling. This indicates that GPU is aimed to compete in the Hi-end spectrum and battle side by side with Nvidia and AMD on the market. Alchemist will also pack full DirectX 12 Ultimate support.
Intel also released names for the next upcoming future generations of ARC GPUs: Battlemage, Celestial & Druid. More information about ARC products will be released later this year.
“Today marks a key moment in the graphics journey we started just a few years ago. The launch of the Intel Arc brand and the reveal of future hardware generations signifies Intel’s deep and continued commitment to gamers and creators everywhere,” Roger Chandler, Intel vice president, and general manager of client graphics products and solutions.
The Microsoft Photos app is a useful tool that allows users to view, edit, as well as create videos on their Windows 10 computers. Although it works just fine most of the time, there are some instances when you might encounter some issues when using it. One of these issues is when you cannot save media from the Photos app after you’ve edited an image. This is most likely related to a permission issue. However, according to some users, they got the error where the edited media file can’t be saved. When you encounter this kind of error, you will see the following error in your Photos app:
“It looks like you don’t have permission to save changes to this file.Try saving a copy instead.”
There are several options you can explore to resolve this error. You can try updating the Microsoft Photos app or verify the ownership of the destination folder. You can also re-register and reinstall the app. For more detailed instructions, make use of the options provided below.
Option 1 – Try to update the Microsoft Photos app
The first thing you can do to fix the problem is to update the Microsoft Photos app.
Open the Microsoft Store and click on the three horizontal dots for the menu located on the top right portion of the window to see the options.
Next, select Downloads and updates and then click the Get updates button in the top right. This will install any pending updates for all the apps including the Microsoft Photos app using the Microsoft Store.
Option 2 – Try to verify the ownership of the destination folder
The next thing you can do to fix the error is to verify the ownership of the folder because chances are, the location where you’re trying to save the file might not have enough permissions to read and write the file to the disk. Thus, you need to take ownership of the folder by following these steps:
Type “command prompt” in the Windows Search bar and then right-click on the relevant search result and select “Run as administrator”.
After that, if a User Account Control or UAC prompt appears, just click on Yes to proceed.
Next, type and enter this command: TAKEOWN /F <path>
Note that the <path> is the location of the folder or file in File Explorer.
Now type and enter this second command: ICACLS <path> /grant administrators:F
Finally, once the command has been executed, restart your computer and then see if you can now access the folder or file.
Option 3 – Try resetting the Photos app
If the first option of restarting the background process of the Photos app didn’t work for you, you can try to reset the Photos app so that it will use the default factory settings. Note that this option works when you are experiencing this issue after making a couple of changes in the Photos app.
To get started in resetting the Photos app, open the Windows 10 Settings.
Then go to Apps > Apps & features.
After that, scroll down until you see the Photos app option – click on it and open its Advanced options.
From there, you will see the Reset button, click on it and click and then click on it once more to confirm.
Note: The process may take a couple of minutes to complete. Once it’s done, open the pictures again using the Photos app.
Option 4 – Try reinstalling the Photos app
If none of the first two options given above worked, then you might want to consider reinstalling the Photos app. Unlike what most users think, it isn’t really that hard reinstalling preinstalled apps as you have the Windows PowerShell for that. To use this program in reinstalling the Photos app, follow these steps:
Open the Windows PowerShell program with admin privileges and key in the following command:
Set-ExecutionPolicy Unrestricted
After that, execute this second command to re-register and reinstall the Microsoft Photos app.
Note: In the command given, do not forget to replace the “PackageFullName” with the actual package name for the Photos app. After executing the command, it will uninstall the Photos app from your computer so you need to install it again from the Windows Store by simply looking for it. Once you found it, just click on install to start the installation process.
A couple of Windows 10 users recently reported getting an error that says, “The group or resource is not in the correct state to perform the requested operation” while opening UWP Applications as well as accessing the File Explorer.
You can encounter this kind of error mostly on File Explorer, Microsoft Store application, and other UWP applications. This indicates that this error occurs during both the Windows Classic Application and the Universal Windows Platform Applications.
There are several ways to fix this error. You can try to run a System File Checker scan, or run the DISM tool or the Program Compatibility troubleshooter or Windows Store Apps troubleshooter or try to reset or reinstall Windows 10 or the affected application that's not working. However, before you do any of these troubleshooting tips, you can try to perform System Restore first as it could undo the changes you’ve made in the system which might have caused the error.
Tap the Win + R keys to open the Run dialog box.
After that, type in “sysdm.cpl” in the field and tap Enter.
Next, go to the System Protection tab then click the System Restore button. This will open a new window where you have to select your preferred System Restore point.
After that, follow the on-screen instructions to finish the process and then restart your computer and check if the problem is fixed or not.
If System Restore wasn’t able to fix the error, then you can refer to each one of the following options.
Option 1 – Try to use the DISM tool
You might want to repair potentially corrupted files in your system as having them could also trigger the “The group or resource is not in the correct state to perform the requested operation”. To repair these corrupted system files, you can run the DISM commands:
Tap the Win + X keys and click on the “Command Prompt (Admin)” option.
After that, input each one of the commands listed below sequentially to execute them:
Dism /Online /Cleanup-Image /CheckHealth
Dism /Online /Cleanup-Image /ScanHealth
Dism /Online /Cleanup-Image /RestoreHealth
Once you’ve executed the commands given above, restart your computer and check if the DCOM error is now fixed.
Option 2 – Run the System File Checker Scan
Aside from the DISM tool, you can also run a System File Checker scan. It is another built-in command utility that helps in restoring corrupted files as well as missing files. It replaces bad and corrupted system files to good system files that might be the cause why you’re getting the error. To run the SFC command, follow the steps given below.
Tap Win + R to launch Run.
Type in cmd in the field and tap Enter.
After opening Command Prompt, type in sfc /scannow
The command will start a system scan which will take a few whiles before it finishes. Once it’s done, you could get the following results:
Windows Resource Protection did not find any integrity violations.
Windows Resource Protection found corrupt files and successfully repaired them.
Windows Resource Protection found corrupt files but was unable to fix some of them.
Reboot your computer.
Option 3 – Try to run the Program Compatibility Troubleshooter
You might also want to run the Program Compatibility Troubleshooter. This built-in troubleshooter is available in the Windows Update & Security section. From there, select Troubleshoot. This will find a list of programs for you and since you have already downloaded the driver files, just click on Not Listed located at the top of the program list. After that, browse and select the driver files and then let the program do its job. In addition, you can try to run the Windows Store apps troubleshooter as it can also help you resolve the problem.
Option 4 – Reset your computer
Tap the Win key or click on the Start button located in the Taskbar.
Then click on the Power button at the bottom right portion of the screen.
Next, press and hold the Shift key on your keyboard and then click on Restart. This will restart your Pc into the Advanced Startup options.
Note: Once you have access to the Advanced Startup options, you have to go to the setting which allows you to Reset your Windows 10 PC. All you have to do is select Troubleshoot > Reset this PC to reach the following screen
Afterward, select either the “Keep my files” option and then proceed to the next on-screen instructions that follow to reset your Windows 10 computer without losing your files.
Disk Write Error in Steam is thrown at you while you try to download or update the game in your library. If you are an unfortunate user of Steam that has encountered this error do not sweat, the error is usually tied to permission in windows or file corruption and not to hardware issues and can be easily resolved.
In this guide, we will go through solutions for this specific error and it is advisable to go through solutions as they are presented since they go from the easiest and most common issues.
Restart PC and Steam
The easiest and quickest way of resolving this issue is just a simple restart of the Steam client. Just completely quit Steam and they run it again, if this has not solved the issue try rebooting your PC. In most cases, this can solve the issue since this error is known to be introduced with some communication issues with OS (Windows)
Set Write permissions
Disk write permissions could also cause this error because if by any chance the Steam library folder has been set or changed to the read-only client would be unable to write anything in it. To easily solve this issue completely exit the Steam client and rerun it as administrator. Just right-click on it and select Run as Administrator. If this has solved your issue run Steam always as an administrator.
To run always as an administrator right click on the steam executable, go to properties, and inside properties go to the compatibility tab. In the compatibility tab check run as administrator and click on OK.
Clear download cache
If for any reason cache has become corrupted there is a big chance that this might be an issue why there is a disk drive error in Steam. To clear download, cache goes into your client, and on top drow down menu click on steam. Find and open settings and inside go to the downloads tab. Locate a clear download cache and immediately you will be prompted to restart Steam. After restart, you will be asked to login into steam and the issue with disk write should be gone.
Repair library folder
Library folder issues can also be the source of disk write annoyance so let's repair them. Click steam in the top left and go to the settings. Locate and click on Downloads and then go to Steam library folders. You will be here shown all disk drivers you are using for steam games and all of the games that are downloaded.
Select the game you are getting errors with and click on three dots on the far right. From the menu choose the repair folder option. Take note that the more games you have installed, the more time the repair process will need.
Change download server
Sometimes the issue is not at your end at all, servers can experience problems and outrages and this can directly reflect at your end with a disk write error. If any of the previous solutions have not resolved the issue this is the next logical step to try. If the server is facing issues then changing the download server will resolve the issue at your end.
Click on settings in the top drop-down menu and then click on the Steam library folder. Find the downloads page and then click on download region, Choose another server than one nearest to your location since that's what will Steam choose by default.
External hard drives have become essential these days as they tend to be very useful to many users. They are usually used for storing system images like system backups, Windows installation media, or for personal use. However, if you are not able to utilize your external drivers for some reason then that could be a huge problem. One of the common issues with hard drives is when your USB device or external hard drive just keeps connecting and disconnecting. This kind of issue could be caused by a faulty USB port, some issues with the USB drivers, your computer’s Power Options, corrupted or damaged system files, and many other factors.
The connecting and disconnecting issue with USB devices and external hard drives isn’t really new and has been experienced by many users for years now. Although this issue has somewhat decreased in Windows 10, there are still some users who encounter it every now and then. Worry not though for there are fixes that you can try to resolve the problem.
Refer to the following straightforward solutions to resolve the issue with your USB device or external hard drive.
Option 1 – Plug your external device on a different port
If your USB device keeps on connecting and disconnecting then the first thing you can do is to try connecting it to a different port. This will help you isolate the problem. In some cases, the port where the USB is connected can be malfunctioning or obsolete so you need to check that possibility by plugging your USB device into a different USB port.
Option 2 – Update or reinstall your USB drivers
As mentioned earlier, the problem could be due to some issues with the USB drivers. It could be that it has to be updated or you need to reinstall it. To do that, follow these steps:
First, click the Start button and type “device manager”.
Then click on the “Device Manager” from the search results to open it.
From there, look for the “Universal Serial Bus controllers” option and then right-click on each one of the USB drivers and select the Update Driver from the menu.
Restart your PC and then click the “Search automatically for updated driver software” option.
You also have the option to update the motherboard and the USB driver from the manufacturer’s official website.
Option 3 – Try turning on the USB External drive
There are times when your system turns off some drives in order to conserve your computer’s power, etc. as a result, the driver that’s required to run your external hard drive properly ends up getting disabled. To fix this, you can prevent your system from turning off your external USB drive by following these steps:
You need to make sure that the external drive is connected to your system first.
Next, go to the Start Menu and type “device manager” in the field, and click on the appropriate result to open the Device Manager.
After opening the Device Manager, expand the category of the Universal Serial Bus controllers.
Then double click on your USB Mass Storage device and take note that the name might be different on your system.
Now go to the Power Management tab and uncheck the checkbox for the “Allow the computer to turn off this device to save power” option and click OK to save the changes made.
Option 4 – Turn off USB Selective Suspend
Another thing you can try is to turn off USB Selective Suspend especially when the issue has something to do with the Power Options. There are certain systems that are configured to disable USB devices after some time which could be the root cause of the problem. Thus, you need to turn off USB Selective Suspend. Here’s how you can do it:
In the Start Menu, search for “control panel” and open the related search result.
Then go to Power Options and click on the “Change plan settings” option.
Next, select “Change advanced power settings” and look for the USB settings and then expand it.
From there, you will see the USB Selective Suspend setting. Disable it and click OK.
Now restart your computer and check if it resolves the problem or not.
Option 5 – Format your drive
To get started formatting your drive, tap the Win + E keys and then go to the access page of the drive.
Next, right-click on the drive and select Format.
After that, uncheck the “Quick Format” option and then format your drive properly.
Now once the formatting process is finished, unplug the drive and plug it back in afterward.
Check if the error is already fixed. If the drive is not initialized, tap the Win + R keys and hit Enter.
After opening the Run dialog box, type “diskmgmt.msc” and hit Enter to open Disk Management.
From there, right-click on the drive volume and select initialize disk.
Next, select the correct partition type and proceed.
Each year Steam makes a couple of large sales, and each year there are speculations and leaks on the date when the sale is going to happen and when it is starting. It seemed that Steam has become aware that these leaks will not stop and that store really cannot hide that kind of important date from the public so in the latest news Steam Purley has just given the date of this year's big winter sale.
Probably tired of even trying to hide it, Steam has released that this year's big Steam Winter sale is officially starting on December 22nd, 2021, and closing on January 5th, 2022. So if you have someone to buy a gift or just want to drop a few great games in your library at a low price this is the time when you should do it.


 Odyssey Neo G9 is a successor to Odyssey G9 curved gaming monitor and it is aimed again at the gaming community with its specifications but of course, it can be used for work as well.
Gapping at a stunning $2500 USD price it is not really a cheap piece of hardware so it is normal to see what do you get for this kind of price and do features justify it, so let’s dive in.
Odyssey Neo G9 is a successor to Odyssey G9 curved gaming monitor and it is aimed again at the gaming community with its specifications but of course, it can be used for work as well.
Gapping at a stunning $2500 USD price it is not really a cheap piece of hardware so it is normal to see what do you get for this kind of price and do features justify it, so let’s dive in.
 This is not the first time that Intel is trying to enter the GPU field but its adventures so far were, well let us agree not so good. All of that is hoping to be changed with the upcoming ARC GPU. The first generation of Arc graphics, code-named Alchemist and previously known as DG2, will support desktop PCs and laptops and is set to arrive in the first quarter of 2022.
Alchemist will have hardware-based Ray tracing and AI-driven supersampling. This indicates that GPU is aimed to compete in the Hi-end spectrum and battle side by side with Nvidia and AMD on the market. Alchemist will also pack full DirectX 12 Ultimate support.
Intel also released names for the next upcoming future generations of ARC GPUs: Battlemage, Celestial & Druid. More information about ARC products will be released later this year.
“Today marks a key moment in the graphics journey we started just a few years ago. The launch of the Intel Arc brand and the reveal of future hardware generations signifies Intel’s deep and continued commitment to gamers and creators everywhere,” Roger Chandler, Intel vice president, and general manager of client graphics products and solutions.
This is not the first time that Intel is trying to enter the GPU field but its adventures so far were, well let us agree not so good. All of that is hoping to be changed with the upcoming ARC GPU. The first generation of Arc graphics, code-named Alchemist and previously known as DG2, will support desktop PCs and laptops and is set to arrive in the first quarter of 2022.
Alchemist will have hardware-based Ray tracing and AI-driven supersampling. This indicates that GPU is aimed to compete in the Hi-end spectrum and battle side by side with Nvidia and AMD on the market. Alchemist will also pack full DirectX 12 Ultimate support.
Intel also released names for the next upcoming future generations of ARC GPUs: Battlemage, Celestial & Druid. More information about ARC products will be released later this year.
“Today marks a key moment in the graphics journey we started just a few years ago. The launch of the Intel Arc brand and the reveal of future hardware generations signifies Intel’s deep and continued commitment to gamers and creators everywhere,” Roger Chandler, Intel vice president, and general manager of client graphics products and solutions. 
 Probably tired of even trying to hide it, Steam has released that this year's big Steam Winter sale is officially starting on December 22nd, 2021, and closing on January 5th, 2022. So if you have someone to buy a gift or just want to drop a few great games in your library at a low price this is the time when you should do it.