Logo

Cartoonize review

Hello and welcome to our software series review. Weel this time we could say this is more of a service review since the application we are going through today is online and you can use it freely without ever needing to install it.

When we choose software that we are going to review and recommend we really try to recommend something that is worth your time and money, Cartoonize fits in both categories in my opinion.

First of all basic plan of this graphic software is completely free and as mentioned it is working online, also as one more feature basic plan does not even require you to have an account of any kind, all you need to do is go to the website of the application and you can start using it right away. There is also paid plan for extra features if you need them billed monthly or annually.

cartoonize application

Features

First things first, this is not Photoshop or GIMP and it does not aim nor want to be. This is something else, directed and pointed at the different types of users. This application is aimed at people that want to make some quick graphics and post them on social media and it does that very well. Even without knowledge to use graphic software this one is so well designed and straightforward that even a complete newcomer can do something right away.

So as the application that wants to be used by people that want to place some cool pictures or ads on their social media what it offers. For starters simplicity and ease of use, every option that you can use is on the left side of the screen nicely packed into the vertical toolbox. Inside the toolbox, you have access to various tools, effects, and filters that you can apply to your image.

Tools explained

Image manager

The first section on the tool panel is the image manager, here you can upload your images, delete them, search stock images, and so forth. nothing more to say about this one as it is only a basic file manager.

Edit

In this tool panel, there are a lot of basic settings for your image manipulations divided into 3 sections: Basics, Enhance, and Creative. In the basic section, you can crop, resize and rotate your image. Enhance panel will let you set exposure, color, vibrance, tint, and details (sharpen). Finally, the Creative part will let you remove the background with AI in a single click, replace colors in the image, and add a vignette and round image.

Effects

In the effects panel, you will be given 4 options to choose from Cartoonizer, Digital art, Sketcher, and painting. Each option once clicked will open another set of options tied to chosen preset where you will be able to choose a different style from chosen template. Once you click on the desired template it will be applied to your image and in the upright corner, you will have edit options to tweak it to your liking. You can play around as much as you want because only once you click on the apply button, the effect will be applied to your image.

Filters

Same as in the effects tool panel here you will also get a series of different filters that you can apply to your image. As in the previous tool once clicked on the chosen filter, you will be given options for its variations and details edits. How there is really plenty of filters options and combined with its own presets I will not focus on explaining what each one is doing since picture thumbnails are pretty accurate and just one look at them will explain to you everything you need to know.

Overlays

In the overlays panel, you can as the name says overlay different kinds of effects on your image. You can add snow, fog, sun flares rain, and many more. Presets work identically to previous effects and filters.

Masks

If you want to place your image in a certain shape or in-text this is the section for you. You will be presented with sections as custom text, shapes, brushes, floral, animals, and patterns. Each section will once again lead to plenty of variations on the chosen subject where you can pick one that you like the most and tweak its options.

Text

As the name suggests, this section is to add text to your picture or design. If you are making some cool ad for Facebook, Instagram, or other social media I believe that you will spend most of your time in this section adding text and tweaking it so it looks best. You have all the tools that you will need to make a catchy title or smaller block of text and you can add multiple texts to your picture tweaking their own visual appearance, the font used, color, and some effects like a drop shadow.

Draw

In the draw section, you will be able to freely draw whatever you like with your mouse or pen if you have one. you have basic options for a brush and eraser so you can erase stuff. Pretty basic tool but it gives a nice touch to underline something, circle it, etc.

Graphics

This panel will let you place various already made graphic assets into a picture. You have hearts, hats, glasses, etc. There really are tons of premade graphics along with thematic ones like new year, st. Patric day and more.

Frames

As the name suggests this section will place a frame of your choice around your picture. You can choose the style of frame, position, color, and many more. There are various styles and each style has its own options.

Conclusion

Cartoonize is a great online application that will let you quickly and easily do cool and nice image edits. As mentioned you can also add various effects, text, and graphics and use this app to make some quick and nice ads for social media. You have the option to publish to your social media right from the app in the save dialog but you can also of course download your image or design to your local computer.

Please note that for this review we used the pro, paid version so all of the features were unlocked. We wanted to give you a full overview of the full potential of the app. In my opinion, the small monthly fee that they charge is well worth it when you see all things that you can do with it.

Go to the cartoonize website and check it out, basic option is completely free and it does not even require making an account. Have fun, be creative and take care, I hope to see you again tomorrow.
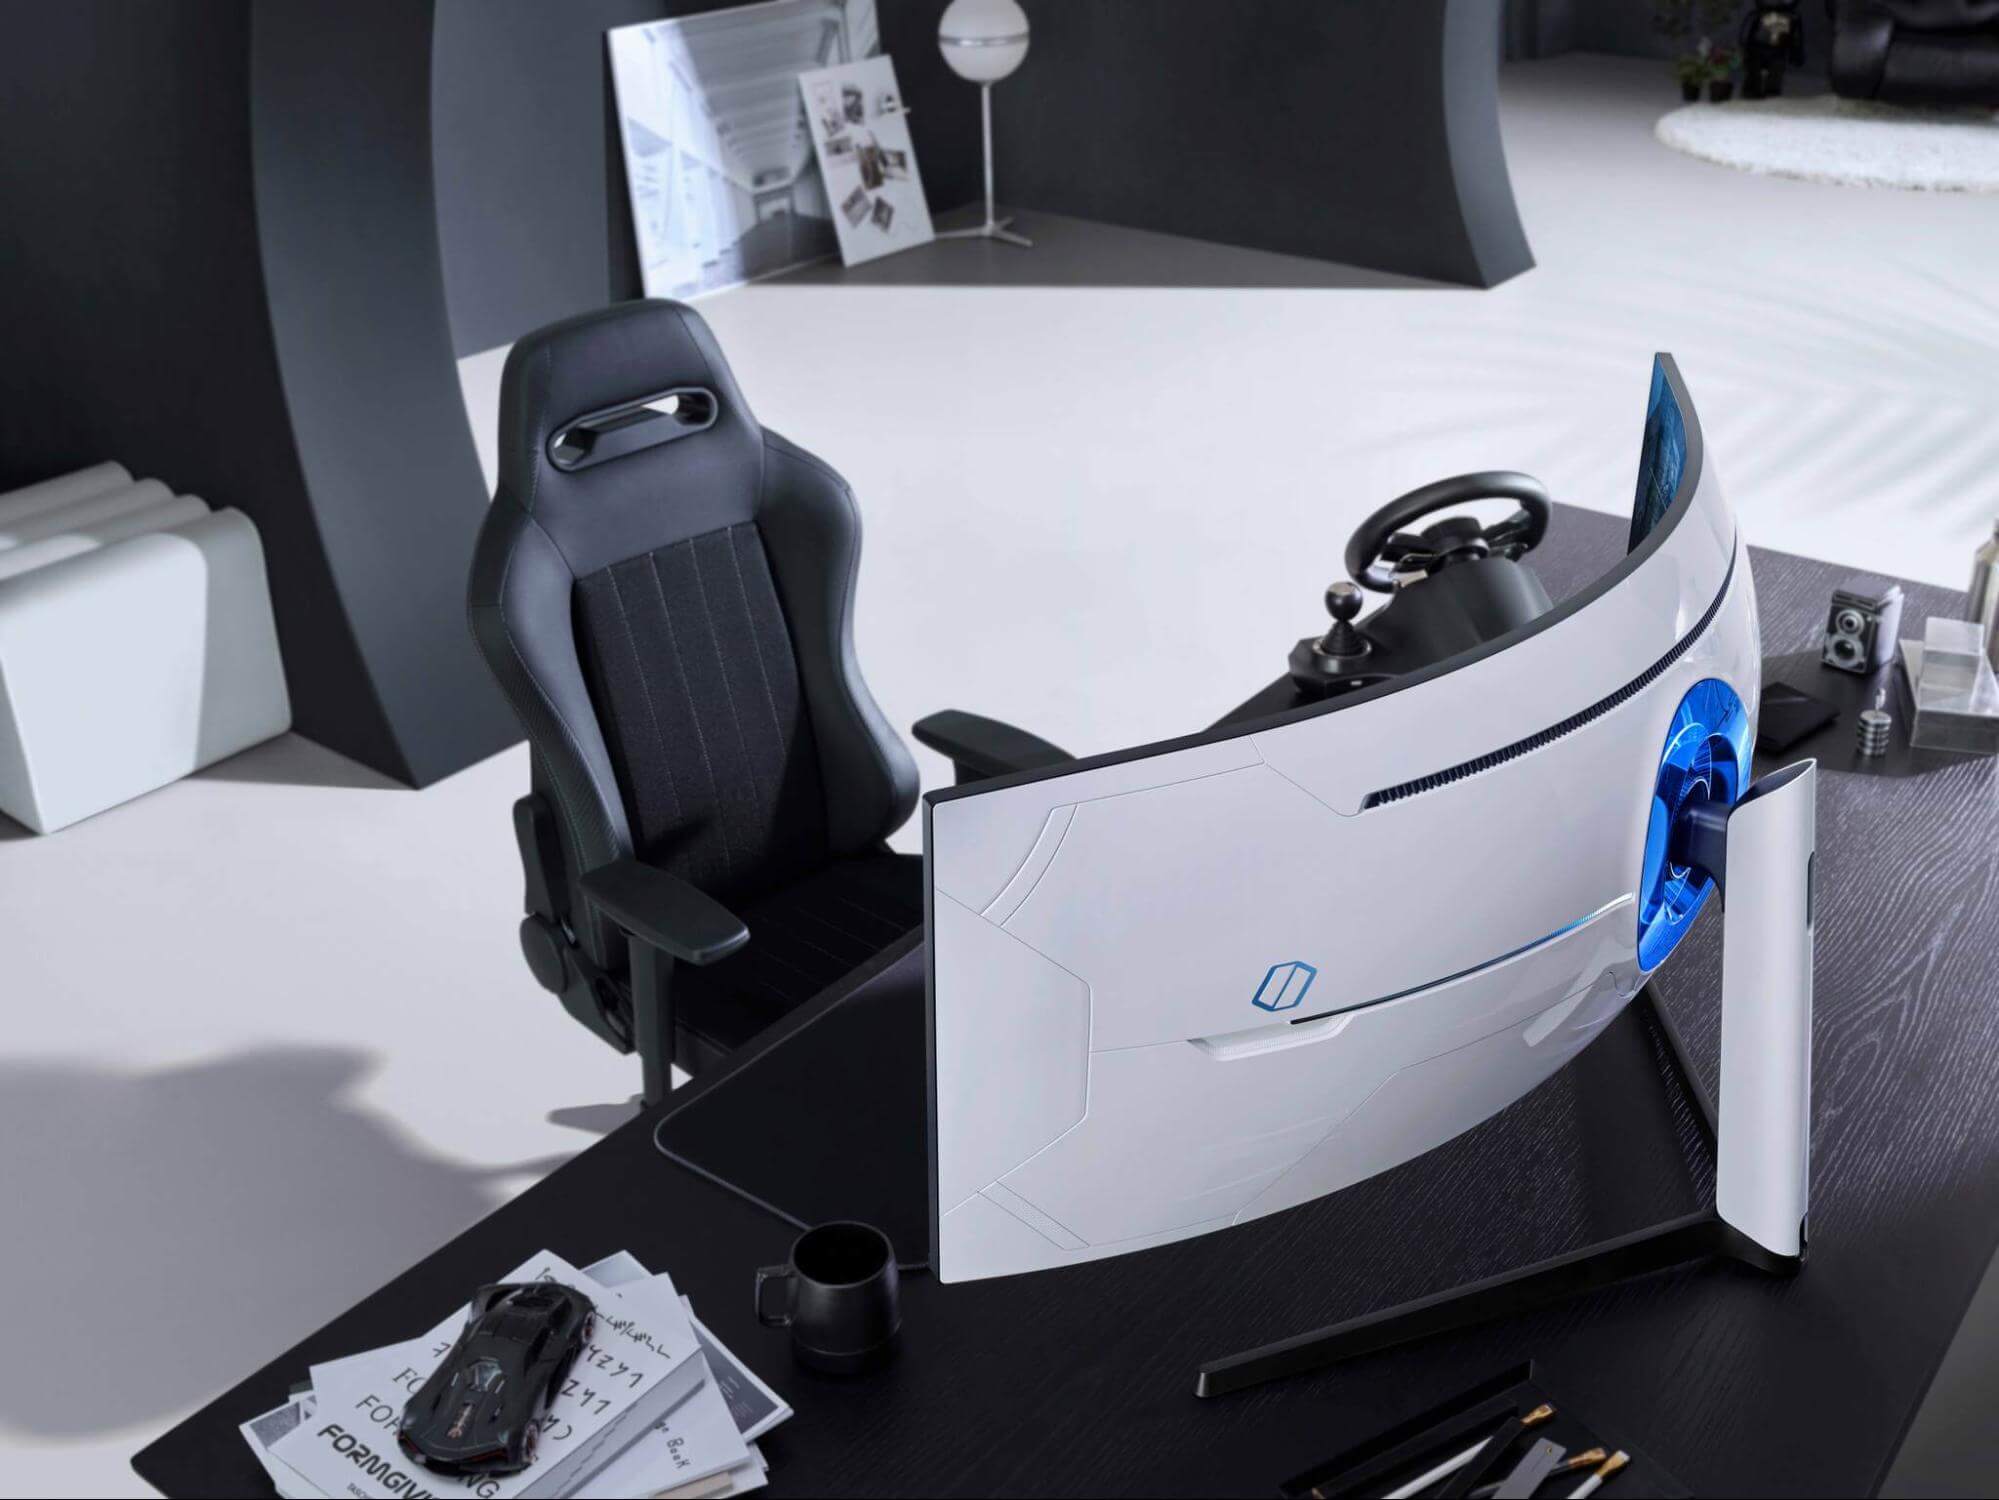
Do You Need Help with Your Device?

Our Team of Experts May Help
Troubleshoot.Tech Experts are There for You!
Replace damaged files
Restore performance
Free disk space
Remove Malware
Protects WEB browser
Remove Viruses
Stop PC freezing
GET HELP
Troubleshoot.Tech experts work with all versions of Microsoft Windows including Windows 11, with Android, Mac, and more.

Share this article:

You might also like

A 3 Step DIY Guide to Repairing Error 501

Error 501 - What is it?

Error 501 is an error code that sometimes may occur while you are using Internet Explorer on your Windows PC. The error message is displayed as:

'Error 501: Not implemented or not supported.'

Solution

Restoro box imageError Causes

It is difficult to narrow down the ultimate cause of error 501. This is because this error code can be triggered by multiple reasons such as:
  • Third-party confliction or due to an incorrect HTTP 1.1 setting
  • Improper program installation
  • Changes in the “LocalAccountTokenFilterPolicy” registry key
  • Corrupted Registry Database

Further Information and Manual Repair

The occurrence of this error regardless of what the cause is may cause a lot of inconvenience to you. And if not fixed on the time it can lead to system failure too. To repair the error 501, identifying the cause for the error really helps. By identifying the cause, you can easily select the most suitable solution to fix it.

Let us walk you through the solutions to fix error 501 timely:

Cause: Third-party conflicts or due to an incorrect HTTP 1.1 setting

Solution: If the above cause is the reason for error 501, this means the Local Policy Rights Settings have been altered. And because of that, Windows is not running your desired program. To solve this error simply log on to Windows as an administrator. Then run local computer policy snap-in. Open it and click on the computer configuration. Here you will see the Windows settings option. Click on it and then open security settings, local policies, and click on properties. Now in the add users section select the user which you want to add to the policy and save by pressing OK. After you’ve made changes, now try using internet explorer again. If this is the cause for the error pop, the error will not occur. If it still occurs then this means there is some other underlying cause for the error. Read on to find out.

Cause: Improper Program Installation

Solution: Error 501 may also occur due to improper program installation. The best way to resolve it is to uninstall recently installed programs.

Cause: Changes in the “LocalAccountTokenFilterPolicy” registry key

Solution: Sometimes during installation registry keys also get damaged or changed. If changes in the LocalAccountTokenFilterPolicy” registry key is the issue, then you need to alter the registry key ‘LocalAccountTokenFilterPolicy settings and its value. This key inside the registry database allows Windows to control the various access options that you have. However, due to wrong settings, it denies access and shows error 501 when you open Internet Explorer. To alter registry key settings can be tricky and complex if you are not a computer programmer. In such as scenario it is advisable to download Restoro. This is a user-friendly and multi-functional repair tool embedded with a powerful register cleaner. In addition to this, it also functions as anti-virus and a system optimizer.

Restoro Solution

Restoro is simple and easy to use. To operate this tool on your PC and to reset registry settings you don’t need any technical expertise or sound knowledge. Its smooth navigation makes it easy for users to scan and repair errors like 501 due to registry misconfiguration in seconds.  With this helper, you don’t have to modify Windows registry settings manually. It will do it automatically. Furthermore, if Error 501 is triggered by a corrupted registry database, you can run it to repair this issue too. It cleans and wipes out all the unnecessary and obsolete files that could be corrupting your registry. This includes junk files, internet history, and invalid registry entries. It clears up your hard disk space and repairs your corrupted registry. If your PC’s registry is damaged due to malicious software like viruses and malware, then it uses advanced antivirus to remove them from your system. It has a value-adding backup feature that enables you to create a backup of your files for data safety and recovery in case of loss during repair. Restoro is compatible with all Windows versions.

Starting with Restoro

Here are 3 simple steps to get started:
  1. Click here to download Restoro.
  2. Once the installation is complete, run it to scan for errors
  3. After scanning the errors, simply click repair to resolve the issues including the error code 501.
Along with fixing error code 501 triggered by registry damage, it also repairs all other PC-related issues. It helps maintain a stable and error-free system for the longest time.
Read More
Not enough storage is available to process...
Each time you execute a command on your computer, it takes into account a number of files and space for the code in the background for the command to be executed. Thus, executing the command is not that easy which is why you could encounter some errors along the way due to various limitations or poor allocation of memory, and so on. One of the errors you might encounter when executing a command on Windows 10 and Windows Server is the “Not enough storage is available to process this command”. There are several potential fixes you can check out to fix this error. To fix this error, you can try to delete the temporary files in your computer, run the DISM tool or apply some registry tweaks. For more details, refer to each one of the given options below.

Option 1 – Try to delete the temporary files

The error could be caused by some temporary or junk files in your computer and so you need to clear them up to fix the problem. You can achieve that using the Storage Sense feature.
  • Open Setting > System > Storage from the WinX Menu.
  • From there, you will see a list of all the local and connected storage devices along with the details on the free space. Make sure that Storage Sense is on.
  • Next, find a link that says “Free Up Space” and click it to open.
  • After that, a screen which is the built-in program in Windows 10 will appear and will scan your computer for the following junk files so you can free up disk space:
    • Windows Upgrade Log Files
    • System created Windows Error Reporting Files
    • Thumbnails
    • Temporary Internet Files
    • Previous Windows Installation Files
    • Delivery Optimisation Files
    • DirectX Shader Cache
  • Choose the files you want to get rid of and then click on the remove files option. Note that you’ll have an idea of the total size as you select any of the junk files listed above.
  • Now go to the “Free Up Space Now” section and click the Clean now button. This will get rid of all the temporary or junk files in your computer and should hopefully fix Error 1310.

Option 2 – Run the DISM tool

You can also run the DISM Tool as it could also help in fixing the “Not enough storage is available to process this command” error in Windows 10. Using this built-in tool, you have various options such as the “/ScanHealth”, “/CheckHealth”, and “/RestoreHealth” that could help in fixing error 0x80246019.
  • You can run the DISM tool via Advanced Startup Options or you could boot your computer into a Clean Boot State and then select Command Prompt.
  • Open the Command Prompt with admin privileges.
  • Then type in the following commands and make sure to hit Enter right after you type each one of them:
    • Dism /Online /Cleanup-Image /CheckHealth
    • Dism /Online /Cleanup-Image /ScanHealth
    • exe /Online /Cleanup-image /Restorehealth
  • Do not close the window if the process takes a while as it will probably take a few minutes to finish. Once it’s done, restart your computer and try again. If it didn’t work, you can try to use the “/StartComponentCleanup” parameter: Dism /Online /Cleanup-Image /StartComponentCleanup

Option 3 – Try to use the Registry Editor

The memory range allocated for the tasks and commands to be executed is associated with the IRPStackSize DWORD. Thus, to fix the error, you need to extend the range by applying some registry tweak. Before you proceed, make sure that you create a System Restore point first. Once you’re done, follow these steps:
  • Tap the Win + R keys to open the Run dialog box and type “Regedit” in the field and tap Enter to open the Registry Editor.
  • Next, navigate to this registry key: ComputerHKEY_LOCAL_MACHINESYSTEMCurrentControlSetServicesLanmanServerParameters
  • From there, look for the DWORD named “IRPStackSize” and right-click on it. If you can’t find this DWORD, just right-click on any empty space and select New > DWORD (32-bit) Value.
  • Input “IRPStackSize” as the DWORD name and double click on it and set its Value data to be greater than its default value. Note that the maximum value allowed is “0xc” and the range starts from “0x1”.
  • Now click on OK and exit the Registry Editor and then restart your computer and see if the error is fixed.
Read More
Intel's open-source Clear Linux* Project
clear linux projectThe Clear Linux Project creates an operating system and software stack that offers highly optimized performance, security, versatility, and manageability. Clearly optimized for Intel CPUs and based on GNOME it will offer you incredible speeds if you are on Intel CPU. The big news, though, is that Clear Linux sports the shiny new Gnome 40. This is a fresher Gnome than you'll find even on Ubuntu's more experimental 21.04 release. The only big names that let you test drive Gnome 40 are Fedora and Arch Linux.

Packages only when you need them

Installation of packages is used by Swupd, a Clear Linux* package management tool. It is easy to use and pretty straightforward.
  • "bundle-list" for showing what's installed
  • "bundle-info" for details on installed bundles (such as owned files via the "‑‑files" flag)
  • "search" for repository searching
  • "bundle-add" for installation
  • "bundle-remove" for uninstallation
The only problem here is the packages themselves. Clean Linux* has been imagined as a developer distro focusing mostly on well-development tolls. In intel’s words: “A Linux OS built for Linux developers”, so some things will be left out. Strangely enough some things as FFmpeg which if you want to have and blast some youtube videos while you work will have to complete manually by yourself.

Clear Linux* modular philosophy

Everything in Clear Linux* is based on a modular philosophy approach. There is no /etc/fstab file, the /boot directory is totally empty. Every partition to be mounted is enabled as a systemd "mount unit." Intel reaping the benefits of systemd's modular philosophy, where everything is a unit. If you know your way around systemd, intermediate-level configuration tasks should be straightforward. Any advanced configuration likely demands deep systemd knowledge.

Clear Linux* performance

As stated earlier this is Intel’s distro, optimized for Intel hardware meaning that Intel as the developer has every possible tool at its disposal to make use of hardware to its maximum potential and it shows. Distro almost leaves other ones two times in speed performance. So if you are looking for a distribution that will deliver you speed and it is aimed for developer Clear Linux* is for you.

Conclusion

Clear Linux* is a really interesting distro and seeing how Intel is adding new software packages on its official website it might have a bright future. But as always, be the judge for yourself and see if it can fit your needs. Go get it at: https://clearlinux.org/
Read More
Remove recommended icons from the start menu
windows 11 start menuIn Windows 11 by default inside the Start menu, there is recommended section that contains recently opened folders, documents, and files. If you do not wish this section and do not want recent items in your Start menu there is an easy way to turn it off.
  1. Press ⊞ WINDOWS + I to open settings
  2. Click on Personalization
  3. On the right side scroll down and click on Start
  4. Click on the switch beside Show recently opened items in Start, Jump lists, and File Explorer
  5. Close settings
Settings will be automatically applied and there will be no more recommended items inside your Start menu to create clutter, it will be nice and clean.
Read More
Fixing the We can’t find a USB flash drive
One of the preferred ways to upgrade Windows 10 is by creating a bootable USB drive. However, you might change your mind when you encounter an error during the Windows 10 Setup that says, “We can’t find a USB flash drive”. Worry not for this error can be fixed using some suggestions that will be provided in this post. The funning thing about this error in Windows setup is that the computer says it’s not there when it’s clearly there. To fix this problem, you need to check if the USB device is accessible on your computer or you can also try a different USB device. In addition, you could check if there are any issues with both the USB 3.0 and USB 2.0 ports as it could be the reason why you’re getting the error or fix the bad sectors in the USB drive as well as see if the USB drive is set as the primary drive.

Option 1 – Try to check if the USB is accessible on your PC

The first thing you can do to resolve the problem is to check if you can access your USB device from your computer. All you have to do is open File Explorer and check if the USB device is listed there or not.

Option 2 – Try to connect a different USB device

The next thing you can do to fix the error is to try connecting a different USB device, specifically the one that has more significant storage space. You also have to make sure that it’s working on a different PC.

Option 3 – Fix any issues with the USB 3.0 and 2.0 ports

Although the USB 3.0 ports are compatible with the USB 2.0 ports, it does not necessarily mean that there wouldn’t be any problem when you use them which is why it’s best to fix any issues in them or better yet, use a compatible drive.

Option 4 – Try to fix the bad sectors in the USB drive via CHKDSK

When it comes to some issues concerning the hard drive or removable devices, there is a utility in Windows that might help which is called “chkdsk”. To use it, follow the steps below.
  • Tap the Win + S keys to open the Search box.
  • Then type “command prompt” in the field and from the search results that appear, right-click on Command Prompt and select “Run as administrator”.
  • After opening an elevated command prompt, copy and paste the following command and hit Enter:
CHKDSK [volume [[path] filename]] [/F] [/V] [/R] [/X] [/C] [: size]]
Note: In the command given above, “[/F]” will try to fix the system errors while “[/R]” will be the one to fix the bad sectors.
  • Now if you are prompted to run CHKDSK after your reboot your PC, just tap Y and reboot your PC.
  • If CHKDSK is not able to find any errors, tap the Win + E keys and navigate the access window. From there, right-click on the concerned drive and click on Properties.
  • After opening Properties, click on the tab Tools and then click on the “Check” button under the Error-checking section.
  • Wait until the process is completed and then restart your computer.

Option 5 – Try checking if the USB is set as the primary drive

You might also want to check if the USB drive is set as the primary drive because if it is, then it won’t appear on the list. It could also be that the USB drive has a primary disk in it. To undo it, you need to use the DISKPART utility.
  • In the Start Search, type “command prompt” and right-click on Command Prompt from the search results, and then select the “Run as administrator” option.
  • Next, execute the “diskpart” command to initiate the DISKPART utility.
  • After that, type the “list disk” command and tap Enter to display the list of disks on the computer. You have to take note of the drive number or letter of the concerned USB drive.
  • Once done, type the “select disk <X>” command where X is the drive letter or number and tap Enter.
  • Then execute the “list partition” command to see the list of all the partitions in your computer. It should be listed as 0, 1, or 2. 0 is the primary partition.
  • Now type the “select partition 0” command and tap Enter and then type “delete partition” to delete the selected partition.
  • You can do the same to the other partitions as well and when you’re done, execute the format command to turn the USB drive into a standard one.
Read More
Recover or set a BIOS or UEFI Password
If you have been using Windows for quite some time now then you’re probably aware of the BIOS or UEFI password. This password lock is the one that ensures you enter the set password even before your Windows PC boots up. However, there’s just one downside with the BIOS or UEFI password – there is no recovery option, unlike your Microsoft account. Worry not though for this post will guide you on how you can set or recover a BIOS or UEFI password on your Windows computer. The BIOS or UEFI passwords are stored at the hardware level which means that unless the OEM wants or has configured a way to recover the password, it is pretty much impossible to reset it. There are times when they are so strict that the only way to get through it by contacting customer care. Note that any Windows computer with this lock can’t be unlocked by trying to reinstall Windows. In this post, you’re going to have to remove the CMOS battery temporarily, clear unknown BIOS/UEFI passwords using the bios-PW website as well as call customer care. For more details, refer to the options provided below.

Option 1 – Remove the CMOS battery temporarily

In case you didn’t know, every motherboard comes with a CMOS battery which helps the computer system to keep the clock ticking and in making sure that the BIOS settings are not lost when the computer is powered down. Every time a computer is turned on, the CMOS battery ensures that the information is available for the computer to boot up. So when you remove the CMOS battery temporarily, say about 30 seconds or a minute, the settings will be lost. There are some motherboards that are built-in ways that when you remove the battery for long, it will reset everything including the password for the BIOS or UEFI.

Option 2 – Clear the unknown BIOS or UEFI passwords using a bios-PW website

If the first option didn’t work, you can try using this BIOS Password website at http://bios-pw.org/ to clear the password.
  • When prompted by the BIOS, enter the wrong password a couple of times as doing so will lock you out of the system.
  • After that, you will see a new number or code on the screen which will include a message about System Disabled [XXXXX] Service TAG [YYYYY].
  • Next, open the BIOS Password website and enter the XXXXX code in it and make sure to tap the Shift + Enter keys or just enter.
  • Now it will open multiple unlock keys which you can use to clear out the BIOS or UEFI lock on your Windows PC.

Option 3 – Call the customer care

If the second option still didn’t work, you have to call customer care and follow their suggestions for they will walk you through fixing the problem using the service tag or might suggest that you visit a service center to make things easier for you. Note: You also have the option to set a BIOS or UEFI password. Although it isn’t recommended, you still can do it if you really want to. Remember that the BIOS or UEFI interface varies from OEM to OEM so you must find something related to either PASSWORD or SECURITY. You will have the following similar options:
  • Supervisor password – it’s the same as the master password that can change important system settings.
  • User password – with this password, any user can change minor settings.
  • Master password – you can use this password for a hard drive or as a general password.
There are several OEMs that offer micro-control where you have to enter the BIOS password. For instance, you’ll have the option to skip for a normal restart, or when you select a boot device while you might have to enter the password for unattended reboots or when your PC is powered on, etc. And if you are here to remove the password, you need to find a remove password option in the same section. You will be prompted to enter the set password once and if it’s correct, it will remove the BIOS password. After that, you have to save and exit the BIOS then restart your computer and check if the settings are properly applied.
Read More
How to Fix Error Code 43

Code 43 - What is it?

Code 43, Device Manager Error, is reported when Windows doesn’t recognize a hardware device such as the video card, USB, printer, or any other piece of external hardware attached to your PC.

The Device Manager stops the hardware if it reports some kind of unspecified problem. It is mostly displayed in the following format:

“Windows has stopped this device because it has reported problems. Code 43”

Solution

driverfix boxError Causes

Code 43 can be triggered due to several reasons. However, 95% of the times it is related to the device driver problems such as:

  • Missing Drivers
  • Corrupted Drivers
  • Outdated Drivers

Driver problems pop up when either new driver versions are available or drivers become damaged due to some underlying reasons like viral infections.

Other than driver problems, code 43 can also pop up when you install and remove the software. This can cause hardware conflict in the registry, altering driver communication.

Code 43 can hamper your ability to use your desired device smoothly.  Although Code 43 is not a fatal error code like Runtime and BSoD errors, it is still advisable to resolve it immediately to avoid inconvenience.

You can sometimes bypass error code 43 temporarily by a simple PC reboot but this will not fix the problem permanently. For a permanent fix, try the methods given below.

Further Information and Manual Repair

To help you repair code 43 permanently from your PC, below are some of the best, easy perform, and effective solutions. Simply follow the steps to get rid of code 43 from your PC.

Method 1 - Launch and Run the Troubleshoot Wizard

This is one way to find the exact nature of the problem that spurred error code 43 to pop up. To launch and run the Troubleshoot Wizard, here’s what you need to do:

  • Go to the start menu
  • Type Device Manager in the search bar and then press enter
  • Click on Device Manager to run it on your system
  • Now click on the ‘General Tab’
  • After that press Trouble Shoot to launch the Troubleshooting Wizard

The Wizard will diagnose the problem and provide you a solution to resolve it, all you have to do from there is to follow the Wizard’s instructions

Method 2 - Check the Hardware Documentation

If for some reason Method 1 doesn’t work,  another solution would be to check the hardware documentation for more information about diagnosing the problem.

Method 3 - Uninstall Faulty Drivers

If the underlying reason for code 43 is related to driver problems, then the best way to resolve it is to uninstall faulty drivers and then reinstall new drivers. One of the many ways to uninstall drivers is:

  • Click on the start button
  • Type ‘sysdm.cpl’ in the search box and then press enter to continue
  • In the System Properties dialog box open the Hardware tab
  • Click Device Manager and then double click Device Type
  • Now click on the problematic hardware device reporting code 43
  • After that go to the Driver tab and click Uninstall to uninstall that driver completely
  • Visit the manufacturer’s website and download the new driver version
  • Install it on your system by extracting the .ZIP file

Method 4 - Update Drivers Automatically

Identifying and updating new driver versions manually can be both frustrating and time-consuming especially if you are in a rush and no computer whiz.

Also, after you update the drivers, you need to keep checking them time and again to ensure they don’t become outdated. You need to update them every time new versions are available which can be stressful.

To avoid this hassle by repairing code 43 permanently, download DriverFIX. This is an innovative and user-friendly device driver software program exclusively designed to resolve all kinds of driver problems.

Whether code 43 occurs on your PC due to missing or outdated drivers, DriverFIX can resolve the problem easily.

The intelligent programming system embedded in this software enables it to detect problematic and outdated drivers in seconds.

It matches new and compatible versions and updates the drivers immediately, automatically, and on a regular basis in just a few clicks. This resolves code 43 and also ensures that all your drivers remain up to date.

DriverFIX is compatible with all Windows versions.

Click here to download DriverFIX to repair and resolve code 43 right away.

Read More
Location services are greyed out in Windows
Location services is a built-in tool in Windows 10 is a useful tool that offers users location information even when your laptop or desktop computer does not have a GPS since it uses Wi-Fi positioning as well as your device’s IP address. However, there are instances when you might encounter some problems when using this service. One instance is when you suddenly find the toggle button for Location service greyed out. This kind of program could be due to some glitch in the system or some third-party application on your computer. Because of this problem, you won’t be able to toggle the Location service on or off and you won’t be able to make any changes in its settings. Worry not, for this post will guide you on what you can do to fix the greyed-out toggle button of Location services in Windows 10. Before you perform some troubleshooting steps, you might want to restart your computer and see if it fixes the problem. If it didn’t, then this problem is not just some minor glitch. Thus, you have to follow the potential fixes provided below to fix the problem but before you do that, make sure that you create a System Restore point first. After that, follow each one of the following options.

Option 1 – Put your PC in a Clean Boot State

The first thing you can do to resolve the problem is to put your computer in a Clean Boot State. It could be that there is a third-party program that’s preventing the toggle button from functioning. To isolate this possibility, you need to put your computer in a Clean Boot State.
  • Log onto your PC as an administrator.
  • Type in MSConfig in the Start Search to open the System Configuration utility.
  • From there, go to the General tab and click “Selective startup”.
  • Clear the “Load Startup items” check box and make sure that the “Load System Services” and “Use Original boot configuration” options are checked.
  • Next, click the Services tab and select the “Hide All Microsoft Services” check box.
  • Click Disable all.
  • Click on Apply/OK and restart your PC. (This will put your PC into a Clean Boot State. And configure Windows to use the usual startup, just simply undo the changes.)
  • Now check if you can now use the toggle button of the Location service or not.

Option 2 – Try to use the Registry Editor

If putting your computer in a Clean Boot state didn’t fix the problem, you might want to make some adjustments in the Windows Registry via Registry Editor.
  • Tap the Win + R keys to open the Run utility and type “regedit” in the field and then tap Enter to open the Registry Editor.
  • After that, navigate to this registry path: HKEY_LOCAL_MACHINESYSTEMCurrentControlSetServiceslfsvcTriggerInfo
  • From there, select the Key (folder) named as “3” and right-click on it, and then delete it.
  • Once done, exit the Registry Editor and restart your computer.

Option 3 – Try to use the Windows Services Manager

  • Tap the Win + R keys to open the Run dialog box and type “services.msc” in the field and hit Enter to open the Services Manager.
  • Next, look for the “Geolocation Service” entry from the list of services.
  • Once you find it, right-click on it and select Properties. This will open a new mini window.
  • From there, make sure that it is “Running” and its Startup Type is set to “Automatic”.
  • After that, close the Services Manager and check if the problem is now resolved.

Option 4 – Try to use the Group Policy Editor

  • Tap the Win + R keys to launch Run and type “gpedit.msc” in the field and click OK to open the Group Policy Editor.
  • After that, navigate to this path: Administrative TemplatesWindows ComponentsLocation and Sensors
  • Next, double click on each one of the following settings and select the “Not configured” or “Disabled” option.
    • Turn off location scripting
    • Turn off location
    • Turn off sensors
  • Once done, navigate to this path: Administrative TemplatesWindows ComponentsLocation and SensorsWindows Location Provider
  • From there, double click on the “Turn off Windows Location Provider” policy setting and set its configuration to either “Disabled” or “Not configured”. You should see the following description of the policy setting in the window:
“This policy setting turns off the Windows Location Provider feature for this computer. If you enable this policy setting, the Windows Location Provider feature will be turned off, and all programs on this computer will not be able to use the Windows Location Provider feature. If you disable or do not configure this policy setting, all programs on this computer can use the Windows Location Provider feature.”
  • Now restart your computer.
Read More
How to move Taskbar to the left in Windows 11
The standard icon place in the Taskbar inside Windows 11 is in the center. Some users welcomed this change, some not so much. If you are part of the user base that is not so much thrilled with this Microsoft’s idea of innovation, do not worry, there is an easy way to move all icons and start button on the left inside Taskbar.

Taskbar icons on leftMoving icons in Taskbar

  1. Open Windows settings by using ⊞ WINDOWS + I key combination
  2. Click on Personalization
  3. Select Taskbar
  4. Click on Taskbar Behaviors
  5. Click on the drop-down menu beside Taskbar Alignment
  6. Select your desired option of icon alignment
  7. Close settings
Your options will be active right away and you will see icons switching to the position of your choosing.
Read More
How to Fix The Rtl70.bpl Error on Your System

Rtl70.bpl Error - What is it?

To understand Rt170.bpl error code, it is important to have a good understanding of .bpl files first. BPL is the abbreviation of Borland Package Library. BPL is a developer file format used by Borland. It contains dynamic link libraries which are used for constructing Borland programs. BPL files are most commonly used for Borland Delphi programs. Delphi competes with Visual Basic as an offering for an object-oriented visual programming approach to application development. There are many programs/applications on your system that use rtl70.bpl file format to run successfully on Windows PC. The rtl70.bpl error occurs when this file gets damaged or corrupted. It fails to execute the command and run the application on your system. When your computer experiences this problem with this file, the following error messages are likely to appear:
  • rtl70.bpl is not responding
  • Runtime error: rtl70.bpl
  • Symantec User Session has encountered a problem and needs to close. We are sorry for the inconvenience. Application Name: rtl70.bpl
This error code exposes you to system freeze, crash, abrupt system shutdowns, blue screen of death errors, and it also reduces your PC performance.

Solution

Restoro box imageError Causes

The potential causes of rtl70.bpl error code includes:
  • DLL file was damaged due to viral infection or spyware
  • DLL file was overwritten by an incompatible version
  • Poor program installation
  • Too many invalid and obsolete registry entries stored in the RAM
  • Related Registry entries are corrupt

Further Information and Manual Repair

Here are some of the best yet simple solutions for you to resolve rtl70.bpl error on your PC:

1. Reboot Your PC

Sometimes this error can be resolved by simply restarting your system. Try rebooting your system and running .bpl supported program. If the program runs after you reboot your PC, then that’s great! But you should keep in mind that this is a temporary solution. The error may reappear anytime soon. So, it is advisable to consider a long-term solution for repairing the error code for the longest time.

2. Uninstall and then Reinstall the Program Causing the Error

If the error occurred after a certain program installed on your system,  it is advisable to uninstall it and then reinstall the program. Simply go to the control panel, select Add/Remove program option and uninstall the program that you recently installed that could be triggering the rtl70.bpl error code. Now reinstall and run it on your system. If the error is resolved, then this means the poor installation was the cause. If not, then this means the cause of the error is related to the registry.

3. Registry Restore to Fix rt170.bpl error

There are two ways to go about it. The first one is to click on the start menu, type registry editor, and press run. This will open the registry editor. Now click on the computer option then click file and import. This helps restore the registry but it is possible that the problem might persist. The error code may pop up again. Also, if the registry is damaged due to viral infection, then this solution may not work and you may still experience the error on your system. Then you will also have to download an antivirus which may further reduce the speed of your PC. However, the best way to restore the registry and to get rid of the error code for the longest time is to download Restoro. This is a new, user-friendly, high and multi-functional repair tool that functions as a registry cleaner and a system optimizer. It cleans the registry by scanning and removing all the unnecessary and obsolete files saved in RAM such as junk files, internet history, invalid registry entries, and more. It also repairs the damaged dll files and restores the registry thereby resolving the rtl70.bpl error. Restoro is easy to use, safe, efficient, and compatible on all Windows versions. To get started and resolve the rtl70.bpl error code in just a few seconds on your system click here and download Restoro.
Read More
1 2 3 171
Logo
Copyright © 2023, ErrorTools. All Rights Reserved
Trademark: Microsoft Windows logos are registered trademarks of Microsoft. Disclaimer: ErrorTools.com is not affiliated with Microsoft, nor claims direct affiliation.
The information on this page is provided for information purposes only.
DMCA.com Protection Status