APC_INDEX_MISMATCH - What is it and how to fix it?
The error 0x0000001 also known as APC_INDEX_MISMATCH is one of the fatal errors that users encounter upon starting their computers. This error appears when there is a sequence mismatch in the driver or system file when it is disabling or re-enabling Asynchronous procedure calls. The mismatch happens maybe because of a virus or malware attack, not shutting down your computer properly and incomplete installation of the system files.
There are many ways to fix this error. The easiest way is to download a repair utility program. The use of these programs perfectly fits those that are not so technical. All you have to do is download the program and install it on your computer. As soon as it is installed, the program will now scan and diagnose your computer for any errors. After it identifies the errors, it will then repair your PC through either manual or automatic tools.
To those who are techie and enjoy the manual resolution, you may take advantage of Microsoft’s analyze debug extension which tells you the cause of the error. After determining the cause then you can now start fixing the error.
Check if Hardware is functioning properly. If the cause is due to a hardware malfunction, you will have to make sure that all the pieces you are using are working. All the wires should be attached to their respective ports. Not only that, but you also must make sure that before installing the hardware, it is compatible with the Windows version that is installed into your computer.
Use Compatible software. If the problem was caused by software or a driver, you can uninstall and reinstall it. Always make it a rule that whenever you install a program or new software to your computer, make sure it is compatible with your operating system and never skip a step during the installation process. You also have to see to it that the program you are installing does not contain any viruses, malware, or spyware that can be harmful to your computer.
Update your Drivers Regularly. In most cases though, the cause of the APC_INDEX_MISMATCH error are outdated device drivers. To resolve this, you will have to go to your Control Panel then look for Device Manager. As soon as you are in the Device Manager window, you can now see the different devices running on your computer. You right-click on each device and check the Properties. In the Properties window, click on the Driver Tab and look for the date when it was last updated. You can then go to the manufacturer’s website and compare the dates.
For a new Windows operating system, you no longer have to go to the manufacturer's website though. All you have to do is click on Update Driver and it will automatically search for updates online.
Use a Genuine Operating System. There are also cases where the 0x0000001 error won’t allow you to access your computer. In this case, we have to suspect that the problem could be in your Operating system. To resolve this, you can reinstall your Operating System or update your current operating system. Only use a genuine licensed Windows Operating System because this will not only protect you from Malware and Viruses but it allows you to get all the recent update available from Microsoft. Update your Windows 10 regularly by going to Settings > Windows Update > Check for Updates. You may also turn on the Automatic Update by going to the Advanced options is found on the Windows Update Page.
You can always get help online but it really helps to know the basics and determining the root cause of the error.
As you know, System Restore is a useful tool in Windows operating system that helps users in fixing system issues by undoing any recent changes to the computer that may have caused the problem. However, there are times when you might encounter some issues when running this tool and one of these issues is when System Restore suddenly gets stuck or hangs up on initializing the restoration of the Registry in Windows 10. If you encounter a similar problem, read on as this post will guide you on what you can do in such cases.
There are several things you can do when you face this kind of problem in System Restore. First, you can try to wait it out, give it more time to load, which should not take longer than 5 minutes. And if it’s still stuck after that time, give it another hour. However, if nothing changed after an hour, then you need to troubleshoot the problem further. Keep in mind that you must not interrupt System Restore by shutting it down abruptly, it could result in an unbootable system.
To get started in troubleshooting the problem, you need to follow each one of the suggestions offered below.
Option 1 – Try to use the Windows Recovery Environment
The first troubleshooting option you need to try is to simply tap the power button for about 10 seconds. This is what you have to do when you have to interrupt System Restore or reset your Windows 10 computer. Tapping the power button for 10 seconds will perform a hard shutdown and once your computer shuts down, restart your computer again and follow the steps below but before you do that, make sure that you have a Windows bootable USB or DVD.
First, insert the bootable USB or DVD and boot into it, and select the “Repair your computer” option.
Next, once you see the manufacturer logo on your computer, tap the key to enter into Windows Recovery Environment.
After that, change the Boot sequence to DVD drive under the UEFI Firmware settings and restart your computer.
Once your computer has restarted, select the boot order and make changes accordingly as displayed in the BIOS.
Option 2 – Try to run the Automatic Repair Utility
You might also want to use Automatic Repair in fixing the error. To do so, follow the steps below.
You can start by creating and booting from a bootable Windows 10 USB Stick.
After that, click on Repair your computer located on the bottom left corner when you are on the initial Windows Startup screen.
Next, click on Troubleshoot, and then on the other screen, click the Startup Repair option.
Now select the operating system you want to repair. Once you do that, it will start to repair your operating system. Wait until the process is completed and then check if the problem’s now fixed.
Option 3 – Try to run System Restore in Safe Mode
If you can’t boot into your Windows 10 computer, you can try to run System Restore again in the Advanced Startup Options.
Boot your computer into Safe Mode.
After that, select an option > Troubleshoot > Advanced Options > Startup Settings > Restart.
Once your computer has restarted, tap the F6 key to enable Safe Mode with Command Prompt and to run System Restore from there.
Now in Command Prompt, type the “rstrui.exe” command to run System Restore in Safe Mode. This will help in fixing the problem since it would be safer to perform System Restore of the computer.
Windows Updates are important and though it is not recommended for any user to turn it off completely, there are just some remote cases where you might have to keep it off. Such are the cases when you want to use your Windows 10 computer just for gaming and you don’t want Windows Update to interrupt it because of some messy driver update. A lot of users have in fact want to disable Windows 10 updates completely. Although you can always use the built-in option to delay Windows Updates or make Windows 10 inform you before downloading the updates, however, there are instances when Windows 10 Update may enable itself even after you turn it off or delay it. To resolve this issue, read on.
You may have to disable the Windows Update Medic Service if Windows Update just keeps on starting and turning itself back on even after turning it off in Windows 10 on top of turning off the Automatic Windows Update Service or wuauserv and setting a Guest Log on. To get started, refer to the instructions prepared below.
Option 1 – Change the Log on account of the Windows Update Service
It appears that one of the major upgrades in Windows 10 has made sure that Windows 10 enables back the Windows Update Service all on its own even if the service has been set to disable by the administrator. And that’s the important thing here, Windows 10 uses admin credentials in order to ensure that it can re-enable the Windows Update Service each time it is in a disabled state. So in this fix, you can prevent the Windows Update Service from changing the account credentials used to run it.
Tap the Win + R keys to open the Run prompt with admin privileges.
Then type “services.msc” and click OK or hit Enter to open Services.
After that, locate the Windows Update Service from the list. Once you see it, double-click on it to open its Properties.
From there, click the Stop button to stop the service.
Next, go to the Log On tab and select the “Log on as ‘Guest” option which is the Guest account.
Just leave the password blank and then click Apply to save the changes made.
Note: After you made the changes, every time the Windows 10 Update Service attempts to run, you might get an error message that states, “Windows could not start the Service” or “The account specified for this service is different from the account specified for other services running in the same process”.
This is what makes this fix a lot better compared to other software or batch file to keep turning off the Windows Update Service. You did not exactly disable the service but you just changed the account used to run the Windows Update service and since there is a password, the service never really works. On the other hand, Windows Defender can’t be stopped using this trick as it will keep getting an update.
Option 2 – Try to disable the Windows Update Medic Service using the Windows Update Blocker
Aside from changing the Log on account of the Windows Update Service, there is also another way you can prevent the service from enabling itself after you disable it. This alternative you can use is the Windows Update Blocker. This is a new Windows Service that was introduced in the recent Windows 10 versions. You can use this service to disable the service.
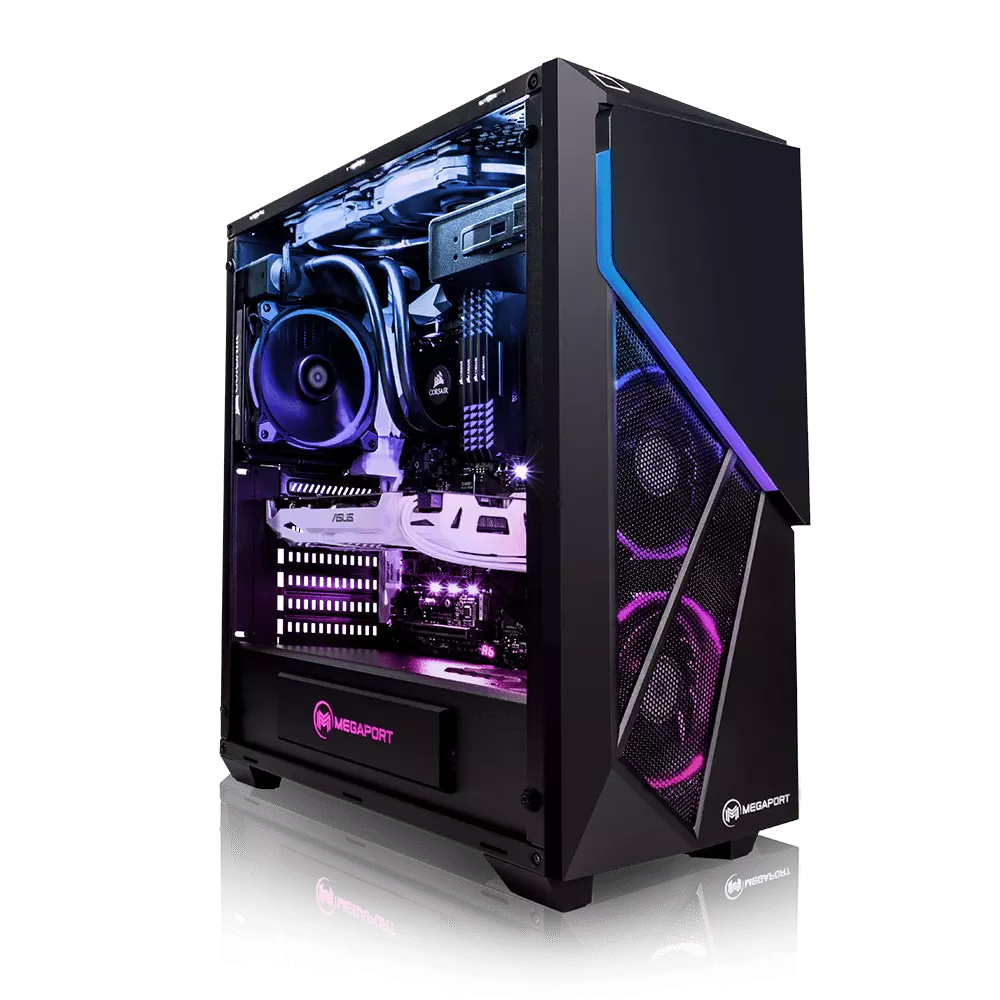
Building your own custom PC system can be one of the greatest things you can do to your budget. Instead of going for a rebuild, we will go into detail about why building your own PC is a much better option. Also, note that if you do not possess enough technical knowledge about a topic there are plenty of stores that will offer you advice on components and after all, you can always get help from a friend.
So without further diversion from the topic, let us explore all the benefits of building a custom computer.
Building a custom PC is cheaper
At the first look, this statement does not feel right since when you look at the prebuilt systems you get a feeling that it is much cheaper than do it yourself variant and although CPU and GPU seem like a great deal I beg you to look under the hood on other components. Usually to lower price compromise would be made on other crucial components like SD or power supply, a PC case, or motherboard so even if you have a good CPU and GPU that will not matter much since other components would not be able to catch up with them. After all, prebuild computers will need to pay people who are building them and there is no way that will be cheaper if you just plain went and bought the same components yourself and install them.
When you are in control in choosing each component there is not only being cheaper online, it is flexibility with building itself. You choose which components you want to be stronger and which to be normal. Also, you can choose the exact model of the given component leaving you more in control and open to future upgrades.
More flexibility
Also, it may sound irrelevant but when building your own custom PC you can also choose which company you would like to purchase for each model, yes considering the CPU it is AMD or Intel but when you are buying a case, SSD, GPU, and other components choosing the right company for your needs is also the thing that should not be overlooked.
You can customize it the way you want
Not really a quality argument but with a custom PC build, you can choose would you like that RGB component or not, you choose do you like white or black fans, and many more things. You really can place a personal stamp on the computer making it indeed a personal computer.
You choose OS and applications
When you buy an already prebuilt PC, usually it comes with some sort of OS on it, sometimes it is freedos, Linux and sometimes it is Windows Home. When you get your hands dirty you can place whichever system you want on it and install applications that you use and know and some preinstalled typical apps.
Could not connect to the System Event explanation: Although logging into a Windows 10 computer may seem like a simple process, it’s actually not since the Windows operating system has built a mechanism in a way that any third party or malware intervention would not compromise access to the system. This mechanism is supported by numerous services, functions, and DLL files. And Microsoft has been taking this security to a whole new level with the introduction of Windows Hello.
Recently, a number of users reported getting the “Windows could not connect to the System Event Notification Service service. Please consult your system administrator” error when logging into their computers. While some users also reported that although they can log in, they encounter the same error message from the Notification area. There are several options you can check out to resolve the error. You have to check the status of several Windows Services and make sure that they are running. You also have to reset Winsock as well as run the System File Checker scan.
Option 1 – Check for certain Windows Services
First, you need to tap the Win + R keys on your keyboard to open the Run dialog box.
Next, type “services.msc” in the field and click OK or tap Enter to open the Windows Services Manager.
After that, you will see a list of services and from there, look for the following Windows Services:
DHCP Client
System Event Notification Service
Windows Font Cache Service
Now make sure that the Startup Type of each service is started and running.
Option 2 – Try resetting the Winsock drivers
In the Start Search, type “command prompt” and right-click on Command Prompt from the search results, and then select the “Run as administrator” option.
After opening Command Prompt, execute this command: netsh winsock reset
Note: If you are using IPv4, execute the “netsh int ipv4 reset” instead. On the other hand, if you are using IPv6, execute the “netsh int ipv6 reset”
Now exit Command Prompt and see if the error is now fixed.
Option 3 – Try running System File Checker or SFC scan
You could also run System File Checker or SFC scan to fix the BSOD error. It is a built-in command utility that helps in restoring corrupted files as well as missing files. It replaces bad and corrupted system files with good system files. To run the SFC command, follow the steps given below.
Tap Win + R to launch Run.
Type in cmd in the field and tap Enter.
After opening Command Prompt, type in sfc /scannow
The command will start a system scan which will take a few whiles before it finishes. Once it’s done, you could get the following results:
Windows Resource Protection did not find any integrity violations.
Windows Resource Protection found corrupt files and successfully repaired them.
Windows Resource Protection found corrupt files but was unable to fix some of them.
Error code 0x80240020 is a Windows 10 upgrade error code that affects users who attempt to upgrade their Windows operating system. This may occur due to a particular program that blocks the upgrade from completing. It can also result when other PC issues interfere with the upgrade process by disrupting the ability of Windows Update to download updates on one’s machine. Common symptoms of error code 0x80240020 include the following:
Message box detailing the presence of error code 0x80240020
Inability to complete Windows 10 upgrade process
Solution
Error Causes
Upgrade error codes occur when Windows users experience upgrade failure while using Windows Update, the Microsoft Windows Update website, the Microsoft Update website, or the Windows Server Update Services (WSUS) server. Disruption may cause this process to fail, for instance, due to system file corruptions or problems related to the Windows Update services.
Further Information and Manual Repair
To correct issues related to error codes, it is often best to apply manual repair methods. These help Windows users determine the root causes of the error code and provide solutions that permanently fix these issues. For instance, if error code 0x80240020 on your machine is due to an issue within the Windows Update tool, you will need to first verify that this is the problem by using a troubleshooter option found within your machine’s settings. The troubleshooter will detect and fix the issue.
Most of these manual repair methods can be implemented by any Windows user, regardless of their background, technical abilities, or lack thereof. However, in certain cases, technical skills are required. If you have trouble implementing the procedures highlighted below or in any other error code article found on this site, consider getting help from a Windows repair technician or use a powerful automated tool.
Below are details regarding the manual repair methods for fixing error code 0x80240020. Ensure you follow the instructions correctly. After all, any error you make will likely cause further problems on your machine and prevent you from resolving error code 0x80240020 in Windows 10.
Method One: Run Windows Update Troubleshooter
One way to fix error code 0x80240020 is to troubleshoot Windows Update. To do this you will need to access Settings within your machine then simply select the relevant troubleshooting options available. Follow the instructions below:
Step one: Type Settings within search box near Start button then press Enter
Step two: In the search box within Settings, type Troubleshooting
Step three: Select the troubleshooting option
Step four: Under System and Security, select Fix problems with Windows Update
Step five: Under Windows Update, select Resolve problems that prevent you from updating Windows.
Step six: Click Next and wait for the troubleshooter to detect and fix problems
If there are problems with Windows Update, the troubleshooter will be able to fix them. Once this process is complete, restart your PC and then reopen Windows Update. Attempt to upgrade your Windows operating system. If Windows Update completes the process and your machine downloads and runs the upgrade, you have successfully resolved error code 0x80240020.
If, however, there is another upgrade failure and the message box detailing the presence of error code 0x80240020 in Windows 10 appears, you will need to apply another manual repair procedure. Please see below for further details regarding manual repair method two.
Method Two: Use SFC to Scan and Fix Corrupted System Files
Corrupted or missing system files may interfere with your machine’s ability to successfully download an upgrade. For this reason, scan and fix any problems related to system files on your machine using Command Prompt. This manual repair method is often called a System File Check/ Checker (SFC).
Step one: Right-click Start Menu
Step two: Select Command Prompt (Admin)
Step three: Type sfc /scannow
To ensure you follow this procedure correctly, enter the command as it is written above, with a space between “sfc” and “/scannow”. Once missing, corrupted or damaged files are present on your machine, the SFC command will enable Command Prompt to scan and fix these issues. Wait until the process is complete then reboot your PC.
With your system successfully rebooted, reattempt the Windows 10 upgrade process in Windows Update or on the Windows Update website. If the issue causing error code 0x80240020 was related to problems with system files, you should be able to complete the upgrade after using the SFC tool.
Method Three: Download an Automated Tool
If you wish to always have at your disposal a utility tool to fix these Windows 10 and other related issues when they do arise, download and install a powerful automated tool.
Hello and welcome to our software series review. Weel this time we could say this is more of a service review since the application we are going through today is online and you can use it freely without ever needing to install it.
When we choose software that we are going to review and recommend we really try to recommend something that is worth your time and money, Cartoonize fits in both categories in my opinion.
First of all basic plan of this graphic software is completely free and as mentioned it is working online, also as one more feature basic plan does not even require you to have an account of any kind, all you need to do is go to the website of the application and you can start using it right away. There is also paid plan for extra features if you need them billed monthly or annually.
Features
First things first, this is not Photoshop or GIMP and it does not aim nor want to be. This is something else, directed and pointed at the different types of users. This application is aimed at people that want to make some quick graphics and post them on social media and it does that very well. Even without knowledge to use graphic software this one is so well designed and straightforward that even a complete newcomer can do something right away.
So as the application that wants to be used by people that want to place some cool pictures or ads on their social media what it offers. For starters simplicity and ease of use, every option that you can use is on the left side of the screen nicely packed into the vertical toolbox. Inside the toolbox, you have access to various tools, effects, and filters that you can apply to your image.
Tools explained
Image manager
The first section on the tool panel is the image manager, here you can upload your images, delete them, search stock images, and so forth. nothing more to say about this one as it is only a basic file manager.
Edit
In this tool panel, there are a lot of basic settings for your image manipulations divided into 3 sections: Basics, Enhance, and Creative. In the basic section, you can crop, resize and rotate your image. Enhance panel will let you set exposure, color, vibrance, tint, and details (sharpen). Finally, the Creative part will let you remove the background with AI in a single click, replace colors in the image, and add a vignette and round image.
Effects
In the effects panel, you will be given 4 options to choose from Cartoonizer, Digital art, Sketcher, and painting. Each option once clicked will open another set of options tied to chosen preset where you will be able to choose a different style from chosen template. Once you click on the desired template it will be applied to your image and in the upright corner, you will have edit options to tweak it to your liking. You can play around as much as you want because only once you click on the apply button, the effect will be applied to your image.
Filters
Same as in the effects tool panel here you will also get a series of different filters that you can apply to your image. As in the previous tool once clicked on the chosen filter, you will be given options for its variations and details edits. How there is really plenty of filters options and combined with its own presets I will not focus on explaining what each one is doing since picture thumbnails are pretty accurate and just one look at them will explain to you everything you need to know.
Overlays
In the overlays panel, you can as the name says overlay different kinds of effects on your image. You can add snow, fog, sun flares rain, and many more. Presets work identically to previous effects and filters.
Masks
If you want to place your image in a certain shape or in-text this is the section for you. You will be presented with sections as custom text, shapes, brushes, floral, animals, and patterns. Each section will once again lead to plenty of variations on the chosen subject where you can pick one that you like the most and tweak its options.
Text
As the name suggests, this section is to add text to your picture or design. If you are making some cool ad for Facebook, Instagram, or other social media I believe that you will spend most of your time in this section adding text and tweaking it so it looks best. You have all the tools that you will need to make a catchy title or smaller block of text and you can add multiple texts to your picture tweaking their own visual appearance, the font used, color, and some effects like a drop shadow.
Draw
In the draw section, you will be able to freely draw whatever you like with your mouse or pen if you have one. you have basic options for a brush and eraser so you can erase stuff. Pretty basic tool but it gives a nice touch to underline something, circle it, etc.
Graphics
This panel will let you place various already made graphic assets into a picture. You have hearts, hats, glasses, etc. There really are tons of premade graphics along with thematic ones like new year, st. Patric day and more.
Frames
As the name suggests this section will place a frame of your choice around your picture. You can choose the style of frame, position, color, and many more. There are various styles and each style has its own options.
Conclusion
Cartoonize is a great online application that will let you quickly and easily do cool and nice image edits. As mentioned you can also add various effects, text, and graphics and use this app to make some quick and nice ads for social media. You have the option to publish to your social media right from the app in the save dialog but you can also of course download your image or design to your local computer.
Please note that for this review we used the pro, paid version so all of the features were unlocked. We wanted to give you a full overview of the full potential of the app. In my opinion, the small monthly fee that they charge is well worth it when you see all things that you can do with it.
Go to the cartoonize website and check it out, basic option is completely free and it does not even require making an account. Have fun, be creative and take care, I hope to see you again tomorrow.
Error Code 0x8007007B (Code 0x8007007B) – What is it?
Error code 0x8007007B (Code 0x8007007B) is an error that occurs when you attempt to activate Windows 10, as well as Windows Server 2008, Windows Vista, Windows 7, Windows 8, or Windows Server 2012.
Common symptoms include:
You will see an error message like this: “Error 0x8007007B 'The filename, directory name, or volume label syntax is incorrect”.
If you are using volume-licensed media to install: Windows 7, Windows 8, Windows Vista Business, Windows Vista Enterprise, Windows Server 2008 R2, Windows Server 2008, Windows Server 2012, Windows 10.
Your computer is not connecting the activation wizard to a Key Management Service (KMS) host computer.
Solution
Further Information and Manual Repair
Error Code 0x8007007B usually occurs when a product key has been activated too many times. Blocking activation aids in avoiding abuse of the key. If abuse of the key is not the case, it is possible to get the key reset, or you may receive a new key altogether. When you are not sure that you can complete these methods yourself, as they do contain advanced steps, it would be wise to consult a computer repair technician to avoid making the problem any worse.
Generally, the solution can be simple; it is just dependent on how comfortable you are with getting technical in your computer. Volume licensed media means that the media has a preset number of times that it is allowed to be activated. This helps to avoid misuse of the product. Some people install the Windows 10 program multiple times on their computer if they are software developers or do certain types of software testing. It is important to know the cause in order to effectively find the solution.
Method One:
From the desktop screen, press the Windows key and S, type “Command Prompt”. Then, right-click on Command Prompt in the results. Select Run as Administrator. Click Yes when asked about requesting permission.
In the Command Prompt box, enter the command: slmgr.vbs -ipk xxxxx-xxxxx-xxxxx-xxxxx-xxxxx
The x's represent the product key. Replace these with your unique product key.
Type in the following command into the “Command Prompt” window: slmgr.vbs -ato
Click Enter
Restart your computer and try to activate windows again. It should not show the error code anymore.
Method Two:
While on the desktop, press the Windows key and R.
A window saying Run should open.
Type in the following command: Slui 3
Press ENTER and a window should appear.
This window asks for you to enter the operating system activation product key.
Enter this key in the space provided.
After entering this, click Activate.
Restart your computer now.
Check for activation. The Error code should be gone now.
Method Three:
Open the Command Prompt with access as administrator just as in Method One, and enter the following command: sfc /scannow
The command will complete the tasks. This will take some time so just let the computer do its thing and work. Let the sfc finish the scan.
When the scan is complete, restart the computer.
Check for the activation. The error code should be gone at this point.
If it is gone, revisit Method One or move on the Method Four.
Method Four:
Call the Microsoft Support Team and explain the problem in as much detail as you can give. Give the team the error code 0x8007007B and ask to have a different product key. When they give you the new product key, repeat Method 2. The Microsoft Support Team will either change your product key, or they will reset your current product key so that it can be used for activation again.
Sadooma is a Browser Extension for Google Chrome. This extension offers users the ability to search for any trending news on the web.
This extension changes your default search engine to Yahoo, and while active it changes the displayed ads on your browser, allowing it to make revenue on every ad you click. While this is not inherently malicious, the extension redirects your search to its servers first before forwarding it to yahoo and displaying search results. The information that is sent back to the servers contains your browsing data & visited web pages. As this represents a security and privacy risk, Sadooma is classified as a browser hijacker for its potentially unwanted functions and poor user experience.
From the Author:
We’ve got what you need!If you are like us, addicted to interesting viral content, you’ve reached the best place for this.Sadooma will help you to find what is trending right now on the internet in an easy and immediate way.Privacy – We don’t share your information with others.Trending Content – New viral content every dayUp to Date – We update sources to keep things fresh.Made with Love – Our content is safe and suitable for all ages.
About Browser Hijackers
Browser hijacking is a type of unwanted software, commonly a browser add-on or extension, which then causes modifications in the web browser’s settings. Browser hijackers can do more than simply modifying home pages. It redirects you to the sponsored sites and inserts advertisements on the internet browser that helps its creator generate earnings. A lot of people think that these types of sites are legitimate and harmless but that is not true. Nearly all browser hijackers pose an existent threat to your online safety and it is vital to classify them under privacy dangers. In a much worst case, your web browser could be hijacked to download malicious software that will do a lot of damage to your computer.
Indications of browser hijack
There are many symptoms that point to a browser hijacking: you see unauthorized modifications to your web browser’s homepage; you get re-directed to sites you never intended to visit; default web engine is modified; you’re getting browser toolbars you haven’t noticed before; your internet browser will display constant pop-up windows; your web browser starts running slowly or presents frequent errors; You can’t access certain websites, particularly anti-virus websites.
How they get into your computer or laptop
Browser hijackers infect computers via malicious email attachments, downloaded infected computer files, or by visiting infected sites. Many web browser hijackings originate from add-on software, i.e., browser helper objects (BHO), toolbars, or extensions added to web browsers to give them extra features. Browser hijackers sneak to your computer along with free software application downloads that you unknowingly install alongside the original. An example of some well-known browser hijacker includes Conduit, Anyprotect, Babylon, SweetPage, DefaultTab, RocketTab, and Delta Search, but the names are regularly changing.
Removal
Certain browser hijacking could be quite easily stopped by finding and removing the corresponding malware application from your control panel. But, the majority of hijackers are really tenacious and require specialized applications to remove them. You should think about undertaking manual repairs only if you’re a tech-savvy individual, as potential risks are associated with fiddling with the system registry and HOSTS file.
You might opt for automatic browser hijacker removal methods by simply installing and running a reliable anti-malware application. One of the top tools for correcting browser hijacker malware is SafeBytes Anti-Malware. It can help you remove any pre-existing malware in your computer and gives you real-time monitoring and protection from the latest internet threats. Together with the anti-malware tool, a system optimizer will help you in removing all linked files and modifications in the computer registry automatically.
What To Do When You Cannot Install Any Antivirus?
All malware is inherently dangerous, but certain kinds of malware do a lot more damage to your computer than others. Some malware variants modify internet browser settings by including a proxy server or change the computer’s DNS configurations. In such cases, you’ll be unable to visit some or all websites, and thus unable to download or install the required security software to clear out the computer virus. If you are reading this, you may have infected by a virus that prevents you from downloading computer security software like Safebytes Anti-Malware. Although this sort of issue will be difficult to circumvent, there are some steps you can take.
Make use of Safe Mode to resolve the problem
In Safe Mode, you could adjust Windows settings, un-install or install some programs, and eliminate hard-to-delete malware. If the malicious software is set to load immediately when the computer starts, switching into this mode may well prevent it from doing so. In order to enter into Safe Mode or Safe Mode with Networking, press the F8 key while the computer is starting up or run MSCONFIG and locate the “Safe Boot” options under the “Boot” tab. Once you are in safe mode, you can try to download and install your anti-malware software program without the hindrance of malicious software. After installation, run the malware scanner to eliminate most standard infections.
Switch to some other browser
Malicious code may exploit vulnerabilities on a specific internet browser and block access to all anti-virus software websites. When you suspect that your Internet Explorer happens to be hijacked by a computer virus or otherwise compromised by hackers, the best plan of action is to switch to a different internet browser such as Google Chrome, Mozilla Firefox, or Apple Safari to download your chosen security application – Safebytes Anti-Malware.
Install and run anti-virus from your Thumb drive
Another solution is to save and run an antivirus program entirely from a USB drive. Try these simple actions to clear up your infected PC using a portable antivirus.
1) Make use of another virus-free PC to download Safebytes Anti-Malware.2) Plug the Flash drive into the clean computer.3) Double-click the Setup icon of the antivirus software to run the Installation Wizard.4) Select the drive letter of the flash drive as the location when the wizard asks you where you would like to install the anti-virus. Follow the on-screen instructions to finish the installation process.5) Remove the pen drive. You may now use this portable anti-malware on the infected computer.6) Double click the Safebytes Anti-malware icon on the flash drive to run the program.7) Run Full System Scan to identify and get rid of all kinds of malware.
Let's Talk About SafeBytes Anti-Malware!
If you are looking to download the anti-malware program for your computer, there are several tools in the market to consider however, you cannot trust blindly anyone, no matter whether it is paid or free program. Some of them do a great job in getting rid of malware threats while some will affect your PC themselves. You have to purchase a tool that has got a good reputation and detects not just viruses but other sorts of malware as well. One of the recommended tools by industry analysts is SafeBytes Anti-Malware, the safest program for Microsoft Windows.
SafeBytes anti-malware is a powerful, very effective protection software made to assist users of all levels of IT literacy in finding and removing malicious threats out of their personal computers. Using its cutting-edge technology, this application will help you get rid of several types of malware including computer viruses, PUPs, trojans, worms, ransomware, adware, and browser hijackers.
There are many great features you’ll get with this security product. Below are some of the highlighted features included in the tool.
Real-time Threat Response: SafeBytes provides round-the-clock protection for your PC restricting malware intrusions instantly. It will regularly monitor your laptop or computer for hacker activity and also provides users with advanced firewall protection.
World-class AntiMalware Protection: Safebytes is made on the best virus engine in the industry. These engines will find and get rid of threats even during the early phases of a malware outbreak.
Faster Scanning: This software has got one of the quickest and most effective virus scanning engines in the industry. The scans are very accurate and take a short amount of time to complete.
Safe Web Browsing: SafeBytes provides an instant safety rating on the web pages you are about to check out, automatically blocking unsafe sites and make sure that you’re certain of your online safety while browsing the net.
Lightweight Tool: SafeBytes is a lightweight and user-friendly anti-virus and antimalware solution. Since it uses minimal computer resources, this application leaves the computer’s power exactly where it belongs to: with you actually.
24/7 Online Technical Support: You could get high levels of support round the clock if you’re using their paid software.
To sum it up, SafeBytes Anti-Malware is pretty great for securing your laptop or computer against all sorts of malware threats. There is no doubt that your computer will be protected in real-time as soon as you put this software to use. So if you’re trying to find a comprehensive antivirus program that’s still simple enough to use, SafeBytes Anti-Malware is exactly what you will need!
Technical Details and Manual Removal (Advanced Users)
If you don’t want to use malware removal software and prefer to eliminate Sadooma manually, you could do so by going to the Add/Remove Programs menu in the Control Panel and removing the offending software; in cases of browser add-ons, you may uninstall it by visiting the browser’s Add-on/Extension manager. You might even want to reset your browser settings, as well as clear your web browser cache and cookies.
In order to ensure the complete removal, manually examine your hard disk and registry for all the following and eliminate or reset the values as needed. However, editing the Windows registry is actually a complicated job that only advanced users and professionals should try to fix it. In addition, certain malicious programs have the capability to defend against its deletion. You are encouraged to do this procedure in Safe Mode.
Mswrd632.wpc is a Microsoft Office Word error message. This error message is often displayed in the following format:
‘Word cannot start the converter mswrd632.wpc’
The error message mswrd632.wpc may pop up when computer users try to open certain MS Word documents using the .doc extension.
Solution
Error Causes
Error Mswrd632.wpc may be triggered due to several reasons. Some of the common reasons for the mswrd632.wpc error code include:
Issues with Microsoft Word application
MSwrd632.wpc file corrupted
Changes in the registry configuration settings
Issues with security updates
Sometimes when you attempt to access the Word file of the older version of the MS Word application after new security updates, you may experience this error code.
This happens because the new security features that you have installed in the updated version blocks old files from being accessed.
Further Information and Manual Repair
If you can’t access important MS Word files on your PC, due to the error Mswrd632.wpc, then don’t you worry! The good news is that it is easy to fix and repair. By following a few simple methods, you can easily resolve this issue and access your MS Word files.
Try the methods listed below to repair error Mswrd632.wpc on your system:
Method 1: Copy the MSwrd632.wpc file From Another Computer
The error may also occur if the MSwrd632.wpc file is corrupted. In such as situation, copy the MSwrd632.wpc file on your PC from another computer.
You can usually find this file in the following path C:\Program Files\Common Files\Microsoft SharedTextConv.
However, please note this method is not secure and may make your PC vulnerable to a possible security hack. Do it when your PC is not connected to the internet.
Method 2: Unregister the Text Converter
This issue can also be resolved by unregistering the converter. Here is a step-by-step guide to unregister the converter.
First, go to the start menu and select RUN.
Type REGEDIT and press the OK button.
Next, what you have to do is find and click on registry subkeys. Here are the keys that you have to click on
HKEY_LOCAL_MACHINESOFTWAREMicrosoftSharedToolsText ConvertersImportMSWord6.wpc (Windows 32 bit OS)HKEY_LOCAL_MACHINESOFTWAREWow6432NodeMicrosoftSharedToolsText ConvertersImportMSWord6.wpc (Windows 64 bit OS)
Choose the key according to your Windows bit operating system. After that, click on the Edit menu, select the Delete option and click ‘Yes’ to activate changes.
This change will effectively unregister the text converter and disable it for third-party applications and for Microsoft Office enabling you to access your desired MS Word files easily.
Method 3 - Download Restoro to Resolve Registry issues
If the error is related to the registry, then the best and most efficient way to fix it is to download Restoro.
This is a powerful registry cleaner and a PC Fixer deployed with a user-friendly interface and compatible with all Windows versions. It scans and removes all registry errors and repairs the registry in seconds.
Click here and download Restoro to resolve the MSwrd632.wpc error now!
In recent times, some Windows 10 users have seen an error code BCM20702A0, when using Bluetooth and they are concerned as to what it is all about. We can say for certain that it has something to do with your Bluetooth driver. The error message in question is:
The drivers for this device are not installed. There are no compatible drivers for this device.
The problem here tends to no longer allow specific Bluetooth components to properly communicate with your Windows 10 operating system. It also affects laptops that do not have native Bluetooth support; therefore, the manufacturer installed a dongle on the inside to deliver the service. This is not the best way to do things because native support is always better. On the other hand, maybe you’re using a Broadcom USB Bluetooth dongle that is acting up, and as such, the error is showing.
Below are solutions provided for this particular error and how to eliminate it.
Run the Bluetooth Troubleshooter
Press ⊞ WINDOWS to open the menu and select settings
In settings choose Update & Security
Go to troubleshoot and on the right panel click on additional troubleshooters
Click on Bluetooth
Select Run the troubleshooter, then sit back and allow the tool to do its thing. Once you’ve completed the task, click on Apply this fix if any repairs are needed
Reboot your computer
Install Broadcom driver from official website
Windows drivers for Broadcom Bluetooth devices are no longer posted on their website. They should be available through Microsoft’s Windows Update service. If drivers were not downloaded automatically by Windows Update, use Device Manager to refresh the driver from Windows Update.
However, the Broadcom Bluetooth drivers seem to be available here on the Lenovo website. To fix the BCM20702A0 driver error, you may download and install them.
After downloading it, right-click on the downloaded item, and select Run as administrator. After installation, restart your computer, then check again if it works.
Remove all Bluetooth drivers and USB controllers
If previous solutions did not work, go to device manager and remove all Bluetooth devices along with all USB controllers.
Reboot your computer and Windows will automatically reinstall and set all devices.