For three decades, Wolfram Mathematica has defined the state of the art in technical computing and provided the principal computation environment for millions of innovators, educators, students, and others around the world.
Widely admired for both its technical prowess and elegant ease of use, Mathematica provides a single integrated, continually expanding system that covers the breadth and depth of technical computing—and seamlessly available in the cloud through any web browser, as well as natively on all modern desktop systems.
With energetic development and consistent vision for three decades, Mathematica stands alone in a huge range of dimensions, unique in its support for today's technical computing environments and workflows.
A Vast System, All Integrated
Mathematica has nearly 5,000 built-in functions covering all areas of technical computing—all carefully integrated so they work perfectly together, and all included in the fully integrated Mathematica system.
Not Just Numbers, Not Just Mathematica But Everything
Building on three decades of development, Mathematica excels across all areas of technical computing—including neural networks, machine learning, image processing, geometry, data science, visualizations, and much more.
Unimaginable Algorithm Power
Mathematica builds in unprecedentedly powerful algorithms across all areas—many of them created at Wolfram using unique development methodologies and the unique capabilities of the Wolfram Language.
Higher Level Than Ever Before
Superfunctions, meta-algorithms... Mathematica provides a progressively higher-level environment in which as much as possible is automated—so you can work as efficiently as possible.
Everything Is Industrial Strength
Mathematica is built to provide industrial-strength capabilities—with robust, efficient algorithms across all areas, capable of handling large-scale problems, with parallelism, GPU computing, and more.
Powerful Ease of Use
Mathematica draws on its algorithmic power—as well as the careful design of the Wolfram Language—to create a system that's uniquely easy to use, with predictive suggestions, natural language input, and more.
Documents As Well As Code
Mathematica uses the Wolfram Notebook Interface, which allows you to organize everything you do in rich documents that include text, runnable code, dynamic graphics, user interfaces, and more.
The Code Makes Sense
With its intuitive English-like function names and coherent design, the Wolfram Language is uniquely easy to read, write, and learn.
Make Your Results Look Their Best
With sophisticated computational aesthetics and award-winning design, Mathematica presents your results beautifully—instantly creating top-of-the-line interactive visualizations and publication-quality documents.
150,000+ Examples
Get started with almost any project with help from 150,000+ examples in the Documentation Center, over 10,000 open-code Demonstrations in the Wolfram Demonstrations Project—and a host of other resources.
Instant Real-World Data
Mathematica has access to the vast Wolfram Knowledgebase, which includes up-to-the-minute real-world data across thousands of domains.
Seamless Cloud Integration
Mathematica is now seamlessly integrated with the cloud—allowing sharing, cloud computing, and more in a unique and powerful hybrid cloud/desktop environment
Connected to Everything
Mathematica is built to be connected to everything: file formats (180+), other languages, Wolfram Data Drop, APIs, databases, programs, the Internet of Things, devices—and even distributed instances of itself.
If you would like to read more helpful articles and tips about various software and hardware visit errortools.com daily.
If you encounter the DRIVER_UNLOADED_WITHOUT_CANCELLING_PENDING_OPERATION Blue Screen error with an error code of 0x000000CE then it means that a driver failed to cancel the pending operations before unloading. Some of the driver files that might be the culprit include the intelppm.sys, intcdaud.sys, tmxpflt.sys, mrxsmb.sys and asusptpfilter.sys.
This kind of Blue Screen error occurs when the driver failed to cancel lookaside lists, worker threads, DPCs, and other items before unloading. You can usually identify which driver file is triggering the BSOD error in the BSOD error itself since its name would be printed on the blue screen and stored in memory at the location (PUNICODE_STRING) KiBugCheckDriver.
Refer to the possible solutions given below to fix the DRIVER_UNLOADED_WITHOUT_CANCELLING_PENDING_OPERATIONS error.
Option 1 – Perform a System Restore
Performing System Restore might help you in fixing the SYNTP.SYS Blue Screen error. You can do this option either by booting into Safe Mode or in System Restore. If you are already in the Advanced Startup Options, just directly select System Restore and proceed with the next steps. And if you have just booted your PC into Safe Mode, refer to the steps below.
Tap the Win + R keys to open the Run dialog box.
After that, type in “sysdm.cpl” in the field and tap Enter.
Next, go to the System Protection tab then click the System Restore button. This will open a new window where you have to select your preferred System Restore point.
After that, follow the on-screen instructions to finish the process and then restart your computer and check if the problem is fixed or not.
Option 2 – Disable the BIOS Memory options
Disabling the BIOS Memory options such as Caching and Shadowing can help you in fixing the DRIVER_UNLOADED_WITHOUT_CANCELLING_PENDING_OPERATIONS Blue Screen error. All you have to do is enter the BIOS first and then use the Arrow and Enter keys to select your choices. And if you can’t seem to find it, look for specific instructions from your OEM or you could also look out for instructions from the manufacturer of your motherboard.
Option 3 – Update or rollback your device drivers
If the first option didn’t work for you, then it’s time to either update or roll back the device drivers. It is most likely that after you updated your Windows computer that your driver also needs a refresh. On the other hand, if you have just updated your device drivers then you need to roll back the drivers to their previous versions. Whichever applies to you, refer to the steps below.
Open the Devices Manager from the Win X Menu.
Then locate the device drivers and right-click on them to open the Properties.
After that, switch to the Driver tab and click on the Uninstall Device button.
Follow the screen option to completely uninstall it.
Finally, restart your computer. It will just reinstall the device drivers automatically.
Note: You can install a dedicated driver on your computer in case you have it or you could also look for it directly from the website of the manufacturer.
Option 4 – Try to run the CHKDSK utility
Running the CHKDSK utility might also help you resolve the DRIVER_UNLOADED_WITHOUT_CANCELLING_PENDING_OPERATIONS Blue Screen error. If your hard drive has issues with integrity, the update will really fail as the system will think that it’s not healthy and that’s where the CHKDSK utility comes in. The CHKDSK utility repairs hard drive errors that might be causing the problem.
Open Command Prompt with admin privileges.
After opening Command Prompt, execute the following command and hit Enter:
chkdsk /f /r
Wait for the process to be completed and then restart your computer.
Option 5 – Run the Memory Diagnostic Tool to check for Memory leaks
Tap the Win + R keys to open Run and type exe and hit Enter to open the Windows Memory Diagnostic Tool.
After that, it will give two options such as:
Restart now and check for problems (Recommended)
Check for problems the next time I start my computer
Once your computer has restarted, perform a basic scan or you could also go for the “Advanced” options such as “Test mix” or “Pass count”. Simply tap the F10 key to start the test.
Note: After you select the option, your PC will restart and check for memory-based issues. If it finds any issues, it will automatically fix them and if there’s no issue found, then it’s most likely not a memory-based issue so you should try the other options given below.
Option 6 – Try analyzing the Memory Dump Files
You can also try to analyze the Memory Dump files as it can help you identify the root cause of the DRIVER_UNLOADED_WITHOUT_CANCELLING_PENDING_OPERATIONS error.
Option 7 – Try checking the Registry settings
You might also want to try disabling the concerned driver file if it is mentioned in the Stop error. For example, if the stop error mentioned the “intelppm.sys” driver file then you have to disable this driver file since it is most likely the culprit. To do that, follow the steps below.
Tap the Win + R keys to open the Run dialog box.
Next, type “Regedit” in the field and hit Enter to open the Registry Editor.
After that, go to the this registry path: HKEY_LOCAL_MACHINE > SYSTEM > CurrentControlSet > Services > Processor
From there, double click on Start and change its value to “4”.
Now go to this path: HKEY_LOCAL_MACHINE > SYSTEM > CurrentControlSet > Services > Intelppm.
Set its value to “4” and then restart your computer to apply the changes made.
Option 8 – Run the Blue Screen Troubleshooter
The Blue Screen troubleshooter is a built-in tool in Windows 10 that helps users in fixing BSOD errors like DRIVER_UNLOADED_WITHOUT_CANCELLING_PENDING_OPERATIONS. It can be found on the Settings Troubleshooters page. To use it, refer to these steps:
Tap the Win + I keys to open the Settings panel.
Then go to Update & Security > Troubleshoot.
From there, look for the option called “Blue Screen” on your right-hand side and then click the “Run the troubleshooter” button to run the Blue Screen Troubleshooter and then follow the next on-screen options. Note that you might have to boot your PC into Safe Mode.
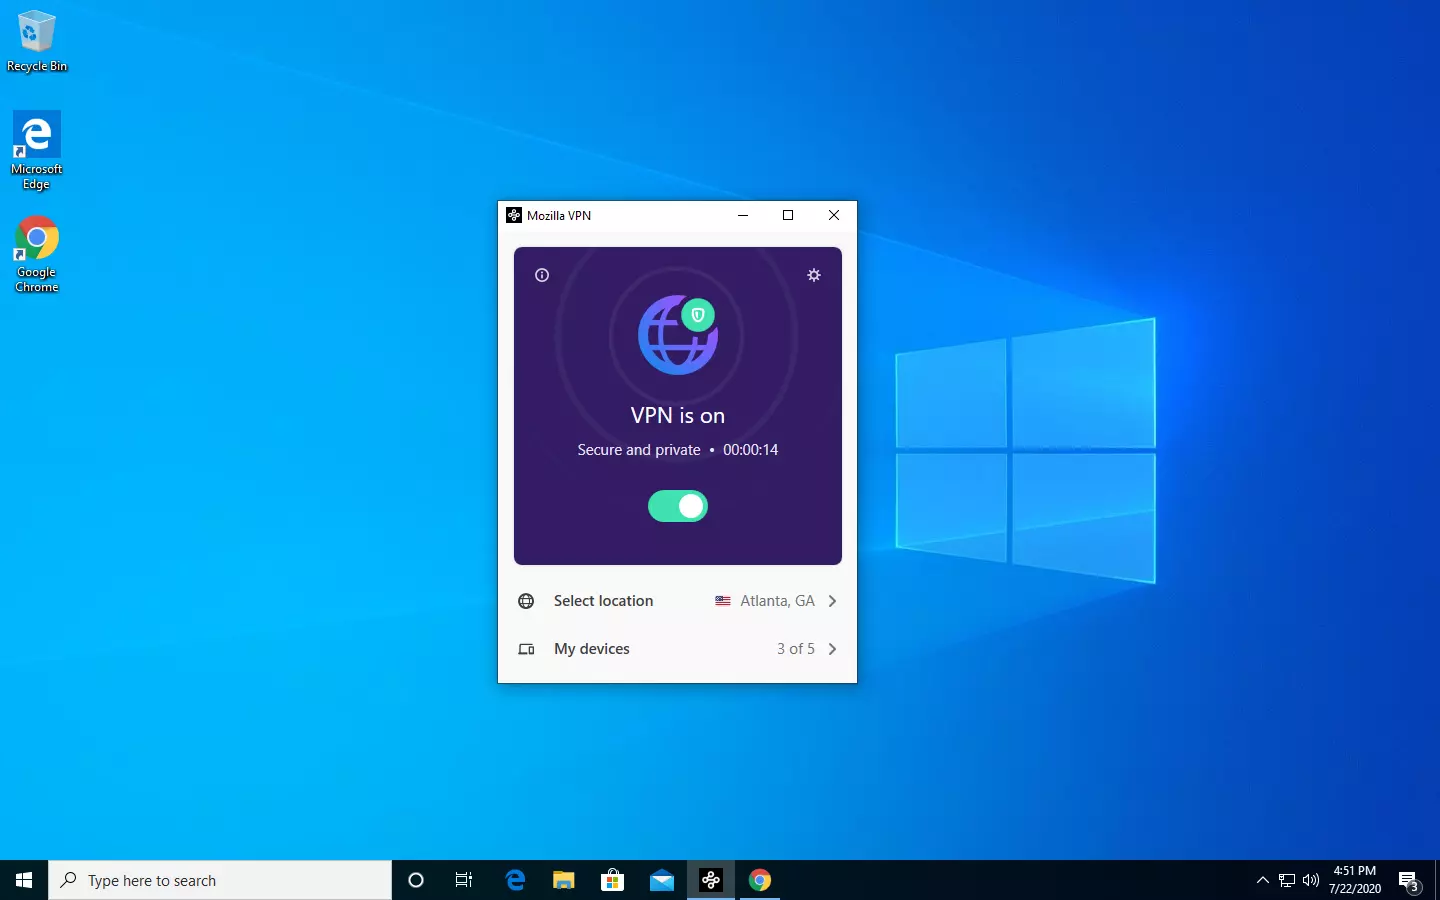
The new thing from Mozilla is not a browser, it is a VPN!
Besides Firefox, Mozilla offers now Firefox Relay, an app helping you to mask your email and phone number, and a new Mozilla VPN.
Mozilla has recently announced a new subscription model that will let you use all products together for $6.99 per month. Although this is a little more expensive than the competition that goes around for $5 per month note that with this subscription you are having access to all services, not just VPN.
VPN will not only hide your IP address but will also make sure websites cannot access your real location and it encrypts all of your network activity. Relay will give you protection against spam, serving as a shield for your email and limiting spammers from access to your real email address and phone number. With Mozilla subscription will let you use both services.
The Local Security Authority Subsystem Service or LSASS.exe is a process in the Windows operating system that is valuable as it enforces the security policy on the computer. Every time you log in to the Windows Server, the LSASS.exe is the one that handles the password changes and creates the access tokens while updating the security log. However, it is also frequently targeted by malware and is often imitated. The original location of this file is at “C:/Windows/System32” so if you open the Task Manager and notice that a process with a similar name has a different location then it is definitely a threat and is exploiting the security of your computer.
To resolve issues related to LSASS.exe, here are some fixes that could help.
Option 1 – Use the Performance Monitor’s Active Directory Data Collector
Note that this option will only work on the recent Windows server versions. Refer to the steps below to use the Performance Monitor’s Active Directory Data Collector set on your computer.
Tap the WINKEY + R button to open the Run dialog box.
Then type “Perfmon.msc” in the field and hit Enter to open the Performance Monitor and from there open the Server Manager.
Next, navigate to Diagnostics > Reliability and Performance > Data Collector Sets > System from the left side of the navigation bar.
Then right-click on “Active Directory Diagnostics” and select Start from the context menu. This will take about 5 minutes or 300 seconds depending on the performance capabilities of your hardware to gather the data required and then take some more time to compile a report from the gathered data. Note that these timings are dependent on one another.
After the report is compiled, you can find it under Diagnostics > Reliability and Performance > Reports > System > Active Directory Diagnostics. The report will contain all the information as well as conclusions. However, it does not mean that it will also contain the exact cause of the problem with LSASS.exe. Nevertheless, it should help you in fixing the problem.
Option 2 – Try to run the System File Checker
System File Checker or SFC is a built-in command utility that helps in restoring corrupted files as well as missing files. It replaces bad and corrupted system files to good system files that might be the cause why the LSASS.exe file is having some issues. To run the SFC command, follow the steps given below.
Type “cmd” in the Start search and then right-click on the appropriate search result.
Next, select “Run as administrator” to open Command Prompt with admin privileges.
After opening Command Prompt, type in sfc /scannow
The command will start a system scan which will take a few whiles before it finishes. Once it’s done, you could get the following results:
Windows Resource Protection did not find any integrity violations.
Windows Resource Protection found corrupt files and successfully repaired them.
Windows Resource Protection found corrupt files but was unable to fix some of them.
Now restart your computer and see if the problem is fixed or not.
Option 3 – Put your computer in a Clean Boot State
If none of the options given above helped, you can try putting your computer in a Clean Boot State as this can help you in finding any incompatible programs that’s causing the problem.
Log onto your PC as an administrator.
Type in MSConfig in the Start Search to open the System Configuration utility.
From there, go to the General tab and click “Selective startup”.
Clear the “Load Startup items” check box and make sure that the “Load System Services” and “Use Original boot configuration” options are checked.
Next, click the Services tab and select the “Hide All Microsoft Services” check box.
Click Disable all.
Click on Apply/OK and restart your PC. (This will put your PC into a Clean Boot State. And configure Windows to use the usual startup, just simply undo the changes.)
From there, start to isolate the problem by checking which one of the programs you installed recently is the root cause of the problem.
Once you’ve found any incompatible programs, you need to uninstall them. Refer to the steps below to do so.
In the search box, type in “control” and then click on Control Panel (desktop app) among the search results.
After that, select Programs and Features from the list which will give you a list of all the programs installed on your computer.
From there, look for the concerned program and select it and then uninstall it.
Note: If you have downloaded the app from the Windows Store, you can simply right-click on it from the application list and then uninstall it.
There are instances when there are multiple accounts which is the result when there are a lot of users who use the computer. Some may use it more often, while others may seldom use it. Having multiple accounts can be quite confusing and inconvenient especially if it takes a lot of space. Thus, in this post, you will be guided on how you can delete a User Account on your Windows 10 computer, as well as how you can create a backup of the existing profile data and files.
All the data of user accounts can be found at C:/Users, where its folder name will be exactly the same as the name of the user. You can check the exact user’s name by simply using the “net user” command either via Command Prompt or Windows PowerShell. Once you delete a user account, its folder, along with its files, will also be deleted. You can also create a backup for user files and the best way to do that is by copying the folder to other partitions or to an external drive.
Here are two methods you can check out to delete a user account in Windows 10 – you can do it via Windows Account settings or via the command line. For more details, follow each one of the options provided below.
Option 1 – Delete the user account using Windows Account settings
First, go to Settings > Accounts > Family & other users.
Next, select the account you want to delete and click on the Remove button. This will open a confirmation window along with a warning message and two buttons that say, “Delete account & data” and “Cancel”.
Click on the Delete account & data button to delete the user account.
Note: Once you remove a user account, it will also remove all its corresponding data such as items like Documents, Photos, Music, Desktop, and other related folders. Thus, if you have not created a backup, then you won’t be able to recover those files.
Option 2 – Delete the user account using the command line
If you want to delete several user accounts, then doing it via Command Prompt or Windows PowerShell is a lot quicker. To get started, follow these steps:
In the Start Search, type “command prompt” and from the search results that appear, right-click on Command Prompt and select the “Run as administrator” option.
Next, type the “net user” command and hit Enter to execute it. This will show you the exact usernames on the computer.
After that, type the “net user <username> /delete” command and hit Enter to execute it. This will delete the account and all of its data without any warning. You have to replace “<username>” with the name of the user account.
Started as an internal network and has slowly expanded since 1960 internet has taken over the world. In the beginning, it was a means of information change but in the modern age you can run applications and virtual machines over the internet, you can stream video and audio, and you can communicate in real-time with someone on the other side of Earth.
With the internet growing so fast in such a small amount of time it is only logical and wise to take a step back and take a good look at what it offers now, what are great things about it and what are some of the worst.
Good sides of the internet
Information
There are a lot of advantages of the internet, first and foremost is information. Internet was made as an information exchange service and even today you can find a lot of various information about various topics that interest you. A site like Wikipedia is a completely free online encyclopedia and a lot of news companies have their own internet sites where you can find free information and news.
On the other hand, there are also websites like udemy, edx, Coursera, and many others that will offer you the education, some for free, some for money but you can get a glimpse and part of university quality education for just a fraction of price.
Online shopping
Sites like Amazon have used the internet and launched themselves as today's multi-billion companies. In today's world, there is not a single thing you can not buy online. Many sites today are going from the large online marketplace where you can find everything to small niche specialized ones. Also every major brand in the world today has its own online store.
Other shops will offer you music, movies, games, etc. Services like steam, xbox pass, sony pass etc, will let you buy games online, other music, movies, and many more.
Streaming services
Days, when you had to buy movies in order to watch them at home, are gone, thanks to the internet we have plenty of streaming services for movies and tv shows as well as ones for music. If you do not want to spend money on actually purchasing things then a good idea is to have a streaming plan set up when you want it.
Email and messaging
Communication is a great thing and since the dawn of mankind people have been talking and sharing with each other, the internet has made it possible to send mail electronically and instantly and modern chat communication is everywhere. We can not just talk with our friends and family that can be on the other side of the world, we can also talk in real-time with the sales representative, with technical service, or attend online classes with a group of people.
Cloud storage services
Saving your pictures in this digital media age on the hard drive can be risky but thanks to modern technologies you can save most of your precious files on cloud servers for safekeeping. From pictures to documents and even other files that you need and want to save. There are some of them that will offer you a free amount and some basic free plans as well.
Bad sides of the internet
Malware, viruses, and phishing
We could not talk about the bad side of the internet if we do not mention its greatest threat. Bad sites, infected software, phishing emails, and many more malicious threats. Problem is that these kinds of tricks and attacks have become more and more sophisticated and harder to detect and avoid.
Pornography
Pornography is bad, having it freely available to children is even worse. Sadly the only way to regulate this is on a computer-by-computer basis by turning on parent control on each one. There are many studies that go into detail about why this is bad, sadly currently there are no effective ways to isolate this content.
No privacy
When we say there is no privacy we do not mean by using social media and not setting your privacy settings altho that also fits in this point, what we are talking about is data mining of your habits and things you do. It is well known that today lot of websites are using some form of AI recommender system in order to tailor your internet experience to suit your needs better. Most of these AI systems are trained by mining your data and analyzing your habits.
If you have 2 google accounts there is a high probability chance that for the same query you will get different results, depending on your so far browsing habits. The same goes for other services as well.
Dark webshops
There are some great things in dark and deep WEB-like sites with true news and information. Even some legit libraries where you can find and download rare books. Sadly as goes with the internet dark and deep WEB also has its well, dark sides, from disturbing content to shops that sell stolen items to straight stealing your money by parading as legit shops but only to steal your money.
Dating sites
We all try to find someone that is perfectly matched with us but using the online dating site has many proven bad effects on psychology. It also devaluates interaction between people and can lower self-esteem.
Bad habits
Since the internet has become wildly available and popular on various devices like tablets and mobile phones more and more people are spending an unhealthy amount of time on it. Harvesting the benefits of the internet is great but find some time for other people as well.
One of the essential parts of the Windows 10 operating system is the Microsoft Store as it is the distribution hub of numerous applications such as Netflix, Facebook, and many more. In fact, Microsoft is planning to make it a hub not just for UWP applications but also Windows Classic applications. Microsoft has already built a bridge with the power of Project Centennial which allows developers to migrate and upload their Windows Classic applications to the Microsoft Store. Although the Microsoft Store has been constantly improving, there are still times when you might face an error while using it. One of these errors is error 0x80131500. When you encounter this error, you will get the following error message on your screen:
“Try that again, Something happened at our end, Waiting a bit might help, The error code is 0x80131500 in case you need it.”
To fix this error, you can try changing your internet connection, toggle the date & time settings, change DNS, create a new user account, run the Microsoft Store Apps troubleshooter or reset the Microsoft Store as well re-register it using Windows PowerShell.
Option 1 – Try changing your internet connection
The first thing you can do is to change your internet connection. If you are using Ethernet, you can try to connect to a Wi-Fi connection instead and see if it helps.
Option 2 – Try to toggle the Date and Time settings
The first thing you can try is to sync the Date and Time of your computer as the wrong Date and Time settings are one of the most common causes of connection problems like the error 0x80131500. This is because of the incompatibility between the SSL Certificate validation date and the System Clock. Thus, you have to sync your System Clock. Refer to the steps below to do so.
Start by tapping the Win + I keys to open the Windows Settings.
Next, go to Time & Language > Date & time.
From there, turn the toggle on for the “Set time automatically and Set time zone automatically” option on the right-side panel.
After that, click on Region & language located on the left side panel and make sure that the Country or region on the right-side panel is set to the country you live in.
Now close the Settings app and restart your computer and see if it fixes the problem or not.
Option 3 – Try to change the DNS Server
In this option, you can try changing your current DNS settings to the Google Public DNS as it could also help in fixing error 0x80131500. To do so, follow the steps below.
The first thing you have to do is right-click on the network icon in the Taskbar and select Network and Sharing Center.
Next, click on the “Change Adapter Settings” option.
After that, search for the network connection that you are using to connect to the internet. Note that the option might be “Wireless Connection” or “Local Area Connection”.
Right-click on your network connection and click on Properties.
Then select the new window to choose the “Internet Protocol 4 (TCP/IPv4)” option.
After that, click on the Properties button and click the checkbox in the new window for the option “Use the following DNS server addresses”.
Type in “8.8.8.8” and “8.8.4.4” and click OK and exit.
Option 4 – Try to create a new Administrator User account
If you have a standard account, you can try creating a new account but this time, you create an administrator user account and then see if the error is fixed or not. Note that you have to sign in with your main account before you can create an admin account.
Option 5 – Run the Microsoft Store Apps troubleshooter
The Microsoft Store Apps Troubleshooter will help you in fixing the error 0x80131500. This is a great built-in tool from Microsoft that helps users fix any app installation issues. So this is worth a try to solve the problem. This built-in tool also helps you fix the Windows 10 Store if it isn’t working.
To use the Windows Store Troubleshooter, follow the steps below.
Tap Win + I keys again to open the Windows Settings panel.
Go to Update & Security and then go to Troubleshoot.
On your right-hand side, scroll down to find the Windows Store Apps and then click on the Run the troubleshooter option and see if it fixes the problem.
Option 6 – Try to reset the Microsoft Store cache
Just like browsers, Microsoft Store also caches as you view apps and games so it is most likely that the cache is no longer valid and must be removed. To do so, follow the steps below.
Right-click on the start button and click on Command Prompt (administrator).
Next, type in the command, “exe” and tap Enter. Once you do, the command will clear the cache for the Windows Store app.
Now restart your PC and afterward, try opening Microsoft Store again and then try to install your app or update your computer again.
Option 7 – Try to re-register the Microsoft Store app via PowerShell
Tap the Win + X key combination or right-click on the Start button and click on the Windows PowerShell (Admin) option.
If a User Account Control or UAC prompt appears, just click on Yes to proceed and open the Windows PowerShell window.
Next, type in or copy-paste the following command to re-register the Microsoft Store app and tap Enter:
Instagram posting has been reserved for mobile phones for a very long time but in October 2021 that privilege has come to an end. Instagram added the long-awaited ability to post to Instagram from the website. You get nearly all of the same filters and editing tools that you can find in the iPhone and Android app, too.
In order to post via computer on your Instagram account all you need is a browser. The first step, of course, is to go to instagram.com and login into your account, if you do not have an account, you can make one for free. Next, click on the + icon in the upper right corner.
Create a new post screen will open, in this screen click on the Select from computer blue button on the bottom. The file manager will open, choose your desired photo and confirm. After that, you will be presented will an adjustment screen for a photo, here you can crop the photo, zoom in, adjust the aspect ratio, or if you wish add more photos to create a slide show.
Once you are done will all of these adjustments, click on Next in the upper right. From there you will be taken into a filter screen where you can apply one of many filters or if you want, you can adjust brightness, contrast, saturation, temperature, etc. just like in the application on your phone. Once you have the desired result, again click on Next in the upper right part of the screen.
Lastly, you will be given an option to write a caption for the photo if you wish and add a location. Once this step is finished you can post the feed by clicking on share in the upper right part.
That is all to it, just like in a mobile application you can now use your computer for Instagram posting.
If you are trying to install or reinstall a program on your Windows 10 computer but encountered an error instead that says, “Fatal error, Installation fails, Installation ended prematurely because of an error”, then you’ve come to the right place as this post will guide you how you can fix it.
This kind of error is most likely caused by some files that may have been left behind by the previous installation of the program. Each time a program is uninstalled, it leaves behind its files and if the uninstallation process wasn’t completed properly, then it would result in errors like the
“Fatal error, Installation fails, Installation ended prematurely because of an error”.
Moreover, this kind of error is a generic one that can also occur with any software reinstallation or installation. And to fix this error, there are several suggestions you must check out. You can try to install or reinstall the program in a Clean Boot State or restart the Windows Installer Service. You could also try to re-register the Windows Installer Service or re-register the VBScript.dll file.
Option 1 – Install or reinstall the program in a Clean Boot State
It is possible that there are some third-party applications in your computer that are preventing the program from getting installed and to isolate this possibility, you need to boot your computer in a Clean Boot State and then try installing the program again. Putting your computer in this state can help you identify which program is the culprit and thus isolates the problem. In a Clean Boot state, your computer will start using only the pre-selected minimal set of drivers and startup programs. Note that you have to disable and enable one process at a time.
Log onto your PC as an administrator.
Type in MSConfig in the Start Search to open the System Configuration utility.
From there, go to the General tab and click “Selective startup”.
Clear the “Load Startup items” checkbox and make sure that the “Load System Services” and “Use Original boot configuration” options are checked.
Next, click the Services tab and select the “Hide All Microsoft Services” checkbox.
Click Disable all.
Click on Apply/OK and restart your PC. (This will put your PC into a Clean Boot State. And configure Windows to use the usual startup, just simply undo the changes.)
After you’ve set your computer into a Clean Boot State, make sure that you’re signed in as administrator and then try to install the program again.
Option 2 – Try to restart the Windows Installer Service
The next thing you can do to fix the problem is to restart the Windows Installer Service. To do this, follow these steps:
Tap the Win + R keys to launch the Run utility and type “services.msc” in the field and then hit Enter to open the Windows Services Manager.
Next, look for the Windows Installer service among the list of services shown.
Once you found it, right-click on it and open its Properties.
From there, click on the Stop button and then click on the Start button.
But if it isn’t running, then just click on the Start button.
Option 3 – Try to unregister and re-register the Windows Installer Module
Tap the Win + R keys to open the Run dialog box.
Then type the “msiexec /unregister” command and hit Enter to unregister the Windows Installer Module.
Next, type the “msiexec /regserver” command and hit Enter to re-register the Windows Installer Module.
Now restart your computer and see if unregistering and re-registering the Windows Installer Module fixed the problem or not.
Option 4 – Try to re-register the vbscript.dll file
You may have to re-register the vbscript.dll file using the regsvr32.exe before you can successfully install the program and fix the error. The Regsvr32 tool is a command-line utility that can be used to register and un-register the OLE controls like DLL and ActiveX (OCX) control in the Windows operating system. Follow the steps below to use it.
Open Command Prompt as admin from the WinX menu.
Next, type regsvr32.exe vbscript.dll in the elevated Command Prompt and hit Enter to execute the command. This will re-register the affected DLL file using the Windows operating system tool, regsvr32.exe.
You should see a message saying, “DllRegisterServer in vbscript.dll succeeded” if the Regsvr32 tool was able to run successfully. After that, try to install the program again and see if it now works.
Apple introduced the Live Photo feature way with iPhone 6S in their iOS9. Live Photo idea was that each time you take a photo, your phone will capture a few seconds of video along with sound and all of that is sent when you share your photo. This of course can sometimes be really bad when some not wanted audio gets recorded in the background.
Since the feature was introduced it has been set as the default option when taking pictures so each time you snap one you just capture a small amount of video and audio along. Good thing is that this feature can be turned off and the even better news is that you can edit your old photos to remove back video and audio.
How to share only photo
You can keep your Live Photos but share only a single still typical photo if you wish. Go to the photos app on your phone and select the photo you wish to share. Press the Share button on the bottom left part of the screen and once the Share menu appears tap on the Live button in the upper left corner of the selected photo. The button should turn grey and become slashed and now you can share only still photo. This is only temporary for this one specific share so next time you want to do this you will have to go through the process again.
How to disable Live Photo
If you are not happy with the previous solution and really do not want to turn off the Live feature each time you want to share a photo or you just simply do not want the feature at all there is way to turn if off for good. Take note that you can temporarily not use this feature just by opening the camera, switching to photo mode, and then tapping on the Live photo button on the toolbar that looks like three circles one inside another. This will temporarily turn the Live Photo feature for this session but next time when you open the camera by default it will be turned on again. This is a good approach if you want the feature but sometimes you just want not to use it.
In order to turn it off completely go to the settings of your phone and go to Camera and then preserve settings. inside the preserve setting turn the switch Live Photo to ON position, now go-to camera and again click on the live photo button to turn it off but this time setting will be saved and next time you open the camera it will not be ON.
Editing old Live Photos
As stated before you can edit your old pictures in order to make them stills. You can edit them to remove audio only but keep the video part, or you can completely remove everything and convert them into typical still images.
In order to only remove audio from your Live Photos go to pictures and select one that you wish to change, click on edit, and inside edit tap on the Live Photo icon (three circles). Next tap on the audio icon located in the top left corner of your screen and it will change into the mute icon. Click on done and you are finished.
To completely remove the Live photo go to Photos, select picture, click on edit and select the live photo button again. This time tap and hold the Live button next to the sound until it turns gray with a strike through it. Click on done and you are finished.
Distributed Component Object Model or DCOM is a module on Windows computers that allows computers to run programs over a network to another computer. It is a software component from Microsoft that allows COM objects to communicate with each other while that program is remotely running over the network. The COM Model is another extension of the DCOM model which both work together in order for the intended task to be executed. To make this module work, there are three components needed such as the Class Identifier or CLSID, the Programmatic Identifier or PROGID, and the Application Identifier or APPID.
However, DCOM does not always work as expected as it could still encounter some errors. One of them is error 1084. Because of this error, the execution of programs in a remote computer on the network would be interrupted. So if you encounter the DCOM error 1084 when you try to start a service like running the DISM tool or in other scenarios on your Windows 10 computer, then this post could help you. Refer to the instructions given below to start troubleshooting the problem.
Option 1 – Try checking the status of DCOMLAUNCH Service or DCOM Server Process Launcher and its 3 dependencies
The DCOM Server Process Launcher service launches both COM and DCOM servers in response to object activation requests. This is why if this service is stopped or disabled, the programs that are using COM and DCOM won’t properly function. So you need to make sure that the DCOMLAUNCH service is running.
In the Cortana search box, type “services” and click on the Services icon to open the Services Manager. Alternatively, you can also tap the Win + R keys to launch the Run prompt and then type “services.msc” in the field and hit Enter to open the Services Manager.
Next, check the following services:
DCOM Service Process Launcher
Background Tasks Infrastructure Service
Local Session Manager
Remote Procedure Call (RPC)
Then right-click on each one of the services and click on their Properties.
After that, select Automatic from the drop-down menu of Startup Type and make sure that all the aforementioned services are Running.
Now click OK for each one of the services.
Option 2 – Troubleshoot the problem in a Clean Boot State
There are instances that some conflicting programs installed in your computer might be the one that’s causing DCOM error 1084. To identify which program is causing the problem, you need to put your computer in a Clean Boot State. To do so, follow the steps below.
Log onto your PC as an administrator.
Type in MSConfig in the Start Search to open the System Configuration utility.
From there, go to the General tab and click “Selective startup”.
Clear the “Load Startup items” check box and make sure that the “Load System Services” and “Use Original boot configuration” options are checked.
Next, click the Services tab and select the “Hide All Microsoft Services” check box.
Click Disable all.
Click on Apply/OK and restart your PC. (This will put your PC into a Clean Boot State. And configure Windows to use the usual startup, just simply undo the changes.)
From there, start to isolate the problem by checking which one of the programs you installed recently is the root cause of the problem.
Option 3 – Try to use the DISM tool
You might want to repair potentially corrupted files in your system as having them could also trigger the DCOM error 1084. To repair these corrupted system files, you can run the DISM commands:
Tap the Win + X keys and click on the “Command Prompt (Admin)” option.
After that, input each one of the commands listed below sequentially to execute them:
Dism /Online /Cleanup-Image /CheckHealth
Dism /Online /Cleanup-Image /ScanHealth
Dism /Online /Cleanup-Image /RestoreHealth
Once you’ve executed the commands given above, restart your computer and check if the DCOM error is now fixed.
Option 4 – Reset your computer
Tap the Win key or click on the Start button located in the Taskbar.
Then click on the Power button at the bottom right portion of the screen.
Next, press and hold the Shift key on your keyboard and then click on Restart. This will restart your Pc into the Advanced Startup options.
Note: Once you have access to the Advanced Startup options, you have to go to the setting which allows you to Reset your Windows 10 PC. All you have to do is select Troubleshoot > Reset this PC to reach the following screen
Afterward, select either the “Keep my files” option and then proceed to the next on-screen instructions that follow to reset your Windows 10 computer without losing your files.