The GameStream is an NVIDIA service that allows users to stream games from their Windows 10 computers to other supported devices which includes the NVIDIA SHIELD devices. However, a number of users reported that the NVIDIA GameStream is not working on their Windows 10 computers. This kind of issue is most likely caused by improper installation, some glitches with the network, and many more.
To fix this issue in the NVIDIA GameStream, there are several options you need to check out to fix the problem. You can try to lo logout of GameStream and try logging back in again. You could also try to update or uninstall and reinstall the drivers related to NVIDIA or fix some network glitches or update the NVIDIA SHIELD device. For more details, you can refer to each one of the given potential fixes below.
Option 1 – Try to logout and log back into NVIDIA GameStream
The first thing you can do is to log out and then log back into NVIDIA GameStream. Some users claimed that by doing this simple task, they were able to resolve the problem. This is probably because with the re-login, the entire cache of the system and service is rebuilt and any bad sectors of that data will be replaced with the fresh one so this should resolve the problem with the NVIDIA GameStream, if not, refer to the other given options below.
Option 2 – Try updating the drivers from the official site of NVIDIA
If both the first and second given options didn’t work, you can also try updating the drivers from the official NVIDIA website. And in case you don’t know the type of Nvidia graphics card that your computer is on, follow the steps below:
Tap the Win + R keys to open the Run dialog box.
Next type in “dxdiag” in the field and click OK or hit Enter to open the DirectX Diagnostic Tool.
From there, you can see what type of Nvidia graphics card that your system is on.
Take note of your graphics card information and then look for the best drivers for your operating system. Once you’ve downloaded and installed the file, restart your PC.
Option 3 – Try to roll back the driver to the previous version
If updating the NVIDIA display drivers didn’t work for you, then it’s time to roll back the device drivers. It is most likely that after you updated your Windows computer that your driver also needs a refresh.
Tap the Win + R keys to launch the Run window and then type in the “MSC” command and hit Enter to open the Device Manager window.
Under the Device Manager, you will see a list of drivers. From there, look for the NVIDIA Drivers and expand it.
Next, select the driver entries that are labeled appropriately.
Then select each one of them and double click to open a new mini window.
After that, make sure that you’re on the Driver tab and if you are not, just navigate to it then click the Roll Back Driver button to switch back to the previous version of the NVIDIA Drivers.
Now restart your computer to successfully apply the changes made.
Option 4 – Try fixing your network
The next thing you can do to fix the problem with the NVIDIA GameStream is to fix the glitches in your network. Make sure that you connect both of your devices to a 5 GHz Wi-Fi network and you also have to ensure that the Wi-Fi connection you’re connected to is strong enough for both the devices for the latency to go down. Once you’ve covered all of these things with your network, restart your computer and change the Wi-Fi channel both devices are connected to. This should resolve the problem.
Option 5 – Try to update the NVIDIA SHIELD device
You might also want to update the NVIDIA SHIELD device. There are times when an outdated NVIDIA SHIELD device can result to several issues like the problem with the NVIDIA GameStream. Thus, you need to update NVIDIA SHIELD and check if it fixes the problem or not.
A general rule of thumb, which is followed by most users, is to download the specific missing DLL file and place it within the software’s installation directory. However, this can be harmful to your system as hackers often upload popular malicious DLL files to target systems. Thus, you should avoid downloading DLLs from the internet. And follow these steps to fix the DLL error:
Restart your computer
System restore to an earlier state
Run a malware/virus scan
Update all the hardware drivers
Running SFC /scannow command in command prompt
Then do as the error suggests, reinstall the program if it’s feasible. Game files can take several hours to install and therefore, reinstallation can be a cumbersome job. Also, frustrating if the error appears after reinstallation.
Update device drivers manually, such as graphics drivers, DirectX software if you see DLL missing error while running game
Resize icons on desktop in Windows 10 in a matter of seconds!
Hello everyone and welcome to today's quick tip. If you have ever been dissatisfied with icon size on your desktop and any of the default sizes like small, medium large, etc have not been appropriate know that there is a quick way to resize icons on your desktop in between sizes.
All that you have to do in order to use this built-in feature is:
Press and hold CTRL and scroll with the mouse. That's it! Find your appropriate size for icons and enjoy.
Error 101 is a Google Chrome error. You may experience this error if you browse the internet using Google Chrome. This error results when the existing HTTP connection between Chrome and the website is broken.
The error is displayed in the following format: “Error 101 (net::ERR_CONNECTION_RESET): The connection was reset.”
Solution
Error Causes
The cause of Google Chrome error 101 cannot be narrowed down. This error can be triggered on your PC due to multiple reasons. These include:
The inability of the Google Chrome installer to create a temporary directory on your PC during the installation process
Enabled DNS Prefetching
Firewall
Viral Infection
Bad Registry Entries
Poor Internet Connection
Though this error code is not fatal, nonetheless it is advisable to fix it to ensure you are able to browse the internet using Google Chrome.
Further Information and Manual Repair
The good news is that this error is quite easy to resolve. Even if you are not a technical whiz you can still manage to fix it by trying these easy and effective DIY methods we have listed below:
Method 1: Reload the Website link on Chrome or Check Your Internet Connection
Sometimes refreshing the webpage can resolve the issue easily. Try doing it. Reload the link by pressing Ctrl +R. This will refresh the webpage.
If it starts working then that’s great but if it doesn’t then it is advisable to check your internet connection. Disable and Enable the connection and then try browsing on Chrome again. If websites are accessible then the problem is resolved.
If the error persists then try other methods.
Method 2: Disable DNS Pre-fetching
Sometimes this error may occur due to enabled DNS pre-fetching. To resolve the issue, open Chrome, then click on the wrench key. Go to setting and under the bonnet and Privacy section, look for the DNS perfecting option.
If it is enabled, then uncheck it to disable DNS Pre-fetching. Save the changes and then close the browser. Now open it again and try browsing on Chrome. If error 101 does not appear and you are able to access websites then the issue is fixed.
Method 3: Scan for Viruses
Another way to fix this is to download and run a powerful antivirus. Scan and remove viruses to fix the problem.
Method 4: Check the permission for your temporary folder
As mentioned above, another underlying reason for error 101 can be Google Chrome installer was unable to create a temporary directory on your system during the installation process.
To resolve it, check the permission for your temporary folder. Here’s how to do it: First go to the start menu and type Run. Now enter one of the following directories in the text fields
1. Windows XP: %USERPROFILE%Local Settings
2. Windows Vista: %USERPROFILE%AppDataLocal
After that press OK. This will open a new window. In the Window that opens, right-click the temp folder. Now select properties and press the security tab to continue. In the group and user names section, select your user profile name.
In the permissions, section verify that the checkboxes for READ, WRITE, and READ & EXECUTE permissions in the DENY column are not selected. After you have verified, click apply and then ok. Now try reinstalling the Google Chrome browser again on your system.
Method 5: Remove Bad Entries by Cleaning the Registry
Bad entries and cookies saved in the registry can also lead to error 101. You can remove them manually but that will take a great deal of time and can be slightly difficult if you are not technically sound.
Therefore, it is advisable to download Restoro. This is a user-friendly PC Fixer integrated with a registry cleaner that scans and removes all registry issues in a few clicks. It removes all the bad entries and junk files cluttering the registry and repairs it instantly.
Click here to download Restoro.
In today's age, free cloud storage is no longer anything exclusive and plenty of companies will offer some free amount of it in hopes that you will buy a premium plan. Among plenty of starter and free options, there are of course some that are more generous and more appealing and offer a larger quantity of free space and even some other services.
In this article, we are taking a look and recommending some of the best ones in our opinion.
Google drive
First on the list is of course google with its google drive. With an amazing 15GB of free could storage just given to anyone who makes a google account this had to be the first recommendation. Also since google drive is requiring a google account you will be given all google office tools for free as well as the Gmail service. Completely free 15GB at your fingertips if you do not mind google tracking policies.
Microsoft one drive
Another company on the list, with only 5GB storage seems little compared to google this entry was simply included because google Microsoft also offers you Office 365 WEB for free with skype along with their Hotmail. So all in all another full package of apps with some free storage that requires also just an account.
IceDrive
With the free offer of 10GB this comes as an easy recommendation, IceDrive is a cloud storage company that is not offering anything of productivity apps but it has some great features in their cloud solution like being able to see encrypted files in your cloud. All you have to do to get this 10GB of storage is to make a free account.
MEGA
With an amazing 20GB of free storage, MEGA is certainly one that gives the most space for free. Sadly a few years ago it was hacked and files and user information were leaked, for that reason, it is on our last place of recommendation but if you are not worried about their security and plan just to use this as a temporary file sharing service with that amount I am sure it will fill your needs.
Long working hours on a laptop can have some issues with laptop heating and thus slowing down. Today we will take a look at how can you prevent it from heating and keep it in a normal temperature range so it lasts longer and works better.
Close unnecessary programs or browser tabs
Usually, the main reason for high laptop temperature is the heavy and constant workload. Of course, the solution is very simple, turn off unnecessary browser tabs or applications running in the background, and less power will be needed for operation thus directly reducing workload and temperature.
Place it on a hard flat surface
Laptops generally have vents on the side and even under them, these vents, of course, are made so hot air is disposed of through them but if they are covered that will create issues. Placing computers on textiles, pillows, and legs can obstruct their venting holes and increase heat also since they are materials that are not taking heat away.
Your best practice should be placing the laptop onto a hard flat surface so air can flow freely and if you need to keep it in your lap there are lap desks made for this purpose.
Clean the laptop
With some good cleaning, the laptop can stop overheating, and generally, it will be cooler. Vents that has for ventilation can get clogged over large periods of time due to dust which is always present. Compressed air can be a quick easy solution to open the vents and redust it. Other methods include a compressor, vacuum, or brush in order to quickly remove any dust clogs. Taking it into service for complete redusting and paste change is also a great option.
Place it on the dedicated pad
There is some disagreement about using dedicated cooling pads for laptops, some say they are not effective at all, and some swear by them but from my experience good paired laptop and pad can indeed help with cooling it down. Usually, cooling pads will come with fans that will take away heat from the laptop itself reducing its overall heat.
Change your Windows power plan
If your laptop is constantly hot but you are not doing much with him check Windows power settings. There is a good chance it is set to run on a high-performance plan and if this is the case switch it back to a balanced power setting. Power plan like high performance will drain more power and more power will mean more heating. Of course, this will affect performance as well but for regular work that excludes some power gaming, video, and picture manipulations and other demanding tasks this power plan will work just fine.
Take control of the fans inside your laptop
Internal cooling is important and sometimes fans are not running to their full capacity so increasing their speed or changing their plan of work can cool down the computer nicely. Some laptops have fans controlling application already on them, especially gaming laptops but most of them do not. If your laptop does not have it, go to your laptop brand website and see if such an application exists for your model, if it does, download and install it but if there is no such application try general free ones like SpeedFan or Argus Monitor.
Reduce voltage of CPU and GPU
How more power means more heat, reducing the power that CPU and/or GPU take can be reduced inside BIOS by lowering voltage of these 2 components. First, go to BIOS and write down the voltage that is currently assigned to your CPU and/or GPU so you can bring it back if ever needed, also take note that reducing voltage and thus power will not affect negatively your components but increasing it thus overclocking can and will so be careful when bringing voltage back not to overdo it. You can always also reset your BIOS settings to bring them back to factory settings.
Do not use the laptop when charging it
When the laptop is placed on the charger in order to be charged and used at the same time, more power is drawn to it, and since the battery is taking electric charge instead of providing it more heat will be generated now since two different sources will be generating it, the battery itself and computer. When you really can not wait for the laptop to be charged, use it, but turn it off and wait to be fully charged if you can.
There are instances when you open a picture or an image in the Windows Photo Viewer and instead of displaying the image, it displays nothing and you’ll see an error message instead that says, “Windows Photo Viewer can’t display this picture because there might not be enough memory available on your computer”.
Although this may look like a clear-cut issue of less storage space or low RAM in your computer, that’s not always the case. Security experts noticed that even when your computer has enough resources and disk space, this kind of problem could still occur. So if you experience the same thing, you need to check the Color Profile of your screen. For more information, refer to the detailed instructions provided below but before you proceed, make sure that you close some processes in the Task Manager or restart your computer and see if it helps in fixing the problem. You can also try using the Disk Cleanup tool. To use it, refer to these steps:
Tap the Win + R keys to open the Run dialog box and then type “cleanmgr” in the field and hit Enter to open the Disk Cleanup window.
After that, select the drive you want to clean.
Now click OK to clean the disk and restart your computer.
If the Disk Cleanup tool didn’t help in resolving the issue, refer to the instructions below.
Step 1: In the search box, type “color management” and then select the “Change advanced color management settings for display” option from the search results. Or you could simply go to Settings > System > Display, Advanced display settings, and from there, select display and click on the Display adapter properties of Display.
Step 2: Next, switch to the Color Management tab and click on the Color Management button.
Step 3: Select the monitor where you’re getting the “Windows Photo Viewer can’t display this picture because there might not be enough memory available on your computer” error in the next window. And if you have two displays, make sure that you select the primary display. You also have an option to identify the monitor.
Step 4: Once confirmed, select the “Use my settings for this device” checkbox.
Step 5: After that, select the Profile listed under the “Profiles associated with this device” option and then click on Remove.
Step 6: Next, go to the Advanced tab and make sure that all settings are set to System default which includes a device profile, perceptual images, rendering intent, Relative Colorimetric, and many more.
Step 7: Once you’re done, you have to restart your computer and then try to open the same image you were trying to open earlier and then check if you can now open it instead of seeing the error.
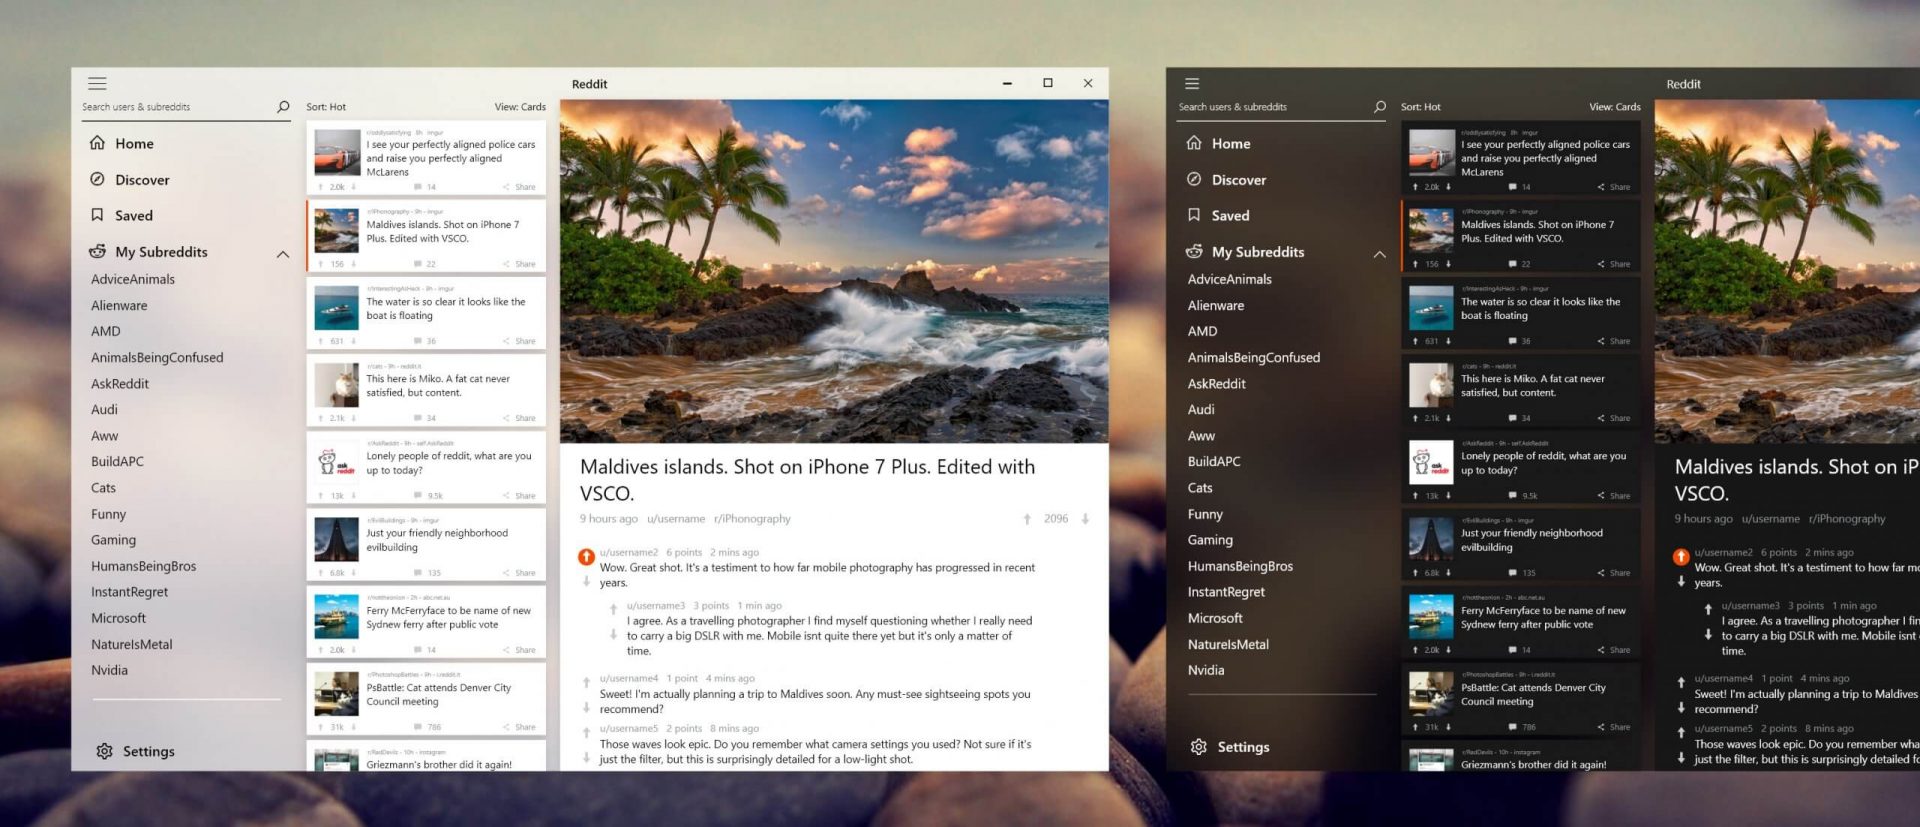
Reddit is one of the most popular websites in the world and how Microsoft is opening doors to everyone in its new store Reddit took a logical step and made a Progressive web application and placed it in it.
Being a Progressive web app makes it more familiar and feels like a home experience using it for a lot of Reddit users.
Reddit itself has a large community and active topics discussions all the time about anything. Bringing it to Windows as an application is, in my opinion, a great move since as an application it is independent, more light-weighted, and offering some other advantages specifically tied to being a standalone windows application.
Everyone familiar with and using the Reddit website will feel right at home in this app and you can start using it right away.
As you know, Windows 10 comes with the option to create Mobile Hotspot for other devices. This allows you to share your Ethernet connection. However, there are times when one of your devices might fail to reconnect to the mobile hotspot again. For instance, you moved out of the Wi-Fi range because you have somewhere to be and whatnot and when you’re back you find that you are now unable to reconnect to the Windows 10 Hotspot or the shared network. Although you can always restart the mobile hotspot to resolve the problem, however, it might only be a temporary fix. So in this post, you will be given options for a much better solution to the problem.
This kind of problem seems unusual and does not occur that often. To fix it, you can try to set up DNS on your Windows 10 device and then configure the settings on the mobile device. It seems that what’s happening here is that the mobile device is unable to lock on to the Mobile Hotspot when the IP address changes for some reason.
Option 1 – Try changing the DNS settings on your laptop
In this option, you need to make sure that IPv4 and IPv6 are selected on your Ethernet connection. You also have to change the Preferred DNS server as well as the Alternate DNS server to 8.8.8.8 and 8.8.4.4, respectively. You also have to validate the settings before you exit just to ensure that you’ve entered everything correctly. After that, open Command Prompt and run the ipconfig command and then take note of the IP address, Gateway DNS 1 and DNS 2.
Option 2 – Try changing the Wi-Fi settings on your mobile device
This option should be mostly the same on all your mobile devices. And given that OEMs build their customization and skin, you might have to fiddle around a little to get the settings. Refer to the steps below to change the Wi-Fi settings:
Go to the Settings of your mobile device and tap on Wi-Fi.
Then click the Mobile Hotspot connection that you’ve created on your laptop.
After that, input the password and tap the Advanced options.
From there, tap on IP settings and select the Static option instead of DHCP.
Now you have to enter the IP address, Gateway, DNS 1, and DNS 2 of the laptop you’ve taken note of earlier and that’s it.
Note: If you are already connected to the Mobile Hotspot, long press on the Wi-Fi network and select the Modify Network option and then follow the steps given above to change from DHCP to static. Once you’re done, your mobile device should now be able to connect to the Windows 10 Mobile Hotspot all the time.
Recently, a number of Windows 10 users getting an error on their computers that state, “Windows can’t find one of the files in this theme”. According to the affected users, this error occurs at random times even when they didn’t make any changes to their computer’s theme prior to getting the error. If you are one of these users, read on as this post will help you resolve this problem.
If you click on the Yes button of the dialog box where the error is displayed, it won’t fix the problem as you will still get the same error from time to time. This kind of error could be caused by the executable file named “SettingSyncHost.exe”. It is possible that this executable file is unable to sync your theme all over your computer. On the other hand, it could also be due to some problems with the active theme. To resolve this issue, you can try to change the active theme, or disable the custom screensaver or disable theme syncing on your computer, as well as run a System File Checker or run the DISM tool. For more instructions, follow the options given below.
Option 1 – Try to change the active theme
The first thing you can do to fix the error is to change the active theme of your computer since the SettingSyncHost.exe file might not be able to properly sync the theme on the computer.
Go to Settings and click on Personalization.
Next, click on Themes and scroll down to apply a theme, and change the theme of the operating system.
After that, tap the Win + R keys to open the Run dialog box and type “%windir%ResourcesThemes” in the field, and then tap Enter to open the folder where the theme files are located.
Once you’re done, right-click and select delete for the active theme to remove the theme and its resources. This should fix the root cause of the problem. If not you can try to create a new Windows 10 theme and save it.
Option 2 – Try to disable the custom screensaver
The custom screensaver is a part of the mechanism of the lock screen. Although they were needed in the earlier Windows versions to prevent the discoloration of CRT monitor screens, they are no longer needed in the current version of Windows. Thus, you can try to disable it as it could be the one that’s causing the problem.
Click on the Start button and go to Settings > Personalization > Lock screen.
Here, scroll down and click on the Screen Saver settings.
After that, select the “Screen saver to (None)” option from the drop-down menu. This will disable the custom screensaver.
Option 3 – Try to disable theme syncing on your computer
You could also try to disable the theme sync feature to fix the problem. This has worked out for some users. To do so, follow these steps:
Click on the Start button and go to Settings > Account > Sync your settings.
From there, toggle off Themes in the individual sync settings column. This will disable the Theme syncing.
Restart your computer and see if the problem is now fixed.
Option 4 – Run the DISM tool
The next thing you can do is run the DISM tool. This tool is known to repair potentially corrupted files in your system as having them could also system issues like the “Windows can’t find one of the files in this theme” error. To repair these corrupted system files, you can run the DISM commands:
Tap the Win + X keys and click on the “Command Prompt (Admin)” option.
After that, input each one of the commands listed below sequentially to execute them:
Dism /Online /Cleanup-Image /CheckHealth
Dism /Online /Cleanup-Image /ScanHealth
Dism /Online /Cleanup-Image /RestoreHealth
Once you’ve executed the commands given above, restart your computer and check if the problem is now fixed.
Option 5 – Run the System File Checker
System File Checker or SFC is a built-in command utility that helps in restoring corrupted files as well as missing files. It replaces bad and corrupted system files to good system files that might be the cause why you’re getting the “Windows can’t find one of the files in this theme” error. To run the SFC command, follow the steps given below.
Type “cmd” in the Start search and then right-click on the appropriate search result.
Next, select “Run as administrator” to open Command Prompt with admin privileges.
After opening Command Prompt, type in sfc /scannow
The command will start a system scan which will take a few whiles before it finishes. Once it’s done, you could get the following results:
Windows Resource Protection did not find any integrity violations.
Windows Resource Protection found corrupt files and successfully repaired them.
Windows Resource Protection found corrupt files but was unable to fix some of them.
Now restart your computer and see if the problem is fixed or not.
The program can’t start because MSVCR71.dll is missing from your computer, Try reinstalling the program to fix this problem.
If by any chance you have encountered this error know that you are not alone and that this is a solvable error. In this guide, we will show you how to fix this error.
Usually, the MSVCR71.dll missing error is met when a new application is installed. So let us dive right into it and solve it.
Reinstall application
If only a certain application is reporting this error, try reinstalling it, there is a high possibility that by some mistake application was not properly installed and corrupted or removed the MSVCR71.dll file. If this is the case, reinstallation will help.
Check recycle bin
like mentioned above, if the application has by mistake deleted the file, open recycle bin and try to locate it there. If this is the case, restore it from recycle bin and everything should be back in normal working conditions.
Download a new version of the file
If the previous 2 methods failed and you still get the missing error, try downloading the file from Microsoft and placing it in C:\Windows\SysWOW64
Reinstall C++ redistributable
Having an incorrect C++ redistributable package can be an issue of the problem, get the latest version from Microsoft and reinstall it.


 Reddit is one of the most popular websites in the world and how Microsoft is opening doors to everyone in its new store Reddit took a logical step and made a Progressive web application and placed it in it.
Being a Progressive web app makes it more familiar and feels like a home experience using it for a lot of Reddit users.
Reddit itself has a large community and active topics discussions all the time about anything. Bringing it to Windows as an application is, in my opinion, a great move since as an application it is independent, more light-weighted, and offering some other advantages specifically tied to being a standalone windows application.
Everyone familiar with and using the Reddit website will feel right at home in this app and you can start using it right away.
Reddit is one of the most popular websites in the world and how Microsoft is opening doors to everyone in its new store Reddit took a logical step and made a Progressive web application and placed it in it.
Being a Progressive web app makes it more familiar and feels like a home experience using it for a lot of Reddit users.
Reddit itself has a large community and active topics discussions all the time about anything. Bringing it to Windows as an application is, in my opinion, a great move since as an application it is independent, more light-weighted, and offering some other advantages specifically tied to being a standalone windows application.
Everyone familiar with and using the Reddit website will feel right at home in this app and you can start using it right away.