For three decades, Wolfram Mathematica has defined the state of the art in technical computing and provided the principal computation environment for millions of innovators, educators, students, and others around the world.
Widely admired for both its technical prowess and elegant ease of use, Mathematica provides a single integrated, continually expanding system that covers the breadth and depth of technical computing—and seamlessly available in the cloud through any web browser, as well as natively on all modern desktop systems.
With energetic development and consistent vision for three decades, Mathematica stands alone in a huge range of dimensions, unique in its support for today's technical computing environments and workflows.
A Vast System, All Integrated
Mathematica has nearly 5,000 built-in functions covering all areas of technical computing—all carefully integrated so they work perfectly together, and all included in the fully integrated Mathematica system.
Not Just Numbers, Not Just Mathematica But Everything
Building on three decades of development, Mathematica excels across all areas of technical computing—including neural networks, machine learning, image processing, geometry, data science, visualizations, and much more.
Unimaginable Algorithm Power
Mathematica builds in unprecedentedly powerful algorithms across all areas—many of them created at Wolfram using unique development methodologies and the unique capabilities of the
Wolfram Language.
Higher Level Than Ever Before
Superfunctions, meta-algorithms... Mathematica provides a progressively higher-level environment in which as much as possible is automated—so you can work as efficiently as possible.
Everything Is Industrial Strength
Mathematica is built to provide industrial-strength capabilities—with robust, efficient algorithms across all areas, capable of handling large-scale problems, with parallelism, GPU computing, and more.
Powerful Ease of Use
Mathematica draws on its algorithmic power—as well as the careful design of the Wolfram Language—to create a system that's uniquely easy to use, with predictive suggestions, natural language input, and more.
Documents As Well As Code
Mathematica uses the Wolfram Notebook Interface, which allows you to organize everything you do in rich documents that include text, runnable code, dynamic graphics, user interfaces, and more.
The Code Makes Sense
With its intuitive English-like function names and coherent design, the Wolfram Language is uniquely easy to read, write, and learn.
Make Your Results Look Their Best
With sophisticated computational aesthetics and award-winning design, Mathematica presents your results beautifully—instantly creating top-of-the-line interactive visualizations and publication-quality documents.
150,000+ Examples
Get started with almost any project with help from 150,000+ examples in the
Documentation Center, over 10,000 open-code Demonstrations in the
Wolfram Demonstrations Project—and a host of other resources.
Instant Real-World Data
Mathematica has access to the vast
Wolfram Knowledgebase, which includes up-to-the-minute real-world data across thousands of domains.
Seamless Cloud Integration
Mathematica is now
seamlessly integrated with the cloud—allowing sharing, cloud computing, and more in a unique and powerful hybrid cloud/desktop environment
Connected to Everything
Mathematica is built to be connected to everything: file formats (180+), other languages,
Wolfram Data Drop, APIs, databases, programs, the
Internet of Things,
devices—and even distributed instances of itself.
If you would like to
read more helpful
articles and tips about various software and hardware visit
errortools.com daily.


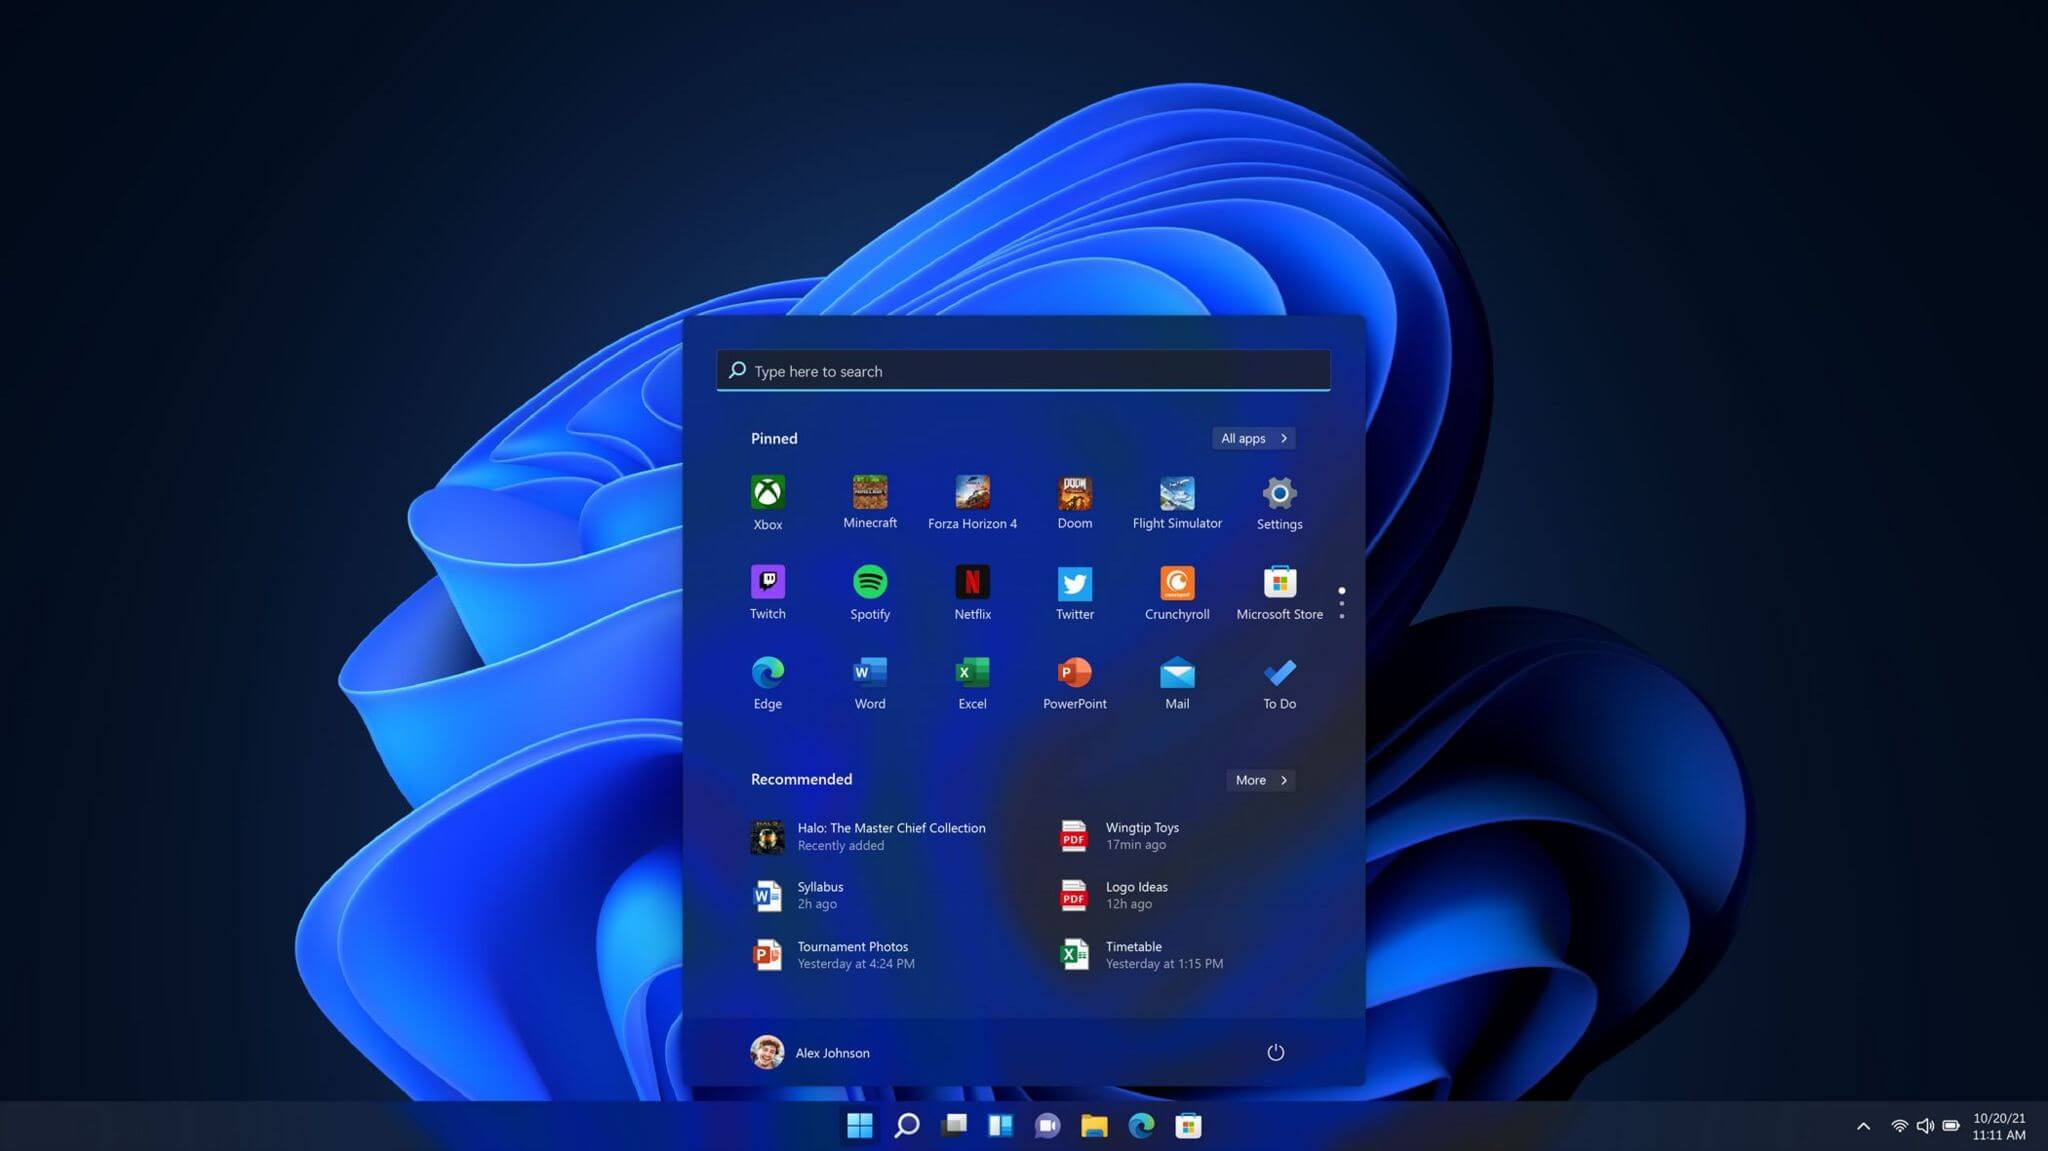 One of the first things that everyone saw when Microsoft has unveiled Windows 11 is its Start menu. Funny enough this is what has caused most of the divide among users, some find it interesting, and some do not like it. Truth is, it is different, and it is centered in the middle instead of the lower left part of the screen.
It has been confirmed however that the Start menu can be moved to any part of the screen so if you want, you could place it on the lower left as it has always been.
Live tiles do not longer exist in the Start menu, instead, we have styled simple icons.
One of the first things that everyone saw when Microsoft has unveiled Windows 11 is its Start menu. Funny enough this is what has caused most of the divide among users, some find it interesting, and some do not like it. Truth is, it is different, and it is centered in the middle instead of the lower left part of the screen.
It has been confirmed however that the Start menu can be moved to any part of the screen so if you want, you could place it on the lower left as it has always been.
Live tiles do not longer exist in the Start menu, instead, we have styled simple icons.
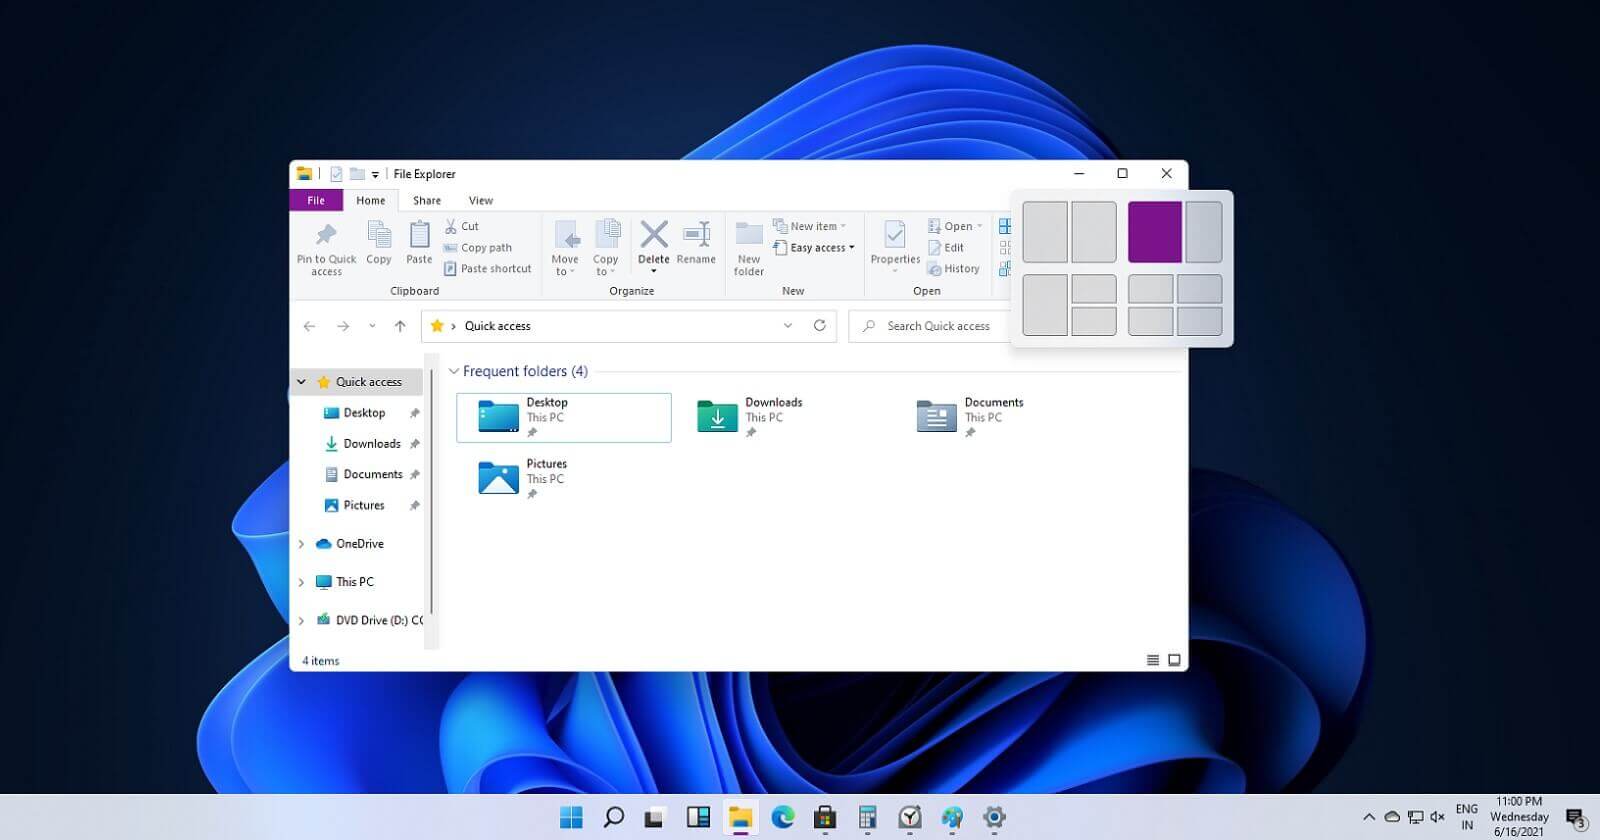 If you have used the cascade option in previous Windows versions then it is most likely that you will like the new Snap controls.
You can quickly snap windows side by side, or arrange them in sections on your desktop just by hovering over maximize button on the title bar.
If you have used the cascade option in previous Windows versions then it is most likely that you will like the new Snap controls.
You can quickly snap windows side by side, or arrange them in sections on your desktop just by hovering over maximize button on the title bar.
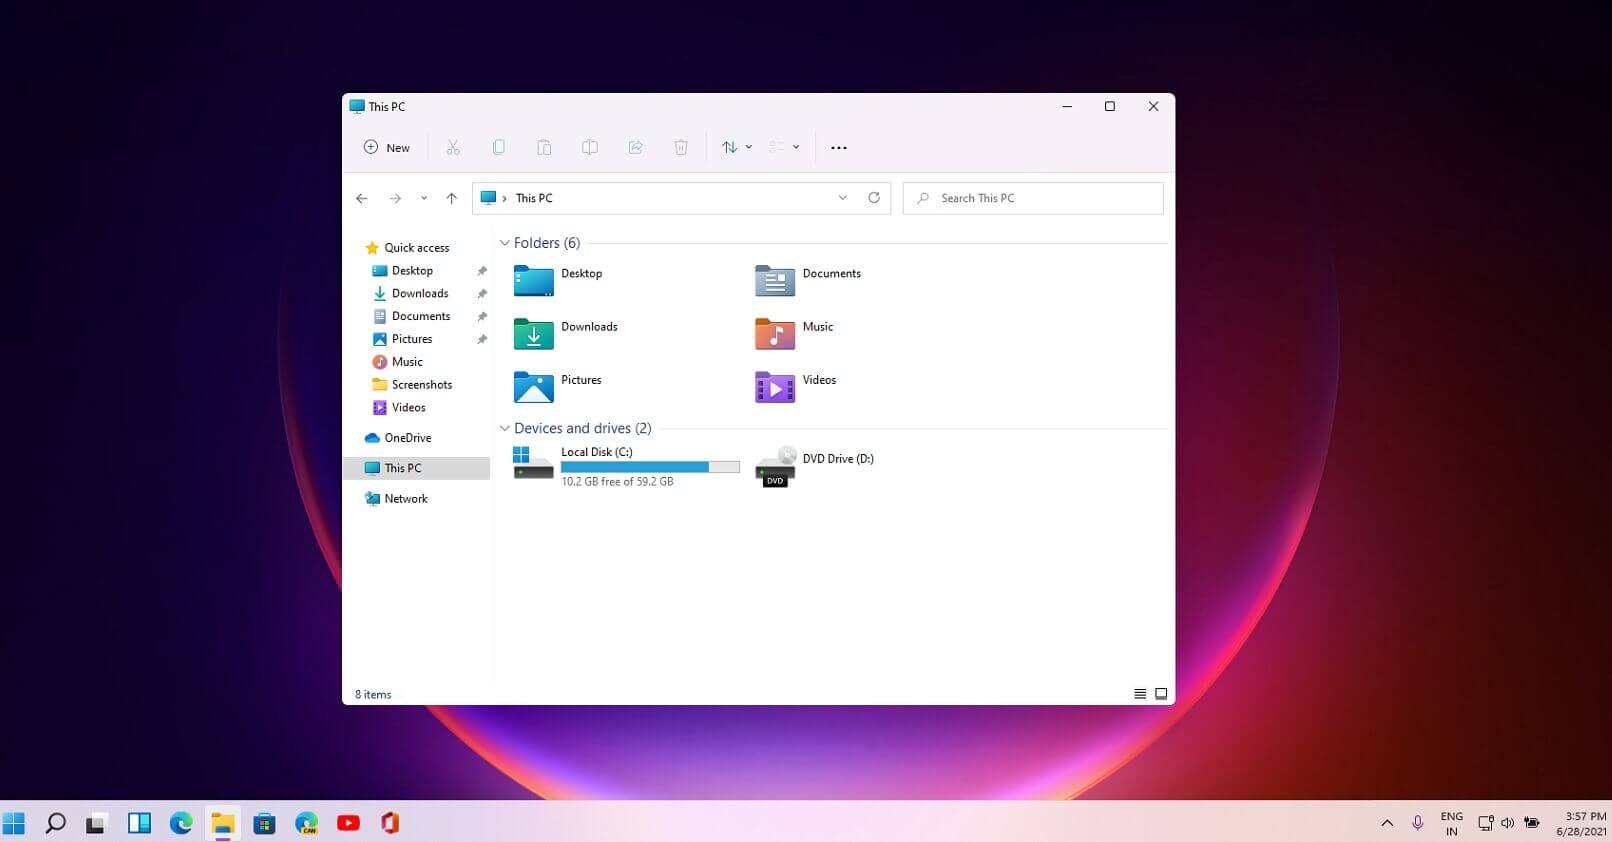 File explorer has gone through some visual and design changes, the ribbon on top has been completely removed and replaced with a header-like feature with a slick and clean design.
The header contains a nice organized and designed single row of icons like cut, paste, copy, rename, delete, and new folder icons.
File explorer has gone through some visual and design changes, the ribbon on top has been completely removed and replaced with a header-like feature with a slick and clean design.
The header contains a nice organized and designed single row of icons like cut, paste, copy, rename, delete, and new folder icons.
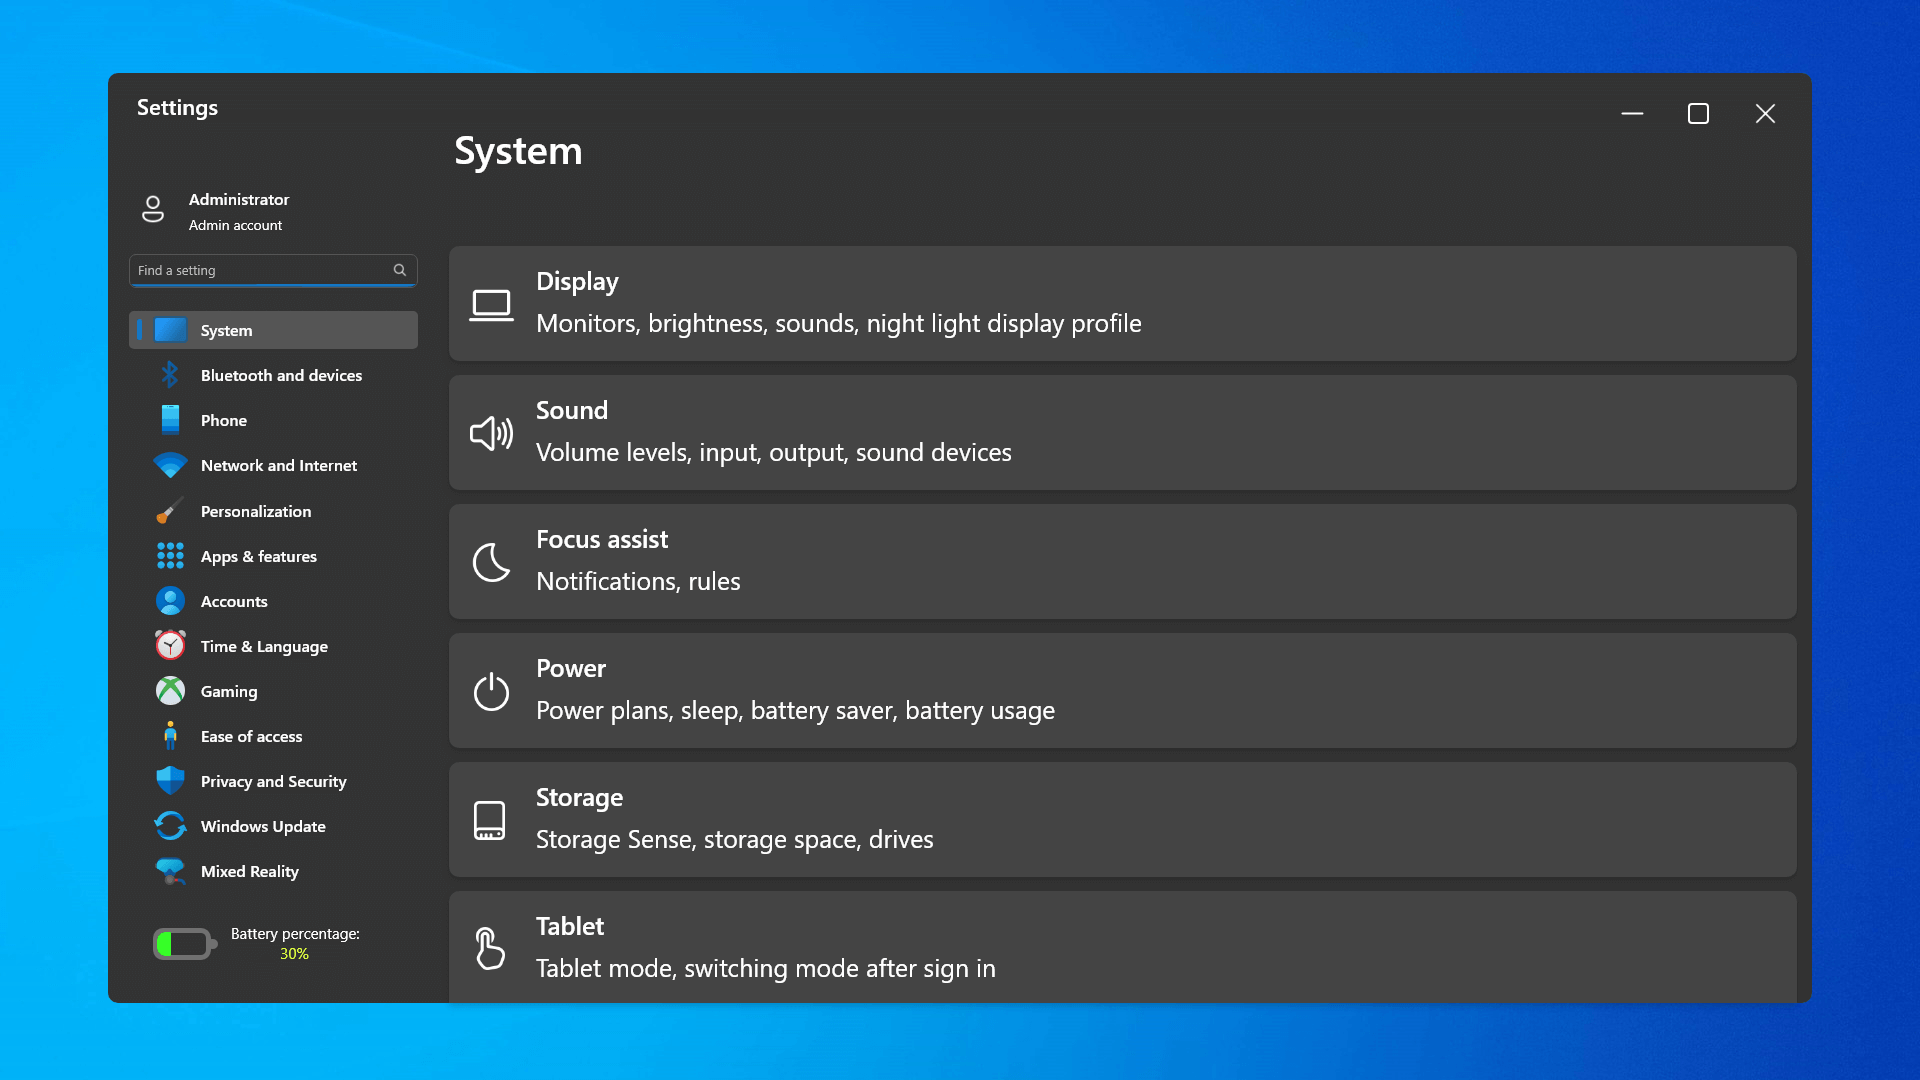 The settings app also has gone through visual and design changes. It has a new design that is very visually appealing and navigation has been simplified and more organized. Finding the right and desired setting is much faster and clearer now.
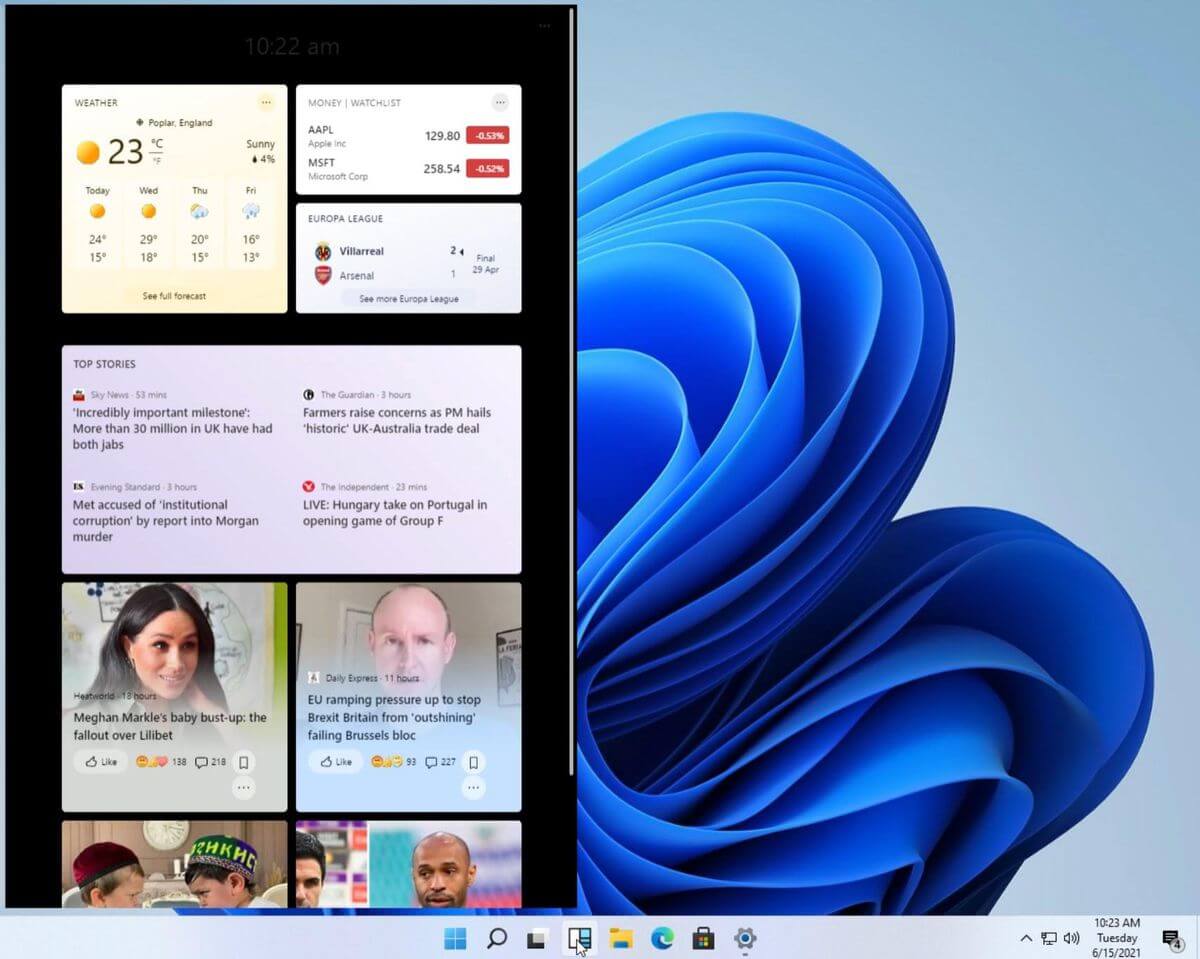 Yes, widgets are back but not like you remember them.
Instead of being all-time present at your desktop like once they used to be, now there is a button on the taskbar which brings the widget bar up that contains desired widgets. This way they are easily accessible and do not clutter desktops.
So far we have weather, news, calendar, and stocks widget but we will see how development on these goes. I expect to have community-made widgets like in old days for all of our needs.
Yes, widgets are back but not like you remember them.
Instead of being all-time present at your desktop like once they used to be, now there is a button on the taskbar which brings the widget bar up that contains desired widgets. This way they are easily accessible and do not clutter desktops.
So far we have weather, news, calendar, and stocks widget but we will see how development on these goes. I expect to have community-made widgets like in old days for all of our needs.
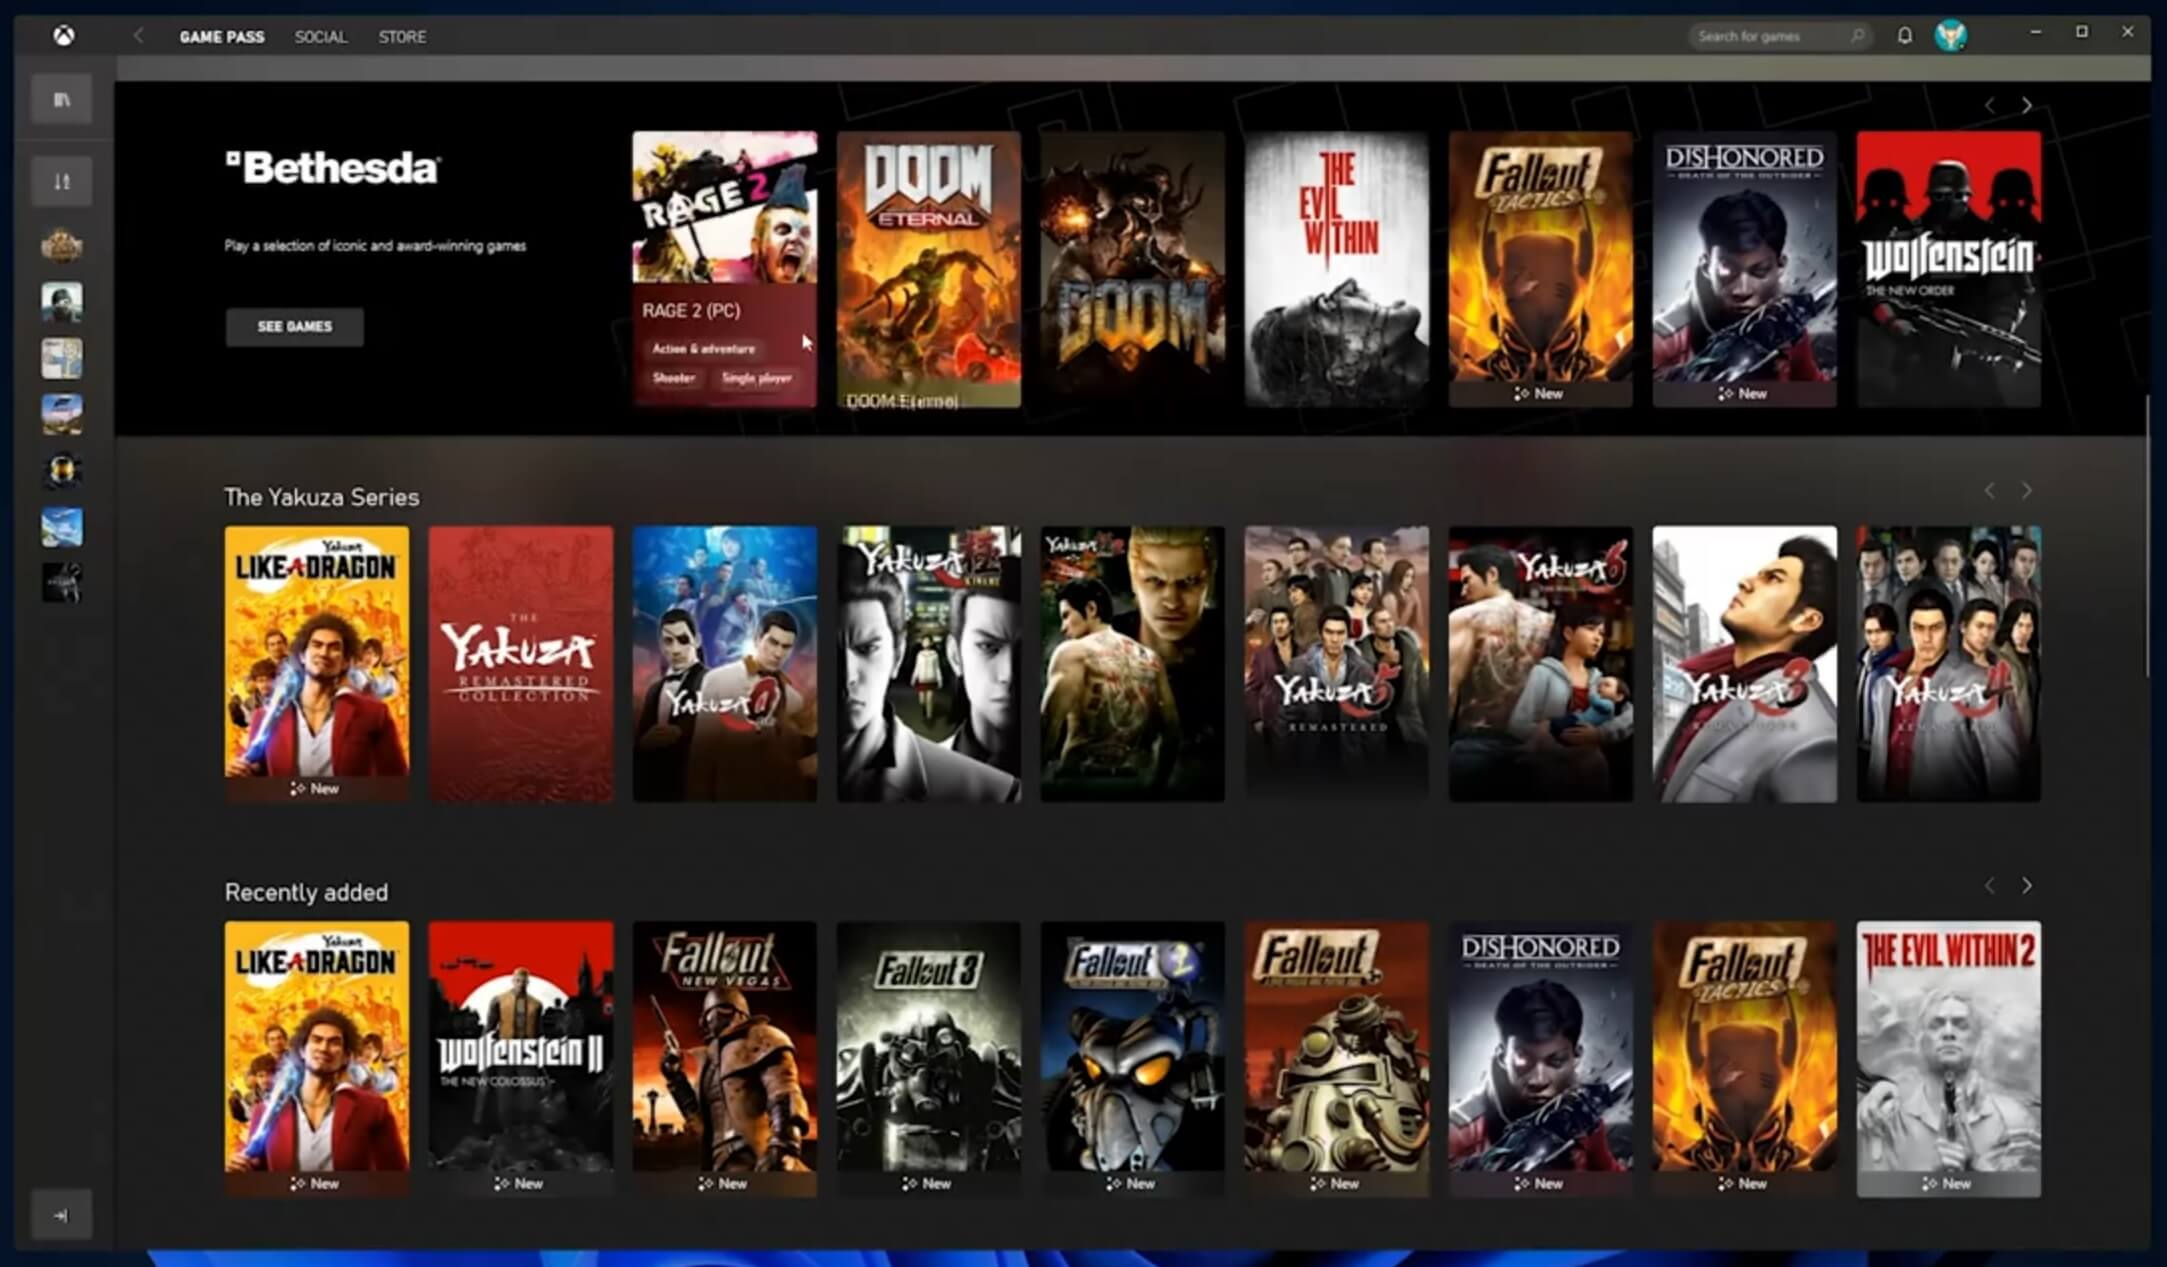 The new Xbox app is now integrated into Windows 11, offering quick access to Xbox Game Pass games, the social parts of the Xbox network, and the Xbox store.
 As widely known by now Windows 11 will require you to have a TPM 2.0 module capable CPU in order to install it.
This system requirement has caused a lot of controversies but essentially it seems that MS's goal is to protect your personal data by using this module.
The upside of course is that your data will be protected much more than in previous Windows versions, the downside, of course, will be that you will need newer hardware to run OS on it.
and that is essentially it, keep on tuned on more Windows 11 information and overall articles tied to PC and technology here at errortools.com
As widely known by now Windows 11 will require you to have a TPM 2.0 module capable CPU in order to install it.
This system requirement has caused a lot of controversies but essentially it seems that MS's goal is to protect your personal data by using this module.
The upside of course is that your data will be protected much more than in previous Windows versions, the downside, of course, will be that you will need newer hardware to run OS on it.
and that is essentially it, keep on tuned on more Windows 11 information and overall articles tied to PC and technology here at errortools.com  In run dialog type RegEdit and press ENTER
 In registry editor find HKEY_LOCAL_MACHINE\SYSTEM\CurrentControlSet\Services\LanmanServer\Parameters
Right-click on Parameters> New> DWORD 32
Name it IRPStackSize and change the value to 32
Save and reboot your computer.
In registry editor find HKEY_LOCAL_MACHINE\SYSTEM\CurrentControlSet\Services\LanmanServer\Parameters
Right-click on Parameters> New> DWORD 32
Name it IRPStackSize and change the value to 32
Save and reboot your computer. You will find yourself in the User Accounts window, inside deselect Users must enter a user name and password to use this computer. Press OK
 Sign in the window will pop up where you will have to type in your password and confirm it in order to start the feature.
 After typing in your password and confirming it, press OK. That's it, next time you wake your computer from hibernation or turn it ON, you will automatically be greeted with a desktop instead of a Windows login screen.