Logo

10 Worst Computer Viruses in history

Computers viruses, worms, ransomware, etc. are kinds of malicious software that no user should take lightly. On several occasions, we have touched upon security steps that each user should take in order to protect its identity and data. Sadly sometimes even when all precautions are taken some malware can still slip through and wreak havoc. Today we are looking at some of the worst or the best, depending on your view that has indeed wreaked plenty of havoc.

viruses10 worst computer viruses in history

In the list of the 10 most famous computer viruses below, we show the costs, dates, reach, and other key facts. First a note about terms: we use the words “virus” and “worm” interchangeably because most readers search for them that way. But there’s a subtle difference that we explain after the list.

1. Mydoom – $38 billion

The worst computer virus outbreak in history, Mydoom caused estimated damage of $38 billion in 2004, but its inflation-adjusted cost is actually $52.2 billion. Also known as Novarg, this malware is technically a “worm,” spread by mass emailing. At one point, the Mydoom virus was responsible for 25% of all emails sent.
Mydoom scraped addresses from infected machines, then sent copies of itself to those addresses. It also roped those infected machines into a web of computers called a botnet that performed distributed denial of service (DDoS) attacks. These attacks were intended to shut down a target website or server.

Mydoom is still around today, generating 1% of all phishing emails. That’s no small feat considering the 3.4 billion phishing emails sent each day. By that figure, Mydoom has taken on a life of its own, infecting enough poorly-protected machines to send 1.2 billion copies of itself per year, 16 years after its creation.
Though a $250,000 reward was offered, the developer of this dangerous computer worm was never caught.
Wondering what makes the world’s most secure computers so safe? See the Tech@Work guide: Upgrade to the World's Most Secure and Manageable PC

2. Sobig – $30 billion

The 2003 Sobig computer virus is actually another worm. It is second only to the Mydoom virus in its scope. The $30 billion figure is a worldwide total, including Canada, the U.K., the U.S., mainland Europe, and Asia. Several versions of the worm were released in quick succession, named Sobig.A through Sobig.F, with Sobig.F being the most damaging.
This cybercriminal program masqueraded as legitimate computer software attached to emails. It disrupted ticketing at Air Canada and interfered with countless other businesses. Despite its widespread damage, the creator of the successful bug was never caught.

3. Klez – $19.8 billion

Klez is a close third on the list of the worst computer viruses ever created. With nearly $20 billion in estimated damages, it infected about 7.2% of all computers in 2001, or 7 million PCs. The Klez worm sent fake emails, spoofed recognized senders and, among other things, attempted to deactivate other viruses.
As with other viruses and worms, Klez was released in several variants. It infected files, copied itself, and spread throughout each victim’s network. It hung around for years, with each version more destructive than the last.
Windows has come a long way since most of the computer viruses on this list hit the web. Thankfully, built-in protection with Microsoft Defender is always on the watch.

4. ILOVEYOU – $15 billion

The year 2000’s ILOVEYOU virus worked by sending a bogus “love letter” that looked like a harmless text file. Like Mydoom, this attacker sent copies of itself to every email address in the infected machine’s contact list. Shortly after its May 4 release, it had spread to more than 10 million PCs.
The virus was created by a college student in the Philippines named Onel de Guzman. Lacking funds, he wrote the virus to steal passwords so he could log into online services he wanted to use for free. He reportedly had no idea how far his creation would spread. This virus is also known as Loveletter.
Need to up your remote work security game before there’s another entry on the list of most deadly computer viruses? See our guide: How to Work Remotely and Securely

5. WannaCry – $4 billion

The 2017 WannaCry computer virus is ransomware, a virus that takes over your computer (or cloud files) and holds them hostage. The WannaCry ransomware ripped through computers in 150 countries, causing massive productivity losses as businesses, hospitals, and government organizations that didn’t pay were forced to rebuild systems from scratch.
The malware raged like wildfire through 200,000 computers worldwide. It stopped when a 22-year-old security researcher in the U.K. found a way to turn it off. Computers with out-of-date operating systems were hit especially hard. That’s why security experts always recommend updating your systems frequently.

Ransomware strikes again

In September 2020, one of the potentially largest computer virus attacks in medical history hit Universal Health Services. The U.S. hospital chain, which has more than 400 locations, was reportedly struck by damaging ransomware. The attack forced the cancellation of surgeries and made healthcare workers switch to paper records.

6. Zeus – $3 billion

The Zeus computer virus is an online theft tool that hit the web in 2007. A whitepaper by Unisys three years later estimated that it was behind 44% of all banking malware attacks. By then, it had breached 88% of all Fortune 500 companies, 2,500 organizations total, and 76,000 computers in 196 countries.
The Zeus botnet was a group of programs that worked together to take over machines for a remote “bot master.” It originated in Eastern Europe and was used to transfer money to secret bank accounts. More than 100 members of the crime ring behind the virus, mostly in the U.S., were arrested in 2010. It’s not as prominent today, but some of the virus’ source code lives on in newer botnet viruses and worms.

Zeus caused documented damage of $100 million. But the real cost in terms of lost productivity, removal, and undocumented theft is undoubtedly much higher. A $3 billion estimate, adjusted for inflation, puts this virus at a cost of $3.7 billion in today’s dollars.

7. Code Red – $2.4 billion

First observed in 2001, the Code Red computer virus was yet another worm that penetrated 975,000 hosts. It displayed the words “Hacked by Chinese!” across infected web pages, and it ran entirely in each machine’s memory. In most cases it left no trace in hard drives or other storage.
Financial costs are pegged at $2.4 billion. The virus attacked websites of infected computers and delivered a distributed denial of service (DDoS) attack on the U.S. White House’s website, www.whitehouse.gov. In fact, the White House had to change its IP address to defend against Cod Red.
Can your printer get a virus? See our cool infographic: The State of Printer Security

8. Slammer – $1.2 billion

The SQL Slammer worm cost an estimated $750 million across 200,000 computer users in 2003. This computer virus randomly selected IP addresses, exploiting vulnerabilities and sending itself on to other machines. It used these victim machines to launch a DDoS attack on several internet hosts, significantly slowing internet traffic.
The Slammer worm hit banks in the U.S. and Canada especially hard, taking ATMs offline in many locations. Customers of Toronto’s Imperial Bank of Commerce found themselves unable to access funds. The attack reared its ugly head again in 2016, launching from IP addresses in Ukraine, China, and Mexico.

9. CryptoLocker – $665 million

Thankfully, ransomware attacks like the 2013 CryptoLocker virus have dipped since their 2017 peak. This malware attacked upwards of 250,000 machines by encrypting their files. It displayed a red ransom note informing users that “your important files encryption produced on this computer.” A payment window accompanied the note.
The virus’ creators used a worm called the Gameover Zeus botnet to make and send copies of the CryptoLocker virus. According to a report by security firm Sophos, the average ransomware attack costs a business $133,000. If we estimate that CryptoLocker hit 5,000 companies, that would put its total cost at $665 million.
Where will cybersecurity go next? See our guide: The Future of Cybersecurity

10. Sasser – $500 million

The Sasser worm was written by a 17-year-old German computer science student named Sven Jaschan. He was arrested at the age of 18 in 2004 after a $250,000 bounty was posted for the computer virus’ creator. A friend of Jaschan’s tipped authorities that the youth had penned not only the Sasser worm but also the damaging Netsky.AC attack.
Jaschan was given a suspended sentence after it was found he was a minor when he wrote the malware. The Sasser worm crashed millions of PCs, and though some reports put damages at $18 billion, the relatively low infection rate suggests a more likely cost of $500 million.
Other notable viruses

The top 10 worst computer viruses above are just the ugly tip of a gargantuan digital iceberg. With a million new malware programs popping up every 3 years, we may miss the forest for a few outstanding trees. Here are just a few more viruses that have wreaked havoc over the years:

Mimail: This worm tried to harvest data from infected machines to launch a string of DDoS attacks, but was relatively easy to remove.

Yaha: Yet another worm with several variants, thought to be the result of a cyber-war between Pakistan and India.

Swen: Written in C++, the Swen computer worm disguised itself to look like a 2003 OS update. Its financial cost has been pegged at $10.4 billion, but not reliably.

Storm Worm: This worm showed up in 2007 and attacked millions of computers with an email about approaching bad weather.

Tanatos/Bugbear: A 2002 keylogger virus that targeted financial institutions and spread to 150 countries.

Sircam: A computer worm from 2001 that used counterfeit emails with the subject line, “I send you this file in order to have your advice.”

Explorezip: This worm used fake emails to spread to every machine on thousands of local networks.

Melissa: The most dangerous computer virus in 1999, Melissa sent copies of itself that looked like NSFW pics. The U.S. FBI estimated cleanup and repair costs at $80 million.

Flashback: A Mac-only virus, Flashback infected over 600,000 Macs in 2012 and even infected Apple’s home base in Cupertino, Calif. In 2020, there’s now more malware on Macs than on PCs.

Conficker: This 2009 virus still infects many legacy systems and could do significant damage if it ever activates.

Stuxnet: This worm is reported to have destroyed Iranian nuclear centrifuges by sending damaging instructions.
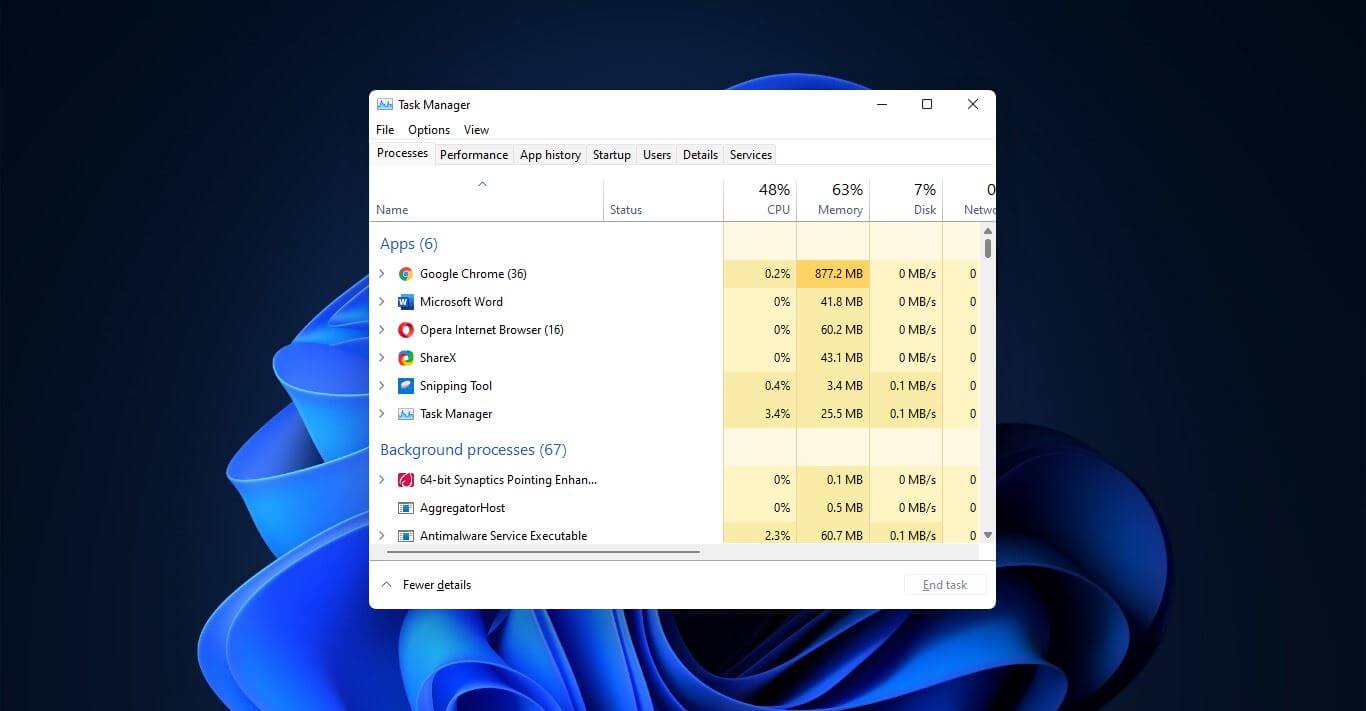
Do You Need Help with Your Device?

Our Team of Experts May Help
Troubleshoot.Tech Experts are There for You!
Replace damaged files
Restore performance
Free disk space
Remove Malware
Protects WEB browser
Remove Viruses
Stop PC freezing
GET HELP
Troubleshoot.Tech experts work with all versions of Microsoft Windows including Windows 11, with Android, Mac, and more.

Share this article:

You might also like

Easy Remove ShopAtHome Guide

ShopAtHome Toolbar is a browser extension. This extension tracks information when you visit a website, whether typing in the URL or clicking a link, the Browser App recognizes whether the URL is that of an Affiliate Store, and, if so, may redirect you through the affiliate network site to the Affiliate Store’s website, at which time, a tracking cookie will be placed in your browser. This cookie is the tracking mechanism that will follow your transaction with the Affiliate Store.

During installation, the Browser App may automatically change the default search engine used by your Web browser, whether via a built-in search box or otherwise, to our search engine. Upon installation and setup, it defines an auto-start registry entry which makes this program run on each Windows boot for all user logins. A scheduled task is added to Windows Task Scheduler in order to launch the program at various scheduled times.

Multiple anti-virus scanners have detected possible malware in ShopAtHome.com Helper and are therefore classified as potentially unwanted and flagged for optional removal.

About Browser Hijackers

Browser hijacking is actually a form of an unwanted program, often a web browser add-on or extension, which then causes modifications in the browser’s settings. Browser hijackers can do a variety of things on your PC. The idea would be to force users to visit certain sites that are looking to increase their visitor traffic and generate higher ad income. A lot of people assume that these kinds of sites are legitimate and harmless but that is incorrect. Almost every browser hijacker poses an actual threat to your online safety and it is important to classify them under privacy risks. They do not just screw up your web browsers, but browser hijackers could also modify the system registry, leaving your computer or laptop susceptible to other forms of hacking.

Browser hijacking signs and symptoms

Signs that your web browser is hi-jacked include: 1. the home page of your web browser is changed suddenly 2. you find yourself regularly directed to some other web page than the one you actually meant 3. The default search page of the browser is changed 4. you find many toolbars in your web browser 5. you see a lot of pop-ups on your computer screen 6. your internet browser starts running sluggishly or displays frequent glitches 7. Inability to navigate to particular sites, particularly anti-malware as well as other security software sites.

How browser hijacker infects PCs

Browser hijackers infect computers through malicious email attachments, downloaded infected documents, or by checking out infected internet sites. They also come from add-on programs, also called browser helper objects (BHO), web browser extensions, or toolbars. Other times you may have unintentionally accepted a browser hijacker as part of a software program package (generally freeware or shareware). Popular examples of browser hijackers include Conduit, CoolWebSearch, Coupon Server, OneWebSearch, RocketTab, Delta Search, Searchult.com, and Snap.do.

The best ways to get rid of browser hijackers

Some hijackers could be removed simply by uninstalling the related freeware or add-ons from the Add or Remove Programs in the Microsoft Windows Control Panel. Sadly, the majority of the software packages utilized to hijack a web browser are deliberately designed to be hard to detect or remove. Besides, browser hijackers can modify the Windows registry so it can be very difficult to fix manually, particularly if you are not a very tech-savvy person.

Help! Malware Preventing Anti-virus Installation And Access To The Web

All malware is inherently dangerous, but certain kinds of malware do a lot more damage to your computer or laptop than others. Some malware sits in between the computer and the net connection and blocks some or all websites that you would like to visit. It might also block you from adding anything on your PC, especially anti-malware applications. If you’re reading this, odds are you’re stuck with a virus infection that is preventing you to download and/or install Safebytes Anti-Malware software on your PC. Do as instructed below to get rid of the malware by alternate methods.

Boot your PC in Safe Mode

In the event the malware is set to load at Windows startup, then booting in Safe Mode should avoid it. Just the minimum required applications and services are loaded when you boot your personal computer in Safe Mode. To launch your Windows XP, Vista, or 7 PCs in Safe Mode with Networking, please do as instructed below. 1) Press the F8 key repeatedly as soon as your PC boots, but before the big Windows logo shows up. This will conjure up the “Advanced Boot Options” menu. 2) Make use of the arrow keys to choose Safe Mode with Networking and press ENTER. 3) Once you get into this mode, you should have online access again. Now, obtain the virus removal application you need by utilizing the browser. To install the application, follow the guidelines in the installation wizard. 4) Right after installation, do a full scan and let the software delete the threats it detects.

Use an alternate web browser to download a security program

Malicious program code can exploit vulnerabilities in a particular browser and block access to all antivirus software websites. The best solution to avoid this problem is to choose a browser that is well known for its security features. Firefox contains built-in Phishing and Malware Protection to keep you secure online.

Install and run anti-virus from a USB drive

Here’s another solution which is using a portable USB anti-virus software package that can check your system for viruses without the need for installation. Try these simple actions to clean up your affected computer by using portable anti-malware. 1) Make use of another virus-free computer system to download Safebytes Anti-Malware. 2) Put the USB drive into the clean PC. 3) Double click on the downloaded file to run the installation wizard. 4) When asked, choose the location of the USB drive as the place where you would like to store the software files. Follow the on-screen instructions to finish the installation. 5) Now, plug the thumb drive into the corrupted system. 6) Run the Safebytes Anti-malware directly from the pen drive by double-clicking the icon. 7) Run Full System Scan to identify and clean-up up all types of malware.

SafeBytes Anti-Malware Features

If you’re planning to purchase anti-malware for your computer system, there are many brands and utilities for you to consider. Some are very good ones, some are ok types, while some are simply just fake anti-malware software that could harm your PC themselves! While looking for an antimalware tool, pick one that provides reliable, efficient, and total protection against all known computer viruses and malware. While considering the dependable software programs, Safebytes AntiMalware is undoubtedly the highly recommended one. Safebytes is among the well-established computer solutions firms, which provide this complete anti-malware tool. With its cutting-edge technology, this application can help you remove multiples types of malware including computer viruses, worms, PUPs, trojans, adware, ransomware, and browser hijackers. SafeBytes anti-malware takes computer protection to a totally new level with its enhanced features. Here are a few popular features found in this program: Antimalware Protection: With a critically acclaimed anti-malware engine, SafeBytes offers multilayered protection that is intended to find and get rid of viruses and malware that are hidden deep inside your computer’s operating system. Live Protection: SafeBytes provides complete and real-time security for your PC. It’ll continuously monitor your pc for hacker activity and also gives users sophisticated firewall protection. Extremely Speed Scanning: SafeBytes Anti-Malware has got a multi-thread scan algorithm that works up to 5x faster than any other anti-malware software. Web Filtering: SafeBytes provides an instant safety rating on the pages you are about to check out, automatically blocking harmful sites and make sure that you’re certain of your online safety while browsing the net. Lightweight Application: This software program is not “heavy” on the computer’s resources, so you will not find any overall performance troubles when SafeBytes is operating in the background. 24/7 Customer Service: Skilled technicians are at your disposal 24/7! They will quickly fix any technical issues you might be encountering with your security software.

Technical Details and Manual Removal (Advanced Users)

If you wish to manually remove ShopAtHome without the use of an automated tool, it may be possible to do so by removing the program from the Windows Add/Remove Programs menu, or in cases of browser extensions, going to the browsers AddOn/Extension manager and removing it. You will likely also want to reset your browser. To ensure the complete removal, manually check your hard drive and registry for all of the following and remove or reset the values accordingly. Please note that this is for advanced users only and may be difficult, with incorrect file removal causing additional PC errors. In addition, some malware is capable of replicating or preventing deletion. Doing this in Safe Mode is advised.

The following files, folders, and registry entries are created or modified by ShopAtHome

Files: File %PROGRAMFILESSelectRebatsToolbarShopAtHomeToolbar.dll. File %WINDIRDownloaded Program Filesinstall.inf. File %WINDIRDownloaded Program Filessahagent-cdt1004.exe. File %LOCALSETTINGSTempsahagent-cdt1004.exe. File %LOCALSETTINGSTempcdt1004.sah. File %LOCALSETTINGSTempsetup4002b.cab. File %LOCALSETTINGSTempsetup4002b.ini. File %SYSDIRap9h4qmo.ini. Search and Delete: ap9h4qmo.ini. File %SYSDIRap9h4qmo.exe. File %SYSDIRBundleLite_westfrontier1001.exe. File %SYSDIRap9h4qmo.ini. File %WINDIRa95kfrhe.exe. File %SYSDIRa95kfrhe.ini. File %SYSDIRa95kfrhe.ini. File %SYSDIRq17i9a4j.ini. Search and Delete: ap9h4qmo.ini. Directory %LOCALSETTINGSTempSahUpdate. Registry: Key 759C257C-F750-4F52-AB58-FB8A7B8770FE at HKEY_CLASSES_ROOTTypeLib. Key HKEY_CLASSES_ROOT named GRInstall7.Installer Key HKEY_CLASSES_ROOT named GRInstall7.Installer.1
Read More
Fix Error 0x80246019 in Microsoft Store
Microsoft has started building a unified store with Windows 8 and later with Windows 10 in order to make it easier for users to get safer and more modern applications for their Windows 10 devices. This unified store is called the Microsoft Store which is tied up with the Windows Update. The delivery for them both are quite similar which is why they also have some common errors as well as fixes for them. So in this post, you will be guided on how you can fix error 0x80246019 for both Microsoft Store and Windows Update in your Windows 10 computer. The error 0x80246019 might be caused by corrupted system files or missing ones or be due to some glitch in the component services and other possible causes but whatever the cause is, you can fix it with the help of the following fixes, make sure to follow each one of them carefully.

Option 1 – Reset Windows Update components

  • Open Command Prompt with admin privileges.
  • After that, type each one of the following commands and hit Enter after you key in one after the other.
    • net stop wuauserv
    • net stop cryptsvc
    • net stop bits
    • net stop msiserver
Note: The commands you entered will stop the Windows Update components such as Windows Update service, Cryptographic services, BITS, and MSI Installer.
  • After disabling WU components, you need to rename both the SoftwareDistribution and Catroot2 folders. To do that, type each one of the following commands below, and don’t forget to hit Enter after you type one command after the other.
    • ren C:WindowsSoftwareDistribution SoftwareDistribution.old
    • ren C:WindowsSystem32catroot2 Catroot2.old
  • Next, restart the services you’ve stopped by entering another series of commands. Don’t forget to hit Enter after you key in one command after the other.
    • net start wuauserv
    • net start cryptsvc
    • net start bits
    • net start msiserver
  • Close Command Prompt and reboot your PC.

Option 2 – Toggle the Windows Insider Program settings

This option is only applicable to you if you are a part of the Windows Insider Program. If you are, then follow the steps below.
  • First, you have to open Settings and go to the Update & Security section.
  • From there select the Windows Insider Program.
  • After that, select the “Stop Insider Preview builds” option and then restart your computer.
  • Now open the Windows Insider Program again and check if it fixes error 0x80246019 or not.

Option 3 – Run the System File Checker Scan

System File Checker or SFC is a built-in command utility that helps in restoring corrupted files as well as missing files. It replaces bad and corrupted system files with good system files that might be the cause why you’re getting error 0x80246019. To run the SFC command, follow the steps given below.
  • Tap Win + R to launch Run.
  • Type in cmd in the field and tap Enter.
  • After opening Command Prompt, type in sfc /scannow
The command will start a system scan which will take a few whiles before it finishes. Once it’s done, you could get the following results:
  1. Windows Resource Protection did not find any integrity violations.
  2. Windows Resource Protection found corrupt files and successfully repaired them.
  3. Windows Resource Protection found corrupt files but was unable to fix some of them.
 Reboot your computer.

Option 4 – Run the DISM tool

You can also run the DISM Tool as it helps in repairing the Windows System Image as well as the Windows Component Store in Windows 10. Using this built-in tool, you have various options such as the “/ScanHealth”, “/CheckHealth”, and “/RestoreHealth” which could help in fixing error 0x80246019.
  • Open the Command Prompt with admin privileges.
  • Then type in the following commands and make sure to hit Enter right after you type each one of them:
    • Dism /Online /Cleanup-Image /CheckHealth
    • Dism /Online /Cleanup-Image /ScanHealth
    • exe /Online /Cleanup-image /Restorehealth
  • Do not close the window if the process takes a while as it will probably take a few minutes to finish.

Option 5 – Try to reset the Microsoft Store cache

Just like browsers, Microsoft Store also caches as you view apps and games so it is most likely that the cache is no longer valid and must be removed. To do so, follow the steps below.
  • Right-click on the start button and click on Command Prompt (administrator).
  • Next, type in the command, “wsreset.exe” and tap Enter. Once you do, the command will clear the cache for the Windows Store app.
  • Now restart your PC and afterward, try opening Microsoft Store again and then try to install your app or update your computer again.

Option 6 – Run the Windows Update Troubleshooter

You might also want to run the Windows Update Troubleshooter as it could also help in fixing error 0x80246019. To run it, go to Settings and then select Troubleshoot from the options. From there, click on Windows Update and then click the “Run the troubleshooter” button. After that, follow the next on-screen instructions and you should be good to go.
Read More
Problem prevented document from being scanned
If an error suddenly pops up that states, “A problem prevented the document from being scanned” when you’re scanning a document in your computer, then you’ve come to the right place as this post will guide you on how exactly you can fix the problem. A lot of users have reported that they receive a two-layer error message when they try to scan their documents – the first screen throws an error message that says, “Error applying Settings to Driver” while the next error message states, “A problem prevented the document from being scanned”. As a result, the scanning won’t be completed which defeats the whole process of buying a printer with a scanner. As you can see the two error messages point to two different situations, while the other one is pointing at the driver, the second one points to the scanning problem. To resolve these issues, there are several suggestions you need to check such as follows:

Option 1 – Run the Printer Troubleshooter

One of the first basic troubleshooting you can perform to resolve the printer issue is running the Printer Troubleshooter. This built-in troubleshooter can detect and automatically fix the problem for you. To use it, follow these steps:
  • Tap the Win + R keys to open the Run dialog box.
  • Next, type “msdt.exe /id PrinterDiagnostic” in the field and click OK or hit Enter to open the Printer Troubleshooter.
  • Then click the Next button and follow the next on-screen instructions to fix the issue with the printer.

Option 2 – Try updating the Printer drivers

You might also want to try updating your printer drivers. All you have to do is locate the USB Composite Device. For complete details, follow the steps below.
  • First, click the Start button and type “device manager”.
  • Then click on the “Device Manager” from the search results to open it.
  • From there, look for the USB Composite Device option and right-click on it, and select the Update Driver from the options.
  • Restart your PC and then click the “Search automatically for updated driver software” option.
Note: You also have the option to download the latest version of your Printer from the manufacturer’s website.

Option 3 – Try to reset the settings of the Printer or reinstall it

If none of the two options given above worked, you can try to either reset the printer settings or reinstall the printer so that it can go back to its default state. However, if it doesn’t work, you can try to uninstall the printer as well as its related drivers. To do so, follow these steps:
  • First, go to Settings > Devices > Printer and Scanners.
  • After that, select the printer and select the Remove Device option.
  • Once done, restart your computer and check again and see if the error is now fixed.

Option 4 – Try to modify the Registry settings for the Still Image devices

In case you don’t know, Windows has Registry settings for the Still Image devices like Scanners and Printers. And these devices have vendor-specific settings that if ended up getting corrupted or misconfigured then you will most likely encounter errors like “A problem prevented the document from being scanned”. Thus, to fix this error, you can try modifying the Still Image devices registry settings, and to do that, you need to follow the instructions below but before that, make sure that you create a System Restore Point first.
  • Once you’ve created a System Restore point, tap the Win + R keys to open the Run dialog box and type “Regedit” in the field, and then hit Enter to open the Registry Editor.
  • Next, navigate to this registry key: HKEY_LOCAL_MACHINESYSTEMCurrentControlSetControlStillImage
  • From there, right-click on the “StillImage” registry key and delete it.
  • After that, exit the Registry Editor and restart your computer.
  • Once your computer has restarted, Windows will recreate the settings of the Still Image devices back to their default settings.
Read More
Do you need Antivirus software for Windows 11
Windows 11 has arrived and it is being adopted all around the globe as we are writing this article. People are adapting it daily and today we will take a look at some advanced security features of the new Windows and do you really need an antivirus in it. Windows securityIt is not a secret that Windows 11 is the most secure Windows ever created, well at least up until now. It is packed with advanced security features like S-mode, Secure Boot, and Trusted Platform Module (TMP 2.0). All these new security features that Microsoft has advertised made people question are enough for security or do you still need third-party Antivirus software. In order to get an answer to this question, let us first take a detailed look at what each one of them does, and then we will give you our opinion on a given subject.

Windows S mode

For everyday home use, Windows 11 S mode is the most secure feature to have on your PC. This is a safety protocol where only apps from Microsoft Store are allowed to be installed. This eliminates the risk of installing third-party apps that may contain viruses or malware. Furthermore, S-mode protects your web browsing activity through the Microsoft Edge browser. S-mode does not allow you to use other browsers for security reasons. If you are using Windows 11 in S-mode, your PC and data will be secure in most parts. You need not buy antivirus when using Windows 11 in S-mode.

Windows Defender

The inbuilt security suite, Windows Defender was launched for the first time in 2006. Earlier to that it had existed and was known as Microsoft AntiSpyWare. Windows Defender has undergone significant improvements over the years. In its latest version available with Windows 11, Windows Defender offers a comprehensive range of security features. It is available under the Windows Security system. Some key security features include real-time virus and threat protection, account protection, firewall & network protection, app and browser control, parental controls, and device (hardware) security. This is comparable to security features offered by third-party antivirus programs.

Microsoft Account

In Windows 11, it is necessary to use a Microsoft account that will be linked to your device. This ensures the security of your data in case your device is lost or stolen. You just need to make sure that you have set a strong password for your device. Windows 11 also has Bitlocker that keeps your data in encrypted form.

Ransomware protection

In view of rising cases of ransomware, Microsoft has introduced dedicated ransomware protection in Windows 11. It works by stopping apps from carrying out unauthorized changes to files and folders. Users can choose their important files and folders that they want to be protected from ransomware.

Conclusion

As we went through Windows 11 security features, we can clearly see that it is packed heavily with many security features that aim to protect your data and your identity. Looking at them, one can clearly come to the conclusion that you do not really need any third-party software and that Windows itself can catch and protect most of the issues, and they would be right. If you use Windows 11 carefully, meaning that you go only to trusted websites, do not open suspicious emails, and click on suspicious links, if you do not use extensively external USB devices or mass media you really do not need any kind of third party protection, Windows built-in tools will do well and keep you protected. However, if you do come in contact with other people's USB devices if you surf over the net, and overall if you really want to be at peace of mind that you are protected you will still need a well-established third-party software protection solution. Windows 11 has great security features, best so far in any Windows but it is still far from being a solution that does not require dedicated protection solution. So do yourself a favor and grab one. We recently had a top antivirus software review, find the article here and pick one that is best for you. https://errortools.com/viruses/the-best-antivirus-software-of-2021/
Read More
Enable or Disable Status Bar in File Explorer
As you know, the Windows File Explorer is quite a responsive program and contains tons of features. It allows you to do various customizations by changing Settings or changing the value of a Registry key or Group Policy modification. Either way, you will be guided on how you can enable or disable the Status Bar in File Explorer on your Windows 10 computer. The Status Bar is located at the bottom of the File Explorer and shows you how many items are inside the folder and how many items you’ve selected. In addition, it also shows you information about each item and can display items using large thumbnails with just a single click. In order to enable or disable the Status Bar in File Explorer, you can use the two given options below as reference. You can either use the Folder Options or the Registry Editor.

Option 1 – Enable or Disable Status Bar via Folder Options

  • Tap the Win + E keys on your keyboard to open File Explorer.
  • Then tap the Alt + F keys and click on Options.
  • From there, make sure that you are in the View tab and look for the “Show Status Bar” option in the list that gets populated.
  • After that, check if the Show Status Bar option is enabled or disabled. It is supposed to be enabled by default so if it is enabled and you want to disable it, just simply uncheck its checkbox otherwise, leave it as it is.
  • Now click on Apply and then OK to save the changes made

Option 2 – Enable or Disable Status Bar via Registry Editor

  • Tap the Win + R keys to open the Run dialog box.
  • Then type “Regedit” in the field and hit Enter to pull up Registry Editor.
  • Next, navigate to this registry key: HKEY_CURRENT_USERSoftwareMicrosoftWindowsCurrentVersionExplorerAdvanced
  • Afterward right-click on Advanced and select New > DWORD (32-bit) Value and then input “ShowStatusBar as the name of the newly created DWORD.
  • Now double click on the new DWORD and change its value to “0” if you want to disable Status Bar and “1” if you want to enable it.
  • Then exit the Registry Editor and restart your computer to apply the changes made.
Read More
How to Fix the Blue Screen Locale ID 1033 Error Code

What is the Blue Screen Locale ID 1033 Error?

Blue screen locale id 1033 error as the name suggests, is a type of BSoD error. This error may occur during Windows startup, program load, or while the program is running. The error indicates poor PC maintenance and occurs without any warning. The error message is prompted in the following format:
Problem signature: Problem Event Name: BlueScreen OS Version: 6.0.6002.2.2.0.16.7 Locale ID: 1033
When the error occurs, the computer screen turns blue and the user is unable to view or access the program. It is advisable to fix the error right away, virtually because BSoD is a critical PC error, it can pose serious threats to your system.

Error Causes

The two most common causes of the occurrence of the Blue Screen Locale ID1033 error code are:
  • Registry issues
  • Viral infection

Further Information and Manual Repair

You don’t need to hire a technician or be a computer whiz to resolve Blue Screen Locale ID1033 error code. Here are some methods that you can try to resolve this error on your PC. These methods are easy to perform and result-driven.

Method 1: Perform a PC Scan by Downloading an Anti-Virus

Since this error is indicative of a viral infection, it is suggested you perform a PC scan by installing an antivirus on your system. Make sure you download an antivirus that is powerful and has the ability to scan all kinds of viruses.

Method 2: Clean and Repair the Registry

Another alternative method is to clean and repair the registry. The Registry is a component of the PC that stores all information and activities performed on the PC. This includes both important and unnecessary files like junk files, cookies, internet history, temporary files, invalid entries, bad registry keys, and more. These files not only accumulate in the registry but also damage and corrupt it thereby generating error codes like the Blue Screen Locale ID1033 error code.
Read More
Fix Boot Device Not Found 3F0 Error
Today we will be solving the Device not found 3F0 error which is a common error, especially among HP (HP Pavilion G6), Lenovo, Acer, and Dell laptops/desktops. This error occurs when the computer is turned ON and when the system is about to boot. It can happen on windows 7,  8, or 10. When a mentioned error occurs one of the following messages will be displayed on your screen:
  • “No bootable device – insert boot disk and press any key”
  • “No Boot Device Found. Press any key to reboot the machine”
  • “Boot Device Not Found. Please install an operating system on your hard disk. Hard Disk (3FO)”
  • “No boot device is available”

The most common reasons for 3F0 error to occur is:

  • Using the unbootable device or disk to boot from.
  • If the bootable hard drive you are using might have corrupted or damaged somehow.
  • MBR or boot sector is damaged on the bootable hard drive.
  • If your system has gone through a virus or malware attack.
  • The wrong boot order in the BIOS.
  • Hard disk connection problem.
  • System files or boot files unknowingly damaged.
  • Corrupt hard drive partitions.
Now all of these being said let us go through some of the solutions and fix this dreaded error in order to get your computer back in working order:

1: Change Boot Order


This is well, the most simple solution and the easiest one, try to change the boot sequence in the BIOS settings of your motherboard. Sometimes most easier solutions can provide great results and solve our problems. If sadly this fails and the issue persists move to the next solution.

2: Perform a Hard Reset


Performing hard reset can often solve issues, to perform a hard reset do the following:
  • Turn off the computer and unplug the power adapter. If there is a removable battery, it should also be removed.
  • Then disconnect all peripherals, including the removable hard drive, etc.
then
  • Press and hold the power button for 15 seconds to drain all remaining power.
  • Insert the battery, and then re-plug the AC adapter into the laptop.
  • Press the power button to turn on the computer.
  • Once the computer starts up properly and the startup menu appears, use the arrow keys to select “Start Windows normally” and then press Enter.
Reconnect everything back of your peripherals. If by any chance problem still persists follow the next step:

3: Test Hard Drive Using HP Diagnostic Tool


Use the built-in tool in the Hp device to solve the issue:
  • Turn on your computer and keep pressing the Esc key until the menu appears on the screen.
  • Next, press the F2 key.
  • Choose the Components Tests option from the HP PC Hardware Diagnostics menu.
  • Select Hard Drive from the Component Tests menu.
  • Click on the Quick Test, then click on the Run once button.
  • If there are still any issues with your hard drive, then run the Extensive Test.

4: Restore BIOS Default Settings


  • Press the Power button to start the computer, and immediately after this, repeatedly press the F10 key to enter the BIOS setup menu.
  • To load and restore BIOS Setup Default settings, press F9 on the BIOS setup menu.
  • Once loaded, press F10 to Save and Exit.
  • Select yes, and then press Enter when it says Exit Saving Changes.

5: Reconnect Your Hard Drive


  • Turn the computer off and remove the power cable.
  • If you have a removable battery, take it out
  • Disconnect your hard drive and then connect it back.
  • Reassemble your computer and turn the computer on to see if it fixed the issue.

6: Fix and Rebuild Damaged MBR


  • Boot from the original installation DVD (or the recovery USB)
  • At the Welcome screen, click Repair your computer.
  • Choose Troubleshoot.
  • Choose Command Prompt.
  • When the Command Prompt loads, type the following commands: bootrec /FixMbr bootrec /FixBoot bootrec /ScanOs bootrec /RebuildBcd.

7: Fix Operating System


  • Prepare a Windows installation disc, CD/DVD or USB flash drive and connect it to your PC.
  • During the installation process, launch Command Prompt.
  • In Windows 7, under the System Recovery Options tab, click Startup Repair.
  • In Windows 8 and Windows 10, click Repair your computer, then select Troubleshoot > Advanced options > Automatic Repair (Windows 8) or Startup Repair (Windows 10).

8: Replace the Hard Disk

Read More
How to Fix Windows Upgrade error 0xa0000400
If you encounter an error code of 0xa0000400 while trying to upgrade your Windows 10 computer using the Windows 10 Upgrade Assistant or the Windows 10 Media Creation Tool, then you might find this post useful as it will guide you in resolving this problem. When you get this error, you will see the following error message:
“Something went wrong You can contact Microsoft support for help with this error. Here is the error code 0xa0000400.”
As you know, keeping your computer up to date with all the Windows Updates is important and is imperative especially if you are experiencing a couple of issues like the Windows Upgrade error 0xa0000400. At the time of writing, there is no specific cause that has been found for this error. However, there are some potential fixes that might help you. You can try to recreate the Windows 10 installation USB and get the ISO files or you could also get a newer version of the Windows Media Creation Tool, or turn off your internet connection at a specific time or run the Windows Update troubleshooter. For more details, refer to the options given below.

Option 1 – Try to recreate the Windows 10 installation USB

Recreating the Windows 10 installation USB might help in fixing the problem. You can use a USB drive to do so but make sure that it has a great read-write speed. Follow the steps below to recreate Windows 10 installation USB”
  • Click this link and then click the Download Tool Now button.
  • Next, click the “Use the tool to create installation media (USB flash drive, DVD, or ISO file)…” option and follow the next given instructions on the screen.
  • Now select the ISO file option in step 5.
  • After that, you should now have an ISO file.
  • Next, go to the location where you’ve downloaded the ISO file.
  • Then right-click on the Windows 10 ISO file and select the Open with option and then select File Explorer.
  • Now click on “setup.exe” and follow the next instructions that appear on the screen. When asked, you have to select either Nothing (clean install) or Keep personal files only option. Take note that you must not select the “Keep personal files, apps, and Windows settings since it doesn’t really work.

Option 2 – Try turning off the Internet connection at a specific time

You might want to turn off your internet connection at a specific time. This option can be quite tricky so what you need to do is to disconnect the internet connection when the update is downloaded using the Windows Upgrade tool. It’s actually okay since all the files you need would be downloaded safely and the Windows Upgrade tool will be the one to install the newer updates using those files.

Option 3 – Try to get a newer version of the Windows Media Creation tool

You can also fix the Windows Upgrade error 0xa0000400 by using the latest version of the Windows Media Creation tool. And so if what you have is an older version, you need to update it in order to resolve the error and upgrade your Windows 10 computer.

Option 4 – Run the Windows Update Troubleshooter

Running the built-in Windows Update troubleshooter is one of the things you can first check out as it is known to automatically resolve any Windows Update or upgrade errors like error code 0x800701E3. To run it, go to Settings and then select Troubleshoot from the options. From there, click on Windows Update and then click the “Run the troubleshooter” button. After that, follow the next on-screen instructions and you should be good to go.

Option 5 – Try running Disk Cleanup

You might want to run the Disk Cleanup utility as it is a useful tool that could delete temporary and useless files in your computer.
  • Tap the Win + R keys to open the Run dialog box and then type “cleanmgr” in the field and hit Enter to open the Disk Cleanup window.
  • After that, select the drive you want to clean.
  • Now click OK to clean the disk and restart your computer.
Read More
How to Fix Error Code 0xc0000001 on Windows 10

Error Code 0xc0000001 – What Is It?

Error code 0xc0000001 on Windows 10 has been reported by some users when attempting to install Windows 10. When you encounter this error, the setup will be in a loop and the error message will keep popping up.

Solution

Restoro box imageError Causes

If you encounter the error code 0xc0000001 while trying to install Windows 10, it most probably be due to corrupted installation file. However, it can also be caused by any of the following:”

  • Damaged SAM file
  • Damaged system files
  • File system integrity compromised
  • Damaged RAM

Further Information and Manual Repair

Here are some methods that will help you fix the error code 0xc0000001 while trying to install Windows 10. Do not perform these methods unless you’re absolutely confident you can do it properly. Otherwise, you might make things worse.

If you’re not that confident, consider seeking advice from a technical expert. If you can’t afford one, you may want to consider getting an automated software to fix the job.

Method 1: Convert drive/partition to GPT

If you need to manually wipe the drive and then convert it to GPT, follow these steps:

  • Step 1: Power down your computer and put your Windows 10 installation DVD or USB drive
  • Step 2: Boot your computer to the USB or DVD key in UEFI mode.
  • Step 3: Once you’re at the Windows 10 Setup, press the Shift+F10 keys. This will open the command prompt window.
  • Step 4: Open diskpart tool from CMD. Just type diskpart and enter.
  • Step 5: Then, type the list disk on CMD again. Press enter. This will allow you to identify your computer’s drive that you want to reformat.
  • Step 6: Choose the drive and reformat it by typing the following on the command prompt:

select disk <disk number> (press enter)

clean (press enter)

convert gpt (press enter)

exit (press enter)

  • Step 7: Proceed with the Windows 10 Setup installation.

Note: when you’re prompted to choose the installation type, make sure to choose Custom. Then, choose unallocated space and click Next. This will automatically start the installation of Windows 10.

Method 2: Use Media Creation Tool to Perform Automatic Repair

Automatic Repair is a Windows feature/utility that allows you to fix certain system problems preventing you from installing or starting Windows. It works by scanning your computer system for any potential problem and tries to fix it.

  • Step 1: Download the Media Creation Tool
  • Step 2: Boot your computer using the Windows 10 DVD, or the System Repair disc. When you’re asked to press any key to boot, just press any key on your keyboard.
  • Step 3: Choose the right time and the keyboard type.
  • Step 4: Click Repair your computer. You’ll see this in the lower-left corner of your screen.
  • Step 5: Choose Troubleshoot from Choose an option screen
  • Step 6: Click Advanced options
  • Step 7: Choose an automatic repair

This will automatically run the utility.

Method 3: Check Hardware Devices

Another possible reason why you are getting this error while installing Windows 10 is due to the connected external hard drives. To fix this, power down your computer. Afterward, unplug and remove all connected external hard drives. If you’re using USB device to install Windows 10, ensure your BIOS is set to boot your computer from the USB.

Method 4: Create New Copy of Windows 10 Installer

Another possible reason why you experience this error is that your copy of the Windows 10 installer is corrupted. To fix this, it’s better to create a new copy of the Windows 10 installer.

  • Step 1: Go to this link
  • Step 2: Click the Download tool now. Choose Run with admin privileges
  • Step 3: On What do you want to do? section, choose installation media for another PC. Click Next.
  • Step 4: Select edition, language, and architecture (32-bit or 64-bit).
  • Step 5: Choose the media you want to use. If you want to use a USB flash drive, make sure the device at least has 5GB of free space. If you’re using an ISO file, you need to save the file first on your computer and then burn the file to a DVD.

Method 5: Use a Powerful Automated Tool

If you still encounter these errors after performing the above methods, find a trustworthy automated tool. As long as the automated tool is powerful and reliable, it will help you fix this error.

Read More
Fix Windows Update Error 0x80244007
Getting errors while trying to update your Windows 10 computer is not an uncommon occurrence. Although some of them are easy to fix, there are others that need a lot of time and research in order to resolve. One of these tough Windows Update errors is Error 0x80244007. This kind of Windows Update error halts the process of Windows Update and a simple system restart won’t help much to fix it. When you encounter this Windows Update error, you will see a description that says, “SOAP client failed because there was a SOAP fault for reasons of WU_E_PT_SOAP_* error codes”. One of the main causes of such an error is that Windows was not able to renew the cookies for Windows Update. To fix this error, here are some suggestions that might be useful.

Option 1 – Clear up temporary or junk files

The error could be caused by some temporary or junk files in your computer and so you need to clear them up to fix the problem. You can achieve that using the Storage Sense feature.
  • Open Setting > System > Storage from the WinX Menu.
  • From there, you will see a list of all the local and connected storage devices along with the details on the free space. Make sure that Storage Sense is on.
  • Next, find a link that says “Free Up Space” and click it to open.
  • After that, a screen which is the built-in program in Windows 10 will appear and will scan your computer for the following junk files so you can free up disk space:
    • Windows Upgrade Log Files
    • The system created Windows Error Reporting Files
    • Thumbnails
    • Temporary Internet Files
    • Previous Windows Installation Files
    • Delivery Optimisation Files
    • DirectX Shader Cache
  • Choose the files you want to get rid of and then click on the remove files option. Note that you’ll have an idea of the total size as you select any of the junk files listed above.
  • Now go to the “Free Up Space Now” section and click the Clear Now button. This will get rid of all the temporary or junk files in your computer and should hopefully fix the Windows Update error 0x80244007.

Option 2 – Try running the Windows Update troubleshooter

Windows 10 have various troubleshooters that can help you resolve many system issues. So if you’re dealing with Windows Update errors like Error 0x80244007, you can run the Windows Update troubleshooter to resolve it. To run it, go to Settings and then select Troubleshoot from the options. From there, click on Windows Update and then click the “Run the troubleshooter” button. After that, follow the next on-screen instructions and you should be good to go.

Option 3 – Try to reset the Windows Update components

If by any chance that the second option didn’t work, resetting the Windows Update components could also help you resolve the problem. How? Refer to the following steps:
  • Open Command Prompt with admin privileges.
  • After that, type each one of the following commands and hit Enter after you key in one after the other.
    • net stop wuauserv
    • net stop cryptsvc
    • net stop bits
    • net stop msiserver
Note: The commands you entered will stop the Windows Update components such as Windows Update service, Cryptographic services, BITS and MSI Installer.
  • After disabling WU components, you need to rename both the SoftwareDistribution and Catroot2 folders. To do that, type each one of the following commands below and don’t forget to hit Enter after you type one command after the other.
    • ren C:WindowsSoftwareDistribution SoftwareDistribution.old
    • ren C:WindowsSystem32catroot2 Catroot2.old
  • Next, restart the services you’ve stopped by entering another series of commands. Don’t forget to hit Enter after you key in one command after the other.
    • net start wuauserv
    • net start cryptsvc
    • net start bits
    • net start msiserver
  • Close Command Prompt and reboot your PC.
Read More
1 2 3 171
Logo
Copyright © 2023, ErrorTools. All Rights Reserved
Trademark: Microsoft Windows logos are registered trademarks of Microsoft. Disclaimer: ErrorTools.com is not affiliated with Microsoft, nor claims direct affiliation.
The information on this page is provided for information purposes only.
DMCA.com Protection Status