In previous versions of Windows changing the system, the font was a pretty straightforward process, but it seems Microsoft did not want this feature to keep for whatever reason and there is no option as of the time of the writing of this article to do it in standard options in Windows 10.
But do not worry, you are still able to customize your Windows and choose which font would you like to see inside it in all of its dialogs. You can choose whichever font you desire, the only prerequisite is it to be installed on your system.
This guide will require you to change values in the registry of Windows itself so please follow step-by-step instructions and always make a backup of the registry before changing it in order to prevent some permanent Windows issues.
All of that being said, let's start.
First thing is to open notepad, in the notepad paste the next block of code:
Windows Registry Editor Version 5.00
[HKEY_LOCAL_MACHINE\SOFTWARE\Microsoft\Windows NT\CurrentVersion\Fonts]
"Segoe UI (TrueType)"=""
"Segoe UI Bold (TrueType)"=""
"Segoe UI Bold Italic (TrueType)"=""
"Segoe UI Italic (TrueType)"=""
"Segoe UI Light (TrueType)"=""
"Segoe UI Semibold (TrueType)"=""
"Segoe UI Symbol (TrueType)"=""
[HKEY_LOCAL_MACHINE\SOFTWARE\Microsoft\Windows NT\CurrentVersion\FontSubstitutes]
"Segoe UI"="NEW_FONT"
Where in "Segoe UI"="NEW_FONT" instead of NEW_FONT you need to write the exact name of the font that you wish to use as a system font.
Once you have replaced the default system font with your desired one, go to File and save as, from file type drop-down menu, choose all files and save this file as .REG type giving it whatever name you wish.
When the file is saved, close notepad, right-click on the saved file and choose the merge option. Confirm with YES and click on OK. Reboot your system and your Windows will now use the font of your choice as its default system font.
If you wish to return the old default system font as it was, follow the same steps but in your notepad paste this code:
Windows Registry Editor Version 5.00
[HKEY_LOCAL_MACHINE\SOFTWARE\Microsoft\Windows NT\CurrentVersion\Fonts]
"Segoe UI (TrueType)"="segoeui.ttf"
"Segoe UI Black (TrueType)"="seguibl.ttf"
"Segoe UI Black Italic (TrueType)"="seguibli.ttf"
"Segoe UI Bold (TrueType)"="segoeuib.ttf"
"Segoe UI Bold Italic (TrueType)"="segoeuiz.ttf"
"Segoe UI Emoji (TrueType)"="seguiemj.ttf"
"Segoe UI Historic (TrueType)"="seguihis.ttf"
"Segoe UI Italic (TrueType)"="segoeuii.ttf"
"Segoe UI Light (TrueType)"="segoeuil.ttf"
"Segoe UI Light Italic (TrueType)"="seguili.ttf"
"Segoe UI Semibold (TrueType)"="seguisb.ttf"
"Segoe UI Semibold Italic (TrueType)"="seguisbi.ttf"
"Segoe UI Semilight (TrueType)"="segoeuisl.ttf"
"Segoe UI Semilight Italic (TrueType)"="seguisli.ttf"
"Segoe UI Symbol (TrueType)"="seguisym.ttf"
"Segoe MDL2 Assets (TrueType)"="segmdl2.ttf"
"Segoe Print (TrueType)"="segoepr.ttf"
"Segoe Print Bold (TrueType)"="segoeprb.ttf"
"Segoe Script (TrueType)"="segoesc.ttf"
"Segoe Script Bold (TrueType)"="segoescb.ttf"
[HKEY_LOCAL_MACHINE\SOFTWARE\Microsoft\Windows NT\CurrentVersion\FontSubstitutes]
"Segoe UI"=-
Reboot your system and your Windows will now revert the font of your choice as its default system font.

Problems occur when your PST file becomes corrupted or hits the size limit. Outlook will start to display error messages. These errors include like 0x80040119, 0x80040600, and 0x8004060c.
You might think Outlook problems are just a minor inconvenience. You can’t access your emails and contact information, but that doesn’t actually affect computer security, right? Wrong! Outlook problems can indicate serious corruption issues within your system.
In many cases, your PST file can even be targeted specifically by a virus.
Today, many viruses are specially designed to steal personal information and then sell that information on the online black market. Since so much personal data is stored within Outlook’s PST file, this is often the first place that viruses look.
If you don’t want some hacker in a foreign country to read your emails, steal your contact information, or do all sorts of other dangerous tasks, then we advise you to fix your PST problem as soon as possible.
Other causes include hitting the 2GB memory limit on older versions of Outlook, erroneous SMTP settings, etc,.
PST errors are an incredibly annoying problem. However, thanks to powerful software like Stellar Phoenix Outlook PST Repair, it has never been easier to fix Outlook and recover all of the data inside your PST file. That means that you won’t lose contact information, calendar entries, emails, or any other information stored in Outlook.
ScanPST.exe rarely fixes problems with the PST file. Since the application is only a few megabytes in size, its effectiveness is very limited. Although Microsoft designed ScanPST.exe to be an effective solution to any PST files, it fails miserably.
Ultimately, after downloading ScanPST.exe and running it, your Microsoft Outlook will still be unable to send or receive emails. And, to make matters worse, you might also be unable to access contact data or read your old emails.
Unlike other PST repair solutions, ScanPST.exe will not recover deleted emails or other lost Outlook data. In fact, using ScanPST.exe can sometimes cause your personal data to become even more difficult to recover.
If you do want to try out ScanPST.exe, then go ahead. While it probably won’t make your PST errors worse, it won’t even come close to fixing them. If you’re ready for a more serious solution to PST problems, then keep reading.
You might think Outlook problems are just a minor inconvenience. You can’t access your emails and contact information, but that doesn’t actually affect computer security, right? Wrong!
Outlook problems can indicate serious corruption issues within your system. In many cases, your PST file can even be targeted specifically by a virus.
Today, many viruses are specially designed to steal personal information and then sell that information on the online black market. Since so much personal data is stored within Outlook’s PST file, this is often the first place that viruses look.
If you don’t want some hacker in a foreign country to read your emails, steal your contact information, or do all sorts of other dangerous tasks, then we advise you to fix your PST problem as soon as possible.
Microsoft’s ScanPST.exe application clearly doesn’t work. So what’s the next best option? Well, a program called Stellar Phoenix Outlook PST Repair has been helping PC users solve Outlook problems for several years. As the world’s leading Outlook solution, Stellar Phoenix Outlook PST Repair will quickly and effectively repair any PST problems you encounter.
So how does Stellar Phoenix Outlook Repair work? Well, it starts by finding your PST file. Once the PST file has been found, Stellar Phoenix Outlook PST Repair determines if the file is corrupt or full. It will then repair your PST file either by removing the size limit or by fixing the corrupt files.
Once Stellar Phoenix Outlook PST Repair determines that your calendar appointments, contact data, and emails have all been successfully recovered, it permanently restores access to your PST file.
In fact, Stellar Phoenix Outlook PST Repair can even restore Outlook data that you deleted a long time ago. So, instead of just being a PST error recovery tool, Stellar Phoenix Outlook PST Repair is also a powerful data recovery program.
After letting Stellar Phoenix Outlook PST Repair go to work, open up Outlook and try it out. You’ll have full access to all of your Outlook files and folders, and all of those ScanPST.exe problems will be a thing of the past.
Stellar Phoenix Outlook PST Repair comes with many advantages. Here are just a few reasons why it’s such a popular program:
Stellar Phoenix PST Repair is superior to ScanPST.exe in every way. But Stellar Phoenix’s most important advantage is that it actually works. If you’re ready to quickly fix your Outlook PST errors, then Stellar Phoenix Outlook PST Repair can help. Download it here today to experience the magic of PST repair for yourself.
Code 39 is a device driver error code that pops up when the Windows operating system cannot load the driver for the hardware you want to use.
This hampers your ability to use the hardware properly. The error code is almost always presented in the following format:
“Windows cannot load the device driver for this hardware. The driver may be corrupted or missing.” Code 39
A device driver is a software program that tells the operating system how to control a particular hardware device. Each hardware device has a different driver.
There are separate device drivers for printers, CD-ROM readers, and keyboards, to name a few.
Many device drivers are already built into the operating system. But sometimes you will need to install a new device driver when you want to use a new piece of hardware device that the operating system is not familiar with, or does not anticipate.
Regardless of whether or not the drivers are already integrated into the operating system, you may still experience code 39, typically because of the corrupted or outdated drivers.
Outdated and corrupted drivers cause hardware malfunction and failure, which trigger device driver error codes like code 39. Other causes include incorrect registry values.
Below are some of the easiest and most effective methods to resolve Device Manager error code 39 on your PC.
To follow and implement these methods, you don’t require any technical knowledge or expertise. Simply follow these instructions to fix the error right away.
There is a possibility that the error code 39 is caused by some fluke within the Device Manager or your BIOS.
If that’s the reason, then a simple PC reboot can resolve the issue immediately. Therefore, before you try anything, it is advisable to restart your system.
If it works, then that is great, but if it doesn’t, then don’t worry, try other methods given below to fix this problem successfully.
If the error code 39 is generated due to faulty or outdated drivers, then simply uninstall and remove them and then reinstall new driver versions. There are two ways to remove faulty drivers.
This method, although effective in resolving error code 39, can be time-consuming. To avoid the hassle and save time, try method 3.
Method 3 - Update Drivers Automatically with DRIVERFIX
If you would like to read more helpful articles and tips about various software and hardware visit errortools.com daily.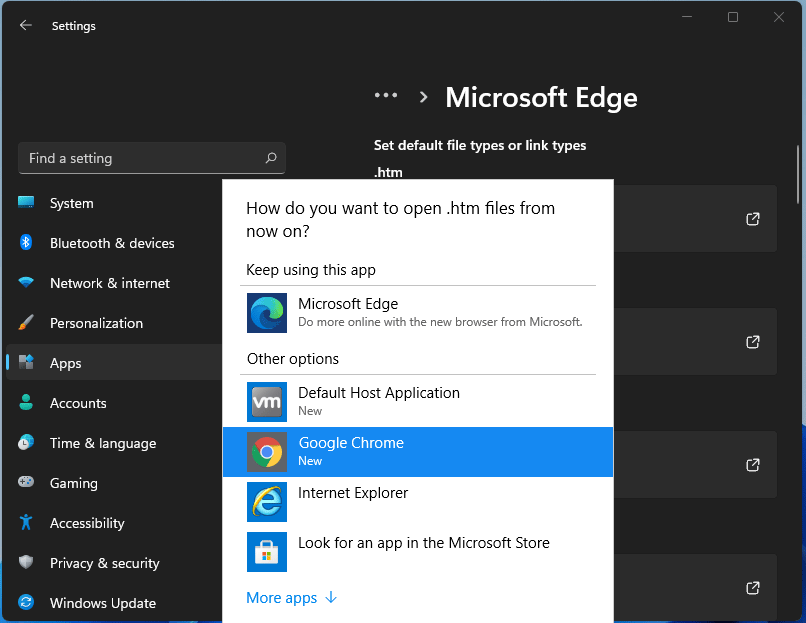 For anyone who is not aware, when Windows 11 was released if you wanted to switch to another browser you had to go into the settings app and choose the default browser for different types of file extensions like HTML, HTM, PDF for opening on the web, etc. Of course, this was completely unnecessary and it was not well received by users. So after some time, Microsoft backpedaled to standard one click, choose your default browser solution that existed in the previous version of Windows OS.
Altho sometimes Microsoft knows how to irritate its users base, it is good to know that they can also listen and fix things that are required.
For anyone who is not aware, when Windows 11 was released if you wanted to switch to another browser you had to go into the settings app and choose the default browser for different types of file extensions like HTML, HTM, PDF for opening on the web, etc. Of course, this was completely unnecessary and it was not well received by users. So after some time, Microsoft backpedaled to standard one click, choose your default browser solution that existed in the previous version of Windows OS.
Altho sometimes Microsoft knows how to irritate its users base, it is good to know that they can also listen and fix things that are required. Error code 0xC004E003 almost always appears when there are damaged files in the Windows operating system. These files could be corrupt for a number of reasons and are usually a serious danger to the life of the computer system. These file errors may be caused by a number of things. Incomplete installation setup, incorrect deletion of hardware or utilities, or an unfinished file erasure. The trigger might also be in the event that the computer system is contaminated with a virus or adware or spyware, or even by the improper shut down of the computer. Any of these scenarios have the possibility to result in the removal or corruption of data of the Windows system data files.
The data system files that are damaged will give linked data and archives that are missing or wrongly linked. These are needed for the proper functioning of the software. This can also happen when or after installing third-party software that might have changed the system files. If it is suspected that a program installation will need to be stopped, it is best to let it run through the setup and then delete it later. While it installs, it is altering program files, and likely rearranging them. Stopping this in the middle can scramble files associated with the program and files vital to the usage of the computer.
 Error Causes
This error will pop up after installing third-party software that has changed the system files. These system files are necessary to finish the activation process. A restore point will be necessary if it is ultimately determined that a system restore is necessary, to bring the computer back to the state it was in previous to the failed installation.
There are several steps that can be taken when the error code 0xC004E003 appears. It is helpful to know that this can occur from trying to install third party software. Going forward, do not attempt to install third-party software that is not trusted, and does not attempt to abruptly stop the third-party software from installing. This may cause the program to corrupt the files or delete important files. Recovering from this error can be easy if there is a recent restore point already backed up in the recovery portion of the system's files.
Run an error scan. The problem should be resolved after rebooting the computer once these steps have been completed.
Best when utilized by an expert.
Another option for restoring. This method can be used by a novice.
NOTE: If there are no restore points available, the system recovery may not be turned on. To check this, go to Control Panel, and select Recovery. Configure System Restore, Configure. Then, select Turn on system protection. Having a current restore point for a computer ensures the ease of recovery if any problems with the computer arise.
If you wish to always have at your disposal a utility tool to fix these Windows 10 and other related issues when they do arise, download and install a powerful automated tool.
Error Causes“This policy setting allows you to control whether a domain user can sign in using a convenience PIN. If you enable this policy setting, a domain user can set up and sign in with a convenience PIN. If you disable or don’t configure this policy setting, a domain user can’t set up and use a convenience PIN. Note: The user’s domain password will be cached in the system vault when using this feature. To configure Windows Hello for Business, use the Administrative Template policies under Windows Hello for Business.”
 Since this requires registry tweak, please follow given solution step by step
 Storage management Page update
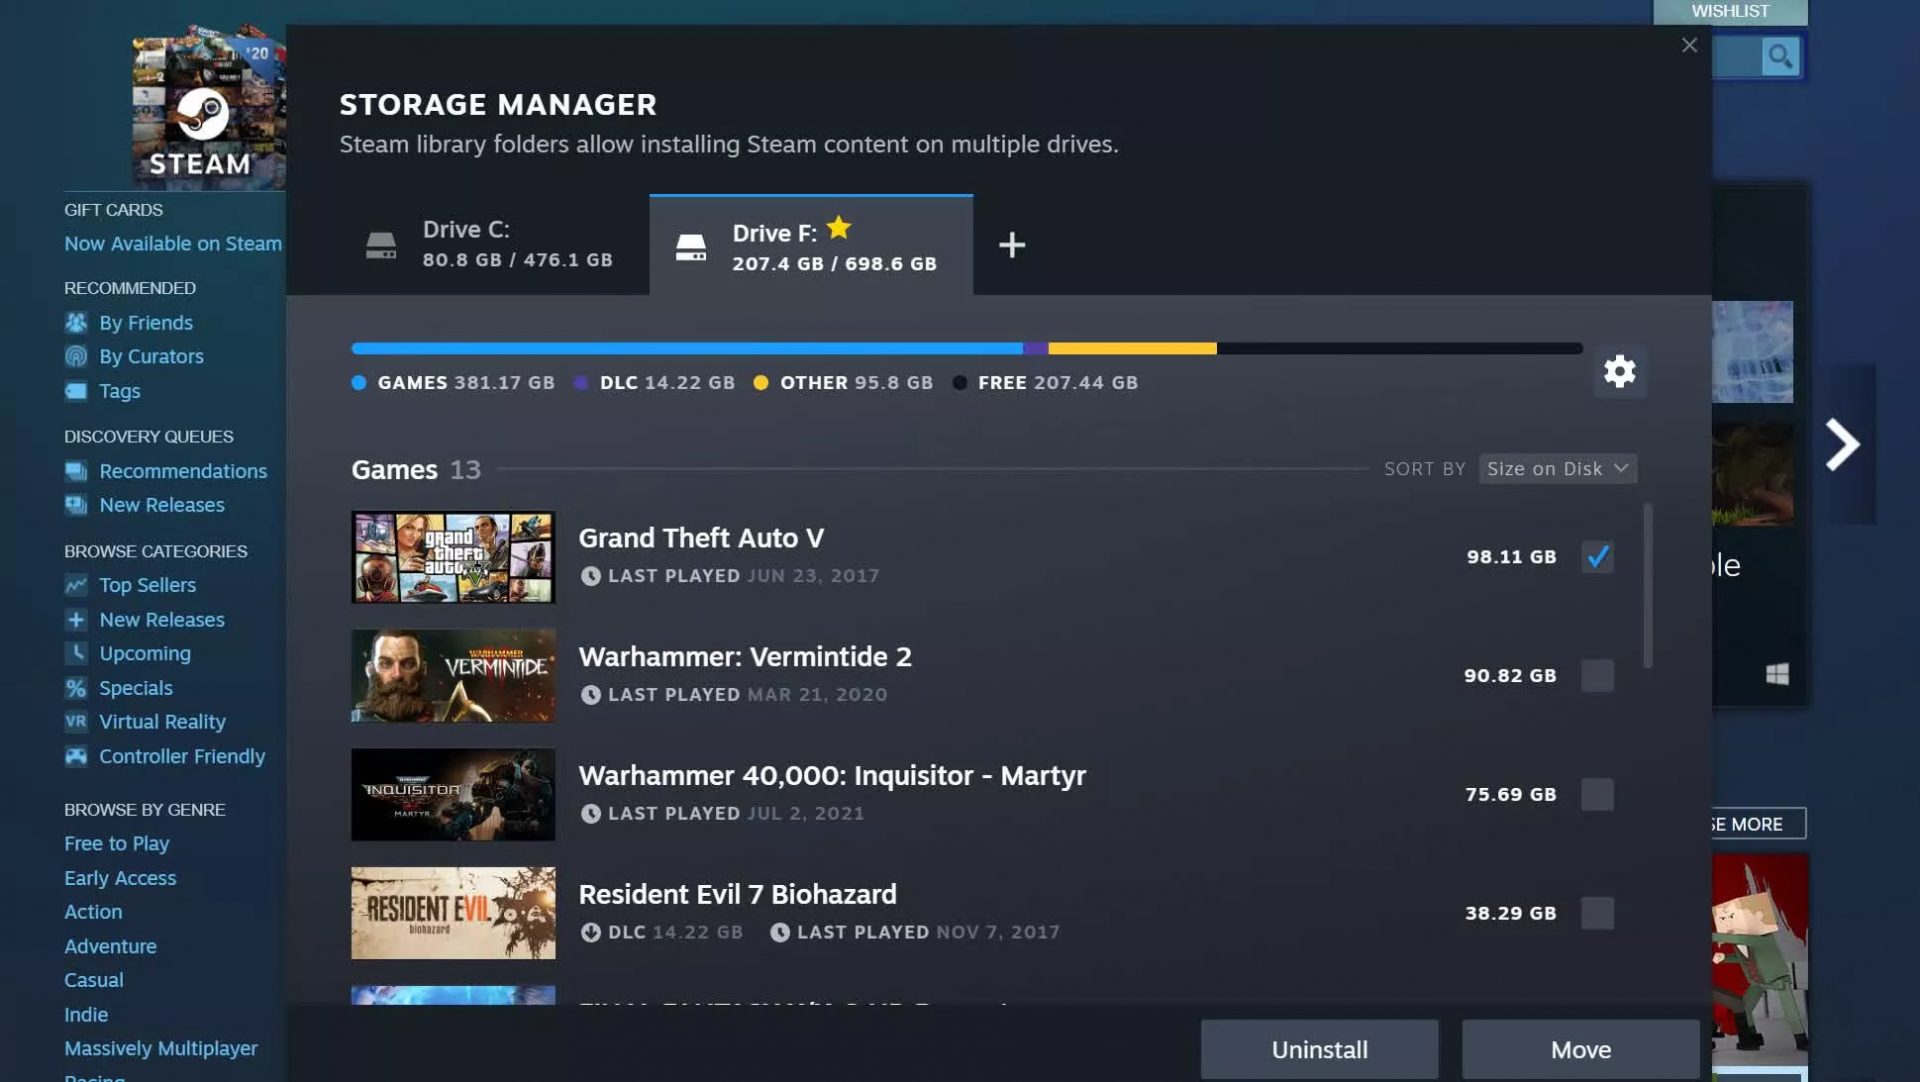 Another thing with the Steam store management page is the ability to move installation files from one location to another. Let’s say that you have two or more hard disk drivers in your machine and that you have SSD that you use for running stuff since it is fast and larger and slower one for storage. Now you can easily and quickly move one installation from one to another in order to take advantage of your faster SSD for quicker LOAD game times without making a new installation.
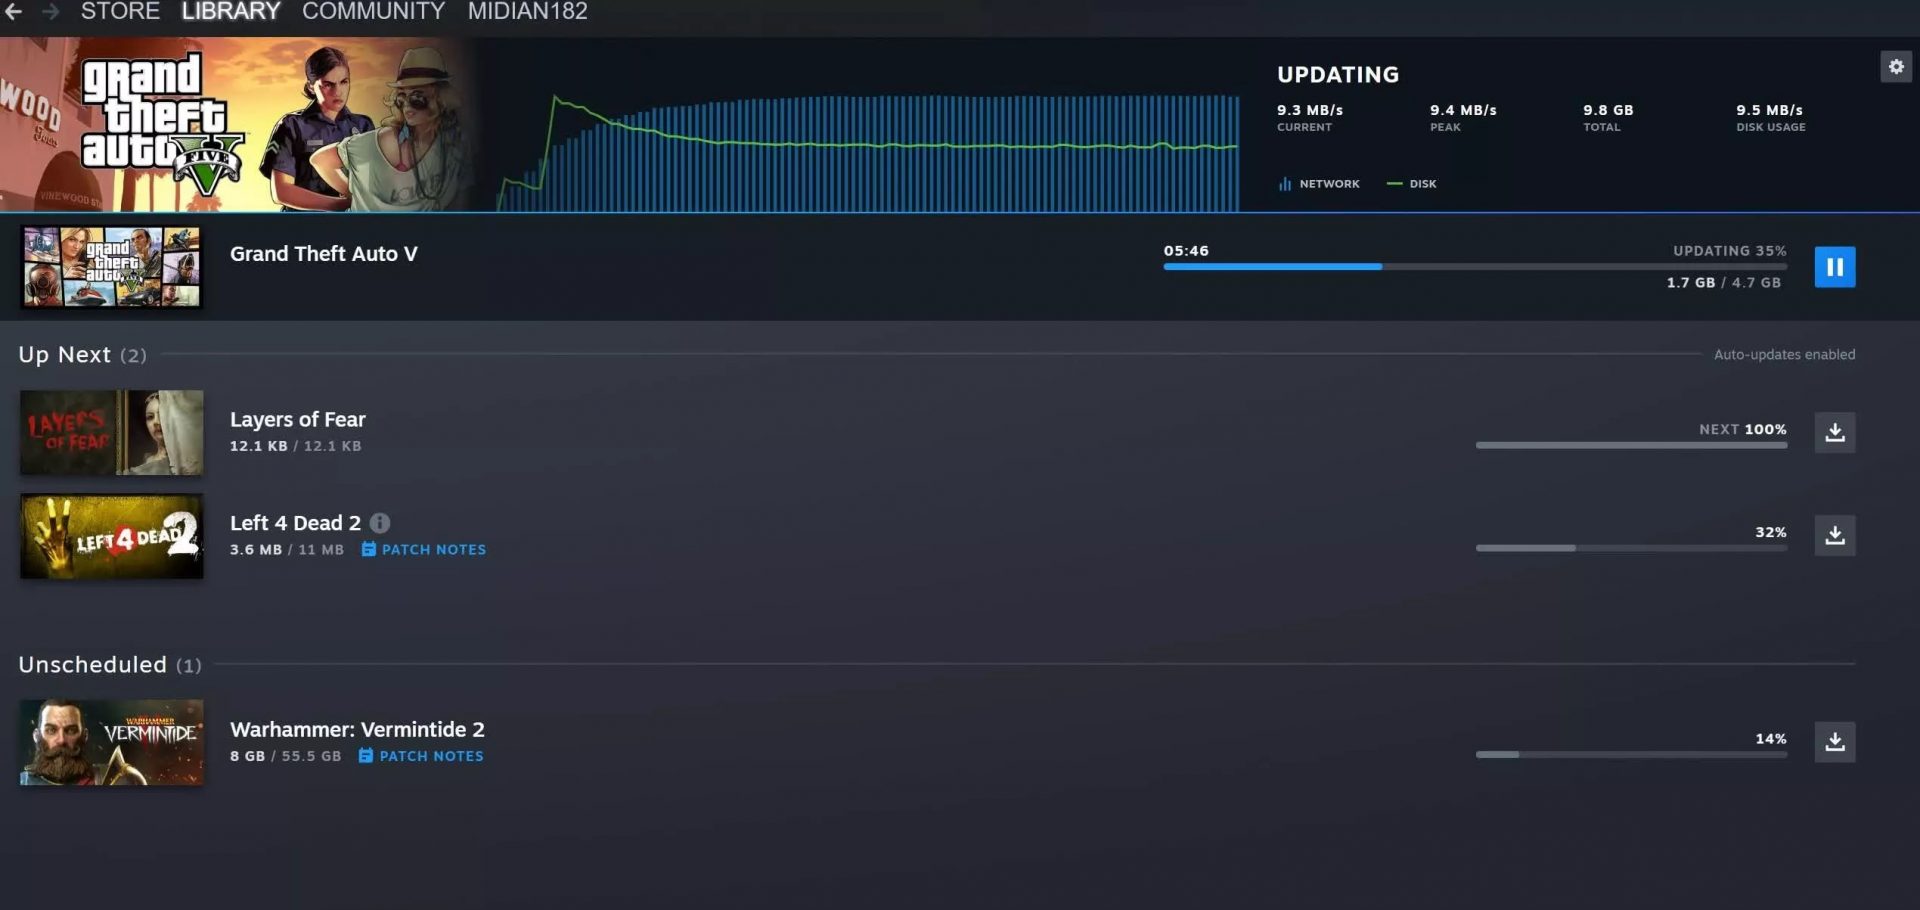 Also, you can now drag and drop items in the download bracket to reorder download orders or place them as active downloads to start downloading right away.