Error Code 0xC1900200, 0x20008 (Code 0xC1900202 – 0x20008) is an error that occurs when you attempt to upgrade to Microsoft Windows 10, but the minimum requirements have not been met by your computer. You will therefore be unable to upgrade to Microsoft Windows 10 until your computer is updated or upgraded to meet those requirements.
Common symptoms include:
When attempting to upgrade a dialog box with Code 0xC1900200 – 0x20008 (Code 0xC1900202 – 0x20008) is displayed.
Your computer is unable to begin the Microsoft Windows 10 upgrade process.
Solution
Error Causes
Error Code 0xC1900200 – 0x20008 (Code 0xC1900202 – 0x20008) occurs when you are unable to begin the Microsoft Windows 10 upgrade because your computer does not meet the minimum requirements to run Microsoft Windows 10.
You are unable to begin the upgrade because your computer does not meet the required system or hardware specifications.
You are not running the correct version of Microsoft Windows to be able to begin the upgrade.
You are not running the latest updated version of Microsoft Windows 7 SP1 or Microsoft Windows 8.1. Error Code 0xC1900200 – 0x20008 (Code 0xC1900202 – 0x20008) as stated, simply means your computer does not meet the requirements to update and does not indicate a permanent problem or inability to continue to use your computer. This error only means that you will not be able to upgrade to Microsoft Windows 10 until your computer is made to meet these requirements.
Further Information and Manual Repair
There are several solutions that the user can complete at home that should fix the problem resulting in a manifestation of Error Code 0xC1900200 – 0x20008 (Code 0xC1900202 – 0x20008). Below are several options that should resolve this error.
Method 1:
Verify what version of Microsoft Windows you are currently running, older, outdated, or no longer supported versions of Microsoft Windows are not able to upgrade to Microsoft Windows 10. If you are not running one of the following versions you will have to update before being able to upgrade.
The most current version of Microsoft Windows 7 SP1
The most current version of Microsoft Windows 8.1
Method 2:
Your computer's system specifications do not meet the requirements to be able to upgrade to and run Microsoft Windows 10. To check your system specifications do the following.
Click on the start button in the bottom left corner, then locate the control panel on the menu, click on it to open.
Once it opens, locate system and security on the menu and click to open, click on system and this will show you your amount of RAM and processor speed.
Find device manager on the left-hand side click this then select display adapter, and it will show you your current video card.
Click on the start button again, then click on the computer in the menu, this will show you your hard drive size, and available space.
If you have the option available you can simply run the get Microsoft Windows 10 app to check compatibility. Once you have your system specs make sure they meet or exceed the following.
1 GHz or higher processor or SoC
1 gig of RAM for 32 bit and 2 gigs of RAM for 64 bit
16 GB available hard drive space for 32 bit, 20 GB for 64 bit
Minimum of DirectX9 that has 1.0 WDDM
At least an 800x600 display
If your computer does not meet these minimum requirements, upgrade the components necessary to meet them. If you do not possess the technical expertise required to accomplish this yourself or do not feel comfortable doing so, download and install a powerful automated tool to get the job done.
Method 3:
Your computer might not meet the aforementioned requirements to make an upgrade because of insufficient hard drive space or resources. Learn how to create space on your computer.
Method 4:
Many people hold on to and use the same computer for a very long time. It is possible that your computer cannot be upgraded to meet the requirements, or that the cost to do so would be so high that a new computer would be cheaper. If that is the case, your only option may be to replace your computer.
Error 2738 is associated with the VBScript engine. VBScript is the abbreviation for Visual Basic Scripting. It is an Active Scripting programming language developed by Microsoft and modeled on Visual Basic. It is used with a fast interpreter in a large variety of Microsoft environments.
Error 2738 indicates that the VBScript engine is not registered properly on your PC. It occurs when you try to install or uninstall VBScript-supported applications on your system. The error message is displayed in the following format:
"Error 2738. Could not access VBScript run time for custom action."
Solution
Error Causes
There are several reasons for the error 2738 message pop up. These include:
Incorrect or corrupt registry entries on your system. These entries interfere with VBScript support in Windows thereby generating such error codes.
Removal of McAfee Antivirus
Windows registry values are not updated accurately during the uninstallation of McAfee Software
The Visual Basic Script is registered in the registry under the local user instead of the local machine
No matter what the cause of the error may be, it is recommended that you resolve the issue immediately without any delay.
Further Information and Manual Repair
Here are some of the easy and proven DIY methods to repair error 2738 on your PC:
Method 1
If the error 2738 occurs because the VBScript is not registered correctly, then follow these steps to resolve.
Go to the start menu, open Run, and type RegEdit in the box and then press OK. This will open the Windows Registry Editor.
Now type KEY_LOCAL_MACHINESOFTWAREClassesCLSID{B54F3741-5B07-11cf-A4B0-00AA004A55E8}InprocServer32, if the key does not have a data value of C:\Windows\System32\vbscript.dll then simply add it.
Now go to the All programs option and then Accessories.
Here right-click on Command Prompt and then ‘Run as Administrator’.
Now type egsvr32 vbscript.dll then press enter. After that type regsvr32 jscript.dll and then press enter.
Restart your PC to activate changes.
Method 2
Sometimes error 2738 may occur when you uninstall preinstalled MacAfee antivirus software on your system. Un-installation usually leaves some trace components in the registry.
These components must be removed completely otherwise error codes like 2738 may keep occurring on your computer screen. In such an event, the best way to resolve it is to download the McAfee Consumer Product Removal utility from McAfee's official website.
Save this file on your desktop. Double click the file and follow the steps to remove this software completely and successfully from your PC. Proper removal of the McAfee program will resolve error 2738 right away.
But if the error still persists then try other methods illustrated below.
Method 3
Download Restoro to remove incorrect and corrupt registry entries on your system that may be interfering with VBScript support.
Restoro is a new and easy-to-use PC Repair Tool deployed with an intuitive interface and a powerful registry cleaner. The registry cleaner removes all entries corrupting the registry, cleans it, and resumes it to its normal state.
Click here to download Restoro.
In today's modern world many households have internet access, most of the connection nowadays is done via Wi-Fi or wireless but there is a high probability that you have also a few devices connected via cable. There are of course many disadvantages and advantages between cable connection and wireless connection.
The main advantages of a hard cable connection are of course faster speed and stability compared to Wi-Fi. But if we look into the cables themselves there is also a big difference between them. Not all cables are the same and quality as well as speed vary a lot between them. Choosing the right cable is essential in order to make a maximum of your internet and we have some great tips and explanations of what cables do so you can make the right choice and enjoy your full internet potential.
Not all cables are the same
Cheap cables and expensive ones are not the same no matter what everyone tells you. The old proverb you get what you pay is true and more expensive cables will be made from better materials and will have a higher transfer rate.
Quality network cables are separated into different categories with proper markings and when buying one you should always look for these markings on the cables themselves, do not buy cables that do not have markings since they will often provide lower transfer rates or will not be shielded from outside influences resulting in packet drops and instability in a network.
Categories and what they mean are:
Cat-5 with a maximum speed of 100Mbps, typically unshielded.
Cat-5e with a maximum speed of 1Gbps, available in both shielded and unshielded varieties.
Cat-6 with a maximum speed of 10Gbps for runs under 55 meters (around 180ft), available in both shielded and unshielded varieties.
Cat-6a with a maximum speed of 10Gbps, shielded.
Cat-7 uses a proprietary GG45 connector rather than the standard RJ-45 connector seen on other cables for speeds of 10Gbps, shielded.
Cat-8 with a maximum speed of 25Gbps (Cat-8.1) or 40Gbps (Cat-8.2) at a distance of around 30 meters (around 100ft), shielded.
Unless stated, these standards are typically rated at their quoted speeds for a run of around 100 meters (around 330 ft) and use a standard RJ-45 Ethernet connector. Each generation of cable is designed to be compatible with the generations that came before it, so it’s possible (for example) to use a Cat-6a cable with a router that only supports speeds of 1Gbps.
Shielded cables
When purchasing higher quality cable you might not be able to choose if you have shielding or not since some standards like Cat-6a, Cat-7, and Cat-8 are always shielded. But if you do not have the need for these and you are satisfied with Cat-5e for example you can choose.
Shielded cables are a little more expensive but they will provide you with a coating that will eliminate interference from outside waves making cables more reliable. Of course, if the cable will go through a room that does not have many radio waves or some other interferences then buying a shielded cable is a waste of money.
Cable platings
Usually, there are two types of connector platings on connectors, silver, and gold, and people usually think that gold is much better but there are major differences between silver and gold platings and truth to be told there is no better one, both are different and should be considered depending on your need.
Silver plating will provide you with faster speed since its conductivity is larger than gold, but gold is slower on the oxidation front so its life span is longer. On the other hand, if your cables are always connecting and disconnecting gold will be first to be scrubbed off from the surface since the gold coating is much thinner.
Overall if you would only connect cable once and have slower internet than cable capacity gold is the way to go, in another case if you would use the cable as always connecting and switching and your internet plan is the same as cable transfer capacity you might want to go with silver one.
Cable material quality
Network cables are made from copper, your standard conduction material but even here there are differences in quality and therefore the chance of pocket losses over it. More quality less loss and more stable connection and this will depend on the purity of copper that is used in the cable itself. More purity in copper, more stability, simple as that.
Conclusion
So as you can see, there are a lot of different things that will influence your pick of proper network cable but the overall best advice is to get one that will fit well into your needs and setup. pair it up with your router and your internet plan since just simply buying something that you can not use is really a waste of money.
There are times when the Windows Search results do not include what you want to search. However, if you are trying to search for something that’s located on your desktop and Libraries, they would appear right away on the search results. Actually, the issue is not with the search but with the list of files and folders that Windows can index. If you encounter this issue, read on as this post will guide you on how to fix it.
The Windows 10 operating system, ever since Windows v1903 was released, offers two kinds of searches – the classic and the enhanced search. You may have to add more folders to the classic search or use the enhanced mode to resolve the issue. In other words, to fix the problem with the Start Menu Search, you can try to enable the Enhanced Mode or add folders to the Class Search or remove the excluded folders, as well as run the Search and Indexing troubleshooter. For more information, refer to each one of the options provided below.
Option 1 – Try to enable the Enhanced Mode
To fix the problem, you have to enable the Enhanced Mode search and configure the folders you want to be indexed. How? Follow these steps:
First, you have to go to Settings > Search > Searching Windows.
Next, select the radio button for the Enhanced option.
After that, select the folders you want the Windows Indexer to exclude from the Enhanced Search mode.
Option 2 – Try to add folders to the Class Search
If you don’t want to enable the Enhanced search mode, then you might want to add folders that are important to you. All you have to do is configure the Search Indexing Options by following these steps:
Go to Settings > Search > Classic and from there, click on the “Customize search locations” option.
Next, click on Modify in the pop-up window that appears.
Then add drives and folders that are important to you. Once the indexing is completed, Windows will be able to find the file and display it in the search results.
Option 3 – Try removing the excluded folders
If you have already enabled the Enhanced mode but your files still don’t appear, then you might want to check out the excluded folder list.
The first thing you have to do is go to Search and from there, you will find a list of folders under the Excluded folder list.
Next, click on the excluded folder that you want to remove by clicking on the “Remove Excluded folders” button.
If you are using the Classic search, you have to check if the index has restrictions on the file type. You can find it in Advanced options > File Types.
Note: If you want to search in Documents, you could also enable the Index Properties and File Contents. This should resolve the problem.
Option 4 – Try to run the Search and Indexing troubleshooter
You might also want to run the Search and Indexing troubleshooter in Windows 10 as it checks whether the settings for the Windows Start Search are in place and automatically corrects any issues if the update or software installation has changed the settings. To run it just click on the Start button and select Settings > Updates and Security > Troubleshoot. From there, select the Search and Indexing Troubleshooter.
Sometimes, some applications after they are installed will put their shortcut in the context menu (right-click on desktop) for easy access, most of the time these are some system tied applications like AMD and Nvidia control panels or archives like WinRAR or 7ZIP but it can happen even for some usual application to do this.
There are some applications that you use frequently and they could be worth putting in the context menu, if you want to avoid clutter on the desktop or in the taskbar this is the third place that you should consider placing shortcuts.
Doing this will require some playing and tweaking in the Windows registry editor so be careful when editing the registry since bad entries can lead to system crash or instability. Follow step-by-step instructions.
Adding apps to the context menu in the registry
Creating entry
Open the registry editor by searching Regedit and pressing enter than inside of the registry editor search for the next key:
HKEY_CLASSES_ROOT\Directory\Background\shell
Select shell and right-click on it, hover over New and in the submenu click on Key. In the next step, you need to name a key, this name will be the thing that will be shown in the context menu when you right-click on a desktop so type in the name that you would like or the name of the application that you wish to add to the menu.
If you wish you can even add a keyboard shortcut to launch this specific application. To do this select entry that you have created and edit the default value, inside the edit string in the Value data field type first & and after that key that you would like as a shortcut. Now after right click if you hit your shortcut key app will be launched right away.
Adding command
The next task is to create a command key that will actually hold the command to launch the application. Right-click on the entry that you have created, hover over New, and click on Key.
Next, you’ll need to create the command key that will actually hold the command used to launch the application. Right-click on the new Notepad key, and then choose New \ Key from the menu. Name this key 'command', all in lower case and without hyphens.
Now in order to finish setting the launcher, you need the full path of the file that you would like to run. Locate your file in file explorer or in another tool and copy its path by SHIFT + right-clicking on the file itself and choosing copy as path option.
Now click on the command key and double click on the default key on right to edit it, inside the field value data paste your path to executable. close and save the registry and you are done.
Windows 7 was an operating system that had one thing which no other Windows had, even today. Official Microsoft desktop widgets.
With an attractive design, users loved to exploit the adequacy and neatness of these gadgets. However, Microsoft had to discontinue these gadgets as they posed a serious security threat to the Operating System. It was believed that a potential attacker could even use a gadget to take complete control of your PC.
With Windows 10, things have changed big time. You have all the fantastic apps and live tiles at your disposal providing a more native experience.
Despite all this, if you still have a fondness for fancy gadgets, we have just the right tool for you to get started with similar “Widgets” on Windows 10. Win10 Widgets is a tool that places the most important information right in front of you, on your desktop.
Win10 Widgets
Win10 Widgets is a desktop app package provided by Rainmeter which is an effective system customization engine for Windows. It brings some informative widgets to Windows 10 which look almost native with their intuitive and sleek design. You can pin them on your desktop to keep an eye on various system figures like CPU usage, data storage, battery usage, detailed computer performance, etc.
Native looking Widgets for Windows 10
These widgets are designed in such a way that it looks totally indigenous to the Windows 10 UI. With a similar design language, visual style, accent color, and even font settings, these widgets almost look like an inseparable system component.
You can choose between different size variants to pin on your desktop and arrange them in an orderly fashion to make the most of it.
Highly customizable desktop gadgets
Apart from the default size variants, you can configure several other parameters pertaining to the look and appearance of any widget. As Rainmeter is an open-source program, you are provided with the .ini configuration files which you can customize as per your wish. You can make adjustments to the widget coordinates, position and transparency as well. You can even create your own skins (.rmskin package) using the built-in Skin Packager and publish them for general usage through Rainmeter.
Illustro Skins
Over and above the cool widgets, Rainmeter also contains Illustro, a simple collection of skins that shows the range of Rainmeter’s capabilities. You can load the skins on your desktop for a brief look at your system internals. You can also start editing these skins to make them yours by taking advantage of the Rainmeter manual and forum link provided on the Welcome screen.
Win10 Widgets is a great tool if you like widgets or gadgets on your Desktop. It blends into the background and puts the important piece of information right on your desktop without you having to look somewhere else. If you already have the Rainmeter application, you can download the Win10 Widgets .rmskin file from here, else you can download the combined bundle for both Rainmeter and Win10 Widgets from here.
Any modifications in a computer, either big ones or small ones can definitely trigger some errors which is why you have to be careful when you modify the system setting. One of the errors you might encounter when you’ve modified your computer is the WHEA_UNCORRECTABLE_ERROR 0x00000124 Blue Screen Error. According to the error data provided by the Windows Hardware Error Architecture or WHEA, aside from system modifications, you could also encounter this error if your computer has a hardware failure which could be due to a hard drive, RAM, or any other hardware component. In most cases, it is related to physical hardware failures which might have something to do with defective hardware, heat-related, memory as well as a processor that is starting to fail or has already failed.
To fix the WHEA_UNCORRECTABLE_ERROR 0x00000124 Blue Screen error, here are some suggestions you have to check out.
Option 1 – Try to perform System Restore
Before you further troubleshoot the problem, you might want to perform System Restore first as the BSOD error might be caused by system modifications. Thus, to undo them, you can use System Restore. Run it using these steps:
First, tap the Win + R keys to open the Run dialog box.
After that, type in “sysdm.cpl” in the field and tap Enter.
Next, go to the System Protection tab then click the System Restore button. This will open a new window where you have to select your preferred System Restore point.
After that, follow the on-screen instructions to finish the process and then restart your computer and check if the problem is fixed or not.
Option 2 – Try disabling Overclocking
If overclocking is enabled, you might have to disable it as some users reported that the WHEA_UNCORRECTABLE_ERROR 0x00000124 error started to appear right after overclocking. To disable it, follow the steps below.
Go to the Start Menu and open Settings.
Next, select Update and Security and go to the Recover tab.
From there, click on Restart now in Advanced startup. This will restart your computer.
Once you’re in the Advanced startup, go to Troubleshoot and then select the Advanced Options.
From there, select the UEFU Firmware Settings.
Now click on Restart. Once your computer has restarted, it will automatically open BIOS.
From the BIOS, go to the Advanced tab and navigate to Performance and then look for Overclocking.
Once you’ve found Overclocking, make sure that it is disabled. If it’s not, then disable it and then save the changes made by tapping the F10 key.
Start your computer normally and check if the WHEA_UNCORRECTABLE_ERROR 0x00000124 error is now fixed.
Option 3 – Check your computer’s cooling components and make sure that they are working
It is a known fact that an overheated PC causes system slowdowns and even Blue Screen errors like WHEA_UNCORRECTABLE_ERROR 0x00000124. To fix it, you need to check your computer’s cooling components to see whether they’re properly working or not. Then make sure that you clean them up including the fan and other hardware from dust and other debris.
Option 4 – Use the Windows Memory Diagnostics
Since the problem has something to do with the physical RAM, you need to use Windows Memory Diagnostics. To run it, refer to these steps:
Tap the Win + R keys to open Run and type exe and hit Enter to open the Windows Memory Diagnostic Tool.
After that, it will give two options such as:
Restart now and check for problems (Recommended)
Check for problems the next time I start my computer
Once your computer has restarted, perform a basic scan or you could also go for the “Advanced” options such as “Test mix” or “Pass count”. Simply tap the F10 key to start the test.
Note: After you select the option, your PC will restart and check for memory-based issues. If it finds any issues, it will automatically fix them.
Option 5 – Update or rollback or disable concerned device drivers
To fix the WHEA_UNCORRECTABLE_ERROR 0x00000124 error, you can also try to roll back, or update, or disable the concerned device drivers.
Open the Devices Manager from the Win X Menu.
Then locate the device drivers particularly the ones that are under the sections of Keyboard, Mouse, USB, and HID Drivers.
Next, right-click on them to open the Properties.
After that, switch to the Driver tab and click on the Uninstall Device button.
Follow the screen option to completely uninstall it.
Finally, restart your computer. It will just reinstall the device drivers automatically.
Note: You can install a dedicated driver on your computer in case you have it or you could also look for it directly from the website of the manufacturer. On the other hand, if you have just updated your device drivers then you need to roll back the drivers to their previous versions or disable them.
Option 6 – Try running System File Checker or SFC scan
You could also run System File Checker or SFC scan to fix the BSOD error. It is a built-in command utility that helps in restoring corrupted files as well as missing files. It replaces bad and corrupted system files with good system files. To run the SFC command, follow the steps given below.
Tap Win + R to launch Run.
Type in cmd in the field and tap Enter.
After opening Command Prompt, type in sfc /scannow
The command will start a system scan which will take a few whiles before it finishes. Once it’s done, you could get the following results:
Windows Resource Protection did not find any integrity violations.
Windows Resource Protection found corrupt files and successfully repaired them.
Windows Resource Protection found corrupt files but was unable to fix some of them.
Reboot your PC.
Option 7 – Try to disable the Digital Driver Signature Enforcement
Reboot your computer from the Start menu.
Then select the option while pressing the Shift key. This will open the Advanced Boot menu.
From there, click on Troubleshoot and select Startup Settings.
Now select the “Disable driver signature enforcement” option using the arrow keys on your keyboard and then restart your computer normally.
Razer is a well-known brand among PC gamers and users, it started as a peripheral manufacturer focused on keyboards and mouse but after years passed Razer expanded its inventory offerings. It soon started offering headphones and lately has branched into wider product lines like gaming chairs and protection masks.
It is not a big surprise that Razer is expanding into other branches of the PC industry. This time, however, it has revealed not one but three new hardware for your PC. Case fans, all in one liquid cooler and power supply.
There are not many details about the products themselves but one thing is one hundred percent confirmed, they come with Razer Chroma, all of them, even the fans.
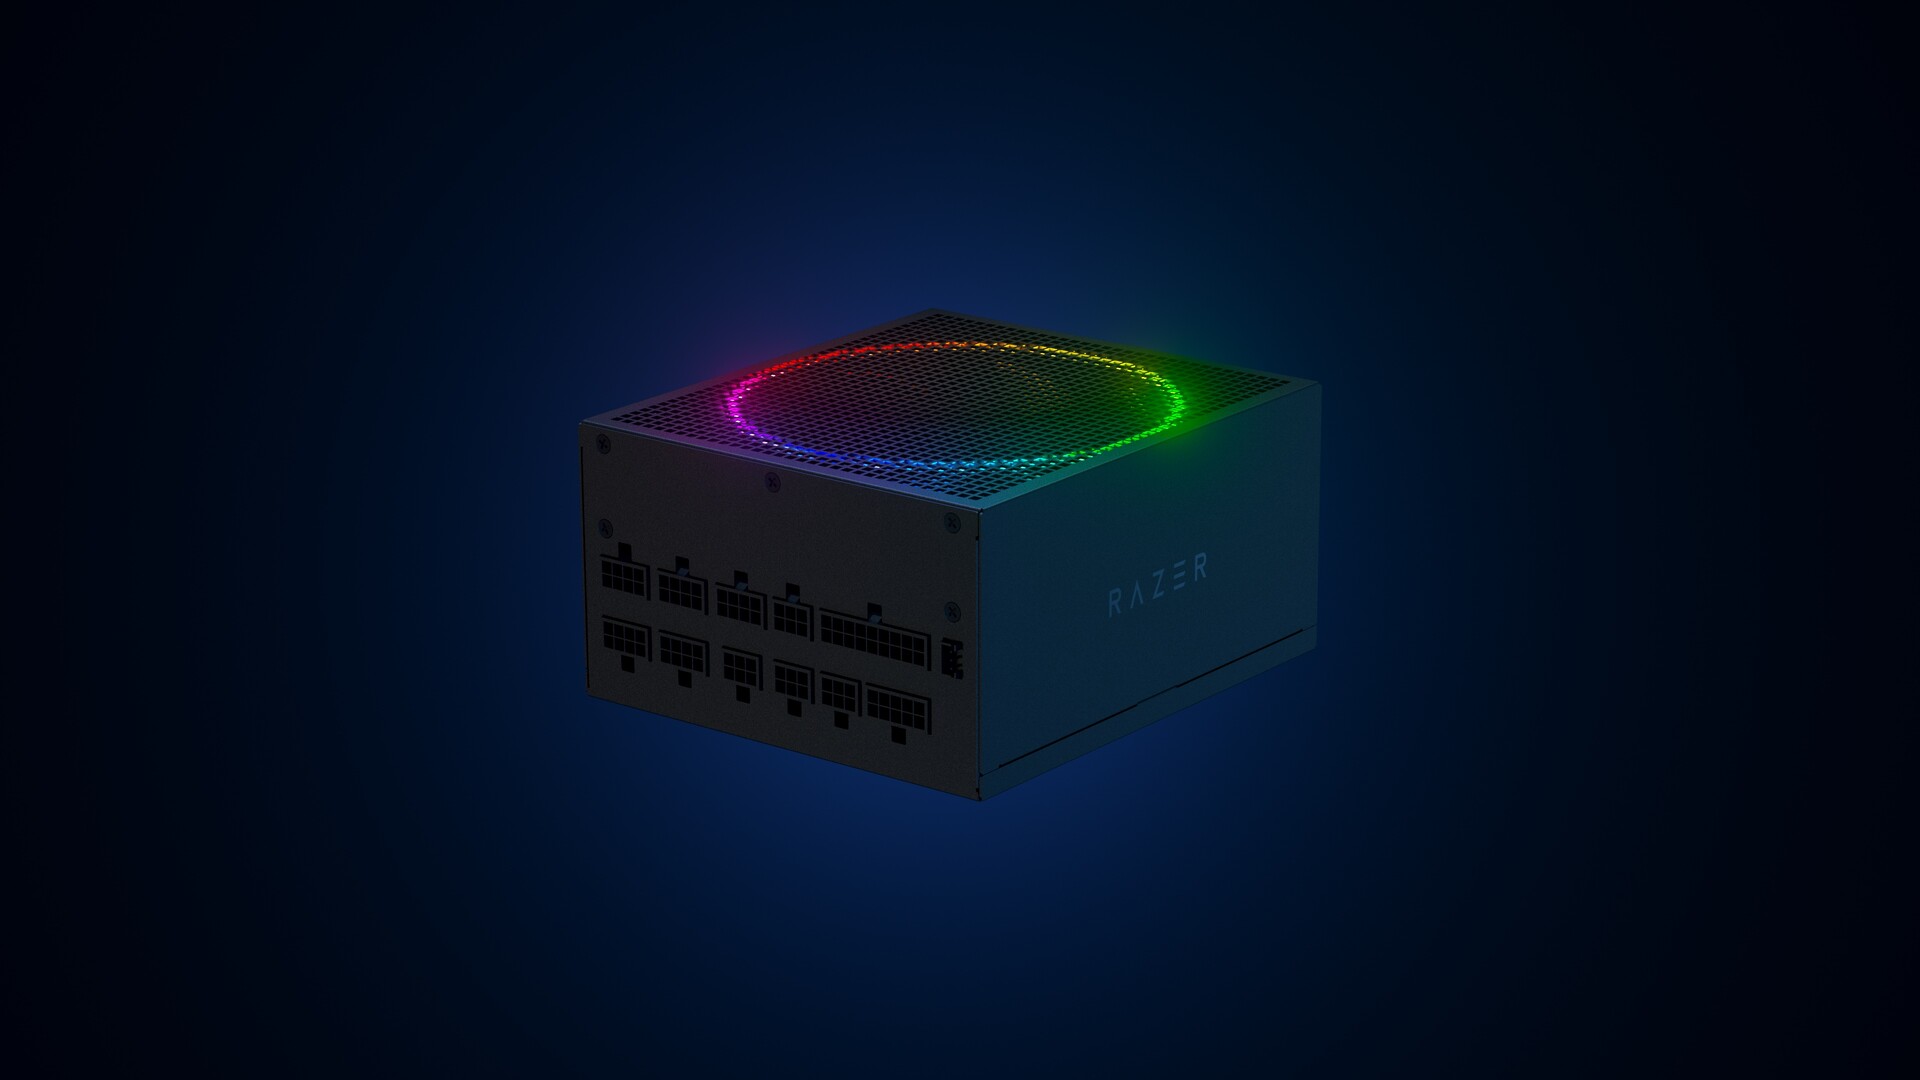
Katana Chroma ATX PSU
Most interesting for me personally is Razers Katana, the power supply unit. It is a modular power supply ranging from 750W to 1200W with the additional option of Titanium rated one with an impressive 1600W of power. Power supply will start shipping in early 2022 and at the time of writing this article no price range has been released.
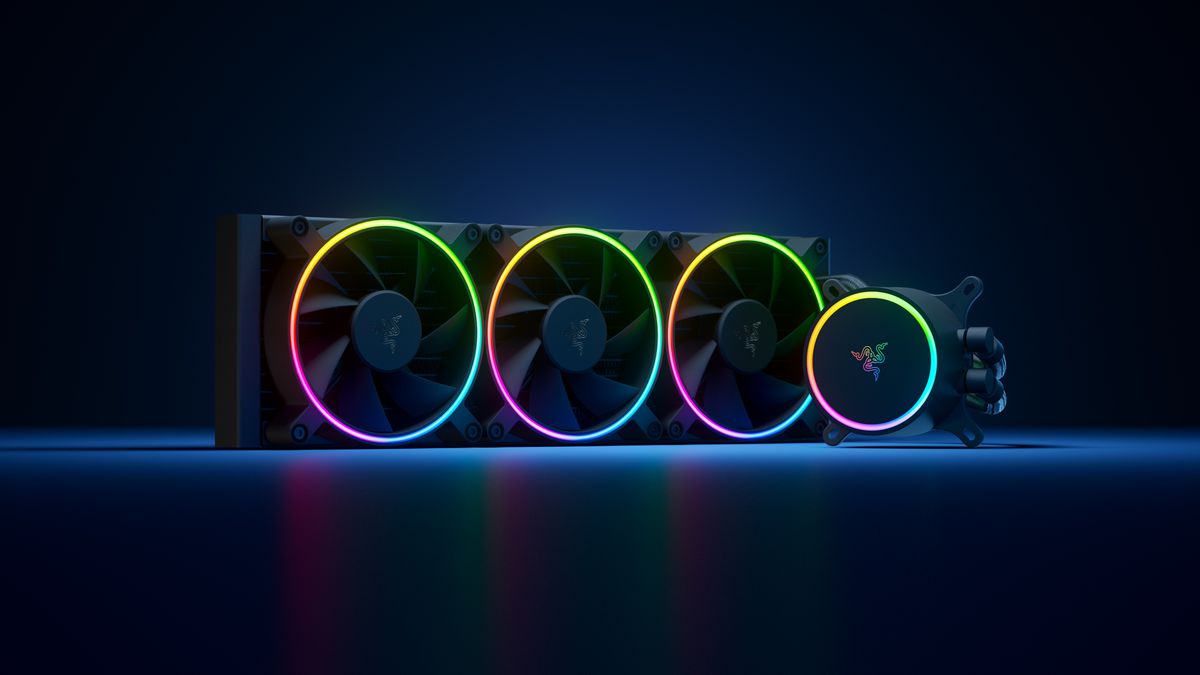
Razer Hanbo AIO
Hanbo liquid cooler will feature an optimized intake design so it can ensure greater heat transfer and fluid dynamic for improved reliability and silent operation. Radiator comes in 240mm size with two fans and a larger one of 360mm with three fans. The pump will be able to rotate in any direction of full 360 degrees so it can fit in any case. Hanbo will be released in November this year but no pricing has been released so far.
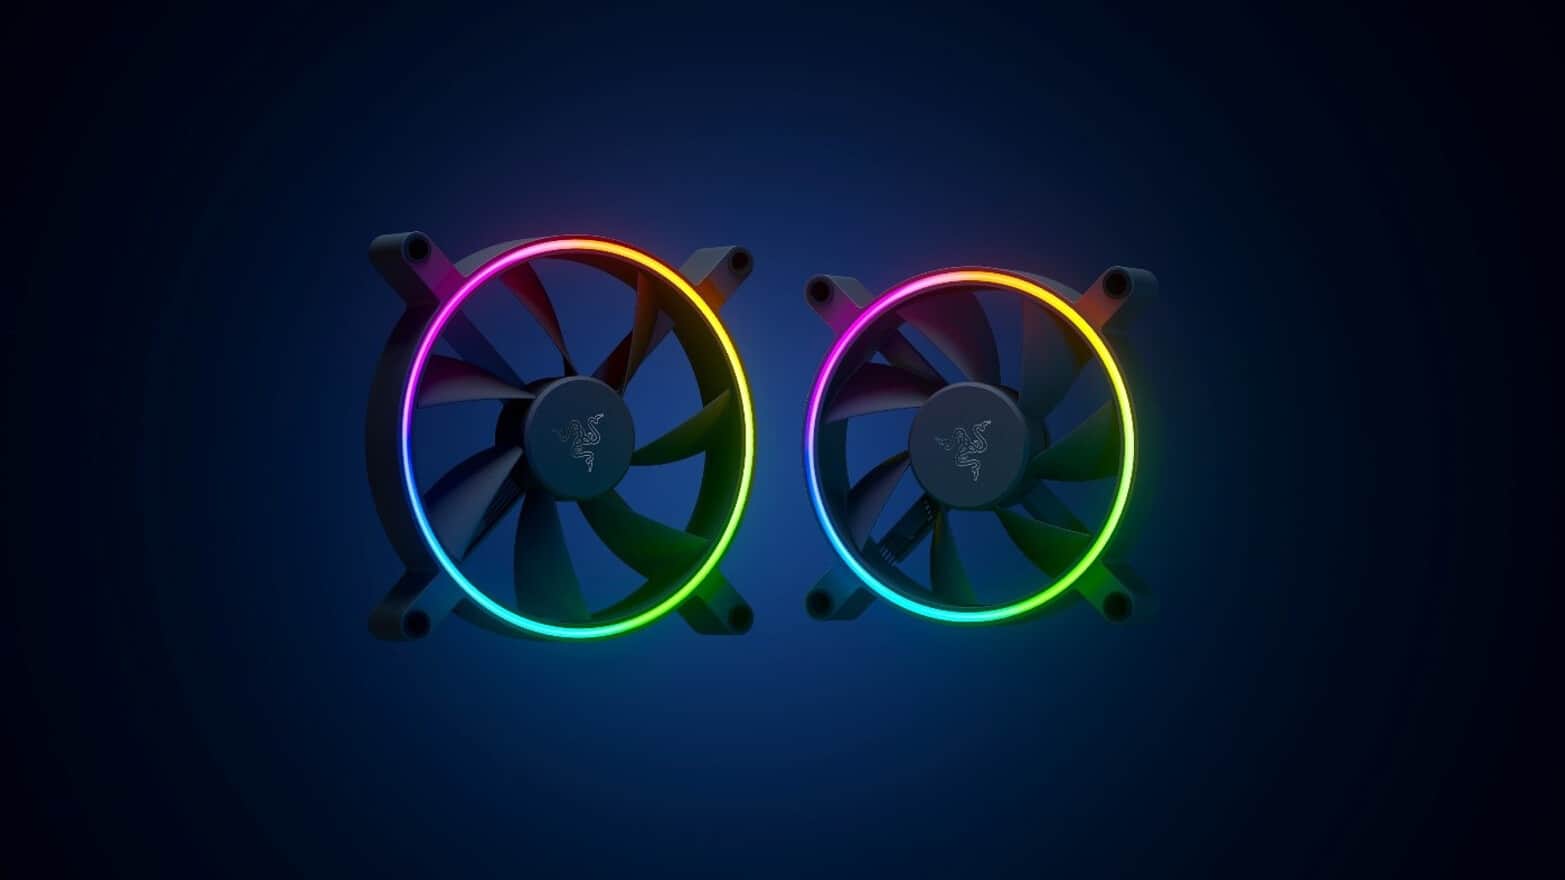
Razer Kunai Chroma case fans
Kunai fans will boast high static pressure performance with lowered noise. They will go as far as 2200rpm for the 120mm version where the 140mm version will go up to 1600rpm. They will come with addressable LEDs and up to eight fans will be able to be connected to Razer’s PWM fan controller that will come with a magnet at the back for easy attachment to any steel part of PC casing.
PWM will use Razer’s Synapse software to customize pulse width modulation in order to improve airflow and noise. PWM will be priced at $49.99 in the Razer Store and it is available for preorder. Fans are priced at $44.99 for one 120mm or $129.99 for a three-pack of 120mm. One 140mm will go for $49.99 and a three-pack will be $129.99.
Windows 11 brought with it a simplified right-click menu that has limited options. If you would like to bring the old Windows 10 right-click menu you will have to do some registry tweaking but it is doable.
Since this requires registry tweak, please follow given solution step by step
Press Start and type RegEdit
Click on Registry Editor
Inside registry editor find next key:
Computer\H_KEY_CURRENT_USER\SOFTWARE\CLASSES\CLSID\
Right click in the right part of editor window and select New > Key
Type in as a name: {86ca1aa0-34aa-4e8b-a509-50c905bae2a2}
Right click on {86ca1aa0-34aa-4e8b-a509-50c905bae2a2} key and select New > Key again to create new key inside this one
Name inside key InprocServer32
Double click the “(Default)” key in InprocServer32 to open it
When the Default key opens close it without making any changes by clicking on OK. This will make its value property Blank instead of value not set
Close Registry Editor
Restart your PC
Once the system is up if the followed solution is applied you will now have an old school menu once right-click is used.
The Google Chrome browser checks the SSL Security Certificate of the website that you are trying to open. However, if Chrome is not able to check the certificate then you might encounter an error related to the SSL Certificates which you might face when browsing the web. This particular error is the ERR BAD SSL CLIENT AUTH CERT error which is caused by many factors such as the computer’s Time, Cached Data is corrupt, Date is out of sync, as well as third party software installed in your computer is the one that’s blocking the site and many more.
The ERR_BAD_SSL_CLIENT_AUTH_CERT error might also be coming from the website’s end. It could be that the server is rejecting the certificate the client website is sending. The certificate might have already expired or the server may not trust its issuer – whichever the case may be, here are some options you can check out to fix the error.
Option 1 – Sync Date and Time
The first thing you can try is to sync the Date and Time of your computer as the wrong Date and Time settings are one of the most common causes of connection problems like the ERR_BAD_SSL_CLIENT_AUTH_CERT error. This is because of the incompatibility between the SSL Certificate validation date and the System Clock. Thus, you have to sync your System Clock. Refer to the steps below to do so.
Right-click on the Taskbar and click on the Adjust Date and Time option.
Next, click on the Sync Now button to synchronize the Date and Time with the Microsoft Servers.
Now make sure that the Time Zone that’s set on the same page is correct.
Option 2 – Try clearing the browser data
There are times when some data in the browser is conflicting with the loading of the website and triggers errors like ERR_BAD_SSL_CLIENT_AUTH_CERT. And so you can try to clear your browser’s data. This might be a very basic solution but oftentimes it works in fixing this kind of error in Google Chrome. Follow the steps below to clear the data in your browser.
Open your Google Chrome browser.
After that, tap the Ctrl + H keys. Doing so will open a new panel that allows you to delete the browsing history and other data in your browser.
Now select every checkbox that you see and click on the Clear browsing data button.
Then restart your Chrome browser and check if you can now open any website or not.
Option 3 – Try to check and fix any possible conflicts with third-party programs
Third-party programs like internet protection software could be interrupting the connection and causing the error. For some unknown reason, your antivirus program or firewall might be detecting the webpage you are trying to open as malicious or with less credibility which is why it is blocking the browser from opening the website. To fix that, if you have third-party programs installed like VPN, security software, or any add-on, or firewall, you can disable them temporarily and see if it fixes the problem and you’re able to pull up the website. After a while, you have to enable them back and configure their settings so that the website won’t get blocked again.
If you were using Google Chrome when you got the ERR_BAD_SSL_CLIENT_AUTH_CERT error, then you need to follow the protocol fixes for SSL3/TLS and QUIC which are usually some of the reasons that cause the SSL version / Cipher Mismatch. It also has a few fixes for Windows 10 computer where you can clear the certificates and make sure that your computer date and time is in sync with your time zone and so on.
If you were using Edge or Internet Explorer when you got the error, then you have to follow the steps below.
Type “Internet” in the search box of your browser. After that, you should see the Internet Options from the search results.
Next, open the Internet Properties window and switch to the Advanced tab and then scroll down to the Security section.
From there, check the “Use TLS 1.1” checkbox as well as the “Use TLS 1.2” checkbox and then click OK to save the changes made.
Restart the browser.
On the other hand, if you were using Firefox when you go the error, here’s what you have to do.
Open Firefox and in the address bar, type “about:config” and hit Enter.
If a warning appears, just click on the “I accept the risk!” button to proceed.
Next, type in “TLS” in the search field and hit Enter.
Then look for “security.tls.version.min” and double click on it and set its integer value to 3 to force the protocol of TLS 1.3.
Now click OK and restart Firefox and do the same thing with SSL.
Option 5 – Try to update Google Chrome
You might also want to try updating your browser to its latest version and have it installed in your computer. After you install the update, check if you can now open the website you were trying to open earlier.
Option 6 – Get rid of any conflicting browser extensions
Open Chrome and press Alt + F keys.
Go to More tools and click Extensions to look for any suspicious browser extensions or toolbars.
Click the Recycle bin and select Remove.
Restart Chrome and press Alt + F keys again.
Proceed to On Startup and mark Open a specific page or set of pages.
To check if the browser hijacker is still active, click Set pages, if it is active, overwrite the URL.
Note: If removing the browser extensions or toolbars didn’t work, you can also try to reset your Google Chrome browser.
Open Google Chrome, then tap the Alt + F keys.
After that, click on Settings.
Next, scroll down until you see the Advanced option, once you see it, click on it.
After clicking the Advanced option, go to the “Restore and clean up option and click on the “Restore settings to their original defaults” option to reset Google Chrome.
If you are trying to copy a file but suddenly encountered an error message saying, “An unexpected error is keeping you from copying the file”, then you’ve come to the right place as this post will help you resolve the problem.
This error comes along with another message that states, “Error 0x80070037: The specified network resource or device is no longer available”. This kind of error occurs when the power supply to the external device is weak and causes the device to be disconnecting and reconnecting consistently. To fix this problem, you need to check out the potential fixes provided below.
Option 1 – Try to physically check the USB ports
You need to check the USB ports as there could be some ports that are loose or damaged physically which affects the overall performance of the port. You could also try to change the USB port since modern computers have a variety of USB ports. So if your USB drive supports USB 3.0 or 3.1, make sure that you plug it inside a USB 3.0 or 3.1 ports. If you’re not sure which port, just keep in mind that the USB 3 port is usually blue or you can also use your computer’s documentation or manual as a reference to locate it.
Option 2 – Check the connected cables physically
Aside from the USB ports, you also have to check the physical status of the connected cables because if there are damaged ones, just like with USB ports, it would also affect the overall connectivity of the device with the computer. So if you notice some irregularities in the connecting cable physically, you might have to buy another one and replace it and then see if it fixes the problem or not.
Option 3 – Update or reinstall the Universal Serial Bus Controller driver
Since it could be a driver issue, you can try to update or reinstall the Universal Serial Bus Controller drivers using the Device Manager. Refer to the following steps:
First, click the Start button and type “device manager”.
Then click on the “Device Manager” from the search results to open it.
From there, look for the “Universal Serial Bus controllers” option and then right-click on each one of the USB drivers and select the Update Driver from the menu.
Note: If it is a regular USB drive, then it will be listed as a USB Mass Storage Device but if you have a USB 3.0 device, then look for a USB 3.0 Extensible Host Controller.
Restart your PC and then click the “Search automatically for updated driver software” option.
Note: If updating the USB Controller drivers didn’t work, you can try to reinstall them instead.
Option 4 – Try connecting to a slower USB port
If connecting your device to USB 3.0 or 3.1 ports didn’t work, you might want to try connecting it to a slower USB port this time. There are times when the device is not capable of supporting the higher power supply from a USB 3.0 or 3.1 port which is why the weak circuits do not work properly. Thus, try connecting your device to a USB 2.0 port and check if your device is now working.
Option 5 – Try to turn off the Power Saving option
You could also try to turn off the Power Saving option to resolve the problem. All you have to do is switch to Power Management after you select the Properties of the USB device and from there, uncheck the “Allow the computer to turn off the device to save power” option. On the other hand, if you are using a laptop and did not use the USB device for a long time, then it could be powered off. This will ensure that the system does not turn off the USB device.
Option 6 – Try to connect your device to another computer
It is also possible that your computer does not support your device. To check that possibility, you can try connecting your device to a different computer and see if it is working without any issues. If it is, then you need to get another device that’s compatible with your computer.
Option 7 – Try to use a different device
You could also try using a different device and connect it to your computer. This will help you figure out if your device is damaged or not. So if the other device you connected is working just fine, then you might have to replace your device with a new one or consult an expert and have it repaired if possible.
Option 8 – Run the Hardware and Devices Troubleshooters
The first thing you need to do is click on Start and then on the gear-like icon to pull up the window for Settings.
After opening Settings, look for the Update and Security option and select it.
From there, go to the Troubleshoot option located on the left-hand side of the list.
Next, select Hardware and Devices from the list and open the Troubleshooter and run it. Once it is doing its job, wait for it to complete the process and then restart the system.
After the system restarts, check if the problem’s now fixed. If not, refer to the next option given below.

 Error Causes
 Razer is a well-known brand among PC gamers and users, it started as a peripheral manufacturer focused on keyboards and mouse but after years passed Razer expanded its inventory offerings. It soon started offering headphones and lately has branched into wider product lines like gaming chairs and protection masks.
It is not a big surprise that Razer is expanding into other branches of the PC industry. This time, however, it has revealed not one but three new hardware for your PC. Case fans, all in one liquid cooler and power supply.
There are not many details about the products themselves but one thing is one hundred percent confirmed, they come with Razer Chroma, all of them, even the fans.
Razer is a well-known brand among PC gamers and users, it started as a peripheral manufacturer focused on keyboards and mouse but after years passed Razer expanded its inventory offerings. It soon started offering headphones and lately has branched into wider product lines like gaming chairs and protection masks.
It is not a big surprise that Razer is expanding into other branches of the PC industry. This time, however, it has revealed not one but three new hardware for your PC. Case fans, all in one liquid cooler and power supply.
There are not many details about the products themselves but one thing is one hundred percent confirmed, they come with Razer Chroma, all of them, even the fans.
 Most interesting for me personally is Razers Katana, the power supply unit. It is a modular power supply ranging from 750W to 1200W with the additional option of Titanium rated one with an impressive 1600W of power. Power supply will start shipping in early 2022 and at the time of writing this article no price range has been released.
 Hanbo liquid cooler will feature an optimized intake design so it can ensure greater heat transfer and fluid dynamic for improved reliability and silent operation. Radiator comes in 240mm size with two fans and a larger one of 360mm with three fans. The pump will be able to rotate in any direction of full 360 degrees so it can fit in any case. Hanbo will be released in November this year but no pricing has been released so far.
 Kunai fans will boast high static pressure performance with lowered noise. They will go as far as 2200rpm for the 120mm version where the 140mm version will go up to 1600rpm. They will come with addressable LEDs and up to eight fans will be able to be connected to Razer’s PWM fan controller that will come with a magnet at the back for easy attachment to any steel part of PC casing.
PWM will use Razer’s Synapse software to customize pulse width modulation in order to improve airflow and noise. PWM will be priced at $49.99 in the Razer Store and it is available for preorder. Fans are priced at $44.99 for one 120mm or $129.99 for a three-pack of 120mm. One 140mm will go for $49.99 and a three-pack will be $129.99.
Kunai fans will boast high static pressure performance with lowered noise. They will go as far as 2200rpm for the 120mm version where the 140mm version will go up to 1600rpm. They will come with addressable LEDs and up to eight fans will be able to be connected to Razer’s PWM fan controller that will come with a magnet at the back for easy attachment to any steel part of PC casing.
PWM will use Razer’s Synapse software to customize pulse width modulation in order to improve airflow and noise. PWM will be priced at $49.99 in the Razer Store and it is available for preorder. Fans are priced at $44.99 for one 120mm or $129.99 for a three-pack of 120mm. One 140mm will go for $49.99 and a three-pack will be $129.99. 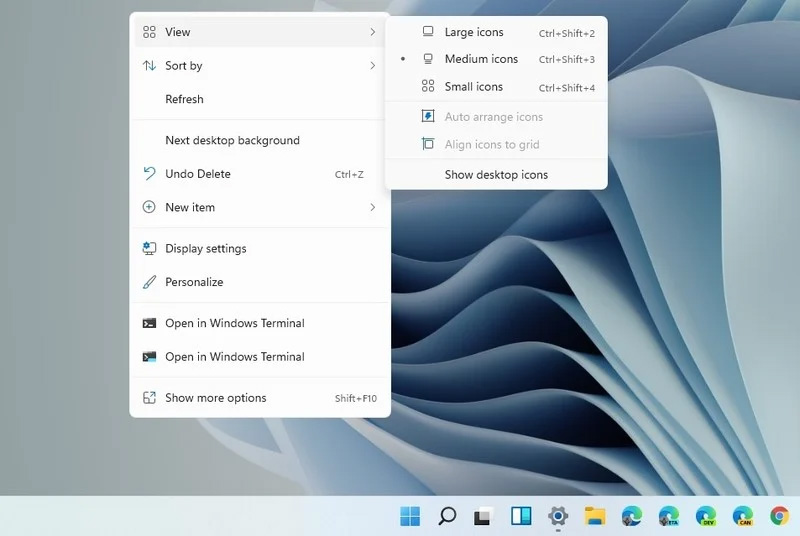 Since this requires registry tweak, please follow given solution step by step