As you already know, the Windows Sandbox is one of the new features in Windows 10. However, just like other new features, it also throws up errors and one of them is the error that states,
“Windows Sandbox failed to start, Error 0x80070057, The parameter is incorrect”.
This particular error in Windows Sandbox occurs due to its dependence on numerous components of Windows 10 that are related to Hyper-V and Virtualization mainly.
To fix this error, there are several options you can check out. You can try to install any pending updates on your Windows 10 computer, as well as make sure that all the services related to Windows Sandbox are enabled.
Option 1 – Try to run the Windows Updates to install pending updates
The first thing you can do to resolve the “Windows Sandbox failed to start, Error 0x80070057” is to check Windows Updates in your computer and see if there are any pending Windows Updates you have to install. All you have to do is go to the Windows 10 Settings app and then go to the Windows Updates section and click on the “Check for updates” button to check if there are any pending updates that are needed to be installed. This could fix the Windows Sandbox error.
Option 2 – Ensure that all the supporting processes and services are running properly
If running Windows Sandbox as an administrator didn’t fix the error, you have to ensure that all related processes for Windows Sandbox are running properly. To do that, follow these steps:
Tap the Win + R keys to launch the Run utility and type “services.msc” in the field and hit Enter to open the Windows Services Manager.
Next, from the list of services, look for the following services in the given order:
Network Virtualization Service
Virtual Disk
Hyper – V Virtual Machine
Hyper – V Host Computer Service
Container Manager Services
After you find the aforementioned services, make sure to check if they are enabled or not and then restart each one of them.
Once done, try to open the Windows Sandbox again and see if the error is fixed or not.
In case you don’t know, there is a feature in Windows 10 computers that allows them to function a lot better. This feature is called Full-Screen optimization and it is enabled by default for several applications such as games and video players. If enabled, the Full-Screen optimization feature enhances the video playback and gaming by simply putting the CPU and GPU process as a priority. However, there are times when it can also result to a drop in the frame rate or FPS while in full-screen mode. And of course, the obvious solution to this dilemma is by disabling the Full-Screen optimization feature which is why Microsoft took action and removed this feature themselves in the recent Windows 10 Update releases. However, there is another way for you to enable it back or disable it yourself if you haven’t installed the recent updates yet and there are plenty of ways you can do both. All you have to do is follow the options given below carefully.
Option 1 – Try using Windows 10 Settings
If you haven’t installed the recent updates yet and all you have are the earlier releases, then this method would suit you.
Open the Windows 10 Settings app.
Next, navigate to System > Display > Graphics Settings or Advanced graphics settings.
From there, uncheck the “Enable Fullscreen optimization” option if you want to disable the feature, else just keep it checked.
Option 2 – Try using the Registry Editor
Tap the Win + R keys to open the Run dialog box and then type “Regedit” in the field and hit Enter to open the Registry Editor.
Afterward, if a User Account Control or UAC prompt appears, click on Yes.
Once the Registry Editor is pulled up, navigate to this registry key: HKEY_CURRENT_USERSystemGameConfigStore
Next, right-click on Explorer and select New > DWORD (32-bit) Value and then name it to “GameDVR_DSEBehavior and tap Enter to save it.
Now double click on the newly created GameDVR_DSEBehavior DWORD and set its value to “2” if you want to disable it, or “0” if you want to enable it.
Once you entered the value, close the Registry Editor and restart your computer to successfully apply the changes made.
Option 3 – Try running the application in Compatibility Mode
If the first two options didn’t work, the next thing you can do is to run the application in a Compatibility Mode. Follow the steps below to do so:
Go to the location of the application or game on which you need to disable or enable the Full-Screen optimization feature.
After that, right-click on it and select Properties.
Next, switch to the Compatibility tab where you can see the “Disable fullscreen optimization” option to disable the feature and vice versa.
Now click on the Apply and OK buttons to apply the changes made in the application’s settings.
File Transfer Protocol Server, also known as FTP Server, is a private or public service that can host files that can be accessed both locally and globally. It is a quick, flexible and seamless service that allows you to store any kind of files depending on the total size of the server. If you’ve always found an FTP server useful, then the good thing is you can now create your FTP server since Windows 10 now allows it. You can host this server locally and later on make it globally available via the internet. So if you are planning to set up an FTP server on your Windows 10 computer, read on as this post will guide you on how to do so.
To set up the FTP server, you need to configure it first and then configure the Windows Firewall for the connections to go through. For more details, refer to the following steps:
Step 1: You need to configure the FTP server on Windows 10.
In the Search box, type in “Turn Windows Features On or Off” to search for it.
Then click on the appropriate result which will open a mini window.
From this mini window, scroll down to the list and expand “Internet Information Services where you have to expand the FTP Server section.
Next, select all the checkboxes to enable all the entries under FTP Server and then click the OK button to apply the changes made.
And now, since your computer is now allowed to host an FTP server, you need to configure it. To do so, type “Internet Information Services (IIS) Manager” in the Search box and click on the appropriate entry.
Next, right-click on Sites under the navigation bar of Connections and select Add FTP Site. This will open a new window where you have to input some information about your FTP hosting.
Now enter the details and click on Next.
Upon clicking Next, you will be prompted to give some authentication details. Enter the following details in the screenshot below.
Now click on Finish. After that, you will get an FTP Server being hosted on your Windows 10 PC.
And now that you’ve successfully configured the FTP Server, the next thing you have to do is to allow connections from and to the FTP server. Refer to the next step below.
Step 2: Configure the Windows Firewall for FTP connections to pass-through
In the Start Search, type “Allow an app or feature through Windows Firewall” and click on the related search result which will open a window with all the settings.
From there, click on the Change Settings button. This will display a list where you have to mark all the checkboxes for the FTP server to enable them in both the Private and Public configurations.
After that, click OK. This will allow you access to the FTP server on your local network.
Mswrd632.wpc is a Microsoft Office Word error message. This error message is often displayed in the following format:
‘Word cannot start the converter mswrd632.wpc’
The error message mswrd632.wpc may pop up when computer users try to open certain MS Word documents using the .doc extension.
Solution
Error Causes
Error Mswrd632.wpc may be triggered due to several reasons. Some of the common reasons for the mswrd632.wpc error code include:
Issues with Microsoft Word application
MSwrd632.wpc file corrupted
Changes in the registry configuration settings
Issues with security updates
Sometimes when you attempt to access the Word file of the older version of the MS Word application after new security updates, you may experience this error code.
This happens because the new security features that you have installed in the updated version blocks old files from being accessed.
Further Information and Manual Repair
If you can’t access important MS Word files on your PC, due to the error Mswrd632.wpc, then don’t you worry! The good news is that it is easy to fix and repair. By following a few simple methods, you can easily resolve this issue and access your MS Word files.
Try the methods listed below to repair error Mswrd632.wpc on your system:
Method 1: Copy the MSwrd632.wpc file From Another Computer
The error may also occur if the MSwrd632.wpc file is corrupted. In such as situation, copy the MSwrd632.wpc file on your PC from another computer.
You can usually find this file in the following path C:\Program Files\Common Files\Microsoft SharedTextConv.
However, please note this method is not secure and may make your PC vulnerable to a possible security hack. Do it when your PC is not connected to the internet.
Method 2: Unregister the Text Converter
This issue can also be resolved by unregistering the converter. Here is a step-by-step guide to unregister the converter.
First, go to the start menu and select RUN.
Type REGEDIT and press the OK button.
Next, what you have to do is find and click on registry subkeys. Here are the keys that you have to click on
HKEY_LOCAL_MACHINESOFTWAREMicrosoftSharedToolsText ConvertersImportMSWord6.wpc (Windows 32 bit OS)HKEY_LOCAL_MACHINESOFTWAREWow6432NodeMicrosoftSharedToolsText ConvertersImportMSWord6.wpc (Windows 64 bit OS)
Choose the key according to your Windows bit operating system. After that, click on the Edit menu, select the Delete option and click ‘Yes’ to activate changes.
This change will effectively unregister the text converter and disable it for third-party applications and for Microsoft Office enabling you to access your desired MS Word files easily.
Method 3 - Download Restoro to Resolve Registry issues
If the error is related to the registry, then the best and most efficient way to fix it is to download Restoro.
This is a powerful registry cleaner and a PC Fixer deployed with a user-friendly interface and compatible with all Windows versions. It scans and removes all registry errors and repairs the registry in seconds.
Click here and download Restoro to resolve the MSwrd632.wpc error now!
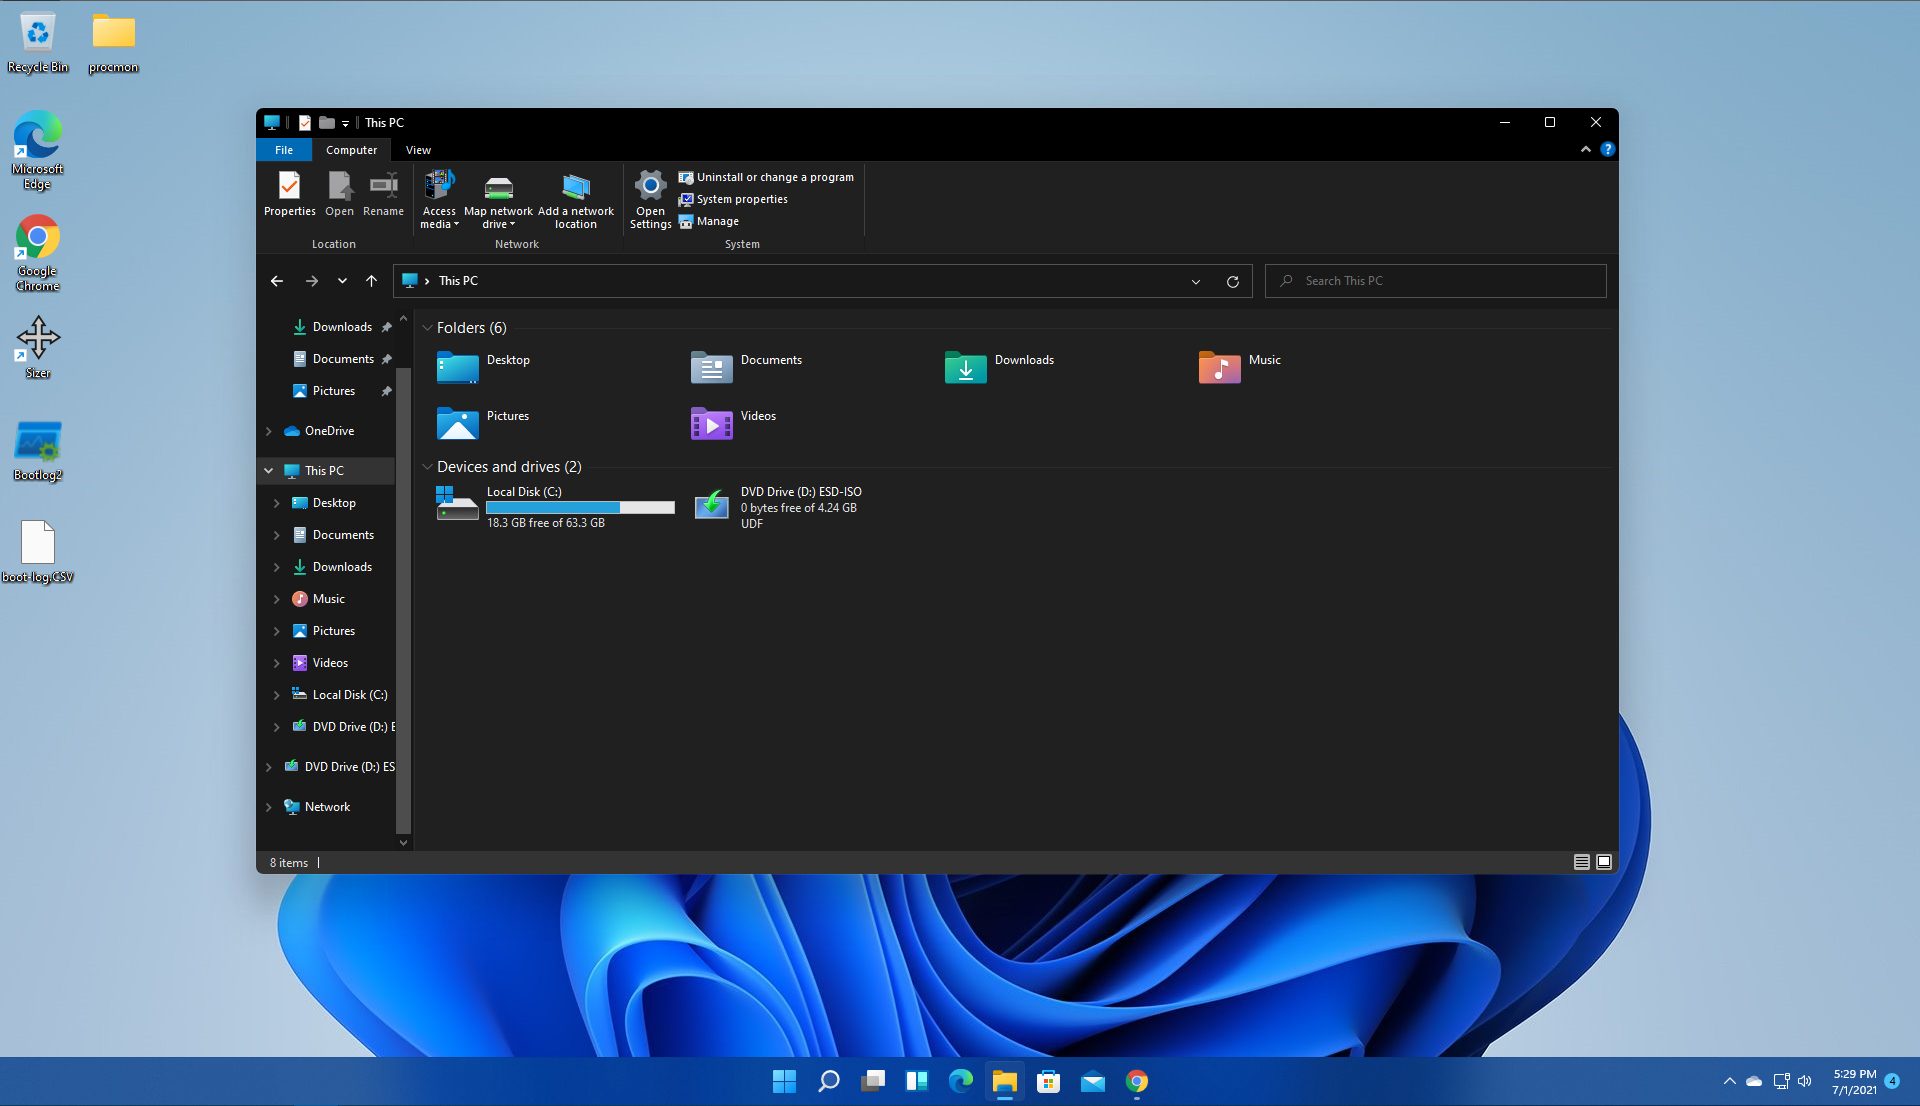
By default inside Windows 11 in File Explorer, once the file is selected, the small check box will appear beside it on left indicating visually that the file is selected. Older users will remember this feature from old Windows Vista and the feature itself is great if you are on some sort of touch device and need to select multiple files.
However, if you are working on a computer with a keyboard and mouse this feature might annoy you and seem like something that is not needed. Like many things inside Windows 11 this feature also can be customized and turned OFF if you do not want it.
In this guide, we will see how to turn these boxes off. Microsoft has somewhat hidden this feature but luckily it is not difficult to find it if you know where to look.
Turning check boxes OFF
Open File Explorer (if you do not have an icon on your Taskbar, right-click on the Start button and select File Explorer from the menu)
Click on View on the top toolbar
Select Show
Uncheck Item Check Boxes
That is everything that needs to be done, after the checkbox is unchecked all check boxes from File Explorer will disappear. If you wish to turn boxes back ON, just follow the steps and check the box beside Item Check Boxes.
As you know, Microsoft Office Word is a program that’s widely used all over the web and it’s because it’s the best program there is when it comes to editing and processing words. However, even when it is the best there is, it is not without its faults and so on as it can still encounter some errors every now and then. One of these errors is the Template_fields errors. When you encounter such an error, you will see a pop-up window. This strange error randomly appears on documents but you need not worry as this post will provide you with possible solutions to resolve the problem. But before you proceed with these solutions, you have to create a backup for all your Word documents to Microsoft OneDrive preferably.
To fix the problem, you can try to disable the add-ins or try to start Word in Safe Mode or repair Office. For more details, refer to the options given below.
Option 1 – Disable the Add-ins
Although add-ins enhance Microsoft Word, there are times when they can also cause problems that end up breaking Microsoft Word instead of improving it which is why you have to disable them. Refer to the following steps to do so:
Open Microsoft Word and then click on File.
After that, select Options from the menu and then click on Add-ins.
From there, you’ll see Manage: Com Add-ins as well as a button that says Go.
Now click on the Go button and wait for a couple of seconds for a new window to appear.
In the newly opened window, uncheck all the Add-ins and click on OK.
Restart Microsoft Word and check if the “Template_fields” error is now fixed or not.
Option 2 – Try starting Word in Safe Mode
You might also want to try rebooting Microsoft Office in Safe Mode as it is one of your best shots in finding out whether the problem is internal or external. However, if the problem does not appear after you reboot Microsoft Word in Safe Mode, then there is a possibility that the problem is with Microsoft Office itself. On the other hand, if the problem persists, then it could be a deeper issue.
First, start Microsoft Word in Safe Mode.
Next, tap and hold the Ctrl key on your keyboard and open the Word document.
After that, you should see a dialog box. Click on Yes and see if Microsoft Word opens in Safe Mode.
Alternatively, you can open the search box and then type “winword.exe /safe” and hit Enter.
Option 3 – Try repairing Microsoft Office
If the first two options didn’t work, then you might want to try repairing Microsoft Office without getting rid of it. In most cases, this usually works in fixing any problems and returns the program back to its default state. To repair Microsoft Office, follow the steps below.
Right-click on the Start Menu button and select Apps and Features.
Next, scroll until you see the Microsoft Office program you want to repair and then select the Modify option.
After that, follow the options to repair Microsoft Office and then restart your PC and see if the “Template_fields” error is no longer present.
Bad or good news, depending on your view comes from RIOT for their game Valorant. It seems that Riot has decided to enforce Windows 11 TPM 2.0 feature into Valorant running on Windows 11 and there is a rumor that it will be de facto standard and that it will move to Valorant in general no matter on which system it runs.
Furthermore, there is a rumor circling around that other developers are also talking about implementing TPM 2.0 requirements so they can harvest advanced security features of Windows 11 in order to prevent hacks and other cheats in their games.
This is an interesting point to stand on, on one side, sure, advanced features that will prevent cheating and hacking is a great thing. On other hand denying access to many computers that do not support TPM 2.0 and removing them from the game can be a permanent loss of customers and therefore loss of money. It is a risk to be sure and I am not really sure that alienating gamers is a good choice for long-term income, especially when you will be able to install Windows 11 on an unsupported PC as stated by Microsoft.
We will all see how this Riot decision will reflect on their business, as not a big Valorant player myself I am not impacted too much with this decision, but it will be interesting to see if others will indeed go with this trend or they will decide to wait a while until much more PC’s are upgraded.
Long working hours on a laptop can have some issues with laptop heating and thus slowing down. Today we will take a look at how can you prevent it from heating and keep it in a normal temperature range so it lasts longer and works better.
Close unnecessary programs or browser tabs
Usually, the main reason for high laptop temperature is the heavy and constant workload. Of course, the solution is very simple, turn off unnecessary browser tabs or applications running in the background, and less power will be needed for operation thus directly reducing workload and temperature.
Place it on a hard flat surface
Laptops generally have vents on the side and even under them, these vents, of course, are made so hot air is disposed of through them but if they are covered that will create issues. Placing computers on textiles, pillows, and legs can obstruct their venting holes and increase heat also since they are materials that are not taking heat away.
Your best practice should be placing the laptop onto a hard flat surface so air can flow freely and if you need to keep it in your lap there are lap desks made for this purpose.
Clean the laptop
With some good cleaning, the laptop can stop overheating, and generally, it will be cooler. Vents that has for ventilation can get clogged over large periods of time due to dust which is always present. Compressed air can be a quick easy solution to open the vents and redust it. Other methods include a compressor, vacuum, or brush in order to quickly remove any dust clogs. Taking it into service for complete redusting and paste change is also a great option.
Place it on the dedicated pad
There is some disagreement about using dedicated cooling pads for laptops, some say they are not effective at all, and some swear by them but from my experience good paired laptop and pad can indeed help with cooling it down. Usually, cooling pads will come with fans that will take away heat from the laptop itself reducing its overall heat.
Change your Windows power plan
If your laptop is constantly hot but you are not doing much with him check Windows power settings. There is a good chance it is set to run on a high-performance plan and if this is the case switch it back to a balanced power setting. Power plan like high performance will drain more power and more power will mean more heating. Of course, this will affect performance as well but for regular work that excludes some power gaming, video, and picture manipulations and other demanding tasks this power plan will work just fine.
Take control of the fans inside your laptop
Internal cooling is important and sometimes fans are not running to their full capacity so increasing their speed or changing their plan of work can cool down the computer nicely. Some laptops have fans controlling application already on them, especially gaming laptops but most of them do not. If your laptop does not have it, go to your laptop brand website and see if such an application exists for your model, if it does, download and install it but if there is no such application try general free ones like SpeedFan or Argus Monitor.
Reduce voltage of CPU and GPU
How more power means more heat, reducing the power that CPU and/or GPU take can be reduced inside BIOS by lowering voltage of these 2 components. First, go to BIOS and write down the voltage that is currently assigned to your CPU and/or GPU so you can bring it back if ever needed, also take note that reducing voltage and thus power will not affect negatively your components but increasing it thus overclocking can and will so be careful when bringing voltage back not to overdo it. You can always also reset your BIOS settings to bring them back to factory settings.
Do not use the laptop when charging it
When the laptop is placed on the charger in order to be charged and used at the same time, more power is drawn to it, and since the battery is taking electric charge instead of providing it more heat will be generated now since two different sources will be generating it, the battery itself and computer. When you really can not wait for the laptop to be charged, use it, but turn it off and wait to be fully charged if you can.
If the Sleep option is missing from the Power Menu then this could be caused by the power settings, local group policy configuration, etc. in your computer. Based on the reports of users who experience the same problem, the issue occurred after they’ve updated or upgraded their Windows 10 computers.
As you know, the sleep mode is quite useful in certain cases and is utilized by most users. If you put your computer in sleep mode, it actually minimizes the power usage of your computer while at the same time keeps your current session running. So if sleep mode is suddenly missing, then that could be a problem but worry not for this post will give you possible fixes to resolve the issue. Make sure to follow each one of them carefully to achieve good results.
Option 1 – Check the Power settings
As mentioned, one of the reasons why the Sleep option is missing could be the power settings in your computer. To check this possibility, make sure that you’ve enabled the sleep mode in the Power options setting window. How? Refer to these steps:
First, go to the Start menu, and from there open Control Panel.
Next, set the View by Large icons and select the Power Options.
After that, click on the “Choose what the power buttons do” option on the left-hand side.
Then click on the “Change settings that are currently unavailable” option and make sure that Sleep is checked under the Shutdown settings.
Afterward, click on Save changes.
Option 2 – Modify the Local Group Policy
If the Power setting isn’t the cause of the problem, then you might want to check the Local Group Policy and modify it. There is a dedicated policy for showing the sleep option in the power menu and if this policy is disabled, then it’s no wonder why you don’t see the sleep option in the power menu. To change this policy, refer to the steps below.
Tap the Win + R keys to open the Run dialog box.
Then type “gpedit.msc” in the field and hit Enter to open the Group Policy Editor.
Next, navigate to this path: Computer Configuration -> Administrative Templates -> Windows Components -> File Explorer
Look for the “Show sleep in the power options menu” option from the right-hand side pane and double click on it.
Now change it to Enabled and click on the Apply and OK buttons to save the changes made and restart your computer.
Option 3 – Try to turn on Standby
Standby, also known as InstantGo, is a feature in Windows 8 and 10 that allows users to maintain network connectivity after a computer has been put into sleep mode. Thus, if this feature is disabled, it can cause the Sleep option to disappear from the power menu. To turn it on, follow these steps:
Tap the Win + R keys to open Run.
And type “Regedit” in the field and tap Enter to open the Registry Editor.
Next, navigate to this path: HKEY_LOCAL_MACHINESYSTEMCurrentControlSetControlPower
From this path, look for the “CsEnabled” key on the right-hand side of the pane and double-click on it.
Set its value to “1” and click OK to save the changes made.
Now reboot your PC.
Note: If you were not able to find the CsEnabled key, then this indicates that your computer does not support the Standby feature. And if that’s the case, proceed to the next given option below.
Option 4 – Try to install a Video Card driver
On the other hand, some users reported that the problem was caused by the video card driver. And if your computer lacks the video adapter driver, it can also cause the same problem. Windows 10 typically install the video card driver on its own, however, there are rare cases when it doesn’t which is why you have to do it yourself manually. All you have to do is go to your manufacturer’s website and look for the video card driver, download it and then install it. Once you’ve installed the video card driver, reboot your computer and check if it has fixed the problem.
Error code 0x80070002 is a Windows Update error code. It occurs due to corruption errors which result when missing files in Windows Update prevent users from accessing updates on their system. It affects Windows 10 users and presents similar symptoms as error code 0x80070003, another Windows Update error. These symptoms include the following:
Presence of message box highlighting the name of the Windows Update error code
The inability of users to complete updates on their system
Error Causes
If certain files are missing in Windows Update on your system, you will most likely experience error code 0x80070002. These missing files prevent Windows Update from functioning properly even in cases where an update is downloaded on your PC.
Further Information and Manual Repair
Manual repair methods are necessary to resolve issues related to many Windows error codes. To fix Windows Update error codes like error code 0x80070002 in Windows 10, users will need to apply several procedures that include stopping and restarting the Windows Update service.
Note that the methods listed below must be done in the order they are listed. This is because they work in conjunction with each other to repair and replace corrupted update files that may be preventing your Windows Update service from functioning correctly.
Method One: Stop Windows Update Service
Stopping the Windows Update service will enable users to begin the manual repair process. It’s crucial, to begin with, this step, as it prepares users to delete temporary update files when the Window Update service is no longer functioning correctly. These temporary files may be the source of the corruption errors resulting in error code 0x80070002. Follow the steps below to stop Windows Update and resolve the error code.
Step one: Type Control Panel in the Search box near the Start button
Step two: Select Control Panel
Step three: Type Administrative Tools in the search box
Stop four: Select Administrative Tools
Step five: Click Services, then search for Windows Update
Step six: Right-click Windows Update service, then select Stop
After you have successfully stopped the service, proceed by deleting temporary update files in the SoftwareDistribution folder.
Method Two: Delete Temporary Update Files in SoftwareDistribution Folder
Error code 0x80070002 is unlikely to be resolved without addressing the problems related to missing or corrupted update files. By deleting temporary update files within the SoftwareDistribution folder, you will most likely be able to fix the error code and access updates within the Windows Update service.
Step one: Open File Explorer, then open Windows folder in drive C
Step three: Open the DataStore folder and delete all files within this folder
Step four: Click Back to access the SoftwareDistribution folder
Step five: Open the Download folder to delete all files from this folder as well
While attempting to delete these files, you may be asked to enter a password as an administrator. If this occurs, enter the required password to proceed.
Method Three: Restart Windows Update Service
Once you have logged on as an administrator and deleted appropriate update files in the SoftwareDistribution folder, follow the steps below to restart the Windows Update service.
Step one: Type Control Panel in the Search box near the Start button.
Step two: Select Control Panel
Step three: Type Administrative Tools in the search box, then select Administrative Tools
Step four: Double-click Services
Step five: Search for the Windows Update service
Step six: Right-click the Windows Update service, then select Start.
Once you’ve selected Start, you’ll be able to access the Windows Update service. Verify these manual methods have proven successful by restarting your PC, then check if you can access updates. If error code 0x80070002 has been resolved, you will be able to complete the download process when you attempt to access updates within Windows 10. You will also no longer see the error code 0x80070002 message box.
If you have or are currently getting a troublesome error saying, “The boot selection failed because a required device is inaccessible” when you boot your computer, then continue reading as this post will give you some suggestions that may help you resolve the error.
This pesky error pops up during the booting process of your computer and prevents you from booting to your Windows 10 PC and displays the error message on a black screen instead. To fix this problem, here are some suggestions you need to check out.
Option 1 – Try checking the boot order in BIOS
Turn on your PC and repeatedly tap the Setup key right away about once every second until you see the Computer Setup Utility or the BIOS settings.
Then use the right arrow key to select the Security menu and then use the down arrow key to select the Secure Boot Configuration option and then tap Enter.
Just a heads up, before you can use Secure Boot Configuration, a warning will pop up. Simply tap F10 to continue to the menu. After opening it, use the down arrow key to select Secure Boot and then the right arrow key to set the setting to Disable.
Next, select the Legacy Support option using the down arrow key and then the right key to set the setting to Enable.
Now tap F10 to confirm the changes and then use the arrow key to select File menu and then the down arrow key to select Save Changes and then Exit and tap Enter to select Yes. From there, your computer should restart and once it does, use the power button to switch it off.
If you are now able to boot from your hard drive, you need to know which option to choose once the boot menu pulls up. Refer to the steps below to easily boot from your hard drive.
Tap the power button to boot your PC. Once your PC starts, a message will appear indicating that the boot mode has now changed.
Next, you’ll see a security screen displaying a four-digit code. Type in this four-digit code and tap Enter.
After that, tap the power button to turn the computer off and wait for a couple of seconds and then turn your PC on and tap the ESC key right away repeatedly until you see the Startup menu.
Now tap F9 to open the Boot Menu and use the down arrow key to select the hard disk and make sure to select it by tapping Enter on your keyboard.
Restart your PC and check.
Option 2 – Try running the DSKCHK Check from the Recovery Media.
The DSKCHK utility scans your hard drive for any errors, bad files, or corrupt sectors so this should help in fixing the problem.
The first thing you need to do is to download the Media Creation Tool from Microsoft and then open it after the download. The file should be “MediaCreationTool.exe”.
Then tap Accept to agree to the terms and conditions and then from the initial screen, select the “Create installation media (USB flash drive, DVD, or ISO file) for another PC” option. Keep in mind that the language, architecture, and edition of the bootable drive will be selected based on your PC’s settings but you have to uncheck the Use the recommended options for this PC in order to choose the correct settings for your own computer that’s getting the error.
Now click Next and then click the USB drive or DVD option once prompted to select between USB or DVD depending on what device you are using to store this image on. Then click Next and select the required drivers from the list of storage devices currently connected to the computer.
Click Next. After that, the Media Creation Tool will proceed to download the files needed to install and create the installation device.
The next thing you have to do is to insert the installation drive.
After that, you will see the “Choose your keyboard layout” window so select the one you prefer and then the Choose an option screen will pop up.
Go to Troubleshoot > Advanced Options > Command Prompt. After opening Command Prompt, input the following command and hit Enter.
CHKDSK /R /X C:
Now boot your PC without the recovery drive and check if the problem’s fixed or not.
Option 3 – Try resetting the BIOS
Open the computer case and then look for the battery in the motherboard. If you can’t find it, you can seek out the motherboard or computer documentation of your PC as well as browse the web or contact the manufacturer for further assistance.
Removing the battery should be easy especially if your computer uses a coin cell battery. Just use your fingers to grab on the edge of the battery then pull it up and out of the socket that’s holding it in place.
Keep the battery removed for about 10 minutes and then insert it back and try booting into the BIOS.
Option 4 – Try using the Startup Repair
Inject the installation drive you created earlier and boot your PC.
Select the keyboard layout from the Choose your keyboard layout window.
From there, the Choose an option screen pops up. Navigate to Troubleshoot > Advanced Options > Startup Repair.


 However, if you are working on a computer with a keyboard and mouse this feature might annoy you and seem like something that is not needed. Like many things inside Windows 11 this feature also can be customized and turned OFF if you do not want it.
In this guide, we will see how to turn these boxes off. Microsoft has somewhat hidden this feature but luckily it is not difficult to find it if you know where to look.
However, if you are working on a computer with a keyboard and mouse this feature might annoy you and seem like something that is not needed. Like many things inside Windows 11 this feature also can be customized and turned OFF if you do not want it.
In this guide, we will see how to turn these boxes off. Microsoft has somewhat hidden this feature but luckily it is not difficult to find it if you know where to look.
 Bad or good news, depending on your view comes from RIOT for their game Valorant. It seems that Riot has decided to enforce Windows 11 TPM 2.0 feature into Valorant running on Windows 11 and there is a rumor that it will be de facto standard and that it will move to Valorant in general no matter on which system it runs.
Furthermore, there is a rumor circling around that other developers are also talking about implementing TPM 2.0 requirements so they can harvest advanced security features of Windows 11 in order to prevent hacks and other cheats in their games.
This is an interesting point to stand on, on one side, sure, advanced features that will prevent cheating and hacking is a great thing. On other hand denying access to many computers that do not support TPM 2.0 and removing them from the game can be a permanent loss of customers and therefore loss of money. It is a risk to be sure and I am not really sure that alienating gamers is a good choice for long-term income, especially when you will be able to install Windows 11 on an unsupported PC as stated by Microsoft.
We will all see how this Riot decision will reflect on their business, as not a big Valorant player myself I am not impacted too much with this decision, but it will be interesting to see if others will indeed go with this trend or they will decide to wait a while until much more PC’s are upgraded.
Bad or good news, depending on your view comes from RIOT for their game Valorant. It seems that Riot has decided to enforce Windows 11 TPM 2.0 feature into Valorant running on Windows 11 and there is a rumor that it will be de facto standard and that it will move to Valorant in general no matter on which system it runs.
Furthermore, there is a rumor circling around that other developers are also talking about implementing TPM 2.0 requirements so they can harvest advanced security features of Windows 11 in order to prevent hacks and other cheats in their games.
This is an interesting point to stand on, on one side, sure, advanced features that will prevent cheating and hacking is a great thing. On other hand denying access to many computers that do not support TPM 2.0 and removing them from the game can be a permanent loss of customers and therefore loss of money. It is a risk to be sure and I am not really sure that alienating gamers is a good choice for long-term income, especially when you will be able to install Windows 11 on an unsupported PC as stated by Microsoft.
We will all see how this Riot decision will reflect on their business, as not a big Valorant player myself I am not impacted too much with this decision, but it will be interesting to see if others will indeed go with this trend or they will decide to wait a while until much more PC’s are upgraded. 