If you encounter the MUP_FILE_SYSTEM Blue Screen error with a value of 0c00000103, then it indicates that the multiple UNC provider or MUP has got an invalid of unexpected data. This can lead to the fact that the MUP cannot channel a remote file system request to a network redirector, the UNC, or Universal Naming Convention provider.
There are several ways you can fix the MUP_FILE_SYSTEM Blue Screen Error on your Windows 10 computer, you can try to check the hardware of your computer physically, update or rollback some device drivers, run the Driver Verifier Manager, remove any hardware you’ve installed recently or fix issues related to IRQ.
Use the given options below as reference to fix the MUP_FILE_SYSTEM Blue Screen Error.
Option 1 – Try to physically check the hardware
The first thing you can do is to check the physical status of the hardware in your computer. You can clean the dust off the hardware components like the Network Card of the computer. You might want to use a small blower or you could also use a soft cloth and run the components gently. Make sure that you don’t damage any parts with moisture or cause harm to any circuits while you carry out this task.
Option 2 – Try to rollback, update several device drivers
You can try to roll back, update or disable certain device drivers on your computer to resolve the MUP_FILE_SYSTEM Blue Screen error.
- First, boot your computer into Safe Mode.
- After that, tap the Win + R keys to launch Run.
- Type in devmgmt.msc into the box and tap Enter or click OK to open the Device Manager.
- After that, a list of device drivers will be displayed. From there, look for the device drivers related to the Network Card, Chipset, Disk Drive, and the Graphics Drivers and any other driver related to MUP.sys and SwapBuffers.sys system files
- After that, right-click on each entry of the device drivers and select the “Update Device” option from the menu.
- Now follow the next on-screen instructions that appear and then restart your computer.
- After restarting your computer, check if the Stop error is now fixed.
Option 3 – Configure the Driver Verifier Manager
The Driver Verifier Manager is another tool in Windows that could help you fix driver-related issues. And so if you want to fix the MUP_FILE_SYSTEM Blue Screen error you need to use the Driver Verifier Manager:
- Type in the keyword “Verifier” in the Cortana search box to search for Verifier in Windows 10.
- After that, select the option “Create custom settings”.
- Make sure that you have checked everything except the options “DDI compliance checking” and “Randomized low resources simulation”.
- Next, select the option “Select driver names from a list” option.
- Afterward, you have to select all the drivers from any unofficial or third-party provider. To simply put it, you have to select all the drivers that are not supplied by Microsoft.
- Then click on the Finish button.
- Open Command Prompt as administrator and execute this command – verifier /querysettings
- The command you just executed will display the Driver Verifier settings so if you see any of the flags enabled boot your Windows 10 PC into Safe Mode.
- Open the Command Prompt as admin again and run this command – verifier /reset
- The command will reset the Driver Verifier. Once the process is done, restart your PC and check.
Option 4 – Try to disconnect or disable newly installed hardware
In this option, you will have to disable or remove the hardware you’ve just installed recently since external devices could be the one that’s causing the Blue Screen of Death error to appear. To do that, just disconnect any external device that’s connected to your computer physically and then check if it fixes the MUP_FILE_SYSTEM Blue Screen error.
Option 5 – Try fixing IRQ-related issues
The Stop error might have something to do with an issue related to IRQ. You can verify it by switching your PCI Cards around. Aside from that, you can also check if the IRQ2 is assigned to a COM Port that is unavailable at that time.
Option 6 – Run the Blue Screen Troubleshooter
The Blue Screen troubleshooter is a built-in tool in Windows 10 that helps users in fixing BSOD errors like MUP_FILE_SYSTEM. It can be found in the Settings Troubleshooters page. To use it, refer to these steps:
- Tap the Win + I keys to open the Settings panel.
- Then go to Update & Security > Troubleshoot.
- From there, look for the option called “Blue Screen” on your right-hand side and then click the “Run the troubleshooter” button to run the Blue Screen Troubleshooter and then follow the next on-screen options. Note that you might have to boot your PC into Safe Mode.
Option 7 – Perform a System Restore
Performing System Restore might help you in fixing the Blue Screen error. You can do this option either by booting into Safe Mode or in System Restore. If you are already in the Advanced Startup Options, just directly select System Restore and proceed with the next steps. And if you have just booted your PC into Safe Mode, refer to the steps below.
- Tap the Win + R keys to open the Run dialog box.
- After that, type in “sysdm.cpl” in the field and tap Enter.
- Next, go to the System Protection tab then click the System Restore button. This will open a new window where you have to select your preferred System Restore point.
- After that, follow the on-screen instructions to finish the process and then restart your computer and check if the problem is fixed or not.


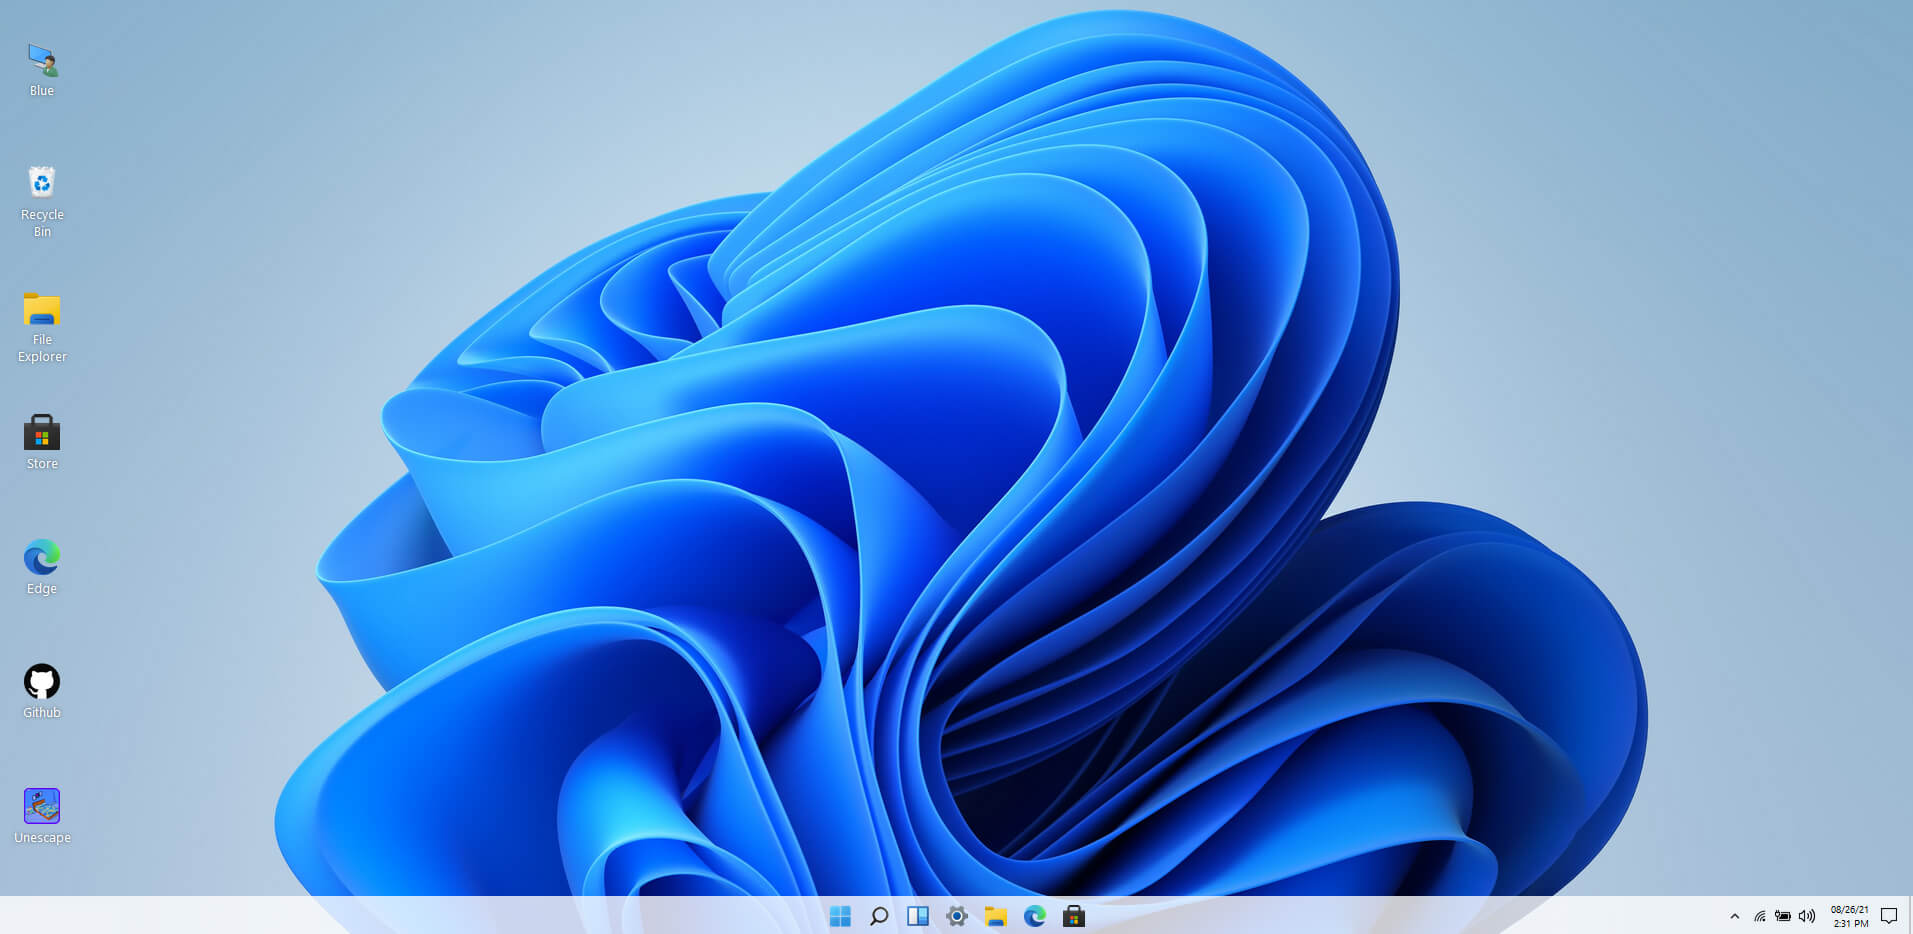 Windows 11 release date is closing in, some people have tried it via insider build, some have decided not to. It has come to our attention that there is a little website made by BlueEdge that offers a virtual Windows 11 desktop.
Opening the Website will put you right inside Windows 11 desktop, now take note that this is not Windows 11, it is a simulation of Microsoft’s newest OS and therefore many things will not work like File Explorer, etc.
One thing you can make sure it is working is UI itself, you can see how you do like the new Taskbar, start menu, widgets, and some other things. You can just pop up on the site and check how you do like the overall new look and feel of Windows 11 UI before installing it or trying it.
We are sure that many more options will come in time but even now you can get a feel of the newest OS.
Windows 11 BlueEdge site:
Windows 11 release date is closing in, some people have tried it via insider build, some have decided not to. It has come to our attention that there is a little website made by BlueEdge that offers a virtual Windows 11 desktop.
Opening the Website will put you right inside Windows 11 desktop, now take note that this is not Windows 11, it is a simulation of Microsoft’s newest OS and therefore many things will not work like File Explorer, etc.
One thing you can make sure it is working is UI itself, you can see how you do like the new Taskbar, start menu, widgets, and some other things. You can just pop up on the site and check how you do like the overall new look and feel of Windows 11 UI before installing it or trying it.
We are sure that many more options will come in time but even now you can get a feel of the newest OS.
Windows 11 BlueEdge site: 

 I going to admit right here that I am a big fan of Cooler Master PC cases, I like them and they are always one of the things that I consider when building a new PC, overall I like their ideas and quality so personal for me it was quite a surprise to see that they are one that is making a new generation gaming chair.
Now truth to be told Orb X is not your typical gaming chair as you can clearly see from the pictures. The chair itself will come in two colors: white or black and RGB lighting looks to be prominently featured throughout.
I going to admit right here that I am a big fan of Cooler Master PC cases, I like them and they are always one of the things that I consider when building a new PC, overall I like their ideas and quality so personal for me it was quite a surprise to see that they are one that is making a new generation gaming chair.
Now truth to be told Orb X is not your typical gaming chair as you can clearly see from the pictures. The chair itself will come in two colors: white or black and RGB lighting looks to be prominently featured throughout.
 The chair itself is advertised as both meant and aimed for professional and gaming crowds but I believe the gaming crowd is in general more interested in this hardware piece.
Hardware is enclosed in a fully motorized shuttle dome which aims to maximize your privacy, it supports a single 49inch display or three 27inch monitors along with surround speakers if you do not wish to use headphones.
The chair itself is advertised as both meant and aimed for professional and gaming crowds but I believe the gaming crowd is in general more interested in this hardware piece.
Hardware is enclosed in a fully motorized shuttle dome which aims to maximize your privacy, it supports a single 49inch display or three 27inch monitors along with surround speakers if you do not wish to use headphones.
 It offers an adjustable headrest, lumbar support, and footrest so you can spend some time in it and be comfortable. Controls on the chair itself allow you to raise or lower the dome for easier getting in and out of it.
Orb X also has a compartment in its backside, it folds out and has a sliding tray designed to hold your PC or console. Everything is enclosed so wiring is not the issue.
Overall Orb X seems really like the computer chair of the future, Cooler Master expects to release the Orb X by December 2021, priced around $12,000-$14,000.
It offers an adjustable headrest, lumbar support, and footrest so you can spend some time in it and be comfortable. Controls on the chair itself allow you to raise or lower the dome for easier getting in and out of it.
Orb X also has a compartment in its backside, it folds out and has a sliding tray designed to hold your PC or console. Everything is enclosed so wiring is not the issue.
Overall Orb X seems really like the computer chair of the future, Cooler Master expects to release the Orb X by December 2021, priced around $12,000-$14,000.