The store is not downloading Apps: As you know, the Windows Store is one of the places where you can download Windows apps. However, there are times when you might not be able to do so for some reason. For instance, if you search for an app and click on the get it now button, instead of downloading the app, nothing happens and there are also cases when the download will start but the page will refresh after half a second. When this issue happens, you won’t be seeing any error message or warning at all. So you’ll just have to look at the download get started where the page will refresh and you’ll be back at the Get button.
This issue in the Windows 10 Store only happens for a few apps so even though you are able to download some apps, you might be able to do on other ones. Note that the apps affected are random and there is no specific set of apps that cause this issue while downloading and that this problem will repeat again each time you click on the Get it now button. This issue is definitely caused by Windows itself and has something to do with a bug in the Windows store which was brought by the latest Windows Update. It’s already a known issue among other Windows 10 users who are also suffering the same dilemma. So until Microsoft releases another update to fix this bug, you will have no choice but to deal with it in the meantime. On the other hand, you can also try a couple of suggestions laid out in this post. Follow the steps in every option given below to fix the issue with the Windows 10 Store.
Option 1 – Try signing out from the Microsoft Store
A lot of Windows 10 users were able to resolve the problem by simply signing out and signing back into the Microsoft Store. How? Follow these steps:
- Go to the Microsoft Store.
- Next, go to the Get page of the app you were trying to download.
- And then click on your account picture located in the top right corner of the window and select your account.
- Sign out from your account and after that, click the Get button to download the app.
- After that, a new window will appear where you’ll have to select your account and click on Continue.
- Now enter your credentials. Once you do, the app should be downloaded automatically after you’re signed in. And that’s about it.
Note: Keep in mind that this option is merely a temporary solution to the problem and once you close the Microsoft Store and open it back again, you will be back to square one.
Option 2 – Wait for the Windows Update
As mentioned, this is already a known issue and a lot of Windows 10 users have already complained about it to Microsoft so a bug fix will be soon released in the latest Windows Updates.

 To personalize the lock screen do:
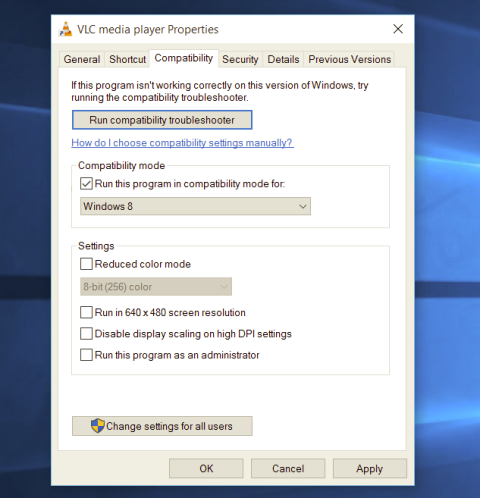 Most of the time running applications with typical settings is fine but from time to time we might have some applications that will require running with administrator privilege in order to work properly. In this case, it is very easy to do it, you just right-click and choose run as administrator.
Although a very easy solution, it can be quite annoying if running the app is on a daily basis or even more times per day. If this is the case then right-clicking and choosing to run as administrator can be a daunting task, sometimes you can even forget to run it like this in heat of work and some unforeseen consequences might occur.
Luckily there is an easy hack so you can open the chosen application each time as an administrator with a simple double click each time.
Most of the time running applications with typical settings is fine but from time to time we might have some applications that will require running with administrator privilege in order to work properly. In this case, it is very easy to do it, you just right-click and choose run as administrator.
Although a very easy solution, it can be quite annoying if running the app is on a daily basis or even more times per day. If this is the case then right-clicking and choosing to run as administrator can be a daunting task, sometimes you can even forget to run it like this in heat of work and some unforeseen consequences might occur.
Luckily there is an easy hack so you can open the chosen application each time as an administrator with a simple double click each time.
 If you are about to install Windows 10, then during the installation process, your computer boots into the Install and Configure Windows 10 screen with Cortana that assist you during the setup. Once you reach the last page which is “Choose privacy settings for your device”, you will see the Advertising ID of your computer. Under the Advertising ID, you have to disable or toggle off the “Apps can use advertising ID to provide more personalized advertising in accordance with the privacy policy of the app provider” option. After you disable it, click on the Accept button to proceed with the installation. After that, the copy of your Windows 10 you are using will have the Advertising ID disabled by default.
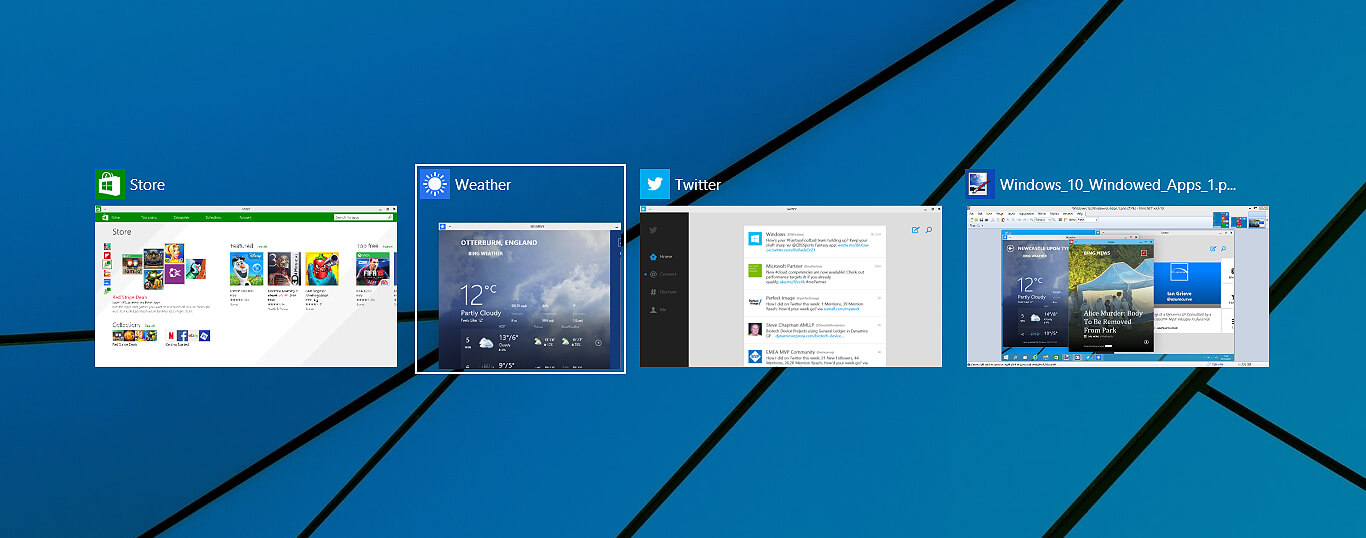 Lately, Microsoft has trying to fix Print Nightmare with various methods and patches. The last patch has seemingly fixed Print Nightmare but it has broken the Alt-tab key combination.
It has been reported that the latest patch has broken famous key combinations for quickly switching from window to window. It seems that combination is not working or it is switching to desktop, even going to blank screen if switching from the full-screen game.
Lately, Microsoft has trying to fix Print Nightmare with various methods and patches. The last patch has seemingly fixed Print Nightmare but it has broken the Alt-tab key combination.
It has been reported that the latest patch has broken famous key combinations for quickly switching from window to window. It seems that combination is not working or it is switching to desktop, even going to blank screen if switching from the full-screen game.
 Before we move to the article I just want to say that technically there are no random crashes, there is always a reason why the system hangs up, why you received blue screen, annoying restarts out of nowhere and many more PC crashes. In this article, we will explore many possible reasons why something may occur and offer you straight forward solution on how to escape the situation and prevent it from happening again.
Without further delay, let's begin:
Before we move to the article I just want to say that technically there are no random crashes, there is always a reason why the system hangs up, why you received blue screen, annoying restarts out of nowhere and many more PC crashes. In this article, we will explore many possible reasons why something may occur and offer you straight forward solution on how to escape the situation and prevent it from happening again.
Without further delay, let's begin:
