One of the most critical errors inside your Windows operating system is The Extended Attributes Are Inconsistent error. This error means that your operating system has been corrupted and it may produce many annoying issues like for example time lags, random crashes, and even freezing of the system when running multiple applications.
There are a lot of reasons for this error, from the registry to faulty application installations to sometimes even hardware issues like bad RAM memory or bad hard drive. Mostly issue is due to corrupted files inside Windows and most often people only think that resetting the PC or complete reinstallation is the only way to fix this problem.
Although reinstalling the system or resetting the PC will solve this error for sure there are other less time-consuming ways to fix this error.
In this guide, we will show you common ways in fixing Extended Attributes are inconsistent errors inside your Windows that are easy to do and less time-consuming than complete reinstallation of the system.
Fixing Extended Attributes Are Inconsistent error
Run SFC scan
Press ⊞ WINDOWS + X to open the hidden menu
Click on command prompt (admin)
In command prompt type in SFC /scannow and press ENTER
Wait for the operation to complete
Reboot your PC
Use System Image Repair Tool
Press ⊞ WINDOWS + X to open the hidden menu
Click on command prompt (admin)
In command prompt type in Dism /Online /Cleanup-Image /RestoreHealth and press ENTER
Wait for the operation to complete
Reboot your PC
Change all user accounts to the administrator
Press ⊞ WINDOWS + R to open the run dialog
Type in netplwiz and press ENTER
Select a first user account and click on Properties
Click on the Group Membership tab
Choose Others from the options
Select administrator (if all accounts are already administrators change all to users)
Repeat process for all other accounts
Click OK to save settings
Change Windows Sound scheme to default
Right-click on the sound icon in the taskbar
Click on Sound options
Go to the Sounds tab
In Sound Scheme click and choose Windows Default
Under Program Events choose Windows User Account Control
Click on the drop-down menu and choose None
Click on Apply
Click on OK
Downgrade the Sound driver
Press ⊞ WINDOWS + X to open the hidden menu
Click on Device Manager
Find your Audio driver and right-click on it
Click on uninstall and then on OK
Reboot your system
Do System Restore
If none of the provided solutions have worked, perform a system restore to the last point where everything was working fine.
Reset PC
If even system restore has not solved the issue or you do not have valid point in system restore time, perform Reset this PC and hopefully, the error will be finally fixed.
Conclusion
If all of the provided methods have not managed to repair this error that checks your hardware, your computer might have some faulty components if after complete PC reset error persists.
As you know, Diskpart is a useful utility that helps in managing the disks in a computer. It is a very useful tool that even when the GUI-based disk management tools in Windows 10 operating system fails, the Diskpart utility still tends to work. However, it also does not mean that this utility does not experience issues as it still does, from time to time. One of the issues you may encounter when using the Diskpart utility is when you encounter an error message that says, “DiskPart has encountered an error, Access is denied”.
This kind of error in the Diskpart utility could be caused by a number of factors. For one, it could be that the Write-Protection is enabled on the drive where the operating is being performed or it could also be that the Command Prompt terminal does not have administrator-level permissions to carry out the command. Thus, you can try to run the Diskpart utility again but this time with admin privileges or you could also remote the Write-Protection from the concerned drive. For more details, refer to the instructions given below.
Option 1 – Try running Command Prompt with Administrator-level permissions
In the Start Search, type “command prompt” and from the search results that appear, look for Command Prompt.
Once you found it, right-click on it and select the “Run as administrator” option.
After that, try to execute the Diskpart operation once again and see if you still encounter the same error.
Option 2 – Try to remove the Write Protection from the drive
As mentioned, removing the Write-Protection on the concerned drive could also help you fix the problem and there are two ways to get rid of the write protection – you can either use the Diskpart utility or the Registry Editor. How? Refer to the following steps.
Via Diskpart utility:
Open Command Prompt with admin privileges and then type the “diskpart” command and tap Enter to execute it.
Next, type “list disk” and tap Enter to get the list of all the Disk connects or all the partitions that are formed on those disks.
After that, you need to choose one command depending on the list of commands you entered. Type “select disk #” and tap Enter to select the disk or partition you want to select.
Then type “attribute disk clear readonly” and tap Enter to Disable the Write Protection on the selected disk or partition.
Via Registry Editor:
Tap the Win + R keys to open the Run utility and type “Regedit” in the field and then tap Enter to open the Registry Editor.
Recently, a number of users reported that their Google Chrome browsers keep on opening new tabs no matter what they do. This issue could be due to lots of reasons but the main ones are corrupt installation, background applications, adware, dubious browser extensions, malware, and so on.
Although there are a lot of possible causes for this particular issue in Chrome, its potential fixes are straightforward so you should not have any problem following the given options below.
Option 1 – Get rid of any conflicting browser extensions
As mentioned, shady browser extensions can cause unusual behavior in a browser. Chances are, these extensions or toolbars might be conflicting with the loading of the website. Thus, you have to get rid of these unwanted extensions and toolbars to fix the issue.
Open Chrome and press Alt + F keys.
Go to More tools and click Extensions to look for any suspicious browser extensions or toolbars.
Click the Recycle bin and select Remove.
Restart Chrome and press Alt + F keys again.
Proceed to On Startup and mark Open a specific page or set of pages.
To check if the browser hijacker is still active, click Set pages, if it is active, overwrite the URL.
Option 2 – Try to disable applications from running in the background
Open Google Chrome and then click on the menu button located in the top-right corner.
From the drop-down, select Settings and then scroll down until you see the Advanced button. Click on it.
Next, turn off the toggle for “Continue running background apps when Google Chrome is closed” under the System section.
Now restart Chrome and check if it is working properly.
Option 3 – Try to configure the search settings of Chrome
Open Google Chrome and type any search query in the address bar and then tap Enter.
After that, it will open the Google search engine. From the top-right corner, click the Settings button.
Next, select Search settings from the drop-down menu.
Then scroll down to the new page that appears and make sure that the “Open New Window for each result” option is set to Uncheck.
Once you’re done, save the changes made and restart Google Chrome.
Option 4 – Reset Chrome
Resetting Chrome can also help you fix the error. This means that you will be restoring its default settings, disabling all the extensions, add-ons and themes. Aside from that, the content settings will be reset as well and the cookies, cache, and site data will also be deleted. To reset Chrome, here’s what you have to do:
Open Google Chrome, then tap the Alt + F keys.
After that, click on Settings.
Next, scroll down until you see the Advanced option, once you see it, click on it.
After clicking the Advanced option, go to the “Restore and clean up option and click on the “Restore settings to their original defaults” option to reset Google Chrome.
Now restart Google Chrome.
Option 5 – Try to clean reinstall Chrome
There are instances when programs leave files behind after you’ve uninstalled them and the same thing can happen to Chrome so before you reinstall Chrome, you have to make sure that you have deleted the User Data folder. To do so, refer to the following steps:
Hit the Win + R keys to open the Run dialog box.
Next, type “%LOCALAPPDATA%GoogleChromeUser Data” in the field and hit Enter to open the User Data folder.
From there, rename the default folder and name it something else, e.g. “Default.old”.
After that, install Google Chrome again and check if the issue is now fixed.
Option 6 – Try scanning your computer using Windows Defender
As mentioned, the error when accessing the security settings or properties of a folder or file might be due to a virus or malware. It could be that it had made some modifications that prevents you from accessing security settings or properties. To eliminate it, you have to scan your computer using security programs like Windows Defender.
Tap the Win + I keys to open Update & Security.
Then click on the Windows Security option and open Windows Defender Security Center.
Next, click on Virus & threat protection > Run a new advanced scan.
Now make sure that Full Scan is selected from the menu and then click the Scan Now button to get started.
The GeForce Experience on graphics card manufactured by NVIDIA is an advantage for users who loves gaming as it makes enhances users’ gaming experience. However, there are times when it may also encounter some problems. One of the problems users may encounter is the error code 0x0001. This kind of error occurs when users open the NVIDIA GeForce Experience utility. Here’s the full content of the error message:
“Something went wrong, try rebooting your PC and then launch GeForce Experience, ERROR CODE: 0x0001.”
Errors like this one diminish the overall experience of users due to the fact that when this error occurs, the NVIDIA GeForce experience wouldn’t even start which renders its features useless. There are several potential fixes you can check out to resolve this error but before you check them out, you can try to restart your computer first and then open the NVIDIA GeForce Experience once again, if you still encounter the error, then you need to check the NVIDIA Display Driver Services or update your NVIDIA display drivers or switch to the BETA release. You could also try to install and reinstall the NVIDIA display drivers or perform System Restore and see if it helps. For detailed instructions, follow the given options below.
Option 1 – Try to check the NVIDIA Display driver services
Tap the Win + R keys to open Run and then type “services.msc” in the field and hit Enter to open the Services Manager.
From there, look for the following NVIDIA services and make sure that their Startup types are as follows:
NVIDIA Display Container LS – Automatic
NVIDIA NetworkService Container – Manual
NVIDIA LocalSystem Container – Automatic
NVIDIA LocalSystem Container – Automatic
NVIDIA GeForce Experience Service – Automatic (Delayed Start)
NVIDIA Geforce Experience Backend Service – Automatic (Delayed Start)
NVIDIA Telemetry Container service – Automatic
Next, double click on each one of the services and go to Properties. Here, check if the service is running. If it’s not, just click on the Start button. On the other hand, if they’re already running, just click on Stop and then click on Start again.
Option 2 – Try to update the NVIDIA Display drivers
You can also try updating the NVIDIA display drivers as it might help in fixing the error. To update them, follow the steps below.
Tap the Win + R keys to open the Run dialog box.
Next type in “dxdiag” in the field and click OK or hit Enter to open the DirectX Diagnostic Tool.
From there, you can see what type of NVIDIA graphics card that your system is on.
Take note of your graphics card information and then look for the best drivers for your operating system. Once you’ve downloaded and installed the file, restart your PC.
Note: If you want to try out the beta release of the NVIDIA display drivers, click on this link. Beware though that the beta software is unstable and buggy and may cause some different bugs.
Option 3 – Try to roll back the driver to the previous version
If updating the NVIDIA display drivers didn’t work for you, then it’s time to roll back the device drivers. It is most likely that after you updated your Windows computer that your driver also needs a refresh.
Tap the Win + R keys to launch the Run window and then type in the “msc” command and hit Enter to open the Device Manager window.
Under the Device Manager, you will see a list of drivers. From there, look for the NVIDIA Drivers and expand it.
Next, select the driver entries that are labeled appropriately.
Then select each one of them and double click to open a new mini window.
After that, make sure that you’re on the Driver tab and if you are not, just navigate to it then click the Roll Back Driver button to switch back to the previous version of the NVIDIA Drivers.
Now restart your computer to successfully apply the changes made.
Option 4 – Try to run System Restore
You could also run System Restore as it might help fix the error code 0x0001 in NVIDIA GeForce Experience.
Tap the Win + R keys to open the Run dialog box.
After that, type in “sysdm.cpl” in the field and tap Enter.
Next, go to the System Protection tab then click the System Restore button. This will open a new window where you have to select your preferred System Restore point.
After that, follow the on-screen instructions to finish the process and then restart your computer and then check if the error code 0x0001 in GeForce Experience is now fixed.
Option 5 – Do a clean install on the NVIDIA driver
Before you do a clean install on the NVIDIA driver, you have to download the latest version of the Display Driver first.
Boot your Windows 10 PC into Safe Mode.
After that, double click on the executable file of the Display Driver Uninstaller to run and install it.
After the installation, open the program. Once you do, you should see the following window on your screen:
In the program window, click on the “Clean and restart” button.
After your PC has rebooted, download the NVIDIA drivers.
Then select your Product Type, Product Series, Product, Operating System, and Language appropriate for your hardware specifications as well as personal requirements.
Next, click on Search to display the latest available driver as per the information you entered.
And click on Agree and Download to start downloading the latest driver executable file.
Run the executable file after you finished downloading the latest driver executable file and then select Custom and click on Next.
Afterward, select “Clean Install” and proceed. Doing so would install the latest driver on your PC.
Restart your PC and check if the error’s now fixed. If not, you can try installing an older version of the driver instead.
Razer is a well-known brand among PC gamers and users, it started as a peripheral manufacturer focused on keyboards and mouse but after years passed Razer expanded its inventory offerings. It soon started offering headphones and lately has branched into wider product lines like gaming chairs and protection masks.
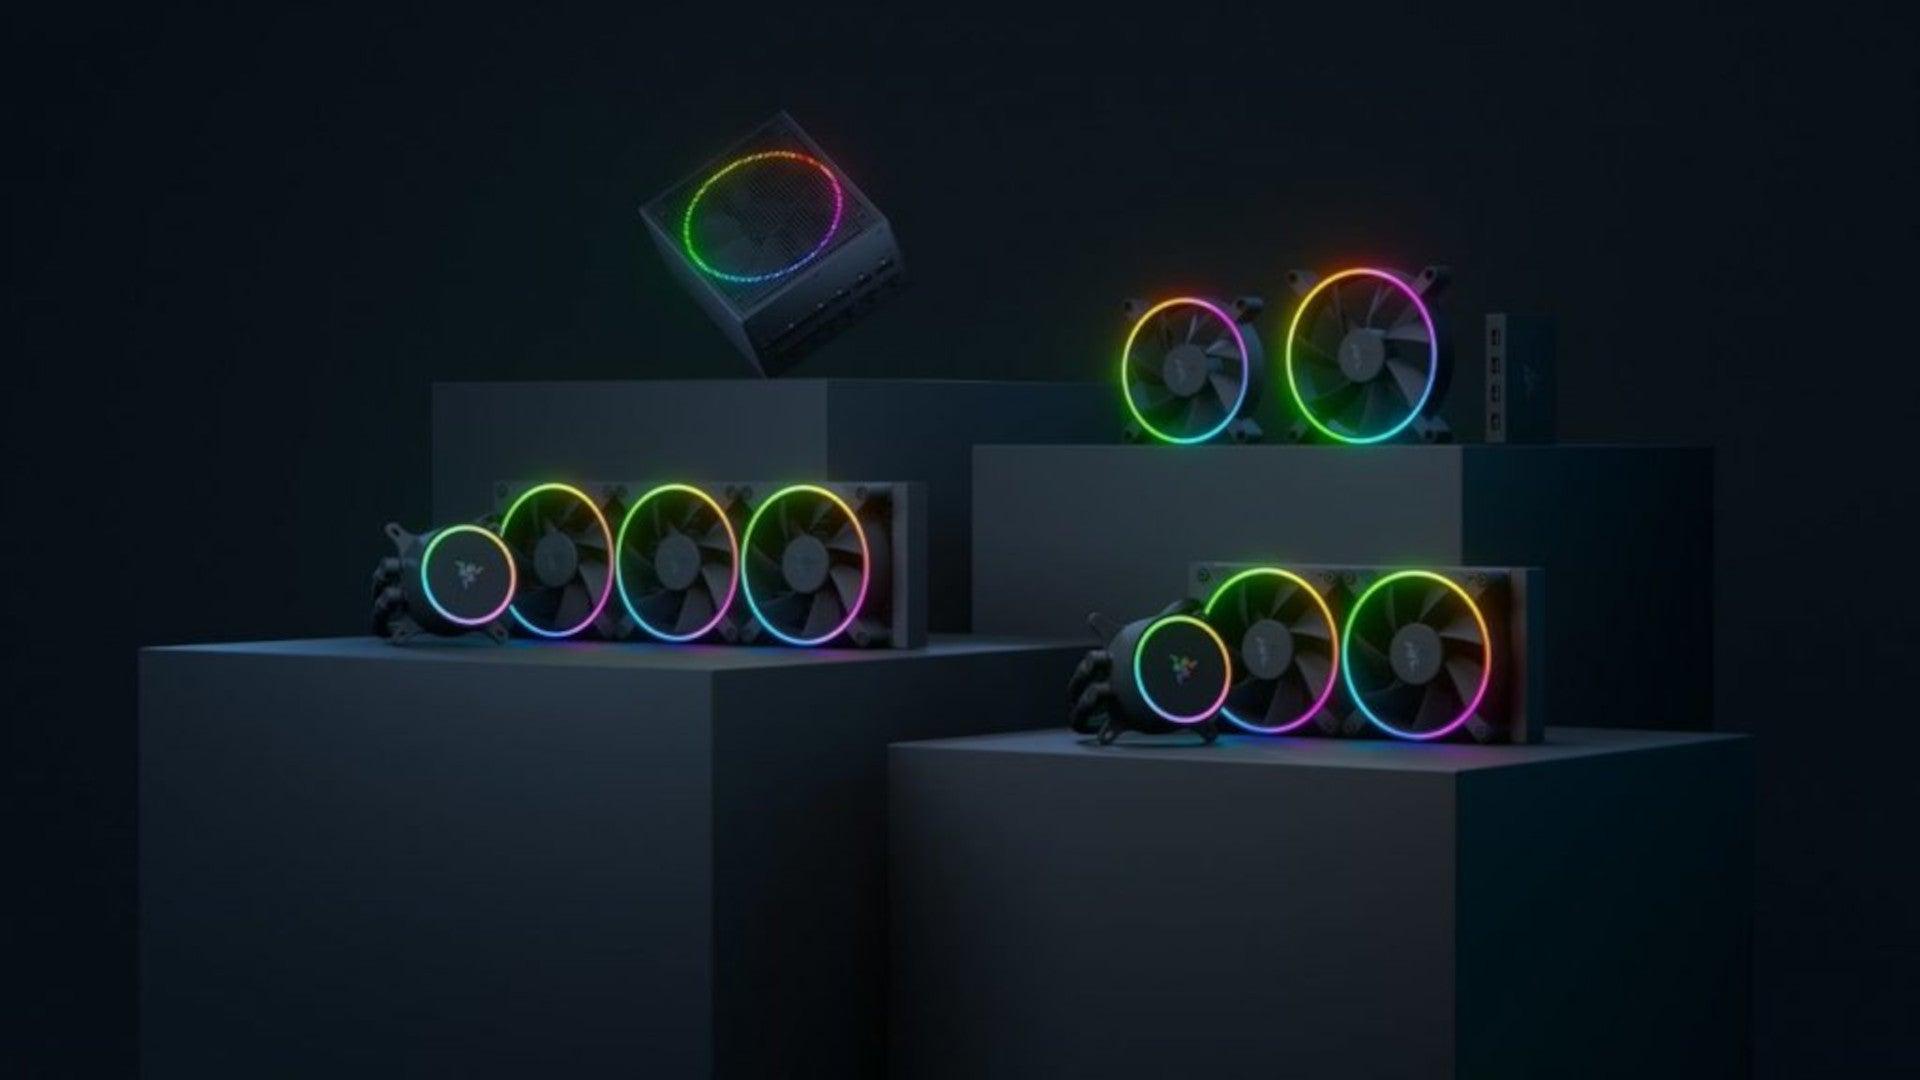
It is not a big surprise that Razer is expanding into other branches of the PC industry. This time, however, it has revealed not one but three new hardware for your PC. Case fans, all in one liquid cooler and power supply.
There are not many details about the products themselves but one thing is one hundred percent confirmed, they come with Razer Chroma, all of them, even the fans.
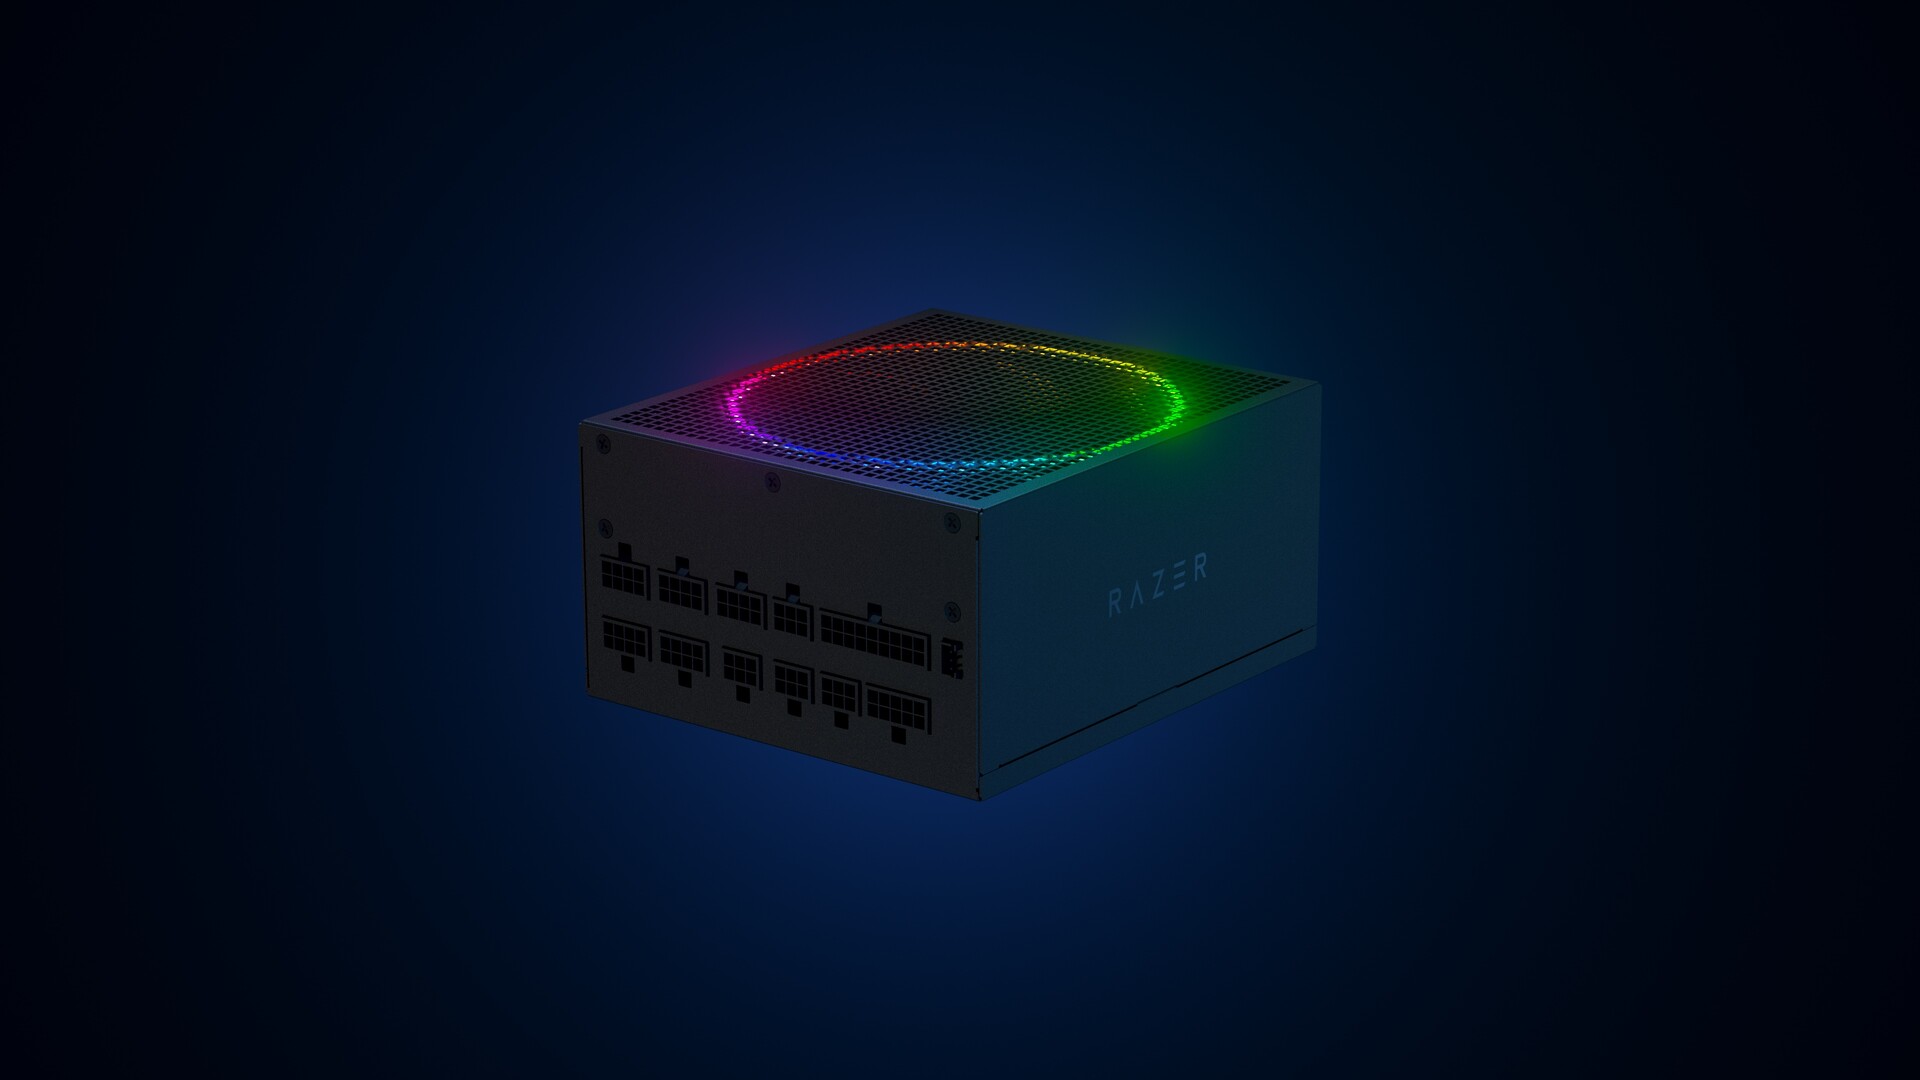
Katana Chroma ATX PSU
Most interesting for me personally is Razers Katana, the power supply unit. It is a modular power supply ranging from 750W to 1200W with the additional option of Titanium rated one with an impressive 1600W of power. Power supply will start shipping in early 2022 and at the time of writing this article no price range has been released.
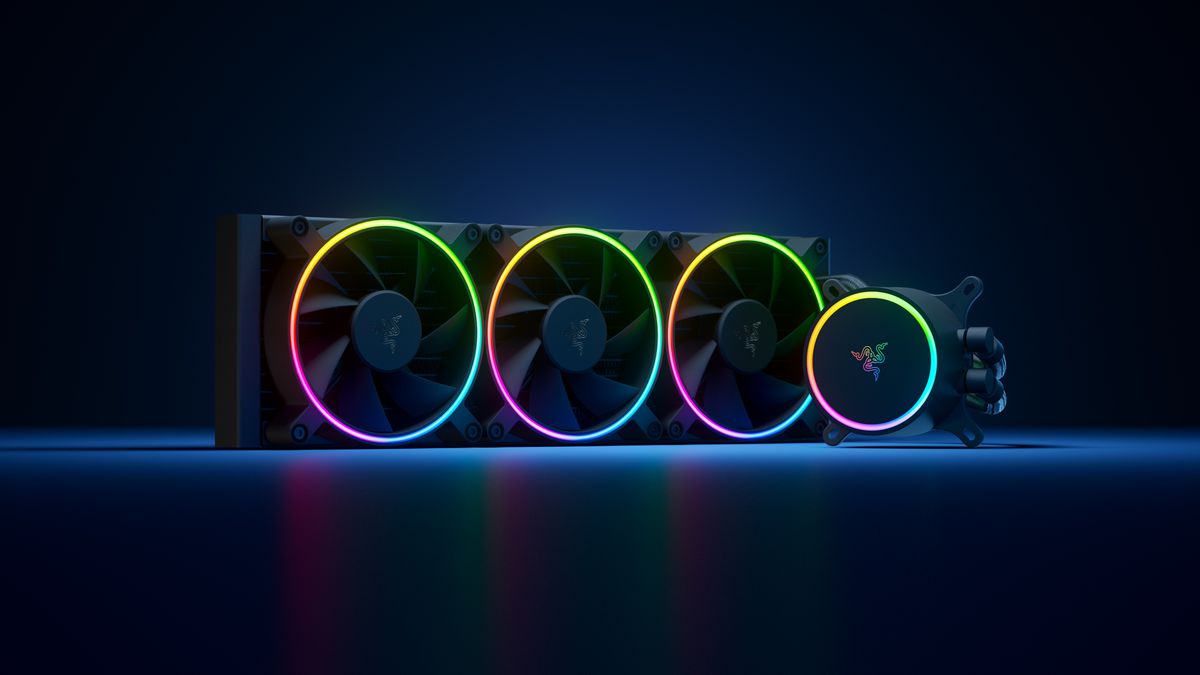
Razer Hanbo AIO
Hanbo liquid cooler will feature an optimized intake design so it can ensure greater heat transfer and fluid dynamic for improved reliability and silent operation. Radiator comes in 240mm size with two fans and a larger one of 360mm with three fans. The pump will be able to rotate in any direction of full 360 degrees so it can fit in any case. Hanbo will be released in November this year but no pricing has been released so far.
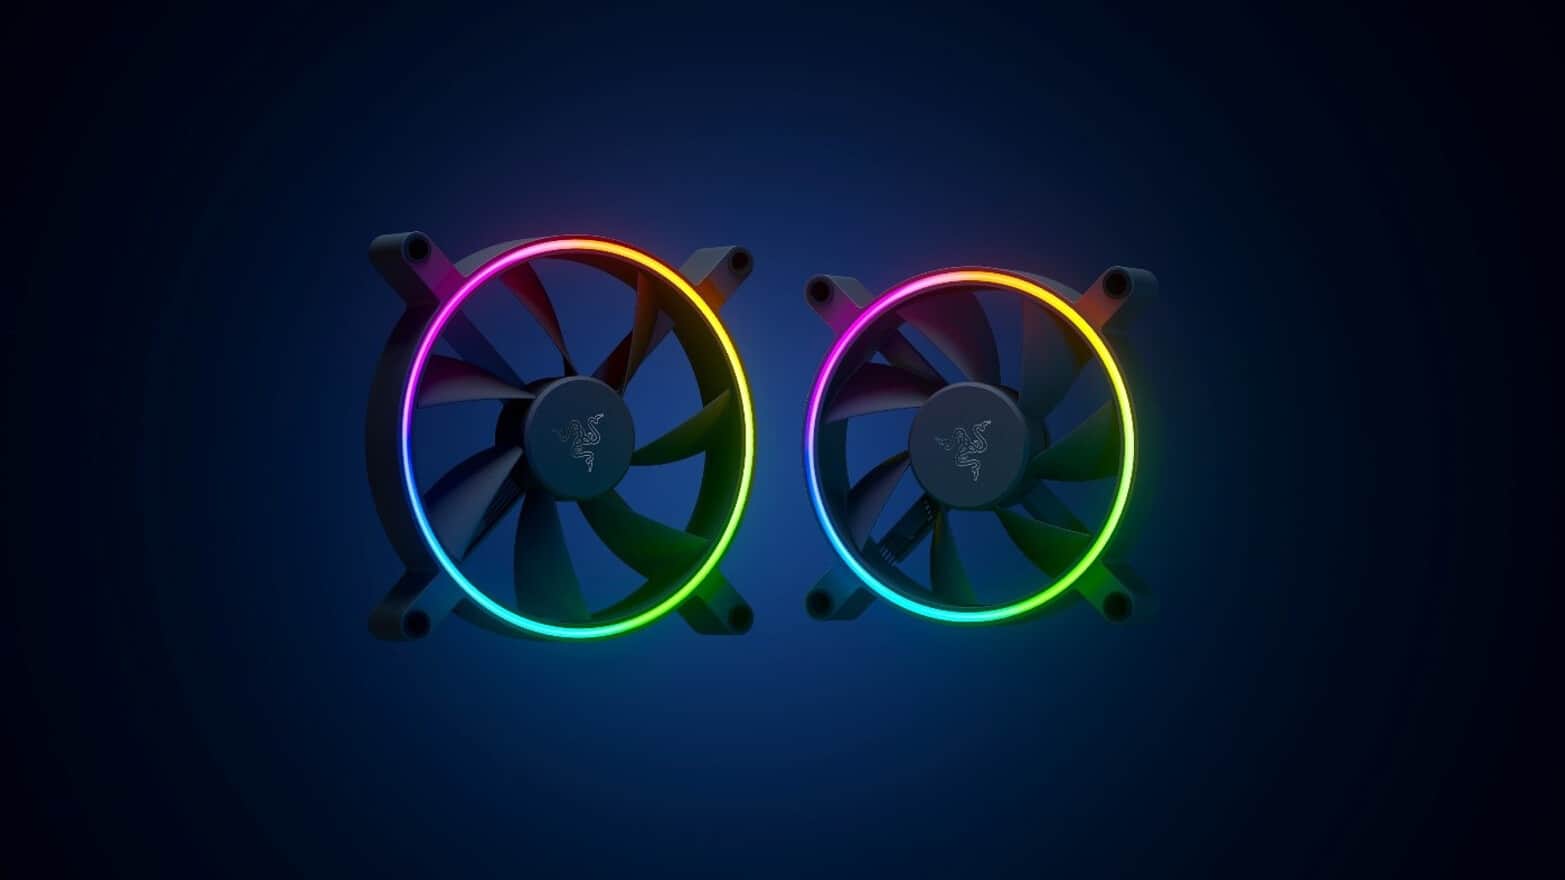
Razer Kunai Chroma case fans
Kunai fans will boast high static pressure performance with lowered noise. They will go as far as 2200rpm for the 120mm version where the 140mm version will go up to 1600rpm. They will come with addressable LEDs and up to eight fans will be able to be connected to Razer’s PWM fan controller that will come with a magnet at the back for easy attachment to any steel part of PC casing.
PWM will use Razer’s Synapse software to customize pulse width modulation in order to improve airflow and noise. PWM will be priced at $49.99 in the Razer Store and it is available for preorder. Fans are priced at $44.99 for one 120mm or $129.99 for a three-pack of 120mm. One 140mm will go for $49.99 and a three-pack will be $129.99.
If you receive an error message saying, “Windows Update cannot currently check for updates because updates on this computer are controlled”, while trying to change the Windows Update preferences or manually update, then read on as this post will guide you in fixing it.
You can mostly encounter this error in managed systems where an Administrator controls the permission on the operating system. The reason why you are not able to modify the Windows Update preferences or manually update your system is that a group policy prevents you from doing so and that the only user who can do these things is none other than the administrator of the system.
Troubleshooting this kind of problem is the same as when you troubleshoot an error message that says, “Some settings are managed by your organization”. In such cases, you need to check both the Windows Update Group Policy and Registry settings.
If you’re just a standard user, you have to contact your system administrator regarding this issue and if you are the administrator, you can make adjustments to the system settings via the Registry Editor and the Group Policy Editor. Refer to the instructions given below for detailed instructions.
Option 1 – via the Registry Editor
If you are using the Home edition of Windows 10 and you want to change the policy for non-admin users on your local computer, then you can use the Registry Editor for that. Here’s how you can do it:
Tap the Win + R keys to open the Run dialog box.
Then type “Regedit” in the field and hit Enter to open the Registry Editor.
After that, navigate to the following registry key:
From there, look for the key named “WindowsUpdate” in the Windows folder and if it does not exist, you can just right-click on the Windows folder and select New > Key.
Now name the new key “WindowsUpdate” and create a new sub-key under the newly created key and input “AU” as its name.
Keep AU selected and then right-click anywhere in the right pane and select New > DWORD (32-bit) Value.
Then name the Value as “AUOptions” and right-click on AUOptions and select Modify.
Next, change the value of the Value data to “5” and click OK to save the changes made to the settings. Note that the Value Data of 5 refers to the policy to allow the local admin to choose the setting.
Now restart your computer once you’re done and check if non-admin users can now modify the Windows Update settings or update Windows.
Option 2 – via Group Policy Editor
Tap the Win + R keys to open the Run dialog box and then type “gpedit.msc” and hit Enter to open the Group Policy Editor.
Next, navigate to this folder: Computer Configuration > Administrative Templates > Windows Components > Windows Update.
Now look for the “Configure Automatic Updates” policy on the right pane and double click on it to open its Properties.
After that, shift the Radio button to “Enabled” and from the drop-down menu for Configure automatic updating, select option 5: Allow local admin to choose the setting.
Then click on Apply and OK to save the changes made to the settings.
Restart your computer and check if the problem’s fixed or not.
NVIDIA is undeniably the market leader as a Graphics Card manufacturer. Recently, NVIDIA came about a feature known as NVIDIA Share. This feature allows users to carry out a number of tasks such as streaming, recording, and sharing their gameplay with other users. NVIDIA Share allows users to take multiple snapshots of the gameplay which brings in capabilities to get the memories of the moments that happen during an awesome game. However, as of late, there were reports that NVIDIA Share is not working or responding. So if you are one of the users who are currently facing this issue, then read on as this post will guide you in resolving it. Make sure to follow the options given below carefully for a successful result.
Option 1 – Try to update the drivers from the official site of NVIDIA
The first thing you can do is to update the drivers from the official site of NVIDIA. And in case you don’t know the type of Nvidia graphics card that your computer is on, follow the steps below:
Tap the Win + R keys to open the Run dialog box.
Next type in “dxdiag” in the field and click OK or hit Enter to open the DirectX Diagnostic Tool.
From there, you can see what type of Nvidia graphics card that your system is on.
Take note of your graphics card information and then look for the best drivers for your operating system. Once you’ve downloaded and installed the file, restart your PC.
Option 2 – Try to roll back the driver to the previous version
If the first option didn’t work for you, then it’s time to roll back the device drivers. It is most likely that after you updated your Windows computer that your driver also needs a refresh.
Tap the Win + R keys to launch the Run window and then type in the “msc” command and hit Enter to open the Device Manager window.
Under the Device Manager, you will see a list of drivers. From there, look for the NVIDIA Drivers and expand them.
Next, select the driver entries that are labeled appropriately.
Then select each one of them and double click to open a new mini window.
After that, make sure that you’re on the Driver tab and if you are not, just navigate to it then click the Roll Back Driver button to switch back to the previous version of the NVIDIA Drivers.
Now restart your computer to successfully apply the changes made.
Option 3 – Try disabling NVIDIA Share
If the first two options given above didn’t work then you might want to try disabling NVIDIA Share. In case you didn’t make any modifications to the driver, chances are either your driver is out of date or there are some issues with the installation of the drivers. For you to find out, you need to first check if your NVIDIA drivers are really up to date. Once you’ve confirmed it, you can now disable the NVIDIA Share feature. Just refer to the steps below to do that.
Search for the NVIDIA GeForce Experience in the search box and then click on the appropriate result to open it.
After you open the NVIDIA GeForce Experience, go to the General tab.
Next, scroll down to the NVIDIA Share section and then select the toggle to turn off this feature.
Now restart your computer and try to check if there are any updates available for the NVIDIA Graphics card and install them again if there are any.
As you know, every Windows Update is essential for every Windows operating system. They have to be regularly installed, especially since they include various security updates that are important to the system. However, there are times when Windows Update fails to execute properly and you get errors like the error code 0x80070BC9. When you encounter this particular Windows Update error, you will get the following error message on your screen:
“0x80070BC9 – ERROR_FAIL_REBOOT_REQUIRED. The requested operation failed. A system reboot is required to roll back changes made.”
This kind of Windows Update error is most likely caused by a newly installed problematic software, corrupted Windows Update files, or policies that restrict the behavior of the Windows Module Installer. The Windows Module Installer, also known as “WMIW” or “TiWorker.exe”, is the one that checks for new updates from the Windows server and installs them on your computer. This is why you need to make sure that you do not have any policies that control the start behavior of the Windows Module Installer since this service must not be hardened to any start value and should be managed by the operating system.
To resolve the Windows Update error code 0x80070BC9, you can check out the options provided below.
Option 1 – Try checking the status of the Windows Modules Installer Worker Service
Since the Windows Update error code 0x80070BC9 has something to do with the Windows Module Installer Worker service, you need to check its status in the Service Manager. Refer to the following steps to do so.
In the Cortana search box, type “services” and click on the Services icon to open the Services Manager. Alternatively, you can also tap the Win + R keys to launch the Run prompt and then type “MSC” in the field and hit Enter to open the Services Manager.
After opening the Services Manager, look for the Windows Modules Installer Worker Service.
Once you found it, check its status and make sure that its Startup type is set to Manual.
Now click on the Start button and see if it fixes the Windows Update error.
Option 2 – Run the Windows Update Troubleshooter
You might want to run a built-in Windows Update troubleshooter to resolve the Windows Update error. It is one of the things you can check out as it is known to automatically resolve any Windows Update errors like error code 0x80072EE2. To run this troubleshooter, go to Settings and then select Troubleshoot from the options. From there, click on Windows Update and then click the “Run the troubleshooter” button. After that, follow the next on-screen instructions and you should be good to go.
Option 3 – Try contacting the IT administrator to modify the group policies
You could also try to contact the IT administrator to have the group policies modified. This option is applicable for company-managed systems. As mentioned, one of the possible causes of the Windows Update error 0x80072EE2 is the policies that control the start behavior of the Windows Module Installer. Thus, you need to have them removed so that the Windows Module Installer Worker service is managed by the operating system itself. And since there could be many policies, it is highly advised that you contact your company’s IT administrator to get the job done for you.
Option 4 – Try to install the Windows Updates in a Clean Boot State
There are some instances that some conflicting programs installed in your computer might be the one that’s causing Windows Update error code 0x80070BC9. To identify which program is causing the problem, you need to put your computer in a Clean Boot State. To do so, follow the steps below.
Log onto your PC as an administrator.
Type in MSConfig in the Start Search to open the System Configuration utility.
From there, go to the General tab and click “Selective startup”.
Clear the “Load Startup items” check box and make sure that the “Load System Services” and “Use Original boot configuration” options are checked.
Next, click the Services tab and select the “Hide All Microsoft Services” check box.
Click Disable all.
Click on Apply/OK and restart your PC. (This will put your PC into a Clean Boot State. And configure Windows to use the usual startup, just simply undo the changes.)
From there, start to isolate the problem by checking which one of the programs you installed recently is the root cause of the problem.
KMODE_EXCEPTION_NOT_HANDLED seems to be connected primarily to a third-party driver, e1d65x64.sys associated with the Intel(R) Gigabit adapter, NIC/Wired network NDIS (Network Driver Interface Specification) 6.x driver. Error is known to produce the dreaded blue screen of death or BSOD.
Most usually error is connected with gaming on Windows 10 computer and it manifests itself during gaming sessions.
If you are unlucky and you are faced with this unfortunate error we will be happy to try to help you and present with tips and tricks in order for you to find a solution for it.
Before you proceed with the provided solutions, be sure you have sufficient disk space on the Windows drive, run Disk Cleanup and then run CHKDSK.
1) Run the Blue Screen Online Troubleshooter
Open Control Panel, change the view setting to icons. Click Troubleshooting, and click “View all” in the tasks pane. Click “Blue Screen”. This opens the Blue Screen Troubleshooter.
2) Run Driver Verifier
Start a Command Prompt window by selecting Run as an administrator, and type verifier to open Driver Verifier Manager.
Select Create standard settings (the default task), and select Next. You can also choose to Create custom settings to select from predefined settings, or to select individual options. For more information, see Driver Verifier options and rule classes and Selecting Driver Verifier Options.
Under Select what drivers to verify, choose one of the selection schemes described in the following table.
Driver verifier table:
Option
Recommended use
Automatically select unsigned drivers
Useful for testing on computers that are running versions of Windows that do not require signed drivers.
Automatically select drivers built for older versions of Windows
Useful for testing driver compatibility with newer versions of Windows.
Automatically select all drivers installed on this computer
Provides maximum coverage in terms of the number of drivers that are tested on a system. This option is useful for test scenarios where a driver can interact with other devices or drivers on a system.
This option can also exhaust the resources available for Special Pool and some resource tracking. Testing all drivers can also adversely affect system performance.
Select driver names from a list
In most cases, you will want to specify which drivers to test.
Selecting all drivers in a device stack allows the Enhanced I/O Verification option to track objects and check compliance because an I/O request packet (IRP) is passed between each of the drivers in the stack, which allows for a greater level of detail to be provided when an error is detected.
Select a single driver if you are running a test scenario that measures system or driver performance metrics, or if you want to allocate the greatest number of resources available for detecting memory corruption or resource tracking issues (such as deadlocks or mutexes). The Special Pool and I/O Verification options are more effective when used on one driver at a time.
If you chose Select driver names from a list, select Next, and then select one or more specific drivers.
Select Finish, and then restart the computer.
3) Update network device drivers
Go to the official Intel website and try to find newer versions of drivers, if there are none perhaps you will need to revert back to the previous version.
4) Scan memory for issues
Run a memory test on your system, sometimes these errors can be traced back to a faulty RAM bank.
5) Stop over-clocking your PC
If you have overclocked your PC please reverse it back to its original state and see if that would solve the issue
6) Perform System Restore to the previous restore point
If none of the previous solutions have bared fruit, roll back to a previous restore point and that should solve the issue.
In today's IT world, if you want a computer for typical day-to-day actions and gaming, there are 3 primary ways you can go. An Apple computer with its proprietary hardware and operating system or a typical machine with Windows or Linux operating system.
Each system has both advantages and disadvantages and picking the right one might be difficult for some users. From hardware differences to specific software and operating system, each system is aimed at a different type of work, and in this article, we will explore each one and help you in choosing the right one for you.
Apple ecosystem
Apple has managed to create a unique ecosystem of its own devices, from its iMac desktop computers to more professional MAC studio and power MAC and all the way to tablet iPad and iPhone are powered by Apple's own operating system that connects all of these devices into one large system. So if you really need one singular ecosystem this is a huge advantage.
The ecosystem on the side, MAC computer systems are great, some would argue best for coding, design, video work, and sound editing. MAC M2 chip is optimized for all of these tasks and a specially tailored operating system is just the icing on the cake. Specific Apple-made software like a logic pro or final cut also helps a lot to position MAC systems on top of the line.
Reading all of this you might think hey this is the computer for me, it does everything! Sadly the truth is not like that. The first thing that is difficult on MAC systems and a maybe big reason that it is not so adopted outside professional working environment is lack of games. If you are a gamer or plan on using MAC for gaming, well I have some bad news. The second big turn-off is that MAC systems tend to be more expensive than PC systems, yes components are of higher quality but rest assured that you will pay for also for branding.
Get MAC as your workstation for serious work and for good tech support, if you need a plain home computer keep reading.
Windows PC machine
There is no better feeling than assembling your own computer, tweaking hardware to make a monster and despite haters hating, Windows is the best all-around operating system on the market. It is supporting the largest variety of hardware and the largest variety of software.
The best platform for serious gaming and streaming Windows machine has cemented itself as a multimedia powerhouse. But, this kind of computer is not alien to being also a professional machine, you can practically do everything that you can do on Apple or Linux machine inside Windows, yes some things might require extra steps or will be slightly slower but in the end, being able to do anything is the greatest strength of Windows machine.
Of course, every system has its flaws and Windows is not immune to that. One of the biggest is being the operating system for every hardware ever made and every software as well while keeping legacy support for old software and hardware, basically, its biggest strength is in the same time its biggest weakness leading to sometimes stability issues. Also being able to place any kind of hardware can also lead to the same stability issues. Executing something a little slower than other systems and having some extra steps can also be looked upon as weaknesses.
Linux system
First and perhaps for some people, the biggest advantage of the Linux operating system is its price, it is completely free! Other advantages include the great server and networking included in the OS itself, the large amount of customization, and unmatched stability. The ability to write scripts inside the OS terminal is also a great thing and coding is much more streamlined and friendlier than on other machines.
The power of Linux is the ability to change anything, even on the system layer, no other operating system will let you change the basic functionality of the OS itself while Linux will let you do this. It is also the only operating system you can fully use by booting it up from a USB stick and having the same experience as it was installed on a local hard drive. Among other OS mentioned earlier, Linux is by far the lightest one, taking the smallest amount of memory among the three.
The bad side of the Linux machine is the steep learning curve, among the three mentioned operating systems rest assured Linux is the most difficult to learn and be comfortable in it. The operating system will require you to know the hardware and how computers work in order to fully use its potential. Other things that place it behind are not so wide hardware support compared to Windows and the somewhat confusing distro model.
Linux versions come in form of different distro packages and first-time users will face many of them being left in awe of which one to choose. Also installing drivers and software via a package system can also be a tedious task as well, often being that some version of the driver will not work on the newer version of the Linux distro.
Get a Linux machine if you are well versed in computer technology, if you want great customization of the OS itself or if you do not want to spend money on OS and software since almost entire Linux software is open source.
If you suddenly encounter an error saying, “Something happened and this app couldn't be installed. Error Code: 0x80244018”, when trying to install apps on your Windows 10 computer, then you’ve come to the right place as this post will help you in resolving the problem.
It’s not just you that’s experiencing this problem right now as several users also reported getting this error they try to apply a Windows update or download and install the application from Microsoft Store. There could are several reasons why you’re getting this error. It could be caused by a third-party application, or it could be that the update is blocked by your VPN or proxy server, or that the BITS service is disabled. In addition, the error could also be due to some glitch in the component services or it could be that the system files are corrupted. Whatever the cause is, you can fix the error by following any of the given options below.
Option 1 – Run the Windows Update Troubleshooter
Running the Windows Update Troubleshooter can help in fixing Error Code 0x80244018. To run it, go to Settings and then select Troubleshoot from the options. From there, click on Windows Update and then click the “Run the troubleshooter” button. After that, follow the next on-screen instructions and you should be good to go.
Option 2 – Put your PC in a Clean Boot State
It could be that some third-party application is the one that’s causing the problem so it’s best if you put your computer in a Clean Boot state. During this state, you can start the system with a minimum number of drivers and startup programs that will surely help you in isolating the root cause of the issue.
Log onto your PC as an administrator.
Type in MSConfig in the Start Search to open the System Configuration utility.
From there, go to the General tab and click “Selective startup”.
Clear the “Load Startup items” check box and make sure that the “Load System Services” and “Use Original boot configuration” options are checked.
Next, click the Services tab and select the “Hide All Microsoft Services” check box.
Click Disable all.
Click on Apply/OK and restart your PC. (This will put your PC into a Clean Boot State. And configure Windows to use the usual startup, just simply undo the changes.)
After that, try to install the Windows app again.
Note: If you are able to install the app without any trouble at all then it means that the error is caused by some third-party application on your computer. You need to look for the culprit and uninstall it once you found it.
Option 3 – Restart BITS
The Background Intelligent Transfer Service or BITS is a part of the Windows Update service and is the one that manages the background download of Windows Update, as well as scans for new updates and so on. And if Windows Update is experiencing some problems, you can try restarting BITS but make sure that you have admin privileges to do so.
Tap the Win + R keys to open the Run dialog box.
Next, type “services.msc” in the field and hit Enter to open Windows Services.
From the list of Services, look for the Background Intelligent Transfer Service and double-click on it to open Properties.
After that, you need to set the Startup type to “Automatic (Delayed Start) and click on Apply.
Now click the Stop button to stop BITS and then click the Start button to restart the service.
Click OK to save the changes made and then restart your PC.
Option 4 – Disable the Proxy server
Tap the Win + R keys to open the Run dialog box.
Then type “inetcpl.cpl” in the field and hit Enter to pull up the Internet Properties.
After that, go to the Connections tab and select the LAN settings.
From there. Uncheck the “Use a Proxy Server” option for your LAN and then make sure that the “Automatically detect settings” option is checked.
Now click the OK and the Apply buttons.
Restart your PC.
Note: If you are using a third-party proxy service, you have to disable it.
Option 5 – Try disabling the VPN
As mentioned, if you are using VPN, this could be the reason why you’re getting Error Code 0x80244018 so the most obvious thing to do is for you to turn off the VPN and try to run the Windows Update once more. And if you use a VPN software that works using their software, you can just completely exit or log-off from its account. On the other hand, if you are using a built-in Windows 10 VPN, you can simply turn it off or delete all the settings you have created there. Although it’s understandable that you might have to use a VPN connection to connect to the work network, you really have to disable it at least after you’ve successfully installed the app.
Option 6 – Reset Windows Update components
Open Command Prompt with admin privileges.
After that, type each one of the following commands and hit Enter after you key in one after the other.
net stop wuauserv
net stop cryptsvc
net stop bits
net stop msiserver
Note: The commands you entered will stop the Windows Update components such as Windows Update service, Cryptographic services, BITS, and MSI Installer.
After disabling WU components, you need to rename both the SoftwareDistribution and Catroot2 folders. To do that, type each one of the following commands below, and don’t forget to hit Enter after you type one command after the other.
Next, restart the services you’ve stopped by entering another series of commands. Don’t forget to hit Enter after you key in one command after the other.
net start wuauserv
net start cryptsvc
net start bits
net start msiserver
Close Command Prompt and reboot your PC.
Option 7 – Run the System File Checker Scan
System File Checker or SFC is a built-in command utility that helps in restoring corrupted files as well as missing files. It replaces bad and corrupted system files with good system files that might be the cause why you’re getting the Error Code 0x80244018. To run the SFC command, follow the steps given below.
Tap Win + R to launch Run.
Type in cmd in the field and tap Enter.
After opening Command Prompt, type in sfc /scannow
The command will start a system scan which will take a few whiles before it finishes. Once it’s done, you could get the following results:
Windows Resource Protection did not find any integrity violations.
Windows Resource Protection found corrupt files and successfully repaired them.
Windows Resource Protection found corrupt files but was unable to fix some of them.
Restart your PC.
Option 8 – Run the DISM tool
You can also run the DISM Tool as it helps in repairing the Windows System Image as well as the Windows Component Store in Windows 10. Using this built-in tool, you have various options such as the “/ScanHealth”, “/CheckHealth”, and “/RestoreHealth” which could help in fixing the Error Code 0x80244018.
Open the Command Prompt with admin privileges.
Then type in the following commands and make sure to hit Enter right after you type each one of them:
Dism /Online /Cleanup-Image /CheckHealth
Dism /Online /Cleanup-Image /ScanHealth
exe /Online /Cleanup-image /Restorehealth
Do not close the window if the process takes a while as it will probably take a few minutes to finish.
 In this guide, we will show you common ways in fixing Extended Attributes are inconsistent errors inside your Windows that are easy to do and less time-consuming than complete reinstallation of the system.
 Razer is a well-known brand among PC gamers and users, it started as a peripheral manufacturer focused on keyboards and mouse but after years passed Razer expanded its inventory offerings. It soon started offering headphones and lately has branched into wider product lines like gaming chairs and protection masks.
It is not a big surprise that Razer is expanding into other branches of the PC industry. This time, however, it has revealed not one but three new hardware for your PC. Case fans, all in one liquid cooler and power supply.
There are not many details about the products themselves but one thing is one hundred percent confirmed, they come with Razer Chroma, all of them, even the fans.
Razer is a well-known brand among PC gamers and users, it started as a peripheral manufacturer focused on keyboards and mouse but after years passed Razer expanded its inventory offerings. It soon started offering headphones and lately has branched into wider product lines like gaming chairs and protection masks.
It is not a big surprise that Razer is expanding into other branches of the PC industry. This time, however, it has revealed not one but three new hardware for your PC. Case fans, all in one liquid cooler and power supply.
There are not many details about the products themselves but one thing is one hundred percent confirmed, they come with Razer Chroma, all of them, even the fans.
 Most interesting for me personally is Razers Katana, the power supply unit. It is a modular power supply ranging from 750W to 1200W with the additional option of Titanium rated one with an impressive 1600W of power. Power supply will start shipping in early 2022 and at the time of writing this article no price range has been released.
 Hanbo liquid cooler will feature an optimized intake design so it can ensure greater heat transfer and fluid dynamic for improved reliability and silent operation. Radiator comes in 240mm size with two fans and a larger one of 360mm with three fans. The pump will be able to rotate in any direction of full 360 degrees so it can fit in any case. Hanbo will be released in November this year but no pricing has been released so far.
 Kunai fans will boast high static pressure performance with lowered noise. They will go as far as 2200rpm for the 120mm version where the 140mm version will go up to 1600rpm. They will come with addressable LEDs and up to eight fans will be able to be connected to Razer’s PWM fan controller that will come with a magnet at the back for easy attachment to any steel part of PC casing.
PWM will use Razer’s Synapse software to customize pulse width modulation in order to improve airflow and noise. PWM will be priced at $49.99 in the Razer Store and it is available for preorder. Fans are priced at $44.99 for one 120mm or $129.99 for a three-pack of 120mm. One 140mm will go for $49.99 and a three-pack will be $129.99.
Kunai fans will boast high static pressure performance with lowered noise. They will go as far as 2200rpm for the 120mm version where the 140mm version will go up to 1600rpm. They will come with addressable LEDs and up to eight fans will be able to be connected to Razer’s PWM fan controller that will come with a magnet at the back for easy attachment to any steel part of PC casing.
PWM will use Razer’s Synapse software to customize pulse width modulation in order to improve airflow and noise. PWM will be priced at $49.99 in the Razer Store and it is available for preorder. Fans are priced at $44.99 for one 120mm or $129.99 for a three-pack of 120mm. One 140mm will go for $49.99 and a three-pack will be $129.99. 

