After you fresh install Windows 10 on your computer, it allows you to set up a PIN just before you can start using it. However, a number of users reported that the Windows 10 installation gets stuck on the “Set up a Pin” phase. If you are one of the users who experience the same thing, then read on as this post will walk you through fixing the problem.
As users start to use their newly installed Windows 10 computer, they reported that the screen is still stuck even after they enter the correct PIN twice and there is no way for them to go forward or backward. Note that this is a part of the account setup and that your computer must stay connected to your internet connection before you finalize everything. And even though the PIN works when the computer is offline, the account setup still needs an internet connection, at least for a fresh installation.
The solution for this kind of issue is quite easy and there won’t be any problem even if your computer shuts down or restarts since the installation is already complete and all that’s left is the account setup. To fix this problem, follow the steps given below.
Step 1: The first thing you have to do is to turn off your internet connection or disable all connectivity from your computer.
Note: If you are using either an Ethernet cable or a Wi-Fi switch to connect to the internet, you have to disable or remove them. But if you don’t have any options, just completely turn off your internet connection.
Step 2: The next thing you have to do is to force your computer to shut down and then restart your computer. The setup process will eventually pick up exactly where it left off. The only difference is that there is no connection to the internet and your screen will no longer be stuck on the PIN setup screen so you now have the option to skip it and wait until you’re logged in for the first time.
Step 3: Once you’re done, you can then you can choose to Setup Pin later on and turn your internet connection back on or connect your computer with an internet connection.
The speed at which the CPU runs varies depending on any Windows laptop or desktop. And in case you don’t know, the CPU does not run at full speed all the time as it depends on how the operating system distributes the load so it works accordingly. However, there are instances when it runs at full speed especially if your Windows 10 computer is on a heavy workload. But if you find that even when your computer is already on a heavy workload and the CPU is still not running at full speed, then you need to look into this situation. To verify that your CPU’s speed, you can use any CPU stress test tool.
This kind of issue is common on laptops compared to desktop computers since laptop runs on battery. The Intel Processor on laptops uses the Speed Stepping Technology which means that when you are doing some small tasks on your laptop, the processor’s speed is reduced. On the other hand, if this happens when you are using a heavy application, it can be due to a low charge on the laptop’s battery. Thus, Windows will try its best to keep the computer running for as long as possible by reducing the CPU speed or processor. But there are times when you are ready to sacrifice battery to make sure that the work gets done on time. To achieve that, here are some options you can check out.
Option 1 – Try setting the processor state to the maximum in Power Options
Type “control” in the search box to view the classic Control Panel as well as the popular options.
Next, click on Power Options > Change plan settings > Change advanced power settings.
Then navigate to Processor power management > Maximum processor state.
Now select 100% when it is on Battery and Plugged in.
After that, expand the System cooling policy option and make sure to set it as Active to make sure that the battery won’t overheat.
Finally, apply the changes made to all the profiles of the power management and restart your computer. This will ensure that your CPU will run at maximum power at all times.
Option 2 – Try to update or disable the Intel Power Management driver
The next option you can try is to update or disable the Intel Power Management driver. The Intel-powered computers have dedicated software that controls CPU speed and Fan speed when it needs to save battery. You can try disabling it temporarily and check if there are any changes with the CPU fan speed.
First, restart your computer by holding the Shift key to boot your computer into Troubleshooting or Advanced mode.
Next, go to Troubleshoot > Advanced Options > Command Prompt.
Then change the directory to C:/Windows/System32/driver and then rename the file named “Intelppm” by entering the “ren intelppm.sys intelppm.sys.bak”.
Now restart your computer.
Note: If you were not able to find the drivers in C:/Windows/System32/driver, check if they are available under C:/Drivers/IntelPPM. After that, the CPU speed should change now with the Intel driver missing from the system. And in case you want to enable it, simply follow the same steps given above and rename the file again.
Option 3 – Try disabling the IPPM using the Command Line or Registry Editor
Command Prompt:
Tap the Win + R keys to open the Run dialog box and type “cmd” and tap Enter to open Command Prompt.
Next, type this command and hit Enter: sc config intelppm start= disabled
The “sc config” command you entered modifies the value of a service’s entries in the registry as well as in the Service Control Manager database.
Registry Editor:
Tap the Win + R keys to open the Run dialog box and type “Regedit” in the field and hit Enter to open the Registry Editor.
Next, navigate to HKEY_LOCAL_MACHINESYSTEMCurrentControlSetServicesintelppm.
From there, double click on the intelppm and change the Start key value to
Now close the Registry Editor and reboot your computer.
Note: The steps given will make sure that the CPU will run at maximum power at all times.
PC Performer is a registry cleaner made by PerformerSoft. The purpose of this program is to remove redundant items from the Windows registry. Registry cleaners remove broken links, missing references within the Windows registry. PC performer is designed to automatically optimize your registry and clean it up.
PC Performer adds registry entries for the current user that allow it to run automatically each time the system is rebooted. It adds a scheduled task to Windows Task Scheduler in order to run at various times. The software connects to the internet, therefore it creates a Windows Firewall exception that allows it to connect without interference. Multiple anti-virus programs detected this software as Malware, it typically comes bundled with other software or is distributed through a pay-per-install bundle.
About Potentially Unwanted Applications
People have encountered it – you download and install a piece of free software application, you then see some unwanted applications on your computer or discover a strange toolbar has been added to your browser. You didn’t install them, so how did they turn up? These unwanted programs, technically known as Potentially Unwanted Programs (PUPs), often come bundled along with other software and install themselves on user’s PC without their knowledge. They perhaps might not look like viruses to some individuals, but they can produce major annoyances and bring about serious trouble for users.
The idea of PUP was coined to define this downloadable crapware as something other than malicious software. Much like malware, PUPs create problems when downloaded and placed on your computer, but what makes a PUP different is that you provide consent to download it – the fact is vastly different – the software installation bundle actually tricks you into agreeing to the installation. Still, there isn’t any doubt that PUPs are still bad news for computer users as they can be incredibly damaging to your computer in lots of ways.
What do PUPs look like?
The unwanted software programs after installation display loads of annoying pop-up adverts, create fake alerts, and quite often it even pushes the user to buy the software. Likewise, the majority of free software applications these days come with quite a few unwanted add-ons; in most cases a web browser toolbar or browser modification such as a homepage hijacker. Not only they needlessly use up space on your screen, but toolbars can also manipulate search engine results, watch your browsing activities, decrease your web browser’s performance, and decelerate your net connection to a crawl.
PUPs employ aggressive distribution techniques to get in your computer. Some might include information gathering program code that could collect and send your private information back to third parties. Due to this unwanted program, your application may freeze, your security protections may get disabled that might leave the computer susceptible, your system may get ruined, and the list goes on and on.
Tips on how to prevent ‘crapware’
• Read cautiously before agreeing to the license agreement as it may have a clause about PUPs.• Usually, when setting up a program you will get two options, ‘Standard Installation (recommended)’ and ‘Custom Installation’. Don’t select ‘Standard’ as PUPs could be installed that way!• Use good anti-malware software. Try Safebytes Anti-Malware which will find PUPs and handle them as malware by flagging them for removal.• Be alert when you install freeware, open-source software, or shareware. Avoid downloading browser extensions and programs you are not familiar with.• Only download applications from the original providers’ sites. Avoid download portals as they use their own download manager to pack additional programs with the initial download.
What you can do if Virus Stops You From Downloading Or Installing Anything?
Malware could potentially cause several kinds of damage to computer systems, networks, and data. Certain malware goes to great lengths to stop you from installing anything on your PC, especially antivirus applications. If you’re reading this right now, you have perhaps recognized that a malware infection is a reason for your blocked web traffic. So what to do if you need to install an antivirus program like Safebytes? There are a few actions you can take to get around this problem.
Eliminate malware in Safe Mode
If the virus is set to load automatically when Microsoft Windows starts, getting into Safe Mode could very well block the attempt. Since just the bare minimum programs and services start-up in safe mode, there are hardly any reasons for issues to happen. The following are the steps you should follow to remove malware in Safemode.
1) At power on/start-up, hit the F8 key in 1-second intervals. This will bring up the Advanced Boot Options menu.2) Select Safe Mode with Networking using arrow keys and hit ENTER.3) Once you get into this mode, you should have an internet connection again. Now, obtain the malware removal application you need by using the browser. To install the software, follow the directions in the installation wizard.4) After installation, do a complete scan and let the software delete the threats it detects.
Switch to an alternate browser
Web-based viruses can be environment-specific, targeting a particular web browser or attacking particular versions of the browser. The best solution to overcome this issue is to opt for a browser that is well known for its security features. Firefox contains built-in Phishing and Malware Protection to keep you safe online.
Install and run anti-virus from a USB drive
To successfully eliminate the malware, you will need to approach the issue of installing an anti-virus program on the infected PC from a different angle. Adopt these measures to employ a USB flash drive to fix your corrupted computer.
1) Use another virus-free computer to download Safebytes Anti-Malware.2) Insert the pen drive into the clean computer.3) Double-click the Setup icon of the antivirus program to run the Installation Wizard.4) When asked, choose the location of the pen drive as the place where you would like to put the software files. Follow the on-screen instructions to complete the installation process.5) Now, insert the pen drive into the infected computer.6) Double-click the EXE file to open the Safebytes program right from the flash drive.7) Click “Scan Now” to run a scan on the infected computer for malware.
Highlights of SafeBytes Anti-Malware
Do you want to install the best anti-malware software program for your computer system? There are various applications in the market that comes in paid and free versions for Microsoft Windows systems. A few of them are great and some are scamware applications that pretend as legit anti-malware software waiting around to wreak havoc on your computer. While looking for anti-malware software, select one which gives dependable, efficient, and full protection against all known computer viruses and malware. On the list of recommended software is SafeBytes Anti-Malware. SafeBytes carries a really good track record of top-quality service, and clients are happy with it.
SafeBytes anti-malware is a highly effective and easy-to-use protection tool that is suitable for users of all levels of computer literacy. With its cutting-edge technology, this application will let you remove multiples types of malware which include viruses, worms, PUPs, trojans, ransomware, adware, and browser hijackers.
SafeBytes anti-malware provides an array of advanced features which sets it apart from all others. Listed here are a few of the great ones:
Anti-Malware Protection: Built on a highly acclaimed anti-virus engine, this malware removal tool is able to detect and remove many obstinate malware threats such as browser hijackers, potentially unwanted programs, and ransomware that other typical anti-virus programs will miss.
Real-time Active Protection: SafeBytes offers an entirely hands-free real-time protection that is set to check, prevent and remove all threats at its first encounter. It’ll check your PC for suspicious activity continuously and shields your PC from unauthorized access.
Faster Scan: SafeBytes’s virus scan engine is one of the quickest and most efficient in the industry. Its targeted scanning seriously increases the catch rate for malware that is embedded in various computer files.
Safe Browsing: Safebytes assigns all sites a unique safety ranking that helps you to have an idea of whether the webpage you’re going to visit is safe to view or known to be a phishing site.
Low CPU Usage: SafeBytes is renowned for its minimal influence on processing power and great detection rate of countless threats. It runs silently and efficiently in the background so you’re free to use your computer at full power all the time.
24/7 Customer Support: SafeBytes provides 24/7 technical support, automatic maintenance, and software upgrades for the best user experience.
Technical Details and Manual Removal (Advanced Users)
If you wish to manually remove PCPerformer without the use of an automated tool, it may be possible to do so by removing the program from the Windows Add/Remove Programs menu, or in cases of browser extensions, going to the browsers AddOn/Extension manager and removing it. You will likely also want to reset your browser.
To ensure the complete removal, manually check your hard drive and registry for all of the following and remove or reset the values accordingly. Please note that this is for advanced users only and may be difficult, with incorrect file removal causing additional PC errors. In addition, some malware is capable of replicating or preventing deletion. Doing this in Safe Mode is advised.
The following files, folders, and registry entries are created or modified by PCPerformer
Files:
File at LOCALAPPDATAPCPerformerSetupPCPerformerSetup.exe.
File at PROGRAMFILESPC PerformerPCPerformer.exe.
File at PROGRAMFILESPC PerformerPSCheckUp.exe.
File at PROGRAMFILESPC PerformerRegistryDefrag.exe.
File at WINDIRTasksPC Performer Daily Check.job.
File at WINDIRTasksPC Performer Scheduled Scan.job.
Registry:
Key PC Performer at HKEY_CURRENT_USERSoftwarePerformerSoft.
Key PC Performer at HKEY_LOCAL_MACHINESOFTWAREPerformerSoft.
Key PCPerformer_is1 at HKEY_LOCAL_MACHINESoftwareMicrosoftWindowsCurrentVersionUninstall.
If your Windows 10 computer is currently experiencing high CPU usage because of the IAStorDataSvc, read on as this post will show you what you can do to resolve the issue. The high CPU usage of IAStorDataSvc is because of the Intel Rapid Storage Technology. It appears as a Service that may not only result in high CPU usage but also high disk and memory usage, as well as slow computer performance and overheating of your PC. This problem usually occurs on HP computers and on any computers that are using the Intel Rapid Storage Technology. You might also notice that your fan runs at high speed each time this issue occurs with the average CPU usage spiking up to 50%.
Take note that this service is used to speed up file access. However, if you are not using an SSD on your computer, then it’s not really necessary for you to have the IAStorDataSvc installed. To resolve this issue, here are some options you can try.
Option 1 – Update or reinstall or remove the IAStorDataSvc driver
Before you proceed, you need to decide first if you want to update, reinstall or remove the IAStorDataSvc driver. To make things easier for you, you can try downloading the latest driver from the Intel Download Centre and then install it on your computer. If it works, good, but if not, you might want to consider removing the driver completely and just let the Windows Update look for the right driver for your computer after you restart it. There are times when the drivers installed are incompatible with the latest Windows update which results in issues like high CPU usage.
Tap the Win + X + M combination on your keyboard to open the Device Manager.
After that, look for the Intel Rapid Storage Technology driver, right-click on it and then select Uninstall.
Now restart your computer for the changes to take effect.
Note: You might also have to go to the list of installed programs and uninstall a program that is listed as “Intel Rapid Storage Technology driver”. To do so, refer to these steps:
In the Cortana Search box, type “control panel” and from the search results that appear, click on Control Panel.
After opening Control Panel, select Programs > Programs and Features which will open the list of installed programs on your computer.
From there, look for Intel Rapid Storage Technology and uninstall it.
Option 2 – Try to disable the IAStorDataSvc via Services Manager
Tap the Win + R keys to open the Run dialog box.
Then type “services.msc” in the field and hit Enter to open Services.
Next, look for the Intel Rapid Storage Technology services from the list of services and then double-click it.
Then change its Startup type to “Disabled”.
After that click on the Apply button and then OK to save the changes made.
Now exit the Services window and check if the problem’s resolved.
Error Code 46 is a device driver error that occurs when Windows fails to access the connected peripheral device to the computer as Windows is in a process of shutting down.
Users experience this error on any Windows 2000 and later operating system versions and usually see a pop-up with the following message:
“Windows cannot gain access to this hardware device because the operating system is in the process of shutting down. (Code 46)”
Solution
Error Causes
Error Code 46 is caused when there is a temporary problem with windows system files which prompts that the system is undergoing a shut down when in fact is it not.
This prevents access to the connected devices. This error may also be caused by a registry issue in which case it has either become corrupted or damaged.
Further Information and Manual Repair
Unlike all other Windows error codes, code 46 is relatively easy to fix with the right knowledge and does not pose any serious threat to the well-being of your PC. Here is how you can do it.
Method 1 – Restart your PC
The simplest method to resolve Error Code 46 is to run a restart of your computer.
The error is most commonly a temporary registry glitch that prevents you from accessing the device connected to your computer. Upon restarting your computer, it will resume working properly as before.
There is no need to run a troubleshooting wizard, use system restore, or run anti-virus software to scan and remove malware or spyware. A simple restart is all that is needed.
Method 2 – Install DriverFIX
Although the error code can be resolved upon restarting the computer, there’s a possibility of damaged or corrupted Windows registry files. This can be fixed by using a program like DriverFIX.
DriverFIX, with its user-friendly approach to help you fix your PC issues, comes with an integrated database that detects which drivers you need to reconfigure within just a few seconds and downloads it automatically.
It further ensures that your drivers are installed in their entirety leaving no room for any corrupted or damaged registry.
Error Code 46 may not be much of an issue, however, to prevent any risk of a Windows system corruption can be disastrous for your computer.
DriverFIX helps you fix your PC registry and device driver problems with user-friendly software and an integrated database. The database which consists of detailed information on what device driver needs to be installed will automatically download the required device driver without you need to refer to your hardware instruction manual.
Registry problems resulting from incomplete program installations and viruses such as malware and spyware damaged registry files. This affects your PC in serious ways.
DriverFIX further has an automatic backup and restoration system that helps create system ‘checkpoints’ which allow you to roll back to a healthier state and resume operations. This can help you avert any Windows error codes in the future.
The 0x8007045D error code is an I/O (input and output) error that is associated with the registry. It indicates that the Windows operating system has become overloaded with invalid system references in the registry.
This may prevent you from executing reading and writing to and from devices successfully.
Error Causes
Registry is the main database of your PC. This portion of your computer saves all the activities that you perform on your PC including the junk files, temporary internet files, invalid entries, bad registry keys, and more.
This clutters the hard disk. If the unnecessary files are not removed from the registry, it may lead to I/O errors like 0x8007045D.
On the hard drive, some parts of the drive may fail to function. If this is not fixed on the time it may lead to serious disk damage and registry corruption eventually resulting in system failure. System failure can make you lose all the valuable data saved on your system for good.
How to Fix the Error Code 0x8007045D?
Error codes on your PC are like warnings. These codes indicate that your PC has some issue. Therefore ignoring it is not wise. To spare yourself from such serious PC damages, it is advisable to take correct measures timely instead of prolonging and making the situation go from bad to worse.
Hello and welcome to our software series review. Weel this time we could say this is more of a service review since the application we are going through today is online and you can use it freely without ever needing to install it.
When we choose software that we are going to review and recommend we really try to recommend something that is worth your time and money, Cartoonize fits in both categories in my opinion.
First of all basic plan of this graphic software is completely free and as mentioned it is working online, also as one more feature basic plan does not even require you to have an account of any kind, all you need to do is go to the website of the application and you can start using it right away. There is also paid plan for extra features if you need them billed monthly or annually.
Features
First things first, this is not Photoshop or GIMP and it does not aim nor want to be. This is something else, directed and pointed at the different types of users. This application is aimed at people that want to make some quick graphics and post them on social media and it does that very well. Even without knowledge to use graphic software this one is so well designed and straightforward that even a complete newcomer can do something right away.
So as the application that wants to be used by people that want to place some cool pictures or ads on their social media what it offers. For starters simplicity and ease of use, every option that you can use is on the left side of the screen nicely packed into the vertical toolbox. Inside the toolbox, you have access to various tools, effects, and filters that you can apply to your image.
Tools explained
Image manager
The first section on the tool panel is the image manager, here you can upload your images, delete them, search stock images, and so forth. nothing more to say about this one as it is only a basic file manager.
Edit
In this tool panel, there are a lot of basic settings for your image manipulations divided into 3 sections: Basics, Enhance, and Creative. In the basic section, you can crop, resize and rotate your image. Enhance panel will let you set exposure, color, vibrance, tint, and details (sharpen). Finally, the Creative part will let you remove the background with AI in a single click, replace colors in the image, and add a vignette and round image.
Effects
In the effects panel, you will be given 4 options to choose from Cartoonizer, Digital art, Sketcher, and painting. Each option once clicked will open another set of options tied to chosen preset where you will be able to choose a different style from chosen template. Once you click on the desired template it will be applied to your image and in the upright corner, you will have edit options to tweak it to your liking. You can play around as much as you want because only once you click on the apply button, the effect will be applied to your image.
Filters
Same as in the effects tool panel here you will also get a series of different filters that you can apply to your image. As in the previous tool once clicked on the chosen filter, you will be given options for its variations and details edits. How there is really plenty of filters options and combined with its own presets I will not focus on explaining what each one is doing since picture thumbnails are pretty accurate and just one look at them will explain to you everything you need to know.
Overlays
In the overlays panel, you can as the name says overlay different kinds of effects on your image. You can add snow, fog, sun flares rain, and many more. Presets work identically to previous effects and filters.
Masks
If you want to place your image in a certain shape or in-text this is the section for you. You will be presented with sections as custom text, shapes, brushes, floral, animals, and patterns. Each section will once again lead to plenty of variations on the chosen subject where you can pick one that you like the most and tweak its options.
Text
As the name suggests, this section is to add text to your picture or design. If you are making some cool ad for Facebook, Instagram, or other social media I believe that you will spend most of your time in this section adding text and tweaking it so it looks best. You have all the tools that you will need to make a catchy title or smaller block of text and you can add multiple texts to your picture tweaking their own visual appearance, the font used, color, and some effects like a drop shadow.
Draw
In the draw section, you will be able to freely draw whatever you like with your mouse or pen if you have one. you have basic options for a brush and eraser so you can erase stuff. Pretty basic tool but it gives a nice touch to underline something, circle it, etc.
Graphics
This panel will let you place various already made graphic assets into a picture. You have hearts, hats, glasses, etc. There really are tons of premade graphics along with thematic ones like new year, st. Patric day and more.
Frames
As the name suggests this section will place a frame of your choice around your picture. You can choose the style of frame, position, color, and many more. There are various styles and each style has its own options.
Conclusion
Cartoonize is a great online application that will let you quickly and easily do cool and nice image edits. As mentioned you can also add various effects, text, and graphics and use this app to make some quick and nice ads for social media. You have the option to publish to your social media right from the app in the save dialog but you can also of course download your image or design to your local computer.
Please note that for this review we used the pro, paid version so all of the features were unlocked. We wanted to give you a full overview of the full potential of the app. In my opinion, the small monthly fee that they charge is well worth it when you see all things that you can do with it.
Go to the cartoonize website and check it out, basic option is completely free and it does not even require making an account. Have fun, be creative and take care, I hope to see you again tomorrow.
Error Code “Windows 10 isn’t activated after upgrading for free” – What is it?
Windows 10 isn’t activated error occurs when Windows users attempt to upgrade to Windows 10 for free and end up in a non-activated state. It is a Windows 10 activation error affecting PC owners who attempt to upgrade their Windows 7 or Windows 8.1 operating systems. A message box will appear with the following message: “Windows 10 isn’t activated after upgrading for free from Windows 7 SPI or Windows 8.1 update.”
Common symptoms of this error code include the following:
Inability to upgrade for free to Windows 10
The appearance of activation error code in the message box
Solution
Error Causes
To understand the cause of this activation error, users will need to understand activation within Windows. Activation is a process that allows Windows to verify that you are upgrading your operating system based on the Microsoft Software Licensing Terms. These terms specify, for instance, the number of devices upon which you can use Windows.
Once you have a genuine copy of Windows and you are following the terms mentioned earlier, you should be able to activate and complete the upgrade to Windows 10. However, the activation fails when these conditions are not met. Note also that the error may occur if users fail to upgrade to Windows 10 before reinstalling, requiring them to repeat the installation process by first going back to the previous version of Windows present on their system. Once the upgrade process is not done as should, you might encounter other Windows 10 errors such as error code 0xc0000142
If you see this error code, “Windows 10 isn’t activated after upgrading for free” proceed to rectify it using manual repair methods below.
Further Information and Manual Repair
To fix this activation error code in Windows 10, users will need to employ at least one manual repair procedure. This process can successfully be completed by non-technical Windows users. However, you may also consider getting assistance from a Windows repair technician if you are not certain you have the requisite skills needed to complete the manual repair tasks below.
The main methods to resolve the error code “Windows 10 isn’t activated after upgrading for free from Windows 7 SPI or Windows 8.1 update” is as follows:
Method One: Manually Activate Windows
If you attempted upgrading for free to Windows 10 and ended up with the activation error you will need to first perform a manual activation. Follow the steps below to complete the process.
Step one: Tap or click the Start button
Step two: Select Settings then Update & security
Step three: Select Activation
Step four: Once activation status is Connect to the Internet to activate Windows, click or tap Activate
The steps above enable users to successfully activate Windows 10 if the issue involves a connection problem. However, if Windows is not activated, it may mean your copy of Windows is not genuine. This may require you purchase a copy of Windows to rectify the issue. However, if you have a genuine copy of Windows proceed by applying the steps found in method two.
Method Two: Use Product Key to Verify Copy of Windows
A valid product key is one way you can verify your copy of Windows is genuine. This will enable you to complete activation and allow you to access the free upgrade to Windows 10. Follow the steps below.
Step one: Click or tap the Start button
Step two: Select Settings then Update & security
Step three: Click Activation
Step four: Select Change Product Key then type in the product key. (Ensure you type the 25 characters in the correct order.)
Method Three: Use an Automated Tool
Error codes in Windows often occur due to poor maintenance of one’s PC. To improve your system and reduce your machine’s risk of experiencing error codes, download a powerful automated tool. This tool is both powerful and user-friendly, making its benefits accessible to even the most non-technical Windows users.
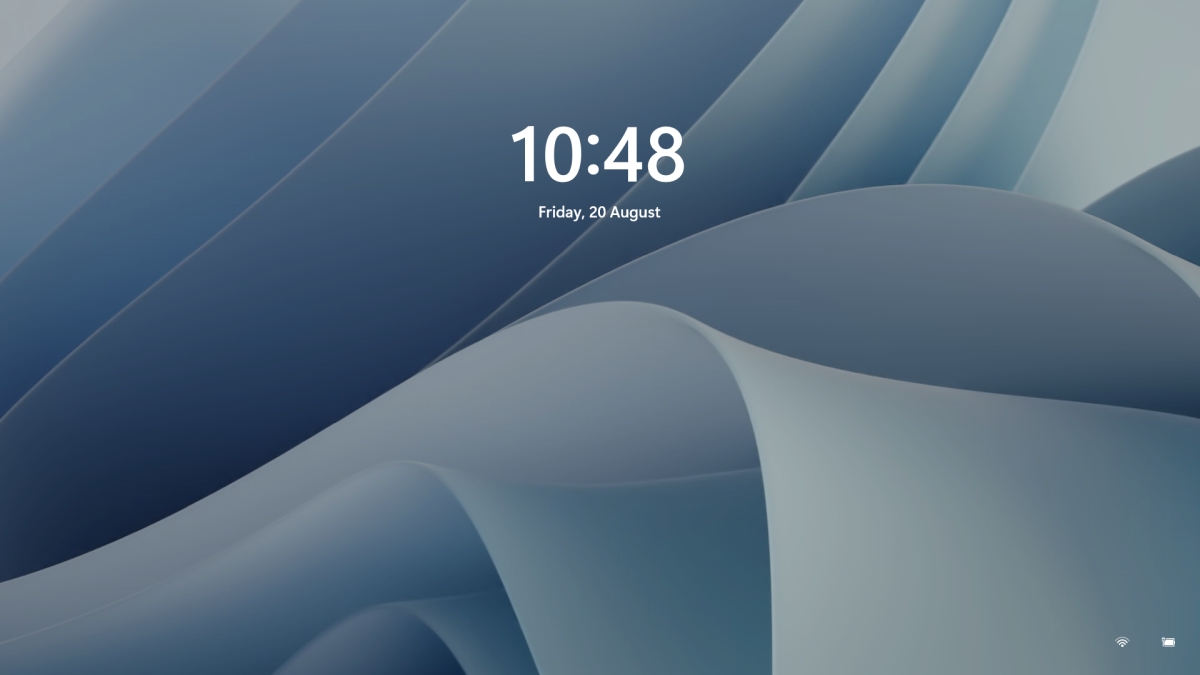
Same as in Windows 10, Windows 11 also features a lock screen. IN this lock screen by default, you will see a clock and date above the standard Windows 11 background. Not all users will be happy with this choice but do not worry, you can choose and customize your lock screen to better suit your idea of it.
To personalize the lock screen do:
Right-click on Desktop and select Personalize
Click on the lock screen
Choose one of three options and customize it
Personalize Your Lock Screen
this option will let you set a custom image or slideshow for your lock screen. Choose either one that best suits you. Under selecting picture or pictures for the slide show you can uncheck the option to see tips, tricks, and facts on your lock screen.
Lock screen status
when clicking on this option you can select the application widget that you wish to be shown on the lock screen like weather, mail, calendar, etc. Choose if you would like one by clicking on it.
Show the lock screen background picture on the sign-in screen
as self-explanatory this switch will enable or disable chosen lock screen wallpaper on your login credentials screen.
Close settings
All settings will be automatically saved and applied and when you wish to lock the screen easiest way is to press ⊞ WINDOWS + L shortcut on your keyboard.
Error 101 is a Google Chrome error. You may experience this error if you browse the internet using Google Chrome. This error results when the existing HTTP connection between Chrome and the website is broken.
The error is displayed in the following format: “Error 101 (net::ERR_CONNECTION_RESET): The connection was reset.”
Solution
Error Causes
The cause of Google Chrome error 101 cannot be narrowed down. This error can be triggered on your PC due to multiple reasons. These include:
The inability of the Google Chrome installer to create a temporary directory on your PC during the installation process
Enabled DNS Prefetching
Firewall
Viral Infection
Bad Registry Entries
Poor Internet Connection
Though this error code is not fatal, nonetheless it is advisable to fix it to ensure you are able to browse the internet using Google Chrome.
Further Information and Manual Repair
The good news is that this error is quite easy to resolve. Even if you are not a technical whiz you can still manage to fix it by trying these easy and effective DIY methods we have listed below:
Method 1: Reload the Website link on Chrome or Check Your Internet Connection
Sometimes refreshing the webpage can resolve the issue easily. Try doing it. Reload the link by pressing Ctrl +R. This will refresh the webpage.
If it starts working then that’s great but if it doesn’t then it is advisable to check your internet connection. Disable and Enable the connection and then try browsing on Chrome again. If websites are accessible then the problem is resolved.
If the error persists then try other methods.
Method 2: Disable DNS Pre-fetching
Sometimes this error may occur due to enabled DNS pre-fetching. To resolve the issue, open Chrome, then click on the wrench key. Go to setting and under the bonnet and Privacy section, look for the DNS perfecting option.
If it is enabled, then uncheck it to disable DNS Pre-fetching. Save the changes and then close the browser. Now open it again and try browsing on Chrome. If error 101 does not appear and you are able to access websites then the issue is fixed.
Method 3: Scan for Viruses
Another way to fix this is to download and run a powerful antivirus. Scan and remove viruses to fix the problem.
Method 4: Check the permission for your temporary folder
As mentioned above, another underlying reason for error 101 can be Google Chrome installer was unable to create a temporary directory on your system during the installation process.
To resolve it, check the permission for your temporary folder. Here’s how to do it: First go to the start menu and type Run. Now enter one of the following directories in the text fields
1. Windows XP: %USERPROFILE%Local Settings
2. Windows Vista: %USERPROFILE%AppDataLocal
After that press OK. This will open a new window. In the Window that opens, right-click the temp folder. Now select properties and press the security tab to continue. In the group and user names section, select your user profile name.
In the permissions, section verify that the checkboxes for READ, WRITE, and READ & EXECUTE permissions in the DENY column are not selected. After you have verified, click apply and then ok. Now try reinstalling the Google Chrome browser again on your system.
Method 5: Remove Bad Entries by Cleaning the Registry
Bad entries and cookies saved in the registry can also lead to error 101. You can remove them manually but that will take a great deal of time and can be slightly difficult if you are not technically sound.
Therefore, it is advisable to download Restoro. This is a user-friendly PC Fixer integrated with a registry cleaner that scans and removes all registry issues in a few clicks. It removes all the bad entries and junk files cluttering the registry and repairs it instantly.
Click here to download Restoro.
0x80004005 Outlook is an error that users commonly encounter while attempting to send or receive emails on Outlook.
The message that appears usually states “This message could not be sent. Try sending the message again or contact your network administrator."
The client operation failed. Error is [OX80004005- 0X0004B9-OXOO501].
Error Causes
This error is usually caused by a problem in the Local Area Network or LAN. What actually happens is that signals with the wireless LAN are lost or a connection problem occurs within the network cable.
As a result, the 0x80004005 Outlook error is triggered while sending or receiving an email. Sometimes the problem goes away on its own. However, if it recurs after a few hours, it shows that some problem exists within the network.
Also, it is important to understand that different factors can affect the quality of wireless connections in a network.
For instance, garage door openers, microwave ovens, and Bluetooth devices can easily become obstacles, disrupting the connection and causing the quality to degrade. Other causes are listed below as follows.
Missing, corrupt, or damaged registry keys
Existence of viruses
Outdated drivers
It is a must to fix this error otherwise potential risks associate with this error such as permanent damage and blue screens.
Further Information and Manual Repair
There are two ways to fix this error and both are listed below as follows.
One solution is to disable script blocking in Norton Antivirus. Most users encountering this problem have Norton Antivirus installed on their PCs. To correct this problem, simply turn off the ‘Enable Script Blocking’ feature. However, there is a downside associated with this solution. Enabling script blocking will make your network or computer vulnerable to viruses and malware. That’s why it is not advised to implement this solution.
The alternative solution is to simply disable the new-mail notification feature offered in Outlook. To disable notifications of any new emails, the steps go as follows. Open Outlook and go to the Tools menu. Here you will come across ‘Options’.Click on it and then select the ‘Preferences’ tab. Here you will find the ‘Email Options’. Click on it and then uncheck the checkbox against the option, ‘Display a notification message when new mail arrives’. Click Ok two times.
Both these workarounds will work. Therefore, it is advised that you employ any one of them as per your needs.


 To personalize the lock screen do: