Logo

Windows installation stuck on Set up a Pin

After you fresh install Windows 10 on your computer, it allows you to set up a PIN just before you can start using it. However, a number of users reported that the Windows 10 installation gets stuck on the “Set up a Pin” phase. If you are one of the users who experience the same thing, then read on as this post will walk you through fixing the problem.

As users start to use their newly installed Windows 10 computer, they reported that the screen is still stuck even after they enter the correct PIN twice and there is no way for them to go forward or backward. Note that this is a part of the account setup and that your computer must stay connected to your internet connection before you finalize everything. And even though the PIN works when the computer is offline, the account setup still needs an internet connection, at least for a fresh installation.

The solution for this kind of issue is quite easy and there won’t be any problem even if your computer shuts down or restarts since the installation is already complete and all that’s left is the account setup. To fix this problem, follow the steps given below.

Step 1: The first thing you have to do is to turn off your internet connection or disable all connectivity from your computer.

Note: If you are using either an Ethernet cable or a Wi-Fi switch to connect to the internet, you have to disable or remove them. But if you don’t have any options, just completely turn off your internet connection.

Step 2: The next thing you have to do is to force your computer to shut down and then restart your computer. The setup process will eventually pick up exactly where it left off. The only difference is that there is no connection to the internet and your screen will no longer be stuck on the PIN setup screen so you now have the option to skip it and wait until you’re logged in for the first time.

Step 3: Once you’re done, you can then you can choose to Setup Pin later on and turn your internet connection back on or connect your computer with an internet connection.

Do You Need Help with Your Device?

Our Team of Experts May Help
Troubleshoot.Tech Experts are There for You!
Replace damaged files
Restore performance
Free disk space
Remove Malware
Protects WEB browser
Remove Viruses
Stop PC freezing
GET HELP
Troubleshoot.Tech experts work with all versions of Microsoft Windows including Windows 11, with Android, Mac, and more.

Share this article:

You might also like

Fix Windows Cannot Find a System Image
If you have encountered the “Windows Cannot Find a System Image on This Computer” error while you are trying to restore a system image, then read on as this post will guide you in resolving this problem. A system image is basically a backup of your whole data in the system. For instance, it can be the backup data of your hard disk or the whole hard disk itself, or one of the volumes. This is really useful in some cases like when you are not able to get back into your system for some reason or when your system has been corrupted. In such cases, you can utilize this feature and get going safe and sound. However, not all things go the way as expected like when you make a system image of a drive for instance, or use that backup to restore data and you suddenly encounter the “Windows Cannot Find a System Image on This Computer” error. This kind of error occurs due to a number of reasons but worry not for your data is safe and you can fix this error easily. This error is most likely triggered by changing the name of the “WindowsImageBackup” folder. Renaming this folder will certainly be an issue since it is the one that stores all your data. Aside from renaming the WindowsImageBackup folder, renaming the sub-folders can also cause this error which means that renaming the sub-folders of the WindowsImageBackup folder can trigger the error. To fix this error, here are some suggestions that might help:

Option 1 – Try putting the WindowsImageBackup folder in the Root directory

Windows will have issues finding the WindowsImageBackup folder if it isn’t in the root directory of the drive so if it is not there, the “Windows Cannot Find a System Image on This Computer” error will pop up. When a folder is in a root directory, it means that it shouldn’t be stored within a folder but in the main directory instead.  Thus, you need to put the WindowsImageBackup folder in the root directory to fix the error.

Option 2 – Don’t add any sub-folders in the WindowsImageBackup folder

Another cause of the error is when you add sub-folders in the WindowsImage Backup folder. Adding any sub-folders in this folder will only trigger the error so you should leave the folder as it is and you must not make any modifications to it. So if you have added sub-folders in it, make sure to remove them right away.

Option 3 – Make sure that there is one system image per USB drive

The error can also appear if you’ve stored multiple images inside a single USB drive as it could confuse Windows and will trigger the “Windows Cannot Find a System Image on This Computer” error. Note that storing system images of different volumes of your hard disk in a single USB will prevent you from restoring your data.

Option 4 – Try renaming the System Image folder

If you’ve just changed the name of the System Image folder after you store it on a USB stick or other external device, then it’s no wonder why you’re getting the “Windows Cannot Find a System Image on This Computer” error. Windows search for the default name, “WindowsImage Backup” folder when restoring your data so if it is not able to find it, it throws up this error instead. To fix the error, you need to change the folder back to its default name which is “WindowsImageBackup”.

Option 5 – Check the WindowsImageBackup sub-folders

As mentioned earlier, renaming sub-folders in the WindowsImageBackup folder can trigger the error so if you have renamed sub-folders in this folder, you need to change them back to their default names so that you can restore your data peacefully.
Read More
MS Edge, autoplay video blocking coming
Microsoft Edge may be about to win a lot of fans by introducing a new feature that it says could prevent one of the most annoying things about being online. A new update to the browser suggests it is looking at a way to block auto-playing videos by default when a user navigates to a website. People spotted a new entry to the Microsoft Edge Canary browser where the company tries out its in-progress updates, that suggests auto-playing videos may have had their day at last. The new addition, for Mac, Windows, and Linux systems, is called “Autoplay Limit Default Setting”, with the description suggesting that Microsoft Edge would set the media autoplay setting to "Limit" as a default - stopping videos from starting up when a user lands on a website. Currently, Edge offers two options for users to control media autoplay - "Allow" (the current default setting), where all videos on a website will play automatically with sound, and "Limit", where media won’t be autoplayed on sites that a user has previously visited. It appears that Microsoft is looking to test the feature in Canary before rolling it out to a wider user base - as blocking autoplaying videos can cause issues for some websites. The same Canary entry also hints at a future "Block" option, which would presumably stop any videos or media from playing when a user lands on a website. However, this feature, which is also listed as being available for Mac, Windows, and Linux systems, doesn't appear to be enabled as yet. If you would like to read more helpful articles and tips about various software and hardware visit errortools.com daily.
Read More
Steam updates including storage management
Valve has released a big update to its online store and distribution platform Steam. Among typical bugs fixing and making the user experience a little more fluid, we have received some major updates as well. Please take note that you need to update Steam itself to the latest version in order to get new features.

steam libraryStorage management Page update

The storage management page has received a complete redesign and UX overhaul and it is now much easier to manage your game libraries and create new ones. The page itself looks and feels a little console more like but thanks to that it offers a much easier and clearer look and feel. steam storage manager
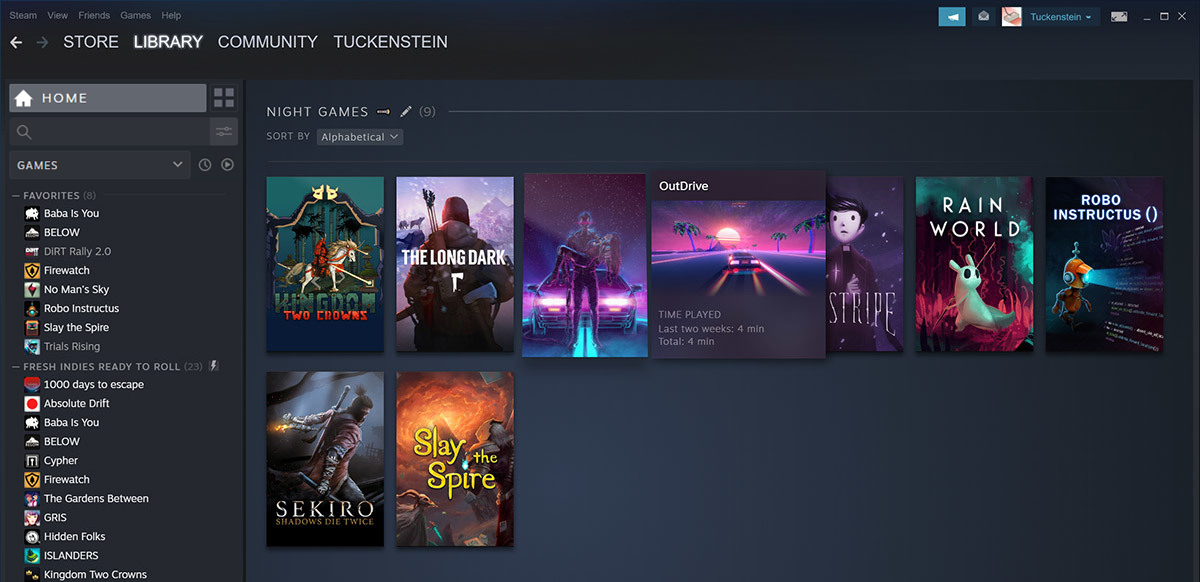
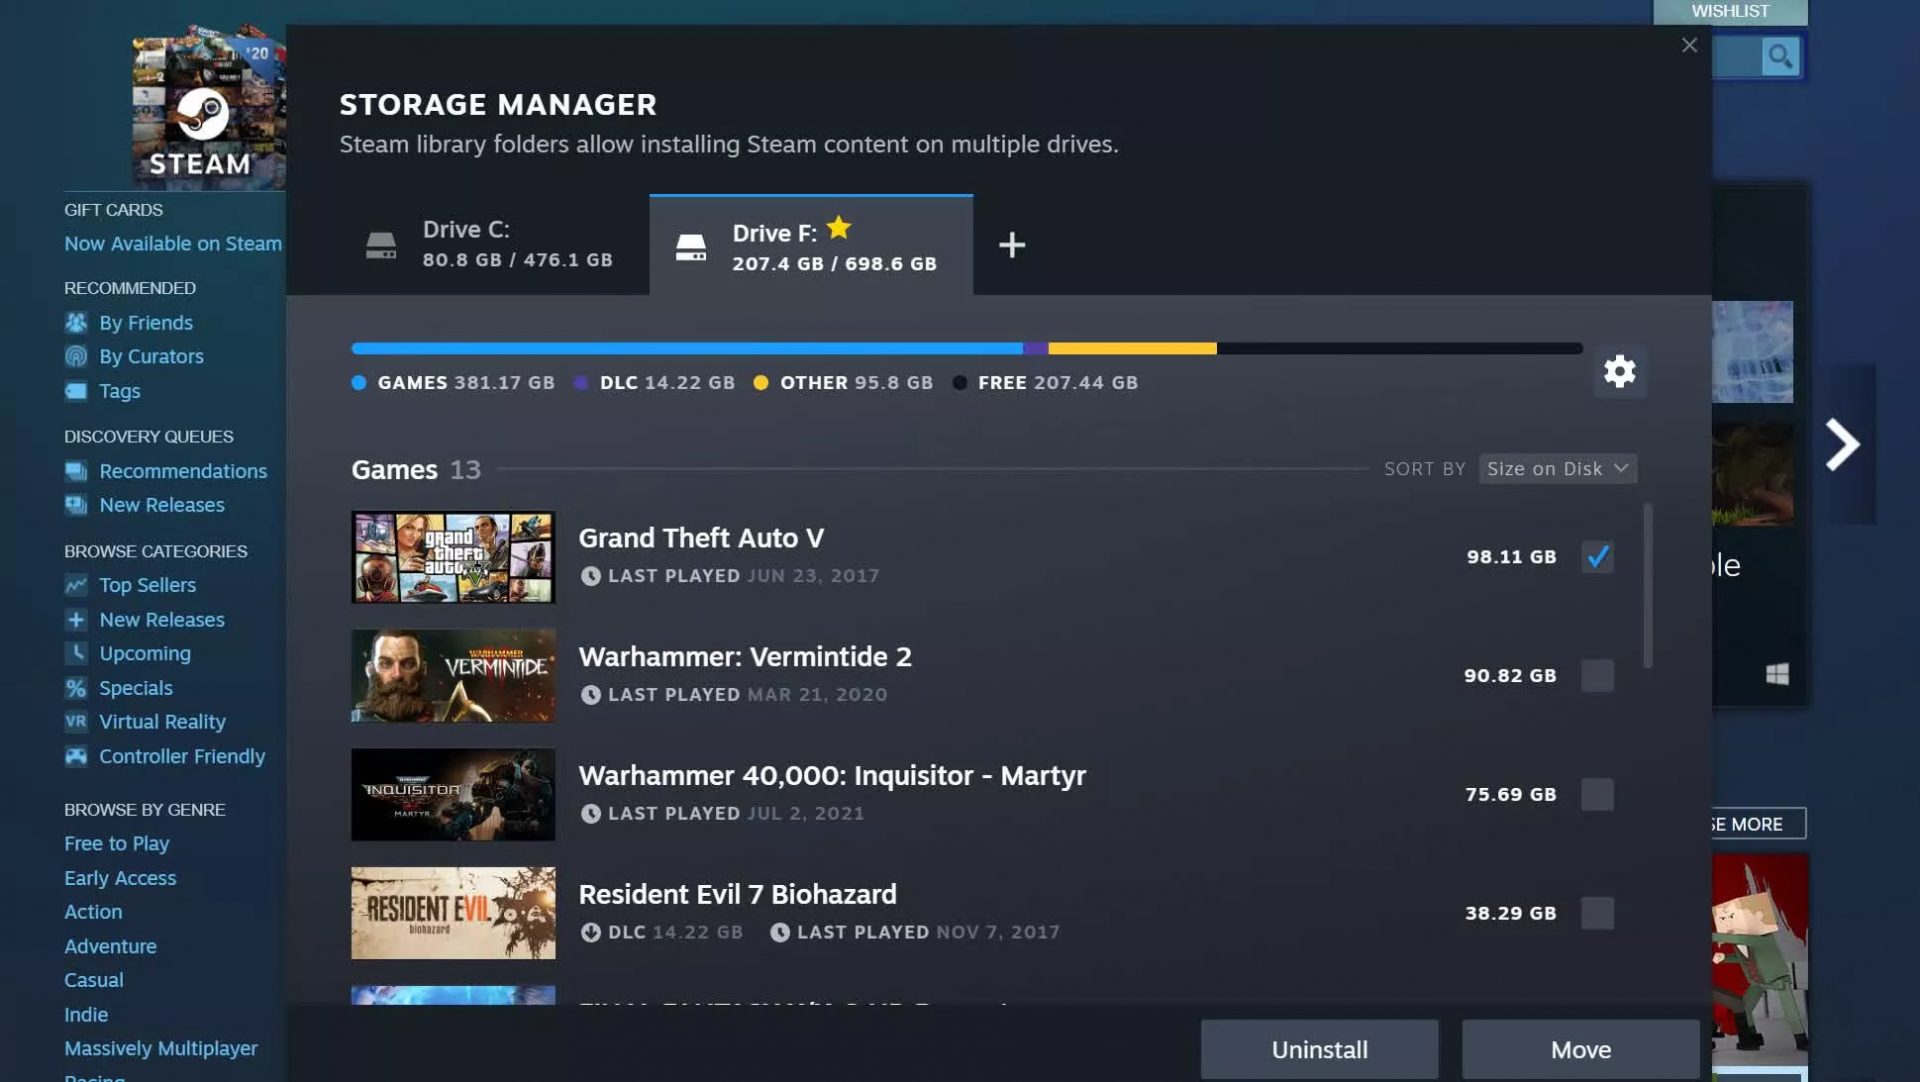
Another thing with the Steam store management page is the ability to move installation files from one location to another. Let’s say that you have two or more hard disk drivers in your machine and that you have SSD that you use for running stuff since it is fast and larger and slower one for storage. Now you can easily and quickly move one installation from one to another in order to take advantage of your faster SSD for quicker LOAD game times without making a new installation.

Steam Download page improvements

The download page has also received some love from Valve by enabling us to now see the installation progress. So far on the download page of Steam, you would only get download progress but it has been updated to show installation progress after download as well now making it more straightforward and giving you a general idea of how much more time there is to wait in order to start gaming. steam download page
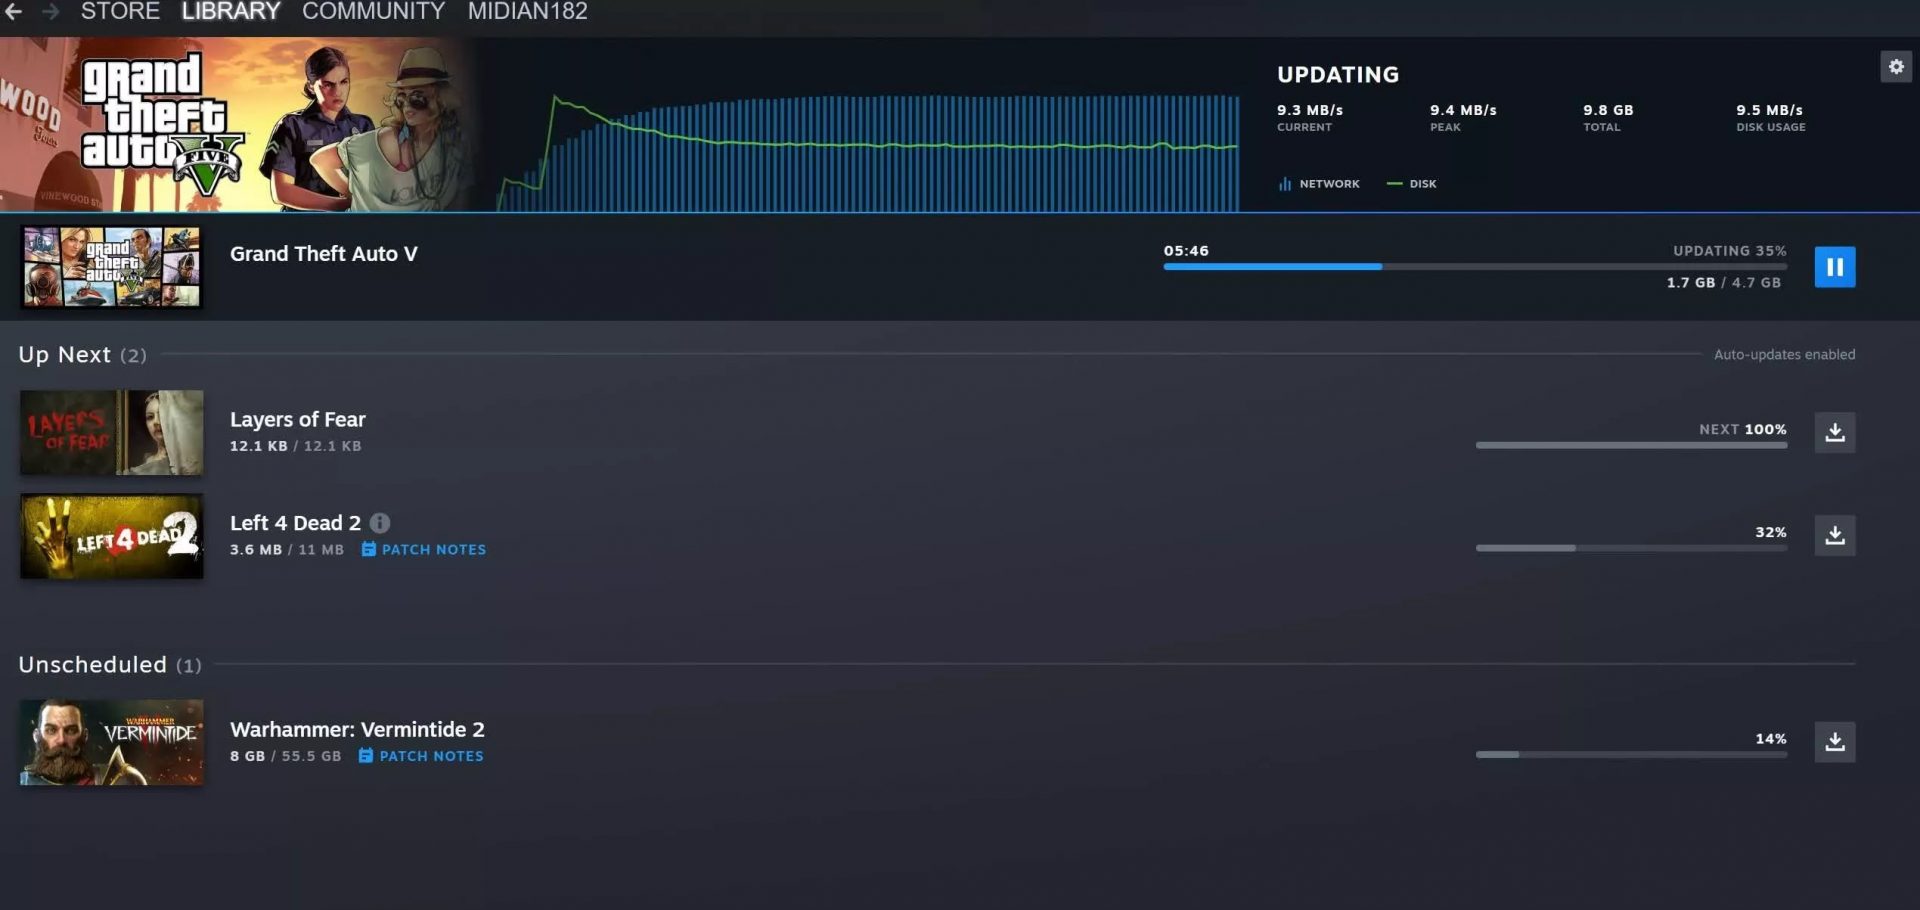
Also, you can now drag and drop items in the download bracket to reorder download orders or place them as active downloads to start downloading right away.
Read More
Taskbar has disappeared from the Desktop
As you know, the Taskbar is one of the integral parts of the Windows desktop and it has been there since the release of Windows 1.0 and up until now with Windows 10. Since then, Microsoft has been modifying the Taskbar with a new design which makes it a home for new features such as Windows Search, Task View, and many more. However, there are times when you may that the Taskbar has disappeared or has stopped responding. If you experience either one of these scenarios, read on as this post will walk you through what you can do to resolve the problem. Here are some suggestions you can check out to resolve the issue with the Taskbar in Windows 10 but before you proceed, make sure that you create a System Restore point first. To do that, follow these steps:
  • In the Start search, type in “create a restore point” and click the entry “System Properties”.
  • Next, select the main system drive under Protection Settings and click on the Configure button.
  • After that, select the “Turn on system protection” option and then click on the Apply and OK buttons to save the changes made.
Once you’ve created a System Restore point, refer to the troubleshooting steps below to fix the Taskbar in Windows 10.

Option 1 – Try to restart the Explorer process

This may sound really basic but it actually is a proven method to fix the Taskbar issue. So if anything gets stuck on the system tray or the Taskbar, you can always fix it by restarting the explorer.exe. How? Refer to these steps:
  • First, right-click on the Taskbar and select the Task Manager.
  • After opening the Task Manager, go to the Processes tab and look for the process named “Windows Explorer”.
  • Then right-click on that process and select the option to Restart. Afterward, you should now be seeing the Taskbar as this will reload the whole Windows Shell.

Option 2 – Unhide the Taskbar using the Settings app

It is possible that the Taskbar could be hidden so you can try to unhide it using the Settings app.
  • Tap the Win + I keys to open Settings.
  • After that, go to Personalization > Taskbar.
  • From the main section, make sure that the “Automatically hide the task in desktop mode” is toggled to the off position. However, if it’s already off then proceed to the next options below.

Option 3 – Make sure that you are not in Tablet Mode

Since Windows 10 is designed to work on both desktop and mobile devices, it could be that your computer has slipped into Tablet Mode which explains why you’re not seeing the Taskbar. To check if your computer is really in Tablet Mode, follow these steps:
  • Go to the Start menu and select Settings.
  • Next, select the System setting and from the left pane select the Tablet Mode.
  • From there, make sure that the buttons next to the options given below are set to the off position:
    • Hide app icons on the taskbar in tablet mode
    • Automatically hide the taskbar in tablet mode

Option 4 – Try to check the Projection Settings

You might also want to check the Projection settings as it could be the reason why Taskbar has disappeared.
  • Tap the Win + P keys to open the Windows Projection settings.
  • Next, make sure that you select the “PC screen only” option and then check if your Taskbar has now appeared or not.
Read More
How to Get Rid of Email Access Online

Email Access Online is a browser extension published by Polarity Technologies Ltd. That offers users quick and easy access to emails and weather reports. While this might sound interesting and useful, there is nothing this extension offers that cannot be solved with a few simple bookmarks.

While installed Email Access Online monitors the user's browser activity and records visited websites, clicked links, and bought products, this data is later used to serve partner ads if the user looks for the covered categories, additionally, it will hijack your new tab page, changing your search engine to Yahoo to allow easier ad placement.

Browsing the internet with this extension enabled will result in additional ad placement, pop-up ads, and sponsored links throughout your browsing sessions.

Upon further investigation, it was discovered that this extension is a repack of MyEmailXP, which was a repack of Fast Email Checker. Due to its suspicious delivery methods and information gathering, several anti-virus scanners have marked this extension as a browser hijacker and it is recommended to remove it from your computer.

About Browser Hijackers

Browser hijacking means that a malicious code has taken control over and modified the settings of your web browser, without your consent. Browser hijacker malware is designed for many different reasons. The idea is to force users to visit specific websites which are aiming to increase their visitor traffic and generate higher advertisement income. It may appear naive, but the majority of such websites are not legitimate and can present a significant risk to your online safety. In a worst-case scenario, your internet browser could be hi-jacked to download malicious software that can do a lot of damage to your PC.

Major signs that your internet browser has been highjacked

There are many signs that could indicate a browser hijacking: 1. the home page of the web browser is changed suddenly 2. you observe new unwanted bookmarks or favorites added, usually directed to ad-filled or porn websites 3. the default search engine is changed and the web browser security settings have been brought down without your knowledge 4. you see unwanted new toolbars added 5. your internet browser will display constant pop-up windows 6. your web browser starts running sluggishly or presents frequent errors 7. Inability to navigate to particular sites, especially anti-malware and other computer security software websites.

So how does a computer get infected with a browser hijacker

There are a number of ways your computer can get infected by a browser hijacker. They usually arrive through spam e-mail, via file sharing websites, or by a drive-by-download. They could also come from add-on software, also referred to as browser helper objects (BHO), web browser extensions, or toolbars. Browser hijackers sneak to your computer in addition to free software application downloads that you unintentionally install along with the original. The presence of any browser hijacker on your system could substantially diminish the web browsing experience, monitor your internet activities that lead to critical privacy concerns, create system stability problems and finally cause your PC to slow down or to a practically unusable condition.

How to repair a browser hijack

Certain kinds of browser hijackers can be effortlessly removed from your PC by deleting malicious software programs or any other recently installed shareware. However, most hijacking codes are certainly not very easy to remove manually, as they go deeper into your operating system. And there’s no denying the very fact that manual repairs and removal methods can certainly be a difficult job for an inexperienced PC user. Besides, there are several risks connected with fiddling around with the system registry files. Anti-malware program is incredibly effective when it comes to discovering and removing browser hijackers that regular anti-virus application has missed. To get rid of any kind of browser hijacker from your computer, you can download the following certified malware removal application – SafeBytes Anti-Malware.

What you can do if Virus Stops You From Downloading Antivirus?

Practically all malware is bad, but certain kinds of malicious software do much more damage to your PC than others. Some malware goes to great lengths to stop you from downloading or installing anything on your personal computer, especially anti-malware software. If you are reading this right now, you’ve probably realized that virus infection is the reason behind your blocked net traffic. So what to do when you want to install an anti-malware application such as Safebytes? There are a few actions you can take to circumvent this issue.

Make use of Safe Mode to fix the issue

If the malware is set to run automatically when Windows starts, getting into safe mode may block this attempt. Since only the bare minimum programs and services start-up in “Safe Mode”, there are rarely any reasons for conflicts to happen. You will need to do the following to remove malware in Safe mode. 1) At power on/start-up, tap the F8 key in one-second intervals. This will bring up the Advanced Boot Options menu. 2) Use the arrow keys to choose Safe Mode with Networking and press ENTER. 3) When you are into this mode, you will have access to the internet again. Now, use your internet browser normally and navigate to https://safebytes.com/products/anti-malware/ to download Safebytes Anti-Malware. 4) Once the software is installed, let the diagnostic scan run to remove viruses and other threats automatically.

Obtain the antivirus software in an alternate browser

Certain viruses may target vulnerabilities of a particular web browser that obstruct the downloading process. If you seem to have a virus attached to Internet Explorer, then switch to an alternate browser with built-in safety features, such as Firefox or Chrome, to download your favorite antivirus program – Safebytes.

Run anti-virus from a pen drive

Here’s yet another solution which is using a portable USB anti-malware software package that can scan your computer for viruses without needing installation. Follow these steps to run the anti-malware on the infected PC. 1) Make use of another virus-free computer to download Safebytes Anti-Malware. 2) Plug the Flash drive into the uninfected computer. 3) Double-click on the downloaded file to run the installation wizard. 4) Choose the drive letter of the USB drive as the location when the wizard asks you exactly where you want to install the anti-virus. Follow activation instructions. 5) Now, insert the USB drive into the infected system. 6) Double click the Safebytes Anti-malware icon on the thumb drive to run the software. 7) Click on “Scan Now” to run a complete scan on the infected computer for malware.

Let's Talk About SafeBytes Anti-Malware!

Nowadays, anti-malware software can protect your PC from different forms of internet threats. But wait, how to select the right one among plenty of malware protection application that is available on the market? As you may be aware, there are numerous anti-malware companies and tools for you to consider. Some of them are good, some are ok types, while some will affect your computer themselves! When looking for an antivirus program, select one which gives solid, efficient, and full protection against all known computer viruses and malware. On the list of the recommended tool by industry experts is SafeBytes Anti-Malware, well-known security software for Microsoft Windows. SafeBytes anti-malware is really a powerful, highly effective protection software intended to help end-users of all levels of IT literacy in identifying and removing malicious threats from their computers. Once you have installed this tool, SafeBytes advanced protection system will ensure that absolutely no viruses or malware can seep through your personal computer.

SafeBytes possesses a plethora of amazing features that can help you protect your computer from malware attacks and damage. The following are some of the great features included in the application.

Real-time Active Protection: SafeBytes offers a totally hands-free active protection and is set to observe, prevent and wipe out all threats at its first encounter. It’ll constantly monitor your pc for hacker activity and also gives users superior firewall protection. Anti-Malware Protection: Using its advanced and sophisticated algorithm, this malware removal tool can detect and remove the malware threats hiding in your PC effectively. High-Speed Malware Scanning Engine: This computer software has got one of the fastest and most efficient virus scanning engines in the industry. The scans are extremely accurate and take a short amount of time to complete. Web Security: SafeBytes gives an instant safety rating on the pages you are about to check out, automatically blocking risky sites and making sure that you’re certain of your online safety while browsing the web. Lowest Memory/CPU Usage: SafeBytes gives you complete protection from online threats at a fraction of the CPU load due to its enhanced detection engine and algorithms. Fantastic Tech Support Team: For any technical inquiries or product guidance, you could get 24/7 expert assistance through chat and email. SafeBytes will keep your personal computer protected from most advanced malware threats automatically, thus keeping your online experience safe and secure. You now may know that this particular software does more than just scan and delete threats on your computer. If you want advanced forms of protection features and threat detections, buying SafeBytes Anti-Malware could be well worth the dollars!

Technical Details and Manual Removal (Advanced Users)

To remove Email Access Online manually, navigate to the Add/Remove programs list in the Windows Control Panel and choose the program you want to remove. For browser plug-ins, go to your browser’s Addon/Extension manager and choose the plug-in you want to remove or disable. You will probably also want to reset your internet browser. To make sure of complete removal, find the following Windows registry entries on your system and eliminate it or reset the values accordingly. However, this is a difficult task and only computer professionals can perform it safely. Additionally, certain malware is capable of replicating itself or preventing deletion. You’re suggested to do this process in Windows Safe Mode.
Registry: HKEY LOCAL MACHINE\SOFTWARE\Microsoft\Internet Explorer\SearchScopes\675942D5-E956-4670-9ADE-6982CF23558F
Read More
Razer Hazel, an RGB mask for max protection
Razer HazelThe world today is still sadly under pandemic and by the looks of it, COVID-19 is here to stay, well at least for some time in the near future. Razer seems to think so as well since their upcoming gear is not really what you would expect. Enter Hazel, a new and upcoming Razer smart mask.

Protection

Hazel mask has a high bacterial surgical N95 filter with fluid resistance that will protect you against large droplets and splashes. A detachable active ventilator regulates airflow and is capable of filtering around 95% of airborne particles. Mask comes with a special charging case that has an auto sterilization UV light that will kill bacteria and viruses inside the case interior while it charges. When the mask is recharging it will change color from red to green visually showing the level of the current charge. Mask of course has easy to replace filters inside ventilators and Razer is standing by that fully charged mask will last enough for full-day use. An active ventilation system brings cool air while releasing breathing heat at the same time drastically reducing CO2 inside the mask that could produce dizziness and headache. Silicon guard is on its edge gluing to around your face in order to prevent exterior air sneaking inside the mask and positioning it firmly so it does not rest on your lips in order for easier and clearer communication.

Hazel personalization and technical features

Hazel has a clear and transparent design making it better for social interaction since other people will be able to see your lips and smiles thus making it more natural. A low light mode that turns on automatically when it is dark outside is also aimed for easier communication. Speaking of communication, the mask comes with voice Amp technology that has a built-in mic and amplifier thus making your voice lines clear so you are not muffled when wearing the mask itself. Your friends and other people will be able to hear you like you are not wearing a mask at all. Thicker air loops apply less pressure on ears and can be adjusted for a more secure fit, while the mask itself can be custom-made to fit your face shape. And of course Hazel comes with 16.8 million colors and a suite of effects with Razer Chroma RBG
Read More
Blizzard caught destroying evidence
Blizzard employeesCalifornia's Department of Fair Employment & Housing has widened its anti-discrimination lawsuit against Activision Blizzard and claims the publisher has been shredding vital documents relevant to the ongoing investigation. A recent report from Kotaku described the department as offering poorly paid, highly insecure positions, with a culture of hostility towards LGBTQ+ testers. The DFEH's rewording of "employees" to "workers" now hopes to take these contractors' experiences into account. "As a contract employee, I feel there's a lot of pressure to excel, impress, and move through the ranks as fast as you can before your contract ends and you're forced to go 3 months without income or find another job," Axios reports one worker saying. "I take pride in what I do, but it feels like it's never enough." Activision's contentious hiring of union-busting third-party law firm WilmerHale "directly interferes" with its own investigation, it says. By going to WilmerHale, Activision appears to be claiming that all work related to the investigation is privileged and can't be shared with DFEH. The suit also claims that Activision HR shredded documents related to "investigations and complaints", against its legal obligation to retain them during the investigation. The relevant parts of the updated lawsuit were shared by Axios reporters Stephen Totilo and Megan Farokhmanesh, the former also noting that the DFEH "fixed their misspelling of Bill Cosby's name". "DFEH is also informed and aware that documents and records have not been maintained as required by law or by the DFEH's Document Retention Notice," the complaint reads, "including but not limited to documents related to investigations and complaints were shredded by human resource personnel and emails are deleted thirty days after an employees separation."

Speculation and answer from Activision Blizzard

Blizzard employee Jessica Gonzalez suspects that the costs of fines associated with destroying these documents may have been an easier blow for Blizzard to take than any penalties drawn from their existence in helping the lawsuit go through. In an email to Kotaku, Activision denied the shredding allegations and issued a statement outlining steps it had taken to improve company culture—including the ousting of high-level executives like Blizzard president J. Allen Brack. The full statement reads: "Throughout our engagement with the DFEH, we have complied with every proper request in support of its review even as we had been implementing reforms to ensure our workplaces are welcoming and safe for every employee. Those changes continue today, and include:
  •     Several high-level personnel changes
  •     Revamped hiring and recruiting practices requiring diverse interview panels
  •     Greater transparency on pay equity
  •     Expanded and improved training and investigative capabilities for human resource and compliance staff
  •     Created investigation teams outside of business units to support greater independence
  •     Restructured divisions to support greater accountability
  •     Enhanced review processes to include evaluation of managers by employees
  •     Clear boundaries on workplace behavior with a zero-tolerance approach to harassment and other actions that diminish or marginalize.
"We strive to be a company that recognizes and celebrates the diverse talents and perspectives that lead to the creation of great, globally appealing entertainment. We have provided the DFEH with clear evidence that we do not have gender pay or promotion disparities. Our senior leadership is increasingly diverse, with a growing number of women in key leadership roles across the company. "We share DFEH’s goal of a safe, inclusive workplace that rewards employees equitably and is committed to setting an example that others can follow."

California and RIOT

Beyond Activision Blizzard, California's DFEH has also probed into League of Legends creator Riot Games, accusing the studio of dragging its heels over sexual harassment allegations dating back to 2019. Riot denied the allegations, telling us that it "will never retaliate against anyone for talking to any government agency".
Read More
Fix MUP_FILE_SYSTEM Blue Screen Error
If you encounter the MUP_FILE_SYSTEM Blue Screen error with a value of 0c00000103, then it indicates that the multiple UNC provider or MUP has got an invalid of unexpected data. This can lead to the fact that the MUP cannot channel a remote file system request to a network redirector, the UNC, or Universal Naming Convention provider. There are several ways you can fix the MUP_FILE_SYSTEM Blue Screen Error on your Windows 10 computer, you can try to check the hardware of your computer physically, update or rollback some device drivers, run the Driver Verifier Manager, remove any hardware you’ve installed recently or fix issues related to IRQ. Use the given options below as reference to fix the MUP_FILE_SYSTEM Blue Screen Error.

Option 1 – Try to physically check the hardware

The first thing you can do is to check the physical status of the hardware in your computer. You can clean the dust off the hardware components like the Network Card of the computer. You might want to use a small blower or you could also use a soft cloth and run the components gently. Make sure that you don’t damage any parts with moisture or cause harm to any circuits while you carry out this task.

Option 2 – Try to rollback, update several device drivers

You can try to roll back, update or disable certain device drivers on your computer to resolve the MUP_FILE_SYSTEM Blue Screen error.
  • First, boot your computer into Safe Mode.
  • After that, tap the Win + R keys to launch Run.
  • Type in devmgmt.msc into the box and tap Enter or click OK to open the Device Manager.
  • After that, a list of device drivers will be displayed. From there, look for the device drivers related to the Network Card, Chipset, Disk Drive, and the Graphics Drivers and any other driver related to MUP.sys and SwapBuffers.sys system files
  • After that, right-click on each entry of the device drivers and select the “Update Device” option from the menu.
  • Now follow the next on-screen instructions that appear and then restart your computer.
  • After restarting your computer, check if the Stop error is now fixed.

Option 3 – Configure the Driver Verifier Manager

The Driver Verifier Manager is another tool in Windows that could help you fix driver-related issues. And so if you want to fix the MUP_FILE_SYSTEM Blue Screen error you need to use the Driver Verifier Manager:
  • Type in the keyword “Verifier” in the Cortana search box to search for Verifier in Windows 10.
  • After that, select the option “Create custom settings”.
  • Make sure that you have checked everything except the options “DDI compliance checking” and “Randomized low resources simulation”.
  • Next, select the option “Select driver names from a list” option.
  • Afterward, you have to select all the drivers from any unofficial or third-party provider. To simply put it, you have to select all the drivers that are not supplied by Microsoft.
  • Then click on the Finish button.
  • Open Command Prompt as administrator and execute this command – verifier /querysettings
  • The command you just executed will display the Driver Verifier settings so if you see any of the flags enabled boot your Windows 10 PC into Safe Mode.
  • Open the Command Prompt as admin again and run this command – verifier /reset
  • The command will reset the Driver Verifier. Once the process is done, restart your PC and check.

Option 4 – Try to disconnect or disable newly installed hardware

In this option, you will have to disable or remove the hardware you’ve just installed recently since external devices could be the one that’s causing the Blue Screen of Death error to appear. To do that, just disconnect any external device that’s connected to your computer physically and then check if it fixes the MUP_FILE_SYSTEM Blue Screen error.

Option 5 – Try fixing IRQ-related issues

The Stop error might have something to do with an issue related to IRQ. You can verify it by switching your PCI Cards around. Aside from that, you can also check if the IRQ2 is assigned to a COM Port that is unavailable at that time.

Option 6 – Run the Blue Screen Troubleshooter

The Blue Screen troubleshooter is a built-in tool in Windows 10 that helps users in fixing BSOD errors like MUP_FILE_SYSTEM. It can be found in the Settings Troubleshooters page. To use it, refer to these steps:
  • Tap the Win + I keys to open the Settings panel.
  • Then go to Update & Security > Troubleshoot.
  • From there, look for the option called “Blue Screen” on your right-hand side and then click the “Run the troubleshooter” button to run the Blue Screen Troubleshooter and then follow the next on-screen options. Note that you might have to boot your PC into Safe Mode.

Option 7 – Perform a System Restore

Performing System Restore might help you in fixing the Blue Screen error. You can do this option either by booting into Safe Mode or in System Restore. If you are already in the Advanced Startup Options, just directly select System Restore and proceed with the next steps. And if you have just booted your PC into Safe Mode, refer to the steps below.
  • Tap the Win + R keys to open the Run dialog box.
  • After that, type in “sysdm.cpl” in the field and tap Enter.
  • Next, go to the System Protection tab then click the System Restore button. This will open a new window where you have to select your preferred System Restore point.
  • After that, follow the on-screen instructions to finish the process and then restart your computer and check if the problem is fixed or not.
Read More
Enabling Enhanced Mode in the Windows Search
In case you don’t know, Microsoft has included an Enhanced Search Mode in the new Windows 10 v1903. This new Enhanced Search mode, compared to the Classic Mode, indexes everything on your Windows 10 computer, and in this post you will be guided on how you can disable this new feature as well as discuss how it is different from the Classic Search mode. Over the years, the Windows 10 Start Search has changed. When you tap the Start button and when you type, the results that appear are categorized into Apps, Documents, Email, Web, Folders, Music, People, Photos, Settings, Videos, and many more. This is the reason why the Enhanced Mode was brought into the picture. So unless everything is indexed, this new feature wouldn’t be of much use. A Classic Search is the term used for the old search technique in Windows 10. The Classic Search mode is restricted to Libraries and Desktop and end-users can only select to customize the search location by adding them manually to the indexer. To simply put it, it would only index files and folders which you want to get indexed and if the search term is not in the index, it would initiate the regular search which would take quite a while and this is where the Enhanced Windows Search comes in. It indexes everything as it is its default nature which is the exact opposite of the Classic Search mode. This feature allows you to exclude folders where the Search will not look and index anything that could be personal to you. In addition, it can also impact the life of the battery of laptops, if you are using one. The initial crawl of your data will take place only when connected to power and during that time, both the CPU usage and battery will take a bit of a hit.

To enable the Enhanced Search Mode in your Windows 10 computer, here’s what you have to do:

Step 1: Go to Settings > Search > Searching Windows. Step 2: Next, click on the radio button for Enhanced. Step 3: After that, select the folders which the Windows Indexer should exclude from the Enhanced Search mode. And that’s about it. The next time you search anything on your computer, Windows will be looking at all the locations except for the ones you excluded and the results will be a lot faster compared to the Classic Search. Now that you’ve enabled the Enhanced Search mode, there are two settings you need to check out.
  • Advanced Search Indexer Settings – this setting allows you to configure how or where Windows will search or what file types it will search in your computer. It will also open the same setting that’s available in the Classic Search.
  • Run the Indexing Troubleshooter – when you click on the Indexing Troubleshooter, it will start to troubleshoot any Search and Indexing issues on your Windows 10 computer and fix them automatically.
Read More
How to Remove PUP ExpressFiles Tutorial

ExpressFiles is a program developed by Express Solutions. A number of Anti-Virus programs have flagged this program as a Potentially Unwanted Application. In many instances, it is bundled with additional programs on installation.

The program claims it offers users easy to search for various currently popular search terms. During our testing, the software never displays any search results, no matter the search words. Upon installation and setup, it defines an auto-start registry entry which makes this program run on each Windows boot for all user logins. A scheduled task is added to Windows Task Scheduler in order to launch the program at various scheduled times. The program defines an exception rule in Windows Firewall, allowing it to connect to the internet without limitations and auto-update itself.

About Browser Hijackers

Precisely what is a PUP?

If you’ve ever downloaded a free application or shareware, chances are high that the computer can get installed with a bunch of unwanted applications. A PUA / PUP (potentially unwanted application / potentially unwanted program) is a software program that comes bundled with free software and you consent to install it on your PC. These are programs you almost certainly don’t want on your computer simply because it doesn’t give any valuable service. Despite being regarded as very detrimental, PUPs aren’t always viruses or malware One simple difference between PUP and malware is distribution. Malware is normally dropped by silent installation vectors like drive-by downloads while PUP gets installed with the consent of the computer user, who purposefully or unknowingly approves the PUP installation on its PC. Having said that, there is no doubt that PUPs remain bad news for PC users as they can be incredibly damaging to the computer in numerous ways.

Exactly how do unwanted programs look like?

Potentially Unwanted Programs appear in different forms and varieties, however, in the majority of instances, they are adware programs that exhibit irritating pop-up ads and advertisements on websites you explore. In addition, the majority of free programs these days come with some unwanted add-ons; in most cases an internet browser toolbar or browser modification like a homepage hijacker. They’ll keep track of your online routines, redirect your search results to risky websites where viruses can be downloaded and installed, hijack your home page, and slow your browser down to a crawl. Potentially Unwanted Programs occasionally act quite much like computer viruses or spyware. They might carry keyloggers, dialers, browser hijackers, and tracking components that gather system details, or tracks customer habits and relays this information to third-party firms. Even if the PUPs really aren’t basically malicious, these software programs still do absolutely nothing good on your personal computer – they will take valuable system resources, slow down your PC, weaken your computer security, and make your system more susceptible to trojans.

How do you avoid PUPs?

• Read cautiously before accepting the license agreement as it may have a clause about PUPs. • Always opt for the custom if you’re presented an option between “Custom” and “Recommended” Installations – never click Next, Next, Next blindly. • Have a top-notch antivirus program like Safebytes Anti-Malware which can protect your computer from PUPs. As soon as you install this software, protection from malware and PUPs is already switched on. • Think carefully before you download any kind of shareware or freeware. Disable or get rid of toolbars and browser extensions you don’t really need. • Only use official product websites for downloading programs. Stay away from download portals altogether as most websites compel users to download the software using their own download manager, which is often bundled up with some sort of PUPs.

What To Do If You Cannot Install Any Anti-Malware?

All malware is bad, but certain types of malicious software do a lot more damage to your computer than others. Some malware types modify browser settings by adding a proxy server or modify the PC’s DNS settings. In these instances, you will be unable to visit some or all of the websites, and therefore not able to download or install the required security software to remove the infection. If you are reading this right now, you have perhaps recognized that a malware infection is a reason for your blocked web connectivity. So how to proceed when you want to install an anti-malware application like Safebytes? Follow the instructions below to eliminate malware by alternative methods.

Install in Safe Mode

The Windows-based PC comes with a special mode called “Safe Mode” where just the bare minimum required applications and services are loaded. If the malware is set to load immediately when the computer starts, shifting to this mode may well prevent it from doing so. In order to enter into Safe Mode or Safe Mode with Networking, press the F8 key while the PC is starting up or run MSConfig and locate the “Safe Boot” options under the “Boot” tab. As soon as you restart the PC into Safe Mode with Networking, you could download, install, and update anti-malware software from there. Right after installation, run the malware scanner to get rid of standard infections.

Utilize an alternate internet browser to download antivirus software

Web-based malware could be environment-specific, targeting a specific web browser or attacking particular versions of the web browser. If you’re not able to download the anti-virus application using Internet Explorer, this means the virus is targeting IE’s vulnerabilities. Here, you need to switch to a different web browser such as Chrome or Firefox to download the Safebytes Anti-malware program.

Install and run antivirus from a Thumb drive

Here’s yet another solution which is creating a portable USB anti-virus software that can scan your computer for malware without the need for installation. Try these simple actions to clean up your infected computer using portable anti-malware. 1) Download Safebytes Anti-Malware or Microsoft Windows Defender Offline onto a clean PC. 2) Mount the pen drive on the same PC. 3) Run the setup program by double-clicking the executable file of the downloaded software, which has a .exe file extension. 4) Select the drive letter of the USB drive as the location when the wizard asks you exactly where you would like to install the anti-malware. Follow activation instructions. 5) Now, insert the thumb drive into the corrupted PC. 6) Run the Safebytes Anti-malware directly from the pen drive by double-clicking the icon. 7) Click the “Scan” button to run a full computer scan and remove viruses automatically.

Overview of SafeBytes Anti-Malware

If you are looking to download the anti-malware program for your computer, there are lots of tools in the market to consider nonetheless, you just cannot trust blindly anyone, irrespective of whether it is free or paid software. A few of them do a great job in removing threats while some will ruin your PC by themselves. You need to pick a company that develops industry-best antimalware and has achieved a reputation as trustworthy. When considering commercial tool options, most people opt for well-known brands, such as SafeBytes, and they are quite happy with it. SafeBytes anti-malware is really a powerful, very effective protection software made to help users of all levels of computer literacy in detecting and removing malicious threats out of their computer. Using its outstanding protection system, this utility will quickly detect and get rid of the majority of the security threats, which include adware, viruses, browser hijackers, ransomware, PUPs, and trojans. SafeBytes anti-malware takes computer protection to a totally new level with its advanced features. Here are a few typical features present in this software: Live Protection: SafeBytes offers complete and real-time security for your laptop or computer. It’ll regularly monitor your computer for hacker activity and also gives end-users superior firewall protection. Most Reliable AntiMalware Protection: With its enhanced and sophisticated algorithm, this malware elimination tool can find and eliminate the malware threats hiding in your PC effectively. “Fast Scan” Features: SafeBytes’s high-speed malware scanning engine minimizes scanning times and extends battery life. Simultaneously, it will effectively identify and remove infected computer files or any online threat. Web Protection: SafeBytes checks and gives a unique safety ranking to each and every website you visit and block access to webpages considered to be phishing sites, thus safeguarding you from identity theft, or known to contain malicious software. Low CPU/Memory Usage: SafeBytes is well known for its low effect on computer resources and great detection rate of diverse threats. It runs quietly and efficiently in the background so you’re free to use your PC at full power all of the time. 24/7 Premium Support: SafeBytes gives you 24/7 technical support, automatic maintenance, and upgrades for the best user experience.

Technical Details and Manual Removal (Advanced Users)

If you wish to manually remove ExpressFiles without the use of an automated tool, it may be possible to do so by removing the program from the Windows Add/Remove Programs menu, or in cases of browser extensions, going to the browsers AddOn/Extension manager and removing it. You will likely also want to reset your browser. To ensure the complete removal, manually check your hard drive and registry for all of the following and remove or reset the values accordingly. Please note that this is for advanced users only and may be difficult, with incorrect file removal causing additional PC errors. In addition, some malware is capable of replicating or preventing deletion. Doing this in Safe Mode is advised.

The following files, folders, and registry entries are created or modified by ExpressFiles

Files: %APPDATAExpressFilescurrent-cloud.html %COMMONDESKTOPExpressFiles.lnk %COMMONSTARTMENUExpressFilesExpressFiles.lnk %COMMONSTARTMENUExpressFilesUninstall.lnk %PROGRAMFILESExpressFilescurrent-cloud.de.html %PROGRAMFILESExpressFilescurrent-cloud.en.html %PROGRAMFILESExpressFilescurrent-cloud.fr.html %PROGRAMFILESExpressFilescurrent-cloud.ru.html %PROGRAMFILESExpressFilesEFupdater.exe %PROGRAMFILESExpressFilesExpressDL.exe %PROGRAMFILESExpressFilesExpressFiles.exe %PROGRAMFILESExpressFilesuninstall.exe %WINDIRTasksExpress Files Updater.job %APPDATAExpressFiles %COMMONSTARTMENUExpressFiles %PROGRAMFILESExpressFileslanguage %PROGRAMFILESExpressFiles Registry: key ExpressFiles.exe at HKEY_LOCAL_MACHINESOFTWAREConduitAppPaths. key ExpressFiles at HKEY_CURRENT_USERSoftware. key ExpressFiles at HKEY_LOCAL_MACHINESOFTWARE. key ExpressFiles at HKEY_USERS.DEFAULTSoftware. HKEY_CLASSES_ROOTMagnetsshellopencommand value $PROGRAMFILESExpressFilesExpressDL.exe at HKEY_LOCAL_MACHINESYSTEMControlSet001ServicesSharedAccessParametersFirewallPolicyStandardProfileAuthorizedApplicationsList. value $PROGRAMFILESExpressFilesExpressDL.exe at HKEY_LOCAL_MACHINESYSTEMControlSet002ServicesSharedAccessParametersFirewallPolicyStandardProfileAuthorizedApplicationsList. value $PROGRAMFILESExpressFilesExpressDL.exe at HKEY_LOCAL_MACHINESYSTEMControlSet003ServicesSharedAccessParametersFirewallPolicyStandardProfileAuthorizedApplicationsList. value $PROGRAMFILESExpressFilesExpressFiles.exe at HKEY_LOCAL_MACHINESYSTEMControlSet001ServicesSharedAccessParametersFirewallPolicyStandardProfileAuthorizedApplicationsList. value $PROGRAMFILESExpressFilesExpressFiles.exe at HKEY_LOCAL_MACHINESYSTEMControlSet002ServicesSharedAccessParametersFirewallPolicyStandardProfileAuthorizedApplicationsList. value $PROGRAMFILESExpressFilesExpressFiles.exe at HKEY_LOCAL_MACHINESYSTEMControlSet003ServicesSharedAccessParametersFirewallPolicyStandardProfileAuthorizedApplicationsList.
Read More
1 2 3 171
Logo
Copyright © 2023, ErrorTools. All Rights Reserved
Trademark: Microsoft Windows logos are registered trademarks of Microsoft. Disclaimer: ErrorTools.com is not affiliated with Microsoft, nor claims direct affiliation.
The information on this page is provided for information purposes only.
DMCA.com Protection Status