A lot of programs in Windows utilize the helper processes to ensure that they can get the job done as early as possible. And one of the programs that use these processes is Microsoft Edge. This built-in browser uses a process called the Edge Content process. The moment you start your computer, these system processes are loaded which makes the Edge browser load faster.
To be specific, these are the three processes that are related to Microsoft Edge:
MicrosoftEdge.exe
MicrosoftEdgeCP.exe
MicrosoftEdgeSH.exe
The process that ends with the “CP.exe” is the content process in Edge. However, when this process stopped working, this can affect the Edge browser. In such cases, when you check the Reliability Monitor, you will see that the state of the “Microsoft Edge Content Process” is “Stopped working” which keeps on appearing. To resolve this issue, you can try to clear the browsing data of Microsoft Edge or repair or reset it. You can also try re-registering Edge via Windows PowerShell as well as check your security programs that might be causing interference with the process.
Option 1 – Clear the browsing data of Microsoft Edge
Open Microsoft Edge.
Then click on the three horizontal dots to open the menu.
From there, click on Settings. And under Settings, click the “Choose what to clear” button under the Clear browsing data section.
Next, check all the checkboxes and then click the Clear button to clear the browsing data in the Edge browser.
Restart Edge.
Option 2 – Try to reset, repair or reinstall Edge via Settings
You can reset, repair or reinstall the Edge browser through Settings.
If none of it helped, you can try the following:
Open File Explorer and then go to this path – C:/Users/YourUsername/AppData/Local/Packages
Note: Before you type in the path in the Address bar, make sure that you put your user account name in place with the “YourUsername”.
Tap Enter to proceed.
Next, look for the folder named “MicrosoftEdge_8wekyb3d8bbwe” then right-click on it.
Click on Properties and uncheck the option “Read-only” under the General tab in the Properties window.
Click on Apply and then OK to save the changes made.
After that, look for the MicrosoftEdge_8wekyb3d8bbwe folder again and delete it. And if a prompt stating “Folder Access Denied” appears on your screen, just click on the Continue button to proceed – doing so will delete most of the content inside the folder except for the folder named “AC”.
Restart your computer
Option 3 – Re-register Edge via Windows PowerShell
In the Start Menu, search “Windows PowerShell”.
Right-click on Windows PowerShell from the search results and select the “Run as administrator” option.
Type in this command in the PowerShell windows and tap Enter – Cd C:/Users/YourUsername
After that, type in this command and tap Enter – Get-AppXPackage -AllUsers -Name Microsoft.MicrosoftEdge | Foreach {Add-AppxPackage -DisableDevelopmentMode -Register "$($_.InstallLocation)AppXManifest.xml" -Verbose}
It is possible that a security program installed in your computer is the one that’s causing the problem which is why you have to check it. According to security experts, there are some security programs that could be detecting the Edge’s content process as suspicious, blocking or terminating it as a result. Thus, you need to modify your security program’s settings to fix the problem.
In some cases, a couple of Windows 10 laptops, especially the newer ones that run the NVIDIA RTX series GPUs have been experiencing some problems, particularly with their headphone jacks which seem to be malfunctioning even though the internal speakers works just fine. And despite having all the drivers updated to their latest versions, the problem still occurs.
According to security experts, this kind of problem occurs on laptop computers that are manufactured by MSI and since there is still no workaround or reliable fix released by the company, in this post you will be guided on how you can resolve the problem with the headphone jack. So if you are using a laptop made by MSI and are experiencing the same issue, then you’ve come to the right place.
There are several potential fixes you can check out to resolve the problem, you can try to force reboot your computer or clean your headphone jack and then plug it back in properly. In addition, you could also try to update your Audio drivers or set your headphone as default. For more information, follow each one of the given options below.
Option 1 – Try to force reboot your computer
The first thing you can do is to force reboot your computer as this simple fix could help in fixing the problem. This option is quite simple, just make sure that before you do it, you have to save all your work.
First, turn on your computer and press and hold the power button for at least 30 seconds. You might notice the screen flashing or making any changes, just ignore it.
After that, plug out and plug in your computer and automatically turn it on.
Once done, check if the headphone jack is now working fine.
Option 2 – Try to clean the headphone jack and plug it properly
The next thing you can do to fix the problem is to clean your headphone jack and plug it back in properly. Make sure that you use a cotton swab in cleaning the headphone jack as there are instances where some dust might have settled in the port which results in issues like your headphone jack no working.
Option 3 – Try to update, rollback or reinstall the Audio driver
If the glitch in your audio has something to do with software, chances are it might be related to the audio driver – it could be that the newest version of your Windows 10 does not work well with the old version of the driver. This is why you have to update your audio driver to the newest available version.
Tap the Win + R keys to open the Run dialog box and then type in MSC and tap Enter or click OK to open the Device Manager.
Expand the section for the outdated device drivers.
And then select the outdated driver(s) and right-click on it/them.
From the drop-down menu, select the Update Driver option and follow the on-screen instructions to install the latest version of the driver.
Then also click on the option, “Search automatically for updated driver software.
Restart your PC after the installation.
Note: If updating or reinstalling the Audio driver didn’t work, you can go to the website of MSI and look for the support section where you can download the drivers for your computer. You just need to take note of your PC’s correct model and model number so you can find the appropriate driver.
Option 4 – Try to set the headphone as the default device manually
There are times when you plug a headphone, it does not toggle the default audio device. Thus, to fix this issue, you have to set the default audio device to the headphones manually. To do that, follow these steps:
First, right-click on the volume icon located on the system tray.
Next, select the Open sound settings option to open the Sound section in the Windows 10 Settings app.
From there, select the Control Panel for Sound on the rightmost column. This will open a new mini window.
After that, select your headphone under the Playback tab and click on the Set default button.
Once done, click on Apply and then OK buttons to save the changes made.
Option 5 – Try to run the Playing Audio Troubleshooter
Since the Windows 10 operating system has the Playing Audio Troubleshooter, you can use this troubleshooter to try and fix the problem with the headphones. You can access this tool in the Control Panel or in the Taskbar Search and even on the Troubleshooters page of Windows 10.
If you encountered an error message saying, “We couldn’t find any drives, To get a storage driver, click Load driver” when you try to install Windows in a VirtualBox machine, then you’ve come to the right place as this post will guide you in fixing this error.
This error message is displayed on the screen where you have to choose a partition to install the guest operating system. This error is most likely due to the lack of correct settings as well as a corrupted virtual disk. To fix this error, you have to remove existing storage devices, create a new storage device and select the correct ISO file.
For complete instructions, follow the given steps below.
Step_1: The first thing you have to do is remove all the existing Storage devices and since this option is already available in VirtualBox by default, there is no need for you to install any third-party software.
Step_2: After that, open VirtualBox and select the virtual machine and then click the Settings button.
Step_3: Next, switch to the Storage section and on your right-hand side, you will see “Controller: SATA” and two other sub-labels. From there, select Controller: SATA and then click on the red cross button that says, “Remove selected storage controller”.
Step_4: Now click on the Add new storage controller icon and select the “Add SATA Controller” option from the given list.
Step_5: Afterwards, click the “Add hard disk” button and select the “Create new disk” option, and then you have to create a new virtual disk for your virtual machine.
Step_6: Verify if you have selected Dynamically allocated while you create the virtual hard disk. Once the process is completed, you will get a “.vdi” file in the list.
Step_7: Next, click on the “Add optical drive” button and select the “Choose disk” option. Here, you have to select the ISO file and if you can find an ISO file in the given list, select it from there, else, you have to click the Add button and navigate to the folder where the ISO file is located.
Step_8: Once you’re done, click the OK button and boot your virtual machine. You should see options instead of the “We couldn’t find any drives, To get a storage driver, click Load driver” error message. If you see the options, you can now create a new partition and start the installation process of the Windows operating system in the VirtualBox machine without any problem.
Pinned Windows 10 Taskbar Items. One of the most used interfaces in the Windows environment is the Taskbar. It is where users like to pin their most-used programs as well as shortcuts with extra privileges and automated tasks. In fact, it’s a lot better than the Start Menu. So if any Windows Update messes up with your computer, or if you’ve just switched to a different computer, setting up the Taskbar with the very same set of programs you used to have is definitely not an easy task. But worry not as this post will guide you on how you can backup and restore the items on your Taskbar either manually or automatically.
Manual Backup:
Tap the Win + R keys to open the Run prompt.
Then type “%AppData%MicrosoftInternet ExplorerQuick LaunchUser PinnedTaskBar” in the field and hit Enter to open the folder where you can see all the shortcuts or pinned items in the Taskbar.
After that, copy all the files in the folder and paste them somewhere else as a backup. For instance, E:\Pinned Items Backuppinnedshortcuts.
Next, tap the Win + R keys to open the Run prompt once more, and then type “Regedit” in the field and hit Enter to open the Registry Editor. When the User Account Control dialog box appears, click Yes.
After opening the Registry Editor, navigate to this key – HKEY_CURRENT_USERSoftwareMicrosoftWindowsCurrentVersionExplorerTaskband
Then right-click on the Taskbar folder and select Export.
Now save the file with the .reg extension to another location like the E:\Pinned Items Backup folder and then name it.
Close the Registry Editor.
Manual Restore:
Make sure to copy all the files to one of the drives if you are using another computer and then refer to the following steps.
Tap the Win + R keys to open the Run prompt.
Then type “%AppData%MicrosoftInternet ExplorerQuick LaunchUser PinnedTaskBar” in the field and hit Enter to open the same folder where you just copied all the shortcuts. Make sure to keep it open.
Then open the backup folder where you saved all the pinned items and copy all the files there.
Next, go to the Taskbar folder (%AppData%MicrosoftInternet ExplorerQuick LaunchUser PinnedTaskBar) and then paste your files in there. If you encounter a problem while doing so, just replace it with your own set of files.
After that, go to E:\Pinned Items Backuppinnedshortcuts and then double click on tb-pinned-items.reg. If a User Account Control prompt appears, click Yes. This will add the registry file into the main registry hub. You will also get a dialog box that will confirm that data has been added to the registry successfully. Click OK.
You should now see the items on the Taskbar. You have to restart Windows Explorer. To do so, end its process in the Task Manager.
Automatic Backup:
Backing up and restoring the pinned Taskbar items in your Windows 10 computer can be done automatically as well. But before you get started on the process, you need to understand what’s going on behind the hood first. First, you need to create two bat files and name them “Backup Pinned Taskbar Items” and “Restore Pinned Taskbar Items”. After you have that covered, refer to the following steps:
Open the Notepad app and paste the following details and save it as “Backup Pinned Taskbar Items.bat.
After that, run the bat file with admin privileges.
Note: Just so you know, there is a drawback to this process as we’ve noticed that any pinned apps that were downloaded from the Windows Store don’t appear in these places and any items downloaded and installed separately from the internet and then pinned.
As you know, each time you log out of your Windows 10 computer, it will take you to the login screen where you can switch users or log back in. But there are instances where Windows 10 remains stuck on the signing out screen, along with a blue spinning circle and all you can see is the process of your computer signing out, however, it does not progress and only gets stuck there. Thus, in this post, you will be guided on how you can resolve such an issue on your Windows 10 computer.
So if you are one of the users who experience the same problem, there are several fixes you can check out if your computer is stuck on the signing out screen with a blue spinning circle. You can try to force shutdown your computer or troubleshoot the problem in a Clean Boot State. You could also try to check the status of the User Profile Service or repair User Profile, as well as run System Restore. For more details, refer to each one of the suggestions provided below. But before you troubleshoot the problem, make sure that you are logged in to your computer as an administrator.
Option 1 – Try to force shutdown your computer
The first thing you can do is to force reboot your computer as this simple fix could help in fixing the problem. This option is quite simple, just make sure that before you do it, you have to save all your work.
First, turn on your computer and press and hold the power button for at least 30 seconds. You might notice the screen flashing or making any changes, just ignore it.
After that, plug out and plug in your computer and automatically turn it on.
Once done, check if the issue is now fixed or not.
Option 2 – Put your computer in a Clean Boot State
It is possible that some third-party application is causing your computer to get stuck in the signing out screen. So you can try putting your computer in a Clean Boot State and see if it fixes the problem.
Log onto your PC as an administrator.
Type in MSConfig in the Start Search to open the System Configuration utility.
From there, go to the General tab and click “Selective startup”.
Clear the “Load Startup items” checkbox and make sure that the “Load System Services” and “Use Original boot configuration” options are checked.
Next, click the Services tab and select the “Hide All Microsoft Services” checkbox.
Click Disable all.
Click on Apply/OK and restart your PC. (This will put your PC into a Clean Boot State. And configure Windows to use the usual startup, just simply undo the changes.)
Once your computer is in a Clean Boot State, you should now be able to sign out or sign in without any problem.
Option 3 – Try checking the status of the User Profile Service
If forcing your computer to shut down or putting your computer in a Clean Boot State didn’t fix the problem, you can try to check the status of the User Profile Service since it is the one responsible for loading and unloading user profiles. Thus, if this service is disabled or stopped, you will no longer be able to sign out or sign in successfully.
Tap the Win + R keys to launch the Run utility and type “services.msc” in the field and hit Enter to open the Services Manager.
From there, look for the User Profile Service and make sure that its Startup Type is set to Automatic and that its status is “Started”.
Once done, exit the Services Manager and see if the issue is resolved.
Option 4 – Try to repair your corrupted profile via Registry
In this second option, you can try to repair the corrupted profile using the Registry but before you proceed, make sure to create a System Restore Point and then follow the steps below.
Tap the Win + R keys to open the Run dialog box.
Then type “regedit” in the field and hit Enter or click OK to open the Registry Editor.
Next, go to this registry key: ComputerHKEY_LOCAL_MACHINESOFTWAREMicrosoftWindows NTCurrentVersionProfileList
Once you’ve opened the registry key, you should see a list of all the user profiles on your computer. Now click on each S-1-5 folder and look for the “ProfileImagePath” entry and double click on it to check which user account it is related to. You will see a path like “CUsersACK” where “ACK” is the username.
You should know which of the user account is corrupted. Just look for a key named “RefCount” and change its Value data to “0” and click OK. And if it isn’t available, simply right-click on the right pane and create it.
After that, double click on the key named “State” and make sure that the Value data is “0” and click OK.
Exit the Registry Editor and restart your computer to apply the changes made and then check if it fixed the problem or not.
Option 5 – Run System Restore
Tap the Win + R keys to open the Run dialog box.
After that, type in “sysdm.cpl” in the field and tap Enter.
Next, go to the System Protection tab then click the System Restore button. This will open a new window where you have to select your preferred System Restore point.
After that, follow the on-screen instructions to finish the process and then restart your computer and check if the problem is fixed or not.
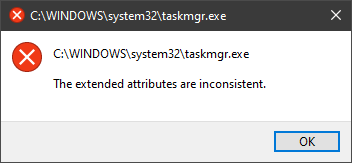
One of the most critical errors inside your Windows operating system is The Extended Attributes Are Inconsistent error. This error means that your operating system has been corrupted and it may produce many annoying issues like for example time lags, random crashes, and even freezing of the system when running multiple applications.
There are a lot of reasons for this error, from the registry to faulty application installations to sometimes even hardware issues like bad RAM memory or bad hard drive. Mostly issue is due to corrupted files inside Windows and most often people only think that resetting the PC or complete reinstallation is the only way to fix this problem.
Although reinstalling the system or resetting the PC will solve this error for sure there are other less time-consuming ways to fix this error.
In this guide, we will show you common ways in fixing Extended Attributes are inconsistent errors inside your Windows that are easy to do and less time-consuming than complete reinstallation of the system.
Fixing Extended Attributes Are Inconsistent error
Run SFC scan
Press ⊞ WINDOWS + X to open the hidden menu
Click on command prompt (admin)
In command prompt type in SFC /scannow and press ENTER
Wait for the operation to complete
Reboot your PC
Use System Image Repair Tool
Press ⊞ WINDOWS + X to open the hidden menu
Click on command prompt (admin)
In command prompt type in Dism /Online /Cleanup-Image /RestoreHealth and press ENTER
Wait for the operation to complete
Reboot your PC
Change all user accounts to the administrator
Press ⊞ WINDOWS + R to open the run dialog
Type in netplwiz and press ENTER
Select a first user account and click on Properties
Click on the Group Membership tab
Choose Others from the options
Select administrator (if all accounts are already administrators change all to users)
Repeat process for all other accounts
Click OK to save settings
Change Windows Sound scheme to default
Right-click on the sound icon in the taskbar
Click on Sound options
Go to the Sounds tab
In Sound Scheme click and choose Windows Default
Under Program Events choose Windows User Account Control
Click on the drop-down menu and choose None
Click on Apply
Click on OK
Downgrade the Sound driver
Press ⊞ WINDOWS + X to open the hidden menu
Click on Device Manager
Find your Audio driver and right-click on it
Click on uninstall and then on OK
Reboot your system
Do System Restore
If none of the provided solutions have worked, perform a system restore to the last point where everything was working fine.
Reset PC
If even system restore has not solved the issue or you do not have valid point in system restore time, perform Reset this PC and hopefully, the error will be finally fixed.
Conclusion
If all of the provided methods have not managed to repair this error that checks your hardware, your computer might have some faulty components if after complete PC reset error persists.
If you are trying to install Office but got an error saying, “Something went wrong, Sorry we ran into a problem” with error codes 12002-4, 12007-4, or 12152-4 instead, this indicates that you have a problem with your internet connection. Aside from internet connection issues, the problem could also be due to some programs that block the installation files to be downloaded so when they time out, you get these error codes.
There are several options you can try to fix the 12002-4, 12007-4, or 12152-4 error codes. You can try to install Office offline or turn off the proxy server or VPN (if you’re using one). You can also try to temporarily disable your antivirus program or Firewall. Refer to the given potential fixes below to troubleshoot and fix the problem.
Option 1 – Try to install Office offline
The first thing you can do if you encounter the error codes 12002-4, 12007-4, or 12152-4 when installing Office is to download an offline copy of Office especially when you’re certain that your internet connection is slow. Once you’ve downloaded it, install it again. The offline installer will download both the 32 and 64-bit versions of Office. Keep in mind that you must download the correct version.
Option 2 – Disable the Proxy server
The first thing you can do is to try disabling the Proxy server as it might be the reason why you’re getting error 0x80244022 for Windows Updates. To disable the proxy server, refer to the steps below.
Tap the Win + R keys to open the Run dialog box.
Then type “inetcpl.cpl” in the field and hit Enter to pull up the Internet Properties.
After that, go to the Connections tab and select the LAN settings.
From there. Uncheck the “Use a Proxy Server” option for your LAN and then make sure that the “Automatically detect settings” option is checked.
Now click the OK and the Apply buttons.
Restart your PC.
Note: If you are using a third-party proxy service, you have to disable it. In addition, if you are also using a VPN, you can try to disable it as well.
Option 3 – Temporarily disable the Antivirus and Firewall
As mentioned earlier, the downloading of the installation files could be blocked by either the antivirus program or Firewall or it could be both especially when the link seems suspicious. To fix this problem, you have to disable both the antivirus like Windows Defender and the Firewall or any third-party software you might be used temporarily and then download the installation files again. Once the download is completed, make sure to turn on the antivirus program and the Firewall again. On the other hand, you can also try downloading in a different location which also means that you have to try a different network. It could be that the load on the current system is too high which is why it’s not able to offer enough bandwidth to download the installation files of Microsoft Office.
The error code 0x80070424 is a Windows PC error. It may occur when using Windows Update, Microsoft Update or while trying to change Windows Firewall settings. This error does not allow you to enable or disable the Firewall on your PC. It is quite common on Windows 7 and Vista.
Symptoms of error code 0x80070424 include Windows Firewall may not be listed on Services.msc, inability to change Windows Firewall settings and you may come across this error message when restarting your PC, “Base Filtering Engine Service could not be found in the system”.
Solution
Error Causes
Some of the common causes of the error code 0x80070424 include:
Base Filtering Engine Service file corruption
Registry issues
When you encounter this error code on your system, it is recommended to fix it immediately as this error can lead to serious PC damages.
Further Information and Manual Repair
To resolve the error code 0x80070424 here are some of the best DIY solutions for you. By following these solutions, you can fix the error all by yourself.
These are simple, easy, and quick PC fixers that require no technical expertise. Just follow the simple steps and the error will be resolved in the shortest time.
Re-Install Windows Firewall & Filtering Engine
If the underlying cause of the error 0x80070424 is Base Filtering Engine Service file corruption, then the best way to resolve it is to download the Firewall and register file from a reliable website. Once you download it extract the zip on your desktop.
Double click on both files one by one to confirm their installation on your PC. Once installed, restart your PC and click on the start button. Search file type and run and then press enter.
When the Run window opens, type REGEDIT and click OK. After that, from the left sidebar navigate to HKEY_LOCAL_MACHINESYSTEMCurrentControlSetservicesBFE.
Now simply right-click on BFE folder and choose permission. Once that’s done, click on add button and type everyone then press OK to confirm settings. Here you will see the ‘everyone’ added field.
After that in the below permission panel, tick the box that says Full Control and confirm. Now close the window and go to the menu and type services MSC.
This will open the service window. From the list search for ‘Base Filtering engine file’ right-click on it. Now search for Windows Firewall and see if you can change the settings. This procedure is most likely to resolve the error code 0x80070424 on your PC. It is time-consuming but worth it.
Use a Registry Cleaner
None the less, if the error is triggered by registry issues, then it is advisable to download Restoro. This is an advanced and highly functional PC fixer integrated with multiple utilities including a powerful registry cleaner.
The registry cleaner utility detects all registry issues on your system and fixes them in seconds. It wipes out the excess, unnecessary, and obsolete registry entries and files corrupting your system cleans, and restores the registry.
It is user-friendly and compatible with all Windows versions. So whether you are using Windows 7, 8, XP or Vista, you can run it on all versions with ease and resolve the error code 0x80070424 generated by registry issues.
This software also includes other functional and value-added features like antivirus and a system optimizer.
Click here to download Restoro and resolve error code 0x80070424 on your PC today!
The error 0x0000001 also known as APC_INDEX_MISMATCH is one of the fatal errors that users encounter upon starting their computers. This error appears when there is a sequence mismatch in the driver or system file when it is disabling or re-enabling Asynchronous procedure calls. The mismatch happens maybe because of a virus or malware attack, not shutting down your computer properly and incomplete installation of the system files.
There are many ways to fix this error. The easiest way is to download a repair utility program. The use of these programs perfectly fits those that are not so technical. All you have to do is download the program and install it on your computer. As soon as it is installed, the program will now scan and diagnose your computer for any errors. After it identifies the errors, it will then repair your PC through either manual or automatic tools.
To those who are techie and enjoy the manual resolution, you may take advantage of Microsoft’s analyze debug extension which tells you the cause of the error. After determining the cause then you can now start fixing the error.
Check if Hardware is functioning properly. If the cause is due to a hardware malfunction, you will have to make sure that all the pieces you are using are working. All the wires should be attached to their respective ports. Not only that, but you also must make sure that before installing the hardware, it is compatible with the Windows version that is installed into your computer.
Use Compatible software. If the problem was caused by software or a driver, you can uninstall and reinstall it. Always make it a rule that whenever you install a program or new software to your computer, make sure it is compatible with your operating system and never skip a step during the installation process. You also have to see to it that the program you are installing does not contain any viruses, malware, or spyware that can be harmful to your computer.
Update your Drivers Regularly. In most cases though, the cause of the APC_INDEX_MISMATCH error are outdated device drivers. To resolve this, you will have to go to your Control Panel then look for Device Manager. As soon as you are in the Device Manager window, you can now see the different devices running on your computer. You right-click on each device and check the Properties. In the Properties window, click on the Driver Tab and look for the date when it was last updated. You can then go to the manufacturer’s website and compare the dates.
For a new Windows operating system, you no longer have to go to the manufacturer's website though. All you have to do is click on Update Driver and it will automatically search for updates online.
Use a Genuine Operating System. There are also cases where the 0x0000001 error won’t allow you to access your computer. In this case, we have to suspect that the problem could be in your Operating system. To resolve this, you can reinstall your Operating System or update your current operating system. Only use a genuine licensed Windows Operating System because this will not only protect you from Malware and Viruses but it allows you to get all the recent update available from Microsoft. Update your Windows 10 regularly by going to Settings > Windows Update > Check for Updates. You may also turn on the Automatic Update by going to the Advanced options is found on the Windows Update Page.
You can always get help online but it really helps to know the basics and determining the root cause of the error.
Finally upgraded to Microsoft’s newest OS, but the performance is a bit sluggish? Here are a few useful tips you may not have thought about that could significantly transform your experience!
How to speed up Windows 11?
1. Disable startup programs
There are many programs that launch right on startup that really aren’t essential. This, in turn, causes your PC to launch and run more slowly.
To check which programs are enabled on startup, go into the Task Manager and select the Startup tab. Find every program that doesn’t need to launch immediately, right-click on it and press ‘Disable’.
This will not shut down the program in that instant. It’ll just prevent it from running automatically as you turn on your PC. You can always launch it manually when you need it.
2. Expand your memory and storage
If you want your PC to run super smoothly, you need to have enough memory to support that. This is especially significant for those of you who love to multitask. Upgrading your RAM gives your PC more space to store the temporary data it needs to complete processing tasks. In other words, processing takes a lot less time.
Your long-term storage is equally important. Hopefully at this point you’re already using SSD over HDD, since this type of storage offers a faster boot time.
Credit: Marc Pezin on Unsplash
In any case, we recommend expanding your storage capacity. The more files and data you store, the more there is to load, significantly influencing your PC’s speed. Larger storage capacity means new data and essential updates can be stored comfortably, preventing any strain on your PC’s performance.
3. Clean up disk space
If you aren’t willing to upgrade your storage just yet, the least you can do is clean up your storage right now.
Aside from manually deleting stuff you no longer need, you can also get rid of temporary files that clutter up your storage and eat up performance for no reason. To get to them, click Windows + X and select ‘Run’ (or just type it in the search bar).
A small window will pop up, where you need to type %temp%. This will take you to a whole folder full of all the temporary files you can remove without thinking twice.
For those who upgraded from Windows 10, there’s a neat trick to get rid of potential leftover files you don’t need on your brand new iteration. Only do this if you’re 100% sticking with Windows 11, though. Go to System > Storage > Temporary files. Make sure to only leave ‘Previous Windows Installation’ and ‘Windows Update Clean-up’ checked and click on ‘Remove files’.
Lastly, make use of Windows 11’s fantastic Storage Sense feature. Turning it on will enable your PC to constantly watch out for junk or unused files to optimize your PC’s performance to the maximum.
4. Install pending updates
This one should go without saying, but pending updates can be detrimental to your Windows 11 performance. The longer you leave them untouched, the more bugs the outdated programs and patches can cause. So, make sure to regularly check for updates and install them as soon as they’re available.
5. Disable visual effects
As cool as visual effects, animations, shadows and transparency are, they can also put quite a toll on your computer’s speed. On a newer setup this generally shouldn’t be a problem, but if you do notice a drop in performance, definitely consider turning off some of these settings.
To do this you can go to the Control Panel, System Properties and click the ‘Advanced’ tab. In the Performance section, choose Settings. If you’d like a quicker way to get to the dialog (Performance Options) with Visual Effects, you can also type sysdm.cpl in the search bar.
Once there, you can either have your PC choose what’s best, choose the best appearance or the best performance. The other option is to manually toggle the effects off and on. The biggest obstacles to speed are taskbar animations, window shadows, control/element animations and animations upon minimizing/maximizing.
Credit: Windows on Unsplash
In the same vein, you should go to Settings > Personalization > Colors and disable Transparency, to prevent your computer from doing overtime just to hit the aesthetic appeal.
6. Get rid of bloatware
Bloatware is one of the biggest culprits of slow computer speed.
Pre-installed software that’s pretty much useless but takes up valuable system resources has been around since day one. No matter which device or platform you’re talking about. Luckily, a lot of it is removable, making it easy to lighten the load on your device.
To boost your Windows 11 computer, go to Settings > Apps > Installed apps.You’ll probably see a bunch of apps you don’t want or need. Click on the three dots next to each one you want to remove and press ‘Uninstall’.
Aside from helping optimize performance, removing bloatware has another great benefit. Unfortunately, often this pre-installed software is quite vulnerable, exposing you to great risk of cyberattacks. So, removing it definitely improves your device’s security and gives you at least some peace of mind.
Summary
These are a few of our fastest tips for boosting performance. There are other, more complex and time-consuming ways, of course. If you’ve tried these quick ones and still need advice on how to improve your PC’s speed, feel free to reach out!
Resource hogging is a term when one single application or few of them are taking all system resources for themself causing extreme slow down in the computer and nonresponsiveness. It can be a very frustrating and time-consuming experience and it can cost you money if you can not finish work on time due to this effect.
I believe that everyone has experienced at least one slowdown in their IT carrier because of resource-hogging applications and most users do not know how to deal with this. We are here to help you with this issue.
Just to be aware that this method shown here is not a method to miraculously speed up your PC or anything similar, this is to be able to detect and recover from extreme slowdowns. Hardware components are still very important and if you can upgrade your computer if it is outdated, please do it because new applications will require a more modern system, and not any kind of tips and tricks will save you from outdated hardware.
Identifying resource hogging app
Now when we got that out of the way let's talk about slowdowns, it is no secret that sometimes an application has bugs and memory leaks that can cause this kind of behavior, and sometimes the application simply takes up too much memory for any other application to work normally. The most simple and straightforward way is to bring up a Windows task manager and inspect running applications and services.
You can bring task manager by the key combination of CTRL + SHIFT + ESC
If the system is in deep memory deficit you will have to wait for the task manager to open and show itself on-screen. Once opened, click on more details if that view is not opened by default. Once the view expands you will see all running applications with how much RAM memory have they taken and how much CPU they are using.
What to do with app?
Now you are presented with a choice on what to do with the problematic application. If you press the end task button on the bottom right, Windows will kill the application and its processes but any unsaved work inside the application will be lost and unrecoverable in most cases. Or you can try to remove smaller applications running to free up more memory and CPU in order for the computer to catch up.
Any choice you make is up to you, but be very careful not to kill Windows essential service by mistake, that will cause immediate system instability with high chances of a system crash.

 In this guide, we will show you common ways in fixing Extended Attributes are inconsistent errors inside your Windows that are easy to do and less time-consuming than complete reinstallation of the system.


