Recently, a number of users reported that they were not able to use the “Run as administrator” context menu option when they tried using it or opening a program with administrator privilege. If you are one of these users facing this problem, then you’ve come to the right place as this post will guide you in fixing this issue.
At the time of writing, it isn’t clear what the cause of the issue is but there are potential fixes you can try to fix the problem. You can try turning on the User Account Control or clean up the Context Menu items change the Group Membership. On the other hand, you can also perform both SFC and DISM scans via Command Prompt or troubleshoot the problem in a clean boot state as it is possible that some third-party programs are the ones that are causing the problem. You could also run an anti-malware scan using Windows Defender or your antivirus program.
Option 1 – Try to turn on the User Account Control
When you open a program with administrator privilege, the User Account Control or UAC prompt will pop up asking you to confirm the permission. However, if you have disabled the User Account Control by mistake or some malware has disabled it, then it’s no wonder why the “Run as administrator” option is not working. Thus, you need to check if UAC is turned on or not. All you have to do is go to the User Account Control settings.
Option 2 – Try changing the Group Membership
First, you need to sign in with your administrator account or ask your administrator to sign in for you. So if you only have a Standard User account, you have to add that account to the Administrators group.
In the taskbar search box, type “netplwiz” and check the search results.
From there, select your user account and click the Properties button.
After that, go to the Group Membership tab and select Administrator.
Now click on the Apply and OK buttons to save the changes made and then sign in to your computer again and see if the “Run as administrator” option is working or not.
Option 3 – Try to create a new Administrator User account
If you have a standard account, you can try creating a new account but this time, you create an administrator user account and then see if you can now use the Run as administrator option or not. Note that you have to sign in with your main account before you can create an admin account.
Option 4 – Run the DISM tool
You can run the DISM tool as well to help fix the problem with the “Run as administrator” option. Using this built-in tool, you have various options such as the “/ScanHealth”, “/CheckHealth”, and “/RestoreHealth”.
Open the Command Prompt with admin privileges.
Then type in the following commands and make sure to hit Enter right after you type each one of them:
Dism /Online /Cleanup-Image /CheckHealth
Dism /Online /Cleanup-Image /ScanHealth
exe /Online /Cleanup-image /Restorehealth
Do not close the window if the process takes a while as it will probably take a few minutes to finish.
Option 5 – Perform a System File Checker scan
The SFC or System File Checker scan could detect and automatically repair damaged system files that could be causing the problem with the “Run as administrator” option on your Windows 10 computer. SFC is a built-in command utility that helps in restoring corrupted files as well as missing files. It replaces bad and corrupted system files with good system files. To run the SFC command, follow the steps given below.
Tap Win + R to launch Run.
Type in cmd in the field and tap Enter.
After opening Command Prompt, type in sfc /scannow and hit Enter.
The command will start a system scan which will take a few whiles before it finishes. Once it’s done, you could get the following results:
Windows Resource Protection did not find any integrity violations.
Windows Resource Protection found corrupt files and successfully repaired them.
Windows Resource Protection found corrupt files but was unable to fix some of them.
Once done, restart your computer.
Option 6 – Put your computer in a Clean Boot State
You can also troubleshoot the problem in a Clean Boot state. It could be that there are some third-party applications in your computer that are preventing you from using the “Run as administrator” option and to isolate this possibility, you need to boot your computer in a Clean Boot State and then try to use the Run as administrator again. Putting your computer in this state can help you identify which program is the culprit and thus isolates the problem. In a Clean Boot state, your computer will start using only the pre-selected minimal set of drivers and startup programs. Note that you have to disable and enable one process at a time.
Log onto your PC as an administrator.
Type in MSConfig in the Start Search to open the System Configuration utility.
From there, go to the General tab and click “Selective startup”.
Clear the “Load Startup items” check box and make sure that the “Load System Services” and “Use Original boot configuration” options are checked.
Next, click the Services tab and select the “Hide All Microsoft Services” check box.
Click Disable all.
Click on Apply/OK and restart your PC. (This will put your PC into a Clean Boot State. And configure Windows to use the usual startup, just simply undo the changes.)
After you’ve set your computer into a Clean Boot State, try to check if the error is now fixed and that you can now view the Properties.
Option 7 – Try scanning your computer using Windows Defender
As mentioned, if your computer was recently infected with some malware, it is possible that the malware changed the User Account Control settings which is why you’re not able to use the Run as administrator option. Thus, you need to scan your computer using Windows Defender.
Tap the Win + I keys to open Update & Security.
Then click on the Windows Security option and open Windows Defender Security Center.
Next, click on Virus & threat protection > Run a new advanced scan.
Now make sure that Full Scan is selected from the menu and then click the Scan Now button to get started.
Msvcr100.dll is a dynamic link library file. This file is loaded into the memory at runtime for successful program execution.
This process is also referred to as runtime dynamic linking. The Msvcr100.dll belongs to the Microsoft Visual C++ Runtime Library.
It is a core Windows component used by numerous Windows-based applications to load and run smoothly on Windows PC.
Msvcr100.dll error occurs when the process of runtime dynamic linking fails. Due to this error, you are unable to access the desired application. The error code is displayed in either of the following formats:
“Msvcr100.dll Not Found"
"This application failed to start because msvcr100.dll was not found. Re-installing the application may fix this problem."
"Cannot find [PATH]msvcr100.dll"
"msvcr100.dll is missing from your computer"
"XXX.exe - System Error - MSVCR100.dll is missing from your computer."
Solution
Error Causes
Narrowing down the cause of the Msvcr100.dll error is not possible as this error can occur on your PC due to multiple reasons. However, here are some of the most common causes of Msvcr100.dll error code on Windows PC:
Msvcr100.dll file corrupt and damaged
Missing Msvcr100.dll file
Corrupt runtime code library
Registry issues
Malware attack and viral infection
Further Information and Manual Repair
Here are some of the best ways to resolve this error on your system:
Reinstall the application causing the error
As dll are shared files used by multiple programs to load and run, there is the possibility of it getting deleted when uninstalling a certain program.
If so, then the best way to fix it is to reinstall the application that is causing the error to pop up on your screen. This way you’ll be able to set up the program again and install the Msvcr100.dll file back on your system.
Download Microsoft Visual C++ 2010 Redistributable Package
Another way to resolve this error is to download Microsoft Visual C++ 2010 Redistributable Package. To do this, first, see if you are running a 32 bit or 64-bit copy of Windows. XP users go to the start menu and click run then type winver and press enter.
In Vista and Windows 7, go to the start menu and type computer and click properties. The information you require is under Windows Edition.
Once you find out whether you are using a 32 bit or a 64-bit version, accordingly, download the correct version of Microsoft Visual C++ 2010 Redistributable Package directly from Microsoft’s official website. Simply download and install the software.
Then follow the prompts to add the toolbox to your PC. After that, restart your computer; most likely the error message will be gone. If it still persists, then this means the error is either related to the registry or malware.
Download and Run Restoro
Restoro can be used to resolve both malware infection and registry issues on your PC that could be triggering Msvcr100.dll errors.
Restoro is a next-generation and multi-functional PC repair tool embedded with powerful utilities like an antivirus, a registry cleaner, and a system optimizer. The registry cleaning feature detects all registry issues and Msvcr100.dll errors.
It removes unnecessary and obsolete files on the disk, like junk files, cookies, internet history, and temporary files cluttering the disk and damaging dll files. It repairs the damaged and corrupt dll files and restores the registry.
Simultaneously the antivirus feature scans and removes all malicious software on your system. These include spyware, viruses, Trojans, adware, and malware that can damage dll files.
This software is efficient and resolves the Msvcr100.dll error in seconds. It is easy to use and has a simple navigation. It is compatible with all Windows versions.
Click here to download Restoro on your PC and resolve the Msvcr100.dll error today!
Error code 0xc0000142 is an error code that affects Windows 10 users. It often occurs when users attempt to run Windows applications. The message in the application error box allows users to recognize the error as it states that “the application was unable to start correctly (0xc0000142).” Common symptoms of this error code include the following:
Inability to start applications
Inability to completely run Windows applications
The appearance of error code 0xc0000142 message box
Error Causes
Error code 0xc0000142 in Windows 10 is often caused by issues related to startup programs, corrupted files or other applications. To address this issue, the source of the issue needs to be located. But how will users be able to do this while the error code is present?
Further Information and Manual Repair
To fix error code 0xc0000142 users will need to employ at least one manual repair procedure. This may include checking your system for corrupt files through tools like Microsoft’s System File Checker (SFC). If you are uncertain of your skills or prefer to get professional support, contact a Windows repair technician to assist you.
The top three methods to resolve error code 0xc0000142 include the following:
Method One: Perform a Clean Boot
A clean boot is one of the most basic procedures you can run to solve a Windows-based error code of this nature. It works by identifying whether or not conflict among startup programs is preventing Windows applications from running properly. This occurs through a clean boot process involving Windows using a minimal set of drivers and startup programs when you reboot.
Here is what you’ll need to do:
Step one: Go to Start and type msconfig
Step two: Right-click and select System Configuration
Step three: Select Service tab and click Hide all Microsoft Services then click Disable all.
Step four: Click Startup tab within the System Configuration dialog box.
Step five: Select Open Task Manager
Step six: Within the Startup tab of Task Manager, select Disable for each Startup item, then close Task Manager.
Step seven: Click OK on the Startup tab of System Configuration.
Step eight: Restart your computer.
This method resolves software conflict arising when you attempt to update, run a program or simply use your operating system. However, if error code 0xc0000142 remains unresolved after you restart your machine, follow the next step below.
Method Two: Run a System File Checker Scan
System File Checker (SFC) is a utility tool built into the Windows 10 operating system, as well as other versions of Windows, to detect and repair corrupted system files. Since corrupted system files can result in error code 0xc0000142, run this tool by following the steps below:
Step one: Go to Start and type Command Prompt or CMD.
Step two: Right-click and select Administrator
Step three: Check for and repair corrupted system files. Simply type sfc /scannow. (Be sure to place a space between “sfc” and “/scannow”).
Once these procedures are followed, the System File Checker tool will automatically scan your machine, and find and repair corrupted files. If this is the source or underlying cause of error code 0xc0000142 on your system, the error code will be resolved. However, if the source of the issue is not due to corruption in our system or is simply a more complicated issue try the next method highlighted below.
It really sucks when you can’t fully enjoy the newest version of your favorite OS.
Windows 11 is still relatively fresh and consequently has some annoying little bugs that really ruin our experience. The good news is that you’re not alone and most of them are easy to fix.
Here are 5 commonly reported Windows 11 issues and what you can do to get rid of them.
1. Windows 11 audio problems
One of the absolute most irritating things in the world is struggling with the sound on your computer. Windows 11 users have reported facing the issue of low or no sound. If you’re currently experiencing the same frustration, you can be relieved. Chances are fixing it will only take a few minutes.
The first thing to check would be whether you accidentally muted your device by pressing the mute button on your keyboard. Yes, we know it sounds a lot like the old “have you tried turning it off and on again?” But it’s important to leave no stone unturned, and the most obvious things are usually the ones we easily overlook.
Moreover, if you have several audio output sources, check whether the right one is selected. You can do this via the Action Center or through Settings. If you want to use the same source every time, we also recommend you set it as the default one.
It’s also important to have a good, up-to-date audio driver. More often than not, this will be the true cause of your audio struggles. Make sure to update your driver, and if that doesn’t work out, you can always un- and reinstall it or install a different one.
Lastly, if all attempts remain unsuccessful, run the audio troubleshooter to figure out what’s actually going wrong.
2. Unable to find files
Such a powerful new operating system, yet it can’t seem to do the simplest thing imaginable? The File Explorer not responding on Windows 11 is one of the most frustrating and most common problems with Microsoft’s newest iteration of its awesome OS.
However, 9/10 times it can be fixed by simply restarting your PC. You could also try killing the Windows Explorer process in the Task Manager and then rerunning it.
If these don’t help, check whether there are any pending Windows 11 updates. A single missing update can compromise your PC’s functionality, so always make sure to install them all on time.
Should none of that work, then there are other ways to solve the File Explorer problem. However, then the issue is probably a bit deeper and it’s no longer in the ‘easy fix’ territory.
3. Start menu not working
Just like the File Explorer, the Start menu is a fundamental element of your OS. So, it’s only natural that its malfunction grinds your gears. It may be more customizable than on previous Windows versions, but it doesn’t always work smoothly.
If you’re facing the so-called Start menu critical error, there are a few things this could be caused by. Usually it means you turned off your system while an important update was still being installed, there is a corrupt file on your PC, or Windows forcefully stopped a program.
Whatever the reason, the solution should be pretty simple. Try the basic steps: restarting your File Explorer (like we explained above) and signing out and back into your account. If that doesn’t do anything, you may want to try uninstalling third-party start menu apps (if you have any), since they can interfere with your default programs’ functionality.
Now, those are the easy fixes. If you get nowhere with them, you might need to identify the root cause and search for more complex solutions than that.
4. Snipping tool not working
Our beloved screenshot tool was introduced with Windows 10 and Microsoft decided to keep it. However, you were probably just as disappointed as us when you tried to run it and failed.
Normally, this can be fixed by installing the latest Out-of-band (OOB) update, or even pending updates in general. Even if your system appears to be up-to-date, run the checker just in case.
Another cool thing Windows 11 lets you do is ‘Repair’ and ‘Reset’, which is the easiest way to troubleshoot your Snipping tool. If this fails, you can also try the good old un- and reinstall method. Simply uninstall the tool through the Control Panel and reinstall it from the Microsoft Store.
Furthermore, in the case of an upgrade from Windows 10 to 11, it may be that the old Snipping tool version is interfering with the launch of the new one. If you don’t care that much about the additional options available with the enhanced screenshot tool, you can use the old version instead.
Simply go to your C Drive, find the Windows.old folder, search for the tool and open it from there. Make sure to pin it to your taskbar as well, if you know you’re going to use it often.
5. Can’t install the latest update
The latest Windows 11 version, 22H2, has brought tons of enhancements to our dearest operating system. Unfortunately, a lot of users still haven’t had the opportunity to experience it. A mere update of your OS version should be the one thing that goes smoothly, but sometimes that’s not the case.
Failure to install 22H2 can be caused by a few things. Most commonly, the issue is caused by lack of storage space or corrupted files, but there could be other culprits.
There are a couple of things you could try. For example, it’s crucial that your drivers be up-to-date and some important services be enabled. These are: Windows Modules Installer, Background Intelligent Transfer Service, Cryptographic Service, Windows Update services.
To enable them, search ‘Services’, find the service you need and right-click on it. Open ‘Properties’ and select the startup type ‘Automatic’.
It may also be necessary to unplug all peripherals that aren’t crucial and disable third-party antivirus tools until after the update is finished.
Ultimately, you can run the Windows Update troubleshooter to detect and fix other possible issues.
Summary
Tiny bugs like these are nothing out of the ordinary. That said, we still all hate when they happen.
Hopefully some of our solutions have helped you to a smoother Windows 11 experience. But if you’re still struggling, feel free to reach out to us. We’d be happy to help!
One of the essential parts of the Windows 10 operating system is the Microsoft Store as it is the distribution hub of numerous applications such as Netflix, Facebook, and many more. In fact, Microsoft is planning to make it a hub not just for UWP applications but also Windows Classic applications. Microsoft has already built a bridge with the power of Project Centennial which allows developers to migrate and upload their Windows Classic applications to the Microsoft Store. Although the Microsoft Store has been constantly improving, there are still times when you might face an error while using it. One of these errors is error 0x80131500. When you encounter this error, you will get the following error message on your screen:
“Try that again, Something happened at our end, Waiting a bit might help, The error code is 0x80131500 in case you need it.”
To fix this error, you can try changing your internet connection, toggle the date & time settings, change DNS, create a new user account, run the Microsoft Store Apps troubleshooter or reset the Microsoft Store as well re-register it using Windows PowerShell.
Option 1 – Try changing your internet connection
The first thing you can do is to change your internet connection. If you are using Ethernet, you can try to connect to a Wi-Fi connection instead and see if it helps.
Option 2 – Try to toggle the Date and Time settings
The first thing you can try is to sync the Date and Time of your computer as the wrong Date and Time settings are one of the most common causes of connection problems like the error 0x80131500. This is because of the incompatibility between the SSL Certificate validation date and the System Clock. Thus, you have to sync your System Clock. Refer to the steps below to do so.
Start by tapping the Win + I keys to open the Windows Settings.
Next, go to Time & Language > Date & time.
From there, turn the toggle on for the “Set time automatically and Set time zone automatically” option on the right-side panel.
After that, click on Region & language located on the left side panel and make sure that the Country or region on the right-side panel is set to the country you live in.
Now close the Settings app and restart your computer and see if it fixes the problem or not.
Option 3 – Try to change the DNS Server
In this option, you can try changing your current DNS settings to the Google Public DNS as it could also help in fixing error 0x80131500. To do so, follow the steps below.
The first thing you have to do is right-click on the network icon in the Taskbar and select Network and Sharing Center.
Next, click on the “Change Adapter Settings” option.
After that, search for the network connection that you are using to connect to the internet. Note that the option might be “Wireless Connection” or “Local Area Connection”.
Right-click on your network connection and click on Properties.
Then select the new window to choose the “Internet Protocol 4 (TCP/IPv4)” option.
After that, click on the Properties button and click the checkbox in the new window for the option “Use the following DNS server addresses”.
Type in “8.8.8.8” and “8.8.4.4” and click OK and exit.
Option 4 – Try to create a new Administrator User account
If you have a standard account, you can try creating a new account but this time, you create an administrator user account and then see if the error is fixed or not. Note that you have to sign in with your main account before you can create an admin account.
Option 5 – Run the Microsoft Store Apps troubleshooter
The Microsoft Store Apps Troubleshooter will help you in fixing the error 0x80131500. This is a great built-in tool from Microsoft that helps users fix any app installation issues. So this is worth a try to solve the problem. This built-in tool also helps you fix the Windows 10 Store if it isn’t working.
To use the Windows Store Troubleshooter, follow the steps below.
Tap Win + I keys again to open the Windows Settings panel.
Go to Update & Security and then go to Troubleshoot.
On your right-hand side, scroll down to find the Windows Store Apps and then click on the Run the troubleshooter option and see if it fixes the problem.
Option 6 – Try to reset the Microsoft Store cache
Just like browsers, Microsoft Store also caches as you view apps and games so it is most likely that the cache is no longer valid and must be removed. To do so, follow the steps below.
Right-click on the start button and click on Command Prompt (administrator).
Next, type in the command, “exe” and tap Enter. Once you do, the command will clear the cache for the Windows Store app.
Now restart your PC and afterward, try opening Microsoft Store again and then try to install your app or update your computer again.
Option 7 – Try to re-register the Microsoft Store app via PowerShell
Tap the Win + X key combination or right-click on the Start button and click on the Windows PowerShell (Admin) option.
If a User Account Control or UAC prompt appears, just click on Yes to proceed and open the Windows PowerShell window.
Next, type in or copy-paste the following command to re-register the Microsoft Store app and tap Enter:
Updating your Windows 10 computer does not always go smoothly as there are some errors you can encounter along the way. One of these Windows Update errors is the error code of 0x80246008. This kind of error can occur during different phases of an update that’s being downloaded or installed and even when an update is being initialized.
If you narrow down the cause of this Windows Update error, you’ll most likely see that it is related to the deliverability of a file to a computer from the servers of Microsoft. In other words, the error might be due to conflicts from programs like Firewall as well as third party programs like Antivirus or it could also be due to corrupted disk image or system files or it could be that any of the supporting Windows Update components and services are not working properly. Whatever the cause may be, the potential fixes provided in this post can be applicable to Windows Updates as well as the Microsoft Store.
Refer to the suggestions provided below to resolve the Windows Update Error 0x80246008 but before you proceed, make sure that you create a System Restore point first.
Option 1 – Apply some tweak in the Windows Registry from Command Prompt
Tap the Win + X keys and select Command Prompt (Admin) to open Command Prompt with admin privileges.
Next, navigate to the root location of the bootable device inside the Command Prompt command line.
Once you’re in the root location, type the following command and tap Enter to execute it:
After that, close the Command Prompt command line and then tap the Win + R keys to open Run utility.
In the field, type “services.msc” and click OK or tap Enter to open the Windows Services Manager.
From there, look for the following services:
Windows Update – Manual (Triggered)
Background Intelligent Transfer Service – Manual
Now open their Properties and make sure that their Startup type is as mentioned above and that they are running. If they are not running, just click on the Start button.
Option 2 – Run the System File Checker Scan
If the registry tweak didn’t work, you can run a System File Checker scan instead. It is a built-in command-line utility that replaces bad and corrupted system files to good system files that might be the cause why you’re getting the error when you try updating your computer. To run the SFC command, follow the steps given below.
Tap Win + R to launch Run.
Type in cmd in the field and tap Enter.
After opening Command Prompt, type in sfc /scannow
The command will start a system scan which will take a few whiles before it finishes. Once it’s done, you could get the following results:
Windows Resource Protection did not find any integrity violations.
Windows Resource Protection found corrupt files and successfully repaired them.
Windows Resource Protection found corrupt files but was unable to fix some of them.
Restart your computer.
Option 3 – Run the Windows Update Troubleshooter
If the System File Checker wasn’t able to resolve the Windows Update error, you could also try running the Windows Update Troubleshooter as it could also help in fixing any issues related to Windows Update including this one. To run it, go to Settings and then select Troubleshoot from the options. From there, click on Windows Update and then click the “Run the troubleshooter” button. After that, follow the next on-screen instructions and you should be good to go.
Option 4 – Try to disable your antivirus program
Disabling the antivirus program or any security software installed in your computer is always a good idea you can try when the Windows Update process does not go smoothly. So before you try updating your computer again, make sure to disable the antivirus or security program and once the Windows Update is done, don’t forget to enable the antivirus program back again.
Option 5 – Try deleting the files from the SoftwareDistribution folder and resetting the Catroot2 folder
The downloaded Windows Updates are placed in a folder called “SoftwareDistribution”. The files downloaded in this folder are automatically deleted once the installation is completed. However, if the files are not clean up or if the installation is still pending, you can delete all the files in this folder after you pause the Windows Update service. For complete instructions, refer to the steps below.
Open the WinX Menu.
From there, open Command Prompt as admin.
Then type in the following command – don’t forget to hit Enter right after typing each one of them.
net stop wuauservnet start cryptSvcnet start bitsnet start msiserver
After entering these commands, it will stop the Windows Update Service, Background Intelligent Transfer Service (BITS), Cryptographic, and the MSI Installer
Next, go to the C:/Windows/SoftwareDistribution folder and get rid of all the folders and files thereby tapping the Ctrl + A keys to select them all and then click on Delete. Note that if the files are in use, you won’t be able to delete them.
After resetting the SoftwareDistribution folder, you need to reset the Catroot2 folder to restart the services you just stopped. To do that, follow these steps:
Type each one of the following commands.
net start wuauservnet start cryptSvcnet start bitsnet start msiserver
After that, exit Command Prompt and restart your computer.
If you encounter an error code of 0xa0000400 while trying to upgrade your Windows 10 computer using the Windows 10 Upgrade Assistant or the Windows 10 Media Creation Tool, then you might find this post useful as it will guide you in resolving this problem. When you get this error, you will see the following error message:
“Something went wrongYou can contact Microsoft support for help with this error. Here is the error code 0xa0000400.”
As you know, keeping your computer up to date with all the Windows Updates is important and is imperative especially if you are experiencing a couple of issues like the Windows Upgrade error 0xa0000400. At the time of writing, there is no specific cause that has been found for this error. However, there are some potential fixes that might help you. You can try to recreate the Windows 10 installation USB and get the ISO files or you could also get a newer version of the Windows Media Creation Tool, or turn off your internet connection at a specific time or run the Windows Update troubleshooter. For more details, refer to the options given below.
Option 1 – Try to recreate the Windows 10 installation USB
Recreating the Windows 10 installation USB might help in fixing the problem. You can use a USB drive to do so but make sure that it has a great read-write speed. Follow the steps below to recreate Windows 10 installation USB”
Click this link and then click the Download Tool Now button.
Next, click the “Use the tool to create installation media (USB flash drive, DVD, or ISO file)…” option and follow the next given instructions on the screen.
Now select the ISO file option in step 5.
After that, you should now have an ISO file.
Next, go to the location where you’ve downloaded the ISO file.
Then right-click on the Windows 10 ISO file and select the Open with option and then select File Explorer.
Now click on “setup.exe” and follow the next instructions that appear on the screen. When asked, you have to select either Nothing (clean install) or Keep personal files only option. Take note that you must not select the “Keep personal files, apps, and Windows settings since it doesn’t really work.
Option 2 – Try turning off the Internet connection at a specific time
You might want to turn off your internet connection at a specific time. This option can be quite tricky so what you need to do is to disconnect the internet connection when the update is downloaded using the Windows Upgrade tool. It’s actually okay since all the files you need would be downloaded safely and the Windows Upgrade tool will be the one to install the newer updates using those files.
Option 3 – Try to get a newer version of the Windows Media Creation tool
You can also fix the Windows Upgrade error 0xa0000400 by using the latest version of the Windows Media Creation tool. And so if what you have is an older version, you need to update it in order to resolve the error and upgrade your Windows 10 computer.
Option 4 – Run the Windows Update Troubleshooter
Running the built-in Windows Update troubleshooter is one of the things you can first check out as it is known to automatically resolve any Windows Update or upgrade errors like error code 0x800701E3. To run it, go to Settings and then select Troubleshoot from the options. From there, click on Windows Update and then click the “Run the troubleshooter” button. After that, follow the next on-screen instructions and you should be good to go.
Option 5 – Try running Disk Cleanup
You might want to run the Disk Cleanup utility as it is a useful tool that could delete temporary and useless files in your computer.
Tap the Win + R keys to open the Run dialog box and then type “cleanmgr” in the field and hit Enter to open the Disk Cleanup window.
After that, select the drive you want to clean.
Now click OK to clean the disk and restart your computer.
Error code 1309 is an error code that occurs when installing either Microsoft Office 2003 or Microsoft Office Project 2003.
This error code may hamper your ability to run and use applications associated with Microsoft Office. To ensure installation is successful, it is first advisable to fix this error code. Error 1309 is displayed in any one of the two formats illustrated below.
When installing Microsoft Office Project 2003, the error message may pop up as:
Error 1309. Error reading from file: pathfilename.cab. Verify that the file exists and that you can access it.
When installing Microsoft Office 2003, the error message may appear in the following format:
Fatal Error During Installation
Solution
Error Causes
Error code 1309 message may appear during Microsoft Office installation due to several reasons. These include:
Problems in the Oclncore.opc file. Project 2003 uses this version of the file for program installation.
Lack of adequate use permission
The requested file was not found
Setup registry entries are modified in an unacceptable manner
To avoid inconvenience and access Microsoft Office 2003 or Microsoft Office Project 2003, it is recommended to fix the error immediately.
Further Information and Manual Repair
To resolve this error you don’t need to be a technical whiz. Here are some of the best, easiest, and proven do-it-yourself methods to resolve error 1309 on your computer screen instantly.
Method 1 - Change CacheLevel Settings
If the problem is related to Oclncore.opc file then try changing CacheLevel settings.
Follow these steps to work around this method.
First, locate the PRJPRO*.XML file in the FILESSETUP folder of the Project 2003 installation source and then open this file in the Notepad.
Also, make sure that you do not open the file as read-only and make sure that a checkmark is not displayed next to Word Wrap on the Format menu.
The next step is to search the file for the following text string: OCLNCORE.OPC_1033.
Now on the line where this string is located, change the CacheLevel=’1’ setting to the following CacheLevel=’3’ save the file back to the original location, and then quit Notepad.
After the changes are activated, try installing the software again on your system. If it installs successfully, then this means error 1309 is resolved. If the error still persists then try other given methods.
Method 2 - Configure security settings to get full permission
When the cause of error 1309 on your PC is related to lack of adequate permission issues, then configure security settings to resolve.
To do this, simply locate the folder on your installation drive.
Then right-click the folder and click Properties. On the Security tab, click edit and now make sure your user name is added to the list.
Grant required security permissions and then click OK to save changes.
After this, try installing Microsoft Office 2003 again on your system.
Method 3 - Copy the requested file from another source
If the error 1309 pops up because the requested file was not found, then try this method. Simply copy the file specified in the error to the destination directory.
For example, if the error shows data1.cab was not found, then copy this file from another source and paste it into the directory specified in the error description.
Method 4- Remove bad registry entries
Bad registry entries are responsible for registry setup modification. If this is the reason for error code 1309, then download Restoro.
This is a user-friendly PC Repair Tool embedded with a powerful registry cleaner. It scans and removes all bad and invalid entries accumulated in the registry. It cleans and repairs the registry resuming it back to its normal function.
Click here to download Restoro and repair error 1309 today.
Well if anyone told me just a few years ago that I will see the day when Microsoft releases a new OS based on Linux I would be very amused, but that day has come. Mariner is the newest OS out of nowhere.
Microsoft’s new Linux Distro, dubbed Common Base Linux (CBL)-Mariner, isn’t the type of distro you’d want to install directly on any old machine. It’s primarily meant for cloud infrastructure and edge products. Specifically Microsoft’s Cloud and Edge products.
But if you are curious, it’s possible to run. Juan Manuel Rey, a Microsoft Senior Program Manager for Azure VMware, recently published a guide to ISO CBL-Mariner image. With that, you can easily get it up and running. And you can build CBL-Mariner on an Ubuntu 18.04 desktop. So you can try it out since it is free.
You can get it from here: https://github.com/microsoft/CBL-Mariner
It is obvious that Microsoft aims to set itself as a leader in enterprise server environments with this move and it is very likely that it may succeed or at least give a good shake to its competitors, mainly red hat and Suse which are two dominant distros in that field.
Many believe that they can win over by providing regular updates and package delivery via their already established system and that feature could be a turning point for some.
In any case, time will tell and we shall see.
PrivacyAssistant is a browser extension developed by SearchAssistant.net. These extensions allegedly offer users a safer way to browse the internet and some other tools to customize the home page with background wallpapers and one-click links that can be added. While all this may sound appealing, PrivacyAssistant also monitors your browser activity, search quarries, clicks, visits, and possibly personal information.
This extension changes your default home page to SearchAssistant.com and rerouting all searches through its search portal, displaying sponsored links instead of your typical search results. While active you may see unwanted ads and even pop-up ads appearing while browsing the internet.
Several anti-virus programs have classified this extension as a Browser Hijacker, and are, therefore, for security reasons, not recommended to keep on your computer.
About Browser Hijackers
Browser hijacking is amongst the web’s constant risks that target internet browsers. It’s a kind of malicious software that alters your internet browser’s configuration settings and redirects you to websites or pages that you had no intention of checking out. They are created to disrupt browser functions for many different reasons. Usually, hijackers will force hits to internet sites of their choice either to increase traffic producing higher advertisement earnings, or to gain a commission for each and every user visiting there. Most people believe that these kinds of websites are legitimate and harmless but that is not the case. Almost every browser hijacker poses an existent threat to your online safety and it’s important to categorize them under privacy dangers. When the program attacks your PC, it starts to mess things up a whole that slows your computer down to a crawl. In the worst-case scenario, you might be forced to deal with serious malware threats as well.
How one can recognize a browser hijack
There are numerous symptoms that point to a browser hijacking: your browser’s home page is suddenly different; you get re-directed to sites you never meant to visit; the default web engine has been changed and your web browser security settings have been lowered without your knowledge; find new toolbars that you simply did not add; you might find many pop-up ads on your computer screen; your web browser starts running slowly or displays frequent errors; you have prohibited entry to certain web pages, for example, the website of an antivirus software developer like SafeBytes.
So how exactly does a browser hijacker infect a PC
Browser hijackers may use drive-by downloads or file-sharing websites or perhaps an email attachment in order to reach a targeted computer system. They can also originate from any BHO, extension, toolbar, add-on, or plug-in with malicious intent. Other times you might have unintentionally accepted a browser hijacker as part of a software program bundle (generally freeware or shareware). A good example of some popular browser hijackers includes Conduit, Anyprotect, Babylon, DefaultTab, SweetPage, Delta Search, and RocketTab, however, the names are constantly changing.
Browser hijacking can lead to serious privacy problems and even identity theft, disrupt your browsing experience by taking control over outgoing traffic, considerably slows down your personal computer by consuming lots of system resources, and result in system instability at the same time.
How to repair a browser hijack
Some hijackers can be removed by uninstalling the free software they were included with or by deleting any extension you’ve recently added to your browser. But, the majority of hijackers are extremely tenacious and require specialized applications to eradicate them. Furthermore, manual removal requires you to execute many time-consuming and tricky procedures which are hard to carry out for inexperienced computer users.
How To Get Rid Of Virus That Is Preventing Antivirus Installation?
Viruses can cause a great deal of damage to your computer system. Some malware sits in between the computer and your net connection and blocks some or all sites that you really want to visit. It will also prevent you from installing anything on your computer, especially anti-malware software. So what to do if malicious software keeps you from downloading or installing Safebytes Anti-Malware? Although this sort of problem can be difficult to circumvent, there are some actions you can take.
Make use of Safe Mode to resolve the problem
In Safe Mode, you can actually change Windows settings, un-install or install some software, and eliminate hard-to-delete malware. In case the malware is set to load immediately when PC boots, switching into this mode may well prevent it from doing so. To enter into Safe Mode or Safe Mode with Networking, press F8 while the system is starting up or run MSCONFIG and look for the “Safe Boot” options in the “Boot” tab. Once you’re in safe mode, you can try to install your anti-malware program without the hindrance of the malicious software. Following installation, run the malware scanner to remove most standard infections.
Switch over to some other web browser
Some malware mainly targets specific browsers. If this is your situation, use another internet browser as it can circumvent the malware. In the event you suspect that your Internet Explorer has been hijacked by a computer virus or otherwise compromised by cybercriminals, the best approach is to switch over to a different internet browser like Mozilla Firefox, Google Chrome, or Apple Safari to download your favorite computer security program – Safebytes Anti-Malware.
Run anti-virus from a USB drive
Another solution is to create a portable anti-malware program on your USB thumb drive. Try these simple actions to clean up your affected PC using a portable antivirus.
1) Download Safebytes Anti-Malware or Microsoft Windows Defender Offline onto a clean computer system.2) Plug the pen drive into the uninfected PC.3) Run the setup program by double-clicking the executable file of the downloaded application, which has a .exe file format.4) Choose the flash drive as the location for saving the file. Follow the on-screen instructions to complete the installation process.5) Transfer the pen drive from the uninfected computer to the infected computer.6) Double-click the EXE file to open the Safebytes tool from the pen drive.7) Click “Scan Now” to run a scan on the infected computer for viruses.
A Look at the Best AntiMalware Program
If you are looking to download an anti-malware application for your computer, there are several tools out there to consider nonetheless, you cannot trust blindly anyone, no matter whether it is paid or free software. Some are really worth your money, but many aren’t. While looking for an anti-malware program, choose one that offers solid, efficient, and complete protection against all known computer viruses and malware. One of the highly recommended software is SafeBytes AntiMalware. SafeBytes carries a very good track record of quality service, and customers appear to be happy with it.
SafeBytes anti-malware is really a powerful, very effective protection tool created to assist users of all levels of IT literacy in finding and eliminating malicious threats out of their PC. Once you’ve got installed this software, SafeByte's state-of-the-art protection system will make sure that no viruses or malicious software can seep through your PC.
SafeBytes anti-malware comes with a plethora of enhanced features which sets it aside from all others. Listed below are some of the highlighted features included in the tool.
Robust Anti-malware Protection: This deep-cleaning anti-malware software goes much deeper than most anti-virus tools to clean your computer. Its critically acclaimed virus engine finds and disables hard to remove malware that conceals deep inside your personal computer.
Active Protection: SafeBytes gives round-the-clock protection for your PC limiting malware attacks in real-time. They’re extremely effective in screening and removing various threats since they’re constantly improved with the latest updates and alerts.
Web protection: SafeBytes checks the links present on a web page for possible threats and alerts you whether the website is safe to explore or not, through its unique safety ranking system.
Light-weight: The program is lightweight and will work quietly in the background, and that does not impact your computer efficiency.
24/7 Premium Support: Support service is readily available for 24 x 7 x 365 days through email and chats to answer your queries.
Technical Details and Manual Removal (Advanced Users)
If you wish to manually remove PrivacyAssistant without the use of an automated tool, it may be possible to do so by removing the program from the Windows Add/Remove Programs menu, or in cases of browser extensions, going to the browsers AddOn/Extension manager and removing it. You will likely also want to reset your browser.
To ensure the complete removal, manually check your hard drive and registry for all of the following and remove or reset the values accordingly. Please note that this is for advanced users only and may be difficult, with incorrect file removal causing additional PC errors. In addition, some malware is capable of replicating or preventing deletion. Doing this in Safe Mode is advised.
The following files, folders, and registry entries are created or modified by PrivacyAssistant
Windows 11 release date is closing in, some people have tried it via insider build, some have decided not to. It has come to our attention that there is a little website made by BlueEdge that offers a virtual Windows 11 desktop.
Opening the Website will put you right inside Windows 11 desktop, now take note that this is not Windows 11, it is a simulation of Microsoft’s newest OS and therefore many things will not work like File Explorer, etc.
One thing you can make sure it is working is UI itself, you can see how you do like the new Taskbar, start menu, widgets, and some other things. You can just pop up on the site and check how you do like the overall new look and feel of Windows 11 UI before installing it or trying it.
We are sure that many more options will come in time but even now you can get a feel of the newest OS.
Windows 11 BlueEdge site: https://win11.blueedge.me/

 Error Causes


 Well if anyone told me just a few years ago that I will see the day when Microsoft releases a new OS based on Linux I would be very amused, but that day has come. Mariner is the newest OS out of nowhere.
Microsoft’s new Linux Distro, dubbed Common Base Linux (CBL)-Mariner, isn’t the type of distro you’d want to install directly on any old machine. It’s primarily meant for cloud infrastructure and edge products. Specifically Microsoft’s Cloud and Edge products.
But if you are curious, it’s possible to run. Juan Manuel Rey, a Microsoft Senior Program Manager for Azure VMware, recently published a guide to ISO CBL-Mariner image. With that, you can easily get it up and running. And you can build CBL-Mariner on an Ubuntu 18.04 desktop. So you can try it out since it is free.
You can get it from here:
Well if anyone told me just a few years ago that I will see the day when Microsoft releases a new OS based on Linux I would be very amused, but that day has come. Mariner is the newest OS out of nowhere.
Microsoft’s new Linux Distro, dubbed Common Base Linux (CBL)-Mariner, isn’t the type of distro you’d want to install directly on any old machine. It’s primarily meant for cloud infrastructure and edge products. Specifically Microsoft’s Cloud and Edge products.
But if you are curious, it’s possible to run. Juan Manuel Rey, a Microsoft Senior Program Manager for Azure VMware, recently published a guide to ISO CBL-Mariner image. With that, you can easily get it up and running. And you can build CBL-Mariner on an Ubuntu 18.04 desktop. So you can try it out since it is free.
You can get it from here: 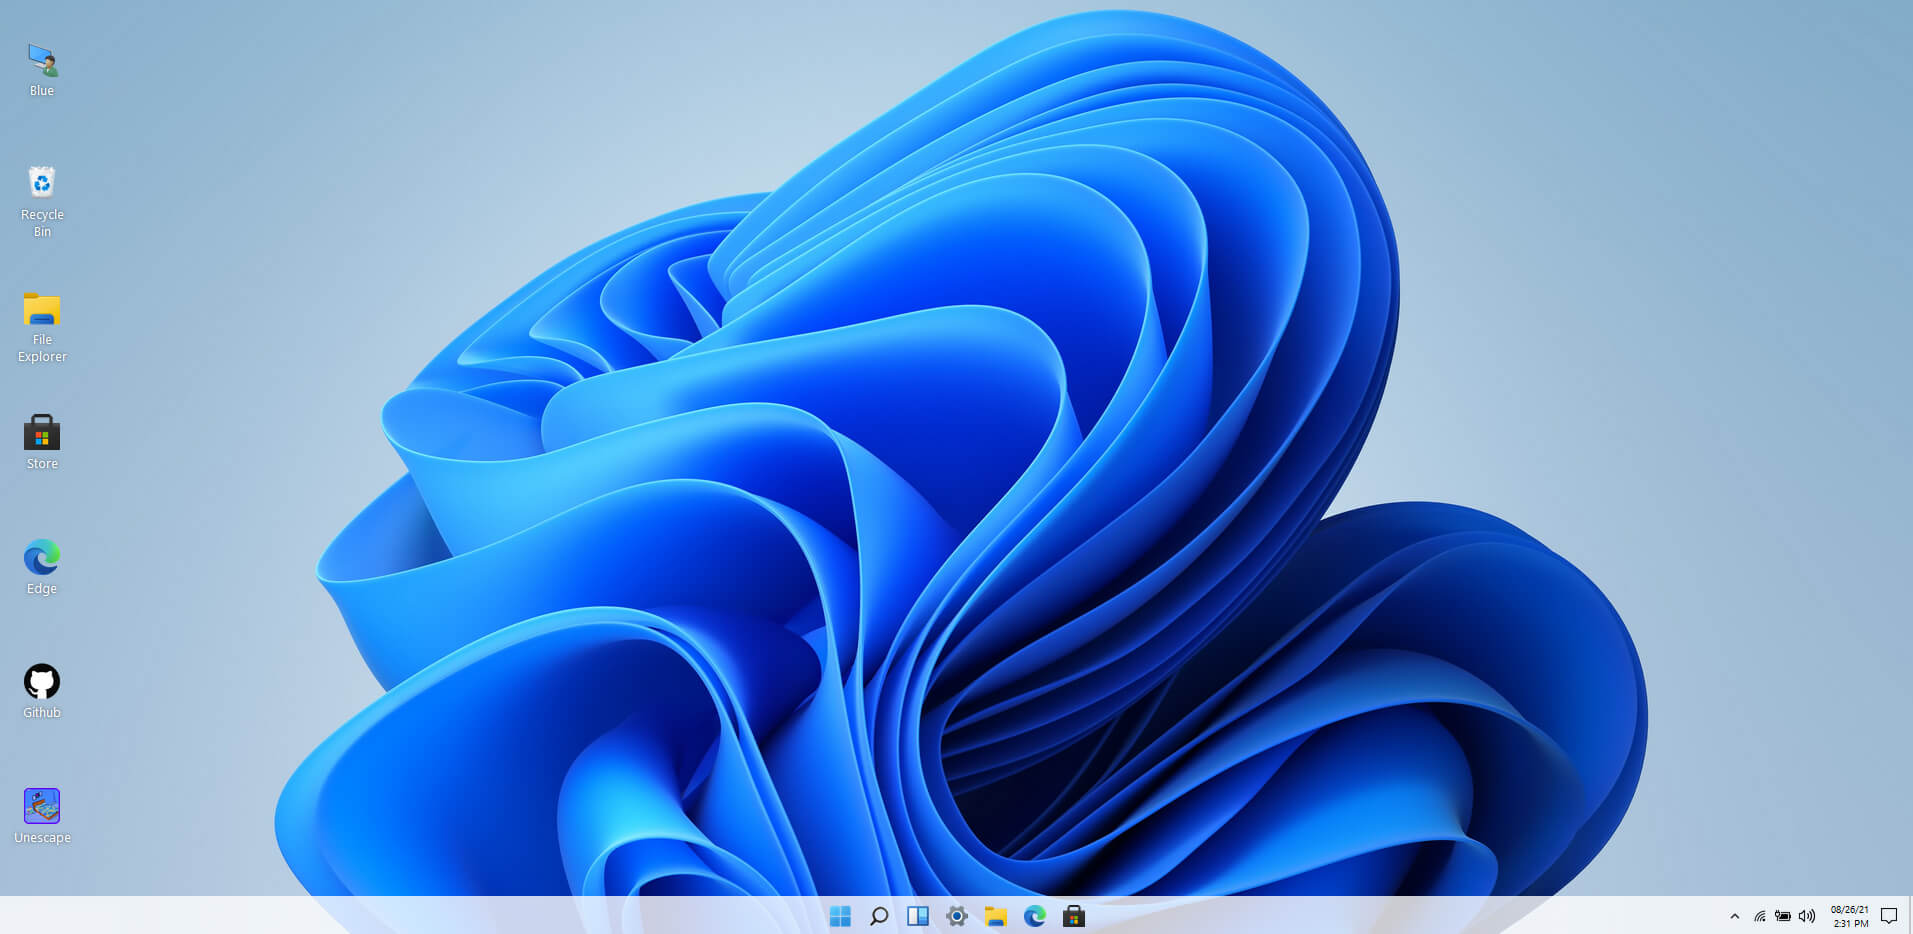 Windows 11 release date is closing in, some people have tried it via insider build, some have decided not to. It has come to our attention that there is a little website made by BlueEdge that offers a virtual Windows 11 desktop.
Opening the Website will put you right inside Windows 11 desktop, now take note that this is not Windows 11, it is a simulation of Microsoft’s newest OS and therefore many things will not work like File Explorer, etc.
One thing you can make sure it is working is UI itself, you can see how you do like the new Taskbar, start menu, widgets, and some other things. You can just pop up on the site and check how you do like the overall new look and feel of Windows 11 UI before installing it or trying it.
We are sure that many more options will come in time but even now you can get a feel of the newest OS.
Windows 11 BlueEdge site:
Windows 11 release date is closing in, some people have tried it via insider build, some have decided not to. It has come to our attention that there is a little website made by BlueEdge that offers a virtual Windows 11 desktop.
Opening the Website will put you right inside Windows 11 desktop, now take note that this is not Windows 11, it is a simulation of Microsoft’s newest OS and therefore many things will not work like File Explorer, etc.
One thing you can make sure it is working is UI itself, you can see how you do like the new Taskbar, start menu, widgets, and some other things. You can just pop up on the site and check how you do like the overall new look and feel of Windows 11 UI before installing it or trying it.
We are sure that many more options will come in time but even now you can get a feel of the newest OS.
Windows 11 BlueEdge site: