In this post, you will be guided on what to do if the Recent Items are no longer visible in the Taskbar icons in Windows 10. This can be quite inconvenient especially if you work simultaneously on many files and documents together and would require you to visit them regularly to incorporate changes. Thus, if you find that the Recent items are not visible in the Windows Taskbar, read on.
In order for the Recent Items to appear on the taskbar icons in Windows 10 again, there are four potential fixes you can check out. You can try to show the recently opened items via Settings or clear the cache of the recent items. You could also make some changes in the Windows Registry or use the Group Policy Editor.
But before you proceed with these potential fixes, it’s best if you create a System Restore Point first just in case something goes wrong after you made changes in the system. The System Restore Point allows you to undo these changes and bring back the previous state of your computer. Thus, you need to create one and then carefully follow the given options below.
Option 1 – Show the recently opened items via Settings
The first thing you can do to fix the problem is to show the recently opened items through the Settings app.
Open the Settings app and select Personalization.
From there, select the Start option and scroll down until you see the “Show recently opened items in Jump Lists on Start or the taskbar” option.
Make sure that its toggle button is turned on.
Option 2 – Try to clear the Recent Items cache
Tap the Win + E keys to open File Explorer.
Next, copy and paste this link on the address bar: %AppData%Microsoftwindowsrecentautomaticdestinations
Once you’re in the given location, you should see multiple files. Now select all these files and completely delete them.
Note: These files are automatically recreated when you interact with the system like performing tasks such as opening apps or accessing files.
After that, go to this next location: %AppData%Microsoftwindowsrecentcustomdestinations
Once there, delete all of its files and restart your computer. This should resolve the problem.
Option 3 – Try making changes via Registry Editor
The next thing you can do to fix the problem is to apply some tweaks in the Registry by following these steps:
Tap the Win + R keys to open the Run dialog box and type “Regedit” in the field and hit Enter to open the Registry Editor.
Next, navigate to this registry sub-path: HKEY_CURRENT_USERSoftwareMicrosoftWindowsCurrentVersion
From there, select the Policies Explorer folder located in the left pane.
Then move to the right pane and look for the “NoRecentDocsHistory” entry and right-click on it.
Now delete this entry.
Note: This entry is the one that stores the Group Policy setting for “Do not keep the history of recently opened documents. The Group Policy adds this entry to the registry with a value of 1 if you enable the “Do not keep the history of recently opened documents” policy. On the other hand, if you disable the policy by setting it to “Not configured” or deleting it, the Group Policy will delete the entry from the registry, and the system will act as though the value is 0 – for instance, it keeps the history of the recently opened files in your computer.
Option 4 – Try to use the Group Policy Editor
Tap the Win + R keys to open the Run utility and type “gpedit.msc” in the field and tap Enter to launch the Group Policy Editor.
Next, navigate to User Configuration > Administrative Templates > Start Menu and Taskbar.
Afterward, double click on the “Do not keep a history of recently opened documents” policy located on the right panel. This is the policy that lets you enable or disable recent items and frequent places.
Now to enable the recent items, as well as the frequent places, feature, click on the “Disabled” or the “Not Configured” option.
Once you’re done, close the Group Policy Editor and restart your PC.
Note: If you choose to enable this setting, the system and Windows programs will not create shortcuts to documents opened while the setting is in effect. Aside from that, they also stay but won’t display the existing document shortcuts and the system will empty the Recent Items menu on the Start menu and the Windows programs won’t also display shortcuts in the Start Menu. In addition, the Taskbar won’t also show the recently opened or frequently used folders, files, or websites.
Computer crashes are one of the most annoying things that can happen to users. It often loses your data and work, you must spend extra time if you were in the middle of something and can even break Windows itself.
Before we move to the article I just want to say that technically there are no random crashes, there is always a reason why the system hangs up, why you received blue screen, annoying restarts out of nowhere and many more PC crashes. In this article, we will explore many possible reasons why something may occur and offer you straight forward solution on how to escape the situation and prevent it from happening again.
Without further delay, let's begin:
Check switch connectors and power outlets
Yes, sometimes the most basic approach provides the best results, check to see if your power outlet is stable and providing you with constant voltage, if not, maybe you want to invest in a UPS system so you do not face random shutdowns and restarts during work, also while you are at it, check to see if that reset and power switch are connected properly and that they are not dirty or loose.
Clean your PC and check connectors
Dirt can cause many issues with computers, from overheating to shutdowns to blue screens and memory dumps, check to see if your computer is clean enough and that all connectors are connected tight into their respective sockets.
Check the temperature of your CPU
CPU overheating can cause so-called random freezes and blue screens, the computer might shut down or restart also without any visible reason. Check to see if your fan on the CPU is working properly and change the thermal paste if needed.
Check the health of your hard drive
If your hard drive is beginning to go down the path of dying out, many issues can come from this condition. There are many tools on the internet and in Windows itself to check if your hard drive is working properly.
Run antivirus and firewall
Random lock-ups or similar issues can also occur if by any chance you have some malware on your system, run protection software, and keep it updated to make sure the issue does not come from the computer being infected with malicious applications.
Keep system clean
Have a habit to clean regularly system files and registries, keep removing unnecessary files from your computer and regularly update your Windows and applications along with drivers.
Run memory test
Bad RAM bank can cause many issues during the work, check it out to be sure the problem is not RAM itself.
Do not run applications that are too demanding for your system
Some applications require stronger hardware, and some require the latest hardware, if your computer is a little outdated, running a demanding application can cause issues like freezing, restarts, etc.
Remove applications you do not use
This does not seem like anything important but if you are not using a specific application just remove it from the system, why? Sometimes an application has some ties to certain services and if it is outdated can cause issues for newer ones.
Stop installing everything you find on the internet
Yes, that extension for chrome looks cool, yes, that fancy new player seems sick but if it is from an unverified source and from the unknown publisher without any reviews maybe you are better off with it. You can never tell what you might be placing into your system from the internet.
And that's it, 10 reasons and solutions on what to do on random computer freezes, crashes, etc.
0x80070002 error message triggers Windows update problems.
This error code pop prevents you from successfully updating Windows operating system and its installed components. Windows update is necessary to keep the system up to date and efficient.
It also helps you close security holes in your system and prevents your system from being infected by viruses or hacked.
Solution
Error Causes for 0x80070002
This error code pops up on the screen and results in an unsuccessful Windows update, when either your system has wrong date/time settings or when Windows update temporary folder is corrupted.
The latter cause is the one to be worried about as it usually results from malware, viral infection, and registry corruption and damage. If this error code is not fixed timely it can lead to system crash and failure too.
Further Information and Manual Repair of 0x80070002
The best way to fix the 0x80070002 Windows update error code is to download Restoro on your system. Restoro is a new, powerful, intuitive, and cutting-edge PC fixer that serves as both a registry cleaner and a system optimizer.
It is integrated with multiple performance-boosting and highly functional utilities. With this helper, you can resolve the maximum number and types of PC issues in a few seconds.
This tool spares you from the hassle of finding and detecting the underlying cause of the error 0x80070002. Its intuitive built-in technology automatically detects and identifies the error and its causes and repairs it right away.
Restoro includes utilities like registry cleaner, privacy issue detector, Active X and Class cleaner, and system stability scanner.
The registry cleaner feature assists users to clean up registry clutter.
This includes clearing junk files, temporary files, and invalid registry entries which take up all the disk space causing the registry to get corrupted and hampering Windows updates. It repairs the corrupt registry in no time allowing you to perform successful Windows updates.
Restoro Privacy Features
Nonetheless, if the error 0x80070002 occurs due to malware, Restoro will scan and repair it too. Its advanced privacy error anti-virus built-in feature scans for all types of malware, spyware, and viruses quickly and removes them from your PC.
This ensures that your PC remains safe from malicious malware that can cause unsuccessful Windows updates and error codes like 0x80070002.
Restoro is compatible with all Windows versions. It has a sophisticated and easy-to-use layout making it easier for users of all levels to use it without any complexity or hassle. It is safe and efficient. It also helps boost the speed of your PC thus lowering boot time tremendously.
For user safety, Restoro advises users to create backup files. This helps retrieve valuable data and files in the event of data loss during repair which rarely happens; but in case it does, you don’t have to suffer from a big loss.
Get Restoro
To get started, all you have to do is download and install Restoro on your system. After downloading, run it on your PC for a scan.
Once the scanning is complete, a comprehensive scan report will be displayed on your screen showing you the errors affecting your system including 0x80070002 errors that you’ve been experiencing when performing Windows updates.
To resolve issues on your PC right away, simply click on repair. This will repair the error 0x80070002 issues on your PC in seconds. After your PC is repaired, you can then perform a Windows update again. It will be executed successfully.
Click here to download Restoro today!
The STOP Code 0x0000008E is essentially an error code that is displayed on the STOP message. This STOP message is also commonly known as Blue Screen of Death or BSOD for short. When this error occurs, usually messages like,
“STOP: 0x0000008E” or “KERNEL_MODE_EXCEPTION_NOT_HANDLED”
are displayed to the user.
Solution
Download Available to Completely Repair Error 0x0000008e
Error Causes
These errors are commonly caused by failures of memory hardware. However, viruses, hardware failures or issues with the device drivers may also trigger them.
If this error code appears but Windows is successfully able to recover from it, then the message ‘Windows has recovered from an unexpected shutdown’ is displayed to the users.
Regardless of what causes these errors, it is of paramount importance that counteractive measures are taken as soon as the error appears.
Further Information and Manual Repair
While this error can be removed in many ways, the most effective ones are listed below as follows.
The screen might be a fluke. Restart your system; the blue screen that appears to you may not be what it seems.
Have you just modified or installed new hardware or driver? If yes, it is highly likely that the change you have made has triggered the error. If this is the case, it is strongly recommended that you revert back to the original settings and check whether the blue screen appears again or not. If it does, you can fix it by reconfiguring or removing the hardware you have recently installed. You can perform System Restore or you can go back to the previous versions if you have installed a new driver.
To keep this error from occurring in the future, it is strongly advised that you test your RAM. Damaged memory or one that’s unable to perform in the usual manner is often the reason this error occurs.
Ensure appropriate installation of your system memory. If you have installed memory in a way other than advised by your memory manufacturer that it may lead to STOP 0x0000008E error or other problems.
Misconfigured or over-clocked memory settings can cause STOP 0x0000008E errors as well. To remedy this situation, it is best advised to return the BIOS settings to their default level.
If you haven’t updated your Windows, apply all the updates you come across. Patches and service packs specifically address such issues.
Windows 11 has brought us a new and revamped settings application that will cover most personalization and overall settings for your operating system. But as much as the new settings app is tweaked and modified there are still some things that can be modified only inside Control Panel.
Since the Control Panel icon itself is somewhat not right away once clicked on the start button we are presenting you a couple of ways to open it so you can change each detail you want.
Via Start menu
The most straightforward and easiest way to reach and open the control panel is via the Start menu. In order to do it just click on the Start menu and type in the control panel. Then click on Control Panel Icon in the results.
Pin Control panel icon to the taskbar
In order to actually pin the control panel to Taskbar, you will need to open it first. Use the previous simple and fast steps in order to quickly open it then in the taskbar right-click on its icon. Choose Pin to Taskbar and close control panel. Now you can open the control panel quickly just by clicking it on its icon in the Taskbar.
Add Desktop icon
If you liked the idea to have an icon that you can click in order to fast open the control panel but you are not very fond of the icon being located in your Taskbar then let's place it on Desktop instead. In order to place a special control panel icon on the desktop, we will use Windows setting app. Open settings app with ⊞ WINDOWS + I and go to Personalization tab. Inside the personalization tab, go to Themes and click on Desktop Icon Settings. Check the box beside Control Panel and click on OK. The Control Panel icon will appear now on your Desktop and you can double click on it to launch it.
Run Control Panel from the Run dialog box
Same as in the previous version of Windows you can also open the Control Panel via Windows built-in run menu. This is mostly the preferred way to gain access to it by system administrators. Press ⊞ WINDOWS + R to open the run dialog. Inside dialog type in control and press ENTER. Control Panel will open right away.
Error Code 35 is a typical Device Manager error. It indicates information missing to properly configure your device. Error code 35 is usually displayed in the following format:
“Your computer's system firmware does not include enough information to properly configure and use this device. To use this device, contact your computer manufacturer to obtain a firmware or BIOS update. Code 35”
Solution
Error Causes
The 2 common reasons for Device Manager error code 35 are:
Outdated BIOS
Mis-configured, corrupted, or outdated Drivers
No matter what the reason may be, it is advisable to resolve the problem immediately without any delay otherwise you will be unable to use your hardware device.
Further Information and Manual Repair
Below is the list of the most effective and easy to perform solutions to resolve error code 35 on your PC. These solutions do not require any technical knowledge or understanding. Simply follow the instructions to resolve this error code.
Method 1 - Update the BIOS
BIOS (Basic Input/Output System) is the embedded software on the computer’s motherboard.
Though not all PCs have the same BIOS manufacturer, but the steps for updating the BIOS are similar for all versions.
Before you get started with the updating process, first identify your current BIOS version.
For this, go to the start menu and type msinfo32, and press enter.
Now click System Summary to view your BIOS version. Here you will see the version number and date.
Now check your PC motherboard manufacturer’s website to download the BIOS update for the model you own. Also, download any Read Me Files and documentation. These contain guidelines and precautions that you should know before you update.
Backup all your data and existing BIOS before you update the BIOS version. This will keep your data protected in case the attempt to update BIOS fails.
Also, when updating, make sure to use an uninterruptible power supply. Remember power outage or even a small power fluctuation can corrupt the BIOS which is something you don’t want.
Now it’s time to perform the update. Run the downloaded installer for the BIOS updating software. Double click on the executable file.
Look for a button names Update, Flash, or Run.
Click on it to start updating the new version
After the update is complete, your computer will restart automatically.
This will hopefully resolve the problem. However, if the error still persists then there is a possibility that the error code is related to outdated drivers. To resolve, try method 2.
Method 2 - Download Driver Assist to Update Drivers Automatically
Update drivers to repair error code 35 on your PC by simply downloading DriverFIX. This is a cutting-edge program deployed with an intelligent programming system.
It is compatible with all Windows versions.
It scans your PC for problematic drivers and updates them with the latest and compatible versions automatically and in a few seconds thereby repairing all Device Manager error codes including error code 35 generated due to outdated/corrupted drivers.
In addition to this, it updates all device drivers on a regular basis, so you don’t have to stress over and keep a track of what drivers on your PC need to be updated and when.
Click here to download DriverFIX to resolve Device Manager error code 35 today!
If you have a BlueTooth device on your computer, you know that each time you need to receive or transfer the file you need to find the icon in the system tray, right-click on it and choose the desired option. But there is a simpler solution, create a Bluetooth icon on the desktop so it is always easy to access.
Open File Explorer by pressing ⊞ WINDOWS + E
Go to C:\Windows\System32
Find fsquirt.exeRight-click on it and choose copy
Go to the desktop and right-click, choose pasteRename the file to Bluetooth
And, you are done!
The third time is charm saying goes but not when we are talking about Microsoft. Print spooler is again in focus, in a bad way.
This is the third print spooler vulnerability to emerge in just five weeks. While a critical flaw was originally identified and patched in June, a similar flaw came to light shortly after and was subsequently patched (with mixed success).
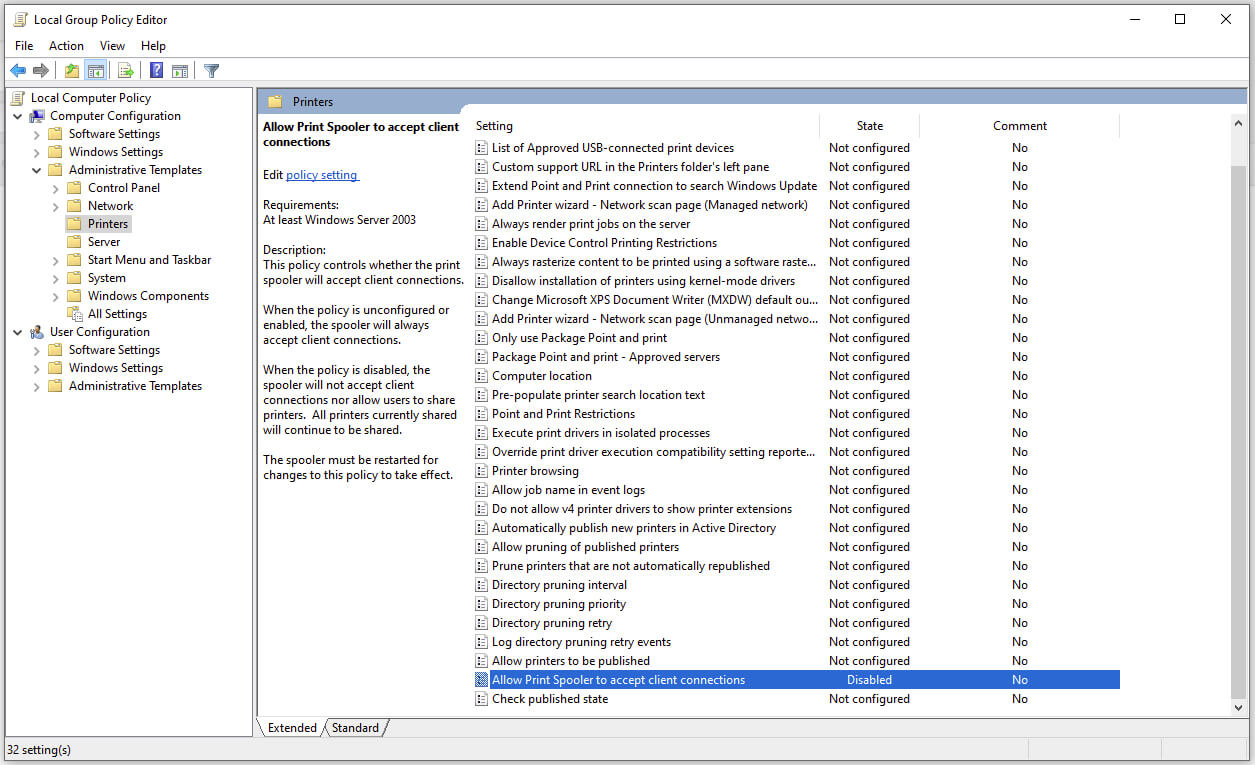
Microsoft is once again advising its customers to disable Windows print spooler after a new vulnerability that allows hackers to execute malicious code on machines has emerged. While a patch fixing the flaw will be released in due course, the most effective workaround currently on the table is to stop and disable the print spooler service entirely.
"An elevation of privilege vulnerability exists when the Windows Print Spooler service improperly performs privileged file operations. An attacker who successfully exploited this vulnerability could run arbitrary code with SYSTEM privileges. An attacker could then install programs; view, change, or delete data; or create new accounts with full user rights."
Stop this service right away or you are risking a potential attack.
Press ⊞ WINDOWS + X to open the hidden menu
Click on Power Shell (admin)
In Power Shell type in the following command to check if spool service is running: Get-Service -Name Spooler followed by ENTER
If spooler service is running type in the next command to stop it: Stop-Service -Name Spooler –Force and press ENTER
Then follow with this command to disable it at startup: Set-Service -Name Spooler -StartupType Disabled followed with ENTER
That’s it, we hope a patch will come soon for all the people that are using network printing and indeed need this service running in order to do work.
NoteHomepage (by MyWay) is a browser extension that may be bundled with other free software that you download off of the Internet, or delivered via other advertising means. When installed NoteHomepage will set the homepage and search engine for your web browser to http://search.myway.com.
While installing this extension will gather information from your browsing sessions, including website visits, clicked links, and sometimes even private information, that it later sends back to display unwanted ads into your browser.
Several anti-virus scanners have marked this extension as a Browser Hijacker and are therefore not recommended to keep on your computer. It is considered potentially unwanted, and many users wish to remove it, so it is flagged for optional deletion.
About Browser Hijackers
Browser hijacking is a form of unwanted software program, usually a web browser add-on or extension, which then causes modifications in the web browser’s settings. Browser hijacker malware is developed for many different reasons. Generally, browser hijacking is utilized for earning advertising revenue from forced advert mouse clicks and site visits. Even though it might seem harmless, these tools are designed by malicious individuals who always look to take full advantage of you, so that they can earn money from your naivety and distraction. Some browser hijackers are programmed to make certain modifications beyond the browsers, like altering entries on the system registry and letting other malware further damage your machine.
Find out how to identify a browser hijack
Below are some signs and symptoms that suggest your browser has been hijacked: the home page of your browser is changed unexpectedly; your browser is constantly being redirected to adult websites; the default search engine is changed; you are getting browser toolbars you have never noticed before; never-ending pop-up advertisements show up and/or your web browser popup blocker is disabled; your web browser gets sluggish, buggy, crashes regularly; Inability to navigate to certain websites, particularly anti-malware and also other security software websites.
So how exactly does a browser hijacker infect a computer?
Browser hijackers might use drive-by downloads or file-sharing networks or an e-mail attachment in order to reach a targeted PC. They could also come from add-on programs, also called browser helper objects (BHO), web browser plug-ins, or toolbars. Browser hijackers sneak into your computer in addition to free software application downloads also that you unknowingly install alongside the original. A good example of some infamous browser hijackers includes Babylon, Anyprotect, Conduit, SweetPage, DefaultTab, Delta Search, and RocketTab, however, the names are regularly changing.
Browser hijackers will affect the user’s web surfing experience severely, track the websites frequented by users and steal personal information, cause difficulty in connecting to the web, and eventually create stability problems, causing software programs and systems to crash.
Learn how to remove browser hijackers
Some hijackers can be removed by just uninstalling the corresponding freeware or add-ons through the Add or Remove Programs in the Windows control panel. But, many browser hijackers are difficult to get rid of manually. No matter how much you try to get rid of it, it might keep returning again and again. Additionally, manual removals demand in-depth system knowledge and thus can be a very difficult job for novices.
Industry experts always suggest users remove any malicious software including browser hijacker with an automatic malware removal tool, which is easier, safer, and quicker than the manual removal method. Employ a PC optimizer along with your anti-malware software to solve various registry issues, remove computer vulnerabilities, and boost your computer performance.
Download the software in Safe Mode with Networking
If the malware is set to run immediately when Windows starts, stepping into safe mode may block the attempt. Just minimal required applications and services are loaded whenever you start your laptop or computer in Safe Mode. To launch your Windows XP, Vista, or 7 PCs in Safe Mode with Networking, follow the instructions below.
1) At power on, hit the F8 key before the Windows splash screen begins to load. This would invoke the “Advanced Boot Options” menu.2) Select Safe Mode with Networking with arrow keys and press ENTER.3) As soon as this mode loads, you should have an internet connection. Now, get the malware removal software you want by utilizing the web browser. To install the program, follow the directions in the installation wizard.4) Immediately after installation, run a full scan and let the software remove the threats it discovers.
Switch over to an alternate browser
Some viruses may target vulnerabilities of a particular web browser that obstruct the downloading process. If you’re not able to download the anti-virus software program using Internet Explorer, this means malware is targeting IE’s vulnerabilities. Here, you need to switch to a different internet browser such as Firefox or Chrome to download the antivirus program.
Run anti-virus from a pen drive
To successfully get rid of the malware, you have to approach the problem of installing anti-malware software on the affected computer system from a different perspective. Adopt these measures to run the anti-virus on the affected computer system.
1) Download the anti-malware software on a virus-free computer.2) Plug the USB drive into the clean computer.3) Double click on the downloaded file to open the installation wizard.4) Select flash drive as the location when the wizard asks you exactly where you wish to install the application. Follow the on-screen instructions to finish the installation process.5) Remove the flash drive. Now you can utilize this portable anti-malware on the affected computer.6) Double-click the anti-malware software EXE file on the USB drive.7) Press the “Scan” button to run a full computer scan and remove viruses automatically.
Technical Details and Manual Removal (Advanced Users)
To eliminate NoteHomepage manually, navigate to the Add or Remove programs list in the Windows Control Panel and select the program you want to get rid of. For web browser plug-ins, go to your web browser’s Addon/Extension manager and choose the add-on you want to disable or remove. You might also want to reset your home page and search providers, as well as clear your web browser cache and cookies.
Finally, check your hard disk for all of the following and clean your Windows registry manually to remove leftover application entries after uninstalls. Please be aware that this is for professional users only and could be challenging, with incorrect file removal resulting in additional PC errors. In addition to that, certain malware is capable of replicating or preventing deletion. You’re advised to do this procedure in Windows Safe Mode.
If the Error Code 0xC004C770 popped up on your computer during your activation of the Windows 10 software, don’t worry. This is a fairly common error, especially for people who own more than one computer upon which Windows 10 is installed and activated. The gist of this error code is that the product key that you have entered has already been claimed or used on a different computer. Because there are limitations on the number of computers that can use any given license activation code or product key, this error code can arise when you have exceeded that limit. If you have a single-use license and have already entered the particular product key onto another machine, you may see this error come up during activation.
Both Error Code 0xC004C770 and Error Code 0x803FA071 arise from the same problem and the same steps can be used to resolve both error codes.
Solution
Error Causes
Error Code 0xC004C770 is likely to appear on your screen during activation of Windows 10 if you or anyone else in your organization have already entered in the product key used on another computer. If you have a multiple-use license, the product key that you are entering may already have been used for the maximum number of computers allowed under that license.
Further Information and Manual Repair
There are two basic methods for addressing the issues associated with Error Code 0xC004C770. These methods can easily be implemented by anyone who is comfortable interacting with the Windows Store from their computer, which makes the resolution of this particular error code fairly simple and straightforward.
If you are unable to complete the steps below or Error Code 0xC004C770 has not been resolved after following the guides below, contact a Windows technician who is familiar with the Windows 10 activation process to assist you in the process. You can also get in touch with the Windows technical support team to assist you in the process if needed.
Method One: Purchase A New Product Key from Windows
If you have already used the product key on another computer or have used it on the maximum number of allowed devices, you may need to purchase an additional product key for the computer with Error Code 0xC004C770. Product keys can be purchased physically from a retailer that sells Windows 10 software licenses or purchased directly from the Windows store.
To purchase a new product key directly from the Windows Store, follow the steps below:
Step One: Select the Windows start button at the bottom of your toolbar. Click on “Settings,” then select the option for “Update and Security.”
Step Two: Click on the “Activation” option.
Step Three: In the menu that appears, choose the option to “Go to Store” and follow any on-screen instructions to finalize a purchase of the Windows 10 software and product key.
Step Four: Use the new product key to complete the installation and activation of the Windows 10 software on your computer.
If you are unable to see the “Go to Store” option when you reach the “Activation” page, you may not be set as an administrator of your machine. In this case, get in touch with the support personnel from your company to complete the purchase, installation, and activation process on your computer.
Method Two: Attempt to Finish Activation via Phone
For users who have changed out parts of their computer’s hardware, like putting in a new motherboard or activating a new hard drive, you may have more success if you attempt activation through a phone.
In order to activate your copy of Windows 10 from your phone, follow the steps below:
Step One: On your mobile device, open up the search box from the taskbar.
Step Two: In the search box, enter the phrase “SLUI 04.”
Step Three: Select the “SLUI 04” option that appears.
Step Four: Follow the directions given on the screen to complete the activation process for your copy of Windows 10.
As with any error code resolution, if the methods above are not successful or if you are not comfortable with your ability to successfully complete the steps above, get in contact with a qualified professional who is trained in the Windows 10 activation process to assist you or download a powerful automated tool to get the job done.
Disk partitioning is a concept that’s been around for so long, but is still only familiar to few. If done right, it can help get your computer in perfect order.
Today we bring you a simple definition of disk partitioning, its pros and cons, and a quick tip on how to do it properly to reap its full benefit!
Definition and purpose
The simplest way to define disk partitioning would be: it’s exactly what it sounds like. It means taking a hard disk drive and separating it into different segments. These segments are called partitions. You can visualize it as cutting a cake into smaller pieces - not necessarily of the same size, though.
So what is the purpose of these pieces?
Well, when you first get a hard drive, it’s basically just a bunch of unallocated storage space. Until there’s at least one partition, this space is unusable to your operating system. Once you create a partition, your OS will recognize it as usable storage space.
You can choose to create a single partition and use it for all your files, from program files to personal data. A lot of off-the-shelf computers come with one primary partition like this and a small secondary one reserved for recovery purposes.
Whether or not you want to split your disk into more than one segment is up to you. We would generally recommend it, though. The whole point of partitioning is for each segment to have its own purpose.
So treating all your storage space as a single unit containing different file types would be like constructing an office building with only one massive room for everything - day-to-day work, conferences, interviews, etc. And all of this for different departments of the company. You can see how this might get a little messy.
Creating multiple partitions eliminates the task of running several different types of files from the same place. This takes a heavy load off the entire process of accessing data.
Disk partitioning also brings a ton of other benefits to the table. An important disclaimer, though: there are disadvantages too. We will walk you through both sides to help you get an objective idea and make an informed decision.
Source: Kina on Unsplash
What are the benefits of disk partitioning?
1. Better file organization
This is the most obvious and perhaps the biggest advantage of partitioning your hard drive.
As we already mentioned, partitioning allows you to create separate segments for different file and data types. You wouldn’t want to use the same partition for your system files and for games, would you?
If organization and time management are important to you, then multiple partitions are the right solution. Searching for specific files will be much easier overall. Say you have one hard drive, but three partitions: C for the system files alone, D for multimedia files and documents, and E for games and apps. Your computer loads the system from C without interference from the other two, and you know exactly where to look when searching for a file.
2. Easy reinstallation
File management isn’t the only thing made faster and simpler thanks to partitioning. If you opt for creating multiple segments on your drive, reinstalling Windows will be easy peasy.
That’s because all you need to do is format the partition your system is on. Then you reinstall the OS on it, and there you go. Now you have a clean installation, with all your files saved on other partitions intact. You can even make a copy of your system partition, so you can revisit the exact same installation in the future if you want. And the whole time your pictures, music, documents stay exactly where you left them.
Source: Andrew M on Unsplash
3. Possibility of using multiple file systems
By now you’ve understood that partitions function completely separately. This means that, if for some reason you need multiple file system capabilities, partitioning will allow that.
One segment could be used for, say, an NTFS file system, while another could run ext or APFS.
4. Running different OSes
You’re an avid Windows user but need to use Linux on the side? No problem. You don’t need to buy a separate computer or anything. The possibility of running different file systems also means you can use partitioning to run multiple operating systems.
Doesn’t that sound enticing? One machine for multiple totally different uses!
5. Backup and recovery made simple
Data loss can happen on any disk, partitioned or not. However, it’s much easier to get it back on a partitioned one. You know where you stored what, and each partition can be backed up exactly as it is. It’s also a lot faster to back up single partitions than entire hard drives.
Ultimately this also means a faster path to recovery. If you lose or accidentally delete important files and data, you might want to use a recovery tool like Recuva to scan for them and get them back. Recuva is even powerful enough to recover data from damaged hard drives. But no matter how powerful, scanning a whole drive is strenuous for any recovery tool. Scanning independent partitions is a lot more convenient than that, and will get you to your goal more efficiently.
6. Optimized performance
Now, let’s keep in mind that computer performance is influenced by a number of factors. Partitioning alone isn’t what makes it better or worse. However, it can contribute to optimization. It’s easier for your computer to scan, say, a 40 GB partition to fetch the system file it needs than scanning the entire capacity of your drive.
7. Improved security (possibly*)
Separate partitions can help make your system more secure. Firstly, they minimize file corruption. If one partition gets corrupted, the others should remain unaffected. And keeping in mind the previous point about backup and recovery, ‘fixing’ the damaged partition would be much easier than fixing the entire hard drive.
Partitioning also improves security in terms of malware protection. A malicious attack on one partition is easier to deal with than malware on the whole drive. If your system partition gets infected, you can simply reinstall your OS and that should do the trick.
*Do keep in mind that partitioning can’t defend you against more advanced attacks. So make sure not to give in to a false sense of security.
What are the disadvantages of partitioning?
1. Data is still vulnerable
Yes, it’s easier to back up and recover data from independent partitions. And yes, partitioning may help protect separated files and data to a higher degree. But remember: everything is still on a single physical drive. So while digital errors and issues may be easier to deal with on partitioned drives, physical damage obviously won’t be.
If your hard drive is destroyed in some way, all data on it will be gone. That’s why, if you have crucial files on your PC, it’s important to give them the proper backup treatment before it’s too late.
2. Disbalance of space
Allocating storage space on separate partitions may be a little more tricky than you think. You may fill up one partition a lot faster than another. So on one side you’re struggling with space, and on another you have too much of it to spare. Imagine nearly filling up your system partition and then it turns out you need a lot more space for its updates than you thought.
That’s why you really have to be sure you actually have enough files of different types that you need help managing efficiently. Otherwise you’ll just create a struggle and disbalance in terms of storage.
3. Increased risk of error
If done incorrectly, partitioning can lead to more harm than good. Aside from space disbalance, there is an increased risk of incorrect partition sizes and formatting. Plus, human error is also a factor: in a moment of distraction, you may erase one partition when you meant another. Undoing such mistakes will definitely be tedious and time-consuming.
4. SSDs eliminate the need of partitioning
SSDs (solid-state drives) don’t function in the same way that HDDs do. They have faster read times and can organize files on their own. This quite literally eliminates the need for organization on your part.
Partitioning: yes or no?
The bottom line is that multiple partitions might not be necessary for the average user. But if you’re planning on storing many file types or different file and operating systems on the same PC, then you should give it a shot. It’s also an excellent solution for businesses, of course.
And if our pros and cons list isn’t enough to help you decide, you can always send us a message and we’ll help you make the right choice.
Decided to partition your hard drive?
If you’ve decided to give it a go, you definitely should make sure to do it right.
The two most effective and reliable ways to partition are using the built-in options on Windows or investing in a dedicated partitioning tool, like the EaseUS Partition Master. Which one you'll opt for depends on your specific needs.
Option 1 may be more suitable for users with at least some level of experience. In this case, you’d have to know exactly which steps to take without making errors. This is done in Disk Management on Windows 10/11. From there, you can select the partitions you’d like to split into different volumes of selected sizes.
If this is your first time partitioning, we highly suggest you either consult professionals for this or move on to option 2. The EaseUS partitioning software is specifically designed for beginners, with an intuitive interface helping you succeed in the process. All you need to do is pick the Partition Master package tailored to your needs and follow their guide.
Each package offers technical support as well, and even free upgrades (to varying degrees based on your subscription). Plus, all of this is valid for not one, but two PCs.
It’s the perfect solution for a smooth and error-free partitioning process. If you want to organize your hard drives efficiently and make the most of all your space without doing irreparable damage, it’s definitely worth the investment.

 Before we move to the article I just want to say that technically there are no random crashes, there is always a reason why the system hangs up, why you received blue screen, annoying restarts out of nowhere and many more PC crashes. In this article, we will explore many possible reasons why something may occur and offer you straight forward solution on how to escape the situation and prevent it from happening again.
Without further delay, let's begin:
Before we move to the article I just want to say that technically there are no random crashes, there is always a reason why the system hangs up, why you received blue screen, annoying restarts out of nowhere and many more PC crashes. In this article, we will explore many possible reasons why something may occur and offer you straight forward solution on how to escape the situation and prevent it from happening again.
Without further delay, let's begin:

 Since the Control Panel icon itself is somewhat not right away once clicked on the start button we are presenting you a couple of ways to open it so you can change each detail you want.

 Microsoft is once again advising its customers to disable Windows print spooler after a new vulnerability that allows hackers to execute malicious code on machines has emerged. While a patch fixing the flaw will be released in due course, the most effective workaround currently on the table is to stop and disable the print spooler service entirely.

