Logo

"Stop Running This Script" Error - How to Fix It

Stop Running This Script Error - What is it?

"Stop Running This Script" Error is a Windows Internet Explorer error message that is displayed in the following format with a yes and a no button:

Stop running this script?

A Script on this page is causing your web browser to run slowly.  If it continues to run, your computer might become unresponsive.

This occurs when some scripts take an excessive amount of time to run. To be precise, there are some websites that use JavaScript, JQuery, and Active X scripts to run.

These scripts are notorious for taking too much time to run. So, if you use the Internet Explorer as your web browser, then by default if the website takes a long time to load, the ‘Stop running this script error will be triggered.

Other than this, if you are scripting an Active X control on the web page to transfer a very heavy file or run a huge database query, this may cause delays and lead to the error display.

However, if you use Firefox, then the ‘Stop running this script error code will be promoted as ‘Unresponsive Script’ error.

Solution

Restoro box imageError Causes

The ‘Stop running this script error code’ is triggered due to multiple reasons. These include:

  • Webpage programming errors
  • Running a pop-up killer
  • Spyware and viral infection
  • Active X control errors

Further Information and Manual Repair

Here are some of the best methods that you can try to resolve Internet Explorer’s ‘stop running this script error’ on your PC:

1. Change the Internet Explorer Settings

This can be done by opening Internet Explorer and in the top menu, click on Tools, and then go to Internet Options. Now click on the Advanced Tab option. Locate where it says ‘Disable Script Debugging’.

Once you find it uncheck the box beside it. Now close the browser and restart your PC. Access the same website on your IE web browser and see if the website opens. If it does, then the error is resolved.

However, if it doesn’t, then you the underlying causes for the stop running this script error message could either be spyware or ActiveX control error.

2. Download Restoro

Whether the error occurs due to spyware invasion of Active X control error, it is advisable to download Restoro on your PC.

This is a next-generation, innovative, and multi-functional PC repair tool that has several powerful utilities deployed together in one program.

Plus you don’t have to get into the technicalities of resolving Active X control issues.

Restoro is safe, bug-free, and efficient. It has a user-friendly interface and simple navigation which makes it quite easy for all levels of users to operate. It is compatible with all Windows versions including Windows 7, 8, XP, Vista, 8.1, and 10.

This PC repair tool is a one-stop solution for all your script error repair needs. It includes the following utilities: a registry cleaner, a system stability detector, and an ActiveX control error scanner.

It simultaneously scans for ActiveX control errors too. So, if the IE script error is triggered by ActiveX control issues, it resolves them too.

To fix the ‘stop running this script’ error code on your PC, click here to download Restoro

Do You Need Help with Your Device?

Our Team of Experts May Help
Troubleshoot.Tech Experts are There for You!
Replace damaged files
Restore performance
Free disk space
Remove Malware
Protects WEB browser
Remove Viruses
Stop PC freezing
GET HELP
Troubleshoot.Tech experts work with all versions of Microsoft Windows including Windows 11, with Android, Mac, and more.

Share this article:

You might also like

How to Fix Runtime Error 339

What is Runtime Error 339?

Runtime Error 339 is a common error code format that appears when a computer overloads with too much data. However, in some cases, it may occur due to the missing registry keys, DLL files, or during installation. It may lead some programs to shut down all of a sudden and may also corrupt files on the system.

Solution

Download Available to Completely Repair Runtime Error 339

Restoro box imageError Causes

This error code is alarming as it is a critical sign of an unstable system followed by improper maintenance of the computer. The potential risks associated with the Runtime Error 339 include:
  • System startup issues
  • Slow PC performance
  • System crash and failure
  • System file corruption
Therefore, to avoid these risks and system failure, it is advisable to fix the runtime error 339 immediately.

Further Information and Manual Repair

If you have a Runtime Error 339 issue on your computer, here is a great way how you can fix it right away:

Scan For Viruses

Improper maintenance of the computer indicates that your system might be exposed to viruses and malware. Viruses can modify the Windows registry and lead to Runtime Error 339. Therefore, first, it is important to scan for viruses on your PC.

Identify Software that Causes Errors

Scanning will help you identify software that produces this error on your PC. Once you identify them, either uninstall them or update the program. To uninstall the program, go to the Control Panel and then click on the Add/Remove program if you have Windows XP, if not then click on the Programs and Features item. Now delete the program from your system.

Obtain the Latest Version of the Installer and Re-install the Deleted Program

Once you get your hands on the latest version of the installer, run it on your system by following the on-screen instructions. Install the program. There is also another way to fix Runtime Error 339 and that is by downloading the Runtime Error tool.

Use a Professional Runtime Error Fixer Tool

To fix the error you can also use a professional Runtime Error fixer tool to scan for viruses on your PC. It is available for free download here. Download the tool and install it on your computer. Simply scan your PC after installation. Click the repair button once the scan is complete. This tool fixes problems in just a few minutes.
Read More
Chrome browser downloads stuck at 100%
These days, Google Chrome is definitely one of the most used browsers in the browser. Google has almost created a nearly perfect product that rarely experiences problems. However, a lot of users have reported an issue where some files they’re downloading or their downloads in their Google Chrome browsers are stuck at 100%. So if you are one of these users, read on as this post will guide you on what you can do to resolve the problem. This kind of problem could be caused by several factors. It is possible that the file download process could be blocked by a third-party antivirus or it could be that the content-length header could be missing from the server. Aside from that, a Google Chrome extension could also be the culprit or it could be that the current installation of the browser could be corrupted. This kind of problem can get really annoying as the download process has already utilized system resources as well as take up your time. Thus, you need to fix the problem using several suggestions. You can try to clear the browser cache, disable the Chrome virus scan, whitelist the file on the third-party antivirus program, put your browser in Incognito mode and download the file again. On the other hand, you could also try to reset or reinstall the browser. For more details, follow the options provided below.

Option 1 – Try to clear browser cache and try downloading again

There are times when some data in the browser is conflicting with the loading of the website and triggers some problems like download getting stuck at 100%. And so you can try to clear your browser’s data. This might be a very basic solution but oftentimes it works in fixing this kind of error in Google Chrome. Follow the steps below to clear the data in your browser.
  • Open your Google Chrome browser.
  • After that, tap the Ctrl + H keys. Doing so will open a new panel that allows you to delete the browsing history and other data in your browser.
  • Now select every checkbox that you see and click on the Clear data button.
  • Then restart your Chrome browser and check if you can now complete the download again.

Option 2 – Try disabling Chrome virus scan

The next thing you can do to resolve the problem is to disable the Chrome virus scan. It is possible that the virus scan is the one that’s preventing the download to be completed, thus, try to disable it and see if it works.

Option 3 – Whitelist the file you’re downloading in your antivirus program

The download getting stuck might also be caused by your antivirus program which could be interfering it from running. To fix this, you have to whitelist dism.exe. How? Refer to these steps:
  • Open the Windows Defender Security Center from the system tray area.
  • Next, click the “Virus & threat protection” option and then open the “Virus and threat protection settings”.
  • After that, scroll down until you find the “Exclusions” and click on the “Add or remove exclusions” option.
  • Then click the plus button and select the type of exclusion you want to add and from the drop-down list, select Folder.
  • Next, navigate to this path and select the WinSxS folder: C:/Windows/WinSxS
  • When a User Account Control or UAC prompt, just click on Yes to proceed.

Option 4 – Try downloading the file in Incognito mode

There are certain browser extensions, especially those security programs, that prevent any suspicious files from being downloaded. So the easy way to fix the problem is to launch the Chrome browser in Incognito mode and then try to download the file again. Additionally, you might want to consider disabling the problematic extension.

Option 5 – Reset Chrome

Resetting Chrome can also help you fix the problem. This means that you will be restoring its default settings, disabling all the extensions, add-ons, and themes. Aside from that, the content settings will be reset as well and the cookies, cache, and site data will also be deleted. To reset Chrome, here’s what you have to do:
  • Open Google Chrome, then tap the Alt + F keys.
  • After that, click on Settings.
  • Next, scroll down until you see the Advanced option, once you see it, click on it.
  • After clicking the Advanced option, go to the “Restore and clean up option and click on the “Restore settings to their original defaults” option to reset Google Chrome.
  • Now restart Google Chrome.

Option 6 – Try to clean reinstall Chrome

There are instances when programs leave files behind after you’ve uninstalled them and the same thing can happen to Chrome so before you reinstall Chrome, you have to make sure that you have deleted the User Data folder. To do so, refer to the following steps:
  • Hit the Win + R keys to open the Run dialog box.
  • Next, type “%LOCALAPPDATA%GoogleChromeUser Data” in the field and hit Enter to open the User Data folder.
  • From there, rename the default folder and name it something else, e.g. “Default.old”.
  • After that, install Google Chrome again and check if the issue is now fixed.
Read More
Activision Blizzard Sued by California
blizzard hqFollowing a two-year investigation by the California Department of Fair Employment and Housing, the state has filed a lawsuit against Activision Blizzard for fostering a "frat boy" culture in which female employees are allegedly subjected to unequal pay and sexual harassment. As reported by Bloomberg, Activision Blizzard is being accused by the state of California of discriminating against female employees at nearly all levels of employment, including in regards to compensation, promotion, assignments, and termination. The state alleges Activision Blizzard’s leadership has failed to address any of these outstanding issues or prevent them from occurring within the workplace. You can read the full details of the lawsuit here. The suit, filed Tuesday in the Los Angeles Superior Court, says Activision Blizzard, which is made up of about 20 percent women, assigns women, and women of color, to "lower paid and lower opportunity levels" with lower starting pay for similar work as their male counterparts. The documents also accuse Activision Blizzard of fostering a "pervasive 'frat boy' workplace culture in the office. Male employees are said to drink "copious amounts of alcohol" as they make their way through cubicles and "often engage in inappropriate behavior toward female employees." Male employees are said to come to work hungover, play video games during work "while delegating their responsibilities to female employees, engage in banter about their sexual encounters, talk openly about female bodies, and joke about rape." The lawsuit also cites one particular incident where a female employee, who was already subjected to intense sexual harassment at the company, committed suicide during a work trip with a male supervisor who allegedly brought inappropriate, sexual items with him on the trip. The lawsuit is asking for an injunction that will force Activision Blizzard to comply with workplace protections, as well as deliver unpaid wages, pay adjustments, back pay, and lost wages and benefits for female employees.

An Activision Blizzard spokesperson sent the following statement in response to the allegations:

We value diversity and strive to foster a workplace that offers inclusivity for everyone. There is no place in our company or industry, or any industry, for sexual misconduct or harassment of any kind. We take every allegation seriously and investigate all claims. In cases related to misconduct, the action was taken to address the issue. The DFEH includes distorted, and in many cases false, descriptions of Blizzard’s past. We have been extremely cooperative with the DFEH throughout their investigation, including providing them with extensive data and ample documentation, but they refused to inform us what issues they perceived. They were required by law to adequately investigate and to have good faith discussions with us to better understand and to resolve any claims or concerns before going to litigation, but they failed to do so. Instead, they rushed to file an inaccurate complaint, as we will demonstrate in court. We are sickened by the reprehensible conduct of the DFEH to drag into the complaint the tragic suicide of an employee whose passing has no bearing whatsoever on this case and with no regard for her grieving family. While we find this behavior to be disgraceful and unprofessional, it is, unfortunately, an example of how they have conducted themselves throughout the course of their investigation. It is this type of irresponsible behavior from unaccountable State bureaucrats that are driving many of the State’s best businesses out of California. The picture the DFEH paints is not the Blizzard workplace of today. Over the past several years and continuing since the initial investigation started, we’ve made significant changes to address company culture and reflect more diversity within our leadership teams. We’ve updated our Code of Conduct to emphasize a strict non-retaliation focus, amplified internal programs and channels for employees to report violations, including the “ASK List” with a confidential integrity hotline, and introduced an Employee Relations team dedicated to investigating employee concerns. We have strengthened our commitment to diversity, equity, and inclusion and combined our Employee Networks at a global level, to provide additional support. Employees must also undergo regular anti-harassment training and have done so for many years. We put tremendous effort into creating fair and rewarding compensation packages and policies that reflect our culture and business, and we strive to pay all employees fairly for equal or substantially similar work. We take a variety of proactive steps to ensure that pay is driven by non-discriminatory factors. For example, we reward and compensate employees based on their performance, and we conduct extensive anti-discrimination training including for those who are part of the compensation process. We are confident in our ability to demonstrate our practices as an equal opportunity employer that fosters a supportive, diverse, and inclusive workplace for our people, and we are committed to continuing this effort in the years to come. It is a shame that the DFEH did not want to engage with us on what they thought they were seeing in their investigation.

Conclusion

We will see how things work out, but I am not too optimistic for Activision Blizzard, truth to be told these reports are really bringing up some disturbing news on the sunlight. I just hope that all responsible will be brought to justice.
Read More
Fix 0xd00000e5, 0x8007139f, 0x80090030 PIN
The quickest and easiest way to log into your computer is when you use the PIN feature in Windows 10. Even though it is a bit slower compared to biometric logins such as Fingerprint and Iris scanning that comes under Windows Hello, the PIN feature is definitely less complicated. However, just like any other module of the software, it is also prone to some errors. In this post, you will be guided in fixing several PIN errors such as 0xd00000e5, 0x8007139f, and 0x8009003. These errors could be caused at different points in time like when you change or create a PIN or when you log into your computer. To fix the 0xd00000e5, 0x8007139f and 0x8009003 PIN errors, there are various solutions you can try. You may empty the contents of the NGC folder or remove and change the PIN or the password. You could also use the Group Policy Editor or reset the ACLs in the NGC folder as well as run built-in tools like System File Checker and the DISM tool.

Option 1 – Take ownership of the NGC folder and delete its contents

  • Boot your computer first into Safe Mode.
  • Next, you need to take ownership of the Ngc folder first and you can do that using Command Prompt.
  • Type “command prompt” in the Windows Search bar and then right-click on the relevant search result and select “Run as administrator”.
  • After that, if a User Account Control or UAC prompt appears, just click on Yes to proceed.
  • Next, type and enter this command: TAKEOWN /F C:WindowsServiceProfilesLocalServiceAppDataLocalMicrosoftNgc
  • Note that the <path> is the location of the folder or file in File Explorer.
  • Now type and enter this second command: ICACLS C:WindowsServiceProfilesLocalServiceAppDataLocalMicrosoftNgc /grant administrators:F
  • Finally, once the command has been executed, restart your computer.
  • Once your computer has restarted, delete all the contents in the Ngc folder and check if the error is now fixed.

Option 2 – Try to remove and change the PIN or password

The 0xd00000e5, 0x8007139f, and 0x8009003 PIN errors could be caused by some conflicting issues with the PIN or password you have set for the User Account of your computer. Thus, you have to remove or change the PIN or password to fix these PIN errors.
  • Remove the PIN by going to Settings > Accounts > Sign-in options.
  • From there, go to the PIN section and click on the Remove button.
  • You will be asked to verify your account to proceed in removing the PIN, enter your credentials.
  • Restart your computer and then set up a new PIN.
  • Once you’re done, restart your computer and check if the error is gone now.

Option 3 – Try to use the Group Policy Editor

  • Tap the Win + R keys to open the Run utility and type “gpedit.msc” in the field and tap Enter to open the Group Policy Editor.
  • Next, navigate to this policy setting: Computer Configuration > Administrative Templates > System > Logon
  • After that, double click on the “Turn on convenience PIN Sign-in” option located on the right-side panel.
  • Then set its radio button to Enabled. You will see the following description when you do so:
“This policy setting allows you to control whether a domain user can sign in using a convenience PIN. If you enable this policy setting, a domain user can set up and sign in with a convenience PIN. If you disable or don’t configure this policy setting, a domain user can’t set up and use a convenience PIN. Note: The user’s domain password will be cached in the system vault when using this feature. To configure Windows Hello for Business, use the Administrative Template policies under Windows Hello for Business.”
  • After setting the radio button to Enabled, it will turn on the Logins in your computer using the PIN.
  • Close the Group Policy Editor and restart your computer for the changes to take effect.

Option 4 – Try to reset the ACLs in the Ngc folder

  • Type “command prompt” in the Windows Search bar and then right-click on the relevant search result and select “Run as administrator”.
  • After opening Command Prompt with admin privileges, execute this command: C:/Windows/Service/Profiles/Local/Service/AppData/Local/MicrosoftNgc /T /Q /C /RESET
  • The command you entered will start checking for errors and fix them automatically.

Option 5 – Run the System File Checker scan and the DISM tool

System File Checker:

  • Tap Win + R to launch Run.
  • Type in cmd in the field and tap Enter.
  • After opening Command Prompt, type in sfc /scannow
The command will start a system scan which will take a few whiles before it finishes. Once it’s done, you could get the following results:
  1. Windows Resource Protection did not find any integrity violations.
  2. Windows Resource Protection found corrupt files and successfully repaired them.
  3. Windows Resource Protection found corrupt files but was unable to fix some of them.
  • Now restart your computer.

DISM tool:

  • Open Command Prompt.
  • Then type in the following commands and make sure to hit Enter right after you type each one of them:
    • Dism /Online /Cleanup-Image /CheckHealth
    • Dism /Online /Cleanup-Image /ScanHealth
    • Dism /Online /Cleanup-image /Restorehealth
  • After that, wait until the process is finished and do not close the window as the process will probably take a couple of minutes.
  • Once it’s done, restart your computer.
Read More
Fix Boot Device Not Found 3F0 Error
Today we will be solving the Device not found 3F0 error which is a common error, especially among HP (HP Pavilion G6), Lenovo, Acer, and Dell laptops/desktops. This error occurs when the computer is turned ON and when the system is about to boot. It can happen on windows 7,  8, or 10. When a mentioned error occurs one of the following messages will be displayed on your screen:
  • “No bootable device – insert boot disk and press any key”
  • “No Boot Device Found. Press any key to reboot the machine”
  • “Boot Device Not Found. Please install an operating system on your hard disk. Hard Disk (3FO)”
  • “No boot device is available”

The most common reasons for 3F0 error to occur is:

  • Using the unbootable device or disk to boot from.
  • If the bootable hard drive you are using might have corrupted or damaged somehow.
  • MBR or boot sector is damaged on the bootable hard drive.
  • If your system has gone through a virus or malware attack.
  • The wrong boot order in the BIOS.
  • Hard disk connection problem.
  • System files or boot files unknowingly damaged.
  • Corrupt hard drive partitions.
Now all of these being said let us go through some of the solutions and fix this dreaded error in order to get your computer back in working order:

1: Change Boot Order


This is well, the most simple solution and the easiest one, try to change the boot sequence in the BIOS settings of your motherboard. Sometimes most easier solutions can provide great results and solve our problems. If sadly this fails and the issue persists move to the next solution.

2: Perform a Hard Reset


Performing hard reset can often solve issues, to perform a hard reset do the following:
  • Turn off the computer and unplug the power adapter. If there is a removable battery, it should also be removed.
  • Then disconnect all peripherals, including the removable hard drive, etc.
then
  • Press and hold the power button for 15 seconds to drain all remaining power.
  • Insert the battery, and then re-plug the AC adapter into the laptop.
  • Press the power button to turn on the computer.
  • Once the computer starts up properly and the startup menu appears, use the arrow keys to select “Start Windows normally” and then press Enter.
Reconnect everything back of your peripherals. If by any chance problem still persists follow the next step:

3: Test Hard Drive Using HP Diagnostic Tool


Use the built-in tool in the Hp device to solve the issue:
  • Turn on your computer and keep pressing the Esc key until the menu appears on the screen.
  • Next, press the F2 key.
  • Choose the Components Tests option from the HP PC Hardware Diagnostics menu.
  • Select Hard Drive from the Component Tests menu.
  • Click on the Quick Test, then click on the Run once button.
  • If there are still any issues with your hard drive, then run the Extensive Test.

4: Restore BIOS Default Settings


  • Press the Power button to start the computer, and immediately after this, repeatedly press the F10 key to enter the BIOS setup menu.
  • To load and restore BIOS Setup Default settings, press F9 on the BIOS setup menu.
  • Once loaded, press F10 to Save and Exit.
  • Select yes, and then press Enter when it says Exit Saving Changes.

5: Reconnect Your Hard Drive


  • Turn the computer off and remove the power cable.
  • If you have a removable battery, take it out
  • Disconnect your hard drive and then connect it back.
  • Reassemble your computer and turn the computer on to see if it fixed the issue.

6: Fix and Rebuild Damaged MBR


  • Boot from the original installation DVD (or the recovery USB)
  • At the Welcome screen, click Repair your computer.
  • Choose Troubleshoot.
  • Choose Command Prompt.
  • When the Command Prompt loads, type the following commands: bootrec /FixMbr bootrec /FixBoot bootrec /ScanOs bootrec /RebuildBcd.

7: Fix Operating System


  • Prepare a Windows installation disc, CD/DVD or USB flash drive and connect it to your PC.
  • During the installation process, launch Command Prompt.
  • In Windows 7, under the System Recovery Options tab, click Startup Repair.
  • In Windows 8 and Windows 10, click Repair your computer, then select Troubleshoot > Advanced options > Automatic Repair (Windows 8) or Startup Repair (Windows 10).

8: Replace the Hard Disk

Read More
Permission to view object security properties
In an operating system, it is ideal for an administrator to have permission to access all the folders and files. However, there are times when you try to access the security settings or attempt to view the properties of a file, you could encounter an error saying, “You do not have permission to view this object’s security properties, even as an administrative user”. This kind of error may be caused by several reasons. For one, if your computer is infected with a virus or malware which might have caused some changes to the concerned folder or file. It could also occur if a program or service is using the folder or file simultaneously which explains why you’re not able to access the system. It could also be that the folder or file might have been owned by a user account that no longer exists or you might not have the permissions to view the targeted folder or file even though you’re logged in as administrator. To fix the “You do not have permission to view this object’s security properties, even as an administrative user” error, here are some options that might help.

Option 1 – Put your computer in a Clean Boot State

You can also troubleshoot the problem in a Clean Boot state. It could be that there are some third-party applications in your computer that’re preventing you from accessing security settings or properties of a file and to isolate this possibility, you need to boot your computer in a Clean Boot State and then try installing the program again. Putting your computer in this state can help you identify which program is the culprit and thus isolates the problem. In a Clean Boot state, your computer will start using only the pre-selected minimal set of drivers and startup programs. Note that you have to disable and enable one process at a time.
  • Log onto your PC as an administrator.
  • Type in MSConfig in the Start Search to open the System Configuration utility.
  • From there, go to the General tab and click “Selective startup”.
  • Clear the “Load Startup items” check box and make sure that the “Load System Services” and “Use Original boot configuration” options are checked.
  • Next, click the Services tab and select the “Hide All Microsoft Services” check box.
  • Click Disable all.
  • Click on Apply/OK and restart your PC. (This will put your PC into a Clean Boot State. And configure Windows to use the usual startup, just simply undo the changes.)
  • After you’ve set your computer into a Clean Boot State, try to check if the error is now fixed and that you can now view the Properties.

Option 2 – Try booting your computer into Safe Mode and delete inactive users

Aside from the Clean Boot State, you can also reboot your computer in Safe Mode and then delete all the inactive users. There are instances when the folder was created or owned by a user account that’s either deleted or inactive now and so you need to get rid of these inactive user accounts to resolve the error.
  • First, boot your computer in Safe Mode.
  • Then right-click on the concerned folder or file and select Properties.
  • Next, select Advanced in the Security tab and click on Add.
  • A new window will appear and from there, click on “Select a principal”.
  • And then type the name of the user to who you wish to give permissions in the “Enter the object name to select” box.
  • Now select Check Names and this would resolve the user name.
  • After that, click OK to save the settings. This will close the window and take you back to the previous one.
  • Next, from the drop-down menu, change the Type to Allow and select the Full Control checkbox.
  • Click OK to save the changes made and then restart your computer in a normal mode.

Option 3 – Try to take ownership of the folder or file

Another thing you can do to fix the problem is to take ownership and force the system into giving permissions to the Administrator. How? Refer to these steps:
  • Type “command prompt” in the Windows Search bar and then right-click on the relevant search result and select “Run as administrator”.
  • After that, if a User Account Control or UAC prompt appears, just click on Yes to proceed.
  • Next, type and enter this command: TAKEOWN /F <path>
  • Note that the <path> is the location of the folder or file in File Explorer.
  • Now type and enter this second command: ICACLS <path> /grant administrators:F
  • Finally, once the command has been executed, restart your computer and then see if you can now access the folder or file.

Option 4 – Try scanning your computer using Windows Defender

As mentioned, the error when accessing the security settings or properties of a folder or file might be due to a virus or malware. It could be that it had made some modifications that prevents you from accessing security settings or properties. To eliminate it, you have to scan your computer using security programs like Windows Defender.
  • Tap the Win + I keys to open Update & Security.
  • Then click on the Windows Security option and open Windows Defender Security Center.
  • Next, click on Virus & threat protection > Run a new advanced scan.
  • Now make sure that Full Scan is selected from the menu and then click the Scan Now button to get started.
Read More
How to switch to Dark mode in Windows 11
Dark mode
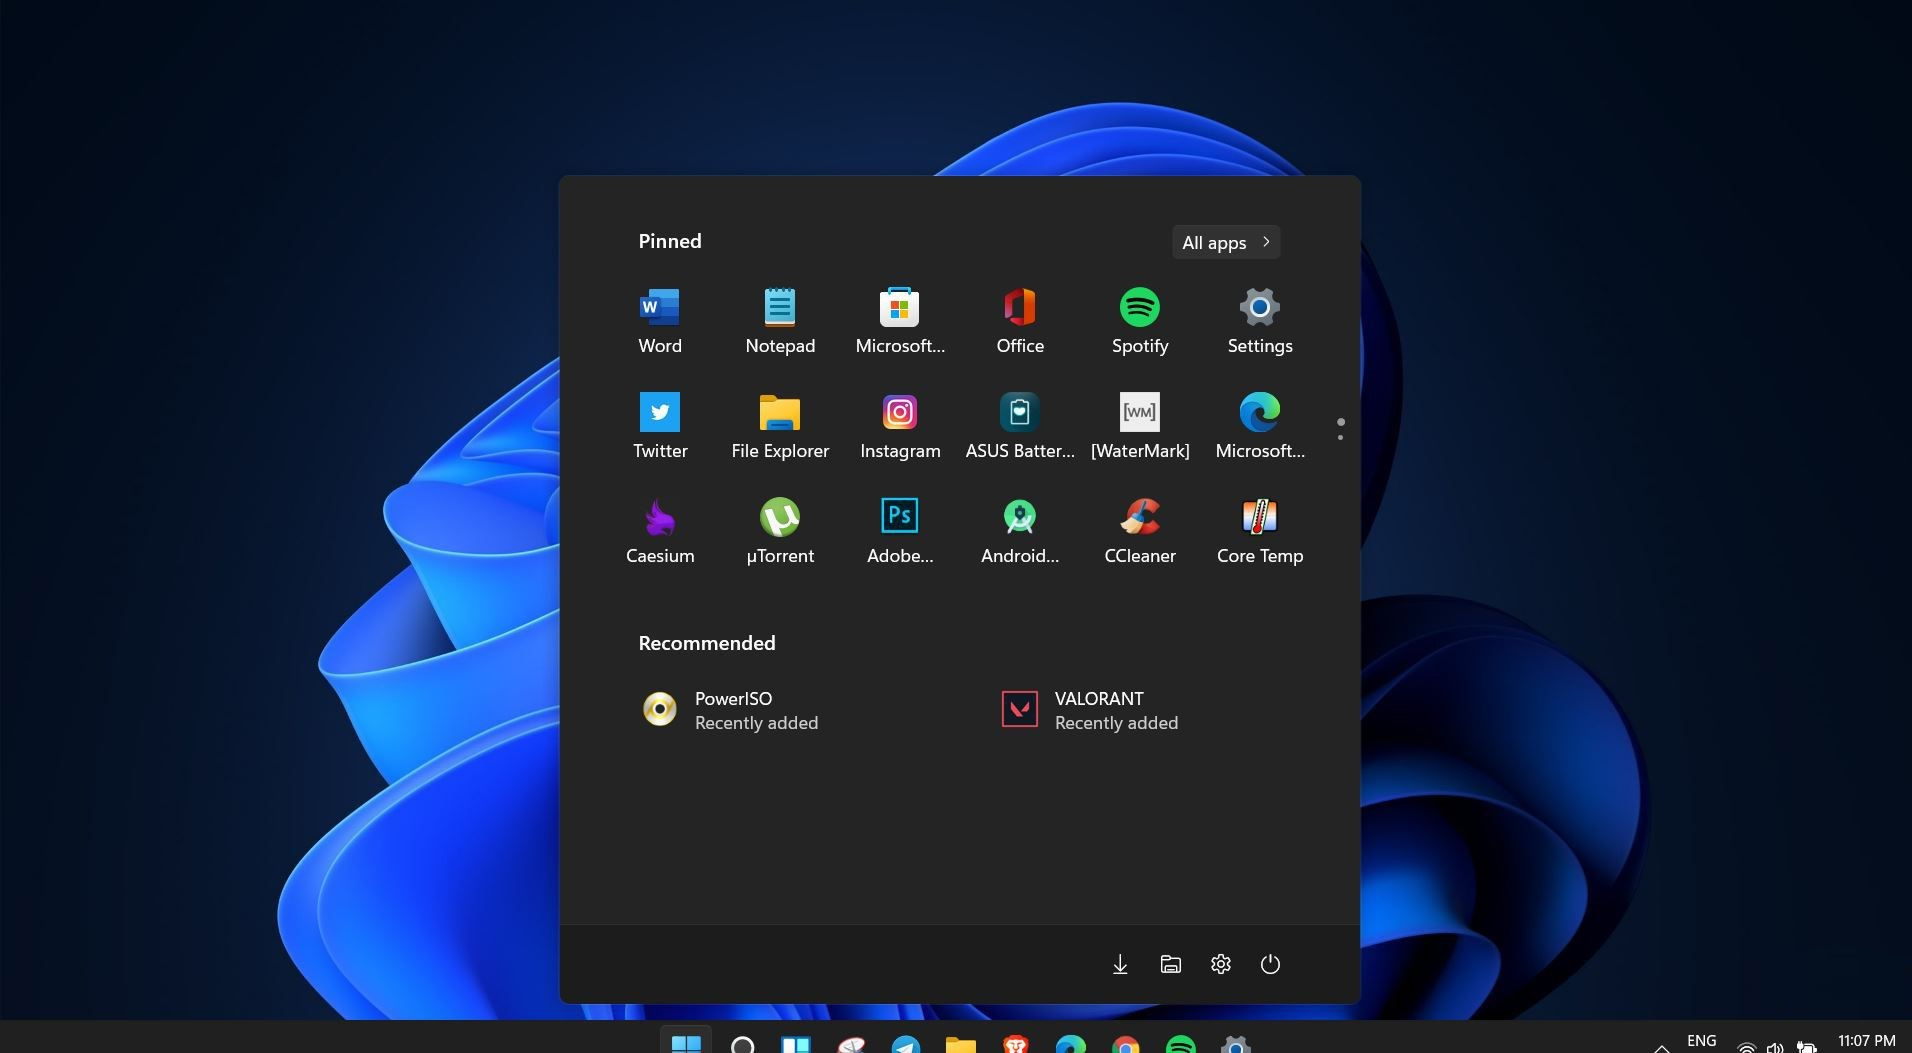
Windows 11 is coming soon, from its typical view and color scheme, Windows 11 will natively support dark mode. The dark mode is very popular in many applications today, some large companies like Adobe, Autodesk, and many more have already adopted a dark color scheme for their software so it is logical for others to follow and Microsoft is aboard for it. The dark mode itself has its benefits, for people who work on computer for longer period of time dark mode inside applications will throw less white and blue light on their eyes making workhours easier and pleasant on them. As a person who does indeed spend a lot of time in front of the screen, I would advise you to switch to dark mode regardless of the time that you spend with a computer, your eyes will be grateful.

Switching to Dark mode in Windows 11

  1. Open Windows 11 Settings by pressing ⊞ WINDOWS + I
  2. Click on Personalization on the left sidebar
  3. On the right side click on Color
  4. In color options click on the drop-down menu right next to Choose your color
  5. Select Dark
Your choice will be applied right away and you can safely close settings.
Read More
Disabling Auto Update in Chrome & Firefox
As you know, all the web browsers come with the support of auto-updates which include both Google Chrome and Mozilla Firefox. However, with these updates, the browser comes with the support of a new web APIs and better rendering. Although there could be a lot of problems that may arise due to these updates. These problems consist of depreciation of features, incompatibility with some websites, to name a few. It includes incompatibility with some websites, depreciation of features, and more. This might push someone to stop the auto-updates of these web browsers. So, in this guide, we will be checking out how to stop auto-update in Google Chrome and Mozilla Firefox on Windows 10. Thus, if you want to be rid of these issues, then you can disable the Chrome & Firefox auto-update and you can do that by either using the Windows Services Manager and the System Configuration utility.

Option 1 – Disable Chrome & Firefox auto-update via Windows Services Manager

The first thing you can do to disable the Chrome auto-update is through the Windows Services Manager. To do so, follow these steps:
  • First, tap the Win + R keys to open the Run dialog box.
  • Next, type “services.msc” in the field and hit Enter to open the Windows Services Manager.
  • After that, you will see a list of services and from there, look for the Google Update Services (gupdate) and Google Update Service (gupdatem).
  • Once you find these services, right-click on each one of them and select Properties and then make sure that the Service Status is set to be Stopped.
  • You should also select the Startup Type to Disabled and click on the Apply and OK buttons.
  • Now restart your computer. This should stop the automatic update of the Chrome browser.

Option 2 – Disable Chrome & Firefox auto-update via System Configuration utility or MSConfig

  • Tap the Win + R keys to open the Run utility and type “msconfig” in the field and tap Enter to open the System Configuration.
  • After that, go to the Services tab and uncheck the two entries, namely Google Update Service (gupdate) and Google Update Service (gupdatem).
  • Next, click on the Apply and OK buttons to save the changes made.
  • Restart your computer.
Note: Now that you’ve stopped the auto-update in Firefox, it’s time for you to stop the auto-update in Mozilla Firefox. To get started, follow the steps below.
  • Open the Mozilla Firefox browser and click on the hamburger menu located on the top-right portion of the screen.
  • After that, select Options and under the General panel and then go to the Firefox Updates section.
  • Next, click on the radio button for updates but select the option to let you install them.
  • You also have to uncheck the options named “Use a background service to install updates” and “Automatically update search engines”.
  • Once done, restart the Firefox browser. This should stop the automatic update.
Read More
New Windows 11 keyboard shortcuts
New Windows brings new keyboard shortcuts, most of them are tied to new features and we are presenting you some new ones that are worth remembering. keyboad shortcuts⊞ WINDOWS + N - notification panel ⊞ WINDOWS + W - News and Interests feed With the News and Interests feed, Windows 11 offers users the ability to check the latest news, the weather, and more without opening a browser window. ⊞ WINDOWS + Z - Snap Layout Instead of the usual two windows snapping capability, Windows 11 allow users to snap their windows in a three-column layout. Users can access this by pressing Windows Key and Z to access the Snap layout. ⊞ WINDOWS + PRT SCN - taking screenshots This one isn’t exactly new, but pressing the Windows Key and Print Screen will automatically capture the entire screen and save a copy of the image on your PC. Once the screen flashes, you will know that the screenshot has been taken, after which you can find the file saved under your Pictures folder in a subfolder called Screenshot. ⊞ WINDOWS + C - Microsoft Teams chat Microsoft Teams app, the service allows anyone with a Microsoft account to quickly start a chat using the Windows + C shortcut.
Read More
Repair Windows 10 Error Code 0xC1900200, 0x20008

Code 0xC1900200, 0x20008, What is it?

Error Code 0xC1900200, 0x20008 (Code 0xC1900202 – 0x20008)  is an error that occurs when you attempt to upgrade to Microsoft Windows 10, but the minimum requirements have not been met by your computer. You will therefore be unable to upgrade to Microsoft Windows 10 until your computer is updated or upgraded to meet those requirements. Common symptoms include:
  • When attempting to upgrade a dialog box with Code 0xC1900200 – 0x20008 (Code 0xC1900202 – 0x20008) is displayed.
  • Your computer is unable to begin the Microsoft Windows 10 upgrade process.

Solution

Restoro box imageError Causes

Error Code 0xC1900200 – 0x20008 (Code 0xC1900202 – 0x20008)  occurs when you are unable to begin the Microsoft Windows 10 upgrade because your computer does not meet the minimum requirements to run Microsoft Windows 10.
  • You are unable to begin the upgrade because your computer does not meet the required system or hardware specifications.
  • You are not running the correct version of Microsoft Windows to be able to begin the upgrade.
  • You are not running the latest updated version of Microsoft Windows 7 SP1 or Microsoft Windows 8.1. Error Code 0xC1900200 – 0x20008 (Code 0xC1900202 – 0x20008) as stated, simply means your computer does not meet the requirements to update and does not indicate a permanent problem or inability to continue to use your computer. This error only means that you will not be able to upgrade to Microsoft Windows 10 until your computer is made to meet these requirements.

Further Information and Manual Repair

There are several solutions that the user can complete at home that should fix the problem resulting in a manifestation of Error Code 0xC1900200 – 0x20008 (Code 0xC1900202 – 0x20008). Below are several options that should resolve this error.

Method 1:

Verify what version of Microsoft Windows you are currently running, older, outdated, or no longer supported versions of Microsoft Windows are not able to upgrade to Microsoft Windows 10. If you are not running one of the following versions you will have to update before being able to upgrade.
  • The most current version of Microsoft Windows 7 SP1
  • The most current version of Microsoft Windows 8.1

Method 2:

Your computer's system specifications do not meet the requirements to be able to upgrade to and run Microsoft Windows 10. To check your system specifications do the following.
  • Click on the start button in the bottom left corner, then locate the control panel on the menu, click on it to open.
  • Once it opens, locate system and security on the menu and click to open, click on system and this will show you your amount of RAM and processor speed.
  • Find device manager on the left-hand side click this then select display adapter, and it will show you your current video card.
  • Click on the start button again, then click on the computer in the menu, this will show you your hard drive size, and available space.
If you have the option available you can simply run the get Microsoft Windows 10 app to check compatibility. Once you have your system specs make sure they meet or exceed the following.
  • 1 GHz or higher processor or SoC
  • 1 gig of RAM for 32 bit and 2 gigs of RAM for 64 bit
  • 16 GB available hard drive space for 32 bit, 20 GB for 64 bit
  • Minimum of DirectX9 that has 1.0 WDDM
  • At least an 800x600 display
If your computer does not meet these minimum requirements, upgrade the components necessary to meet them. If you do not possess the technical expertise required to accomplish this yourself or do not feel comfortable doing so, download and install a powerful automated tool to get the job done.

Method 3:

Your computer might not meet the aforementioned requirements to make an upgrade because of insufficient hard drive space or resources. Learn how to create space on your computer.

Method 4:

Many people hold on to and use the same computer for a very long time. It is possible that your computer cannot be upgraded to meet the requirements, or that the cost to do so would be so high that a new computer would be cheaper. If that is the case, your only option may be to replace your computer.
Read More
1 2 3 171
Logo
Copyright © 2023, ErrorTools. All Rights Reserved
Trademark: Microsoft Windows logos are registered trademarks of Microsoft. Disclaimer: ErrorTools.com is not affiliated with Microsoft, nor claims direct affiliation.
The information on this page is provided for information purposes only.
DMCA.com Protection Status