Logo

Solution for Error 0x000000d1

What Is 0x000000D1 Error?

Error code 0x000000D1 is a serious error that is displayed when Windows automatically shuts down to protect the system against further damage.

Usually, when this error occurs, the message displayed to the users states something like STOP 0x000000D1 DRIVER_IRQL_NOT_LESS_OR_EQUAL.

Solution

Restoro box imageWhat Causes 0x000000D1 Error?

Usually, the STOP 0x000000D1 error code is caused by issues like incompatibilities, third-party drivers, driver conflicts, outdated drivers, malicious drivers, and other related problems.

Speaking technically, the message displayed to the user actually means that the kernel-mode driver has tried to gain access to memory at an unreasonably high process IRQL.

If left unfixed, STOP 0x000000D1 error can become quite serious. Increased frequency of occurrence may not only lead to data loss but can cause system corruption as well. That’s why it is crucial to fix it and to resolve the underlying issues causing it as soon as possible.

Further Information and Manual Repair

There are different ways of quickly fixing this error, some of which are briefly listed below as follows.

  • The solution advised for advanced users is to start the system and log on to it as the administrator. Then do to Start button. Click on All Programs -> Accessories-> System Tools->  System Restore. Here you will find the option, “Restore my computer to an earlier time”. Click on it and select ‘Next’. A list of restore points will appear in front of you. Select the latest restore point and then click on ‘Next’. The confirmation window will appear again. Click on the Next button again. Restart your computer. Congratulations, you have successfully restored your computer.
  • Another way that’s more suitable for novice users goes as follows. Download a repair utility tool. Now install the program. You are most likely to come across a Scan button. Once that happens, choose the Fix/Repair button. Your scan will be completed. The error will be removed. You can then restart your computer again to ensure the error is no longer displayed.

Some other suggestions to keep your computer from encountering these problems in the future are outlined below.

  • Update all your drivers. Obsolete or old hardware or software drivers may also trigger this STOP 0x000000D1 error.
  • If you have recently installed or modified a driver or hardware and the error has occurred afterward, it is highly likely that the installation or modification has caused it. Revert back to the original settings to steer clear of this driver in the future.

Do You Need Help with Your Device?

Our Team of Experts May Help
Troubleshoot.Tech Experts are There for You!
Replace damaged files
Restore performance
Free disk space
Remove Malware
Protects WEB browser
Remove Viruses
Stop PC freezing
GET HELP
Troubleshoot.Tech experts work with all versions of Microsoft Windows including Windows 11, with Android, Mac, and more.

Share this article:

You might also like

Windows Photo Viewer can’t display picture
There are instances when you open a picture or an image in the Windows Photo Viewer and instead of displaying the image, it displays nothing and you’ll see an error message instead that says, “Windows Photo Viewer can’t display this picture because there might not be enough memory available on your computer”. Although this may look like a clear-cut issue of less storage space or low RAM in your computer, that’s not always the case. Security experts noticed that even when your computer has enough resources and disk space, this kind of problem could still occur. So if you experience the same thing, you need to check the Color Profile of your screen. For more information, refer to the detailed instructions provided below but before you proceed, make sure that you close some processes in the Task Manager or restart your computer and see if it helps in fixing the problem. You can also try using the Disk Cleanup tool. To use it, refer to these steps:
  • Tap the Win + R keys to open the Run dialog box and then type “cleanmgr” in the field and hit Enter to open the Disk Cleanup window.
  • After that, select the drive you want to clean.
  • Now click OK to clean the disk and restart your computer.
If the Disk Cleanup tool didn’t help in resolving the issue, refer to the instructions below. Step 1: In the search box, type “color management” and then select the “Change advanced color management settings for display” option from the search results. Or you could simply go to Settings > System > Display, Advanced display settings, and from there, select display and click on the Display adapter properties of Display. Step 2: Next, switch to the Color Management tab and click on the Color Management button. Step 3: Select the monitor where you’re getting the “Windows Photo Viewer can’t display this picture because there might not be enough memory available on your computer” error in the next window. And if you have two displays, make sure that you select the primary display. You also have an option to identify the monitor. Step 4: Once confirmed, select the “Use my settings for this device” checkbox. Step 5: After that, select the Profile listed under the “Profiles associated with this device” option and then click on Remove. Step 6: Next, go to the Advanced tab and make sure that all settings are set to System default which includes a device profile, perceptual images, rendering intent, Relative Colorimetric, and many more. Step 7: Once you’re done, you have to restart your computer and then try to open the same image you were trying to open earlier and then check if you can now open it instead of seeing the error.
Read More
Fix Failed to play test tone Error in Windows
If you are testing your headphone or your speaker but all of a sudden encountered an error that says, “Failed to play test tone” in your Windows 10 computer, worry not for this post will walk you through how you can fix this problem. The test tone is used to check the right-left balance of the headphones and speakers in your computer, however, if you are not able to use it, there are several options you can check out. You can try to run the Playing Audio troubleshooter or restart the services that are related to Windows Audio. Aside from these, you could also disable Audio Enhancements or you could also change the default test tone rate and bit depth.

Option 1 – Try to run the Playing Audio Troubleshooter

Since the Windows 10 operating system has the Playing Audio Troubleshooter, you can use this troubleshooter to try and fix the problem with the “No Audio Output Device is installed” error. You can access this tool in the Control Panel or in the Taskbar Search and even on the Troubleshooters page of Windows 10. Run this troubleshooter and see if it can fix the issue or not.

Option 2 – Try to restart the Windows Audio-related services

The next thing you can do to fix the problem is to restart the services related to Windows Audio. Although the audio services start automatically on every system boot, there are times when they might fail to start. Thus, you can start these services manually by following these steps:
  • Tap the Win + R keys to launch the Run utility and type “services.msc” in the field and hit Enter to open the Services Manager.
  • Then look for the services named “Windows Audio” and “Windows Audio Endpoint Builder”.
  • Double click on each one of these services and check if their Service Status is set to Running or not and also check if the Startup Type is set to Automatic.
  • If none of the services are running, just click on the Start button and select the Automatic option from the drop-down menu.
  • Now click on the Apply and OK buttons to save the changes made and then check if the error is fixed.

Option 3 – Try to update the Audio driver

You might also want to consider updating or the Audio driver as it could help in fixing the error.
  • Tap the Win + R keys to open the Run dialog box and then type in devmgmt.msc and tap Enter or click OK to open the Device Manager.
  • Expand the section for the outdated device drivers.
  • And then select the outdated driver(s) and right-click on it/them.
  • From the drop-down menu, select the Update Driver option and follow the on-screen instructions to install the latest version of the driver.
  • Then also click on the option, “Search automatically for updated driver software.
  • Restart your PC after the installation.
Note: If updating or reinstalling the Audio driver didn’t work, you can go to the manufacturer’s website and look for the support section where you can download the drivers for your computer. You just need to take note of your PC’s correct model and model number so you can find the appropriate driver.

Option 4 – Try changing the default test tone rate and bit depth

Windows selects a default test tone rate and bit depth depending on your headphone or speaker. This allows you to look for the best sound quality from your audio output device. So if your headphone or speaker has some problems with the default settings, then it’s no wonder why you’re getting the “Failed to play test tone” error. To fix this, you can try to change the default test tone rate and bit depth by following the steps below.
  • First, you need to open the Windows Settings panel and then go to System > Sound.
  • Next, look for the Device properties option located on your right-hand side and click on it.
  • After that, select the Additional device properties option and go to the Advanced tab.
  • From there, select a different test tone rate and bit depth and then click on the Test button.
  • Once done, check if it was able to fix the problem or not.

Option 5 – Try disabling the Sound or Audio enhancements

To make your operating system’s specific hardware sound nothing but perfect, both Microsoft and third-party vendors have shipped audio enhancement packages which are usually referred to as “Audio Enhancements” in Windows 10. However, there are instances when instead of improving the sound or audio quality of your computer, it can cause problems so to fix the problem you need to turn off these audio enhancements. How? Simply follow the steps below.
  • Type in “Sound” in the taskbar search and then from the list of results, select “Sound Control Panel”.
  • After clicking Sound, the Sound properties box will pop up. From there, go to the Playback tab and right-click on the default device i.e. Speakers or Headphones then select Properties.
  • After that, the Speakers properties box will appear. From there, go to the Enhancements tab and select the checkbox for the “Disable all enhancements” option.
Read More
Disable non MS store apps in Windows 11
Disable non MS store apps in Windows 11 post pictureYou can prevent starting of app installations files if they have not come from the MS store inside Windows 11. This can make your PC more secure because all apps in the store will have to be digitally signed and overall it can provide you with more control over what will be installed. Follow the guide below to find out how can you easily turn this feature ON.
  1. Press ⊞ WINDOWS + I to open Windows settings
  2. Select Apps and then choose Apps & Features
  3. Click on Choose where to get apps to bring a drop-down menu
  4. Select The Microsoft Store only (Recommended)
  5. Close settings
Settings will apply changes immediately and you continue using Windows right away. With these settings turned ON if you want to install a downloaded application or run the installer you will not be able to, and message The app you’re trying to install isn’t a Microsoft-verified app will show on your screen. You can always reverse this setting by choosing Anywhere in settings instead of Microsoft store only.
Read More
Quick Workarounds to Repair Error 126

What Is Error 126?

Error 126 is a very commonly occurring error that is often the result of damaged system files of Windows. They usually occur during the installation of some Windows program or application. When Error 126 is generated, it terminates the installation process almost instantly. It is important to take corrective measures immediately to ensure that no such problems are encountered again in the future.

Solution

Restoro box imageError Causes

There are a variety of conditions that may trigger Error 126. These conditions are listed below as follows.
  • Corruption of the service-related DLL file
  • Missing or damage service-related DLL file
  • Corrupt, damaged, or Misconfigured system files
  • Improper hardware or application installations or uninstallations
  • Existence of viruses, malware, adware, or spyware in the system
  • Corrupt or incorrect registry entries in the system files
When any of the above-listed conditions occur, the corrupt system files will go to the improper links or missing information. Eventually, the problems with the files will keep the applications or programs from responding in the usual manner. Whatever are the reasons for error generation, it is of utmost importance that the error is removed to ensure smooth functioning of the system.

Further Information and Manual Repair

There are many different ways this error can be rectified. However, the two most effective solutions are listed below as follows.
  • This solution is for the advanced user. Turn on the system and log on to it as the Administrator. Now click on the Start button. Now click on All programs -> Accessories -> System Tools. Here you will come across the option for System Restore. Click on it. A new window will appear. Select 'restore my computer to an earlier time' point. Now clock on Next. A list of restore points will now appear in front of you. Choose the latest restore point you come across from this list and click on ‘Next’. In the next window that opens, click on ‘Next’ again. This is the confirmation window. Once the restoration finishes, restart your computer.
  • This solution is for novice users. Download an Error 126 repair utility program. Install it on your system. Now use it to scan your system for errors. Find out if there is an option to fix/repair error. When you come across it, click on it as soon as the scan is complete. Restart your computer. Your system is now free of Error 126.
Read More
Remove Task View button from Windows 11
Task View
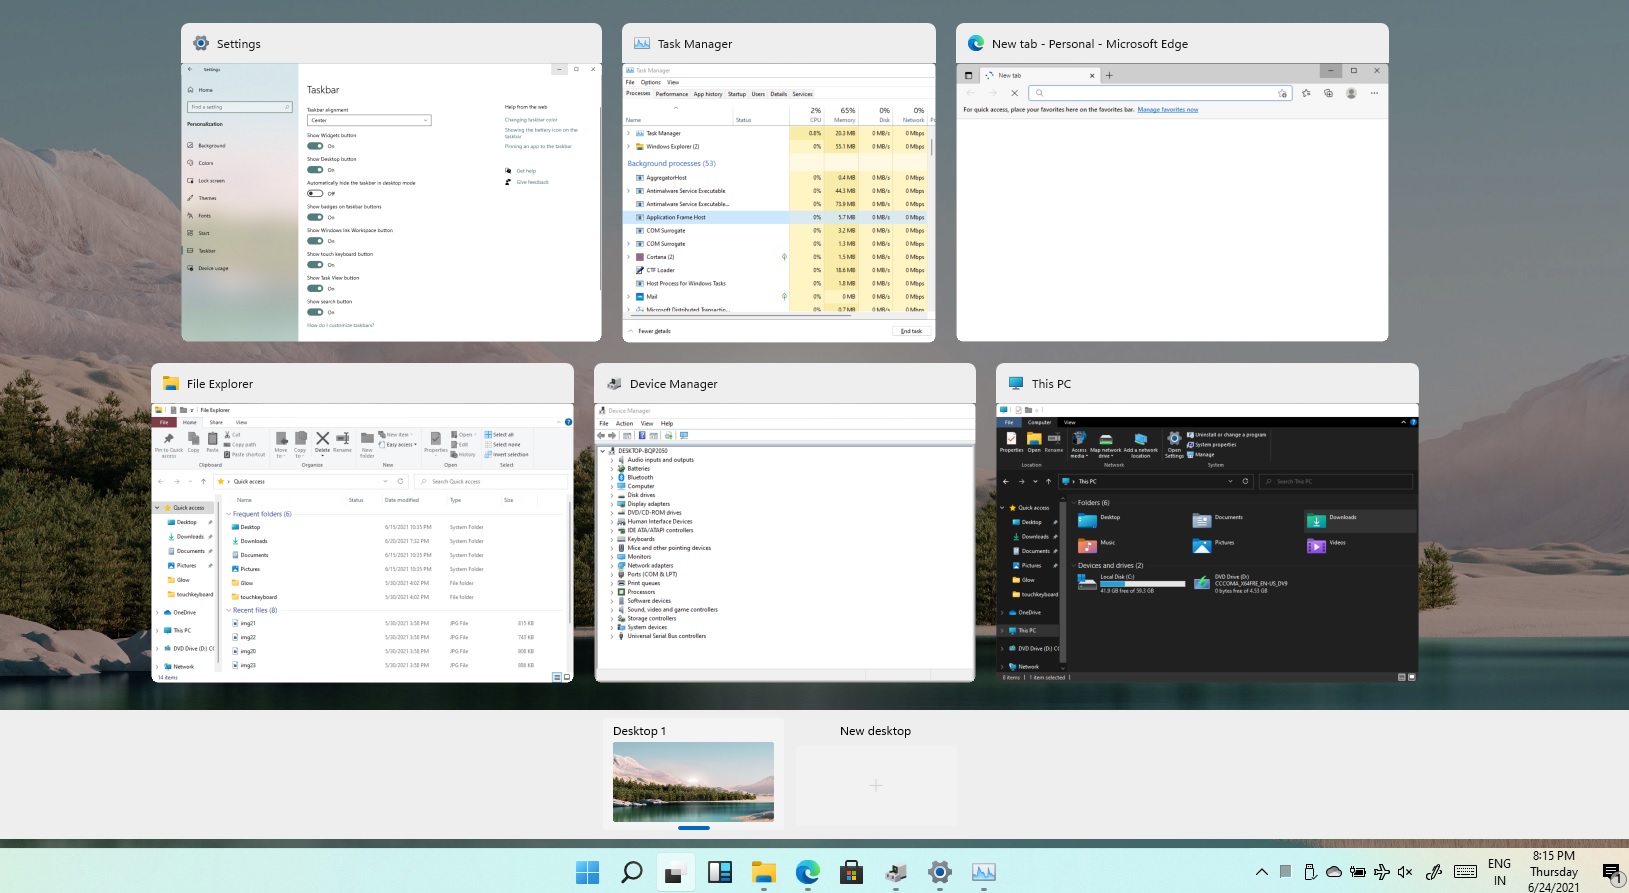
Task View feature inside Windows 11 is actually a great feature, letting you quickly view open windows and virtual desktops. How Task view itself could be reached with keyboard shortcut combination of ⊞ WINDOWS + TAB some users will prefer this way of using it and thus button on the taskbar is something you do not want or need. There is a very easy way to remove mentioned button and I will show you how to do it. Right-click the taskbar button itself and click on Hide From Taskbar. That’s it, you have done it. Now in order for you to bring it back if you change your mind, you will have to do some extra steps but it is nothing difficult. Right-click on the taskbar and click on Taskbar settings, you will be lead to Personalization > Taskbar. Inside locate Taskbar Items and switch Task View to ON, you will see the Task View button right away showing itself again.
Read More
Fix Tile Database is corrupt Error in Windows
As you know, the Start Menu in Windows 10 is quite a stable experience. However, there are times when it can encounter some issues as well like getting corrupted. If your computer is going through the same problem, you’ve come to the right place as this post will guide you on how you can fix the “Tile Data is corrupt” error. This kind of problem is actually quite common among a lot of Windows 10 users. This kind of problem prevents the Start Menu from working properly and no amount of clicking the keyboard keys or mouse will resolve the issue. Fixing it is important since the Start Menu is required for the operating system to function properly and even though there are several ways to get around in using the Start Menu, it can get quite problematic. Even if you manage to open the Start Menu, the ability to click on apps to open them is out of the question and you need to fix the problem. Worry not for the potential fixes provided in this post are not hard to follow. You can try to run the Start Menu troubleshooter or run the DISM tool. You could also reset the folder for Tile Database or re-register the Windows 10 Start Menu. For more details, refer to each one of the options provided below.

Option 1 – Try running the Start Menu troubleshooter

The first and basic thing you can do to fix the problem is to run the Start Menu troubleshooter as it can help you fix the problem automatically. Since this is not a built-in troubleshooter, you can download it from the official website of Microsoft. After you download it, run it and wait until it’s done identifying the problem and automatically fixing it.

Option 2 – Try running the DISM tool

You can run the DISM tool as well to help fix the “Tile Database is corrupt” error. Using this built-in tool, you have various options such as the “/ScanHealth”, “/CheckHealth”, and “/RestoreHealth”.
  • Open the Command Prompt with admin privileges.
  • Then type in the following commands and make sure to hit Enter right after you type each one of them:
    • Dism /Online /Cleanup-Image /CheckHealth
    • Dism /Online /Cleanup-Image /ScanHealth
    • Dism(.)exe /Online /Cleanup-image /Restorehealth
  • Do not close the window if the process takes a while as it will probably take a few minutes to finish.
  • Once it’s done, check if it was able to fix the corrupted Start Menu or not.

Option 3 – Try to reset the Tile Database folder

  • First, you need to restart your computer and log into another user account where the Start Menu works.
  • Next, navigate to this folder location, C:/Users/<userX>/AppData/Local/Tile/DataLayer.
  • From there, copy the “TdlData.xml” file and save it to another drive.
  • Once done, restart your computer and log into the user account where the Start Menu is corrupted.
  • After that, navigate to this folder location, C:/Users/<userY>/AppData/Local/Tile/DataLayer.
  • Now paste the TdlData.xml file you copied earlier and navigate to this location, %LocalAppData%MicrosoftWindowsShell.
  • Afterward, copy the DefaultLayouts.xml file from the user account that’s working fine to the user account where the Start Menu is corrupted.

Option 4 – Try to re-register the Windows 10 Start Menu

  • Tap the Win + X and select the “Windows PowerShell (Admin” option from the menu.
  • After opening PowerShell, execute this command: Get-AppXPackage -AllUsers |Foreach{Add-AppxPackage -DisableDevelopmentMode -Register "$($_.InstallLocation)AppXManifest.xml"}
  • Wait until the command is executed and then see if it fixed the problem with the Start Menu or not.
Read More
Fix Windows Upgrade Error 0x800F081E – 0x20003
If you are trying to run Windows Upgrade on your Windows 10 computer but suddenly interrupted by the error 0x800F081E – 0x20003, worry not for this post will guide you on how you can fix this Windows Upgrade error. This particular Windows Upgrade error is a Windows status code for CBS_E_NOT_APPLICABLE which indicates that some of the update requirements are missing or the files that are installed are already of a higher version compared to the ones that are still pending. In most cases, this error occurs when you try to upgrade to earlier versions of the Windows 10 N edition to a later version. Here’s the full content of the error message:
“0x800f081E-0x20003, The installation failed in the SECOND_BOOT phase with an error during BOOT operation”
In case you don’t know, Microsoft distributes special “N” editions of Windows in Europe and the “KN” editions in Korea. These editions are the same as the standard editions of Windows except that they do not have the Windows Media Player as well as the multimedia playback features. Thus, when the Windows Upgrade fails with the error code and error message and it doesn’t provide much information as to why the update couldn’t be installed, there is something you can do about it to fix the error. Since Windows uses generic error codes and so if you see the error code 0x800f081e, you have to check the error log first. For more details, follow the instructions laid out below. Step_1: You need to navigate to C:$WINDOWS.~BTSourcesPanther and from there look for the text file named “setuperr.log” and open it with a text viewer/editor program like Notepad. Step_2: After opening the setuperr.log file, you should see content that’s similar to this:
C:WINDOWSSoftwareDistributionDownload80b2677d6e15a2a206625bb25a7124feamd64_Microsoft-Windows-MediaPlayer-Package~~AMD64~~10.0.17134.1. Error: 0x800F081E 2019-09-10 20:26:57, Error SP Operation failed: Add [1] package C:WINDOWSSoftwareDistributionDownload80b2677d6e15a2a206625bb25a7124feamd64_Microsoft-Windows-MediaPlayer-Package~~AMD64~~10.0.17134.1. Error: 0x800F081E[gle=0x000000b7]
Note: From the content above, it is clear that the Windows Upgrade failed due to complete due to the Windows Media Player. It could be that the log file may contain other error messages and other error codes and if you see the error code 0x800f081e from the list, then you need to uninstall the Media Feature Pack. Step_3: You have to uninstall the Media Feature Pack.
  • Tap the Win + R keys to launch the Run dialog box and type “optionalfeatures.exe” in the field and hit Enter to open the Windows Features wizard.
  • Next, you need to wait until the list of Windows Features populates and then click on the + sign to collapse the folder of the Media Features.
  • After that, uncheck the “Windows Media Player” option from the Media Features folder.
  • Now click on the Yes and OK buttons to save the changes made and then close the Windows Features dialog box.
  • Restart your computer and boot, try to run the Windows Upgrade process again, and check if the error is fixed or not.
Note: If the installation has been successfully completed, you have to go back to the Windows Features and enable the Windows Media Player again. And if you are using the Windows 10 N Edition, then you can just download and install the latest version of the Media Feature Pack for your Windows 10 N edition. On the other hand, running the built-in Windows Update troubleshooter could also help you resolve any Windows Update-related problems, including the error 0x800F081E – 0x20003. To run it, go to Settings and then select Troubleshoot from the options. From there, click on Windows Update and then click the “Run the troubleshooter” button.
Read More
Ordinal not found, dynamic link library Error
If you encounter an error message saying, “The ordinal xxx could not be located in the dynamic link library C:/Program Files (x86)/Microsoft VS Code Insiderscode – insiders.exe“ and you see a reference of a missing DLL file, then this indicates that the software is trying to locate the related DLL file, however, it is missing, hence the error. The error mentioned “Ordinal” which refers to the order of a number mathematically, e.g. 1st, 2nd, etc. And in this error message, the ordinal is referring to an Xth file of an XX.DLL file which is missing which is why you’re getting this kind of error. When you get this particular error, it means that your computer is missing the Microsoft Visual C++ Redistributable program. As per the error message, XXX is a number that in turn is the Ordinal. There is also another common error related to Ordinal which says, “The ordinal 12404 could not be located in the dynamic link library mfc90u.dl”. The error message could be referring to any DLL in the message. And since all these DLL files are part of the package, the error changes quite a bit as the Visual Studio looks for that DLL file. To fix this error, here are some suggestions that might be of help.

Option 1 – Try installing Microsoft Visual C++ Redistributable

As pointed out earlier, the error pops up when the Microsoft Visual C++ Redistributable program is missing on your computer. Thus, you need to download it from the official website of Microsoft. Once you’ve downloaded the Microsoft Visual C++ Feature Pack Redistributable Package, install it and then check if the error is now fixed.

Option 2 – Try to install OpenSSL

If you encounter the same error message but it points out that the LIBEAY32.DLL file is missing, then you have to install OpenSSL. In such a case, you will see the following error message:
“Ordinal not found. The Ordinal [Xxxx] could not be located in the Dynamic Link Library Libeay32.dll.”
 Make sure that when you install OpenSSL, you do it into the Windows system directory since the Libeay32.dll file is related to security.

Option 3 – Try to check Windows Updates

There are instances when Microsoft rolls out the framework and related updates via Windows Updates. It could be that an update related to DLL is still pending which is why you need to check Windows Updates. To do so, go to Settings > Update and Security and from there check if there is any pending update. If there is, you need to install that update and then restart your computer if needed.
Read More
Fix volsnap.sys failed BSOD Error in Windows
The Volsnap.sys is a Windows operating system file that is related to the Volume Shadow Copy Service or VSS. It is known to cause a Blue Screen of Death error. The main cause of the Volsnap.sys Blue Screen errors include conflicts with the RAM, issues with the hard disk, incompatible firmware, corrupted drivers, malware infection, and many more. Despite its many possible causes, its fixes are quite straightforward so won’t have any problem following them. The Blue Screen errors that are related to the Volsnap.sys file are:
  • KMODE EXCEPTION NOT HANDLED
  • PAGE FAULT IN A NONPAGED AREA
  • SYSTEM THREAD EXCEPTION NOT HANDLED
  • IRQL NOT LESS OR EQUAL
You might want to try performing System Restore as it could resolve Blue Screen errors like the ones related to the Volsnap.sys before you proceed with the troubleshooting tips given below. To run System Restore, follow these steps:
  • Tap the Win + R keys to open the Run dialog box.
  • After that, type in “sysdm.cpl” in the field and tap Enter.
  • Next, go to the System Protection tab then click the System Restore button. This will open a new window where you have to select your preferred System Restore point.
  • After that, follow the on-screen instructions to finish the process and then restart your computer and check if the problem is fixed or not.
If System Restore didn’t help in fixing the Blue Screen error, now’s the time for you to resort to the troubleshooting tips provided below but before you get started, make sure that you create a System Restore point first.

Option 1 – Check if the Volume Shadow Copy service is running and restart it

The first thing you need to do is check if the Volume Shadow Copy service. To do that, refer to the following steps:
  • Click on Start and type “cmd” and right-click on Command Prompt from the search results.
  • Then select the “Run as administrator” option to open Command Prompt with admin privileges.
  • After that, type “net stop sdrsvc” and hit Enter to execute the command in stopping the Volume Shadow Copy service.
  • Next, type the “net start sdrsvc” command and hit Enter to start the service again.
Note: You can also restart the service using the Windows Services Manager.
  • In the Cortana search box, type “services” and click on the Services icon to open the Services Manager. Alternatively, you can also tap the Win + R keys to launch the Run prompt and then type “services.msc” in the field and hit Enter to open the Services Manager.
  • From there, look for the Volume Shadow Service (sdrsv) from the list of services. Its Startup type should be set to Manual by default.
  • Restart the service and if you don’t encounter any error while you turn it on, re-run the backup service and see if the backup process runs successfully.

Option 2 – Try checking the Memory for the Errors using Memory Diagnostic Tool

The Memory Diagnostic tool in windows can help resolve the Volsnap.sys Blue Screen error by checking and automatically fixing any memory-based issues. To run it, refer to these steps:
  • Tap the Win + R keys to open Run and type mdsched.exe and hit Enter to open the Windows Memory Diagnostic Tool.
  • After that, it will give two options such as:
    • Restart now and check for problems (Recommended)
    • Check for problems the next time I start my computer
  • Once your computer has restarted, perform a basic scan or you could also go for the “Advanced” options such as “Test mix” or “Pass count”. Simply tap the F10 key to start the test.
Note: After you select your preferred option, your computer will restart and check for memory-based issues. If it finds any issues, it will automatically fix them and if there’s no issue found, then it’s most likely not a memory-based issue so you should try the other options given below.

Option 3 – Try to update or rollback your device drivers

If the first option didn’t work for you, then it’s time to either update or rollback the device drivers. It is most likely that after you updated your Windows computer that your driver also needs a refresh. On the other hand, if you have just updated your device drivers then you need to roll back the drivers to their previous versions. Whichever applies to you, refer to the steps below.
  • Open the Devices Manager from the Win X Menu.
  • Then go to the section of IDE ATA/ATAPI controllers as well as Storage Controllers and right-click on them to open the Properties.
  • After that, switch to the Driver tab and click on the Uninstall Device button.
  • Follow the screen option to completely uninstall it.
  • Finally, restart your computer. It will just reinstall the device drivers automatically.
Note: You can install a dedicated driver on your computer in case you have it or you could also look for it directly from the website of the manufacturer.

Option 4 – Try to run the CHKDSK utility

Running the CHKDSK utility might also help you resolve the Volsnap.sys Blue Screen error. If your hard drive has issues with integrity, the update will really fail as the system will think that it’s not healthy and that’s where the CHKDSK utility comes in. The CHKDSK utility repairs hard drive errors that might be causing the problem.
  • Open Command Prompt with admin privileges.
  • After opening Command Prompt, execute the following command and hit Enter:
chkdsk /f /r
  • Wait for the process to be completed and then restart your computer.

Option 5 – Run the System File Checker Scan

System File Checker or SFC is a built-in command utility that helps in restoring corrupted files as well as missing files. It replaces bad and corrupted system files with good system files. To run the SFC command, follow the steps given below.
  • Tap Win + R to launch Run.
  • Type in cmd in the field and tap Enter.
  • After opening Command Prompt, type in sfc /scannow
The command will start a system scan which will take a few whiles before it finishes. Once it’s done, you could get the following results:
  1. Windows Resource Protection did not find any integrity violations.
  2. Windows Resource Protection found corrupt files and successfully repaired them.
  3. Windows Resource Protection found corrupt files but was unable to fix some of them.
  • Restart your computer.

Option 6 – Run the Blue Screen Troubleshooter

The Blue Screen troubleshooter is a built-in tool in Windows 10 that helps users in fixing BSOD errors like Volsnap.sys. It can be found on the Settings Troubleshooters page. To use it, refer to these steps:
  • Tap the Win + I keys to open the Settings panel.
  • Then go to Update & Security > Troubleshoot.
  • From there, look for the option called “Blue Screen” on your right-hand side and then click the “Run the troubleshooter” button to run the Blue Screen Troubleshooter and then follow the next on-screen options. Note that you might have to boot your PC into Safe Mode.
Read More
How to Fix the Error Code 0X80070005

What is Error 0X80070005?

Error 0x8007005 is a typical Windows Error Code. This error occurs during installation or Windows update. The error 0x8007005 is prompted as an ‘Access Denied’ message. It is typically generated when you either lack file or registry permission to perform the installation.

Solution

Restoro box imageError Causes

Narrowing down the ultimate reason for the error 0x8007005 can be difficult because there are multiple causes for this error occurrence. However, some of the common causes include:
  • Administrative issues
  • Viral Infection
To perform a successful Windows update, it is vital to resolve this error on your system. Furthermore, you must also hurry in fixing this issue on your PC especially if the underlying cause of this error is malware or viruses. Malware can damage your PC badly. It can expose your computer to serious threats like privacy issues, data breaches, cyber crimes and identity thefts.

Further Information and Manual Repair

To fix the error 0x8007005 on your PC, you don’t have to hire a professional and pay hundreds of dollars. In fact, you can resolve it all by yourself even if you are not technically sound. Here are some easy DIY methods for you to try: Solution 1: The error may occur if you don’t have administrator’s permission and there are many user accounts to access the PC. The easiest way to fix the error and perform a successful Windows update is to log on from the administrators account. Once you log on as the administrator, then try installing the updates again. Solution 2: Sometimes the file and registry permissions may get changed by malware. Therefore, to fix the error, it is advisable to download an antivirus and perform an entire PC scan. The antivirus will help remove all sorts of viruses infecting your system and fix the issue. However, please note anti-viruses are known for slowing down PC performance so you might have to compromise on your system’s speed once to install this software.

Solution 3: Download Restoro.

Downloading Restoro is perhaps the best and the fastest way to resolve error 0x8007005 without compromising on your PC’s speed. Plus this software also resolves all registry issues too. Restoro is an advanced and multi-functional PC Fixer. It is deployed with powerful utilities including an antivirus that detects and removes all kinds of malicious software including viruses, Trojans, spyware and malware. To ensure your PC speed is not affected, it also features a system optimizer. The system optimizer boosts the speed of your PC significantly.

Other Restoro Features

In addition to this, it also includes a registry cleaner. The registry cleaner simultaneously detects all registry-related issues and resolves them instantly. It cleans the registry, fixes the damaged files, and restores the registry back to normal. It is safe, bug-free, and efficient. You can install it on any Windows version. It has a user-friendly interface and simple navigation making it easy for all levels of users to operate. Click here to download Restoro on your PC and resolve error 0x8007005 now!
Read More
1 2 3 171
Logo
Copyright © 2023, ErrorTools. All Rights Reserved
Trademark: Microsoft Windows logos are registered trademarks of Microsoft. Disclaimer: ErrorTools.com is not affiliated with Microsoft, nor claims direct affiliation.
The information on this page is provided for information purposes only.
DMCA.com Protection Status