Windows 10 has a Cloud Clipboard feature that allows users to have a list of multiple copied text in place so that they can reuse it. And each time the computer restarts, the Clipboard Data is cleared. However, you can actually do it manually. How? Read on as this post will walk you through how you can turn on or off as well as clear the Clipboard history in Windows 10. This kind of feature is already available in Windows 10 v1903.
In the previous versions of Windows, there was no feature to turn off history in the clipboard and users have to use other ways to clear the clipboard history. And now it seems that Microsoft has put an end to this dilemma as it now allows users to clear the clipboard history.
To turn on or off or clear the Clipboard history, here are some instructions you need to follow:
Step 1: Tap the Win + X keys to open the power menu and select Settings.
Step 2: After that, navigate to Settings > System > Clipboard.
Step 3: From there, turn off the toggle button under the Clipboard history section. This will turn off the Cloud Clipboard feature. As a result, the default clipboard will hold one last item and will not display the data on the clipboard.
Note: When you tap the Win + V keys to invoke the clipboard manager, you will see a prompt that says, “Can’t show history, See all copied items in place, Turn on clipboard history”. You have the option to turn it back on by simply clicking on the available button. Doing so would only hide the existing data and makes sure that no copy of the data is kept.
Conclusion
On the other hand, if you want to clear the clipboard without affecting its history data, you have to make sure to pin the items on the clipboard that you want to stay. After that, click on the three-dotted icon for the menu and click on the “clear all” option. This will delete all the entries but will keep the pinned items on your clipboard.
When you run a program in Windows 10, error 0xc000012f may pop up, mentioning that the files and binaries you’re trying to run are corrupted. Error 0xc000012f means Bad Image, denoting that the program’s executable or one of the supporting modules is corrupt. Or there is probably a DLL mismatch.
This error usually manifests itself after a windows update or after installation of some application, in order to fix it follow the steps below:
Perform SFC scan
Press ⊞ WINDOWS + X to open the Windows menu
From the menu choose command prompt (admin)In command prompt type sfc /scannow and press ENTER
Leave the computer for the operation to be completed and Reboot your computer
Run DISM
Press ⊞ WINDOWS + X to open the Windows menu
From the menu choose command prompt (admin)in command prompt type: DISM.exe /Online /Cleanup-image /Restorehealth and press ENTER
wait for the process to be finished and Reboot your computer
Reinstall application
If this error has been popping up after the application install remove the installed application and install it again. There is the possibility that the application installer has by accident corrupted some files, reinstalling it might fix the issue.
Uninstall Windows update
In some cases, Windows update can introduce this issue, go to Windows updates, into advanced options, and uninstall the latest update to see if this will fix the error.
Install Visual C++ Redistributable
Go to the official Microsoft website and download C++ redistributable package and install it
Install new windows update
If there is a new Windows update install, there is a chance that in the last update something went wrong and it is very likely that it was fixed in the last one.
Building a custom PC is a great feeling but it can sometimes not be ideal and we are not talking about breaking or losing parts. What we mean is that choosing the right components can be sometimes a difficult task. Of course, picking a PC case can have its issues, choosing the right power supply can be tricky but pairing all components together, especially CPU and GPU can be tricky.
Builders with no depth knowledge and experience can sometimes choose improper CPU or GPU, picking one of them to be much more powerful than another thus not using it to its full potential because another component cannot handle stuff at the same speed. In order to not be trumped by this kind of stuff, there is a website that is completely free and you do not even need to be registered in order to use it.
Bottlenet calculator link here
What is even better, once you input your components you will get advice on what to change in order to tweak the system a little more to avoid bottlenecks even more. It is a very useful tool and we are advising you to use it in order to save money but not throwing it on some component that will be half used.
From the various report, it is now clear that no one is prone to Ransomware attacks. Cyber-criminals never target any specific field of the user workgroup for this Ransomware attack. But in past few years, it has hugely affected home users, businesses, organizations.
We can say, Ransomware victims come in all shapes & sizes. Many business owners think that they will never be attacked by Ransomware crooks because their business is not so big. But that’s not true.
A huge proportion of Ransomware attacks happened in small sector businesses because of their weak security resistances.
Some leading negative consequences of Ransomware attacks faced by almost every victim are:
Permanent or temporary loss of proprietary or sensitive information.
Lots of trouble in performing regular operations.
Huge financial losses sustain for restoring up your files and systems.
Latent harm to the reputation of an organization.
Even making the Ransom payment doesn’t guarantee the safe releasing of your encrypted files.
Attackers get the victim’s money along with their banking details.
Getting the decrypting files doesn’t mean malware infection has completely been removed.
Ransomware put a tremendous impact on disturbing business operations and in the end, leads to data loss situations.
Here are some huge impacts of Ransomware attacks on business are:
Damage or loss of all the crucial information
In the Ransomware post-attack period Business disrupts a lot.
Destruction of hostage data, file, and system.
Business downtime
Victimized company’s reputation dropdown
Productivity loss
Apart from the ransom, the cost of downtime because of restricted system access will bring major concerns.
It’s a fact that due to downtime victims may has to pay a cost of ten thousand dollars daily.
As, Ransomware is becoming more and more widespread, so all companies require to brush up on their annual cyber-security goals. Moreover, approach for some appropriate implementations of Ransomware recovery plans and commit sufficient funds in their IT budgets for cyber-security resources.
Among the most effective impact of Ransomware, “data encryption” is very hard to deal with.
Meanwhile, this victim is completely restricted to access any of their encrypted data.
The only way for unlocking these encrypted files is through the decryption key which only belongs to hackers.
Many times, the decryption key is given to the organization, after the payment of the ransom. But there are also some cases when data is not handover to the victim, even after the ransom payment.
The main risk that generates with “operational impact of Ransomware” is on the businesses. Can you just imagine, what will happen if all of a sudden entire services or processes of your business halt down?
Well, this dreadful Ransomware threat is so impactful that it can:
Close down the entire plant
Freeze manufacturing control system
Make other backlogs
All the damages that occur due to downtime can be a major one and can have so many consequences.
A well-organized strategy of backup and recovery will not certainly make the Ransomware attack painless.
As this takes an extensive amount of money and time for data restoration.
Apart from that, the decision of recovering your system using the backup moreover depends on three things:
First the amount of data loss that is considered acceptable by your business or organization.
Up to how extent, the impact of Ransomware has spread
How fast the Ransomware attack was spotted.
However, in many cases, data gets so encrypted that you can’t revert back to the restore point. At that time external backup is considered the best option.
Among the wide-reaching impact of Ransomware “Data loss” is the most effective one. As it starts from little disruption and leads to permanent business failure.
Sometimes data loss in a Ransomware attack leads to disclosure of all your confidential information which ends up in fines and lawsuits.
Attackers always look for backup files and folders after encrypting your system data. So that user can’t retrieve their corrupted file from the backup. Such dreadful activities make this Ransomware threat so profitable and effective.
Victims don’t have any choice left either they have to pay the ransom or they have to face their risk of data loss.
Microsoft has started to use group along with every open window in the Taskbar ever since the release of Windows 10. Early on, they used to show an individual entry for each one of the windows after grouping them which makes the taskbar look cleaner and organized. However, the main issue lies in the fact that you have to hover on your desired window to get on to them. At the time of writing, you need to tap the Ctrl key and click on the taskbar icon to open the last active window but you have to only click on the program’s taskbar icon after you apply the tweak given in this post for the last active window to open. Take note that the “Last Active” windows feature will only work if the taskbar buttons are combined.
Before you get started doing the instructions given below, you need to create a System Restore Point first since you will be dealing with registry files and modifying some of the critical settings in Windows 10. Once you’ve done this, proceed to the given steps below.
Step 1: Tap the Win + R keys to open the Run dialog box and then type “Regedit” in the field and hit Enter to open the Registry Editor.
Step 2: If a User Account Control or UAC prompt appears, just click on Yes to proceed to open the Registry Editor.
Step 3: Next, navigate to the following registry path:
Step 4: From there, right-click on the right side of the panel and select New > DWORD (32-bit) and then name it “LastActiveClick”.
Step 5: After that, double click on the newly created DWORd to modify its value. Put “1” as its value data.
Step 6: Then click OK and close the Registry Editor.
Step 7: Now restart your computer to successfully apply the changes made.
Note: In case you want to revert back to the default configuration, all you have to do is set the value data of LastActiveClick to “0” or simply delete that DWORD and restart your computer to successfully apply the changes made.
Google Chrome is the most used browser in the world with the most user downloads. Most users are using browsers how it is, open it up and just surf but Chrome offers more than just plain surfing. Here we are presenting you with some interesting features that most users do not use but should.
Use Omnibox to search inside websites
Chrome's Omnibox, also known as the address bar got its name because it can do much more than just search the internet. You already probably know that just by typing any word you will search the internet with Google or another search engine of choice.
You can also set specific keywords inside Chrome settings to tie them with specific websites, for example, you can tie the letter E with errortools, and then just by typing E windows error you will search term windows error on website errortools. There are some already predefined things and you can add anything you want so this is a great feature in order to speed up your work skipping part of actually opening the site.
Search the internet for selected text
On any webpage, you can simply select any text and right-click on it to get a new menu entry that will say search Google for "your selected text" and by clicking on it you will automatically search the net for the selected term.
Grouping tabs
When we surf the internet some of us tend to have plenty of open tabs and over time they can clutter and shrink in width making the surfing experience an unpleasant one.
Chrome has tab groups and you really need to start using them since you can organize much better all the tabs, even color-code them.
Search all open tabs
On top right part on title bar right next to minimize button there is small arrow pointing down, once you clik on it all opened tabs will be displayed by name as a listand by clicking on it you will automatically switch to it.
Change download location
Google Chrome has its default download destination but you can change that destination and even turn on option to be asked where you would like your download to be saved each time.
Live Captions
YouTube has cations for its videos but Chrome itself has live caption option in order to provide you with automatic AI captions for any type of video or audio on any website. If you are struggling with following what is being said try this awesome option.
Extensions
Using extensions in Chrome is awesome, specialy if extensions are usefull but if you go incognito they are not active. There is an option in Chrome to turn on the extensions even in incognito mode and even better, you can even choose which ones you want to be active, you do not need to turn all of them.
Counter strike has evolved from half-life mod into the full-featured game and has kept in popularity for years, even today game is wildly popular and has a huge player base.
Sadly game can crash in Windows 10. Here in this article, we will address how to fix csgo crashing in Windows 10 so you can play it smoothly and crash-free as it was meant to be played.
Update your display drivers
Often in the gaming world having the latest display drivers can mean a world of difference. Counterstrike GO is no different, make sure that your drivers are updated to the latest version, if they are not, go to your manufacturer's website and download the latest version.
Update Windows
Just how much important is it to have the latest display drivers so it is to have the latest Windows update. Often problematic things are addressed in the update itself.
Turn off compatibility mode
Compatibility mode is most often the cause of crashes. Go to the game installation folder and search for csgo.exe. Once you locate it right-click on it and choose properties.
Under properties, find the compatibility tab and turn off compatibility mode if it is ON.
Uncheck run as administrator also
Delete CSGO.EXE and add cl_disablehtmlmotd 1
If disabling compatibility mode has not solved the issue do next:
Pull up the installation directory folder, find csgo.exe, and delete it
Pull up the Steam Library and locate Counter-Strike Global Offensive
Right-click on it to select properties
Find the local tab and click on verify integrity of game files
When that is complete, go back into the Counter-Strike Global Offensive installation folder and search for cgo.exe
Turn compatibility OFF like in the previous step
Return to the Steam Library, right-click on Counter-Strike Global Offensive and click on properties again
Go under the launch options settings
In the new window, type in cl_disablehtmlmotd 1Save the changes and restart the game
Lower game settings
If previous steps did not help and the game still crashes, try lowering game graphic settings. Crashes can happen if a game is heavy on the current system resources.
If you are typing inside the Search bar, Cortana, Taskbar, Windows 10 apps, etc., and then everything seems invisible then read on as this post will guide you in fixing this issue. At first, you might think that something is wrong with your keyboard but it really has nothing to do with it. The problem actually lies with the apps from Microsoft Store. Thus, if you can’t type anything in any of the apps from Microsoft Store in Windows 10, refer to the options given below to fix them.
Option 1 – Ensure that ctfmon.exe is running
Ctfmon.exe is a Microsoft process in Windows 10 that controls the Alternative User Input as well as the Office Language bar. In other words, it enables end-users to control the computer using on-screen keyboard inputs, speech, and even pen for various languages. It would be better if you launch the program once by going to the C:/Windows/system32 folder. Doing so will ensure that whatever API is needed for the keyboard typing to work properly again. You also have to make sure that its startup status is not disabled. In addition, you can also try the following steps, alternatively.
Open the Task Scheduler.
Then go to Microsoft > Windows > TextServicesFramework.
And on the MsCtfMonitor, right-click and enable the task.
Now restart your computer.
This will ensure that all the text boxes will start to work again. And if the task MsCtfMonitor is missing from the list of tasks, you can import it with the XML file from basics.net. Then download and create a task to run it each time you log in to your PC.
Option 2 – Use the Windows Store Apps Troubleshooter
You might also try running the Windows Store Apps Troubleshooter as it can help in resolving issues with the Windows Store apps. This built-in tool can resolve most of the app-related problems. To use it, go to Settings > Update & Security > Troubleshooting > Windows Store Apps and from there, click the start the troubleshooter button. The Windows Store Apps Troubleshooter will scan the computer for any issues with the Windows store apps and will automatically fix them if it finds any.
Option 3 – Re-register all the Windows 10 UWP apps using PowerShell
First, make sure to close all the running applications on your computer.
Next, in the Start search, type in PowerShell and right click on the result, and select the “Run as administrator” option.
After that, type the following commands to re-register the Windows 10 apps. Make sure to hit Enter on each line:
You can also run the DISM Tool as it helps in repairing the Windows System Image as well as the Windows Component Store in Windows 10. Using this built-in tool, you have various options such as the “/ScanHealth”, “/CheckHealth”, and “/RestoreHealth” which could help in fixing the problem.
Open the Command Prompt with admin privileges.
Then type in the following commands and make sure to hit Enter right after you type each one of them:
Dism /Online /Cleanup-Image /CheckHealth
Dism /Online /Cleanup-Image /ScanHealth
exe /Online /Cleanup-image /Restorehealth
Do not close the window if the process takes a while as it will probably take a few minutes to finish.
Option 5 – Run the System File Checker Scan
System File Checker or SFC is a built-in command utility that helps in restoring corrupted files as well as missing files. It replaces bad and corrupted system files to good system files. To run the SFC command, follow the steps given below.
Tap Win + R to launch Run.
Type in cmd in the field and tap Enter.
After opening Command Prompt, type in sfc /scannow
The command will start a system scan which will take a few whiles before it finishes. Once it’s done, you could get the following results:
Windows Resource Protection did not find any integrity violations.
Windows Resource Protection found corrupt files and successfully repaired them.
Windows Resource Protection found corrupt files but was unable to fix some of them.
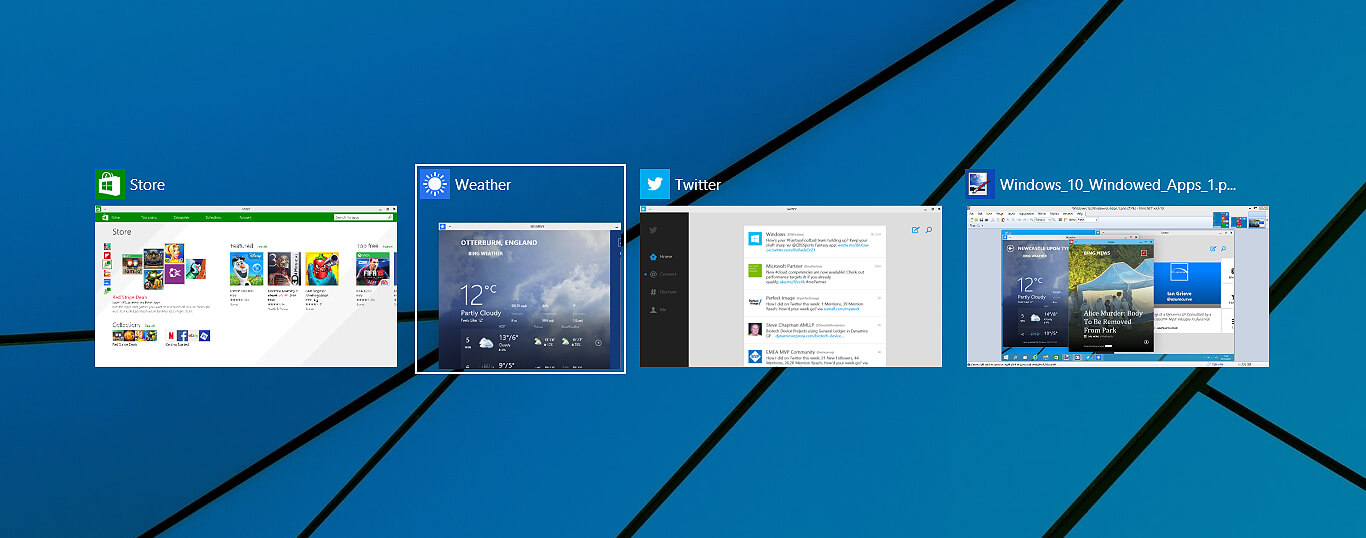
Lately, Microsoft has trying to fix Print Nightmare with various methods and patches. The last patch has seemingly fixed Print Nightmare but it has broken the Alt-tab key combination.
It has been reported that the latest patch has broken famous key combinations for quickly switching from window to window. It seems that combination is not working or it is switching to desktop, even going to blank screen if switching from the full-screen game.
Fixing the issue
Luckily this issue is easily fixable.
The first and easier fix for this issue is surprising to turn off the news and info widget, right-click on it and choose News and interests and then click on turn off.
The second solution would be to uninstall the update. Go to Settings, then to Update & Security, and from there view Update History and remove the update.
The STOP Code 0x0000008E is essentially an error code that is displayed on the STOP message. This STOP message is also commonly known as Blue Screen of Death or BSOD for short. When this error occurs, usually messages like,
“STOP: 0x0000008E” or “KERNEL_MODE_EXCEPTION_NOT_HANDLED”
are displayed to the user.
Solution
Download Available to Completely Repair Error 0x0000008e
Error Causes
These errors are commonly caused by failures of memory hardware. However, viruses, hardware failures or issues with the device drivers may also trigger them.
If this error code appears but Windows is successfully able to recover from it, then the message ‘Windows has recovered from an unexpected shutdown’ is displayed to the users.
Regardless of what causes these errors, it is of paramount importance that counteractive measures are taken as soon as the error appears.
Further Information and Manual Repair
While this error can be removed in many ways, the most effective ones are listed below as follows.
The screen might be a fluke. Restart your system; the blue screen that appears to you may not be what it seems.
Have you just modified or installed new hardware or driver? If yes, it is highly likely that the change you have made has triggered the error. If this is the case, it is strongly recommended that you revert back to the original settings and check whether the blue screen appears again or not. If it does, you can fix it by reconfiguring or removing the hardware you have recently installed. You can perform System Restore or you can go back to the previous versions if you have installed a new driver.
To keep this error from occurring in the future, it is strongly advised that you test your RAM. Damaged memory or one that’s unable to perform in the usual manner is often the reason this error occurs.
Ensure appropriate installation of your system memory. If you have installed memory in a way other than advised by your memory manufacturer that it may lead to STOP 0x0000008E error or other problems.
Misconfigured or over-clocked memory settings can cause STOP 0x0000008E errors as well. To remedy this situation, it is best advised to return the BIOS settings to their default level.
If you haven’t updated your Windows, apply all the updates you come across. Patches and service packs specifically address such issues.
Universal Windows Platform (UWP) applications are the modern application in the windows store that can be used in all the Window devices like Xbox, Hololens, Tablet, PC or Phone. Basically, UWP provides a common platform for every device that runs Windows 10. When attempting to login into these applications and receive this error:
Can’t sign in with a Microsoft accountThis program is blocked by group policy. For more information, contact your system administrator.0x8000704ec
Then this post is for you. We will guide you on how to easily resolve issues, please follow the steps provided.
Local group policy editor solution
Press ⊞ WINDOWS + R to open the Run dialog.
In the Run dialog box type gpedit.msc and press ENTER to open Group Policy Editor.
Inside the Local Group Policy Editor, navigate to the path below:
Computer Configuration > Windows Settings > Security Settings > Local Polices > Security Options
On the right pane, double-click on Accounts: Block Microsoft accounts to edit its properties.
Under Local Security Setting tab, click on the drop-down and select This policy is disabled.
Click Apply > OK to save the changes.
Exit Group Policy Editor.
Registry editor solution
As always, it is highly recommended to make a backup of the registry editor just in case that something goes wrong.
Press ⊞ WINDOWS + R to open the Run dialog.
In the Run dialog box, type regedit and hit ENTER to open Registry Editor.

 From the menu choose command prompt (admin)
 In command prompt type sfc /scannow and press ENTER
Leave the computer for the operation to be completed and Reboot your computer
In command prompt type sfc /scannow and press ENTER
Leave the computer for the operation to be completed and Reboot your computer Builders with no depth knowledge and experience can sometimes choose improper CPU or GPU, picking one of them to be much more powerful than another thus not using it to its full potential because another component cannot handle stuff at the same speed. In order to not be trumped by this kind of stuff, there is a website that is completely free and you do not even need to be registered in order to use it.

 Lately, Microsoft has trying to fix Print Nightmare with various methods and patches. The last patch has seemingly fixed Print Nightmare but it has broken the Alt-tab key combination.
It has been reported that the latest patch has broken famous key combinations for quickly switching from window to window. It seems that combination is not working or it is switching to desktop, even going to blank screen if switching from the full-screen game.
Lately, Microsoft has trying to fix Print Nightmare with various methods and patches. The last patch has seemingly fixed Print Nightmare but it has broken the Alt-tab key combination.
It has been reported that the latest patch has broken famous key combinations for quickly switching from window to window. It seems that combination is not working or it is switching to desktop, even going to blank screen if switching from the full-screen game.
