Logo

How to see your Wi-Fi password in Windows 11

Each time you connect to a Wi-Fi network your PC saves that network password. If for any reason you need to see this password or passwords there are ways you can do it and we are here to show you how.

Wi-Fi passwordHello and welcome to error tools where we aim to help you with all of your Windows problems and issues, where we offer our insight on various topics and sometimes go offroad and write something crazy. This time we will offer you a way on how to easily and quickly see how can you find out your memorized Wi-Fi password.

Find your W-Fi password

  1. Make sure that you are connected to the Wi-Fi network you wish to find out the password of
  2. Open Windows Settings app by pressing ⊞ WINDOWS + I
  3. On the left side choose Network & Internet and click on it
  4. Click on Advanced Network Settings
  5. Inside Advanced Network Settings go to Related Settings
  6. Select More Network Adapted Options
  7. Right-click on your adapter and select Status
  8. Click on Wireless Properties
  9. Click on the Security tab
  10. Click on enable on Show Character box beneath Network Security key to reveal Wi-Fi password

Do You Need Help with Your Device?

Our Team of Experts May Help
Troubleshoot.Tech Experts are There for You!
Replace damaged files
Restore performance
Free disk space
Remove Malware
Protects WEB browser
Remove Viruses
Stop PC freezing
GET HELP
Troubleshoot.Tech experts work with all versions of Microsoft Windows including Windows 11, with Android, Mac, and more.

Share this article:

You might also like

CHKDSK cannot continue in read-only mode
As you know, the CHKDSK utility is proven to be one of the useful tools to fix any issues that concerns file system, storage, and disk. However, as useful as it may be, it is still not immune to issues as you could encounter errors when running it. One of these errors is the “One such error is the CHKDSK cannot continue in read-only mode” error. If you receive such an error message while running CHKDSK, then you’ve come to the right place as this post will help you sort the problem out. It is possible that the drive is read-only or that the Write Protection is enabled. It could also be that the drive is already being used and scanned by a different program or utility. To get rid of this error, there are a couple of suggestions you need to check out. You can try to run the CHKDSK utility from Recovery or run it on Boot. You could also try to disable Write Protection. For more detailed steps, follow the given instructions below.

Option 1 – Try to run the CHKDSK utility from Recovery

The first thing you can do to resolve the error in CHKDSK is to run the CHKDSK utility from Recovery. How? Follow these steps:
  • First, boot into the installation environment for Windows 10 from a Windows installation media.
  • Next, click on the “Repair your computer” option.
  • After that, select Troubleshoot > Advanced options > Command Prompt.
  • After opening Command Prompt, type this command and tap Enter: chkdsk <Partition Letter>: /r /f
  • Wait until the disk error checking process is completed.
  • Once it’s done, exit the Command Prompt window and restart your computer and then see if the error is fixed.

Option 2 – Try running the CHKDSK utility on Boot

On the other hand, you can also try to run the CHKDSK utility on Boot so you can fix the error and recover any damaged segments of the drive.
  • Open an elevated Command Prompt and enter this command: chkdsk /r
  • After that, you will a message that says, “Chkdsk cannot run because the volume is in use by another process. Would you like to schedule this volume to be checked the next time the system restarts? (Y/N)”
  • Type Y and tap Enter to schedule a CHKDSK scan once your computer reboots next time.

Option 3 – Try to remove the Write Protection from the drive

As mentioned, removing the Write-Protection on the concerned drive could also help you fix the problem and there are two ways to get rid of the write protection – you can either use the Diskpart utility or the Registry Editor. How? Refer to the following steps.

Via Diskpart utility:

  • Open Command Prompt with admin privileges and then type the “diskpart” command and tap Enter to execute it.
  • Next, type “list disk” and tap Enter to get the list of all the Disk connects or all the partitions that are formed on those disks.
  • After that, you need to choose one command depending on the list of commands you entered. Type “select disk #” and tap Enter to select the disk or partition you want to select.
  • Then type “attribute disk clear readonly” and tap Enter to Disable the Write Protection on the selected disk or partition.

Via Registry Editor:

  • Tap the Win + R keys to open the Run utility and type “Regedit” in the field and then tap Enter to open the Registry Editor.
  • Next, navigate to the following registry key:
ComputerHKEY_LOCAL_MACHINESYSTEMCurrentControlSetControlStorageDevicePolicies
  • After that, look for the DWORD named “WriteProtect” and double click on it, and then set its Value Data to “0”.
  • Now restart your computer and see if the problem is now fixed or not.
Read More
How to move Taskbar to the left in Windows 11
The standard icon place in the Taskbar inside Windows 11 is in the center. Some users welcomed this change, some not so much. If you are part of the user base that is not so much thrilled with this Microsoft’s idea of innovation, do not worry, there is an easy way to move all icons and start button on the left inside Taskbar.

Taskbar icons on leftMoving icons in Taskbar

  1. Open Windows settings by using ⊞ WINDOWS + I key combination
  2. Click on Personalization
  3. Select Taskbar
  4. Click on Taskbar Behaviors
  5. Click on the drop-down menu beside Taskbar Alignment
  6. Select your desired option of icon alignment
  7. Close settings
Your options will be active right away and you will see icons switching to the position of your choosing.
Read More
Fix Error Code 0x80072EE7 in Windows
Installing or updating Google Chrome does not always go smoothly as there are times when it also encounters some errors like the error code 0x80072EE7. This kind of error in Chrome is most likely caused by the Windows Firewall or third-party Firewall (if you’re using one) that blocks the installation or update process. Aside from this known culprit, there are also other factors to consider such as corrupted or incompatible installation files or it could also be caused by some issue with your internet connection. If you face this kind of problem when installing or updating Chrome, you will see the following error message on your screen:
“An error occurred while checking for updates: Unable to connect to the Internet. If you use a firewall, please whitelist GoogleUpdate.exe. (error code 7: 0x80072EE7 — system level).”
Whatever the cause of this error is, you need to use the options prepared below to fix it.

Option 1 – Whitelist the “googleupdate.exe” in Firewall

If the issue is really caused by the Firewall, you need to whitelist the googleupdate.exe program to fix the error. To do that, follow these steps:
  • Tap the Win + E keys to open the File Explorer.
  • Next, copy and paste the following location in the address bar and tap Enter to go there.
Control Panel/All Control Panel Items/Windows Defender Firewall/Allowed apps
  • After that, click on the Change Settings button, and from the given list, look for Google Chrome.
  • Now check both Private and Public connections for it and then click on OK and see if it fixes the error or not.

Option 2 – Disable the proxy server for LAN

If the problem has something to do with your internet connection, then you can try disabling the proxy server for LAN and see if that helps.
  • Tap the Win + R keys to open the Run dialog box.
  • Then type “inetcpl.cpl” in the field and hit Enter to pull up the Internet Properties.
  • After that, go to the Connections tab and select the LAN settings.
  • From there. Uncheck the “Use a Proxy Server” option for your LAN and then make sure that the “Automatically detect settings” option is checked.
  • Now click the OK and the Apply buttons.
  • Restart your PC.
Note: If you are using a third-party proxy service, you have to disable it.

Option 3 – Check your VPN

If you are using a VPN application, then this option should apply to you, if not, skip this option and proceed to the next one. There are times when VPN software causes some issues like this error. If that’s the case, you can try to disable your VPN temporarily and see if the error is resolved or not and if turns out that your VPN is the culprit, you have to uninstall it and install a new one or its latest version. To uninstall it, follow the steps below.
  • Tap the Win + R keys to open the Run dialog box
  • Then type “appwiz.cpl” in the field and hit Enter to open the Programs and Features in Control Panel.
  • From there, look for the VPN service you are using, select it and then click on Uninstall to remove it.
  • After that, restart your computer and try to install the latest version of the program again. It should work now. If not, proceed to the next available option below.

Option 4 – Try to run the Chrome Cleanup tool

You might want to run Google Chrome’s built-in Malware Scanner & Cleanup tool as it could also help in getting rid of any unwanted ads, pop-ups, and even malware, as well as unusual startup pages, toolbars, and anything else that might overtake the network and could affect the performance of the browser.

Option 5 – Reset Google Chrome

Before you proceed, make sure that the Chrome browser is not running anywhere in the background via Task Manager. Once you’ve made sure that it’s no longer running, refer to these steps:
  • Tap the Win + R keys to open the Run dialog box.
  • Then type “%USERPROFILE%AppDataLocalGoogleChromeUser Data” in the field and tap Enter to open this location.
  • From there, look for the Default folder and then tap the Shift + Delete button and if a confirmation prompt appears, click on Yes.
  • After deleting the Default folder, open Google Chrome and click on the three vertical dots icon located in the top-right corner to open the menu.
  • Next, click on Settings and scroll down and then click on Advanced to open the Advanced Settings.
  • Then scroll down until you see the “Reset and clean up” section and click the “Restore Settings to their original defaults” option.
  • After that, you will see a confirmation box and from there, click on the Reset settings button to reset your Google Chrome browser.
Read More
Fixing the Java Error Code 1603 in Windows 10
You might have experienced a situation where you’re trying to install or update your Java application on your Windows 10 computer but were not able to do so for some reason. One of the problems you can encounter while updating or installing Java is Error Code 1603. There are two ways you can install Java – you have the option to choose where to get Java either from the online download or offline download. There are times when before you can install Java, you might have to disable the firewall first as it may interrupt the Java online installation. And while doing so, if you are getting the “Java Update or Install did not complete – Error Code 1603” error message, read on as this post will show you what you can do to fix it. At the time of writing, the exact cause of this error is still unknown. On the other hand, you must still check if you have fulfilled all the system requirements needed to install Java. You have to make sure that your Windows 10 PC has sufficient disk space available for the Java installation or update. In addition, you also have to make sure that you meet all the hardware requirements and you are using a popular web browser for the installation, and that you have administrative privileges for download and installation. To fix the “Java Update or Install did not complete – Error Code 1603” error, here are some suggestions you can try.

Option 1 – Restart your computer before you install the new Java package

You might have to restart your computer if you got the error code 1603 while installing Java through an offline download.
  • Restart your computer.
  • Next, download and install the offline installer of the Java package from the official site of Java and not some third-party source.
  • In the prompt box that appears while downloading the Java package, select the option Save in and save the package in your preferred folder.
  • After that, navigate to the saved, downloaded package on your computer and then double click on the file to begin the installation process.
After that, if it didn’t fix the problem and you’re still getting the error code 1603, follow the next given option below.

Option 2 – Uninstall the old versions of Java before you install the new package

  • Open the Control Panel.
  • After that, click on Programs and features.
  • Then select the old Java package and click on Uninstall.
  • Restart your computer and then try installing the new Java package again from its official site.

Option 3 – Disable the Java content in the browser you’re using via Java Control Panel and reinstall Java

  • Open the Control Panel again.
  • And then click on the Java icon to open the Java Control Panel.
  • Next, navigate to the Security tab and then uncheck the “Enable Java content in the browser” option.
  • Then click on Apply and then Ok to save the changes made.
  • Now install the new Java package again after you download it from its official website.
  • Once the installation is completed, re-enable the “Enable Java content in the browser” option in the Java Control Panel as it is essential especially if you are running Java content in your browser.
Read More
Windows 10 Update and Shutdown/Restart is not working
Update and Shutdown/Restart is not working. As you have probably noticed, every time a new update is released and is downloaded on your Windows 10 computer, the operating system replaces the Restart and Shut down button with “Update and Restart” as well as “Update and Shut down”. This is most likely done so that you won’t miss the update. However, some users noticed that there are times when these buttons still continue to display the same message even if they’ve already performed the required operations such as shutting down or restarting their PCs. Cases like this happen when an update wasn’t installed properly or has failed which is why your computer keeps on prompting you to Update and Shutdown every time. To fix this dilemma, follow the options laid out below.

Option 1 – Try restarting the File Explorer

Restarting the File Explorer can definitely help you fix lots of issues especially when there is some issue with the user interface including this one.
  • On the right side of the Taskbar, right-click on any open spot.
  • Then click on Task Manager.
  • Next, scroll down until you see Windows Explorer.
  • After that, right-click on it and select Restart.
  • If you are able to kill its process, you have to tap the Win + R keys to open the Run dialog box and type “explorer.exe” in the field, and hit Enter to launch the Windows Explorer.

Option 2 – Try running the Windows Update Troubleshooter

As you know, Windows 10 has various auto-repair built-in tools to help users fix small issues which used to get fixed manually. And in this case, you will need the Windows Update Troubleshooter to fix the issue.
  • Go to Settings and click on Update and Security.
  • From there, click Troubleshoot and click on Windows Update and then click the “Run the troubleshooter” option.
  • After that, it will try to detect and automatically fix common issues in the Windows Updates which can be resolved by Windows itself. Note that the process may take several minutes before it completes so you need to wait until it’s done. Once it’s done, in case you have some pending update that wasn’t realized by the system early on, it will apply the fix right away and restart the Windows Update service.

Option 3 – Try setting the Power button to Shut down

In case the first two options didn’t work out, you can try changing what the power button does. To do that, refer to these steps:
  • Go to Control Panel > Power Options.
  • From there, select the “Choose what the power buttons do” option from the left side.
  • Then set the Power button setting the “When I press the power button” option to “Shut down”. After that, it will shut your computer down without installing the updates but obviously, this is only a temporary fix.

Option 4 – Turn off your PC instantly without updating it

  • Tap the Win + R keys to open the Run dialog box.
  • Type in “shutdown -s -f -t 0” in the field and hit Enter if you really want to turn off your computer without any delay.
  • You could also tap the Ctrl + Alt + Del keys and select Shut down from the bottom right menu.
Just like the third option, this is also only a temporary fix.

Option 5 – Try running the Windows Module Installer

The Windows Module Installer is a built-in service in Windows 10 that allows you to fix the stuck Windows Updates in your computer. To use it, follow these steps:
  • In the Cortana search box, type in “cmd” and from the search results that appear, right-click on Command Prompt and select the “Run as administrator” option from the context menu.
  • Once you’ve opened Command Prompt as admin, type the SC config trustedinstaller start=auto command and tap Enter.
  • After the command is executed, you will see the “[SC] ChangeServiceConfig SUCCESS” message displayed on the Command Prompt console.
  • Now exit Command Prompt and then check if the buttons are now back to normal.

Option 6 – Put your PC in a Clean Boot State

  • Log onto your PC as an administrator.
  • Type in MSConfig in the Start Search to open the System Configuration utility.
  • From there, go to the General tab and click “Selective startup”.
  • Clear the “Load Startup items” checkbox and make sure that the “Load System Services” and “Use Original boot configuration” options are checked.
  • Next, click the Services tab and select the “Hide All Microsoft Services” check box.
  • Click Disable all.
  • Click on Apply/OK and restart your PC. (This will put your PC into a Clean Boot State. And configure Windows to use the usual startup, just simply undo the changes.)
After putting your PC in a Clean Boot State, try creating a system restore point and see if the problem still occurs. Clean Boot troubleshooting is designed to help you isolate the problem. For you to execute a clean boot troubleshooting, you must do a couple of actions (the steps are given above) and then restart your PC after every action. You might have to disable one third-party app after the other to really isolate the issue. And once you’ve narrowed down the problem, you can either disable the third-party app that’s causing the problem or remove it. Note that you must switch your PC back into the Normal Startup mode after you’re done troubleshooting the problem. Here’s how you can do it:
  • From the “Start” menu, go to System Configuration.
  • After that, switch to the General tab and click the option for “Normal Startup”.
  • Next, go to the Services tab and clear the checkbox for “Hide all Microsoft services”.
  • Then find and click “Enable all” and if prompted, you have to confirm.
  • Afterward, go to the Task Manager and enable all the Startup programs and confirm the action.
  • Restart your PC when prompted.
Read More
Your account has been disabled error
If you are trying to log into your user account on your Windows 10 computer but encountered an error message instead that says, “Your account has been disabled, Please see your system administrator”, read on as this post will guide you on how you can fix this problem. In this kind of scenario, you won’t be able to access your data unless you have access to the administrator account. This problem could be caused by several problems. It is possible that malware has infected your computer and has changed some settings in your computer, especially if your system has been under a malware attack not too long ago. The malware could’ve changed the “Account is disabled” option. The only thing you can do to resolve this kind of problem is to log into your computer using another administrator account and then change the setting. However, if you don’t have a second administrator account, you can just enable the built-in hidden administrator account on your computer. You shouldn’t have any problem enabling the hidden administrator account as it is quite easy when you can log into your account. And in this post, you will be guided on how you can enable the hidden administrator account using the Registry Editor to fix the “Your account has been disabled, Please see your system administrator” error.

To get started, follow the instructions given below.

  1. First, you need to start your computer and ensure that you are on the error screen. From there, you will see the Power options located on the right-hand side.
  2. Click on the Power options and tap and hold the Shift key and then select Restart.
  3. After that, the Advanced Boot Options will appear and from there select Troubleshoot > Command Prompt.
  4. Next, you have to select your user account and enter the user account’s password to open Command Prompt.
  5. After opening Command Prompt, open your screen and type “Regedit” and then tap Enter on your keyboard.
  6. Now select the HKEY_LOCAL_MACHINE in the Registry Editor and go to File > Load Hive.
  7. Afterward, you have to open the Windows installation drive and go to the location – WindowsSystem32Config
  8. From there, you should find a file named “SAM” – select this file and click the Open button.
  9. Next, you have to enter a key name. You can just input whatever you prefer.
  10. Once done, navigate to this path: HKEY_LOCAL_MACHINEkey_nameSAMDomainsAccountUsers
  11. From this path, you will see a key named “000001F4” – select this key and double click on the “F” entry that you can find on the right-hand side of the screen.
  12. After that, look for the value data line labeled “0038” which should show 11 in the first column. You have to replace it with 10.
  13. Once done, click on the OK button and close the Registry Editor and the Command Prompt to restart your computer.
  14. Now once your computer has restarted, sign in to the Administrator account and open the Computer Management window. You can just search for it using the search bar in the Taskbar.
  15. After you open Computer Management, go to Local Users and Groups > Users – where you can find all the user accounts. Look for your deleted user account and right-click on it and select Properties and then unmark the checkbox that says “Account is disabled”. This should fix the problem.
Read More
Windows 11 Insider Preview Build 22000.71
Microsoft just released Windows 11 Insider build 22000.71. Let’s dive in and see what it brings with you.

windows insider 2000Changes and features

New entertainment widget. The entertainment widget allows you to see new and featured movie titles available in the Microsoft Store. Selecting a movie will direct you to the Microsoft Store to see more information about that title. Just open widgets and click or tap on the “Add widgets” button and choose the entertainment widget. For now, the entertainment widget is available for Insiders in the following countries: US, UK, CA, DE, FR, AU, JP. The new context menus and other right-click menus have been updated to use acrylic material. We are testing the usability of a SplitButton for making new folders and files in the File Explorer command bar. The Taskbar previews (when you mouse-over open apps on the Taskbar) have been updated to reflect the new visual design of Windows 11.

Fixes

Taskbar:

  • We fixed an issue where if you drag app icons on the Taskbar to rearrange them, it was making the apps launch or minimize when you released the icon.
  • Using a long press with a touch on an app icon in the Taskbar to open the jump list should now work.
  • After right-clicking the Start icon in the Taskbar, clicking somewhere else should now dismiss the menu more reliably.
  • Shift + Right-click on an app icon in the Taskbar will now bring up the window menu like it used to and not the jump list.
  • We’ve addressed an issue that was making your mouse move slowly when hovering over the Taskbar previews.
  • We’ve included the fix for an issue when using multiple Desktops where an app icon in the taskbar might give the appearance of multiple windows being open when that wasn’t the case on that Desktop.
  • When using the Amharic IME you should no longer see an unexpected X next to the IME icon in the taskbar.
  • The issue where if you click on the input indicator on the Taskbar and it would unexpectedly highlight Quick Settings has been fixed.
  • When you hover over Task View, the preview flyout for your Desktops will no longer pop back up after using Esc to dismiss them.
  • We made a fix to address an issue where explorer.exe might crash after hovering over the Task View icon in the Taskbar.
  • We fixed an issue where the selected date in the calendar flyout was out of sync with the date in the Taskbar.
  • We made an update to address a scenario resulting in some Insiders not seeing the lunar calendar text in the calendar flyout when enabled in Settings.
  • This flight addressed an issue that could unexpectedly make the Taskbar background transparent.
  • Right-clicking the focus assist icon in the taskbar should now show a context menu.
  • The issue from the previous flight where icons in the taskbar corner were getting crushed against the top of the Taskbar has been addressed.
  • The tooltip for the location in use icon in the Taskbar should no longer appear blank sometimes.

Settings:

  • We fixed an issue making Settings crash on launch periodically.
  • Using the volume mixer sliders in Sound Settings should be more responsive now, as well as the page responsiveness as a whole.
  • We fixed an issue resulting in Disk and Volumes Settings’ change size option being clipped.
  • There was a non-functional verify link under Backup Settings – this has been fixed.
  • The Power and Battery Settings page should no longer be reporting that the battery saver is engaged if it’s not.
  • The Power and Battery Settings page should also now not crash when launched from Quick Settings.
  • We fixed a grammatical error in the Sign-in Settings text.
  • The “I forgot my PIN” link was unexpectedly missing in Sign-in Settings when a PIN was set up and has now been returned.
  • The issue where the Move option under Apps & Features in Settings wasn’t working reliably should be addressed in this build.
  • We’ve mitigated a problem where some of the colors in Settings weren’t updating after switching between dark and light mode, leaving the unreadable text.
  • We’ve done some work to help improve the performance of Settings when switching between light and dark mode.
  • We addressed an issue where some of the elements of the Themes page in Settings would end up crowded together when the window size was small.
  • We resolved an issue where the Pen menu toggle under Taskbar Settings was not in sync with the actual state of the feature.
  • Changes made to “Dismiss notification after this amount of time” in Accessibility Settings should now persist.
  • Some of the icons you could enable in Taskbar Settings were erroneously labeled Windows Explorer even though that’s not what they were – this should now be fixed.
  • The Connect text in Quick Settings has been updated to say Cast.

File Explorer:

  • Clicking the command bar button twice should now close any dropdown that appeared.
  • The new command bar should now appear when “Open folders in a separate process” is enabled under File Explorer Options > View.
  • This build addresses an issue where right-clicking a file and selecting Open With > Choose another app might launch the file in the default app rather than opening the Open With dialog.
  • Fixed an issue the desktop and File Explorer context menu would stop launching.

Search:

  • We fixed an issue where the option to verify your account in Search wasn’t working.
  • Hovering over the Search icon on a secondary monitor will now show the flyout on the correct monitor.
  • Search should now work if you open Start and start typing after having gone to the apps list and back.

Widgets:

  • When using the Outlook client with a Microsoft account, Calendar, and To-Do updates should sync faster down to the widgets.
  • We addressed an issue where if you added multiple widgets quickly from the widget's settings, it could result in some of the widgets not being visible on the board.
  • We fixed a bug where widgets could all become stuck in a loading state (blank squares in the window).
  • The traffic widget should now follow the Windows mode (light or dark).
  • The title of the sports widget should no longer mismatch with the content of the widget.

Other:

  • This build addresses an issue where ALT + Tab was getting stuck open sometimes after you released the keys and had to be manually dismissed.
  • We made a fix for an issue where Narrator's focus wasn’t ending up on the emoji panel after using the keyboard shortcut to open it.
  • Magnifier’s lens view has been updated so the lens now has rounded corners.
  • We found an issue that was noticeably impacting Start launch reliability for some Insiders, and have addressed it with this flight.
  • We’ve updated the “Most Used” text in the Start menu’s app list so it should no longer be getting clipped.
  • Using the semantic zoom in Start’s app list should no longer result in the list being pushed down and to the right off the edge of the window.
  • We fixed an issue where if you pressed ⊞ WIN + Z you would need to press Tab before you could use the arrow key to navigate through the snap layouts.
  • We addressed an issue where an acrylic area could get left on the screen after repeatedly snapping and unsnapping a window with touch.
  • We’ve done some work to mitigate an unexpected flash when moving a snapped window with touch.
  • We made a change to help window borders have a little more contrast when “Show accent color on title bars and windows borders” was turned off.

Known issues in Windows 11 repaired

Start:

  • In some cases, you might be unable to enter text when using Search from Start or the Taskbar. If you experience the issue, press ⊞ WIN + R on the keyboard to launch the Run dialog box, then close it.
  • Based on feedback, we are working on adding access keys to ⊞ WIN + X so that you can do things like “⊞ WIN + X M” to launch Device Manager. Insiders may see this functionality in this build, however, we are currently investigating an issue in which sometimes the option is unexpectedly unavailable.

Taskbar:

  • There is an issue in this build where Explorer.exe will crash when the date and time button on the Taskbar is clicked to access new notifications with Focus Assist turned off. The workaround for this is to enable Focus assist to priority or alarms mode. Note that when focus assist is turned on, notification popups won’t appear, but they will be in the notification center when opened.
  • The Taskbar will sometimes flicker when switching input methods.
  • Taskbar previews may draw partially offscreen.

Settings:

  • When launching the Settings app, a brief green flash may appear.
  • When using Quick Settings to modify Accessibility settings, the settings UI may not save the selected state.
  • The button to rename your PC doesn’t work in this build. If needed, this can be done using sysdm.cpl.
  • Settings will crash when clicking “Facial recognition (Windows Hello)” under Sign-in Settings if Windows Hello is already set up.
  • Reset this PC and Go back buttons in Settings > System > Recovery does not function. Reset and rollback can be accessed from the Windows Recovery Environment by selecting System > Recovery > Advanced startup, and pressing Restart now. Once in Windows Recovery, choose Troubleshoot.
  • Choose Reset this PC to perform a reset.
  • Choose Advanced options > Uninstall Updates > Uninstall latest feature update to perform a rollback.

File Explorer:

  • exe crashes in a loop for Insiders using the Turkish display language when the battery charge is at 100%.
  • When right-clicking the desktop or File Explorer, the resulting context menu and submenus may appear partially off-screen.
  • Clicking a desktop icon or context menu entry may result in the wrong item being selected.

Search:

  • After clicking the Search icon on the Taskbar, the Search panel may not open. If this occurs, restart the “Windows Explorer” process, and open the search panel again.
  • When you hover your mouse over the Search icon on the Taskbar, recent searches may not be displayed. To work around the issue, restart your PC.
  • The search panel might appear black and not display any content below the search box.

Widgets:

  • Widgets board may appear empty. To work around the issue, you can sign out and then sign back in again.
  • Launching links from the widgets board may not invoke apps to the foreground.
  • Widgets may be displayed in the wrong size on external monitors. If you encounter this, you can launch the widgets via touch or WIN + W shortcut on your actual PC display first and then launch on your secondary monitors.

Store:

  • The install button might not be functional yet in some limited scenarios.
  • Rating and reviews are not available for some apps.

Windows Security:

  • Device Security is unexpectedly saying “Standard hardware security not supported” for Insiders with supported hardware.
  • “Automatic sample submission” is unexpectedly turned off when you restart your PC.

Localization:

  • There is an issue where some Insiders may be missing some translations from their user experience for a small subset of languages running the latest Insider Preview builds. To confirm if you have been impacted, please visit this Answers forum post and follow the steps for remediation.
That's is so far, the latest update information on Windows 11 insider build. Stay tuned for more information when it comes as it comes.
Read More
Intel’s GPU ARC coming aimed at AMD & Nvidia
intel ARC
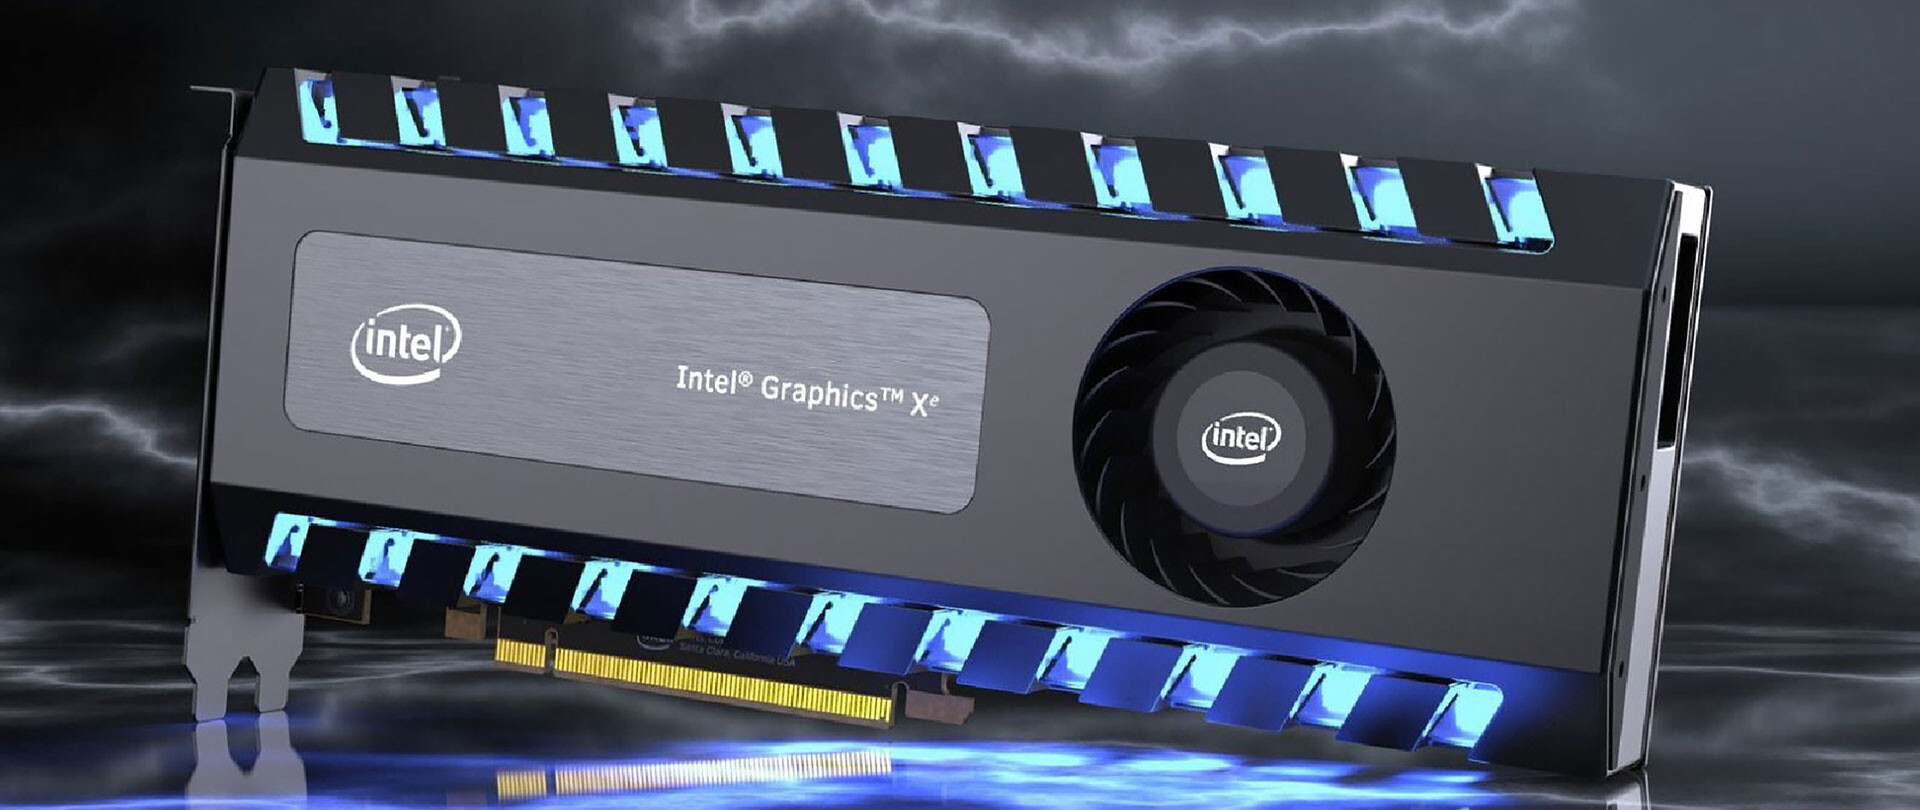
This is not the first time that Intel is trying to enter the GPU field but its adventures so far were, well let us agree not so good. All of that is hoping to be changed with the upcoming ARC GPU. The first generation of Arc graphics, code-named Alchemist and previously known as DG2, will support desktop PCs and laptops and is set to arrive in the first quarter of 2022. Alchemist will have hardware-based Ray tracing and AI-driven supersampling. This indicates that GPU is aimed to compete in the Hi-end spectrum and battle side by side with Nvidia and AMD on the market. Alchemist will also pack full DirectX 12 Ultimate support. Intel also released names for the next upcoming future generations of ARC GPUs: Battlemage, Celestial & Druid. More information about ARC products will be released later this year. “Today marks a key moment in the graphics journey we started just a few years ago. The launch of the Intel Arc brand and the reveal of future hardware generations signifies Intel’s deep and continued commitment to gamers and creators everywhere,” Roger Chandler, Intel vice president, and general manager of client graphics products and solutions.
Read More
Communication with service process failed
The Intel Driver and Support Assistant automatically identifies, finds, and installs drivers in a computer and is pre-installed in newer Intel-supported systems. If you are using one of those newer Intel supported systems but encountered an error that says, “Communication with service process failed, Tray cannot start” when you launch a program, read on as this post will guide you in fixing this problem. This kind of issue in Intel supported system could be due to some third party application that’s meant to update drivers could be interfering. It is also possible that the Intel Driver and Support Assistant application is corrupted. Whatever the cause may be, here are some suggestions you have to check out to resolve the problem.

Option 1 – Try to uninstall all the third party driver update applications

One of the reasons why some users install third-party driver update software is that it is kind of tiresome to update each one of the drivers manually. However, as tiresome as it might be, it is still better than using a third-party driver update application as these kinds of applications could mess up the drivers, and the Intel Driver and Support Assistant is still much better. To fix the error, you have to uninstall the previously installed third-party driver update application on your computer.
  • Tap the Win + R keys to open the Run dialog box
  • Then type “appwiz.cpl” in the field and hit Enter to open the Programs and Features in Control Panel.
  • From there, look for the third-party driver update application you are using, select it and then click on Uninstall to remove it.
  • After that, restart your computer and try to install the latest version of the program again. It should work now. If not, proceed to the next available option below.

Option 2 – Try to disable the DSATray in Startup

Another thing about the “Communication with service process failed, Tray cannot start” error is that it keeps on popping up each time you boot your computer. And so to resolve this bug, you can just disable the DSATray from Startup. How? Refer to these steps:
  • Tap the Ctrl + Alt + Del to pull up the Security options window.
  • From there, select the option to open the Task Manager.
  • Once you’re in the Task Manager, go to the Startup tab and look for “DSATray” and right-click on it and then select the Disable option.
  • Now restart your computer and you should be good to go.

Option 3 – Try to reinstall the Intel Driver and Support Assistant

If the Intel Driver and Support Assistant is corrupted, you need to uninstall it from your computer. All you have to do is go to Programs and Features like what you did in the first option to uninstall the program. Once you’ve uninstalled it, download the newer or latest version of the Intel Driver and Support Assistant from the official site of Intel and then install it.
Read More
Fixing Your Firefox profile cannot be loaded
Caching is used to enhance the performance of applications in Windows and other operating systems. It helps applications to load faster but there are times when the cache can get damaged or corrupted and as a result, you might encounter some issues. One of them is in the Firefox browser where the “Your Firefox profile cannot be loaded, It may be missing or inaccessible” error message may appear. You could also encounter this kind of error when Firefox is unable to access or find the profile folder. In case you don’t know what the profile folder is, it is where Firefox stores your user data and settings by default. Firefox pulls information from this folder each time you choose to open it. You can find this default Firefox profile folder under the %APPDATA%MozillaFirefoxProfiles folder. If you experience issues when trying to access the Profile Manager, you have the option to create a new default Firefox profile folder. This will fix the “Your Firefox profile cannot be loaded, It may be missing or inaccessible” error. How? Simply follow the given steps below. Step 1: Tap the Win key or click the Windows Start button to open the Start menu. Step 2: Next, type “%appdata%” in the field and hit Enter to open the hidden AppDataRoaming folder. Step 3: Now double click the Mozilla folder as well as the Firefox folder. Step 4: From there, look for the “profiles.ini” file and delete it. Make sure that you don’t delete the Profiles folder which should have the icon of a file folder. Note: Keep in mind that the .ini file extension is identified as the file that features a gear icon beside the “Configuration settings” or “Application settings”. Step 5: Once you open Firefox, a new profile will be created. On the other hand, if you know where your profile exists, you can try the following steps below to help Firefox locate it.
  • First, you need to move the profile folder back to its original location.
  • Next, restore the profile folder’s original name if you have modified it.
  • Then create a new profile using the Profile Manager and give it an appropriate name.
  • Now click on the Choose Folder button and select the profile folder you have moved or renamed before you exit the Create a new profile wizard.
Read More
1 2 3 171
Logo
Copyright © 2023, ErrorTools. All Rights Reserved
Trademark: Microsoft Windows logos are registered trademarks of Microsoft. Disclaimer: ErrorTools.com is not affiliated with Microsoft, nor claims direct affiliation.
The information on this page is provided for information purposes only.
DMCA.com Protection Status