Logo

How to hide taskbar inside Windows 11

windows 11 taskbarWindows 11 has brought some bad reviews for its inability to change the taskbar location to the screen. Luckily we can still hide it if needed.

In order to hide the taskbar from the screen follow these simple instructions:

  1. Right-click the taskbar itself and select “Taskbar Settings” in the tiny menu that pops up or open Windows Settings and navigate to Personalization > Taskbar
  2. Click on Taskbar Behaviors
  3. Check the box next to Automatically hide the Taskbar
  4. Close settings

As soon as you click on the box to hide the taskbar Windows 11 will apply your settings and hide the taskbar, you will get one line at the very bottom of the screen indicating that the taskbar is still present, just hidden.

When you reach the bottom of your screen with the mouse it will pop up and be visible again, just like in all Windows so far.

Do You Need Help with Your Device?

Our Team of Experts May Help
Troubleshoot.Tech Experts are There for You!
Replace damaged files
Restore performance
Free disk space
Remove Malware
Protects WEB browser
Remove Viruses
Stop PC freezing
GET HELP
Troubleshoot.Tech experts work with all versions of Microsoft Windows including Windows 11, with Android, Mac, and more.

Share this article:

You might also like

Fix an Unformattable and Unusable USB Drive
If you have a USB that has stopped working and does not show any signs of life do not throw it away just jet. Hello and welcome to another great tutorial on errortools.com, today we will explore how to bring back to life dead USB memories.

Detect a Corrupted  Drive:

If your computer is still able to detect your USB drive, you might want to know if it’s been corrupted. Select the Properties of the drive folder and check the device status. If it says This device is working properly this USB drive is worth saving. There’s no need to worry if you can’t see the USB drive folder.

Erase the USB Drive with Diskpart Tool

Press ⊞ WINDOWS + X top open start menu and choose Command prompt (admin) Type diskpart and press ENTER Type in list disk and press ENTER Locate your USB drive by size and type in select disk#, where # is the number of removable disks.

Reallocate the USB Drive Volume

Press ⊞ WINDOWS + R to open the run dialog and type in diskmgmt.msc Select the USB drive and Right-click on it and select create simple volume. It will lead to a new simple volume wizard window. Once you click next, you can specify the volume size for the pen drive. Select the maximum volume, which is shown as a default unit in MB. As soon as you see the next step, select assign drive letter which will help you view your pen drive once again. Format the partition in the next step. This may be just an extra step because you have already wiped the data clean. But it is always better to be sure. Click Finish to complete the new simple volume wizard which will now be allocated to the USB drive. After you reallocate the unallocated USB drive space, you will be able to view the USB drive storage once again.
Read More
Something went wrong, We couldn’t start
There are instances when you might encounter an error that says, “Something went wrong, We couldn’t start your program” when you open any Office program. This could be due to an issue with the Office file and any Office app you open throws the same error message. This applies to Office 2019/2016, Office 365 Home, Office for Business as well as Business editions. In this post, you will be guided in what you can do to resolve this error. There are several potential fixes for this error, you might only have to restart your computer or you may have to repair Office from Apps and Features or you could also uninstall and install it back again. For more details, follow each one of the provided options below.

Option 1 – Restart your computer

You might be unable to launch any Office app due to some background process that got stuck or there might be some glitch in the system. Thus, the first thing you can do to resolve the error is simply restarting your computer. Once you’ve restarted your computer, open the Office app again or you could also try to sign in back with your Microsoft account that’s connected to Office. If you’re not quite sure which account you were using, you can follow these steps:
  • Open any Office app.
  • Then click on File and look for your name located in the top-right portion.
  • Now click on it. This will display the email or Microsoft account that’s related to Office.

Option 2 – Try repairing Office from Apps and Features

Since Windows 10 offers some repair features that could replace some of the core files with the original files, you can take advantage of such a feature to fix the “Something went wrong, We couldn’t start your program” error when opening any Office app.
  • Open Windows settings and click the Apps and Features option.
  • Next, scroll down until you see the Microsoft Office installation option. Select it and click on Modify.
  • This will open a window and from there, select Quick Repair or Online Repair and click on the Repair button.
Note: When you choose to repair, you might be given two options which depend on how Microsoft Office was installed. For instance, it was installed via Web Installer or Offline Installer (MSI-based). In Web Installer, select Online Repair > Repair when you’re prompted on how you would like to repair Office. While in MSI-based, you have to select Repair under “Change your installation” and then click on Continue. The repair process makes sure that the app data remains untouched.

Option 3 – Try to uninstall and reinstall Office

If neither of the two given options above worked, then you might want to uninstall Office and reinstall it. All you have to do is download the Microsoft Office Uninstall tool from the official site of Microsoft and run it. This will remove any incomplete Office installation as well as unwanted files. It will also get rid of all the Office apps and settings on your computer.
Read More
Delete Downloaded, Failed and Pending Windows Updates in Windows 10
There are instances when instead of fixing problems the Windows Update brings you problems on your Windows 10 computer. You might even see some pending Windows Updates which for some reason, refuse to install no matter what you do. The good thing is you won’t have to deal with those failed and pending updates that are incompletely downloaded to your PC as you can actually delete them. Follow the instructions prepared below to delete the failed and pending Windows Updates.

Step 1: The first thing you have to do is delete all the contents in the Temporary folder

  • Tap the Win + R keys to open the Run dialog box.
  • Next, type in “%temp%” in the field and hit Enter or click OK to open the Temporary folder.
  • From there, select all the folders and files within the Temporary folder and then delete them all.
Note: %temp% is one of the many environment variables in Windows that could open the designated folder by Windows as the Temporary folder which is usually located at C:\Users[username]AppDataLocalTemp.

Step 2: Next, remove the pending.xml file

  • Go to the C:\Windows WinSxS folder.
  • Once you’ve opened the folder, look for a file named “pending.xml” file and right-click on it and you can either rename it or delete it.
  • After that, the Windows Update should delete the pending tasks and build a fresh new update.

Step 3: Delete all the contents of the SoftwareDistribution folder

The Software Distribution folder in the Windows operating system is a folder that can be found in the Windows directory and is used to store files temporarily which might be required to install the Windows Update on your PC. Thus, it is required by the Windows Update and maintained by WUAgent. Aside from that, it also contains all the Windows Update History files and once you delete them, you will most likely lose the Update history. As a result, the next time you run the Windows Update, it may result in a longer detection time.
  • Open the WinX Menu.
  • From there, open Command Prompt as admin.
  • Then type in the following command – don’t forget to hit Enter right after typing each one of them.
net stop wuauserv net stop bits
  • After entering these commands, it will stop the Windows Update Service and the Background Intelligent Transfer Service.
  • Next, got to the C:\Windows\Software\Distribution folder and get rid of all the folders and files thereby tapping the Ctrl + A keys to select them all and then click on Delete. Note that if the files are in use, you won’t be able to delete them.
  • Once all the contents in the Software Distribution folder are deleted, restart your PC and then go back to Command Prompt and input the following commands again.
net start wuauserv net start bits
Since the folder has already been flushed, it will be populated afresh the instant your restart your computer and open Windows Update.

Step 4: Try resetting the catroot2 folder

You can also try resetting the catroort2 folder as it is known to fix tons of Windows Update issues. Both the Catroot and catroot2 are Windows operating system folders that are required for the Windows update process.  So when you run the Windows Update, the catroort2 folders stores the signatures of the Windows Update package and helps it in the installation. It makes use of the “%windir%System32catroot2edb.log” file in the updating process. Afterward, the updates are stored in the SoftwareDistribution folder which is used then by the Automatic Updates in order to execute the updating process. Keep in mind that you must not rename or delete the Catroot folder. Although the Catroot2 folder is recreated automatically by Windows, the Catroot folder isn’t.
Read More
Fix WIFI not asking for password
Windows has tendencies to remember WIFI passwords so it can reconnect automatically to them. But from time to time we change passwords and Windows does not let us change it since he has network remembered. In this case, we will not be able to connect to the internet. In this helpful guide, we will let you know which steps you will need to take in order to solve this issue and to be able to connect to the internet again.
  1. Restart Modem

    First thing first, restart your modem. Windows might see it as a new network and offer you to type in the password for it.
  2. Update driver

    Sometimes the issue could be due to driver problems, open device manager and update WIFI driver or reinstall it.
  3. Reset WIFI password

    Press ⊞ Windows + R type “Control” > hit Enter. Now click Network and Internet > Network and Sharing Center > Change adapter settings. Right-click on the connected Wifi and select Status. Click Wireless Properties, change the password from the Network security key section, and then click OK to reset your WiFi password.
  4. Forget the network

    Click on Start > Settings > Network & Internet > Wi-Fi. Click the Manage known networks link Select the network you are looking for Select Forget.
  5. Delete your WIFI profile

    Press ⊞ Windows + X to open the secret menu and click on Command prompt (admin) In command prompt windows type: netsh wlan show profile netsh wlan delete profile name=<profile name> Reboot
Read More
The Steam Autumn sale is coming!

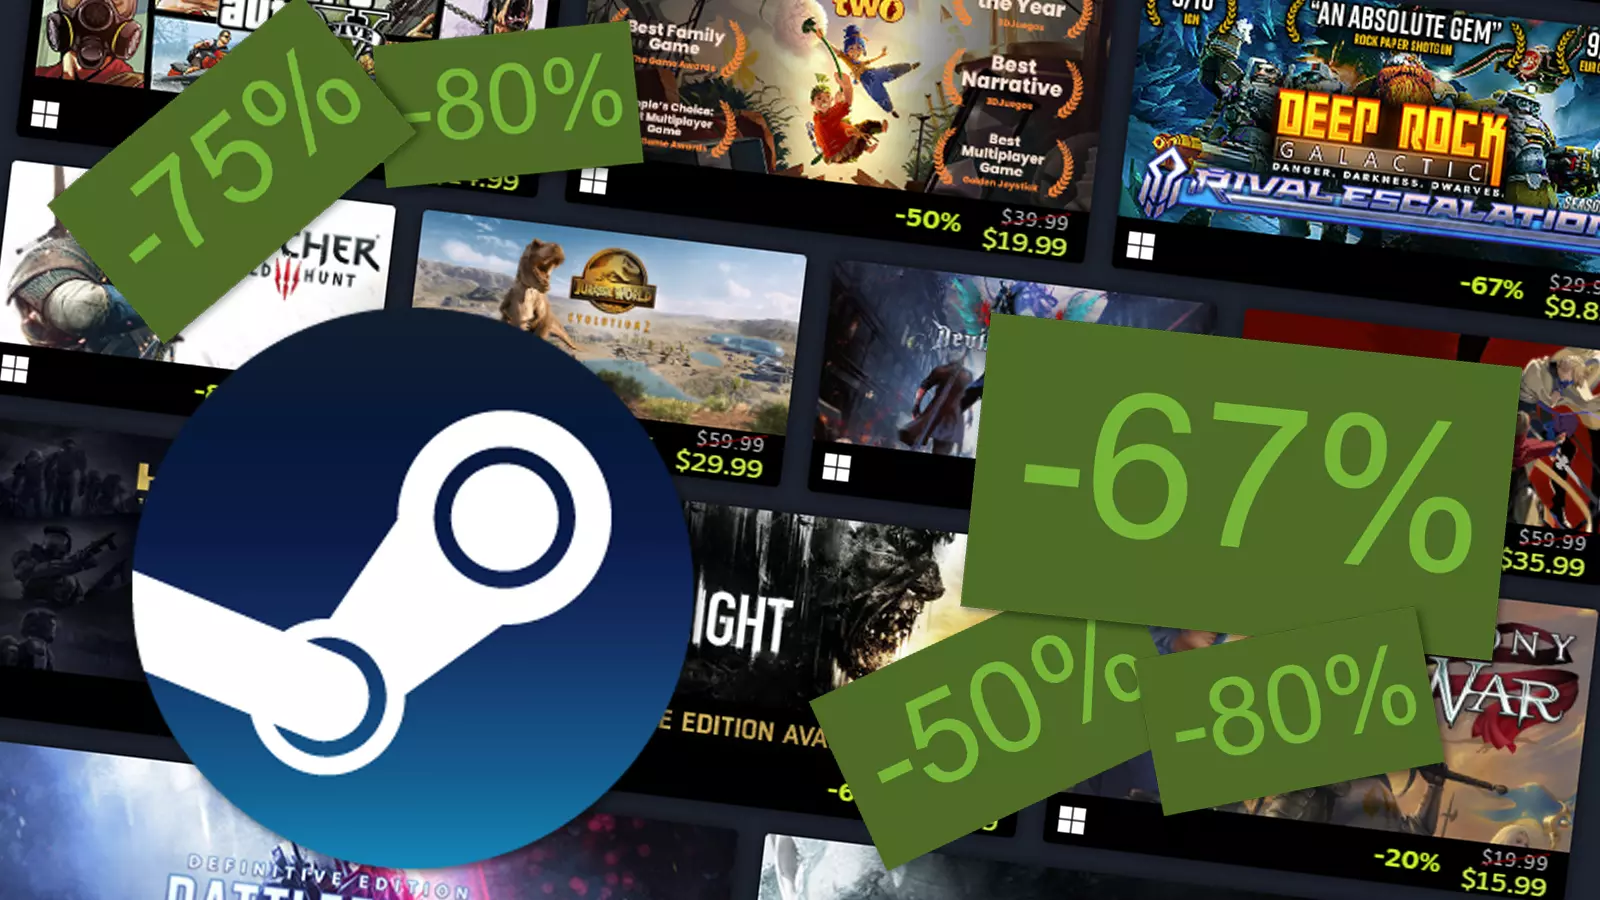
Oh, gamers rejoice, the Steam autumn sale is just around the corner!!!

The sale starts on November 22nd and lasts until November 29th. A great deal for any gamer, especially for ones that have plenty on their wishlist. Speaking of wishlists now would be a good time to place some interesting titles on them so you can be notified about discounts on them.

If you by any chance are unavailable to participate in the Autumn sale, do not worry, Steam winter sale is coming on December 22nd and it will last until January the 5th so you can save for it.

The best tactic for sale is not to jump on the train right away, it is best to wait until a few days, maybe even until the last 2 days since some games can go even lower on discount in the last days of the sale. Also, there might be also some packages that include games you wish to buy but are packed with other ones in a bundle and even with a higher discount.

So get prepared for the upcoming sale and treat yourself to something nice!

steam sale
Read More
File or directory is corrupted and unreadable
If you encounter an error message that says, “<Drive>: is not accessible, The File or directory is corrupted and unreadable” when you try to connect your USB or external device, then the File System could have been corrupted or the external device might be infected with malware. On the other hand, it is also possible that the device might have some physical damage. To fix the “The file or directory is corrupted and unreadable” error, you can try to run Check Disk or scan your computer for malware or you could also format the destination drive. For more details, refer to each one of the given options below.

Option 1 – Run the Check Disk utility

You can also run the Check Disk utility to fix the error when you connect your USB or external device.
  • In the Windows Search box, type “command prompt” and from the search results, right click on Command Prompt and select “Run as administrator”.
  • After opening Command Prompt, type this command and tap Enter: chkdsk <Partition Letter>: /f /r /x /b
  • The command you entered will start to check for errors and fix them automatically. Else, it will throw an error message saying, “Chkdsk cannot run because the volume is in use by another process. Would you like the schedule this volume to be checked the next time the system restarts? (Y/N)”.
  • Tap the Y key to schedule Disk Check the next time your computer restarts.

Option 2 – Try to format the destination drive

Formatting the drive can also help you resolve the error. To format it, follow these steps:
  • To get started formatting your drive, tap the Win + E keys and then go the access page of the drive.
  • Next, right click on the drive and select Format.
  • After that, uncheck the “Quick Format” option and then format your drive properly.
  • Now once the formatting process is finished, unplug the drive and plug it back in afterwards.
  • Check if the error is already fixed. If the drive is not initialized, tap the Win + R keys and hit Enter.
  • After opening the Run dialog box, type “diskmgmt.msc” and hit Enter to open Disk Management.
  • From there, right click on the drive volume and select initialize Disk.
  • Next, select the correct partition type and proceed.
Option 3 – Try scanning your computer for malware using Windows Defender Your computer could be infected with malware which might have triggered the “The file or directory is corrupted and unreadable” error. To fix this, you need to scan your computer using a reliable program like Windows Defender.
  • Tap the Win + I keys to open Update & Security.
  • Then click on the Windows Security option and open Windows Defender Security Center.
  • Next, click on Virus & threat protection > Run a new advanced scan.
  • Now make sure that Full Scan is selected from the menu and then click the Scan Now button to get started.
Read More
Diablo 2 is trending after launch looking good
Finally, some good news for Blizzard entertainment after tons of bad stuff happening around it regarding lawsuits and people layoffs. Diablo 2 has become the most-watched game on Twitch after its official release and sold copies are on a satisfactory level. Diablo 2 resurrectedFor people not familiar with recent events, the state of California has sued Blizzard for various things including discrimination and offensive behavior. Later Blizzard executives were caught shredding some evidence and things just started to go to worse from there. After much drama, many people believed that this is the end for Blizzard entertainment and that they would not be able to recover from this since the community has sided with California and Blizzard has received a large punch as many subscribed WOW players have left the game. Things are not so grim as they were looking as their Diablo 2 remake has made moderate success despite being released in these troubling times and there are rumors of Overwatch 2 planned release date as of the first quarter of 2022. overwatch 2
Read More
What is Windows Terminal and should you use it
Windows Terminal
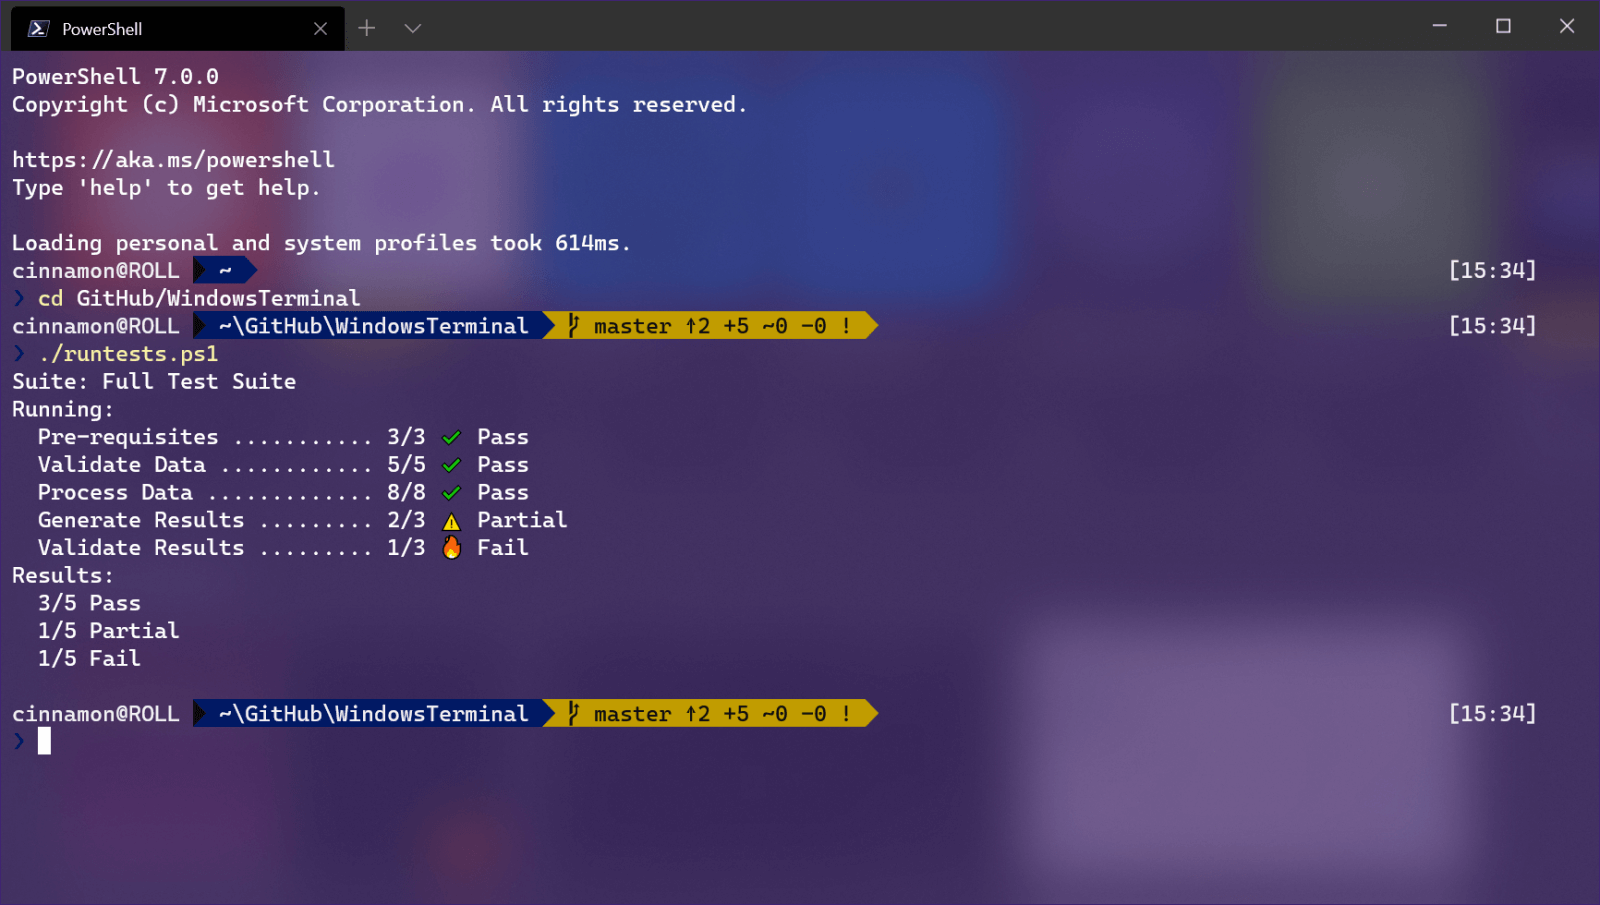
Windows Terminal is a new free Microsoft terminal sort of application. When you open either Power Shell or Command Prompt in Windows they will be opened in different windows, and if you want several of each you will have several windows of each on your screen. Windows Terminal fixes this by opening each of the Instances of Command Prompt and Power Shell as separate tabs inside itself making it much easier to manage multiple instances of named applications. You can also run both Power Shell and Command prompt tabs in the same Windows Terminal. Luckily running command prompt and power shell in different tabs is not the only thing you can do. Windows Terminal lets you choose your own theme, it has emoji support, GPU rendering, split panes, and many more customizable options. Windows 11 will have Terminal as the default command-line environment for opening Power Shell or Command prompt, even Windows Subsystem for Linux (WSL)

Setting Windows Terminal as the default application

If I was successful I have managed to show you that Windows Terminal is something that you should use even if you do not or cannot upgrade to Windows 11. You can use it inside Windows 10 also. First thing is to download and install it. You can get Windows Terminal from the official Microsoft website here: Windows Terminal page After download and installation are completed, open the Terminal app and select the down arrow menu, click Settings. Alternatively, you can use CTRL + + shortcut. Inside Settings by default Default Terminal application would be set to Windows Console Host Click on the Default Terminal application to bring a drop-down menu and choose Windows Terminal from the list. Now by default once opened Windows Terminal will use Power Shell as the default profile, however, you can change this by clicking on the drop-down for the default profile where you can choose between Command Prompt, Power Shell, Windows Power Shell, or Azure Cloud Shell. Pick one that you prefer, click on Save and it will be opened as default on the next run.
Read More
GitHub introduction and explanation
If you are starting to get into the “wonderful” world of coding there is a high chance that you have heard of GitHub or Git for short and there is a slight chance that you might be confused about what exactly GitHub is. If this is the case, we are welcoming you to go through our article and find everything about it and why it is so popular and used all around the world.

githubWhat exactly is GitHub?

If we want to go all technical and just point the obvious we could say that GitHub is basically a WEB site and cloud service used for storing and managing code in all languages. But to truly understand why you should use GitHub and not Dropbox or any storage service instead you need to understand concepts like Version Control and Git.

Version Control

Version control is meant to help developers to work separately on different parts of codes and update is separately not breaking the original one. Take note that this option is meant when there is a big project and has more than one coder working on it. If you are a solo coder on your personal project this might not be anything groundbreaking for you personally. But let’s now assume that you are part of a team and that your task is to edit only one function of a project and other people working will also have their tasks. With version control, you could take only part of the code and work on it and once you are finished merge it back into the main repository. All changes in the main code are automatically tracked and can be easily reverted back if needed. The good stuff is that rolling back can be used only let’s say on a code you submitted and other changes made to the source can be kept. As you can see this makes a very good and efficient working space and a good coding environment.

Git

Git itself is a specific version control system, an open-source version control system to be more precise created by Linus Torvalds in 2005. It is a distributed version control system, which means that the entire codebase and history is available on every developer’s computer, which allows for easy branching and merging. Currently, over 87% of worldwide developers are using Git on a daily basis.

So GitHub is?

GitHub is a profit company that offers a cloud-based Git repository hosting service, in other words, it automates and makes it easy for everyone to use Git for version control and collaboration. It focuses on user interface and ease of use so even beginner coders can use it right away without any large confusion and using command lines and setting it themselves manually. GitHub also has a free personal plan in which you can host a public code repository completely free. This option placed GitHub very popular with open source projects. If you are a company you can purchase a plan to have a private code repository shared only to members of your team or company.

Conclusion

As stated almost every developer on a planet uses some version of Git, many of them are on GitHub and there is a lot of open source projects on it. Some employers even ask to see your GitHub repository when deciding if they want to employ you, think of it as a portfolio for coders. There is not a single disadvantage and not a single argument against using it, especially it has a personal free option. So if you want to look better and more professional in the coding world go, make an account and place some code on it, share it with the world, and see how it goes. You might even get some help on projects from other coders if you need it.
Read More
How to Resolve the Sqlite3.dll Error Code

Sqlite3.dll Error - What is it?

Sqlite3.dll error is a typical example of DLL errors. This error message occurs when the system fails to access Sqlite3.dLL (Dynamic Link Library) files shared by certain programs to run on the PC. The error is displayed in the following format:

"Cannot find the file sqlite3.dll (or one of its components)"

Followed by:

"Error starting program.. A required .DLL file sqlite3.dll was not found."

Solution

Restoro box imageError Causes

The sqlite3.dll error message may pop up on your computer screen due to the following reasons:
  • Missing sqlite3.dll files
  • DLL files affected due to viruses and malware on your system
  • Registry overloaded with invalid entries
  • Disk fragmentation
Whether the cause for the sqlite3.dll error code on your PC is malware invasion or registry issues, it is recommended to resolve it immediately before the damage sets in. Such errors can expose your PC to serious threats like privacy errors, data breaches, identity thefts, cybercrime, system failure, crashes, and valuable data loss.

Further Information and Manual Repair

When it comes to fixing sqlite3.dll error code, you don’t always need to hire a professional and spend hundreds of dollars on the repair. Here are some simple and do it yourself solutions that you can try and resolve the error on your system for free.

1. Check inside recycle bin and restore the deleted file

If this error popped on your computer screen after installing a certain program, then you need to check your recycle bin. This is because DLL files are shared by multiple programs, it might be possible that the program you just deleted also used the sqlite3.dll file to run on your system. And so when you uninstalled the program, the sqlite3.dll file also got removed. To resolve this, check your recycle bin for the file. If you find it, restore it. Once the files is restored, try running the application that was generating the sqlite3.dll error message. If the error still persists, then this means the cause of the sqlite3.dll error is deeper. It could be due to malware or the registry.

2. Remove Malware

To remove malware, run an antivirus. This will help scan for such malicious software on your system affecting DLL files and remove them. However, the drawback is that it may slow down the speed of your PC significantly. And when running it, you may have to stop all other activities on your system.

3. Repair and Restore the Registry

If the cause of the sqlite3.dll error is the registry corrupted with invalid entries and disk fragmentation, then you need to repair and restore the registry. The best way to do this is to download Restoro. Restoro is a powerful and highly functional registry cleaner. It scans your entire PC and detects all registry issues in seconds. It wipes out all the unnecessary and obsolete files including the junk files, invalid registry entries, bad registry keys, temporary internet files, cookies, and browser history. It clears up hard disk space and frees it of clutter. Furthermore, this registry cleaner also repairs the damaged DLL files and restores the registry. Restoro is not only a registry cleaner but is also a system optimizer. This means you can also run it to scan and remove malware on your PC and system instability issues. It boosts your PC’s speed and performance. It runs smoothly on all Windows versions. It is safe, efficient and user-friendly. The layout is neat and the interface is easy to use and intuitive. In just a few clicks you can resolve the sqlite3.dll error and resume using your desired programs. Click here to download Total System Care on your PC to resolve sqlite3.dll error pop-ups.
Read More
1 2 3 171
Logo
Copyright © 2023, ErrorTools. All Rights Reserved
Trademark: Microsoft Windows logos are registered trademarks of Microsoft. Disclaimer: ErrorTools.com is not affiliated with Microsoft, nor claims direct affiliation.
The information on this page is provided for information purposes only.
DMCA.com Protection Status