If you are trying to update your Windows 10 computer using Windows Update but encounter an error code 0x80242006, then you’ve come to the right place as this post will guide you in fixing this particular Windows Update error. This kind of error might be due to mishandling by the operating system. It could also be caused by the antivirus program or security software installed in your computer.
When you encounter this error, you will see the following error message on your screen as you try to run Windows Update:
“0x80242006, WU_E_UH_INVALIDMETADATA. A handler operation could not be completed because the update contains invalid metadata.”
Here are some troubleshooting tips you can try to fix Windows Update Error 0x80242006.
Option 1 – Try to reset the Windows Update components
If by any chance that the second option didn’t work, resetting the Windows Update components could also help you resolve the problem. How? Refer to the following steps:
Open Command Prompt with admin privileges.
After that, type each one of the following command and hit Enter after you key in one after the other.
net stop wuauserv
net stop cryptsvc
net stop bits
net stop msiserver
Note: The commands you entered will stop the Windows Update components such as Windows Update service, Cryptographic services, BITS and MSI Installer.
After disabling WU components, you need to rename both the SoftwareDistribution and Catroot2 folders. To do that, type each one of the following commands below and don’t forget to hit Enter after you type one command after the other.
Next, restart the services you’ve stopped by entering another series of commands. Don’t forget to hit Enter after you key in one command after the other.
net start wuauserv
net start cryptsvc
net start bits
net start msiserver
Close Command Prompt and reboot your PC.
Option 2 – Run the Windows Update Troubleshooter
If resetting the Windows Update components didn’t work, you could also try running the Windows Update Troubleshooter as it could also help in fixing any issues related to Windows Update including this one. To run it, go to Settings and then select Troubleshoot from the options. From there, click on Windows Update and then click the “Run the troubleshooter” button. After that, follow the next on-screen instructions and you should be good to go.
Option 3 – Try to disable your antivirus program
Disabling the antivirus program or any security software installed in your computer is always a good idea you can try when the Windows Update process does not go smoothly. So before you try updating your computer again, make sure to disable the antivirus or security program and once the Windows Update is done, don’t forget to enable the antivirus program back again.
Option 4 – Check the Background Intelligent Service and the Cryptographic Service
Tap the Win + R keys to open the Run dialog box.
Next, type “services.msc” in the field and hit Enter or click OK to open Services.
From the list of Services, look for the following services and make sure that their Startup type is as follows:
Background Intelligent Transfer Service – Manual
Cryptographic Service – Automatic
After that, check if the Service status of the listed services above are set to Running. If they’re not, click on the Start button to start these services and then check if you can now enable the Windows Update service or not.
Option 5 – Run the System File Checker Scan
System File Checker or SFC is a built-in command utility that helps in restoring corrupted files as well as missing files. It replaces bad and corrupted system files to good system files. To run the SFC command, follow the steps given below.
Tap Win + R to launch Run.
Type in cmd in the field and tap Enter.
After opening Command Prompt, type in sfc /scannow
The command will start a system scan which will take a few while before it finishes. Once it’s done, you could get the following results:
Windows Resource Protection did not find any integrity violations.
Windows Resource Protection found corrupt files and successfully repaired them.
Windows Resource Protection found corrupt files but was unable to fix some of them.
Restart your computer.
Option 6 – Try running the DISM tool
You can try running the Deployment Imaging and Servicing Management or DISM tool to fix the Windows Update error 0x80242006. Using this built-in tool, you have various options such as the “/ScanHealth”, “/CheckHealth”, and “/RestoreHealth”.
Open the Command Prompt with admin privileges.
Then type in the following commands and make sure to hit Enter right after you type each one of them:
Dism /Online /Cleanup-Image /CheckHealth
Dism /Online /Cleanup-Image /ScanHealth
exe /Online /Cleanup-image /Restorehealth
After that, wait until the process is finished and do not close the window as the process will probably take a couple of minutes.
If you are typing inside the Search bar, Cortana, Taskbar, Windows 10 apps, etc., and then everything seems invisible then read on as this post will guide you in fixing this issue. At first, you might think that something is wrong with your keyboard but it really has nothing to do with it. The problem actually lies with the apps from Microsoft Store. Thus, if you can’t type anything in any of the apps from Microsoft Store in Windows 10, refer to the options given below to fix them.
Option 1 – Ensure that ctfmon.exe is running
Ctfmon.exe is a Microsoft process in Windows 10 that controls the Alternative User Input as well as the Office Language bar. In other words, it enables end-users to control the computer using on-screen keyboard inputs, speech, and even pen for various languages. It would be better if you launch the program once by going to the C:/Windows/system32 folder. Doing so will ensure that whatever API is needed for the keyboard typing to work properly again. You also have to make sure that its startup status is not disabled. In addition, you can also try the following steps, alternatively.
Open the Task Scheduler.
Then go to Microsoft > Windows > TextServicesFramework.
And on the MsCtfMonitor, right-click and enable the task.
Now restart your computer.
This will ensure that all the text boxes will start to work again. And if the task MsCtfMonitor is missing from the list of tasks, you can import it with the XML file from basics.net. Then download and create a task to run it each time you log in to your PC.
Option 2 – Use the Windows Store Apps Troubleshooter
You might also try running the Windows Store Apps Troubleshooter as it can help in resolving issues with the Windows Store apps. This built-in tool can resolve most of the app-related problems. To use it, go to Settings > Update & Security > Troubleshooting > Windows Store Apps and from there, click the start the troubleshooter button. The Windows Store Apps Troubleshooter will scan the computer for any issues with the Windows store apps and will automatically fix them if it finds any.
Option 3 – Re-register all the Windows 10 UWP apps using PowerShell
First, make sure to close all the running applications on your computer.
Next, in the Start search, type in PowerShell and right click on the result, and select the “Run as administrator” option.
After that, type the following commands to re-register the Windows 10 apps. Make sure to hit Enter on each line:
You can also run the DISM Tool as it helps in repairing the Windows System Image as well as the Windows Component Store in Windows 10. Using this built-in tool, you have various options such as the “/ScanHealth”, “/CheckHealth”, and “/RestoreHealth” which could help in fixing the problem.
Open the Command Prompt with admin privileges.
Then type in the following commands and make sure to hit Enter right after you type each one of them:
Dism /Online /Cleanup-Image /CheckHealth
Dism /Online /Cleanup-Image /ScanHealth
exe /Online /Cleanup-image /Restorehealth
Do not close the window if the process takes a while as it will probably take a few minutes to finish.
Option 5 – Run the System File Checker Scan
System File Checker or SFC is a built-in command utility that helps in restoring corrupted files as well as missing files. It replaces bad and corrupted system files to good system files. To run the SFC command, follow the steps given below.
Tap Win + R to launch Run.
Type in cmd in the field and tap Enter.
After opening Command Prompt, type in sfc /scannow
The command will start a system scan which will take a few whiles before it finishes. Once it’s done, you could get the following results:
Windows Resource Protection did not find any integrity violations.
Windows Resource Protection found corrupt files and successfully repaired them.
Windows Resource Protection found corrupt files but was unable to fix some of them.
The color settings in a Windows computer certainly matter a lot especially when it comes to printing pictures. Users who are found or edit photos for a living change their computer’s color settings in order to ensure that the printout looks like the actual colors. However, those settings might not be appropriate for computer display and you can really tell right away that there something’s not right in the display. You might also notice some weird tint which isn’t easy to get rid of. You can’t actually tell the difference at first, not until you look at some other computers and then wonder what’s wrong with yours so, in this guide, you will know how to restore the display color settings back to their default state on your Windows 10 PC.
Make sure to follow each one of the steps laid out below carefully to restore the default Display Color settings.
Step 1: Set the Color Management Settings to default.
In the Start search box, type in “color management”. Once you see it in the search results, open it.
Once you’ve pulled up the Color Management window, go to the Advanced tab. From there, make sure that every single option is set to default – from all the options in both the “Windows Color System” and “ICC rendering intent to WCS gamut mapping”.
Note: You also have the option to reset it for everyone by simply clicking on the “Change system defaults” button.
Finally, you can also try to calibrate your display.
Step 2: Set the Graphics Properties to default.
After making changes in the Color Management settings, you need to also set the Graphics Properties to default.
Start by right-clicking on any empty space on your desktop.
Then select the Graphics properties from the context menu. From the Graphics properties window, you will see that most sections have to restore defaults.
Step 3: Try using Nvidia Color Settings for Desktop
The next thing you can try is using the Nvidia Color Settings if you have Nvidia graphics installed on your Windows 10 PC. Just the Control Panel to reset the color settings.
From the system tray, launch the Nvidia control panel.
Next, go to Display > adjust desktop color settings.
From there, select the display and then select the Nvidia Settings.
After that, change the options accordingly in order to get the correct combination though you can always leave them to default.
Apple introduced the Live Photo feature way with iPhone 6S in their iOS9. Live Photo idea was that each time you take a photo, your phone will capture a few seconds of video along with sound and all of that is sent when you share your photo. This of course can sometimes be really bad when some not wanted audio gets recorded in the background.
Since the feature was introduced it has been set as the default option when taking pictures so each time you snap one you just capture a small amount of video and audio along. Good thing is that this feature can be turned off and the even better news is that you can edit your old photos to remove back video and audio.
How to share only photo
You can keep your Live Photos but share only a single still typical photo if you wish. Go to the photos app on your phone and select the photo you wish to share. Press the Share button on the bottom left part of the screen and once the Share menu appears tap on the Live button in the upper left corner of the selected photo. The button should turn grey and become slashed and now you can share only still photo. This is only temporary for this one specific share so next time you want to do this you will have to go through the process again.
How to disable Live Photo
If you are not happy with the previous solution and really do not want to turn off the Live feature each time you want to share a photo or you just simply do not want the feature at all there is way to turn if off for good. Take note that you can temporarily not use this feature just by opening the camera, switching to photo mode, and then tapping on the Live photo button on the toolbar that looks like three circles one inside another. This will temporarily turn the Live Photo feature for this session but next time when you open the camera by default it will be turned on again. This is a good approach if you want the feature but sometimes you just want not to use it.
In order to turn it off completely go to the settings of your phone and go to Camera and then preserve settings. inside the preserve setting turn the switch Live Photo to ON position, now go-to camera and again click on the live photo button to turn it off but this time setting will be saved and next time you open the camera it will not be ON.
Editing old Live Photos
As stated before you can edit your old pictures in order to make them stills. You can edit them to remove audio only but keep the video part, or you can completely remove everything and convert them into typical still images.
In order to only remove audio from your Live Photos go to pictures and select one that you wish to change, click on edit, and inside edit tap on the Live Photo icon (three circles). Next tap on the audio icon located in the top left corner of your screen and it will change into the mute icon. Click on done and you are finished.
To completely remove the Live photo go to Photos, select picture, click on edit and select the live photo button again. This time tap and hold the Live button next to the sound until it turns gray with a strike through it. Click on done and you are finished.
You have probably heard a lot of good things about gaming mice, how they are better feeling, better in any way possible and it is all true, everything you heard is actually true, they are superior in any way to a regular mouse but with one big disadvantage, and that would be the price. While you can find a regular mouse for pocket change, a gaming mouse is in comparison very expensive even for entry-level ones.
In this article we will explore all advantages and compare it with the regular one so you can come up with your own conclusion about do you really need one for yourself or if you are fine with regular.
Price
As stated price is one factor that does not favor gaming mice. Regular mouse for a personal computer goes around 10 or 20 USD, while entry-level in gaming one will be 40 USD and can go up to 250 USD, this large gap in price is usually determining factor why people pick up regular one. If you are on a really tight budget go for the regular one, but if you can afford a gaming one get it without second thoughts.
Software
This is where you will see the big difference between mice. Regular ones when connected are recognized and the driver is automatically installed and you can use it, same goes with gaming ones but with one big difference, you have an option to install additional manufacturers' software specially tailored for your mouse. In the application, you will be able to access some features that are specific to the mouse model that you could not set in typical Windows mouse properties. Beside more options software can also have features like setting your profiles and saving them to be recalled when you need them on the fly.
Sensitivity of mouse
The sensitivity of the mouse is measured in dots per one inch or short DPI, this is directly shown on your screen by how fast your mouse can move, higher sensitivity means your mouse will move faster across the screen and lower means it will move slower. All gaming mice come with buttons and settings that will allow you to change DPI on the fly and you can choose precise DPI settings in the software.
The regular mouse comes with DPI around 800 and goes to 1200 typically and does not have usually the option to change this while gaming mice start at 400 and can go as high as 26000 with the option to change it. Some regular mice can have only 1 option of DPI, usually very cheap ones.
Polling rates in mice
Pooling rate is the measurement of how often your mouse reports where it is positioned on the computer. The higher the pooling rate, the more responsive your mouse will be and vice versa. It is measured in hertz (Hz) and regular mice have them around 125Hz that is enough if you are using a computer for office, internet, and mail work.
If you are working in design or gaming you will need more than 125Hz polling rate, luckily gaming mice come with a minimum of 500Hz as an entry point and some hi-end models are going as far as 8000Hz. This very high pooling rate will get some extra load on your CPU but the mouse itself will be maximally responsive and will respond even to the smallest moves.
Ergonomics
Regular mice are well just mice, they are typical shape and size, gaming mice are made with ergonomics in mind. How they are made for extensive daily use of several hours per day they are constructed in a way to offer a pleasant and pain-free experience.
If you work on a computer for long periods of time consider gaming an ergonomic mouse since it will take the strain from hands and place them in a more natural position.
Macro keys
Gaming mice most of the time come with more keys compared with regular ones and good thing is that via its software you can tie certain actions to these extra keys making work or gaming more pleasant and quicker.
Components and material quality
In order to make regular mice more affordable and cheaper materials and quality of components had to suffer. Gaming mice have millions of guaranteed clicks by companies that make them before they break and regular ones usually do not guarantee a single one. This is due of course quality of materials that have been used in constructing these devices.
In the long term, if you use a gaming mouse for typical daily tasks it will outlive your regular one and on the side offer you more pleasant and responsive use along the way.
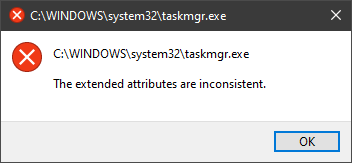
One of the most critical errors inside your Windows operating system is The Extended Attributes Are Inconsistent error. This error means that your operating system has been corrupted and it may produce many annoying issues like for example time lags, random crashes, and even freezing of the system when running multiple applications.
There are a lot of reasons for this error, from the registry to faulty application installations to sometimes even hardware issues like bad RAM memory or bad hard drive. Mostly issue is due to corrupted files inside Windows and most often people only think that resetting the PC or complete reinstallation is the only way to fix this problem.
Although reinstalling the system or resetting the PC will solve this error for sure there are other less time-consuming ways to fix this error.
In this guide, we will show you common ways in fixing Extended Attributes are inconsistent errors inside your Windows that are easy to do and less time-consuming than complete reinstallation of the system.
Fixing Extended Attributes Are Inconsistent error
Run SFC scan
Press ⊞ WINDOWS + X to open the hidden menu
Click on command prompt (admin)
In command prompt type in SFC /scannow and press ENTER
Wait for the operation to complete
Reboot your PC
Use System Image Repair Tool
Press ⊞ WINDOWS + X to open the hidden menu
Click on command prompt (admin)
In command prompt type in Dism /Online /Cleanup-Image /RestoreHealth and press ENTER
Wait for the operation to complete
Reboot your PC
Change all user accounts to the administrator
Press ⊞ WINDOWS + R to open the run dialog
Type in netplwiz and press ENTER
Select a first user account and click on Properties
Click on the Group Membership tab
Choose Others from the options
Select administrator (if all accounts are already administrators change all to users)
Repeat process for all other accounts
Click OK to save settings
Change Windows Sound scheme to default
Right-click on the sound icon in the taskbar
Click on Sound options
Go to the Sounds tab
In Sound Scheme click and choose Windows Default
Under Program Events choose Windows User Account Control
Click on the drop-down menu and choose None
Click on Apply
Click on OK
Downgrade the Sound driver
Press ⊞ WINDOWS + X to open the hidden menu
Click on Device Manager
Find your Audio driver and right-click on it
Click on uninstall and then on OK
Reboot your system
Do System Restore
If none of the provided solutions have worked, perform a system restore to the last point where everything was working fine.
Reset PC
If even system restore has not solved the issue or you do not have valid point in system restore time, perform Reset this PC and hopefully, the error will be finally fixed.
Conclusion
If all of the provided methods have not managed to repair this error that checks your hardware, your computer might have some faulty components if after complete PC reset error persists.
Steam Autumn sale is still raging and other storefronts like EPIC and GOG have also had their go, and as the year slowly closes we reflect on the best games released this year.
The games presented are not in any particular order and as sales are still raging pick one for you for a good time.
F1 Manager 22
If you are into formula racing this new manager is something we will wholeheartedly recommend. How it has been a very long time since a good F1 manager has been released this one is breath of fresh air. Masterfully done and fun to play, also licensed with real teams and cars get it here: https://store.steampowered.com/app/1708520/F1_Manager_2022/
Stray
I like cats, but this game is on another level from its competitors. Unique approach, great storyline, and of course orange cat as the main character! Set in a cyberpunk environment following the story of some unfortunate androids you can do most cat things like playing in boxes, etc but essentially the game is a puzzle platformer which in my opinion is a great thing. Meow your things and get the game while it is discounted: https://store.steampowered.com/app/1332010/Stray/
Neon White
Mirror's Edge was the very unique game when it was released introducing parkour into the gaming world, and Neon white brings it one level up. With competitive parkour FPS gameplay this game is great for killing some time and competing with your friends but most of all it is fun to play experience. Get it here: https://store.steampowered.com/app/1533420/Neon_White/
This game needs to be experienced in order to fully grasp its magnitude and quirkiness. From the creators of borderlands comes a new IP fusion of fantasy, guns, and crazy ideas all wrapped into an action RPG looter shooter with a recognizable borderlands style of graphics. https://store.steampowered.com/app/1286680/Tiny_Tinas_Wonderlands/
Norco
Winner of multiple awards, Norco is a classic point-and-click adventure game with a great sci-fi story with a lot of environmental focus. Story and atmosphere are the main selling points for the game and if you enjoy good stories with interesting characters give this one a go: https://store.steampowered.com/app/1221250/NORCO/
Final Fantasy 14: Endwalker
Expansion for Massive multiplayer online roleplaying game brings so much to the table that we just could not oversee it and place it aside. Technically not full standing game since it is the expansion it still delivers on many fronts and since it is supposedly the last expansion now is the best time to pick it up and give a final fantasy 14 a go: https://store.steampowered.com/app/1592500/FINAL_FANTASY_XIV_Endwalker/
Elden Ring
Of course, the list would not be complete if we did not include Elden ring, a great example of how a difficult but well-executed game can go over and beyond. With a story on par with great epics and compact as in dark souls, this title will provide you with many hours of gameplay and content. https://store.steampowered.com/app/1245620/ELDEN_RING/
If you suddenly encounter a PNP_DETECTED_FATAL_ERROR Blue Screen error, then this post can help you out. The PNP_DETECTED_FATAL_ERROR BSOD usually occurs when any new hardware that is mostly the Plug and Play type is attached. In such cases, when the device is plugged, and the driver for that device crashes or isn’t found or is not compatible, you will most likely encounter this particular BSOD error.
There are several error codes that come under this category, some of them are 0x000000CA (0x01681690, 0xEA96A7BE, 0x938A81AD, 0xF8362881. This BSOD error can also occur at any time. However, the only constant thing here is when you plug a PNP device like earphones, microphones, USB drives, and many more.
The PNP_DETECTED_FATAL_ERROR bug check has a value of 0x000000CA which indicates that the Plug and Play Manager encountered some severe error which is most likely have something to do with a problematic Plug and Play driver. To fix this error, here are some possible solutions that could help.
Option 1 – Run the Blue Screen Troubleshooter
The Blue Screen troubleshooter is a built-in tool in Windows 10 that helps users in fixing BSOD errors like PNP_DETECTED_FATAL_ERROR Blue Screen error. It can be found on the Settings Troubleshooters page. To use it, refer to these steps:
Tap the Win + I keys to open the Settings panel.
Then go to Update & Security > Troubleshoot.
From there, look for the option called “Blue Screen” on your right-hand side and then click the “Run the troubleshooter” button to run the Blue Screen Troubleshooter and then follow the next on-screen options. Note that you might have to boot your PC into Safe Mode.
Option 2 – Try disabling or removing newly installed hardware
In this option, you will have to disable or remove the hardware you’ve just installed recently since external devices could be the one that’s causing the Blue Screen of Death error to appear. To do that, just disconnect any external device that’s connected to your computer physically and then check if it fixes the PNP_DETECTED_FATAL_ERROR Blue Screen error.
Disabling the BIOS Memory options such as Caching and Shadowing can help you in fixing the PNP_DETECTED_FATAL_ERROR Blue Screen error. All you have to do is enter the BIOS first and then use the Arrow and Enter keys to select your choices. And if you can’t seem to find it, look for specific instructions from your OEM or you could also look out for instructions from the manufacturer of your motherboard.
Option 4 – Try to run the CHKDSK utility
Running the CHKDSK utility might also help you resolve the PNP_DETECTED_FATAL_ERROR Blue Screen error. If your hard drive has issues with integrity, the update will really fail as the system will think that it’s not healthy and that’s where the CHKDSK utility comes in. The CHKDSK utility repairs hard drive errors that might be causing the problem.
Open Command Prompt with admin privileges.
After opening Command Prompt, execute the following command and hit Enter:
chkdsk /f /r
Wait for the process to be completed and then restart your computer.
Option 5 – Try to uninstall programs you’ve installed recently
Chances are, some programs that you just installed might be the one that’s causing the BSOD error. Thus, you need to uninstall the program to resolve the problem.
In the search box, type in “control” and then click on Control Panel (desktop app) among the search results.
After that, select Programs and Features from the list which will give you a list of all the programs installed on your computer.
From there, look for the concerned program and select it and then uninstall it.
Option 6 – Update the Device drivers
Tap the Win + R keys to launch Run.
Type in devmgmt.msc into the box and tap Enter or click OK to open the Device Manager.
After that, a list of device drivers will be displayed. Look for the device driver you and then select either “Update driver” or “Uninstall device”. And if you find any “Unknown device”, you need to update it as well.
Select the “Search automatically for updated driver software” option and then follow the instructions to complete the process.
If you have chosen to uninstall the driver, follow the screen options to complete the process and then restart your PC.
Connect the device and Scan for hardware changes – you can see this option under Device Manager > Action.
Option 7 – Perform a System Restore
Performing System Restore might help you in fixing the PNP_DETECTED_FATAL_ERROR Blue Screen error. You can do this option either by booting into Safe Mode or in System Restore. If you are already in the Advanced Startup Options, just directly select System Restore and proceed with the next steps. And if you have just booted your PC into Safe Mode, refer to the steps below.
Tap the Win + R keys to open the Run dialog box.
After that, type in “sysdm.cpl” in the field and tap Enter.
Next, go to the System Protection tab then click the System Restore button. This will open a new window where you have to select your preferred System Restore point.
After that, follow the on-screen instructions to finish the process and then restart your computer and check if the problem is fixed or not.
Device drivers are needed in order for the hardware and software to communicate in an operating system. Some of these drivers are digitally signed. These kinds of drivers are drivers that are signed by their issuing authority in a way that the end-user or any third party won’t be able to modify them. And there are times when you encounter an error that says, “Windows requires a digitally signed driver” when you try to install or update device drivers.
Driver Signing is the process of associating a digital signature with a driver package. Digital signatures are used in Windows device installations to verify the identity of the vendor providing the driver packages as well as to verify the integrity of the driver packages.
All the drivers you usually install on your PC from Windows Update, Original Equipment Manufacturers, or some other third-party driver download software and so on must be verified digitally by Microsoft through the digital signature. A digital signature is an electronic security mark that verifies the publisher for the driver and all the relevant information related to it. That’s why Windows won’t run a driver if it isn’t certified by Microsoft, be it a 32-bit or 64-bit system – this is called the Driver Signature Enforcement.
The only Kernel-mode drivers that Windows 10 will load are the ones that are digitally signed by the Dev Portal. However, the changes only affect the new installations of the operating system with Secure Boot on while the non-upgraded fresh installations would require drivers that are signed by Microsoft.
The “Windows requires a digitally signed driver” error indicates that the driver you are trying to update or install hasn’t been signed digitally by the issuing authority, preventing you from installing or updating it. To resolve this issue, you can try to update the drivers directly from the manufacturer’s site. You could also disable driver signing via Group Policy Editor.
Option 1 – Update the device drivers directly from the manufacturer’s site
The reason why you’re getting the “Windows requires a digitally signed driver” error in the first place is that you might have downloaded the drivers from external media. It could also be that the drivers didn’t update for some time now and the issuing authority changed its policies. Thus, you can try to update the drivers straight from the manufacturer’s website and install them. If this option didn’t work, then you’ll have to disable the driver signing or its recognition in Windows 10. Keep in mind that doing so is not advisable if you have to use the concerned driver.
Option 2 – Disable driver signing via Group Policy Editor
Tap the Win + R keys to open the Run utility and type “gpedit.msc” in the field and tap Enter to open the Group Policy Editor.
After that, navigate to this policy setting: User configuration > Administrative templates > System > Driver installation
Next, double click on the “Code signing for device drivers” entry located on the right pane to open its properties where you’ll see the following description:
“This setting determines how the system responds when a user tries to install device driver files that are not digitally signed. It establishes the least secure response permitted on the systems of users in the group. Users can use the System in Control Panel to select a more secure setting, but when this setting is enabled, the system does not implement any setting less secure than the one the setting established.When you enable this setting, use the drop-down box to specify the desired response.“Ignore” directs the system to proceed with the installation even if it includes unsigned files.“Warn” notifies the user that files are not digitally signed and lets the user decide whether to stop or to proceed with the installation and whether to permit unsigned files to be installed. “Warn” is the default.“Block” directs the system to refuse to install unsigned files. As a result, the installation stops, and none of the files in the driver package are installed.To change driver file security without specifying a setting, use System in Control Panel. Right-click My Computer, click Properties, click the Hardware tab, and then click the Driver Signing button.”
Now select the radio button for “Enabled” and select Ignore from the drop-down menu under “When Windows detects a driver file without a digital signature”.
Then click on the Apply and OK buttons to save the changes made. This will get rid of the “Windows requires a digitally signed driver” error but take note that this will also make your system less secure.
This post will help you fix the request that failed due to a fatal device hardware error on your Windows 10 PC. You can encounter this error when that hard drive/SSD on your computer is damaged physically and the system is either unable to access or perform read/write operations in it. Aside from hard drive/SSD, this error can also happen to removable drives.
This kind of error is not uncommon and in most cases, the hardware is physically damaged due to which you are not able to perform operations. However, there are a couple of fixes that you can try to resolve the problem before you go ahead and back up your data and move them to a different drive. What exactly causes this error? It’s actually self-explanatory and it gives you an idea that the drive is either corrupted or in a bad state. To resolve the error, follow the given options below carefully and see which one worked best for you.
Option 1 – Verify the hard drive using SMART attributes
In case you don’t know, Windows has a built-in feature of SMART analysis which analyzes the hard drive/SSD and checks all the parameters by performing some minor operations. To use it, follow these steps:
Tap the Win + S keys and type “command prompt” in the field then right-click on the related search result and select the “Run as administrator” option.
After opening Command Prompt as admin, type the “wmic diskdrive get status” command and hit Enter.
You should get a result after that, and if you see that it’s “normal”, proceed to the next option below.
Option 2 – Use the CHKDSK utility
When it comes to some issues concerning the hard drive or removable devices, there is a utility in Windows that might help which is called “chkdsk”. This error check utility can help with several issues in the system.
Tap the Win + S keys to open the Search box.
Then type “command prompt” in the field and from the search results that appear, right-click on Command Prompt and select “Run as administrator”.
After opening an elevated command prompt, copy and paste the following command and hit Enter:
Note: In the command given above, “[/F]” will try to fix the system errors while “[/R]” will be the one to fix the bad sectors.
Now if you are prompted to run CHKDSK after your reboot your PC, just tap Y and reboot your PC.
If CHKDSK is not able to find any errors, tap the Win + E keys and navigate the access window. From there, right-click on the concerned drive and click on Properties.
After opening Properties, click on the tab Tools and then click on the “Check” button under the Error-checking section.
Wait until the process is completed and then restart your computer.
Option 3 – Format your drive
You can try formatting your drive since this problem also occurs on removable hard drives. In addition, if your drive is not properly initialized, this error will really pop up. Thus, you need to make sure that the hard drive is initialized and that the correct partition style is selected.
To get started formatting your drive, tap the Win + E keys and then go to the access page of the drive.
Next, right-click on the drive and select Format.
After that, uncheck the “Quick Format” option and then format your drive properly.
Now once the formatting process is finished, unplug the drive and plug it back in afterward.
Check if the error is already fixed. If the drive is not initialized, tap the Win + R keys and hit Enter.
After opening the Run dialog box, type “diskmgmt.msc” and hit Enter to open Disk Management.
From there, right-click on the drive volume and select Initialize Disk.
Next, select the correct partition type and proceed.
That should fix the problem, if not, follow the next advanced option below.
Error code 0x80070422 is a Windows-based error code occurring in various versions of Windows including Windows 7, Windows 8 and Windows 8.1, and Windows 10. It usually occurs when users attempt to update Windows. A message box will appear stating that the error code has occurred. Users will notice the following common symptoms:
Inability to complete Windows updates
Error message occurring during use of Windows Update service
The error code, if left unresolved, can cause serious problems for PC users as they will be unable to access the latest updates to the Windows operating system. Such a situation can expose their system to vulnerabilities. Thus, fixing Windows 10 error code is of utmost importance.
Solution
Error Causes
Among the many reasons Error code 0x80070422 is encountered includes:
Corrupted or missing registry and DLL files
Badly or poorly installed software. The software could also be infected by a virus or Trojan
Outdated or poorly installed drivers
Further Information and Manual Repair
Fixing Windows-based error codes can be a simple process. However, in some cases, it requires specialized skills. In the case of Windows 10 error code 0x80070422 consider the two (2) main solutions available through manual repair. You may also need to consider help from a certified Windows repair technician or the use of an automated tool if you are not confident you have the skills to perform the solutions below.
Method 1: Check if Windows Update is Running Properly
One of the main reasons for error code 0x80070422 is a Windows Update service that is not running on the right settings. To verify if an issue with your Windows Update service is the source of the problem applies the following steps:
Type “Windows Update” in the search bar near the Windows home button.
Select “Windows Update settings” when this option appears. (You may also click the home button, then “Settings” followed by “Update and Security”.)
Select “Advanced Options”
(You will be given an option to choose how updates are installed.) Select Automatic.
Save settings and restart the computer.
Once these settings are in place Windows will be able to download updates automatically. This enables your machine to run more smoothly. However, if after applying the steps above, Windows 10 error code 0x80070422 is not resolved, you may proceed to solution two (2).
Method 2: Disable Internet Protocol Version 6 (IPv6)
IPv6 is the latest or most current version of Internet Protocol (IP). This provides your machine with an IP address, a crucial aspect of all communications related to the Internet. By disabling this IP some users have been able to successfully resolve Windows 10 error code 0x80070422.
Like many tasks involving Windows, there are more than one ways in which you can attempt to disable IPv6. These require different types of skills and must be approached with care, as mistakes can lead to serious issues with your machine. Methods include using Command Prompt, Registry Editor, or Control Panel.
If your experience with Windows 10 is quite limited and you are not certain of your skills choose the simplest approach as listed below.
Select Control Panel.
Choose “Network and Internet”, then “Network and Sharing Center”.
Right-click your Internet Connection. The name of your connection will be listed underneath the heading – “View your basic network connection and set up connections”.
Select “Properties” then uncheck Internet Protocol version 6 (IPv6)
Save settings by clicking OK.
Restart the computer and check if the 0x80070422 error code has been corrected.
Method 3: Using An Automated Tool
If the issue persists despite following the solutions above, the best step to take is to use an automated tool. This may not be your preferred course of action, especially since it can be difficult to ascertain the safety of certain tools found online. For this reason, choose a reputable source offering automated tools which are designed to specifically fix Windows 10 error code including error code 0x80070422.
Download and install a powerful automated tool to access the best Windows 10 error code solutions. The process is simple and includes clear instructions which enable even average Windows users to completely resolve complicated errors on their machine.
How to Stop Future Error Codes from Occurring
Though it is hard to predict when an error code will occur, each Windows 10 user can take precautionary steps to prevent other errors from occurring. This includes the following:
Ensure you download software from reputable sources to avoid viruses and other forms of malware.
Clean your registry often. The registry stores settings across all applications. Regular cleaning will your machine function more efficiently as it reduces the likelihood of issues such as crashes or system errors.


 In this guide, we will show you common ways in fixing Extended Attributes are inconsistent errors inside your Windows that are easy to do and less time-consuming than complete reinstallation of the system.