Logo

Fix Windows Update error 0x80070003

If you are trying to run Windows Update but encountered an Error 0x80070003, read on as this post will guide you on how you can fix it. This kind of error in Windows Update can occur when you activate Windows Firewall or download from the Windows Store. This kind of error indicates that the Windows Update service or WUAUSERV is not started or that the Background Intelligent Transfer Service or BITS can’t be started. Aside from that, you can also encounter this error with the other Windows Update components.

To fix the Windows Update error 0x80070003, you can try to run the built-in Windows Update troubleshooter or replace the old Configuration file named “Spupdsvc.exe”. You can also try to reset the Windows Update components or check the status of all the Windows Update-related services, as well as run a System File Checker scan.

Option 1 – Run the Windows Update Troubleshooter

Running the built-in Windows Update troubleshooter is one of the things you can first check out as it is known to automatically resolve any Windows Update errors like error code 0x80070003. To run this troubleshooter, Refer to these steps:

  • Tap the Win + I keys to open Settings.
  • From there, click Update and Security and go to the Troubleshoot section.
  • Next, select Windows Update and click the “Run the troubleshooter” button and wait until it’s finished, and then try to run Windows Update again.

Option 2 – Try replacing the old Configuration file named “Spupdsvc.exe”

The next thing you can do to fix the Windows Update error is to replace the Spupdsvc.exe file. This is a process file that comes under the Microsoft Update RunOnce service. So when an update becomes available for your computer, the process responsible for performing the upgrade is notified. In addition, the RunOnce entry is also added to the registry for the spupdsvc.exe and this process is executed when your computer restarts and when you log on.

  • In the Start Search, type “command prompt” and from the search results, right-click on Command Prompt and select the “Run as administrator” option.
  • Next, execute this command to replace the old configuration of the Spupdsvc.exe file with a new one: c m d (remove spaces on CMD) /c ren %systemroot%System32Spupdsvc.exe Spupdsvc.old
  • After that, try to run Windows Updates again and check if the error is now gone.

Option 3 – Try deleting the files from the SoftwareDistribution folder and resetting the Catroot2 folder

The downloaded Windows Updates are placed in a folder called “SoftwareDistribution”. The files downloaded in this folder are automatically deleted once the installation is completed. However, if the files are not clean up or if the installation is still pending, you can delete all the files in this folder after you pause the Windows Update service. For complete instructions, refer to the steps below.

  • Open the WinX Menu.
  • From there, open Command Prompt as admin.
  • Then type in the following command – don’t forget to hit Enter right after typing each one of them.

net stop wuauserv

net start cryptSvc

net start bits

net start msiserver

  • After entering these commands, it will stop the Windows Update Service, Background Intelligent Transfer Service (BITS), Cryptographic, and the MSI Installer
  • Next, go to the C:/Windows/SoftwareDistribution folder and get rid of all the folders and files thereby tapping the Ctrl + A keys to select them all and then click on Delete. Note that if the files are in use, you won’t be able to delete them.

After resetting the SoftwareDistribution folder, you need to reset the Catroot2 folder to restart the services you just stopped. To do that, follow these steps:

  • Type each one of the following commands.

net start wuauserv

net start cryptSvc

net start bits

net start msiserver

  • After that, exit Command Prompt and restart your computer.

Option 4 – Check the status of some Windows Update Services

  • Tap the Win + R keys to open the Run dialog box.
  • Next, type “services.msc” in the field and hit Enter or click OK to open Services.
  • From the list of Services, look for the following services and make sure that their Startup type is as follows:
    • Windows Update – Manual (Triggered)
    • Background Intelligent Transfer Service – Manual
    • Cryptographic Services – Automatic
    • Workstation Service – Automatic
  • After that, check if the Service status of the listed services above are set to Running. If they’re not, click on the Start button to start these services and then check if the Windows Update error 0x80070003 is now fixed or not.

Option 5 – Run the System File Checker Scan

If manually resetting the Windows Update components didn’t work, you can run a System File Checker scan instead. It is a built-in command-line utility that replaces bad and corrupted system files with good system files that might be the cause why you’re getting the error when you try updating your computer. To run the SFC command, follow the steps given below.

  • Tap Win + R to launch Run.
  • Type in cmd in the field and tap Enter.
  • After opening Command Prompt, type in sfc /scannow

The command will start a system scan which will take a few whiles before it finishes. Once it’s done, you could get the following results:

  1. Windows Resource Protection did not find any integrity violations.
  2. Windows Resource Protection found corrupt files and successfully repaired them.
  3. Windows Resource Protection found corrupt files but was unable to fix some of them.
  • Restart your computer.

Do You Need Help with Your Device?

Our Team of Experts May Help
Troubleshoot.Tech Experts are There for You!
Replace damaged files
Restore performance
Free disk space
Remove Malware
Protects WEB browser
Remove Viruses
Stop PC freezing
GET HELP
Troubleshoot.Tech experts work with all versions of Microsoft Windows including Windows 11, with Android, Mac, and more.

Share this article:

You might also like

Override default Regional settings in Windows
As you probably know, Windows 10 does not offer lots of choices for its Regional settings depending on where you are and what locale you work with or belong to. The standard region settings for Windows 10 allow users to select one set of formats for the calendar and more. However, this has somewhat changed in the Windows 10 v1809. If you don’t want such a change, you can just override the default regional format settings in the Windows 10 Improved local experience. So in this post, you will be guided on how you can do such a thing. Follow the given instructions below to override the default Regional Format settings in Windows 10. Step 1: Go to Settings > Time and Language > Region. Step 2: From there, the default region is what Windows and apps might use to provide you with local content. However, this won’t be much of use if you work for a different locale and need to have different format settings like Calendar, Dates, Times, Currency, and First day of the week, all of which you can modify under the Regional format. Step 3: You need not reboot your Windows 10 computer after changing. On the other hand, some of the apps will have to close and launch again in order to apply the new format. Thus, if you need to use apps that are of different locales, you will only see the changes after you re-launch the app. Note: You can also select a different language that makes more sense to you. In other words, if you prefer more common words to standard words for your Windows 10 computer, then this is definitely the way to do it. This local format will be used for messages, menus, navigation, settings, and other topics. Step 4: Look for a link that says “Add a Windows display language with local experience packs” under Languages. In case you don’t know, Local Experience Packs are Microsoft Store apps that deliver Windows display language quality improvements. So once you click the link, it will download the packs from the Microsoft Store. In addition, Windows has already begun using AI or Artificial Intelligence as well as neural network-based Machine Learning for Windows localization. And as the number increase, the Machine language improvements and feedback from users will help in making the translations a lot better and make them available to even more languages. All in all, it’s pretty much an interesting and a good move for Microsoft as the demands for topics and machines to be available in local languages have been increasing for the past couple of years.
Read More
How to Fix the Error 550

Error 550 - What is it?

Error 550 is an SMTP (Simple Mail Transfer Protocol) outgoing server error code. It usually occurs when you try to send emails through your Outlook account and the email message encounters a relay error. The email returns back without being delivered with a 550 error message. The error message is prompted as either of the following:
"550 Requested action not taken: mailbox unavailable" "550 5 2 1 mail from refused spam site"
In other words, the error code 550 means that your SMTP server was not able to deliver the sent email to the user.

Solution

Restoro box imageError Causes

There are multiple reasons for this error message including:
  • The email address was typed incorrectly
  • Incorrect SMTP Server settings
  • ISP placing restrictions for outgoing mails on the email server
  • System infected by virus or malware
Further Information and Manual Repair Regardless of what the reason may be for the error 550 code occurrence, it is advisable to repair and fix the issue quickly to avoid inconvenience. You may not be able to send emails from your Outlook account if the error continues. This can cause great hassle in corresponding with others timely and may create a big communication gap. Here are some quick and efficient ways to resolve this issue on your system:

Solution 1:

There is no need to panic when you encounter error 550. Sometimes the error message may occur because you inserted the wrong/ incorrect email address of the recipient. In such a case, cross-check the recipient’s email address to verify if it is correct. If not, insert the correct address and try sending the email again.

Solution 2:

If the error still persists, try other methods to resolve it. Sometimes error 550 can also occur due to incorrect SMTP settings. Fix it to resolve the error. This can be done by opening your Outlook settings Tools and Accounts option. Now go to view/change the email account for the email account you are having problems with. After that check, the SMTP server is set to mail.yourdomain.com. Then click more settings and then click the outgoing server tab. See if the ‘My server requires authentication for the outgoing server’ is checked. If not, then check on it. Then simply save to confirm changes. Now try emailing again. Hopefully, this will resolve the issue.

Solution 3:

Another reason for the error occurrence can be ISP blockage. When the junk email volumes increase, network administrators (the people who are responsible for managing ISP servers) place restrictions on SMTP email servers to prevent spam on their network. If this is the reason, contact your ISP administrator to resolve the issue.

Solution 4:

Malware and viral infection can also be the cause for error 550. To remove all kinds of viruses including Trojans and spyware and fix the issue right away without compromising on the speed of your PC it is advisable to download Restoro. This is a highly functional and advanced PC Fixer embedded with multiple utilities like a powerful antivirus and a system optimizer. It scans your entire PC in seconds, detects and removes all kinds of viruses. Simultaneously, the system optimizer feature ensures the speed of your PC does not slow down during the scanning and virus removal process. This feature boosts your PC speed significantly. It is user-friendly and has easy navigations making it quite simple for even those users who are not technically sound to work around it and operate it with ease. It is compatible with all Windows versions. Click here to download Restoro and resolve the error 550 messages today!
Read More
Change default name for New Folder in Windows
Anytime when a new folder is created in Windows name "New Folder" is offered and set as the default name. If by any chance you would like to change this and set your own default name instead of the standard one, follow this guide. Please be aware that this guide will require you to change the registry of Windows, it is common practice to make a backup of your registry each time you want to manually change any values in it, just in case something goes wrong.
  • In order to change the default new folder name first press ⊞ WINDOWS + R to open the run dialog, type in it RegEdit, and press ENTER run dialog with regedit
  • In registry editor find the key:
HKEY_CURRENT_USER\SOFTWARE\Microsoft\Windows\CurrentVersion\Explorer
  • Select the NamingTemplates key. If it is not present, you’ll need to create one.
  • Right-click the NamingTemplates key to add a String Value.
  • Assign it the following name: RenameNameTemplate.
  • Double-click on the RenameNameTemplate data value to open the Edit String dialog box.
  • In the Value Data field enter the new text you want to appear when you create a new folder. You have to make sure you are not using any of the following characters: \ / ? : * " > < |
  • Close the Registry Editor and Exit.
  • Now, when you create a new folder, it will be named Whatever you chose instead of the New folder.
And that is all to it, you now have your own personal new folder naming template.
Read More
A Quick Guide to Fixing Error 451

Error 451 - What is it?

This is a typical SMTP error code. SMTP is the abbreviation for Simple Mail Transfer Protocol. It is an internet standard for email transmission. In other words, SMTP is a text-based protocol in which the sender communicates with the mail receiver by issuing commands and receiving a response code. The SMTP error 451 is displayed in the following format:
‘451 Requested action aborted: local error in processing’
This error message indicates that the program cannot send more messages and the server has hit the limit. This is because some mail servers have limits. The sever stops the task of sending and receiving emails when this limit is achieved.

Solution

Restoro box imageError Causes

The causes of error 451 include:
  • Server limit reached
  • Email rejection due to a remote anti-spam filter
  • Request denied by the server
  • Viral infection
If you heavily rely on email communication with your business partners and colleagues, then it is advisable to immediately resolve this issue without any delays. Though this error is not fatal, you should repair it right away to avoid inconvenience. SMTP error code 451 can hamper your ability to communicate via email.

Further Information and Manual Repair

Here are some of the best, easy, and effective DIY methods that you can try to repair error code 451 on your PC.

Method 1

To fix this error, simply follow these steps:
  • login to Linux SSH
  • Open the file /etc/localdomains
  • Nano/etc/localdomains and then add the domain name that is triggering email sending error
  • Now reboot your PC
This will hopefully resolve the issue. Nonetheless, if the error code still persists, then try other methods given below.

Method 2 - Configure List Settings to change the server limit.

This can be done by accessing the List Settings then Outgoing Mail Server (SMTP) and then the Limit Feature. By accessing the limit feature, you can easily adjust the program to any limit of your choice. Configure the limit and save changes. Reboot PC to activate the changes made.

Method 3 - Scan and Remove Viruses.

This error code can also be triggered due to viral infection. If this is the cause, then simply download an anti-virus on your PC. Scan the entire system and remove all detected malicious programs like Trojans, malware, adware, viruses, and spyware. This will repair the error 451 on your system.

Method 4

If the error still persists, then contact your SMTP provider to check the situation and resolve it. There is a possibility the error is generated from the SMTP provider’s end.
Read More
Switch audio devices in Windows 11 taskbar
windows 11 audio settings
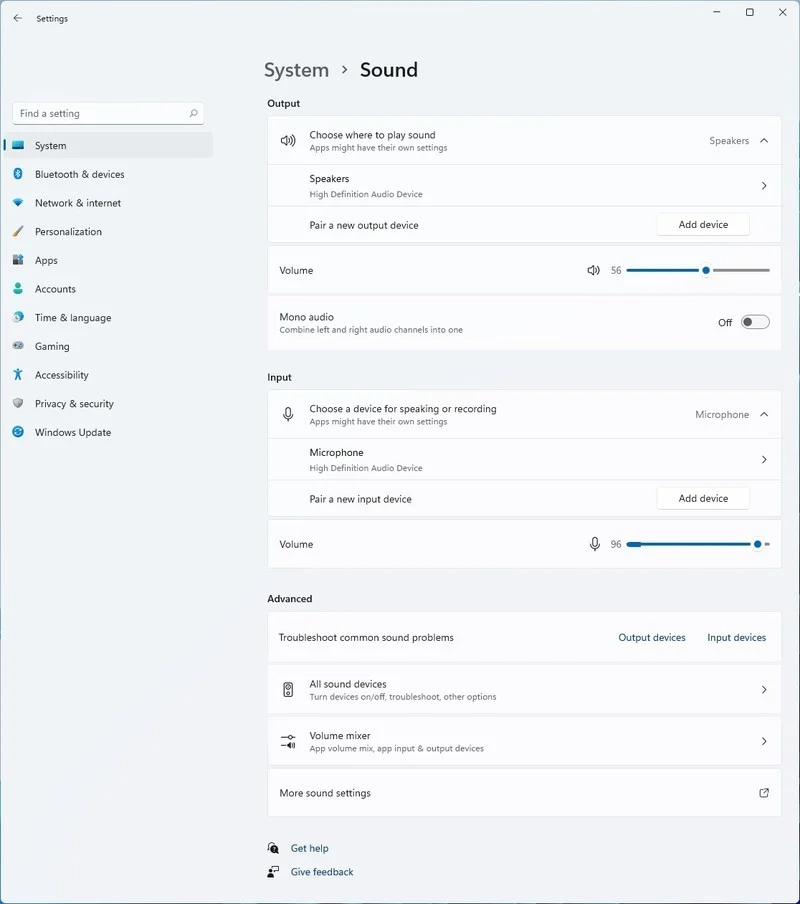
Windows 11 has brought some new features and changed some of the existing ones. One of these changes includes quick switching of audio devices which will play audio. Audio switching can still be done under the taskbar, it is just a little different and one could say even hidden. Follow this quick guide and you will be switching from your headphones to speakers as an example in a matter of seconds.
  1. Click on the speaker icon located in the far-right part of the taskbar.
  2. After the quick settings menu appears click on the right arrow located right of the volume slider. If the arrow is not present, instead of click on the pencil icon, then on add, and finally select Volume from the list.
  3. After clicking on the arrow icon, a list of all enabled audio devices on the system will replace the volume slider. Click on the desired audio device in order to make it active.
  4. Click anywhere outside the quick setting menu to save changes and close it.
Note: in the Quick settings menu if you choose More Volume Settings it will bring you to System > Sound where you can access more sound input and output options.
Read More
Change system font in Windows 10
In previous versions of Windows changing the system, the font was a pretty straightforward process, but it seems Microsoft did not want this feature to keep for whatever reason and there is no option as of the time of the writing of this article to do it in standard options in Windows 10. But do not worry, you are still able to customize your Windows and choose which font would you like to see inside it in all of its dialogs. You can choose whichever font you desire, the only prerequisite is it to be installed on your system. This guide will require you to change values in the registry of Windows itself so please follow step-by-step instructions and always make a backup of the registry before changing it in order to prevent some permanent Windows issues. All of that being said, let's start.

Setting new font

First thing is to open notepad, in the notepad paste the next block of code:
Windows Registry Editor Version 5.00 [HKEY_LOCAL_MACHINE\SOFTWARE\Microsoft\Windows NT\CurrentVersion\Fonts] "Segoe UI (TrueType)"="" "Segoe UI Bold (TrueType)"="" "Segoe UI Bold Italic (TrueType)"="" "Segoe UI Italic (TrueType)"="" "Segoe UI Light (TrueType)"="" "Segoe UI Semibold (TrueType)"="" "Segoe UI Symbol (TrueType)"="" [HKEY_LOCAL_MACHINE\SOFTWARE\Microsoft\Windows NT\CurrentVersion\FontSubstitutes] "Segoe UI"="NEW_FONT"
Where in "Segoe UI"="NEW_FONT" instead of NEW_FONT you need to write the exact name of the font that you wish to use as a system font. Once you have replaced the default system font with your desired one, go to File and save as, from file type drop-down menu, choose all files and save this file as .REG type giving it whatever name you wish. When the file is saved, close notepad, right-click on the saved file and choose the merge option. Confirm with YES and click on OK. Reboot your system and your Windows will now use the font of your choice as its default system font.

Restoring default font

If you wish to return the old default system font as it was, follow the same steps but in your notepad paste this code:
Windows Registry Editor Version 5.00 [HKEY_LOCAL_MACHINE\SOFTWARE\Microsoft\Windows NT\CurrentVersion\Fonts] "Segoe UI (TrueType)"="segoeui.ttf" "Segoe UI Black (TrueType)"="seguibl.ttf" "Segoe UI Black Italic (TrueType)"="seguibli.ttf" "Segoe UI Bold (TrueType)"="segoeuib.ttf" "Segoe UI Bold Italic (TrueType)"="segoeuiz.ttf" "Segoe UI Emoji (TrueType)"="seguiemj.ttf" "Segoe UI Historic (TrueType)"="seguihis.ttf" "Segoe UI Italic (TrueType)"="segoeuii.ttf" "Segoe UI Light (TrueType)"="segoeuil.ttf" "Segoe UI Light Italic (TrueType)"="seguili.ttf" "Segoe UI Semibold (TrueType)"="seguisb.ttf" "Segoe UI Semibold Italic (TrueType)"="seguisbi.ttf" "Segoe UI Semilight (TrueType)"="segoeuisl.ttf" "Segoe UI Semilight Italic (TrueType)"="seguisli.ttf" "Segoe UI Symbol (TrueType)"="seguisym.ttf" "Segoe MDL2 Assets (TrueType)"="segmdl2.ttf" "Segoe Print (TrueType)"="segoepr.ttf" "Segoe Print Bold (TrueType)"="segoeprb.ttf" "Segoe Script (TrueType)"="segoesc.ttf" "Segoe Script Bold (TrueType)"="segoescb.ttf" [HKEY_LOCAL_MACHINE\SOFTWARE\Microsoft\Windows NT\CurrentVersion\FontSubstitutes] "Segoe UI"=-
Reboot your system and your Windows will now revert the font of your choice as its default system font.
Read More
Close non responsive application in Windows
We have all been there, unfortunately, the application freezes, and sometimes it can even freeze whole windows. Well if the whole Windows freezes because of the application there is not much we can do except hard reset but if only the application freezes we can still kill it and return the PC in working condition. The first thing you can try is to press ALT + F4, this shortcut is for closing the program, if the application is frozen Windows will try to close it when using this shortcut, and if it succeeds you will find yourself on the desktop environment in Windows with non-responsive application taken care of. If however, this fails and the application is not closed, try ending it in the task manager. To open task manager press CTRL + SHIFT + ESC, locate unresponsive application select it, and click on the end task button on the bottom right.
Read More
Fix THREAD_STUCK_IN_DEVICE_DRIVER 0x000000EA
If a program tried and failed to use the Graphics rendering capabilities of a computer, Windows 10 will most likely throw a Blue Screen error that says, “ THREAD_STUCK_IN_DEVICE_DRIVER ”. 0x000000EA is the Stop code for this particular Blue Screen error and could be caused by a bad display driver or bad video card. Whatever the cause is, here are some suggestions you need to check out to resolve this Blue Screen error.

Option 1 – Try to rollback, update, or disable the Graphics card drivers

Since the THREAD_STUCK_IN_DEVICE_DRIVER Blue Screen error has something to do with Graphics card drivers, you can either roll back, update or disable them depending on your preference in order to resolve the error.
  • First, boot your computer into Safe Mode.
  • After that, tap the Win + R keys to launch Run.
  • Type in devmgmt.msc into the box and tap Enter or click OK to open the Device Manager.
  • After that, a list of device drivers will be displayed. From there, look for the Display Adapters and click on them.
  • After that, right-click on each entry under the Display Adapters and select the “Uninstall Device” option from the menu.
  • Now restart your computer.
  • After restarting your computer, go to the Settings app and Check for Updates in the Windows Update section.
Note: You also have the option to go directly to the website of your graphics card manufacturers like NVIDIA, Intel, or AMD and go to the section called Drivers then check if there’s a new available update – if there is, download and install it.

Option 2 – Try removing hardware or drivers that you’ve installed recently

If you have recently installed some hardware or drivers, you might want to disable or remove them since external devices are proven to be one of the factors that trigger Blue Screen errors like THREAD_STUCK_IN_DEVICE_DRIVER. All you have to do is physically disconnect any external devices that are connected to your computer and then check if it fixes the BSOD error or not.

Option 3 – Run System File Checker at boot time

  • Once you get to the Welcome Screen part, click on Next.
  • Afterward, click on the Repair your computer option located on the bottom-left part of the window.
  • Then click on Troubleshoot.
  • Next, select the Advanced Options and then Command Prompt.
  • After opening Command Prompt, type the “sfc /scannow” command and hit Enter to run the System File Checker scan.
  • Wait until the process is completed and type “exit” to close Command Prompt and then restart your computer to successfully apply the changes made.

Option 4 – Try to run the Blue Screen Troubleshooter

As you know, the Blue Screen troubleshooter is a built-in tool in Windows 10 that helps users in fixing BSOD errors like the THREAD_STUCK_IN_DEVICE_DRIVER error. It can be found in the Settings Troubleshooters page. To use it, refer to these steps:
  • Tap the Win + I keys to open the Settings panel.
  • Then go to Update & Security > Troubleshoot.
  • After that, look for the option called “Blue Screen” on your right-hand side and then click the “Run the troubleshooter” button to run the Blue Screen Troubleshooter and then follow the next on-screen options. Note that you might have to boot your PC into Safe Mode.

Option 5 – Try to manually check the Graphics Card hardware

You might also want to check the physical status of your Graphics card and you can do this by disconnecting the Graphics card or any other external device connected to your computer. Once you’ve removed the external device, check it for any damages. If there’s none, connect it back to your computer and check if the THREAD_STUCK_IN_DEVICE_DRIVER Blue Screen error is fixed or not.

Option 6 – Uninstall any faulty drivers

You can also uninstall any faulty drivers via Device Manager. How? Refer to these steps:
  • Tap the Win + R keys to launch the Run dialog box.
  • Then type “devmgmt.msc” in the field and tap Enter to open the Device Manager.
  • From there, look for any faulty drivers. You can identify them easily as they will be marked with a yellow exclamation point. And then check which entries would not affect the normal functioning of your PC.
  • Now click on the entries of every faulty driver and click on the Uninstall option.
  • Once you’ve uninstalled them, restart your computer to allow your computer to reinstall the faulty drivers you’ve just removed.
Read More
NVIDIA driver keeps crashing in Windows
As you know, NVIDIA is one of the topmost graphics cards used and it has been that way for several years already. And in those years, the company has managed to release the best cards on the market. However, there are still times when some things fail and don’t work as expected due to some NVIDIA driver issues. As of late, one of the issues users reported about NVIDIA drivers is that it keeps on crashing on a daily basis. It gets to the point where they aren’t able to play games anymore while some users experience lag and rendering issues. In addition, some users also reported that their computer display tends to freeze sometimes, and then things would seem to go back to normal but only for a short span of time as the crash seems to happen every 10 minutes. This can be extremely annoying as you won’t be able to use your computer properly. If you are one of these users, worry not for there are several ways you can try to resolve the problem in your Windows 10 computer. Make sure to carefully follow the options given below.

Option 1 – Try checking if the NVIDIA graphics card is enabled

Although the problem is quite massive, the fix could be as simple as enabling the NVIDIA graphics card if it turns out to be disabled. There might be some strange reason why your graphics card disables itself. Thus, the best and first option you can try is to check if the NVIDIA graphics card is enabled or not. To do so, follow these steps:
  • Tap the Win + R keys to open the Run dialog box.
  • Then type “devmgmt.msc” in the field and hit Enter to open the Device Manager.
  • After opening the Device Manager, look for the Nvidia graphics card option among the list of device drivers. Once you found it, check if it is enabled or not. If it’s not enabled, you should see a gray arrow pointing downwards. Right-click on the card and select Enabled.
  • Next, right-click on the graphics card once more and click on the Update Driver Software option and then click on the “Search automatically for updated driver software” option.

Option 2 – Try to choose Maximum Performance and disable Vsync

If the first option didn’t work out for you, then you might want to try turning off Vsync and adjust the performance to the maximum. Refer to these steps to disable Vsync and adjust performance to the maximum.
  • The first thing you have to do is right-click on your desktop and select the NVIDIA Control Panel among the options.
  • After opening the NVIDIA Control Panel, select Manage 3D Settings.
  • After that, set Vsync to off, and then in the Power Management Mode, set it to Maximum Performance. That should fix the problem.

Option 3 – Try updating the drivers from the official site of NVIDIA

If both the first and second given options didn’t work, you can also try updating the drivers from the official NVIDIA website. And in case you don’t know the type of Nvidia graphics card that your computer is on, follow the steps below:
  • Tap the Win + R keys to open the Run dialog box.
  • Next type in “dxdiag” in the field and click OK or hit Enter to open the DirectX Diagnostic Tool.
  • From there, you can see what type of Nvidia graphics card that your system is on.
  • Take note of your graphics card information and then look for the best drivers for your operating system. Once you’ve downloaded and installed the file, restart your PC.
Read More
Bluetooth A2dp Source not working Code 52
A number of users have recently reported that they were going through an issue with their Bluetooth devices on their Windows 10 computers. This issue involves an error saying,
“Windows cannot verify the digital signature for the drivers required for this device. A recent hardware or software change might have installed a file that is signed incorrectly or damaged, or that might be malicious software from an unknown source. (Code 52).”
If you are one of the users who encountered this kind of error on your Windows 10 computer, read on as this post will guide you on how you can fix this Bluetooth error. According to security experts, the key to fixing this error is to sign the Bluetooth A2DP files with the built-in tool, System File Checker. Apart from that, you could also run the Hardware and Devices troubleshooter or perform System Restore, as well as update or reinstall the concerned drivers. For more details, refer to each one of the options provided below.

Option 1 – Try to check Bluetooth-related services

In Services, there is a Bluetooth-related service that helps users use Bluetooth so if that particular service suddenly malfunctions for some reason, you will most likely get the “Windows was unable to connect with your Bluetooth network device” error message. That’s why you need to check Services and to do that, refer to these steps:
  • Tap Win + R keys to open Run prompt and type in “services.msc” then tap Enter to open Services.
  • Next, look for the Bluetooth Support Service and double click on it to open Properties.
  • From there, verify if the Service status is showing “Running” or “Stopped”. If it’s the latter, you have to click the Start button.
  • Lastly, check if the Startup type is set to Manual.

Option 2 – Try running System File Checker or SFC scan

You could also run System File Checker or SFC scan to fix the Bluetooth error. It is a built-in command utility that helps in restoring corrupted files as well as missing files. It replaces bad and corrupted system files with good system files. To run the SFC command, follow the steps given below.
  • Tap Win + R to launch Run.
  • Type in cmd in the field and tap Enter.
  • After opening Command Prompt, type in sfc /scannow
The command will start a system scan which will take a few whiles before it finishes. Once it’s done, you could get the following results:
  1. Windows Resource Protection did not find any integrity violations.
  2. Windows Resource Protection found corrupt files and successfully repaired them.
  3. Windows Resource Protection found corrupt files but was unable to fix some of them.
  • Reboot your PC.

Option 3 – Try to perform System Restore

You might also want to perform System Restore as the error might be caused by system modifications. Thus, to undo them, you can use System Restore. Run it using these steps:
  • First, tap the Win + R keys to open the Run dialog box.
  • After that, type in “sysdm.cpl” in the field and tap Enter.
  • Next, go to the System Protection tab then click the System Restore button. This will open a new window where you have to select your preferred System Restore point.
  • After that, follow the on-screen instructions to finish the process and then restart your computer and check if the problem is fixed or not.

Option 4 – Try running the Hardware and Devices Troubleshooter

The next thing you can do to fix the problem is to run the Hardware and Devices troubleshooter. Although it won’t make much of a difference, there’s still a possibility that it could automatically fix the Bluetooth error. To use it, refer to these steps:
  • The first thing you need to do is click on Start and then on the gear-like icon to pull up the window for Settings.
  • After opening Settings, look for the Update and Security option and select it.
  • From there, go to the Troubleshoot option located on the left-hand side of the list.
  • Next, select Hardware and Devices from the list and open the Troubleshooter and run it. Once it is doing its job, wait for it to complete the process and then restart the system.
  • After the system restarts, check if the problem’s now fixed. If not, refer to the next option given below.

Option 5 – Try to reinstall or update the Bluetooth driver

The issue might have something to do with the Bluetooth drivers. It could be that it is outdated and needs to be updated or that you recently updated it and since then you have trouble removing the Bluetooth devices and so to fix the issue, you can update, roll back or uninstall the Bluetooth drivers. How? Follow the steps below.
  • Tap the Win + X keys to open the Device Manager.
  • Next, look for the Bluetooth device and right-click on it.
  • Select the option “Update driver”.
  • After that, a new popup window will appear. In there, select the option, “Search automatically for updated driver software”.
Note: Checking the update may take a few minutes so you’ll have to wait until it finishes. If it is able to find an update, you must install it. And if you want to reinstall the Bluetooth driver, just select the “Uninstall driver” option and follow the next on-screen instructions that follow.
Read More
1 2 3 171
Logo
Copyright © 2023, ErrorTools. All Rights Reserved
Trademark: Microsoft Windows logos are registered trademarks of Microsoft. Disclaimer: ErrorTools.com is not affiliated with Microsoft, nor claims direct affiliation.
The information on this page is provided for information purposes only.
DMCA.com Protection Status