Logo

Windows SmartScreen can’t be reached right now

SmartScreen is a cloud-based anti-phishing and anti-malware component that’s come packed in all Windows 8 (8.1) and Windows 10 versions. This security component is also used in several browsers and programs like Internet Explorer, Microsoft Edge and Outlook.com. Although this program is quite useful, there’ve been reports that SmartScreen is apparently blocking Microsoft’s own apps from opening. According to some users, they only get the “Windows SmartScreen can’t be reached right now” error message every time they try to open apps from the built-in Windows suite like Photos, Mail, Alarms, Maps, etc.

Whenever Windows SmartScreen is either down or unreachable on an end-user PC, your computer won’t be able to download anything in both official and unofficial channels. This error might be due to a corrupted Windows account, or it could be that SmartScreen is disabled from the Windows Defender Security Center or it might be down due to an MS issue. In addition, the error might also be caused by a proxy entry.

Option 1 – Make sure that SmartScreen is enabled

Before anything else, the first thing you must do is to check if SmartScreen is even enabled as it might be the reason why you’re getting the error. You can verify this by simply going to the Windows Defender Security Center. To do so, follow the steps below.

  • Tap the Win + R keys to open the Run dialog box.
  • Next, type “ms-settings:windowsdefender” in the field and hit Enter to open the Windows Defender Security Center.
  • After that, click on the Open Windows Defender Security Center button located under Windows Security.
  • Then click on App & browser control.
  • From there, make sure that the Check apps and files toggle is set to Warn and then check the same thing for Microsoft Edge and SmartScreen for Microsoft Store apps.
  • If it turns out that SmartScreen is indeed disabled, you have to restart your computer after making some changes and then check if the issue is fixed upon the next startup.

Option 2 – Check if SmartScreen is down for maintenance

Another possible reason why SmartScreen is not working is that it might be scheduled for maintenance. When SmartScreen is scheduled for maintenance, it will become unreachable for a lot of users at the same time and so before you go over unnecessary troubleshooting steps, you need to verify if SmartScreen is down for maintenance or not.

Option 3 – Try to disable the proxy server

If applicable, you can try to disable the proxy server to fix SmartScreen. There are some users who reported that they’ve fixed the problem after they’ve disabled the use of a proxy server using the built-in way. In some instances, certain proxy servers can interfere with the SmartScreen component and cause it to become unusable. However, if you are not using a proxy server, just skip this option and proceed to the next one, otherwise, follow the steps below to disable the proxy server.

  • Tap the Win + R keys to open the Run dialog box.
  • Next, type “ms-settings:network-proxy” in the field and hit Enter to open the Proxy tab under Settings.
  • After that, scroll down to the Manual proxy setup and make sure that the toggle button of the “Use a proxy server” option is turned off.
  • Now restart your PC and check if the problem is fixed upon the next startup.

Option 4 – Try to create a new Windows user account

There are some users who were able to fix the problem by simply creating a new Windows user account. Although this solution will make you lose a couple of settings enforced through your user account, it’s actually effective in circumventing the “Windows SmartScreen can’t be reached right now” error. To create a new Windows user account, here’s what you have to do:

  • Tap the Win + R keys to open the Run dialog box.
  • And then type “ms-settings:otherusers” in the field and hit Enter to open the Family & other people tab under the Accounts menu.
  • After that, click on the “Add someone else to this PC” option and then click on “I don’t have this person’s sign-in information.
  • Next, insert the user credentials like emails, password, birth date, etc., and then click Next. Take note that if you want to create a new local user account, just click on Add a user without a Microsoft account.
  • After you’re done creating the new Windows user account, click the start icon and then click the account icon and choose to Sign out.
  • After you’re logged in, check if SmartScreen now works properly or not.

Do You Need Help with Your Device?

Our Team of Experts May Help
Troubleshoot.Tech Experts are There for You!
Replace damaged files
Restore performance
Free disk space
Remove Malware
Protects WEB browser
Remove Viruses
Stop PC freezing
GET HELP
Troubleshoot.Tech experts work with all versions of Microsoft Windows including Windows 11, with Android, Mac, and more.

Share this article:

You might also like

A Quick Way to Fixing Error 0x8007045D

What Does 0x8007045D Error Code Mean?

The 0x8007045D error code is an I/O (input and output) error that is associated with the registry. It indicates that the Windows operating system has become overloaded with invalid system references in the registry. This may prevent you from executing reading and writing to and from devices successfully.

Error Causes

Registry is the main database of your PC. This portion of your computer saves all the activities that you perform on your PC including the junk files, temporary internet files, invalid entries, bad registry keys, and more. This clutters the hard disk. If the unnecessary files are not removed from the registry, it may lead to I/O errors like 0x8007045D. On the hard drive, some parts of the drive may fail to function. If this is not fixed on the time it may lead to serious disk damage and registry corruption eventually resulting in system failure. System failure can make you lose all the valuable data saved on your system for good.

How to Fix the Error Code 0x8007045D?

Error codes on your PC are like warnings. These codes indicate that your PC has some issue. Therefore ignoring it is not wise. To spare yourself from such serious PC damages, it is advisable to take correct measures timely instead of prolonging and making the situation go from bad to worse.
Read More
Fix update error 0x8024ce0e in Windows 10
The Windows update error 0x8024ce0e can happen as a result of improper installation, a virus, or due to file corruption. Follow this guide to easily fix errors and continue with your work.
  1. Restart Windows

    As awkward as it seems this method actually works most of the time. Click on the start button and restart your system.
  2. Check hard disk space

    Of course, when installing updates there should be enough disk space for updates to be downloaded and installed. Check your disk space to see if there is sufficient available space.
  3. Disconnect external components

    External components can interfere sometimes with the update process, disconnect external hard drives, USB, and other devices, leaving only the keyboard, mouse, and core ones.
  4. Check devices in the device manager

    Open device manager and visually check to see if there is a device with a yellow exclamation sign next to it. If there is such a device, right-click on it and choose update driver.
Read More
RealOnlineRadio removal Guide

RealOnlineRadio is a Browser Extension for Google Chrome. This extension offers users the ability to listen to radio stations across the web. From the Author: Real Online Radio is different, as it is a simple radio aggregator. This means Real Online Radio puts together thousands of independent radio stations from all parts of the world in a browser extension that is free and easy to use. It is made for people, who want to have control over their radio streaming. With our simple radio widget, you can get an overview of thousands of radio stations both from your hometown and from the rest of the world. With Real Online Radio, you can listen to your favorite radio station or get an impression of all styles and sorts of music – without being guided in a specific direction by anybody – or anything (such as those radio bots). Real Online Radio returns the control to you, to discover exactly the kind of music that you love.

While this may look useful, this extension changed your default search engine and hijacks your home page. While this extension is active, all your searches are redirected through fileupsticks.com, where a database of your search queries is kept to better server ads that are later delivered through the Yahoo search engine.

About Browser Hijackers

Browser hijackers (also known as hijackware) are a type of malware that changes internet browser configurations without the user’s knowledge or approval. These kinds of hijacks happen to be rising at an astonishing rate across the world, and they can be truly nefarious and sometimes harmful too. Nearly all browser hijackers are created for marketing or advertising purposes. These are generally used to force visitors to a specific website, manipulating web traffic to generate ad revenue. Even though it might appear naive, these tools are designed by vicious individuals who always attempt to take full advantage of you, so that they could make money from your naive and distraction. Browser hijackers can also allow other vicious programs without your knowledge to further damage your PC.

Signs of browser hijacker malware

Below are some signs and symptoms that indicate your internet browser has been hijacked: your browser’s home page has been reset to some mysterious site; you find redirected to websites you never intended to visit; the default web browser settings are changed and/or your default search engine is altered; you find multiple toolbars on the browser; you’ll find random pop-ups start showing regularly; your internet browser starts running sluggishly or displays frequent glitches; you can’t visit certain sites such as homepages of antivirus software.

How it infects the computer

Browser hijackers can get into a computer by some means or other, including via file sharing, downloads, and e-mail as well. They may also be deployed via the installation of an internet browser toolbar, add-on, or extension. A browser hijacker could also be installed as a part of freeware, shareware, demoware, and fake programs. An example of some infamous browser hijackers includes Babylon, Anyprotect, Conduit, SweetPage, DefaultTab, Delta Search, and RocketTab, however, the names are continually changing. The presence of any browser hijacker malware on your system can substantially diminish the web browsing experience, record your online activities that lead to serious privacy concerns, develop system stability issues and finally cause your PC to slow down or to a nearly unusable condition.

Browser Hijacker Malware – Removal

The one thing you could try to eliminate a browser hijacker is to locate the malicious software in the “Add or Remove Programs” list in the Microsoft Windows Control Panel. It might or might not be there. If it is, try and uninstall it. However, the majority of hijacking codes are certainly not very easy to get rid of manually, as they go deeper into the operating system. Also, browser hijackers can modify the Computer registry so it could be very tough to restore all the values manually, particularly if you are not a tech-savvy person. You can go for automatic browser hijacker removal by just installing and running a reliable anti-malware application. SafeBytes Anti-Malware will counter persistent browser hijackers and provide you real-time PC protection against all types of malware.

Can't Install Safebytes Anti-malware due to the presence of Malware? Try This!

Practically all malware is detrimental and the level of the damage will differ greatly in accordance with the type of infection. Certain malware goes to great lengths to stop you from installing anything on your computer, especially anti-virus software programs. If you’re reading this, odds are you’re stuck with a malware infection that is preventing you to download and/or install the Safebytes Anti-Malware program on your computer system. There are some actions you can take to get around this problem.

Install anti-malware in Safe Mode with Networking

If the virus is set to load automatically when Microsoft Windows starts, stepping into safe mode could very well block the attempt. Only the bare minimum required applications and services are loaded when you start your personal computer into Safe Mode. You need to do the following to get rid of malware in Safe mode. 1) After switching on the computer, hit the F8 key before the Windows splash screen begins to load. This will conjure up the “Advanced Boot Options” menu. 2) Choose Safe Mode with Networking with arrow keys and press Enter. 3) As soon as this mode loads, you will have the internet. Now, obtain the malware removal software you need by utilizing the web browser. To install the application, follow the directions in the installation wizard. 4) Immediately after installation, run a complete scan and allow the software to delete the threats it detects.

Download the security program using an alternate web browser

Certain viruses may target vulnerabilities of a specific browser that block the downloading process. If you’re not able to download the security application using Internet Explorer, this means the virus is targeting IE’s vulnerabilities. Here, you should switch to an alternate web browser like Chrome or Firefox to download Safebytes Anti-malware software.

Install and run anti-malware from the Thumb drive

To successfully get rid of the malware, you have to approach the issue of installing an anti-virus software program on the infected computer system from a different perspective. Adopt these measures to run the antivirus on the affected computer system. 1) Download the anti-malware software on a virus-free computer. 2) Put the USB drive into the clean computer. 3) Double-click the executable file to open the installation wizard. 4) When asked, select the location of the USB drive as the place where you would like to put the software files. Follow the on-screen instructions to complete the installation. 5) Transfer the flash drive from the clean PC to the infected computer. 6) Double click the Safebytes Anti-malware icon on the USB drive to run the software. 7) Hit the “Scan Now” button to start the virus scan.

Overview of SafeBytes Anti-Malware

These days, anti-malware software can protect your laptop or computer from various kinds of internet threats. But exactly how to choose the right one amongst countless malware protection application that’s available out there? As you may be aware, there are several anti-malware companies and products for you to consider. Some are really worth your money, but most aren’t. When searching for an anti-malware program, choose one that gives dependable, efficient, and total protection against all known computer viruses and malware. One of the recommended software programs is SafeBytes AntiMalware. SafeBytes carries a good track record of excellent service, and customers seem to be happy with it. SafeBytes anti-malware is a trustworthy tool that not only protects your computer completely but is also extremely user-friendly for people of all ability levels. With its outstanding protection system, this tool will instantly detect and remove the majority of the security threats, which include browser hijackers, viruses, adware, PUPs, trojans, worms, and ransomware. There are many great features you’ll get with this security product. Listed here are some of the great ones: Real-time Active Protection: Malware programs trying to enter the system are discovered and stopped as and when detected by the SafeBytes real-time protection shields. This tool will always keep track of your computer for any suspicious activity and updates itself regularly to keep abreast of the constantly changing threat situation. Best AntiMalware Protection: Using a critically acclaimed malware engine, SafeBytes offers multilayered protection that is made to find and remove threats that are concealed deep in your computer’s operating system. Safe Web Browsing: Safebytes assigns all websites a unique safety rating that helps you to have an idea of whether the webpage you are about to visit is safe to view or known to be a phishing site. Low CPU/Memory Usage: This software is lightweight and will work quietly in the background, and will not have an effect on your computer efficiency. Fantastic Tech Support: You will get 24/7 technical assistance to quickly resolve any concern with your security application. SafeBytes has put together a wonderful anti-malware solution that can help you conquer the latest malware threats and virus attacks. Malware issues will become a thing of the past when you put this tool to use. If you want sophisticated forms of protection features and threat detections, purchasing SafeBytes Anti-Malware could be worth the dollars!

Technical Details and Manual Removal (Advanced Users)

If you would like to carry out the removal of RealOnlineRadio manually instead of utilizing an automated software tool, you may follow these steps: Navigate to the Windows Control Panel, click the “Add or Remove Programs” and there, select the offending program to remove. In cases of suspicious versions of browser plugins, you can actually get rid of it via your browser’s extension manager. You will probably also want to reset your internet browser. Finally, check your hard drive for all of the following and clean your registry manually to remove leftover application entries following uninstalls. However, this is often a tricky task and only computer professionals could perform it safely. In addition, some malicious programs have the capability to defend against its removal. Doing this in Safe Mode is recommended.
Read More
The request failed due to a fatal device hardware error
When you are copying some files from your computer to your hard disk and vice versa or when you have several disks connected to your Windows 10 computer and you suddenly receive an error message saying, “The request failed due to fatal device hardware error”, then this means that there is some issue with the hardware of your computer. This issue might be caused by various reasons but whatever they may be, this post will guide you on how you can fix the “The request failed due to fatal device hardware error”. To fix the error, here are some suggestions that could help.

Option 1 – Check for any hard disk errors

  • On your desktop, right-click on the “This PC” or computer icon and then select Manage to open the Disk Management. Here you get to check your drive’s health.
  • Next, click on Disk Management on the left side panel.
  • From there, check the state of your drives. If it shows that all your partitions are healthy then it means all is good and that the problem may have something to do with some physical issues with your hard drive.

Option 2 – Run the CHKDSK utility

When it comes to some issues concerning the hard drive or removable devices, there is a utility in Windows that might help which is called “chkdsk”. This error check utility can help with several issues in the system including “The request failed due to fatal device hardware error”.
  • Tap the Win + S keys to open the Search box.
  • Then type “command prompt” in the field and from the search results that appear, right-click on Command Prompt and select “Run as administrator”.
  • After opening an elevated command prompt, copy and paste the following command and hit Enter:
CHKDSK [volume [[path] filename]] [/F] [/V] [/R] [/X] [/C] [: size]]
Note: In the command given above, “[/F]” will try to fix the system errors while “[/R]” will be the one to fix the bad sectors.
  • Now if you are prompted to run CHKDSK after your reboot your PC, just tap Y and reboot your PC.
  • If CHKDSK is not able to find any errors, tap the Win + E keys and navigate the access window. From there, right-click on the concerned drive and click on Properties.
  • After opening Properties, click on the tab Tools and then click on the “Check” button under the Error-checking section.
  • Wait until the process is completed and then restart your computer

Option 3 – Verify the hard drive using SMART attributes

In case you don’t know, Windows has a built-in feature of SMART analysis which analyzes the hard drive/SSD and checks all the parameters by performing some minor operations. To use it, follow these steps:
  • Tap the Win + S keys and type “command prompt” in the field then right-click on the related search result and select the “Run as administrator” option.
  • After opening Command Prompt as admin, type the “wmic disk drive get status” command and hit Enter.
  • You should get a result after that, and if you see that it’s “normal”, proceed to the next option below.

Option 4 – Format your hard disk

You can try formatting your drive since this problem also occurs on removable hard drives. In addition, if your drive is not properly initialized, this error will really pop up. Thus, you need to make sure that the hard drive is initialized and that the correct partition style is selected.
  • To get started formatting your drive, tap the Win + E keys and then go to the access page of the drive.
  • Next, right-click on the drive and select Format.
  • After that, uncheck the “Quick Format” option and then format your drive properly.
  • Now once the formatting process is finished, unplug the drive and plug it back in afterward.
  • Check if the error is already fixed. If the drive is not initialized, tap the Win + R keys and hit Enter.
  • After opening the Run dialog box, type “diskmgmt.msc” and hit Enter to open Disk Management.
  • From there, right-click on the drive volume and select Initialize Disk.
  • Next, select the correct partition type and proceed.
Read More
Mozilla VPN is here

The new thing from Mozilla is not a browser, it is a VPN!

Besides Firefox, Mozilla offers now Firefox Relay, an app helping you to mask your email and phone number, and a new Mozilla VPN.

mozilla vpn

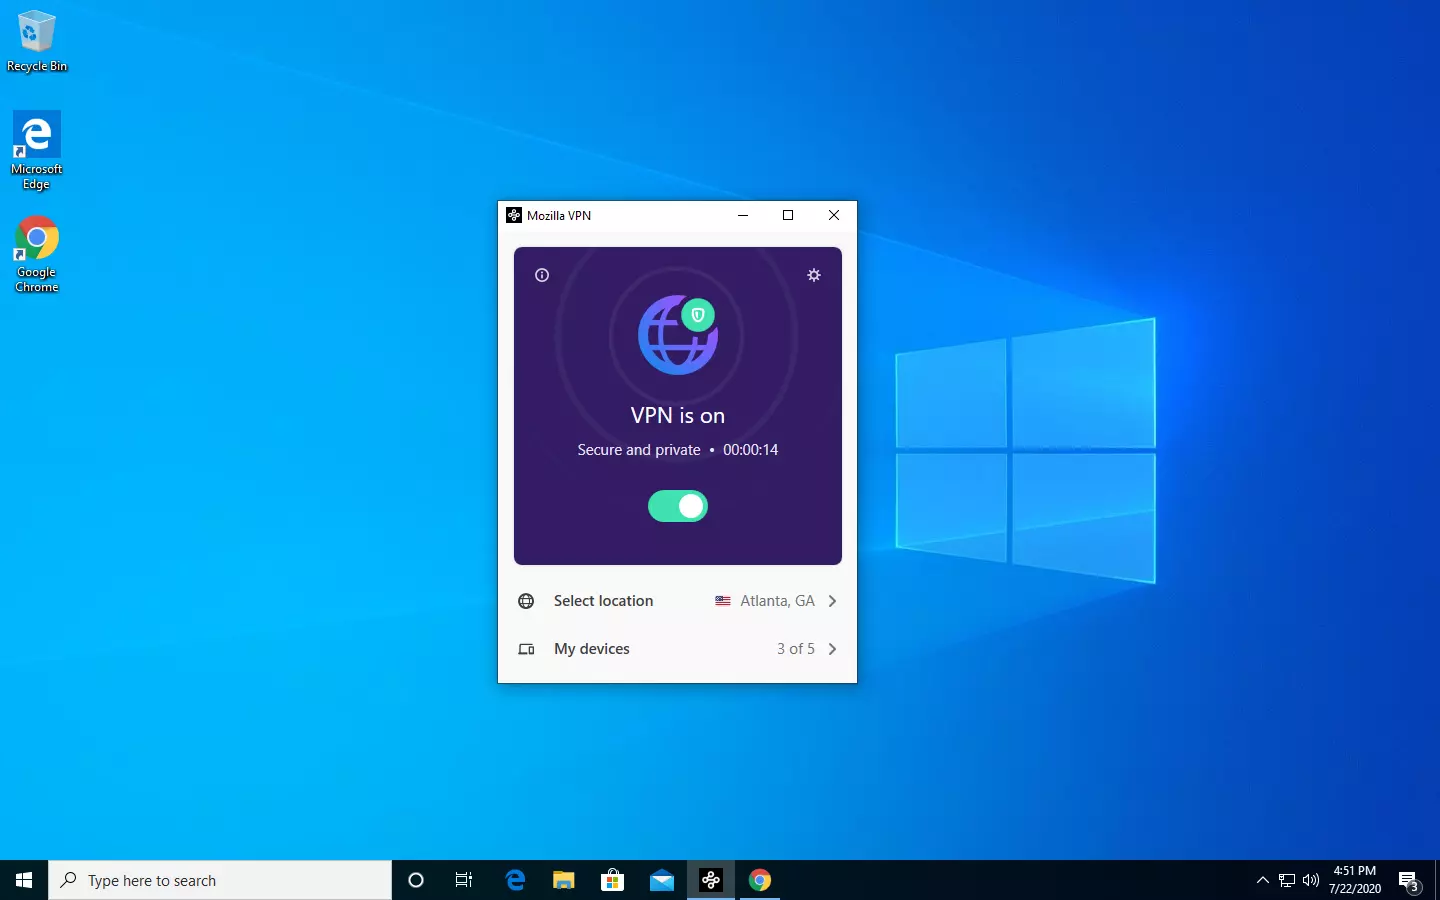
Mozilla has recently announced a new subscription model that will let you use all products together for $6.99 per month. Although this is a little more expensive than the competition that goes around for $5 per month note that with this subscription you are having access to all services, not just VPN.

VPN will not only hide your IP address but will also make sure websites cannot access your real location and it encrypts all of your network activity. Relay will give you protection against spam, serving as a shield for your email and limiting spammers from access to your real email address and phone number. With Mozilla subscription will let you use both services.

Read More
Complete Ethernet cable guide

In today's modern world many households have internet access, most of the connection nowadays is done via Wi-Fi or wireless but there is a high probability that you have also a few devices connected via cable. There are of course many disadvantages and advantages between cable connection and wireless connection.

lan network cables

The main advantages of a hard cable connection are of course faster speed and stability compared to Wi-Fi. But if we look into the cables themselves there is also a big difference between them. Not all cables are the same and quality as well as speed vary a lot between them. Choosing the right cable is essential in order to make a maximum of your internet and we have some great tips and explanations of what cables do so you can make the right choice and enjoy your full internet potential.

Not all cables are the same

Cheap cables and expensive ones are not the same no matter what everyone tells you. The old proverb you get what you pay is true and more expensive cables will be made from better materials and will have a higher transfer rate.

Quality network cables are separated into different categories with proper markings and when buying one you should always look for these markings on the cables themselves, do not buy cables that do not have markings since they will often provide lower transfer rates or will not be shielded from outside influences resulting in packet drops and instability in a network.

Categories and what they mean are:

  • Cat-5 with a maximum speed of 100Mbps, typically unshielded.
  • Cat-5e with a maximum speed of 1Gbps, available in both shielded and unshielded varieties.
  • Cat-6 with a maximum speed of 10Gbps for runs under 55 meters (around 180ft), available in both shielded and unshielded varieties.
  • Cat-6a with a maximum speed of 10Gbps, shielded.
  • Cat-7 uses a proprietary GG45 connector rather than the standard RJ-45 connector seen on other cables for speeds of 10Gbps, shielded.
  • Cat-8 with a maximum speed of 25Gbps (Cat-8.1) or 40Gbps (Cat-8.2) at a distance of around 30 meters (around 100ft), shielded.

Unless stated, these standards are typically rated at their quoted speeds for a run of around 100 meters (around 330 ft) and use a standard RJ-45 Ethernet connector. Each generation of cable is designed to be compatible with the generations that came before it, so it’s possible (for example) to use a Cat-6a cable with a router that only supports speeds of 1Gbps.

Shielded cables

When purchasing higher quality cable you might not be able to choose if you have shielding or not since some standards like Cat-6a, Cat-7, and Cat-8 are always shielded. But if you do not have the need for these and you are satisfied with Cat-5e for example you can choose.

Shielded cables are a little more expensive but they will provide you with a coating that will eliminate interference from outside waves making cables more reliable. Of course, if the cable will go through a room that does not have many radio waves or some other interferences then buying a shielded cable is a waste of money.

Cable platings

Usually, there are two types of connector platings on connectors, silver, and gold, and people usually think that gold is much better but there are major differences between silver and gold platings and truth to be told there is no better one, both are different and should be considered depending on your need.

Silver plating will provide you with faster speed since its conductivity is larger than gold, but gold is slower on the oxidation front so its life span is longer. On the other hand, if your cables are always connecting and disconnecting gold will be first to be scrubbed off from the surface since the gold coating is much thinner.

Overall if you would only connect cable once and have slower internet than cable capacity gold is the way to go, in another case if you would use the cable as always connecting and switching and your internet plan is the same as cable transfer capacity you might want to go with silver one.

Cable material quality

Network cables are made from copper, your standard conduction material but even here there are differences in quality and therefore the chance of pocket losses over it. More quality less loss and more stable connection and this will depend on the purity of copper that is used in the cable itself. More purity in copper, more stability, simple as that.

Conclusion

So as you can see, there are a lot of different things that will influence your pick of proper network cable but the overall best advice is to get one that will fit well into your needs and setup. pair it up with your router and your internet plan since just simply buying something that you can not use is really a waste of money.

Read More
DDR5 what we know so far about it
DDR5 memory moduleNext-generation of RAM, DDR5 supposed to hit shelves around late summer or fall in 2021if everything goes as planned. Its goal is to increase speed and efficiency, wants to pack more memory in a single stick, and have better power management.

Hardware requirements for DDR5

Using the latest memory technology will require other hardware to follow certain standards and the first ones that will need to follow are CPUs and Motherboards. Intel is already prepared with its Alder Lake CPUs that suppose to come out also later this year. AMD on other hand has not stated anything at the time of this writing but it is a bet that their next generation that will come in 2022 will have full support. It is speculated that bot companies and their respective CPUs will have both support for DDR4 and DDR5. A story about motherboards is a little different. Motherboards will support DDR4 or DDR5 memory banks, not both, so make sure that your motherboard will support the memory you plan on getting.

Capacity of memory

The goal and aim for the DDR5 memory stick are to reach a whopping 126GB per stack. This will be done by using a dual in-line module or DIMM enabling larger capacity. That being said, the first modules that we will see are more likely to be 16GB as standard and 8GB as low entry ones.

Power consumption of DDR5 memory

The standard voltage that DDR4 operates under is 1.2V. DDR5 wants to lower this to 1.1V without sacrificing speed. Voltage regulation on modules themselves will be now integrated on memory banks instead of leaving that to motherboards which will help to detect memory errors directly on the memory bank.

Speed of memory

The most common speed of DD4 memory banks is 2,666MHz, more expansive ones go from 3,600 to 4,000MHz. DD5 aims to raise this bar to 4,800MHz and offers greater speed.

Should you get it right away?

Hardware is ever-evolving, we have PCIe 3.0 to PCIe 4.0, and taking into account that sometimes the newest tech can cause some unexpected behavior it is always the best strategy to wait for a little. Price for the newest tech has also been in its heist just when it is released and seeing how DDR5 will benefit mostly servers mostly since even today memory, processors, and other available equipment can tackle all daily tasks.
Read More
How to Fix Windows 10 Error Code 0xc004fc03

Error Code 0xc004fc03 – What is it?

Error code 0xc004fc03 occurs when Windows users fail to activate their Windows operating system due to a networking problem. The error code’s common symptoms include the following:

  • Inability to activate Windows 10 operating system
  • Message box with error code 0xc004fc03

Solution

Restoro box imageError Causes

Error code 0xc004fc03 in Windows 10 usually occurs due to issues related to a Windows user’s network. Your computer may be having problems connecting to the Internet or your firewall may be blocking or interrupting your device’s ability to activate Windows 10. In some cases, users may simply need to wait a day or two to reattempt to activate their system using a valid product key, as there may be an issue with the Windows activation servers.  Failure to promptly fix this error code might result in other Windows 10 error messages, such as error code 0xc004f034.

Further Information and Manual Repair

To rectify the error code, Windows 10 users will need to perform manual repair procedures that fix the underlying problems causing error code 0xc004fc03. These procedures may include reconnecting to one’s network, checking your firewall settings, or activating your Windows operating system via phone. The manual repair methods are simple and do not require technical knowledge of the Windows operating system. If your attempts at manually repairing this error code fail, however, you may need to try a few other procedures.

Method One: Verify Internet Connection

To check your Internet connection, you’ll need to access the Network & Internet tab in Windows 10. Follow the instructions below to access this tab and fix Internet connectivity issues if they are preventing you from activating Windows on your machine.

  • Step one: Click the Start button and select Settings
  • Step two: Select Network & Internet
  • Step three: Click the Status section of the Network & Internet tab

If your status shows that you are not connected to a network, you will need to fix your connection. Simply use the Network Troubleshooter to troubleshoot your connection. You will be able to activate your copy of Windows once your connectivity issues are resolved.

If, however, the problem persists and error code 0xc004fc03 occurs during the activation process, this simply means that the existence of the error code is not due to connectivity or networking problems. In such a case, move to the next manual repair method listed below and follow the exact instructions given.

Method Two: Check Firewall Settings

Windows Firewall protects your PC from hackers, worms, and other malicious programs. However, in some cases, it may result in error codes like error code 0xc004fc03. If your firewall is interfering with the Windows 10 activation, you’ll be able to rectify the problem by simply adjusting your settings. Follow the steps below to check – and adjust if necessary – your Windows Firewall settings.

  • Step one: Click search bar and type firewall
  • Step two: Select Windows Firewall
  • Step three: Select Turn Windows Firewall on or off

In some cases, Windows users may not be able to adjust settings within the Windows Firewall tab, as your firewall settings may be controlled by a third party antivirus software. If this is the case, open the antivirus software and turn off the firewall if the software does not prevent you from making such changes to its settings.

Note, however, that you will need to readjust the settings as soon as you activate your version of Windows 10. This is due to the fact that turning off your firewall settings permanently may lead to exposure to worms and other malicious programs.

Method Three: Activate Windows by Phone

Activation of Windows via phone is another option for individuals experiencing error code 0xc004fc03. The activate by phone option in the Update & Security tab will be available once you fail to activate Windows 10. To complete this manual repair method, follow the steps below.

  • Step one: Select Settings
  • Step two: Click Update & security
  • Step three: Select Activate by phone
  • Step four: Follow the instructions provided thereafter.

This is one of the most effective ways to fix error code 0xc004fc03. If the issue persists, however, you can proceed to the last resort.

Method Four: Download an Automated Tool

If you wish to always have at your disposal a utility tool to fix these Windows 8 and other related issues when they do arise, download and install a powerful automated tool.

Read More
Fix Boot Device Not Found Error in Windows
If you encounter an error saying, “Boot Device Not Found” when you turn on your Windows 10 computer, then you’ve come to the right place as this post will guide you on how you can fix this problem. Apart from the error message, you will also see a message that states, “Please install an operating system on your hard disk, Hard Disk<xxx>”. You will then be asked to tap the F2 key to initiate the System Diagnostics. If you install the Windows operating system, it becomes the boot device, and when your computer boots, the UEFI or the BIOS looks for the operating installed on your drive and continues the process. So when you encounter the “Boot Device Not Found” error, this means that the UEFI or the BIOS wasn’t able to locate the drive where it can boot. There are several suggestions you can check out to resolve this error. You can try checking the connection with your boot drive or change the boot order. You can also fix the Boot Record from Recovery and see if the primary partition is active or not. But before you troubleshoot the problem, make sure that you have a bootable Windows USB drive ready since two of the options provided below will require you to boot into the Advanced Recovery mode. Once you have this covered, proceed to each one of the following options.

Option 1 – Try checking the connection with the boot drive

If you have a custom computer that comes with a cabinet, you might want to open it and remove any connected power supply, and then check the wires. As you know, drives are connected with the motherboard using a cable. So all you have to do is check if both ends are connected properly and make sure that the connection is not loose. You could also try to unplug the cable and plug it back in.

Option 2 – Try changing the boot order

You might also want to try changing the boot order of your computer. Each time a computer boots, the BIOS or the UEFI follows a boot order. It is the one that tells where to first look for the boot drive and if for some reason, a USB is connected to your computer and the first boot device found in the USB, then you have resolved the problem. All you have to do is to remove the USB device and boot or go into the BIOS and change the boot order yourself.

Option 3 – Try to rebuild the BCD files

The next thing you can do to resolve the issue is to Rebuild Boot Configuration Data or BCD files.
  • You can start by booting into the installation environment for Windows 10 from an installation media.
  • After that, click on Repair your computer and on the blue screen, select Troubleshoot and then select the Advanced options menu.
  • From there, select Command Prompt and once you open it, enter each one of the commands given below by sequence.
    • bootrec /FixMbr
    • bootrec /FixBoot
    • bootrec /ScanOS
    • bootrec /RebuildBcd
  • Once you’re done executing the commands given above, type “exit” to close the Command Prompt window and then restart your computer and see if it fixed the “Boot Device Not Found” error.

Option 4 – Try setting the System Partition to Active

Like the first given option, you also have to make sure that you have a bootable Windows 10 USB drive before you proceed to set the System Partition to Active. Once you have it covered, refer to these steps:
  • Boot your computer using the bootable Windows 10 USB drive.
  • Next, click Next when you get to the Welcome Screen.
  • Then click on Repair your computer located at the bottom left part of the window and select Troubleshoot > Advanced Options > Command Prompt.
  • After opening Command Prompt, type the following command and hit Enter to start the Diskpart utility. It is a command line-based utility just like Command Prompt but has a UAC prompt once you provoke it. So if you encounter a UAC prompt, just click on Yes to proceed.
diskpart
  • Now type the following command:
list disk
  • From there, select your primary disk by typing the following command:
select disk number
  • After that, list all the partitions on the selected disk by entering the following command:
list partition
  • The command you just entered will list all the partitions created on your PC including both types of partitions that are visible to a normal user in the File Explorer as well as the ones created by Windows 10 by default which helps it in storing the boot files and other important system files.
  • Now type the following command to select the partition that is usually around 100 MB in size:
select partition number
  • Finally, type the following command to mark the partition active:
active
  • Then type the “exit” command to exit the disk part utility.
Once it’s done, the primary drive should now be active and you should now be able to boot into your computer without the “Boot Device Not Found” error.
Read More
Windows computer shuts down instead of Sleep
As you know the Windows 10 operating system is has a lot of features and some of them are related to turning off your computer in different ways in order to save power at different levels. These particular features are Shut down, Restart, Hibernate, and Sleep. However, there are times when you might encounter some issues when using any of the aforementioned features. One of these issues is when your computer shuts down instead of going to Sleep. This issue could be caused by several factors including a bug related to the Intel Management Engine Interface or IMEI driver as well as any misconfiguration in the power settings of the BIOS or UEFI. If your computer is going through this problem, read on as this post will guide you in fixing it. There are several potential fixes you can try to fix the problem. You can try to check the Sleep Advanced Settings or run the built-in Power troubleshooter or run the Power Efficiency Diagnostic Report. In addition, you can also try to troubleshoot the problem in a Clean Boot State or reset or update the BIOS.

Option 1 – Check the Sleep Advanced Settings

  • Click on the Windows key and type “control panel” in the field and select the related search result.
  • Next, select the Security and Maintenance option and click on the Power Options.
  • After that, you have to select the Change Plan Settings but keep in mind that this option is barely readable so you need to read each option carefully.
  • Now click on the Change advanced power settings button and a new window will appear.
  • Then look for the “Sleep” option and expand it. Make sure that the “Allow hybrid sleep” option is on.
  • Reboot your computer and check if your computer now functions properly. If it still didn’t work, you may have to reverse the changes you’ve made.

Option 2 – Try to run the Power troubleshooter

The next thing you can do is to run the Power troubleshooter. To do so, follow these steps:
  • Go to Settings and navigate to Update & Security > Troubleshoot.
  • After that, look for the “Power” option from the given list of built-in troubleshooters and click on it.
  • Next, click on the “Run the troubleshooter” button to run the Power troubleshooter.
  • Once the troubleshooter is done identifying the problems, follow the next on-screen instructions to resolve the problem.

Option 3 – Troubleshoot Sleep Mode issue in a Clean Boot State

The issue with Sleep Mode might be caused by some third-party programs installed on your computer. This program might be the one that puts your computer to sleep and so to isolate this possibility, you have to put your PC in a Clean Boot State using the steps below.
  • Log onto your PC as an administrator.
  • Type in MSConfig in the Start Search to open the System Configuration utility.
  • From there, go to the General tab and click “Selective startup”.
  • Clear the “Load Startup items” check box and make sure that the “Load System Services” and “Use Original boot configuration” options are checked.
  • Next, click the Services tab and select the “Hide All Microsoft Services” check box.
  • Click Disable all.
  • Click on Apply/OK and restart your PC. (This will put your PC into a Clean Boot State. And configure Windows to use the usual startup, just simply undo the changes.)
  • After that, try to put your computer to sleep again.

Option 4 – Try to run the Power Efficiency Diagnostics Report

You could also try to run the Power Efficiency Diagnostics Report to fix the problem. This tool is helpful and will help you analyze the status of the battery but note that this can be quite overwhelming especially if you’re not well-versed in this matter.

Option 5 – Try to update the BIOS

Updating the BIOS can help you fix the ATTEMPTED_WRITE_TO_READONLY_MEMORY BSOD error but as you know, BIOS is a sensitive part of a computer. Even though it is a software component, the functioning of the hardware depends on it largely. Thus, you must be careful when modifying something in the BIOS. So if you don’t know much about it, it’s best if you skip on this option and try the other ones instead. However, if you are well-versed in navigating the BIOS, then follow the steps below.
  • Tap the Win + R keys to open the Run dialog box.
  • Next, type “msinfo32” in the field and press Enter to open System Information.
  • From there, you should find a search field on the bottom where you have to search for the BIOS version and then press Enter.
  • After that, you should see the developer and version of the BIOS installed on your PC.
  • Go to your manufacturer’s website and then download the latest version of BIOS on your computer.
  • If you are using a laptop, make sure that you keep it plugged in until you have updated the BIOS.
  • Now double click on the downloaded file and install the new BIOS version on your computer.
  • Now restart your computer to apply the changes made.
Note: If updating the BIOS didn’t help, you might want to consider resetting it instead.
Read More
1 2 3 171
Logo
Copyright © 2023, ErrorTools. All Rights Reserved
Trademark: Microsoft Windows logos are registered trademarks of Microsoft. Disclaimer: ErrorTools.com is not affiliated with Microsoft, nor claims direct affiliation.
The information on this page is provided for information purposes only.
DMCA.com Protection Status