Logo

Cannot start new hardware device, Error 49

In case you don’t know, the Windows Registry contains a System Hive which is a core part of Windows. The Windows operating system store various settings, options, and configurations. And if you encounter a Device Manager Error 49 for a device then it means that the system hive has exceeded its size limit. Worry not for this post will provide you with possible solutions that can help you in fixing error code 49.

You will see the following error message when you encounter error code 49:

“Windows cannot start new hardware devices because the system hive is too large (exceeds the Registry Size Limit), (Code 49)”

There are instances when it may so happen that the device or devices are no longer attached to the computer but they are still listed in the system hive of the registry. For instance, if you were removing hardware and application for years but they weren’t removed from the registry then the size of the system hive keeps on growing until it hits the maximum limit.

As you know, making changes in the registry manually, no matter how knowledgeable you are on such things is not sage since the registry is not only important but also complex. In addition, the System Hive is also a permanent part of the Registry associated with a set of files that contain information related to the configuration of the computer on which the OS is installed. To resolve this error, you must remove or uninstall any hardware devices that are no longer in the system. In fact, the Device Manager hides them by default so you need to enable hidden or non-present devices.

Follow the instructions given below to set the Devices Manager to display devices that are no longer connected to the computer.

Step 1: Tap the Win + R keys to open the Run dialog box.

Step 2: After that type in “cmd” and hit Enter to open the Command Prompt.

Step 3: Type “set devmgr_show_nonpresent_devices=1” in the Command Prompt and hit Enter to enable the hidden devices option.

Step 4: After that, exit Command Prompt and tap Win + X + M to open the Devices Manager.

Step 5: After opening the Devices Manager, click on View and then select the “Show hidden devices” option. This will show you all the devices that are not connected to the computer but are still mentioned.

Step 6: Next, select a non-present device and click Uninstall from the Driver tab.

Step 7: After that, repeat what you’ve done on step 5 for any other device that you no longer use.

Step 8: Restart your computer.

You can check the device Properties dialog box in the Device Manager after you’re done removing all the useless devices, to check if the error is now fixed or not.

Moreover, you can also try running the Hardware and Devices Troubleshooter as it can also help resolve hardware-related problems. To use it, refer to the steps below.

  • The first thing you need to do is click on Start and then on the gear-like icon to pull up the window for Settings.
  • After opening Settings, look for the Update and Security option and select it.
  • From there, go to the Troubleshoot option located on the left-hand side of the list.
  • Next, select Hardware and Devices from the list and open the Troubleshooter and run it. Once it is doing its job, wait for it to complete the process and then restart the system.
  • After the system restarts, check if the problem’s now fixed. If not, refer to the next option given below.

Do You Need Help with Your Device?

Our Team of Experts May Help
Troubleshoot.Tech Experts are There for You!
Replace damaged files
Restore performance
Free disk space
Remove Malware
Protects WEB browser
Remove Viruses
Stop PC freezing
GET HELP
Troubleshoot.Tech experts work with all versions of Microsoft Windows including Windows 11, with Android, Mac, and more.

Share this article:

You might also like

How to Set up and Use a Ram Drive in Windows
RAM drive is basically a hard drive made of your RAM memory. Altho this kind of drive can not and is not available to save any data when the computer is shut down its advantage is lightning fast speed since the application is installed in RAM itself, it is loading from there and executing from there. Creating this kind of drive which will use your RAM memory, well part of it can not be done natively in Windows, you will need some kind of application for this task. Luckily there is a free open source application for this kind of task. ImDisk, you can download the application here. ImDisk Toolkit is an application for managing virtual drives. It also includes a utility that allows the creation of RAM drives. Download the application and install it, make sure that you select all components on the installation selection screen. After installation is finished double click on icon labeled RamDisk Configuration. Once the application is running adjust the disk size in the box at the top of the window for your RAM drive. Click “OK” at the bottom of the window. This will create your RAM drive, which is just a virtual disk that’s assigned to your computer’s RAM. The process happens transparently, so there’s nothing you need to do. If you get a warning about shutdown settings, click on the “Shutdown Settings” button. Then unlock the settings pane with your administrator password. Finally, uncheck the checkbox next to “Turn on fast startup (recommended)” and click “Save Changes” at the bottom of the window. Your RAM drive is now ready for use. Fast Startup speeds up the process of turning on your computer by saving a system state between completely off and hibernation to your hard drive. This happens when the computer writes the contents of your RAM to a stable hard drive. As you may guess, this could mess with your RAM drive’s ability to preserve and track its data. With Fast Startup off, boots may take slightly longer, but it’s doubtful that you’ll notice much. Disabling a fast startup will satisfy the warning window, but let’s consider why. This will also allow ImDisk to save your RAM drive’s data to an image file when you shut down your computer. If you don’t, the contents of your RAM drive will be erased completely every time, with no saved image storage. It would also disable the RAM drive’s ability to load the previous content. Basically, the drive would act much more like RAM and much less like a disk. Depending on your use case, that may be disappointing or unusable. You can access and use it just like any normal hard drive. It shows up in Windows’s file explorer just like any other drive. However, a Ram drive is exponentially faster than traditional types of storage. And we mean exponentially. Whereas an SSD might offer 300 to 500 MB when reading from the disk, a RAM drive can offer more than 5000 MB, even on mediocre memory sticks.
Read More
How to remove Nectar Toolbar from your Windows PC

Nectar Toolbar is a Browser addon for Internet Explorer developed by AIMIA Coalition Loyalty. This addon changed your default search provider to Yahoo UK. While installed, you might see additional unwanted ads and sponsored links injected in the search results.

From the Author: We all search the web every day for information from handy how-to’s, must know news about shopping. So wouldn’t it be great if you could collect extra Nectar points just for doing something you do already? Like to shop online? Nectar Search will also tell you when you’re on a shopping website (like Argos, Debenhams, Next, Play.com, and Apple) where you can collect points too.

Several anti-virus scanners have marked this addon as a Browser Hijacker and are therefore not recommended to keep on your computer.

About Browser Hijackers

Browser hijacking means a malicious program code has power over and modified the settings of your browser, without your permission. Browser hijackers could do more than just changing home pages. In general, hijackers are developed for the benefit of online hackers often through income generation that comes from forced ad mouse clicks and website visits. Nonetheless, it isn’t that harmless. Your web safety is compromised and it is also really annoying. In a much worst case, your browser could be hijacked to download malicious software that will do a great deal of damage to your computer.

Key symptoms that your browser has been hijacked

When your browser is hi-jacked, the following can happen: you notice unauthorized changes to your internet browser’s homepage; you observe new unwanted favorites or bookmarks added, usually directed to advertisement-filled or porn websites; the default browser configurations have been changed and/or your default web engine is altered; unwanted new toolbars are added to your internet browser; you might notice numerous pop-up adverts on your computer screen; your browser has instability issues or exhibits frequent errors; You can’t access particular websites, especially anti-malware websites.

Exactly how they invade computers

A browser hijacker can be installed on your computer or laptop when you go to an infected site, click on an e-mail attachment, or download something from a file-sharing site. Many internet browser hijackings originate from add-on programs, i.e., browser helper objects (BHO), toolbars, or plug-ins added to browsers to provide them additional features. Other times you might have accidentally accepted a browser hijacker as part of a software bundle (generally freeware or shareware). Popular examples of browser hijackers include CoolWebSearch, Conduit, OneWebSearch, Coupon Server, RocketTab, Delta Search, Searchult.com, and Snap.do. Browser hijacking can bring about serious privacy problems and even identity theft, affect your web browsing experience by taking control over outgoing traffic, drastically slows down your computer or laptop by depleting lots of resources, and lead to system instability also.

Browser hijacker removal methods

Some browser hijacking can be easily stopped by identifying and eliminating the corresponding malware software from your control panel. However, most hijackers are quite tenacious and require specialized applications to get rid of them. Moreover, browser hijackers could modify the Windows registry so it can be extremely tough to fix manually, particularly when you are not a tech-savvy person. Browser hijackers can be effectively removed by installing and running an anti-malware application on the affected computer. To get rid of any browser hijacker out of your computer, you could download this particular top-notch malware removal application – SafeBytes Anti-Malware. Together with anti-malware, a PC optimizer software, similar to Total System Care, could help you correct Windows registry errors, remove unwanted toolbars, secure your internet privacy, and stabilize programs installed on your computer.

Find Out How To Install Safebytes Anti-Malware On An Infected Computer system

All malware is bad and the consequences of the damage will vary based on the specific type of malicious software. Certain malware goes to great lengths to stop you from downloading or installing anything on your computer system, particularly anti-virus programs. If you are reading this, you probably have infected by a virus that stops you from installing a security program like Safebytes Anti-Malware. Follow the instructions below to remove malware through alternative methods.

Install in Safe Mode with Networking

Safe Mode is a unique, simplified version of Windows where just essential services are loaded to counteract malware and other problematic programs from loading. In case the malicious software is set to load immediately when the PC boots, switching to this mode could prevent it from doing so. To boot into Safe Mode, hit “F8” key on the keyboard right before Windows logo screen appears; Or right after normal Windows boot up, run MSCONFIG, look over Safe Boot under Boot tab, and then click Apply. Once you are in Safe Mode, you can try to install your anti-malware application without the hindrance of the malware. After installation, run the malware scanner to eliminate standard infections.

Download the anti-malware program in a different internet browser

Some malware only targets particular internet browsers. If this is your case, employ another browser as it might circumvent the computer virus. In case you suspect that your Internet Explorer happens to be hijacked by a computer virus or otherwise compromised by online hackers, the most effective course of action is to switch over to a different web browser such as Mozilla Firefox, Google Chrome, or Apple Safari to download your favorite security application – Safebytes Anti-Malware.

Make a bootable USB anti-virus drive

Another solution is to save and run an anti-malware software program entirely from a Thumb drive. To run antivirus from a thumb drive, follow these simple steps: 1) On a clean computer, install Safebytes Anti-Malware. 2) Plug the USB drive into the clean computer. 3) Double-click the Setup icon of the anti-malware software to run the Installation Wizard. 4) Select the drive letter of the pen drive as the location when the wizard asks you where you would like to install the anti-virus. Follow the onscreen instructions to finish the installation. 5) Now, insert the USB drive into the corrupted PC. 6) Run the Safebytes Anti-malware directly from the pen drive by double-clicking the icon. 7) Simply click “Scan Now” to run a complete scan on the affected computer for malware.

SafeBytes Anti-Malware Features

To protect your laptop or computer from various internet-based threats, it’s important to install anti-malware software on your personal computer. However, with countless numbers antimalware companies out there, these days it is hard to decide which one you should buy for your laptop. Some of them do a great job in eliminating malware threats while some will damage your PC by themselves. You must be careful not to pick the wrong product, especially if you buy a paid application. On the list of strongly recommended software by industry leaders is SafeBytes Anti-Malware, the most dependable program for Microsoft Windows. SafeBytes anti-malware is a trustworthy tool that not only secures your PC permanently but is also quite user-friendly for people of all skill levels. Once you’ve got installed this application, SafeByte's sophisticated protection system will ensure that no viruses or malware can seep through your PC.

SafeBytes anti-malware provides an array of enhanced features that sets it aside from all others. Some of them are listed as below:

Real-Time Protection: SafeBytes gives you round-the-clock protection for your PC limiting malware intrusions in real-time. This utility will constantly monitor your computer for suspicious activity and updates itself continuously to keep abreast of the constantly changing threat landscape. Most effective AntiMalware Protection: Built on a greatly acclaimed anti-virus engine, this malware removal application can find and get rid of numerous stubborn malware threats such as browser hijackers, potentially unwanted programs, and ransomware that other common anti-virus applications will miss. Website Filtering: Safebytes allots all websites a unique safety score that helps you to have an idea of whether the webpage you’re just about to visit is safe to browse or known to be a phishing site. Fast Multi-threaded Scanning: Safebytes Anti-Malware, with its advanced scanning engine, offers extremely fast scanning which can promptly target any active online threat. Low CPU/Memory Usage: SafeBytes is well known for its low influence on processing power and great detection rate of various threats. It operates silently and efficiently in the background so you’re free to utilize your PC at full power all of the time. 24/7 Customer Service: For any technical concerns or product assistance, you could get 24/7 professional assistance through chat and email. Put simply, SafeBytes has created a meaningful anti-malware solution that is aimed to protect you against all manner of malware. You now may understand that this particular software does more than just scan and eliminate threats from your PC. So if you’re searching for the absolute best malware removal application out there, and when you don’t mind shelling out a few bucks for it, opt for SafeBytes Anti-Malware.

Technical Details and Manual Removal (Advanced Users)

To eliminate Nectar Toolbar manually, go to the Add or Remove programs list in the Windows Control Panel and choose the program you want to remove. For browser extensions, go to your web browser’s Addon/Extension manager and select the add-on you want to remove or disable. You’ll probably also want to reset your internet browser to its default settings. Finally, check your hard disk for all of the following and clean your computer registry manually to get rid of leftover application entries after uninstallation. But bear in mind, this can be a tough task and only computer professionals can perform safely. In addition, certain malicious programs have the capability to defend against its removal. Completing this task in Safe Mode is suggested.
Files: C:\Program Files (x86)\Nectar Toolbar C:\Program Files (x86)\Nectar Toolbar\tbunsg7A.tmp\AimiaPoints.png C:\Program Files (x86)\Nectar Toolbar\tbunsg7A.tmp\AimiaPointsAct.png C:\Program Files (x86)\Nectar Toolbar\tbunsg7A.tmp\AimiaToolbar.css C:\Program Files (x86)\Nectar Toolbar\tbunsg7A.tmp\ArrowDown.png C:\Program Files (x86)\Nectar Toolbar\tbunsg7A.tmp\ArrowRight.png C:\Program Files (x86)\Nectar Toolbar\tbunsg7A.tmp\ArrowUp.png C:\Program Files (x86)\Nectar Toolbar\tbunsg7A.tmp\arrow_refresh.png C:\Program Files (x86)\Nectar Toolbar\tbunsg7A.tmp\background.html C:\Program Files (x86)\Nectar Toolbar\tbunsg7A.tmp\background.js C:\Program Files (x86)\Nectar Toolbar\tbunsg7A.tmp\basis.xml C:\Program Files (x86)\Nectar Toolbar\tbunsg7A.tmp\BrowserTweak.css C:\Program Files (x86)\Nectar Toolbar\tbunsg7A.tmp\btn-background-grey.png C:\Program Files (x86)\Nectar Toolbar\tbunsg7A.tmp\CanCollect.png C:\Program Files (x86)\Nectar Toolbar\tbunsg7A.tmp\CanCollectAct.png C:\Program Files (x86)\Nectar Toolbar\tbunsg7A.tmp\closeIcon.png C:\Program Files (x86)\Nectar Toolbar\tbunsg7A.tmp\cog.png C:\Program Files (x86)\Nectar Toolbar\tbunsg7A.tmp\Collecting.png C:\Program Files (x86)\Nectar Toolbar\tbunsg7A.tmp\CollectingAct.png C:\Program Files (x86)\Nectar Toolbar\tbunsg7A.tmp\computer_delete.png C:\Program Files (x86)\Nectar Toolbar\tbunsg7A.tmp\eShopsMenu.html C:\Program Files (x86)\Nectar Toolbar\tbunsg7A.tmp\eShopsMenu.js C:\Program Files (x86)\Nectar Toolbar\tbunsg7A.tmp\help.png C:\Program Files (x86)\Nectar Toolbar\tbunsg7A.tmp\HelpMenu.html C:\Program Files (x86)\Nectar Toolbar\tbunsg7A.tmp\HelpMenu.js C:\Program Files (x86)\Nectar Toolbar\tbunsg7A.tmp\icon-128.png C:\Program Files (x86)\Nectar Toolbar\tbunsg7A.tmp\icon-16.png C:\Program Files (x86)\Nectar Toolbar\tbunsg7A.tmp\icon-48.png C:\Program Files (x86)\Nectar Toolbar\tbunsg7A.tmp\icons.bmp C:\Program Files (x86)\Nectar Toolbar\tbunsg7A.tmp\icons.png C:\Program Files (x86)\Nectar Toolbar\tbunsg7A.tmp\ie7vista.png C:\Program Files (x86)\Nectar Toolbar\tbunsg7A.tmp\ie7xp.png C:\Program Files (x86)\Nectar Toolbar\tbunsg7A.tmp\ie8bg.png C:\Program Files (x86)\Nectar Toolbar\tbunsg7A.tmp\IE8GuardWorkaround.exe C:\Program Files (x86)\Nectar Toolbar\tbunsg7A.tmp\info.txt C:\Program Files (x86)\Nectar Toolbar\tbunsg7A.tmp\InstIcon.ico C:\Program Files (x86)\Nectar Toolbar\tbunsg7A.tmp\jquery-1.7.2.min.js C:\Program Files (x86)\Nectar Toolbar\tbunsg7A.tmp\jquery.placeholder.min.js C:\Program Files (x86)\Nectar Toolbar\tbunsg7A.tmp\JSON.js C:\Program Files (x86)\Nectar Toolbar\tbunsg7A.tmp\main.js C:\Program Files (x86)\Nectar Toolbar\tbunsg7A.tmp\menu.js C:\Program Files (x86)\Nectar Toolbar\tbunsg7A.tmp\nectar-icon-32×32.png C:\Program Files (x86)\Nectar Toolbar\tbunsg7A.tmp\PIE.htc C:\Program Files (x86)\Nectar Toolbar\tbunsg7A.tmp\PIE.js C:\Program Files (x86)\Nectar Toolbar\tbunsg7A.tmp\SearchHist.html C:\Program Files (x86)\Nectar Toolbar\tbunsg7A.tmp\SearchHist.js C:\Program Files (x86)\Nectar Toolbar\tbunsg7A.tmp\search_glass.png C:\Program Files (x86)\Nectar Toolbar\tbunsg7A.tmp\separator.png C:\Program Files (x86)\Nectar Toolbar\tbunsg7A.tmp\separator_arrows.png C:\Program Files (x86)\Nectar Toolbar\tbunsg7A.tmp\TbCommonUtils.dll C:\Program Files (x86)\Nectar Toolbar\tbunsg7A.tmp\tbcore3.dll C:\Program Files (x86)\Nectar Toolbar\tbunsg7A.tmp\TbHelper2.exe C:\Program Files (x86)\Nectar Toolbar\tbunsg7A.tmp\tbhelperU.dll C:\Program Files (x86)\Nectar Toolbar\tbunsg7A.tmp\uninstall.exe C:\Program Files (x86)\Nectar Toolbar\tbunsg7A.tmp\UninstIcon.ico C:\Program Files (x86)\Nectar Toolbar\tbunsg7A.tmp\update.exe C:\Program Files (x86)\Nectar Toolbar\tbunsg7A.tmp\version.txt C:\Program Files (x86)\Nectar Toolbar\tbunsg7A.tmp\Yahoo.ico C:\Program Files (x86)\Nectar Toolbar\tbunsg7A.tmp\yahoo.png C:\Program Files (x86)\Nectar Toolbar\tbunsg7A.tmp\your_logo.png Registry: HKEY_CURRENT_USER\Software376694984709702142491016734454 HKEY_CURRENT_USER\Software\Microsoft\Windows\CurrentVersion\Run 13376694984709702142491016734454
Read More
Steam beta introduces no rollback game updates
The latest steam beta update has introduced code that will prevent downloading and installing previous game versions via the steam client. steamFor many people that are playing online games, this is not such a big deal since they always must have the latest version in order to play their games but for other ones, this has arrived as a bit of a problem. Many people preferred older game versions since often updates can change certain mechanics inside the game making it different as an experience or introduce some elements that not everyone likes. So far, people could use the steamDB site to find depo of the game versions you would like to play and download it but if this beta code goes live that will not be an option anymore. Now, playing old games without updates could also be used for nostalgic reasons and these people have also been cut off with this update. It is important to point that update is still in beta client only but users have already started to voice their opinions asking Valve not to place it live. In the end, it will all depend on Valve’s decision will they listen to their customers or decide to push updates on live service.
Read More
Disabling File Grouping in Explorer in Windows
Browsing your files on a computer seamlessly is made possible by the File Explorer in Windows 10 as it provides users with a great sense of customization for both listing and performing operations on a file. You have the option to arrange the folders and files being browsed by their name, type, date, size, and so on. Moreover, files that share a common attribute can be also be grouped accordingly using the grouping feature. However, there are times when instead of helping, it causes some problems for some users. This is why in this post, you will be guided on how you can disable the File Grouping feature in the File Explorer in Windows 10. There are two methods you need to consider in disabling the File Grouping feature in Windows 10. First, you can disable it for only one folder or you can disable it for all the folders on your computer. For more details, follow the instructions given below.

Option 1 – Disable File Grouping in only one folder

This first option is relatively straightforward and simple which will work if you only want to disable File Grouping in one folder.
  • First, open File Explorer, and go to the folder you want to disable File Grouping.
  • Next, right-click anywhere on that folder.
  • And then select Group by > None. This will disable File Grouping for only that particular folder.

Option 2 – Disable File Grouping in all the folders

If you wish to disable File Grouping in all the folders on your computer, then you need to follow this option. If you have already tried the first one, then continue with the given steps below.
  • Tap the Alt + V key combination.
  • Then tap the Alt + Y keys and then tap Alt + O keys.
  • After that, navigate to the View tab, and under the Folder views section, select Apply to Folders.
  • Now click on the Apply and OK buttons to save the changes made. This will disable File Grouping in all the folders listed in the File Explorer.
Read More
How to Fix Windows 10 Error Code 0x80072F8F

Error Code 0x80072F8F - What is it?

Error Code 0x80072F8F manifests in one main way. It is known to appear as early as Windows 7, and mainly deals with an error that occurs in the update process, or when the computer is trying to connect to the online activation service. It can appear when the activation fails to verify the product key. The error code will present itself when the system realizes that the PC's date and time are incorrect. Error Code 0x80072F8F will also appear if the computer has determined that the time zone settings on the computer are not accurate.

When Windows is going through the installation process and is verifying all of the information associated with the computer, Error Code 0x80072F8F will arise, indicating that the information in the computer's settings is not valid. Correct times and dates are necessary when using serial validation keys to install Windows. When these settings are outside of the tolerated window, the problem will arise.

Error Causes

There is only one main symptom to look out for, and it will manifest during a Windows installation. In the midst of the installation, the computer will not be able to proceed with the installation if Error Code 0x80072F8F has popped up. Because the information cannot be verified, Windows will not be able to continue the installation process when the time settings are not accurate. This interrupts the process, causing the need to edit the settings, restart the computer, and try again. It is imperative to be sure that the date and time on the computer are inside of the tolerated window for the serial key.

  • This error code will not give any information on how to correct it.
  • Windows Error 0x80072F8F is displayed on the screen.
  • The error code appears when typing the Windows serial key and proceeding.

Further Information and Manual Repair

When experiencing Error Code 0x80072F8F, the date and time need to be corrected in the computer settings menu, and then verify the correct time zone settings.  There are a few different ways to edit the time and date settings, and one may need to even edit the time zone settings. After this, restarting the computer may be needed. When booting into Windows, the validation code should be activated within 30 days of obtaining the serial number.

  • Method One

Check the time and date settings.

  1. Open the Start menu.
  2. Select Settings, then Time and Language, then Date and Time.
  3. Check and make sure that the PC is operating at the correct time and date.
  • Method Two

Ensure that the computer is connected to the internet.

  1. Enter “network troubleshooter” into the search box located on the taskbar.
  2. Select “Identify and Repair Network Problems”.
  3. Follow the instructions that are given on-screen. This will fix any problems that the network is experiencing.
  • Method Three

Review the timezone.

  1. Open the Start menu.
  2. Select Settings, then Time and Language, then Date and Time.
  3. Check to make sure that the correct timezone is selected from the drop-down menu.
  • Method Four

Reboot the PC and check if that fixes the problem. This may help in the event that the network troubleshooter does not detect a problem.

After completing these steps to edit the time, date, and time zone settings, it may be necessary to restart the computer. This is to ensure that the computer will save and recognize the new settings. After restarting, continue the process as intended and enter the product key. The computer will now be able to verify the product key since the time and date will be recognizable. The Windows installation should proceed as normal and complete successfully when the time, date, and time zone are inside of the parameters for the Windows product key.

In short, if it is not, the computer will not be able to recognize the product key, thus will not be able to install the Windows product. Generally, the fix is quite simple and does not take much time at all, but it is very important.

Read More
RealOnlineRadio removal Guide

RealOnlineRadio is a Browser Extension for Google Chrome. This extension offers users the ability to listen to radio stations across the web. From the Author: Real Online Radio is different, as it is a simple radio aggregator. This means Real Online Radio puts together thousands of independent radio stations from all parts of the world in a browser extension that is free and easy to use. It is made for people, who want to have control over their radio streaming. With our simple radio widget, you can get an overview of thousands of radio stations both from your hometown and from the rest of the world. With Real Online Radio, you can listen to your favorite radio station or get an impression of all styles and sorts of music – without being guided in a specific direction by anybody – or anything (such as those radio bots). Real Online Radio returns the control to you, to discover exactly the kind of music that you love.

While this may look useful, this extension changed your default search engine and hijacks your home page. While this extension is active, all your searches are redirected through fileupsticks.com, where a database of your search queries is kept to better server ads that are later delivered through the Yahoo search engine.

About Browser Hijackers

Browser hijackers (also known as hijackware) are a type of malware that changes internet browser configurations without the user’s knowledge or approval. These kinds of hijacks happen to be rising at an astonishing rate across the world, and they can be truly nefarious and sometimes harmful too. Nearly all browser hijackers are created for marketing or advertising purposes. These are generally used to force visitors to a specific website, manipulating web traffic to generate ad revenue. Even though it might appear naive, these tools are designed by vicious individuals who always attempt to take full advantage of you, so that they could make money from your naive and distraction. Browser hijackers can also allow other vicious programs without your knowledge to further damage your PC.

Signs of browser hijacker malware

Below are some signs and symptoms that indicate your internet browser has been hijacked: your browser’s home page has been reset to some mysterious site; you find redirected to websites you never intended to visit; the default web browser settings are changed and/or your default search engine is altered; you find multiple toolbars on the browser; you’ll find random pop-ups start showing regularly; your internet browser starts running sluggishly or displays frequent glitches; you can’t visit certain sites such as homepages of antivirus software.

How it infects the computer

Browser hijackers can get into a computer by some means or other, including via file sharing, downloads, and e-mail as well. They may also be deployed via the installation of an internet browser toolbar, add-on, or extension. A browser hijacker could also be installed as a part of freeware, shareware, demoware, and fake programs. An example of some infamous browser hijackers includes Babylon, Anyprotect, Conduit, SweetPage, DefaultTab, Delta Search, and RocketTab, however, the names are continually changing. The presence of any browser hijacker malware on your system can substantially diminish the web browsing experience, record your online activities that lead to serious privacy concerns, develop system stability issues and finally cause your PC to slow down or to a nearly unusable condition.

Browser Hijacker Malware – Removal

The one thing you could try to eliminate a browser hijacker is to locate the malicious software in the “Add or Remove Programs” list in the Microsoft Windows Control Panel. It might or might not be there. If it is, try and uninstall it. However, the majority of hijacking codes are certainly not very easy to get rid of manually, as they go deeper into the operating system. Also, browser hijackers can modify the Computer registry so it could be very tough to restore all the values manually, particularly if you are not a tech-savvy person. You can go for automatic browser hijacker removal by just installing and running a reliable anti-malware application. SafeBytes Anti-Malware will counter persistent browser hijackers and provide you real-time PC protection against all types of malware.

Can't Install Safebytes Anti-malware due to the presence of Malware? Try This!

Practically all malware is detrimental and the level of the damage will differ greatly in accordance with the type of infection. Certain malware goes to great lengths to stop you from installing anything on your computer, especially anti-virus software programs. If you’re reading this, odds are you’re stuck with a malware infection that is preventing you to download and/or install the Safebytes Anti-Malware program on your computer system. There are some actions you can take to get around this problem.

Install anti-malware in Safe Mode with Networking

If the virus is set to load automatically when Microsoft Windows starts, stepping into safe mode could very well block the attempt. Only the bare minimum required applications and services are loaded when you start your personal computer into Safe Mode. You need to do the following to get rid of malware in Safe mode. 1) After switching on the computer, hit the F8 key before the Windows splash screen begins to load. This will conjure up the “Advanced Boot Options” menu. 2) Choose Safe Mode with Networking with arrow keys and press Enter. 3) As soon as this mode loads, you will have the internet. Now, obtain the malware removal software you need by utilizing the web browser. To install the application, follow the directions in the installation wizard. 4) Immediately after installation, run a complete scan and allow the software to delete the threats it detects.

Download the security program using an alternate web browser

Certain viruses may target vulnerabilities of a specific browser that block the downloading process. If you’re not able to download the security application using Internet Explorer, this means the virus is targeting IE’s vulnerabilities. Here, you should switch to an alternate web browser like Chrome or Firefox to download Safebytes Anti-malware software.

Install and run anti-malware from the Thumb drive

To successfully get rid of the malware, you have to approach the issue of installing an anti-virus software program on the infected computer system from a different perspective. Adopt these measures to run the antivirus on the affected computer system. 1) Download the anti-malware software on a virus-free computer. 2) Put the USB drive into the clean computer. 3) Double-click the executable file to open the installation wizard. 4) When asked, select the location of the USB drive as the place where you would like to put the software files. Follow the on-screen instructions to complete the installation. 5) Transfer the flash drive from the clean PC to the infected computer. 6) Double click the Safebytes Anti-malware icon on the USB drive to run the software. 7) Hit the “Scan Now” button to start the virus scan.

Overview of SafeBytes Anti-Malware

These days, anti-malware software can protect your laptop or computer from various kinds of internet threats. But exactly how to choose the right one amongst countless malware protection application that’s available out there? As you may be aware, there are several anti-malware companies and products for you to consider. Some are really worth your money, but most aren’t. When searching for an anti-malware program, choose one that gives dependable, efficient, and total protection against all known computer viruses and malware. One of the recommended software programs is SafeBytes AntiMalware. SafeBytes carries a good track record of excellent service, and customers seem to be happy with it. SafeBytes anti-malware is a trustworthy tool that not only protects your computer completely but is also extremely user-friendly for people of all ability levels. With its outstanding protection system, this tool will instantly detect and remove the majority of the security threats, which include browser hijackers, viruses, adware, PUPs, trojans, worms, and ransomware. There are many great features you’ll get with this security product. Listed here are some of the great ones: Real-time Active Protection: Malware programs trying to enter the system are discovered and stopped as and when detected by the SafeBytes real-time protection shields. This tool will always keep track of your computer for any suspicious activity and updates itself regularly to keep abreast of the constantly changing threat situation. Best AntiMalware Protection: Using a critically acclaimed malware engine, SafeBytes offers multilayered protection that is made to find and remove threats that are concealed deep in your computer’s operating system. Safe Web Browsing: Safebytes assigns all websites a unique safety rating that helps you to have an idea of whether the webpage you are about to visit is safe to view or known to be a phishing site. Low CPU/Memory Usage: This software is lightweight and will work quietly in the background, and will not have an effect on your computer efficiency. Fantastic Tech Support: You will get 24/7 technical assistance to quickly resolve any concern with your security application. SafeBytes has put together a wonderful anti-malware solution that can help you conquer the latest malware threats and virus attacks. Malware issues will become a thing of the past when you put this tool to use. If you want sophisticated forms of protection features and threat detections, purchasing SafeBytes Anti-Malware could be worth the dollars!

Technical Details and Manual Removal (Advanced Users)

If you would like to carry out the removal of RealOnlineRadio manually instead of utilizing an automated software tool, you may follow these steps: Navigate to the Windows Control Panel, click the “Add or Remove Programs” and there, select the offending program to remove. In cases of suspicious versions of browser plugins, you can actually get rid of it via your browser’s extension manager. You will probably also want to reset your internet browser. Finally, check your hard drive for all of the following and clean your registry manually to remove leftover application entries following uninstalls. However, this is often a tricky task and only computer professionals could perform it safely. In addition, some malicious programs have the capability to defend against its removal. Doing this in Safe Mode is recommended.
Read More
What is and how to Remove Shortcut Virus
Shortcut virus is an easily spreadable and annoying combination of Worm and Trojan that hides all of your files and folders and then replaces them with shortcuts that look identical to replaced files and folders. Shortcut virus
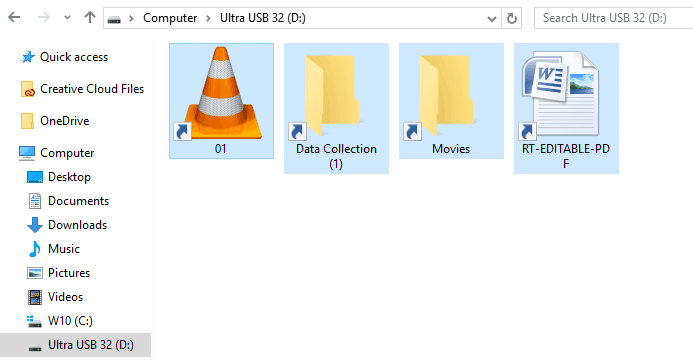
Once disguised it will wait patiently for a user's click and once that happens it will replicate itself and further infect the system. This rapid spread can lead to stolen personal data, some system hick-ups, and other system-related issues. This malware mainly affects physical file transfer devices like for example and most USB drives, hard drives, and SD memory cards and it can easily transfer itself to the computer. The advantage of this shortcut virus comparing it to others is that it is mostly undetected by a vast variety of antivirus software. So running just anti-virus software maybe not be enough to remove it from your system. Luckily for all unfortunate users that have caught this annoyance, it can be easily removed fully manually in a short time.

How to Remove Virus from USB and other removable media

Firstly plugin USB, SD, or removable drive. The infection will transfer to your computer when the infected drive is plugged in so before we go to clean the computer itself, clean each removable drive that you have. Also know that infection will spread from computers into removable devices as well if it is not cleaned. Open the File Explorer and remember under which letter is removable drive registered. Open Command prompt but with administrator privileges and go to infected rive by typing its letter followed with “:” (for example D:) and press ENTER Once you have successfully gone to infected drive type in command prompt: Attrib -s -r -h /s /d *.* This will unlock all original files back into removable storage, next copy all files to your computer, and format the removable drive. Once the format is complete, unplug the removable device. Continue to clean all devices with the same method.

How to Permanently Remove a Shortcut Virus from Your PC

Now once we have cleaned all removable devices it is time to fully clean the PC Firstly open the task manager ( CTRL + SHIFT + ESC ), in the process tab find wscript.exe or wscript.vbs, right-click on it (or both if present), and select End Task. Now close the task manager and press Start. Inside start typing in registry editor to search for it and once found open it. Find the following key inside the registry editor: HKEY_CURRENT_USER/Software/Microsoft/Windows/CurrentVersion/Run In the right panel, look for any strange-looking key names, such as odwcamszas, WXCKYz, OUzzckky, etc. For each one, run a Google search to see if it's related to shortcut viruses. If any returns a positive match, right-click on them and select Delete. !!! Accidentally deleting an important key can cause Windows to become unstable, so double-check everything !!!. Close the Registry Editor Now press ⊞ WINDOWS + R to open the run dialog and type in it Msconfig followed by ENTER. Once the System Configuration window opens go to the Startup tab. In the Startup tab, look for any strange-looking .EXE or .VBS programs, select each one and click Disable. Close the Window. Once again open the run dialog and type inside %TEMP% and press ENTER in order to open the Windows temp folder. Inside this folder delete everything. Next in the File explorer go to C:\Users\[username]\AppData\Roaming\Microsoft\Windows\Start Menu\Programs\Startup Look for any strange-looking .EXE or .VBS files and delete them.
Read More
Chkdsk Error - How to fix It In Seconds

What is Chkdsk Error?

Chkdsk (Check Disk) is a built-in Microsoft Windows O/S utility tool.

This tool is designed to verify the integrity of data stored on the hard drive. In addition to this, it resolves and finds errors that may corrupt and damage stored data on your system and affect your PC’s performance.

This tool is intended to keep your PC’s Windows database clean.

However, this tool has certain limitations. It prevents the hard disk from getting damaged but if it gets damaged and corrupt then this tool is no good. It fails to disk check and repair. As a result, you may come across Chkdsk error pop-ups.

In such an event, it is not advisable to run the malfunctioned Chkdsk utility on your PC as it may damage your system beyond repair making you lose all your valuable data saved on your system.

Solution

Restoro box imageError Causes

Chkdsk errors are triggered by multiple reasons:

  • Viruses
  • Hard Drive failure
  • Registry Corruption Due to Data Overload
  • Poor PC Maintenance

Chkdsk errors may cause PC to freeze and lag and also result in data loss as we discussed above.

Further Information and Manual Repair

To avoid serious damages that the Chkdsk error code can cause to your system, it is advisable to fix it. You can either hire a professional or install Restoro. The latter is not just the best way but also a time and money-saving option. It is fast, user-friendly and you can download it for free thus saving hundreds of dollars that you would be paying for professional services.

Why Use Restoro?

Restoro is an advanced PC repair tool embedded with multiple features such as a registry cleaner, anti-virus, system optimizer, and Active X and Class error scanner. It helps resolve practically all types and kinds of PC-related errors including the most notorious ones like the Chkdsk errors.

It has an automated and intuitive interface smoothly integrated with the latest technology that enables this software to scan your entire PC and detect errors in seconds.

With the help of its super functional registry cleaner, Restoro detects errors registry issues triggering Chkdsk errors on your system. It cleans all the unnecessary files like junk files, bad and invalid registry entries, and internet files that are stored in your hard disk and taking a lot of space. It removes the clutter and frees up your disk space and repairs the damaged registry.

It boosts the speed of your system and ensures that programs run smoothly on your PC and there are no hang-ups or system freezes.

The privacy error detector functions as a powerful anti-virus. With the help of this feature, Restoro identifies and scans for viruses and malware infecting your system. These are removed right away.

Restoro is 100% safe and efficient. It has a backup feature that enables users to create backup copies. This is carried for safety purposes. In case you lose your data during the repair of the Chkdsk error, you can always recover and restore the lost files without any hassle.

With some registry cleaners and repair tools you may often have to struggle with compatibility issues but not with this PC Fixer.

Restoro is compatible with all Windows versions. It is simple and very easy to use. From beginners, intermediate to experienced, all levels of users can use it with ease.

Here are the steps to get started:

  1. Click here to install Restoro on your computer
  2. Once the installation is complete, run the fixer for a scan. You have the option to either scan some portions of the PC or the entire PC.
  3. Scanning will take a few seconds
  4. Once the scanning is complete, Restoro will display the scan results. This is presented in a comprehensive report showing you errors found including the Chkdsk error and errors related to it.
  5. After that, all you need to do is press the repair button to resolve the error(s) promptly.
  6. Once the error is resolved, try running the Chkdsk utility again.
Read More
Quick Fix for Error Code 100

What is Error Code 100?

Error Code 100?? Whenever a Setup error contains error codes in the message, this indicates what the setup was operating on, let’s say copying files. The text in the error message will determine whether that it is fatal or not. An error code 100 is a system error that is displayed as ‘ERROR_TOO_MANY_SEMAPHORES’ or as a value 0x64. This error means that the system ‘cannot create another system semaphore.’ A semaphore is used in controlling access to parallel programming or a multi-user platform through multiple processes. This error can prevent certain features of your Windows to perform properly, like trying to get a print, copying files, deleting files, or any other routine computer activities.

Solution

Restoro box imageError Causes

Error code 100 can affect a wide range of activities that you normally perform on your PC. This error can occur for a number of reasons, of which some of the common ones include:
  • When the Microsoft SQL Server fails to start the service
  • When the account used for starting AOS does not match the database in SQL Server
  • When the AOS licenses have exceeded their limit
  • When the SQL Server database is incorrectly case sensitive
Though these are the common causes for error code 100, there can be other ways through which this error can occur. To find out the specific cause for error code 100, follow these steps:
  • Go to Start and select All Programs. Go to Administrative Tools and click Even Viewer
  • Click Application in Even Viewer
  • Locate the error message in the right pane by scrolling down
  • Click on the error message and see if the message applies to the error code.

Further Information and Manual Repair

In order to manually repair this error, you will have to work with your Network Administrator as they will have security privileges to take the steps. However, there are more than one ways to resolve this issue, for instance:
  1. Starting SQL Server Service
    • A likely cause of an error code 100 can be that your SQL Server service is not started. To activate it, follow these steps:
    • Got to Start and Click on All Programs, go to Administrative Tools and click on Services
    • Find SQL/MSSQLServer service
    • Right Click on it and click Start to activate the service
  2. Network Resolve
If you are connected to a network, then you can work with your network administrator to fix error code 100. Follow these steps to resolve this error:
  • Got to Start and then Run. Type dcomcnfg and press Enter
  • Locate Default Security and click it
  • Find Default Access Permissions and click Edit Default
  • You should locate System and Interactive, listed in the Allow Access. If they’re not listing, you can add them by clicking Add
  • Find the local computer in the list and click on Allow Access
  • Click Ok on the following three steps
  • Log off the computer and log in again.
Read More
Fix Windows Error Code 0x80070017
If you suddenly encountered a Windows Error Code 0x80070017 during an Update, Installation or System Restore then it’s probably due to some missing or corrupted system files. This kind of error code can occur during an update, installation, or system restore and the only way out of it is to download the file once again and re-run the installation from the top. Before you start to troubleshoot the problem, you need to create a System Restore Point first. After you create a System Restore point, you can follow the troubleshooting options laid out below to fix the Windows Error Code 0x80070017. You just have to follow the troubleshooting option that applies to your situation and whether you got the error during an update, installation, or during System Restore. Whether you got the error 0x80070017 while updating Windows 10 or installing it or during a system restore, the first thing you must do is run the System File Checker. As pointed out early on, the Windows Error Code 0x80070017 might be caused by corrupted or missing system files so the first thing you can try is to run the System File Checker scan.
  • Tap Win + R to launch Run.
  • Type in cmd in the field and tap Enter.
  • After opening Command Prompt, type in sfc /scannow and hit Enter.
The command will start a system scan which will take a few whiles before it finishes. Once it’s done, you could get the following results:
  1. Windows Resource Protection did not find any integrity violations.
  2. Windows Resource Protection found corrupt files and successfully repaired them.
  3. Windows Resource Protection found corrupt files but was unable to fix some of them.
If you have encountered Windows Error Code 0x80070017 during an Update, then here are some options you need to try:

Option 1 – Delete the files/contents in the SoftwareDistribution Folder

The Software Distribution folder in the Windows operating system is a folder that can be found in the Windows directory and is used to store files temporarily which might be required to install the Windows Update on your PC. Thus, it is required by the Windows Update and maintained by WUAgent. A lot of users tried deleting the files in this folder to fix the problem and so far it has worked. Like them, you can try clearing the Windows Update cache by simply deleting the contents of the folder named “SoftwareDistribution” since Windows apparently can’t clear and re-download the update contents once they are corrupted. Thus, deleting the contents of this folder will make Windows download the contents again which will fix the problem. To do that, follow the steps below.
  • Open the WinX Menu.
  • From there, open Command Prompt as admin.
  • Then type in the following command – don’t forget to hit Enter right after typing each one of them.
net stop wuauserv net stop bits
  • After entering these commands, it will stop the Windows Update Service and the Background Intelligent Transfer Service.
  • Next, go to the C:/Windows/SoftwareDistribution folder and get rid of all the folders and files thereby tapping the Ctrl + A keys to select them all and then click on Delete. Note that if the files are in use, you won’t be able to delete them.
  • Once all the contents in the Software Distribution folder are deleted, restart your PC and then go back to Command Prompt and input the following commands again.
net start wuauserv net start bits
Since the folder has already been flushed, it will be populated afresh the instant your restart your computer and open Windows Update.

Option 2 – Run the Windows Update Troubleshooter

Running the built-in Windows Update troubleshooter could also help you resolve the Windows Update Error Code 0x80070017. To run it, go to Settings and then select Troubleshoot from the options. From there, click on Windows Update and then click the “Run the troubleshooter” button. After that, follow the next on-screen instructions and you should be good to go. On the other hand, if you got the error code 0x80070017 during a Windows 10 installation, then it’s because of bad media or corruption in ISO. Here are some troubleshooting steps for this kind of situation:

Option a – Try to create Windows 10 ISO media again

In this option, you will have to create a Windows 10 bootable media and use it to install the latest Windows 10 version. Most users reported that this option works and the reason why it does have something to do with the Windows Update client since the Windows Updates downloaded from the regular Windows Update client seem to create issues such as the error 0x80070017. However, issues like this one don’t occur when the very same Windows Updates are downloaded and installed via an ISO file. Take note that when using a Windows ISO file, you will be asked to choose what you want to do with the previous settings and apps. A lot of users opted for the “Not to keep the old Windows settings” option which has resolved the issue. So if you want to keep the previous settings then you must try to update Windows first while keeping the old settings. However, if it doesn’t work, you have to try installing the latest version of Windows without keeping the previous settings.
  • Click this link and then click the Download Tool Now button.
  • Next, click the “Use the tool to create installation media (USB flash drive, DVD, or ISO file)…” option and follow the next given instructions on the screen.
  • Now select the ISO file option in step 5.
  • After that, you should now have an ISO file.
  • Next, go to the location where you’ve downloaded the ISO file.
  • Then right-click on the Windows 10 ISO file and select the Open with the option and then select File Explorer.
  • Now click on “setup.exe” and follow the next instructions that appear on the screen. When asked, you have to select either Nothing (clean install) or Keep personal files only option. Take note that you must not select the “Keep personal files, apps, and Windows settings since it doesn’t really work.

Option b – Run Microsoft’s online troubleshooter

Running Microsoft’s online troubleshooter might also help you fix the Windows update error 0x80070017. This online troubleshooter is known to help in fixing Windows Update errors, it scans your computer for issues that might be causing the problem and then fixes them automatically. If you got the error during System Restore then this means that the files that are being copied from the disk are not making it to the hard drive. To resolve it, here’s what you can do:

Option 1 – Run System Restore in Safe Mode

You might want to run System Restore in Safe Mode and see if it works. Just reboot your PC into Safe Mode and then run System Restore.

Option 2 – Reset Repository

  • Boot your PC into Safe Mode.
  • Then open Command Prompt as admin.
  • Next, type the “net stop winmgmt” command and hit Enter to stop the Windows Management Instrumentation Service.
  • After that, go to C:/Windows/System32/wbem. From there, rename the repository folder to “repository-old”.
  • Restart your computer.
  • After your computer has restarted, open Command Prompt as admin again and then type the “net stop winmgmt” command and hit Enter.
  • Next, type the “winmgmt /resetRepository” and hit Enter to reset Repository.
  • Restart PC and check if System Restore now works.

Option 3 – Try resetting Windows 10

To fix the error 0x80070017, you can try resetting Windows 10. Doing so won’t get rid of any file in your system – instead of erasing all your media files and documents, it only resets all the system settings and files. Simply go to Settings > Recovery. From there click the Get started button under the Reset This PC section.
Read More
1 2 3 171
Logo
Copyright © 2023, ErrorTools. All Rights Reserved
Trademark: Microsoft Windows logos are registered trademarks of Microsoft. Disclaimer: ErrorTools.com is not affiliated with Microsoft, nor claims direct affiliation.
The information on this page is provided for information purposes only.
DMCA.com Protection Status