Logo

How to Fix the TWCU.EXE Failed to Load Library File Error in Windows 10

The TWCU.EXE or TP-LINK Wireless Client Utility is a configuration application required to run wireless adapters successfully. The TP-LINK Wireless Client Utility application only exists on computers that are using the TP-LINK adapters. Upon the installation of this application, the service will be automatically added to the Windows service list that will continuously run in the background.

The Twcu.exe is placed at the C:\Program Files\TP-LINKTP-LINK\Wireless Utility folder and is used by TP-LINK to connect to the internet. The name of the main executable file is twcu.exe and can be viewed in the Services tab of the Task Manager. If you are one of the users who just upgraded to Windows 10 from the previous Windows versions, then you’ll most likely see an error saying, “Failed to load the library file!” that has something to do with twcu.exe or TWCU. This error pops up when you go to your desktop and every time you log into your Windows 10 PC.

Like pointed out, this error is related to the TP-LINK Wireless Client Utility and every user who is using the TP-LINK Wireless Client Utility is experiencing this problem which may be due to some compatibility issues especially when you start getting this error right after you upgraded to Windows 10. To fix this problem, follow each one of the options given below.

Option 1 – Try running in Compatibility Mode

The best thing you can do is to run the TP-LINK Wireless Client Utility in the compatibility mode since the problem is due to some compatibility issue. To run this utility in the compatibility mode, here’s what you have to do:

  • Look for the TP-LINK Wireless Client Utility which should be located on your desktop.
  • Once you find it, right-click on it and select Properties from the context menu.
  • After that, go to the Compatibility tab and mark the checkbox for “Run this program in compatibility mode for:” and from the drop-down list, select either Windows 7 or Windows 8.
  • Click the Apply button and then click OK to save the changes made and check if it has resolved the issue or not.

Option 2 – Try troubleshooting compatibility

This option is almost the same as the first one except it is an alternative way of fixing the TP-LINK Wireless Client Utility in case the first one didn’t work. In this option, you will troubleshoot the compatibility issue of the TP-LINK Wireless Client Utility.

  • Look for the TP-LINK Wireless Client Utility which as mentioned, is on your desktop.
  • Then right-click on it and select the “Troubleshoot compatibility” from the context menu.
  • After that, click on the “Try recommended setting” option. Once the process is done, the error message should be gone.

Do You Need Help with Your Device?

Our Team of Experts May Help
Troubleshoot.Tech Experts are There for You!
Replace damaged files
Restore performance
Free disk space
Remove Malware
Protects WEB browser
Remove Viruses
Stop PC freezing
GET HELP
Troubleshoot.Tech experts work with all versions of Microsoft Windows including Windows 11, with Android, Mac, and more.

Share this article:

You might also like

Fix Installer encountered an error 0x800f0905

Are you trying to update your Windows 11 OS and are receiving a 0x800f0905 error? Do not sweat and do not worry we have a couple of solutions that you can try in order to fix this issue. How this error is tied to various things like misconfigured settings, corrupt system files, and more there is no way to present one simple solution that will solve everything in one click.

error 0x800f0905
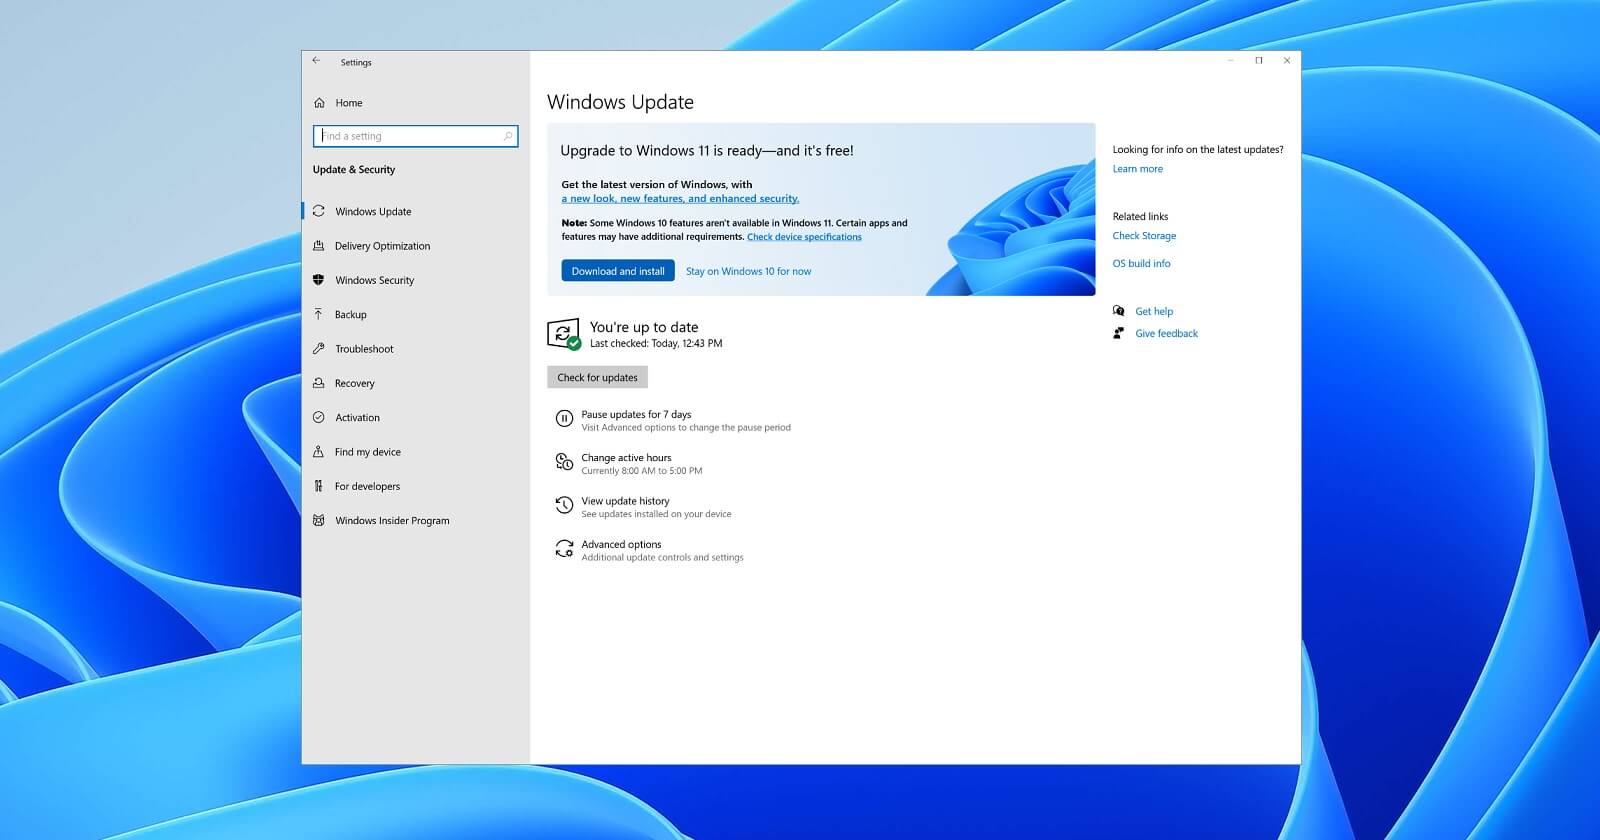
Therefore we are presenting a couple of solutions that will fix your issue, it is advisable to follow them as presented since they will go from the most common to the more complex one.

Run the troubleshooter

The most common fix and one that will actually repair things most of the time is simply running the Windows Update troubleshooter.

  1. Press ⊞ WINDOWS + I to open the Settings app
  2. Click on System on the left
  3. Click on Troubleshoot in the right part
  4. Click on Other Troubleshooters
  5. Find the Windows Update section and click on Run
  6. Let troubleshooter finish

Reset Windows update components

If the previous solution did not work we will need to do things manually. Follow the steps as presented in order to reset Windows update components.

  1. Press ⊞ WINDOWS + S to open search
  2. Type in Terminal
  3. Select Run as administrator
  4. Click on Yes on the User account control (UAC) pop up
  5. Press CTRL + SHIFT + 2 to open Command prompt
  6. Inside command prompt type each line of a command followed by ENTER after each line:
    net stop bits
    net stop wuauserv
    Del “%ALLUSERSPROFILE%Application DataMicrosoftNetworkDownloaderqmgr*.dat”
    Ren %Systemroot%\SoftwareDistribution\DataStore DataStore.bak
    Ren %Systemroot%\SoftwareDistribution\Download Download.bak
    Ren %Systemroot%\System32\catroot2 catroot2.bak
    exe sdset bits D:(A;;CCLCSWRPWPDTLOCRRC;;;SY)(A;;CCDCLCSWRPWPDTLOCRSDRCWDWO;;;BA)(A;;CCLCSWLOCRRC;;;AU)(A;;CCLCSWRPWPDTLOCRRC;;;PU)
    sc.exe sdset wuauserv D:(A;;CCLCSWRPWPDTLOCRRC;;;SY)(A;;CCDCLCSWRPWPDTLOCRSDRCWDWO;;;BA)(A;;CCLCSWLOCRRC;;;AU)(A;;CCLCSWRPWPDTLOCRRC;;;PU)
    cd /d %windir%\system32
    regsvr32.exe atl.dll
    regsvr32.exe urlmon.dll
    regsvr32.exe mshtml.dll
    regsvr32.exe shdocvw.dll
    regsvr32.exe browseui.dll
    regsvr32.exe jscript.dll
    regsvr32.exe vbscript.dll
    regsvr32.exe scrrun.dll
    regsvr32.exe msxml.dll
    regsvr32.exe msxml3.dll
    regsvr32.exe msxml6.dll
    regsvr32.exe actxprxy.dll
    regsvr32.exe softpub.dll
    regsvr32.exe wintrust.dll
    regsvr32.exe dssenh.dll
    regsvr32.exe rsaenh.dll
    regsvr32.exe gpkcsp.dll
    regsvr32.exe sccbase.dll
    regsvr32.exe slbcsp.dll
    regsvr32.exe cryptdlg.dll
    regsvr32.exe oleaut32.dll
    regsvr32.exe ole32.dll
    regsvr32.exe shell32.dll
    regsvr32.exe initpki.dll
    regsvr32.exe wuapi.dll
    regsvr32.exe wuaueng.dll
    regsvr32.exe wuaueng1.dll
    regsvr32.exe wucltui.dll
    regsvr32.exe wups.dll
    regsvr32.exe wups2.dll
    regsvr32.exe wuweb.dll
    regsvr32.exe qmgr.dll
    regsvr32.exe qmgrprxy.dll
    regsvr32.exe wucltux.dll
    regsvr32.exe muweb.dll
    regsvr32.exe wuwebv.dll
    netsh winsock reset
    net start bits
    net start wuauserv

Well, that was a lot of typing or copy and pasting line by line followed by ENTER after each one but hopefully, your issue is solved. These provided solutions fixed most users' issues with this error but if for some reason this is not the case for you, move to the next step.

Run the SFC scan

If you are still having 0x800f0905 error after previous attempts do the following:

  1. Press ⊞ WINDOWS + S to open search
  2. Type in Terminal
  3. Select Run as administrator
  4. Click on Yes on the User account control (UAC) pop up
  5. Press CTRL + SHIFT + 2 to open Command prompt
  6. Type in sfc /scannow and press ENTER
  7. Wait for the scan to finish
  8. Reboot the computer

Perform a system restore

If for any reason previous solutions have not provided you with the solution we will try to fix the issue by performing system restore.

  1. Press ⊞ WINDOWS + S to open search
  2. In the text box type in Create a restore point
  3. Click on the closest match in search results, should be Create a restore point
  4. Click on System Restore or on Next if there are no points created
  5. Choose to restore a point from the list and click on next
  6. Review settings and click on Finish
  7. Wait for the process to finish and for the computer to restart

Manually install update

If for any reason Windows still cannot install the update, try installing it manually.

  1. Go to Windows 11 update history and find the Knowledge base (KB) number for the latest version
  2. Go to the official Microsoft Update Catalog
  3. Paste the KB number in the search box and press ENTER
  4. Click on DOWNLOAD
  5. Double click on the downloaded file to launch the installer
  6. Follow on-screen instructions and install the update

Perform Windows 11 reset

If nothing worked, reset your Windows 11 to its factory settings to fully repair and reset the whole operating system.

Read More
Nostalgia hit: Commodore 64 emulator and games
If you are a kid or in your teenage years you maybe will be not familiar with Commodore 64 but we are welcoming you anyway to go with us on this journey through time and find out about one of the most influential and beloved home computer of all time.

commodore 64
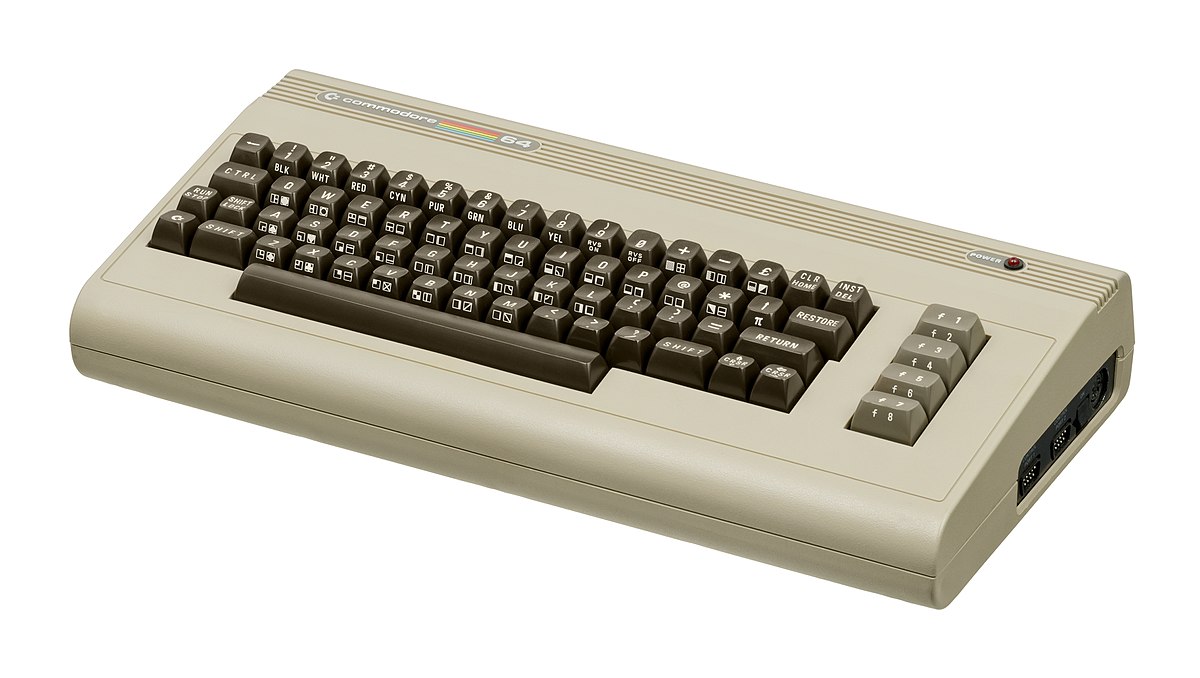
History of Commodore

Firstly shown to the world in January of 1982, at the Consumer Electronics Show, C64 caught attention right away with its low price of only $595. Although it had some issues like limited functionality in some fields and a non-wide range of use by 1984 its price dropped below $200 and it cemented itself as an affordable home computer for the middle class. In as same year Apple has released their Apple II computer with far superior capabilities, commodore 64 remains a middle-class favorite due to its price. Also, the company has decided to distribute its homemade computer via some other means including not only just electronics stores specialized in that kind of equipment but in general shops and big department stores, through toy stores and book shops as well as through specialized dealers. This has given C64 a more competitive edge and mixed with the affordable price it soon became a staple of home computing. c64 store
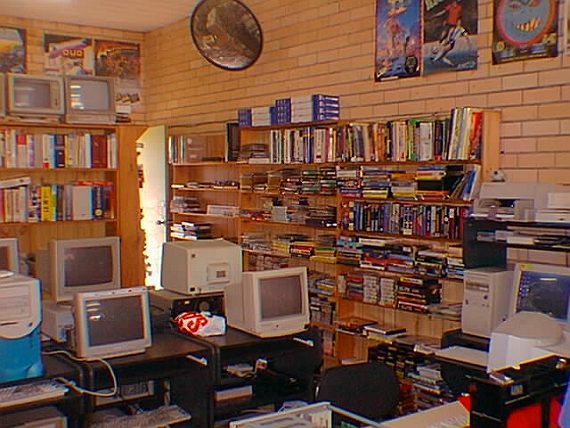
With sales booming and the early reliability issues with the hardware addressed, software for the C64 began to grow in size and ambition during 1984. This growth shifted to the primary focus of most US game developers. The two holdouts were Sierra, who largely skipped over the C64 in favor of Apple and PC compatible machines, and Broderbund, who was heavily invested in educational software and developed primarily around the Apple II. In the North American market, the disk format had become nearly universal while cassette and cartridge-based software all but disappeared. So most US-developed games by this point grew large enough to require multi-loading. 
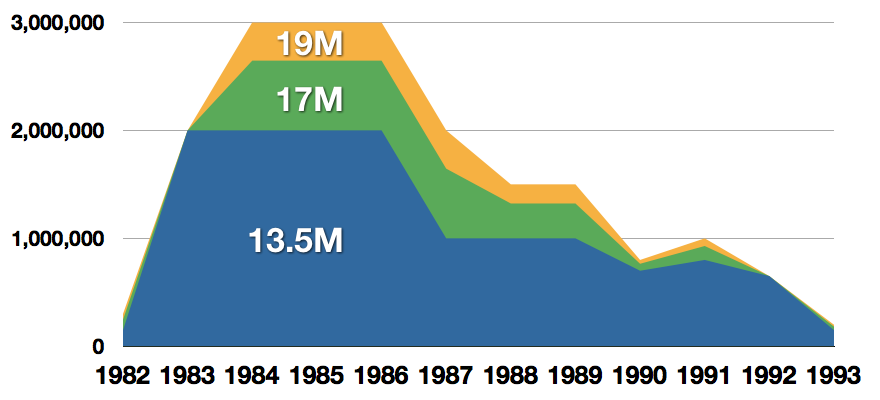
At a mid-1984 conference of game developers and experts at Origins Game Fair, Dan Bunten, Sid Meier, and a representative of Avalon Hill said that they were developing games for the C64 first as the most promising market. By 1985, games were an estimated 60 to 70% of Commodore 64 software. Over 35% of SSI's 1986 sales were for the C64, ten points higher than for the Apple II. Everything was great for Commodore but the industry was moving forward and by the year 1988, PC compatible computers were stated to be the largest and fastest-growing home entertainment systems pushing C64 on to second place. Also, Nintendo’s gaming system has started to take hold in the world with amazing 7 million systems sold in 1988 only. By the year 1991, many developers exited the gaming market for Commodore 64 home computer system and its popularity started to fall due to lack of software and not so many hardware changes. commodore salesCommodore announced that the C64 would be finally discontinued in 1995. However, only one month later in April 1994, the company filed for bankruptcy. When Commodore went bankrupt, all production on their inventory, including the C64, was discontinued, thus ending the C64's 11 and a half year production.

Legendary titles

The history of Commodore 64 is interesting ones and I believe that it has done much for computers in general, yes it ran 11 years and that seems like a small-time, but remember that it was 11 years of C64 alone, there were other computers released by the company but none except arguably AMIGA 500 has not reached that much popularity as Commodore 64. That being said the system has left some of the great titles in its catalog that are great to be played even today and have been classic games on other platforms, even on PC itself. That being said I am giving you the top 100 games for Commodore 64:
  1. maggot
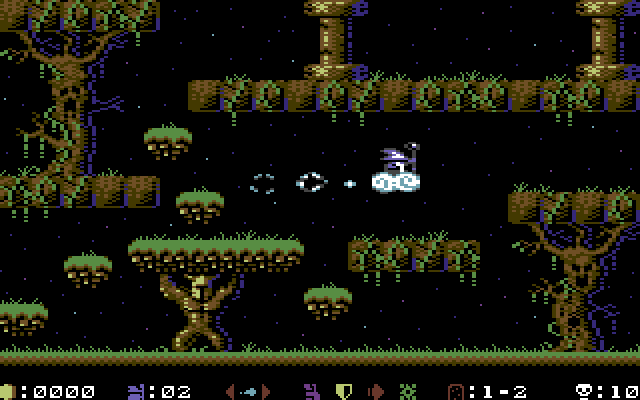
Zak McKracken and the Alien Mindbenders
  2. Pirates!
  3. Maniac Mansion
  4. IK+
  5. Bubble Booble
  6. Turrican II: The Final Fight
  7. Last Ninja 2
  8. Space Rogue
  9. Ultima IV: Quest of the Avatar
  10. Archon: The Light and the Dark
  11. Turrican
  12. Wasteland
  13. Defender of the Crown
  14. Elite
  15. Ultima V: Warriors of Destiny
  16. Laser Squad
  17. Prince of Persia
  18. Impossible Mission
  19. U.L.E.
  20. Pool of Radiance
  21. Bruce Lee
  22. Paradroid
  23. Project Stealth Fighter
  24. Curse of the Azure Bonds
  25. Ultima III: Exodus
  26. Legacy of the Ancients
  27. Winter Games
  28. Leaderboard Golf
  29. Supremacy
  30. Airborne Ranger
  31. Exile
  32. Last Ninja, The
  33. World Class Leader Board
  34. MicroProse Soccer
  35. Project Firestart
  36. Boulder Dash
  37. Summer Games 2
  38. Great Giana Sisters, The
  39. Neuromancer
  40. Mad Doctor
  41. Mail Order Monsters
  42. Zork I: The Great Underground Empire
  43. Buck Rogers: Countdown to Doomsday
  44. Katakis
  45. Bard's Tale, The: Tales of the Unknown
  46. WIzball
  47. Times of Lore
  48. Emlyn Hughes International Soccer
  49. Ultimate Wizard
  50. Alternate Reality: The Dungeonalternate reality dungeon
  51. World Games
  52. Leaderboard Executive
  53. California Games
  54. Samurai Warrior: The Battles of Usagi Yojimbo
  55. Summer Games
  56. Creatures 2: Torture Trouble
  57. Gunship
  58. Space Taxi
  59. International Karate
  60. Silent Service
  61. Bard's Tale III, The: Thief of Fate
  62. Seven Cities of Gold
  63. Armalyte
  64. Raid on Bungeling Bay
  65. Alter Ego: Male Version
  66. Enforcer: Fullmetal Megablaster
  67. Detective Game, The
  68. Creatures
  69. Skate or Die!
  70. Heart of Africa
  71. E.R.O. - Helicopter Emergency Rescue Operation
  72. Way of the Exploding Fist, The
  73. Stunt Car Racer
  74. Wizard of Wor
  75. Bard's Tale II, The: The Destiny Knight
  76. Mayhem in Monsterland
  77. Train, The: Escape to Normandy
  78. Jumpman
  79. Champions of Krynnchampions of krynn
  80. Pitstop II
  81. Barry McGuigan World Championship Boxing
  82. Montezuma's Revenge
  83. Boulder Dash II: Rockford's Revenge
  84. Spy vs Spy
  85. Mercenary: Escape from Targ
  86. Midnight Resistance
  87. Lords of Midnight
  88. Lode Runner
  89. Castles of Doctor Creep, The
  90. Boulder Dash Construction Kit
  91. Buggy Boy
  92. Racing Destruction Set
  93. Dino Eggs
  94. Realm of Impossibility
  95. Rainbow Islands
  96. Beach-Head II: The Dictator Strikes Back
  97. Barbarian: The Ultimate Warrior
  98. Grand Prix Circuit
  99. Head Over Heels
  100. Sentinel, The

Commodore 64 emulator and game ROMs

Commodore 64 might be in the past but its legacy still lives on even today through emulators and ROMs for emulators. You can even purchase one in working condition if you want and relive the full experience as it once was. vice c64 emulator
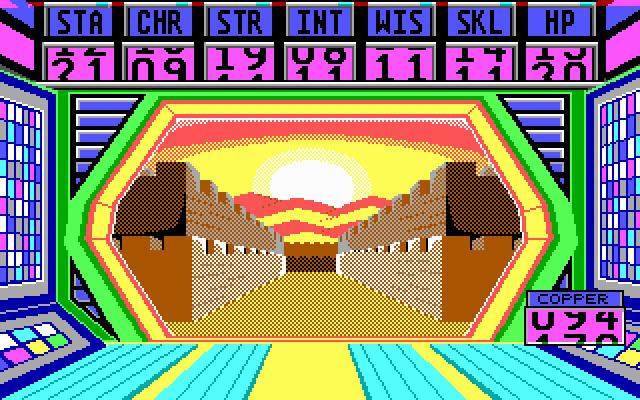
If you are not keen on spending money for reliving and checking games or software of C64 here are some links to help you to at least experience part of it completely free. Commodore 64 Emulator C64 Game ROMs

Conclusion

It is without a doubt that the C64 home system has made a great mark on home computers echoing even today and I am very grateful that I have been part of it as a kid. Sometimes today I will still spin some old classic via emulator just for nostalgia and enjoy its simplicity. Thank you for reading the article and I hope to see you soon again.
Read More
Diablo 2 Resurrected facing server issues
It has been some time since the release of Diablo 2 resurrected and overall reception was pretty good. People are enjoying the old classic game in hi-def. resolution and with new and improved visuals. Sadly some server issues are present still until this day and somewhat spoil the experience for players. diablo 2 server statusThe greatest lag and server crashes are pinpointed to game-creating events. When a player creates a new online game, the server needs to pull a lot of details from the database and make a game, due to some legacy code present this process takes some time and it is demanding a bit on the server-side, and although code was optimized to cater to more modern approach some legacy code still remains. Another thing that was spotted to affect performance itself is player behavior, to be more specific, modern gamer behavior. Where players find good builds and runs on the internet and then go to farm-specific areas or bosses for loot or experience points, which in return boils down to making plenty and short runs that are made by creating games and after run eliminating them. Now pair that with the previous statement about legacy server and database code and you can add 1 and 1 and see how this might be an issue. A lot of short games over legacy code are placing games in a state it was not designed for back in 2001 and therefore we have issues. Sadly solutions without completely rewriting the whole code are not very promising and they include rate limiting, which will prevent players to create many games in succession in a short period of time and maybe even login queues to drop a load on servers. Blizzard reached to people in the whole company, even old diablo 2 developers to ask for advice and they say that they are working on solutions so they could lift limitations and have everything running fine.
Read More
How to Repair Windows 10 Upgrade Error 0x800F0923

Code 0x800F0923 – What is it?

The Error Code 0x800F0923 is one that appears only when attempting to update from older versions of Microsoft Windows to Microsoft Windows 10. This error does not occur with every install and is believed to be the result of a driver incompatibility issue. It is unclear which specific drivers are having the compatibility issues, though it is widely believed that DuplexSecure's SPTD drivers are the ones at fault. When operating correctly, without errors, the update process should not take longer than 30 minutes. Common symptoms include:
  • Error message window/pop-up during the install process, giving the Error Code 0x800F0923
  • Inability to install and update from older versions of Microsoft Windows to version 10

Solution

Restoro box imageError Causes

There are various relevant factors associated with the error code 0x800F0923 incompatibility issue in Windows 10 installation/upgrade. These factors include but are not limited to:
  • The Operating System (OS) upgrading does not support older hardware.
  • Your computer’s specs did not meet the minimum requirements.
  • Not enough hard disk space.
  • The new software might lack software drivers for older hardware

Further Information and Manual Repair

Microsoft has recently released its Windows 10 operating system. While there are still a few kinks to be worked out, overall the reviews have been positive. As with any new Microsoft update, compatibility issues can arise. If you are unsure whether your current PC will be able to handle the new Windows 10, here is an easy way to check your system.

Method 1: Check if your computer is compatible

  • Locate the “Get Windows 10” application icon in your notification tray (bottom right corner of your screen, white Windows logo).
  • Right-click on this icon, then select the “check your upgrade status” option.
  • Be prepared for the menu to take a few minutes to open.
  • Click on the menu on the upper left-hand corner of this new dialog box. (It looks like three blue horizontal lines)
  • Select “check your PC”
  • After the system checks for compatibility, it will let you know whether or not your PC has the appropriate drivers, etc. (Keep in mind that this is not a foolproof method for checking compatibility status).

Method 2: Download or upgrade your drivers/software

If you have already attempted to update to Windows 10, and have received the Error Code 0x800F0923, this is the simplest way to solve the issue yourself.

1. Open the “Get Windows 10” application. 2. Open the menu in the upper left corner, looks like three blue lines. 3. Select “Check your PC”. 4. The system will tell you which drivers are incompatible. 5. Go to the Microsoft Support website to install and/or update the drivers that proved to be an issue. 6. Once the driver issue is corrected, retry the Windows 10 update.

Method 3: Create space on your computer

If your computer does not have sufficient space to accept the upgrade, you might want to clear up some space on your computer. Here’s how to do it. If you have not attempted to install Microsoft Windows 10 yet, it is a good idea to check your system's compatibility prior to installing. While it is not absolutely necessary, it will save time and frustration. Microsoft Support suggests contacting them directly if you are unable to solve your driver compatibility issues, or if the above do-it-yourself method is unsuccessful. To resolve this compatibility issue and get your upgrade going use a powerful and user-friendly tool to clean up the problem. Click here to download Restoro. Users should also be aware that those who choose to upgrade to Windows 10 have 30 days in which they may decide that they would rather use their old system. However, reverting back to the older system may not be a smooth process, and some data could be lost.
Read More
Happy New Year from ErrorTools.com!!!
As we are on the last day of 2021, our team here at errortools.com would like to express their great gratitude to you all for being with us all this time and would also want to wish you error-free 2022!!! Thank you for being part of this community, we wish you all the best in the upcoming 2022 and hope that we will see you again From all members of errotools, HAPPY NEW YEAR!!! new year christmass tree
Read More
5 ways to open task manager in Windows 11
Something we are used to doing in a certain way inside Windows 10 is slightly changed in Windows 11. One of those things is how you open task manager, well kind of. task manager
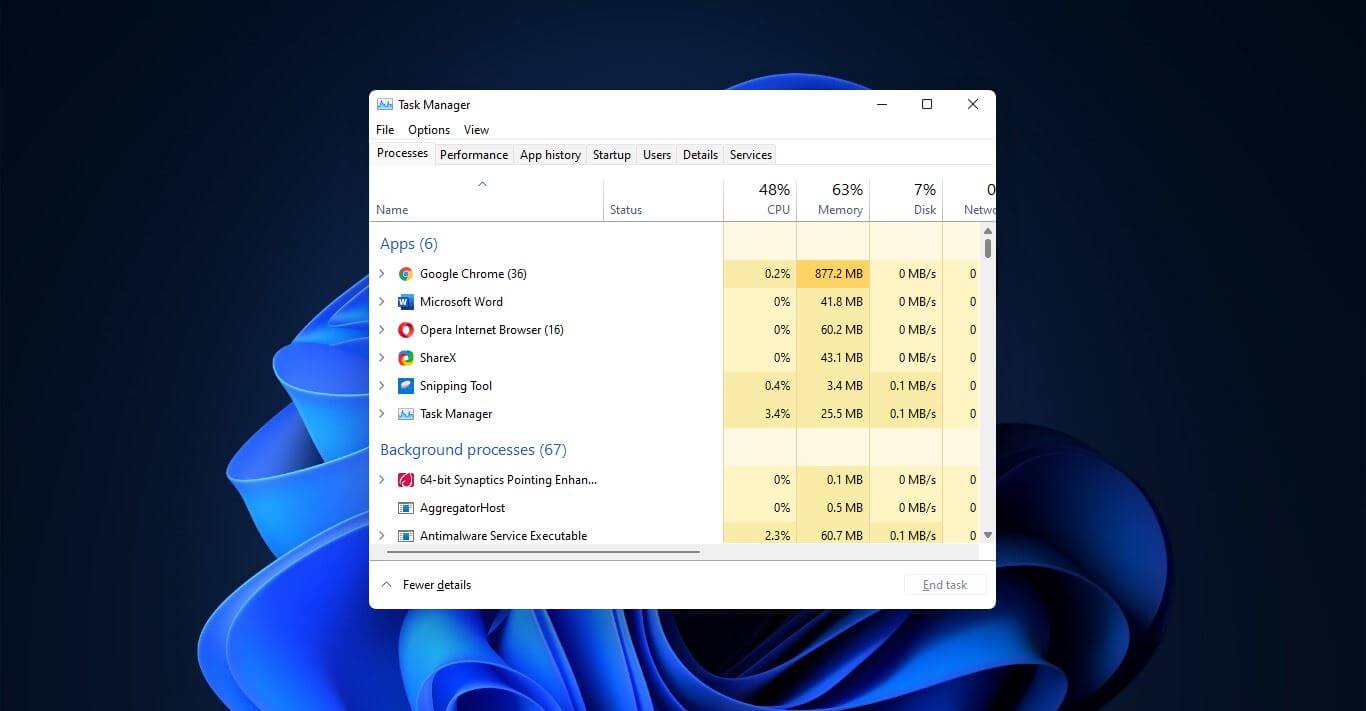
Option to right-click on the taskbar and launch task manager is gone but do not worry there are other same and simple ways you can launch it.
  1. Press CTRL + SHIFT + ESC or CTRL + ALT + DEL
  2. Right-click on the START button
  3. Type task manager in start search on top in the start menu
  4. Type taskmgr in command prompt
  5. Press ⊞ WINDOWS + R to open run dialog and type in taskmgr
And that’s it, now depending on your situation, you might use different methods to evoke task manager.
Read More
Fix Logitech Blue Yeti mic not working in W11
Blue Yeti has gained popularity among streamers and users that want a high-quality mic for their setup. Without going into details of the hardware itself I will say it is a pretty good mic. Now the issues that have been reported with it are that Windows 11 can have issues with it resulting in the microphone not being recognized by the operating system. If you are one of the unfortunate Blue Yeti users and have this issue, do not despair because we have a solution for you, several to be more precise so you can easily fix the issue and get back to talking.

logitech blue yetiCheck cables

Sometimes it is not a software problem at all. First thing is to check if by any chance cable of the mic is disconnected, damaged, or similar. If the cable seems fine next step is to plug in the mic into another port in order to eliminate faulty jack on the computer. If nothing happened the last thing to try is to connect the mic to another computer so we can be sure that the mic itself is in working order so we can focus on software. If by any chance mic is not working on another computer that some hardware inspection of it will be required.

Set Blue Yeti as a default device

There is a chance that Windows 11 has not set Blue Yeti as a default audio device for recording and therefore you can not use it. In order to eliminate and fix this issue, right-click on the speaker icon on the taskbar in the far-right part of it and choose sound settings. Go down to the input section and pick Blue Yeti beside Choose device for speaking or recording.

Update driver

More often than not device not working is tied to malfunctioning or a bad driver. In order to eliminate and resolve this issue right click on the Start icon and choose device manager. Inside device manager expand the Sound, video and game controllers section. Right-click on each device in the section and choose update driver. Wait for the update to complete and restart your system.

Run the troubleshooter

Press ⊞ WINDOWS + I to open Windows settings. Go to System in the left pane and click on it. In the right panel choose and click on troubleshoot. Inside troubleshoot click on Other. Scroll down and locate the Recording Audio troubleshooter and then click on Run next to it. Wait for the troubleshooter to finish and follow on-screen instructions to resolve the issue.

Check Blue Yeti microphone privacy setting

Not very often, but sometimes privacy settings can be the issue even when everything else is working perfectly. In order to check privacy settings press ⊞ WINDOWS + I to open Windows settings and go to Privacy & Security on the left panel and click on it. On the right panel click on the microphone. Make sure that toggle next to Let apps access your microphone is ON.
Read More
0x3D55: Family App information is corrupted
What is 0x3D55? As you know, Windows 10 is loaded with various Universal Windows Platform or UWP apps such as the Microsoft News, Weather, Calculator, Windows Mail, and many other applications that are based on the modern UWP platform of Microsoft that was introduced in Windows 10. Each one of these apps has a shared piece of code in the kernel for them to be able to get executed across any device that runs the Windows 10 OS which includes laptops, PCs, 2-in-1 devices, mobile phones, mixed reality headsets, and many more. However, there are times when the runtime information for these apps ends up getting corrupted which causes them not to function as expected and throws errors like the error 0x3D55. This kind of error can be pinned down when the UWP app malfunctions and you can also find an error message in the Event Log that reads, “0x3D55: Package family <App name with ID> runtime information is corrupted”. So if you encounter this error, read on for this post will walk you through fixing it. There are three suggestions you need to check out to fix this error – first, you can try to reset the Microsoft Store cache, second, you can try to re-register or reinstall the problematic app and lastly, run the Windows Store App troubleshooter.

Option 1 – Try to reset the Microsoft Store cache

Just like browsers, Microsoft Store also caches as you view apps and games so it is most likely that the cache is no longer valid and must be removed. To do so, follow the steps below.
  • Right-click on the start button and click on Command Prompt (administrator).
  • Next, type in the command, “wsreset.exe” and tap Enter. Once you do, the command will clear the cache for the Windows Store app.
  • Now restart your PC and afterward, try opening Microsoft Store again and then try to install your app or update your computer again.

Option 2 – Run the Microsoft Store Apps troubleshooter

The Microsoft Store Apps Troubleshooter will help you in fixing the error 0x3D55. This is a great built-in tool from Microsoft that helps users fix any app installation issues. So this is worth a try to solve the problem. This built-in tool also helps you fix the Windows 10 Store if it isn’t working. To use the Windows Store Troubleshooter, follow the steps below.
  1. Tap Win + I keys again to open the Windows Settings panel.
  2. Go to Update & Security and then go to Troubleshoot.
  3. On your right-hand side, scroll down to find the Windows Store Apps and then click on the Run the troubleshooter option and see if it fixes the problem.

Option 3 – Try to re-register the UWP app via PowerShell

  • First, type “command prompt” in the Start Search and right-click on Command Prompt and then select the “Run as administrator” option.
  • Next, navigate to this location in the command line utility: C:/Users/<Insert Username>/AppData/Local/Packages
  • After that, execute the “DIR” command to view the list of all the directories in the given location.
  • Once the list appears, look for the ID of the problematic app and take note of it.
  • Now tap the Win + X key combination or right-click on the Start button and click on the Windows PowerShell (Admin) option.
  • If a User Account Control or UAC prompt appears, just click on Yes to proceed and open the Windows PowerShell window.
  • Next, type in or copy-paste the following command to re-register the Microsoft Store app and tap Enter:
PowerShell -ExecutionPolicy Unrestricted -Command "& {$manifest = (Get-AppxPackage Microsoft.<YOUR APP ID HERE>).InstallLocation + 'AppxManifest.xml' ; Add-AppxPackage -DisableDevelopmentMode -Register $manifest}"
  • Wait for the process to be completed and then restart your computer.
Read More
Hive ransomware on Exchange servers

Hive ransomware has been targeting Microsoft exchange servers lately vulnerable to ProxyShell security issues in order to deploy various backdoors. Once the backdoor has been placed various attacks can be performed including but not limited to network reconnaissance, stealing admin accounts, taking valuable data, and even installing and deploying file-encrypting algorithms.

hive ransomware

ProxyShell wide abuse

ProxyShell is a set of three vulnerabilities in the Microsoft Exchange Server that allows remote code execution without authentication on vulnerable deployments. The flaw has been used in past by various ransomware like Conti, BlackByte, Babuk, Cuba, and LockFile.

Security vulnerabilities have been reported to be fully patched on May 2021 but how Hive was able to still be successful in exploiting PowerShell and infiltrating into the system there seems to be still some unpatched and open issues.

Hive

Hive has gone a long way since it was first observed in the wild back in June 2021, having a successful start that prompted the FBI to release a dedicated report on its tactics and indicators of compromise.

In October 2021, the Hive gang added Linux and FreeBSD variants, and in December it became one of the most active ransomware operations in attack frequency.

Last month, researchers at Sentinel Labs reported on a new payload-hiding obfuscation method employed by Hive, which indicates active development.

Read More
How to Fix Error 0x8024a206 in Windows
When you upgrade or update your Windows 10 computer but you suddenly got Error 0x8024a206 while trying to install the updates, it is due to a rouge update that was downloaded or because of some corrupted component in Windows. In case you don’t know, any file downloaded by Windows is verified for its integrity and if the files don’t pass the integrity test, then Error 0x8024a206 will most likely pop up during the Windows update or upgrade.

Option 1 – Reset the Windows Update components to the default

You have to stop a couple of services such as BITS, Cryptographic, MSI Installer, and Windows Update Services. And to do that, you need to flush the contents in the SoftwareDistribution folder. The Software Distribution folder in the Windows operating system is a folder that can be found in the Windows directory and is used to store files temporarily which might be required to install the Windows Update on your PC. Thus, it is required by the Windows Update and maintained by WUAgent. Aside from that, it also contains all the Windows Update History files and once you delete them, you will most likely lose the Update history. As a result, the next time you run the Windows Update, it may result in a longer detection time.
  • Open the WinX Menu.
  • From there, open Command Prompt as admin.
  • Then type in the following command – don’t forget to hit Enter right after typing each one of them.
net stop wuauserv net start cryptSvc net start bits net start msiserver
  • After entering these commands, it will stop the Windows Update Service, Background Intelligent Transfer Service (BITS), Cryptographic, and the MSI Installer
  • Next, go to the C:/Windows/SoftwareDistribution folder and get rid of all the folders and files thereby tapping the Ctrl + A keys to select them all and then click on Delete. Note that if the files are in use, you won’t be able to delete them.
After resetting the SoftwareDistribution folder, you need to reset the Catroot2 folder to restart the services you just stopped. To do that, follow these steps:
  • Type each one of the following commands.
net start wuauserv net start cryptSvc net start bits net start msiserver
  • After that, exit Command Prompt and restart your computer, and then try to run Windows Update once more.

Option 2 – Re-register DLLs related to Windows Update

DLL files, also known as Dynamic Link Library, are parts of applications that are separated from the core program so that they can be used again as well as independently be updated. The DLL files are loaded into memory and then used. Note that they have to be registered with Windows so they can be loaded. So if they’re not, the main program will fail. And this is the same with the DLL files related to the Windows Update. Thus, you need to register them in order to resolve Error 0x8024a206.
  • In the Cortana search box, type “command prompt”.
  • From the search results that appear, right-click on Command Prompt and select the “Run as administrator” option.
  • After that execute the commands listed below one after the other and don’t forget to hit Enter right after you key in each one of them.
    • regsvr32 JSCRIPT.DLL
    • regsvr32 MSXML3.DLL
    • regsvr32 WUPS2.DLL
    • regsvr32 WUPS.DLL
    • regsvr32 WUAUENG.DLL
    • regsvr32 WUAPI.DLL
    • regsvr32 WUCLTUX.DLL
    • regsvr32 WUWEBV.DLL
Note: You also have the option to run the commands together via a batch file. Simply create a batch file by copying all the commands in a notepad and then save it as “WURegisterDLL.bat”. After that, run the batch file and it will execute the commands all at the same time. Then you have to restart your computer and see if it has fixed the Error 0x8024a206.

Option 3 – Run the System File Checker

The SFC or System File Checker scan could detect and automatically repair damaged system files that could be causing the Error 0x8024a206. SFC is a built-in command utility that helps in restoring corrupted files as well as missing files. It replaces bad and corrupted system files to good system files. To run the SFC command, follow the steps given below.
  • Tap Win + R to launch Run.
  • Type in cmd in the field and tap Enter.
  • After opening Command Prompt, type in sfc /scannow and hit Enter.
The command will start a system scan which will take a few whiles before it finishes. Once it’s done, you could get the following results:
  1. Windows Resource Protection did not find any integrity violations.
  2. Windows Resource Protection found corrupt files and successfully repaired them.
  3. Windows Resource Protection found corrupt files but was unable to fix some of them.

Option 4 – Run the Windows Update Troubleshooter

Running the built-in Windows Update troubleshooter could also help you resolve the Windows Update Error 0x8024a206. To run it, go to Settings and then select Troubleshoot from the options. From there, click on Windows Update and then click the “Run the troubleshooter” button. After that, follow the next on-screen instructions and you should be good to go.
Read More
1 2 3 171
Logo
Copyright © 2023, ErrorTools. All Rights Reserved
Trademark: Microsoft Windows logos are registered trademarks of Microsoft. Disclaimer: ErrorTools.com is not affiliated with Microsoft, nor claims direct affiliation.
The information on this page is provided for information purposes only.
DMCA.com Protection Status