Logo

Fix MUP_FILE_SYSTEM Blue Screen Error

If you encounter the MUP_FILE_SYSTEM Blue Screen error with a value of 0c00000103, then it indicates that the multiple UNC provider or MUP has got an invalid of unexpected data. This can lead to the fact that the MUP cannot channel a remote file system request to a network redirector, the UNC, or Universal Naming Convention provider.

There are several ways you can fix the MUP_FILE_SYSTEM Blue Screen Error on your Windows 10 computer, you can try to check the hardware of your computer physically, update or rollback some device drivers, run the Driver Verifier Manager, remove any hardware you’ve installed recently or fix issues related to IRQ.

Use the given options below as reference to fix the MUP_FILE_SYSTEM Blue Screen Error.

Option 1 – Try to physically check the hardware

The first thing you can do is to check the physical status of the hardware in your computer. You can clean the dust off the hardware components like the Network Card of the computer. You might want to use a small blower or you could also use a soft cloth and run the components gently. Make sure that you don’t damage any parts with moisture or cause harm to any circuits while you carry out this task.

Option 2 – Try to rollback, update several device drivers

You can try to roll back, update or disable certain device drivers on your computer to resolve the MUP_FILE_SYSTEM Blue Screen error.

  • First, boot your computer into Safe Mode.
  • After that, tap the Win + R keys to launch Run.
  • Type in devmgmt.msc into the box and tap Enter or click OK to open the Device Manager.
  • After that, a list of device drivers will be displayed. From there, look for the device drivers related to the Network Card, Chipset, Disk Drive, and the Graphics Drivers and any other driver related to MUP.sys and SwapBuffers.sys system files
  • After that, right-click on each entry of the device drivers and select the “Update Device” option from the menu.
  • Now follow the next on-screen instructions that appear and then restart your computer.
  • After restarting your computer, check if the Stop error is now fixed.

Option 3 – Configure the Driver Verifier Manager

The Driver Verifier Manager is another tool in Windows that could help you fix driver-related issues. And so if you want to fix the MUP_FILE_SYSTEM Blue Screen error you need to use the Driver Verifier Manager:

  • Type in the keyword “Verifier” in the Cortana search box to search for Verifier in Windows 10.
  • After that, select the option “Create custom settings”.
  • Make sure that you have checked everything except the options “DDI compliance checking” and “Randomized low resources simulation”.
  • Next, select the option “Select driver names from a list” option.
  • Afterward, you have to select all the drivers from any unofficial or third-party provider. To simply put it, you have to select all the drivers that are not supplied by Microsoft.
  • Then click on the Finish button.
  • Open Command Prompt as administrator and execute this command – verifier /querysettings
  • The command you just executed will display the Driver Verifier settings so if you see any of the flags enabled boot your Windows 10 PC into Safe Mode.
  • Open the Command Prompt as admin again and run this command – verifier /reset
  • The command will reset the Driver Verifier. Once the process is done, restart your PC and check.

Option 4 – Try to disconnect or disable newly installed hardware

In this option, you will have to disable or remove the hardware you’ve just installed recently since external devices could be the one that’s causing the Blue Screen of Death error to appear. To do that, just disconnect any external device that’s connected to your computer physically and then check if it fixes the MUP_FILE_SYSTEM Blue Screen error.

Option 5 – Try fixing IRQ-related issues

The Stop error might have something to do with an issue related to IRQ. You can verify it by switching your PCI Cards around. Aside from that, you can also check if the IRQ2 is assigned to a COM Port that is unavailable at that time.

Option 6 – Run the Blue Screen Troubleshooter

The Blue Screen troubleshooter is a built-in tool in Windows 10 that helps users in fixing BSOD errors like MUP_FILE_SYSTEM. It can be found in the Settings Troubleshooters page. To use it, refer to these steps:

  • Tap the Win + I keys to open the Settings panel.
  • Then go to Update & Security > Troubleshoot.
  • From there, look for the option called “Blue Screen” on your right-hand side and then click the “Run the troubleshooter” button to run the Blue Screen Troubleshooter and then follow the next on-screen options. Note that you might have to boot your PC into Safe Mode.

Option 7 – Perform a System Restore

Performing System Restore might help you in fixing the Blue Screen error. You can do this option either by booting into Safe Mode or in System Restore. If you are already in the Advanced Startup Options, just directly select System Restore and proceed with the next steps. And if you have just booted your PC into Safe Mode, refer to the steps below.

  • Tap the Win + R keys to open the Run dialog box.
  • After that, type in “sysdm.cpl” in the field and tap Enter.
  • Next, go to the System Protection tab then click the System Restore button. This will open a new window where you have to select your preferred System Restore point.
  • After that, follow the on-screen instructions to finish the process and then restart your computer and check if the problem is fixed or not.

Do You Need Help with Your Device?

Our Team of Experts May Help
Troubleshoot.Tech Experts are There for You!
Replace damaged files
Restore performance
Free disk space
Remove Malware
Protects WEB browser
Remove Viruses
Stop PC freezing
GET HELP
Troubleshoot.Tech experts work with all versions of Microsoft Windows including Windows 11, with Android, Mac, and more.

Share this article:

You might also like

UEFI Firmware settings goes missing
When it comes to booting an operating system on a computer, one of the most essential pieces of software you can use is the UEFI. In fact, a lot of users now prefer to use UEFI instead of BIOS. It also depends on whether the UEFI or the BIOS is supported on the motherboard. Recently, a number of users reported an issue with UEFI where they were unable to find it under the Advanced Options screen where it’s supposed to be located. The missing UEFI Firmware settings in the Advanced Options could be caused by several reasons. It is possible that the access to the UEFI menu is blocked or it could also be due to the Extra Fast Startup feature being enabled. It is also possible that the operating system is installed in Legacy mode. There are several options to try to fix this issue. You need to check if your computer supports UEFI or you could also try to disable Fast Startup or bypass the Extra Fast Startup feature. You can also use a boot to UEFI shortcut as well as check the CMOS battery.

Option 1 – Try checking if your computer supports UEFI

The first thing you have to do is to verify if your computer supports UEFI. If your computer does not support UEFI, then it’s no wonder why you don’t see the UEFI Firmware settings in the Advanced Options.

Option 2 – Try turning off Fast Startup

  • First, boot your computer in Safe Mode.
  • Once your computer is booted in Safe Mode, tap the Win + R keys to open the Run dialog box and type in “control” to open the Control Panel.
  • Next, click on the Hardware and Sound section and click on Power Options.
  • Afterward, select the “Choose what the power buttons do” option from the left side menu pane.
  • Now click on Change settings that are currently unavailable and uncheck the entry that says, “Turn on fast startup (Recommended)”.
  • Then click on Save Changes and restart your computer and see if it has fixed the problem or not.

Option 3 – Try bypassing the Extra Fast Startup feature

As mentioned, the missing UEFI Firmware settings could be due to the Extra Fast Startup feature. To fix it, you have to disable this feature. All you have to do is tap and hold the Shift key and click on the Shutdown button from the Start button. This will boot your PC with the UEFI booting from the beginning and then use the hotkey for your motherboard to boot into the UEFI setup.

Option 4 – Try using a boot to UEFI shortcut

  • Right-click on any empty space on your Desktop and select New > Shortcut.
  • This will open a new mini window. And here, you have to type this in the text field: shutdown /r /fw
  • After that, click on Next and name the desktop shortcut and then click on Finish.
  • Next, right-click on the newly created shortcut and select Properties.
  • Click on the Advanced button and select the “Run as administrator” option.
  • Now click OK to save the changes made. Each time you execute this shortcut, your computer will automatically be booted to the UEFI Firmware Settings.

Option 5 – Try to check the CMOS battery

Another thing you can do is check the CMOS battery physically on the motherboard and see if it has to be replaced since a damaged CMOS battery can also cause the issue with the missing UEFI Firmware settings.

Option 6 – Set your computer from Legacy to UEFI

If applicable, you can try to set your computer from Legacy to UEFI to resolve the problem.
  • In the Windows Search box, type “command prompt” and from the search results that appear, right-click on Command Prompt and select the “Run as administrator” option.
  • After that, execute this command: mbr2gpt.exe /convert /allowfullOS
  • Now, wait until the process is completed since you can track its process on your screen.
  • Once it’s done, go to Settings > Update & Security > Advanced Startup options and from there, click on Restart Now. This will restart your computer and give you advanced options.
  • Next, select Troubleshoot > Advanced Options where you will see further options including System Restore, Startup Repair, Go back to the previous version, Command Prompt, System Image Recovery, and UEFI Firmware Settings.
  • Now select the UEFI Firmware Settings. This will take you to the BIOS. Boot Mode is typically available under Boot > Boot Configuration. Once you’re there, set it to UEFI and then save the changes you’ve made. After that, your computer will restart.
Read More
How to Repair Runtime Error 216

What is Runtime Error 216?

Runtime Error 216 is not a common error message like Runtime Error 339. However, it may sometimes occur when starting up the computer if you are using a Windows-based application or using Internet Explorer.

Solution

Download Available to Completely Repair Runtime Error 216

Restoro box imageError Causes

The runtime error 216 error occurs when your computer gets infected with one or more viruses. The most common virus, in this case, is the SubSeven Trojan virus. Once your computer gets infected with a virus(es) it creates a backdoor on your Windows system. This might give hackers access to monitor your PC remotely. This poses a great risk to confidential information and personal data stored on your PC. The hackers can easily monitor your PC, access your private information and misuse it.

Further Information and Manual Repair

If you experience this error message, it is advisable to repair it immediately without any delays; Runtime Error 216 can make your system vulnerable. Here’s what you must do:
  • First things first, disconnect the internet connection so that the hacker can’t access your PC.
  • Now perform a boot scan through a powerful antivirus.  The antivirus will scan your system for viruses. After the scan is complete, all the disinfected files will appear in the scan report results. You are advised to delete them and click repair to fix the error.
  • Remember the antivirus will not scan infected Windows Registry entries, therefore to remove SubSeven.exe Windows Registry entries go to the start menu and type REGEDIT in the search box.
  • Click on REGEDIT and select Run as Administrator. Now type the following registry path HKEY_LOCAL_MACHINESoftware. This will help locate SubSeven.exe infected files. Once located, delete all of them and close Windows Registry Editor.
To ensure your computer is completely free from SubSeven Trojan Virus and other possible viruses, it is advisable to remove all the recently installed programs and downloaded applications. This is recommended because sometimes while downloading programs, we tend to download corrupted programs which include viruses. It’s, therefore, best to delete all the programs you’ve installed recently. Secondly, to prevent virus and hacker attacks, you must frequently update your security program by installing a powerful antivirus program. Following the repair guide steps will protect your system from malware. It will also help fix runtime error 216 and ensure your PC is protected from similar threats.
Read More
Fatal error occurred while trying to sysprep
There are several kinds of errors you could encounter when you are running Windows 10 on a virtual machine. The Windows OS knows the difference between booting up in a standalone computer or in a virtual machine. This is why some specific drivers and system capabilities are used while emulating the Windows OS on software and during this phase, there are times when the System Preparation may throw up an error that says, “A fatal error occurred while trying to sysprep the machine”. This kind of error arises due to a race condition wherein the Sysprep command tries to stop the Microsoft Distributed Transaction Coordinator or MSDTC service and the VMware tool tries to start the MSDTC service. You may also see the following messages logged in the Setuperr.log file:
  • [0x0f0082] SYSPRP LaunchDll:Failure occurred while executing ‘C:Windowssystem32msdtcprx.dll,SysPrepDtcCleanup’, returned error code -2146434815[gle=0x000000b7]
  • [0x0f0070] SYSPRP RunExternalDlls:An error occurred while running registry sysprep DLLs, halting sysprep execution. dwRet = -2146434815[gle=0x000000b7]
  • [0x0f00a8] SYSPRP WinMain:Hit failure while processing sysprep cleanup providers; hr = 0x80100101[gle=0x000000b7]
To fix the 0x0f0082, 0x0f0070, 0x0f00a8 Sysprep errors, you can check out two potential fixes. First, you have to check the status of the MSDTC service and the second one is to check the settings in the Windows Registry. Note that these fixes are proven to be effective on many users and apply to several versions of Windows, including Windows 10.

Option 1 – Check the status of the MSDTC service via Command Prompt

As mentioned, the error could be caused by the malfunctioning of the MSDTC service or it. Thus, you have to uninstall and reinstall the MSDTC service to resolve the problem and you can do that using Command Prompt. Follow the steps below.
  • In the Start Search, type “command prompt” and from the results, right-click on Command Prompt and then select the “Run as administrator” option to open it with admin privileges.
  • If a User Account Control or UAC prompt appears, just click on Yes to proceed.
  • Once you’ve opened Command Prompt, execute this command: msdtc –uninstall
  • The command you just entered will uninstall the MSDTC service. After that, you need to execute this second command to reinstall the service: msdtc –install
  • Now exit Command Prompt and check if the error is now fixed.

Option 2 – Check the Registry settings

  • Tap the Win + R keys to open the Run dialog box and type “Regedit” in the field and click OK or hit Enter to open the Registry Editor.
  • After opening the Registry Editor, navigate to this registry path: HKEY_LOCAL_MACHINESOFTWAREMicrosoftWindows NTCurrentVersionSoftwareProtectionPlatform
  • From there, look for a DWORD value that’s named “SkipRearm” and double click on it.
  • Then change its value data to “1”.
  • Restart your computer to apply successfully apply the changes made and check if it was able to fix the error.
Read More
Disable Windows print spooler in PowerShell
The third time is charm saying goes but not when we are talking about Microsoft. Print spooler is again in focus, in a bad way. This is the third print spooler vulnerability to emerge in just five weeks. While a critical flaw was originally identified and patched in June, a similar flaw came to light shortly after and was subsequently patched (with mixed success). print spooler
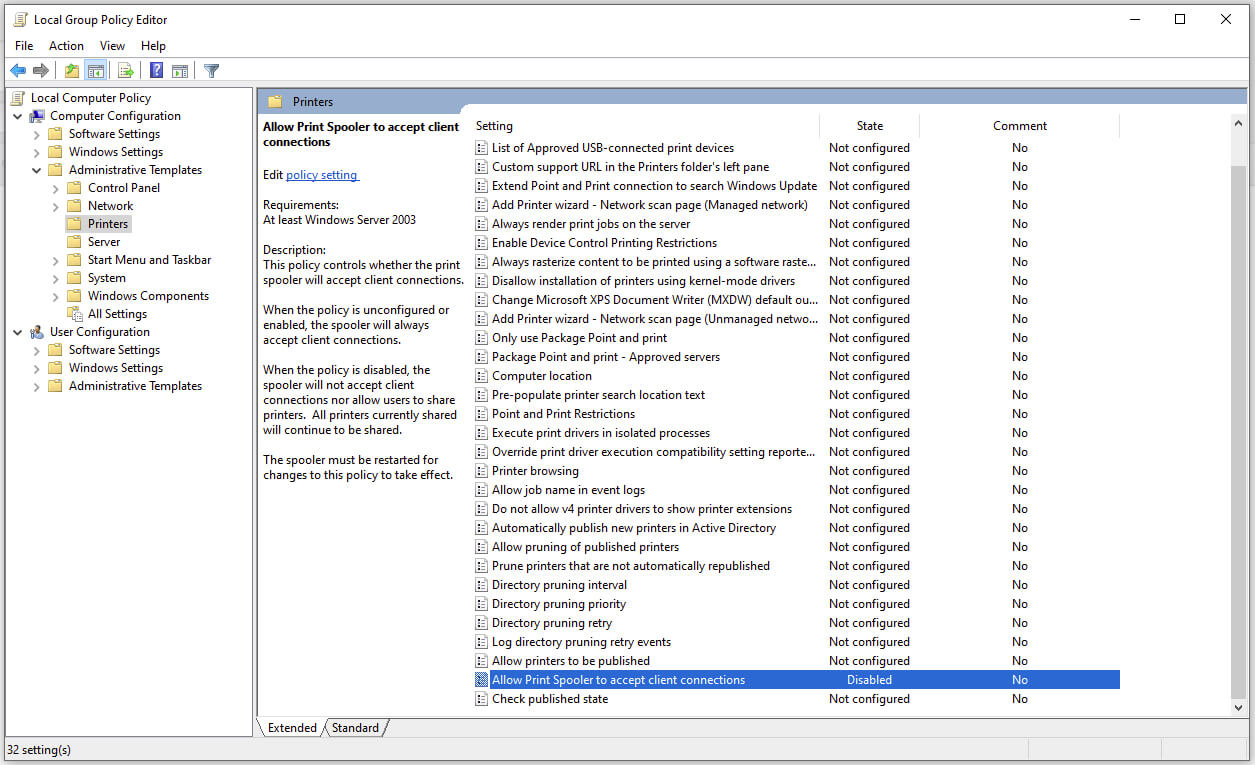
Microsoft is once again advising its customers to disable Windows print spooler after a new vulnerability that allows hackers to execute malicious code on machines has emerged. While a patch fixing the flaw will be released in due course, the most effective workaround currently on the table is to stop and disable the print spooler service entirely.
"An elevation of privilege vulnerability exists when the Windows Print Spooler service improperly performs privileged file operations. An attacker who successfully exploited this vulnerability could run arbitrary code with SYSTEM privileges. An attacker could then install programs; view, change, or delete data; or create new accounts with full user rights."

Stop this service right away or you are risking a potential attack.

  1. Press ⊞ WINDOWS + X to open the hidden menu
  2. Click on Power Shell (admin)
  3. In Power Shell type in the following command to check if spool service is running: Get-Service -Name Spooler followed by ENTER
  4. If spooler service is running type in the next command to stop it: Stop-Service -Name Spooler –Force and press ENTER
  5. Then follow with this command to disable it at startup: Set-Service -Name Spooler -StartupType Disabled followed with ENTER
That’s it, we hope a patch will come soon for all the people that are using network printing and indeed need this service running in order to do work.
Read More
Protestware, what it is, and why it is a bad thing

The author of the famous software library mode-ipc that gets over a million downloads per week found that it has some questionable code inside. The code itself behaves like this: if it finds out that your location is within Russia or Belarus it will try to replace the contents of all files on the computer with a heart emoji.

One important thing is that we here are not supporting the current Ukrainian situation and are against any type of violence or war but we also do not support this kind of behavior as well. If we look at this only from a technical perspective, we would then classify the mode-ipc library as malware and a harmful piece of code no matter the motivation behind it.

code block

So this so-called protestware is well basically malware, but not always, it will protest when certain conditions are met. The issue with this is that companies and users should not be placed under harm if they do not share the personal view of the code author. Imagine if, for example, I would publish code to delete all pictures from your computer if my code found out that you do not like metal music. I guess you not liking metal music and war in Ukraine are two very different things but the source is the same, unreliable code that invades your privacy in order to serve one purpose, punishment for disagreeing with my personal views and that should not be allowed.

Not all protestware are equal, some will not harm your computer on purpose, they will just annoy you with some messages like viruses did in their infancy stages, others might place some developer sanctions but no matter the outcome basic principle is the same, it does something without user consent and without informing the user that something like that might happen.

On the internet, many blog posts and discussions were open about this issue and its morality. Discussion is still active with different takes on the situation and how to prevent it. Our take on this matter is that professional developers should have standards and not submit to doing harm for the sake of personal views and feelings.

In the long run, this kind of behavior and practice can only harm developers involved in this kind of entanglement. Infected libraries will in time stop being used since people would not trust them and authors will have a stain on their name as impulsive or not trustworthy.

Read More
How to Fix Error 1005 Access Denied
Recently, some users reported that they were unable to access a website and only got the Error 1005 Access Denied instead. Specifically, users experience this issue when trying to open the Crunchyroll website – one of the largest anime and manga websites. This particular error is encountered not just on Crunchyroll but on a variety of websites like blogs, video streaming, forums, and so on. Here’s the full context of the error message:
“Error 1005 Access Denied – The owner of this website has banned the autonomous system number (ASN) your IP address from accessing this website.”
Usually, this error occurs when the website administrator decides to block an IP address or IP range. To fix this error, here are some suggestions you can try:

Option 1 – Uninstall the VPN service you are using or use a different provider

If you are using a VPN service, you might want to uninstall it. As mentioned, website administrator blocks IP ranges if they notice any malicious activities and because of this, your IP address might fall into the banned range even if you didn’t do anything at all. To uninstall the VPN service, follow the steps below.
  • Tap the Win + R keys to open the Run dialog box
  • Then type “appwiz.cpl” in the field and hit Enter to open the Programs and Features in Control Panel.
  • From there, look for the VPN service you are using, select it and then click on Uninstall to remove it.
  • After that, restart your computer and try to install the latest version of the program again. It should work now. If not, proceed to the next available option below.

Option 2 – Try disabling the Proxy server

There are some users who reported that they’ve fixed the problem after they’ve disabled the use of a proxy server using the built-in way. Follow the steps below to disable proxy server.
  • Tap the Win + R keys to open the Run dialog box.
  • Then type “inetcpl.cpl” in the field and hit Enter to pull up the Internet Properties.
  • After that, go to the Connections tab and select the LAN settings.
  • From there. Uncheck the “Use a Proxy Server” option for your LAN and then make sure that the “Automatically detect settings” option is checked.
  • Now click the OK and the Apply buttons.
  • Restart your PC.
Note: If you are using a third-party proxy service, you have to disable it.

Option 3 – Use the Google Public DNS

You might want to change your DNS to Google Public DNS as it could also help you in fixing the ERR_CERT_COMMON_NAME_INVALID error in Chrome. To do so, follow the steps below.
  • The first thing you have to do is right-click on the network icon in the Taskbar and select Network and Sharing Center.
  • Next, click on the “Change Adapter Settings” option.
  • After that, search for the network connection that you are using to connect to the internet. Note that the option might be “Wireless Connection” or “Local Area Connection”.
  • Right-click on your network connection and click on Properties.
  • Then select the new window to choose the “Internet Protocol 4 (TCP/IPv4)” option.
  • After that, click on the Properties button and click the checkbox in the new window for the option “Use the following DNS server addresses”.
  • Type in “8.8.8.8” and “8.8.4.4” and click OK and exit.

Option 4 – Try contacting the website administrator

If the first three given options didn’t work, you might want to consider contacting the website administrator especially if you’ve already determined that the issue does not occur due to a VPN or proxy server that you’re using. This option can be quite tricky since you won’t be able to submit a contact form since you’re banned from accessing the website but you can contact the admin via the form section if available.
Read More
How to Fix a Windows PC Crash Dump
Crash Dump is a type of malfunction that can happen when a few portions of the processor's data or RAM memory are erroneously copied to one or more files. It is common among Windows PCs. It used to be most prominent on the Windows 95 edition but subsequent versions have mostly remedied the situation. Even with the remedies over time though, this error still occurs.

Error Causes

A Crash Dump usually points to some serious and critical errors with your Computer. Below are some of the possible causes for this error:-
  • Corrupt memory
  • Incorrect configurations on hardware
  • Programming errors.
  • Incompatible drivers
  • Faulty Operating system
Despite the listed causes for Crash Dumps. Nobody is ever ready for them. A crash dump is classified as an unexpected error simply because it can happen anytime.

Further Information and Manual Repair

Most PC users get scared and anxious when a crash dump happens. Which need not be the case. You can easily repair a Crash Dump without necessarily requiring a computer technician. Follow these simple steps and the malfunction will soon dissipate:

a) Re-Install the Operating System

Put the setup CD into the computer disk drive. Once you've completed this, reboot the pc.

b) Push F8

Push the F8 function key on your keyboard while the pc is re-booting. This takes you to a menu where you should choose “Advanced Boot Options”

c) Click "Repair My Computer"

As soon as you push the F8 option, and do what's suggested in the last measure above, you must click on "Repair My Computer" and press the "Return/Enter" key.

d) Click on the "Startup Repair"

Search for the start-up repair option, and choose it. Subsequently, move to Next. Using this method, the cause of the Crash dump will undoubtedly be recognized and ended after a thorough scan of your system. Additionally, it is smart to take note of the whole Crash Dump information that appears on your screen. Windows supplies you with detailed error messages. Write down each of the error codes in hexadecimal values as well as capital characters as displayed on the screen.
  • Disconnect Hardware  and Un-Install all Drivers

Disconnect and remove any new hardware that is causing your PC to crash dump. Uninstall any drivers you used to install the hardware. If this solves the problem, contact the hardware manufacturer and request the latest and updated device drivers. At length, prior to starting panicking, see the error information that appears on your own display. Browse to see whether it includes info on a certain driver that you ought to search for and install. Bottom line, remain calm when your computer crash dumps and use the mentioned steps to repair it.
Read More
Best VR headsets in 2021 so far
Virtual Reality is slowly becoming standard in gaming. More and more affordable headsets are coming out lowering entry prices and making them affordable for all. But in a sea of new VR headsets, it is important to at least purchase a decent one that will perform nicely and hopefully last longer. Therefore in today’s article, we will address some of the best options currently available on the market,

Oculus Quest 2

occulus quest 2 VRWith its Rift model, Oculus set itself as a big player in VR. Now the company is slowly bowing out of the dedicated, tethered VR headset with its latest Quest 2 designed to primarily be a standalone headset. In case you do not know, tethered headset means that the headset itself is connected to your PC and is using its power to drive your VR experience. Now technical specifications of Quest 2 are pretty OK and it can drive stuff pretty decently and if you want you can purchase the dedicated cable to connect it to your PC for the full experience of games requiring more capable hardware. Oculus Quest 2 is the cheapest headset on this list and with its stable performance, is highly recommended.

Valve Index VR

valve index vrAlthough the headset itself is nothing revolutionary or special its controllers are. They can track individual finger movements, making games (that take advantage of them) much more immersive than the standard trigger grips on other controllers. The Index's higher refresh rate makes for smoother action, as well, which is another nice bonus. If you already have an HTC Vive or Vive Cosmos Elite, and their base stations (not the regular Cosmos), you can buy only the controllers.

Sony PlayStation VR

playstation vrThe PlayStation VR is compelling thanks to Sony backing its development, plus the PlayStation 4's affordability and availability compared with gaming PCs. All you need is the headset, a PlayStation 4, and a PlayStation Camera (now included with most PlayStation VR bundles). Not really the best of the bunch but still one of the top ones for console gaming. Sony is working on a new PlayStation VR system for the PlayStation 5, with redesigned controllers. The new headset hasn't been revealed yet, but the company has released a preview of the new controllers.

HP Reverb G2 VR

HP Reverb G2HP headset is one which you get if you want the best image quality in VR headset, sadly controllers did not follow the same quality of headset itself. But this is still a pretty decent headset overall and worth the purchase.

HTC Vive Cosmos

HTC Vive CosmosHTC's Vive Cosmos is the upgraded version of the Vive. It features a higher resolution and replaces the external base stations with outward-facing cameras for motion tracking. It's a comprehensive package for whole-room VR. HTC recently released the Vive Pro 2, a high-end VR headset targeting both enterprise users and consumers. This new headset features a 2,448-by-2,448 resolution display for each eye, making it the highest-resolution headset currently available. It's also more expensive than the Cosmos Elite. Sadly one thing that is bringing this headset down is the price.
Read More
A Quick Guide to Resolving IRQL_NOT_LESS_OR_EQUAL Error

IRQL_NOT_LESS_OR_EQUAL - What is it?

IRQL_NOT_LESS_OR_EQUAL error is a type of blue screen of death (BSoD) error. It is a typical Windows PC error that occurs even in the latest Windows versions. The IRQL_NOT_LESS_OR_EQUAL error occurs on the computer screen when a memory address triggers unauthorized access. This leads to the suspension of your login session. The computer screen turns blue.

Solution

Restoro box imageError Causes

IRQL_NOT_LESS_OR_EQUAL error occurs due to several reasons. However, the most common causes for this error code include:
  • Incompatible device drivers
  • The poor device driver installation
  • Faulty hardware
  • Disk fragmentation
  • Registry issues
  • Viruses and malware attack
Blue screen of death error codes like IRQL_NOT_LESS_OR_EQUAL is critical. If not resolved timely, this error code can pose serious threats to your PC. It can lead to system crash and failure, due to which you can also lose your valuable data stored in your system. How to Fix IRQL_NOT_LESS_OR_EQUAL Error Code?

Further Information and Manual Repair

Here are some of the best and easy DIY methods to resolve this error code on your PC:

1. Roll Back Drivers

If the underlying cause of IRQL_NOT_LESS_OR_EQUAL error is poor driver installation, then try this method to resolve the issue. This can be done by simply clicking the start menu. Once you click on it, go to the control panel, then double click the system icon and locate the System Properties window. After that, click the hardware tab and then the device manager button. Now locate the device you recently installed. Double click on the recently installed device driver, click the driver tab, and then the rollback driver button. This will take a while, so wait for the process to finish.  After that, reboot the system.

2. Run Hardware Diagnostic

The IRQL error may also be triggered by faulty hardware. To identify which hardware is causing the error to pop up, you will have to run a hardware diagnostic.
  • For this, go to the start menu, type Memory Diagnostic in the search bar.
  • Now access this tool and click on Diagnose your memory problems. As you click it, it will ask you to perform the check by either restarting the PC immediately or on the next restart.
  • Select the immediate one to get going. The system will carry a scan on the memory and show you the list of problematic errors detected during the scan. To resolve this error then all you have to do is replace the piece of faulty hardware.
Nonetheless, if no faulty hardware is detected, this means the error is related to memory. If so, try method 3 to resolve.

3. Disable Memory Caching

To fix the IRQL_NOT_LESS_OR_EQUAL error, try disabling the memory caching option. This is called BIOS memory caching. This can be done by restarting your PC and pressing the BIOS setup keys to enter the settings screen. Mostly it is an F2 key, however, it may be different in some computers as the motherboards of different makes have their own respective keys. Once you enter the BIOS settings look for options stating memory settings. Access these options and disable the memory caching feature.

4. Scan your PC for Malware

As mentioned above this error message can also result due to the intrusion of malicious software like malware, viruses, and spyware. To detect and remove them from your PC, download an antivirus and perform a system scan. Remove the detected viruses and malware to resolve. Please note, antivirus installation may lower the speed of your PC.

5.  Repair Registry and Fragmented Disk

Due to poor PC maintenance, you may experience registry issues. The registry stores all the activities performed on the PC including the unnecessary pieces of information like junk files, internet history, temporary files, cookies, and other flies. Such files take up a lot of disk space. When there is not much space on the storage device, the new data is saved in fragments. This is called disk fragmentation. When this file becomes fragmented it takes time to rearrange the data and reunite it to run the fragmented file on your PC. If not resolved, this leads to registry issues and thereby generating various PC error codes including IRQL_NOT_LESS_OR_EQUAL errors. The best way to clean the registry and repair the fragmented disk is to download Restoro. This is an advanced and multi-functional PC Fixer. It is embedded with multiple system repair utilities including a powerful registry cleaner that detects all registry issues in seconds, removes and wipes out unnecessary files cluttering the registry, cleans and repairs the registry and the damaged files. Other utilities include an antivirus that detects privacy errors and all types of malicious software infecting your system. It also functions as a system optimizer which means by running this software on your PC you won’t be compromising on your system’s performance. The system optimizer utility boosts the speed of your PC. This tool is safe and efficient. It has a user-friendly interface and is compatible with all Windows versions. Click here to download Restoro and resolve the IRQL_NOT_LESS_OR_EQUAL error code right away.
Read More
What to do if the Windows Wireless Service in Windows 10 is not running
When experiencing internet connection problems, most users run the built-in troubleshooter to fix the problem. However, you might come across another problem when instead of fixing the problem, the troubleshooter throws up an error message saying, “The Windows Wireless Service is not running on this computer”. After displaying this error message, the troubleshooter would exit. Usually, this kind of error indicates that Windows has failed to initialize the wireless service so it can start searching for broadcast signals and try to connect to them. So in this post, we have prepared some workarounds that might help you resolve the issue.

Option 1 – Try to check the WLAN Status

You have to make sure that the wireless service is enabled in your computer before you proceed to the other troubleshooting options below as this error could occur for a simple reason as the wireless capability is turned off from your PC either on some built-in settings or physically. This is why you need to make sure that Wireless is enabled. And if it turns out that it is disabled, you need to turn it back on and then reconnect to the wireless network again. You should now be able to connect to the internet without any issue.

Option 2 – Try to check the WLAN AutoConfig Service

The WLAN AutoConfig service is the one that provides the logic and functionality required to discover, connect and configure wireless networks with your PC. Aside from that, it also contains the module that allows your PC to be discoverable to other systems on a network. Thus, you need to verify if the WLAN AutoConfig service is on or not.
  • Tap the Win + R keys to open the Run dialog box.
  • And in the field, type in “services.msc” and hit Enter to open Services.
  • After opening the Services window, look for the entry named “WLAN AutoConfig” and then right-click on it and select Properties from the context menu.
  • Next, click on the Start button to turn on the service and then set the startup type as “Automatic”.
  • Then try to connect to your Wireless network again and check if the issue has been resolved.

Option 3 – Try to reset the Network Configurations

Resetting the Network Configurations can also help you in fixing the Windows Wireless service as the network settings often get disrupted or corrupted in a variety of different cases every now and then. Note that this module will reset all the network settings stored on your computer.
  • Tap the Win + S keys to open Search and then type in “command prompt” in the field.
  • From the search results that appear, right-click on Command Prompt and select the “Run as administrator” option.
  • After opening Command Prompt, copy and paste the following command and hit Enter to execute it:
netsh winsock reset
  • The command given will reset the Winsock data. Once it is executed, restart your PC for the changes to take effect and then check if the internet connection is now fine.
Note: Do make sure that the WiFi drivers are up to date. To do that, follow these steps:
  • Tap the Win + R keys to launch Run.
  • Type in devmgmt.msc into the box and tap Enter or click OK to open the Device Manager.
  • After that, a list of device drivers will be displayed. If you see a red or yellow sign that shows up against the driver, right-click on the driver’s name and select “Update Driver Software” or “Uninstall”. And if you find any “Unknown device”, you need to update it as well.
  • Select the “Search automatically for updated driver software” option and then follow the instructions to complete the process.
  • Restart your PC.
Note: You also have the option to go directly to the website of your graphics card manufacturer and check if there’s a new update – if there is, download it.

Option 4 – Perform System Restore

Recently, a lot of issues have resurfaced after users installed the latest Windows update. So the wireless service issue might also be related to it. To fix the problem, you can perform System Restore to roll back your Windows to the last time when it was working just fine. It automatically creates backups in time whenever you install a new update or periodically. Follow the steps below to perform System Restore.
  • Tap the Win + S keys to open Search and then type in “restore” in the field and select the topmost result.
  • Once you’ve opened the restore settings, click on System Restore located at the beginning of the window under the System Protection tab.
  • After that, a wizard will appear that will guide you through all the steps needed to restore the system. You can choose either the recommended restore point or a different one.
  • After you select the restore point, click Next to proceed to the next on-screen instructions.
  • Then select the restore point where the Windows Update was installed on your computer. If you have more than one restore point, you can just select the latest restore point and check the functionality from there. If it doesn’t work, you can just try another restore point.
  • Another prompt will appear and will ask you to confirm your actions. Click OK and wait for the system to be restored. Once it’s done, check if the problem’s now fixed.
Read More
1 2 3 171
Logo
Copyright © 2023, ErrorTools. All Rights Reserved
Trademark: Microsoft Windows logos are registered trademarks of Microsoft. Disclaimer: ErrorTools.com is not affiliated with Microsoft, nor claims direct affiliation.
The information on this page is provided for information purposes only.
DMCA.com Protection Status