Logo

How to Fix Media disconnected error message on Windows 10

A computer with no internet connection is like a mobile phone that can’t call nor text though you can still use it for other things. So if you are having problems with your computer’s internet connection, worry not as there are some basic things you can try before you go over the actual troubleshooting. Just make sure that you really have working internet. To verify it, try connecting your other devices. Aside from that, you must also make sure that your computer is connected properly over cable or connected to the router over the Wi-Fi. Once you have all these things covered, now’s the time to start troubleshooting the problem with the help of the instructions prepared below. To be more specific, this guide will walk you through what you can do when you encounter a particular internet connection problem where you get the Media State Media disconnected error message on your Windows 10 computer.

Before you troubleshoot the problem, you need to first check the internet connection status on your computer. To do that, follow these steps:

  • Type in “cmd” in the Cortana search box.
  • From the search results, right-click on Command Prompt and select “Run as administrator” from the context menu.
  • After opening Command Prompt with administrator privileges, type in the ipconfig /all command and hit Enter.
  • After you enter the command, you will see a list of all the connected media like the Ethernet, Wi-Fi along with its status, and more. From there, you need to check everything closely. I notice a message that says, “Media State . . . . . Media disconnected”, then your internet connection is indeed having issues.

Refer to the options below to fix the Media State Media disconnected error message on your Windows 10 PC.

Option 1 – Try resetting WINSOCK and IP Stack

  • Type in “cmd” in the Cortana search box.
  • From the search results, right-click on Command Prompt and select “Run as administrator” from the context menu.
  • After opening Command Prompt, type in each one of the commands listed below
    • netsh winsock reset catalog – This command will reset the WINSOCK entries.
    • netsh int ipv4 reset reset.log – This command will reset the IPv4 TCP/IP stack.
    • netsh int ipv6 reset reset.log – This command will reset the IPv6 TCP/IP stack
  • Once you’ve executed the commands listed above, restart your PC to successfully apply the changes made.

Option 2 – Check if your Network Adapter is disabled

If you’ve disabled the network adapters on your computer, then it’s most likely the reason why you’re getting the Media State Media disconnected error message. Thus, you need to enable it back.

  • Open Settings and go to Network and Internet > Select Ethernet > Change adapter options.
  • From there, right-click on the adapter and enable it.

Option 3 – Check the Wi-Fi Properties

Though this case is not common, Wi-Fi sharing has actually caused issues for some users. That’s why you need to check the Wi-Fi properties. Go to Network Connections and right-click on Wi-Fi and select Properties. From Properties, go to the Sharing tab and select the first option and click OK.

Option 4 – Try updating the Network driver

  • Tap the Win + R keys to open the Run dialog box and then type in devmgmt.msc and tap Enter or click OK to open the Device Manager.
  • Expand the section for the outdated device drivers.
  • And then select the Network driver or any other outdated driver(s) and right-click on it/them.
  • From the drop-down menu, select the Update Driver option and follow the on-screen instructions to install the latest version of the driver.
  • Then also click on the option, “Search automatically for updated driver software.
  • Restart your PC after the installation.

Note: If updating the Network driver didn’t work, you can go to the website of your PC manufacturer and look for the support section where you can download the drivers for your computer. You just need to take note of your PC’s correct model and model number so you can find the appropriate driver.

Do You Need Help with Your Device?

Our Team of Experts May Help
Troubleshoot.Tech Experts are There for You!
Replace damaged files
Restore performance
Free disk space
Remove Malware
Protects WEB browser
Remove Viruses
Stop PC freezing
GET HELP
Troubleshoot.Tech experts work with all versions of Microsoft Windows including Windows 11, with Android, Mac, and more.

Share this article:

You might also like

Photo viewer on clean Windows 10 instalation
Windows photo viewer was a popular photo viewing application integrated into Windows 7, 8, and 8.1 but in Windows 10 it has been replaced with photos, Microsoft's new application aimed at photo viewing on your desktop. Now if any one of you wonders why should be bringing the old application back to Windows 10 since we have an alternative one, the answer would be resources and speed. The old photo viewer application is lightweight, fast, and reliable, opening the same photo in both photo viewer and in new photos shows us that Microsofts new viewer application takes even three times more RAM, and it's visibly slower in loading times for pictures. Since I am a person who prefers speed and functionality over fancy looks I would be very glad to have the option to bring back a photo viewer. If you have by any chance Windows 10 as an upgrade, bringing back photo viewer is easy as 1,2,3. you just need to open settings and go to default apps, under photo viewer you should see your current default viewing application, probably photos, click on it to see options and choose photo viewer and exit the Settings menu, and you're done. Sadly if Windows 10 has been installed clean on the system and not as upgrade things are a little bit more complicated but do not worry, stay with us, keep reading and you will get there.

Activating photo viewer

How technically photo viewer is still in the system but not used we will have to make it available again and this we will do by adding some lines in the Windows registry, that being said, open a notepad and paste the following code as it is in it.
Windows Registry Editor Version 5.00 [HKEY_CLASSES_ROOT\jpegfile\shell\open\DropTarget] "Clsid"="{FFE2A43C-56B9-4bf5-9A79-CC6D4285608A}" [HKEY_CLASSES_ROOT\pngfile\shell\open\DropTarget] "Clsid"="{FFE2A43C-56B9-4bf5-9A79-CC6D4285608A}" [HKEY_CLASSES_ROOT\Applications\photoviewer.dll\shell\open] "MuiVerb"="@photoviewer.dll,-3043" [HKEY_CLASSES_ROOT\Applications\photoviewer.dll\shell\open\command] @=hex(2):25,00,53,00,79,00,73,00,74,00,65,00,6d,00,52,00,6f,00,6f,00,74,00,25,\ 00,5c,00,53,00,79,00,73,00,74,00,65,00,6d,00,33,00,32,00,5c,00,72,00,75,00,\ 6e,00,64,00,6c,00,6c,00,33,00,32,00,2e,00,65,00,78,00,65,00,20,00,22,00,25,\ 00,50,00,72,00,6f,00,67,00,72,00,61,00,6d,00,46,00,69,00,6c,00,65,00,73,00,\ 25,00,5c,00,57,00,69,00,6e,00,64,00,6f,00,77,00,73,00,20,00,50,00,68,00,6f,\ 00,74,00,6f,00,20,00,56,00,69,00,65,00,77,00,65,00,72,00,5c,00,50,00,68,00,\ 6f,00,74,00,6f,00,56,00,69,00,65,00,77,00,65,00,72,00,2e,00,64,00,6c,00,6c,\ 00,22,00,2c,00,20,00,49,00,6d,00,61,00,67,00,65,00,56,00,69,00,65,00,77,00,\ 5f,00,46,00,75,00,6c,00,6c,00,73,00,63,00,72,00,65,00,65,00,6e,00,20,00,25,\ 00,31,00,00,00 [HKEY_CLASSES_ROOT\Applications\photoviewer.dll\shell\open\DropTarget] "Clsid"="{FFE2A43C-56B9-4bf5-9A79-CC6D4285608A}" [HKEY_CLASSES_ROOT\PhotoViewer.FileAssoc.Bitmap] "ImageOptionFlags"=dword:00000001 "FriendlyTypeName"=hex(2):40,00,25,00,50,00,72,00,6f,00,67,00,72,00,61,00,6d,\ 00,46,00,69,00,6c,00,65,00,73,00,25,00,5c,00,57,00,69,00,6e,00,64,00,6f,00,\ 77,00,73,00,20,00,50,00,68,00,6f,00,74,00,6f,00,20,00,56,00,69,00,65,00,77,\ 00,65,00,72,00,5c,00,50,00,68,00,6f,00,74,00,6f,00,56,00,69,00,65,00,77,00,\ 65,00,72,00,2e,00,64,00,6c,00,6c,00,2c,00,2d,00,33,00,30,00,35,00,36,00,00,\ 00 [HKEY_CLASSES_ROOT\PhotoViewer.FileAssoc.Bitmap\DefaultIcon] @="%SystemRoot%\\System32\\imageres.dll,-70" [HKEY_CLASSES_ROOT\PhotoViewer.FileAssoc.Bitmap\shell\open\command] @=hex(2):25,00,53,00,79,00,73,00,74,00,65,00,6d,00,52,00,6f,00,6f,00,74,00,25,\ 00,5c,00,53,00,79,00,73,00,74,00,65,00,6d,00,33,00,32,00,5c,00,72,00,75,00,\ 6e,00,64,00,6c,00,6c,00,33,00,32,00,2e,00,65,00,78,00,65,00,20,00,22,00,25,\ 00,50,00,72,00,6f,00,67,00,72,00,61,00,6d,00,46,00,69,00,6c,00,65,00,73,00,\ 25,00,5c,00,57,00,69,00,6e,00,64,00,6f,00,77,00,73,00,20,00,50,00,68,00,6f,\ 00,74,00,6f,00,20,00,56,00,69,00,65,00,77,00,65,00,72,00,5c,00,50,00,68,00,\ 6f,00,74,00,6f,00,56,00,69,00,65,00,77,00,65,00,72,00,2e,00,64,00,6c,00,6c,\ 00,22,00,2c,00,20,00,49,00,6d,00,61,00,67,00,65,00,56,00,69,00,65,00,77,00,\ 5f,00,46,00,75,00,6c,00,6c,00,73,00,63,00,72,00,65,00,65,00,6e,00,20,00,25,\ 00,31,00,00,00 [HKEY_CLASSES_ROOT\PhotoViewer.FileAssoc.Bitmap\shell\open\DropTarget] "Clsid"="{FFE2A43C-56B9-4bf5-9A79-CC6D4285608A}" [HKEY_CLASSES_ROOT\Applications\photoviewer.dll\shell\print] "NeverDefault"="" [HKEY_CLASSES_ROOT\Applications\photoviewer.dll\shell\print\command] @=hex(2):25,00,53,00,79,00,73,00,74,00,65,00,6d,00,52,00,6f,00,6f,00,74,00,25,\ 00,5c,00,53,00,79,00,73,00,74,00,65,00,6d,00,33,00,32,00,5c,00,72,00,75,00,\ 6e,00,64,00,6c,00,6c,00,33,00,32,00,2e,00,65,00,78,00,65,00,20,00,22,00,25,\ 00,50,00,72,00,6f,00,67,00,72,00,61,00,6d,00,46,00,69,00,6c,00,65,00,73,00,\ 25,00,5c,00,57,00,69,00,6e,00,64,00,6f,00,77,00,73,00,20,00,50,00,68,00,6f,\ 00,74,00,6f,00,20,00,56,00,69,00,65,00,77,00,65,00,72,00,5c,00,50,00,68,00,\ 6f,00,74,00,6f,00,56,00,69,00,65,00,77,00,65,00,72,00,2e,00,64,00,6c,00,6c,\ 00,22,00,2c,00,20,00,49,00,6d,00,61,00,67,00,65,00,56,00,69,00,65,00,77,00,\ 5f,00,46,00,75,00,6c,00,6c,00,73,00,63,00,72,00,65,00,65,00,6e,00,20,00,25,\ 00,31,00,00,00 [HKEY_CLASSES_ROOT\Applications\photoviewer.dll\shell\print\DropTarget] "Clsid"="{60fd46de-f830-4894-a628-6fa81bc0190d}" [HKEY_CLASSES_ROOT\PhotoViewer.FileAssoc.JFIF] "EditFlags"=dword:00010000 "ImageOptionFlags"=dword:00000001 "FriendlyTypeName"=hex(2):40,00,25,00,50,00,72,00,6f,00,67,00,72,00,61,00,6d,\ 00,46,00,69,00,6c,00,65,00,73,00,25,00,5c,00,57,00,69,00,6e,00,64,00,6f,00,\ 77,00,73,00,20,00,50,00,68,00,6f,00,74,00,6f,00,20,00,56,00,69,00,65,00,77,\ 00,65,00,72,00,5c,00,50,00,68,00,6f,00,74,00,6f,00,56,00,69,00,65,00,77,00,\ 65,00,72,00,2e,00,64,00,6c,00,6c,00,2c,00,2d,00,33,00,30,00,35,00,35,00,00,\ 00 [HKEY_CLASSES_ROOT\PhotoViewer.FileAssoc.JFIF\DefaultIcon] @="%SystemRoot%\\System32\\imageres.dll,-72" [HKEY_CLASSES_ROOT\PhotoViewer.FileAssoc.JFIF\shell\open] "MuiVerb"=hex(2):40,00,25,00,50,00,72,00,6f,00,67,00,72,00,61,00,6d,00,46,00,\ 69,00,6c,00,65,00,73,00,25,00,5c,00,57,00,69,00,6e,00,64,00,6f,00,77,00,73,\ 00,20,00,50,00,68,00,6f,00,74,00,6f,00,20,00,56,00,69,00,65,00,77,00,65,00,\ 72,00,5c,00,70,00,68,00,6f,00,74,00,6f,00,76,00,69,00,65,00,77,00,65,00,72,\ 00,2e,00,64,00,6c,00,6c,00,2c,00,2d,00,33,00,30,00,34,00,33,00,00,00 [HKEY_CLASSES_ROOT\PhotoViewer.FileAssoc.JFIF\shell\open\command] @=hex(2):25,00,53,00,79,00,73,00,74,00,65,00,6d,00,52,00,6f,00,6f,00,74,00,25,\ 00,5c,00,53,00,79,00,73,00,74,00,65,00,6d,00,33,00,32,00,5c,00,72,00,75,00,\ 6e,00,64,00,6c,00,6c,00,33,00,32,00,2e,00,65,00,78,00,65,00,20,00,22,00,25,\ 00,50,00,72,00,6f,00,67,00,72,00,61,00,6d,00,46,00,69,00,6c,00,65,00,73,00,\ 25,00,5c,00,57,00,69,00,6e,00,64,00,6f,00,77,00,73,00,20,00,50,00,68,00,6f,\ 00,74,00,6f,00,20,00,56,00,69,00,65,00,77,00,65,00,72,00,5c,00,50,00,68,00,\ 6f,00,74,00,6f,00,56,00,69,00,65,00,77,00,65,00,72,00,2e,00,64,00,6c,00,6c,\ 00,22,00,2c,00,20,00,49,00,6d,00,61,00,67,00,65,00,56,00,69,00,65,00,77,00,\ 5f,00,46,00,75,00,6c,00,6c,00,73,00,63,00,72,00,65,00,65,00,6e,00,20,00,25,\ 00,31,00,00,00 [HKEY_CLASSES_ROOT\PhotoViewer.FileAssoc.JFIF\shell\open\DropTarget] "Clsid"="{FFE2A43C-56B9-4bf5-9A79-CC6D4285608A}" [HKEY_CLASSES_ROOT\PhotoViewer.FileAssoc.Jpeg] "EditFlags"=dword:00010000 "ImageOptionFlags"=dword:00000001 "FriendlyTypeName"=hex(2):40,00,25,00,50,00,72,00,6f,00,67,00,72,00,61,00,6d,\ 00,46,00,69,00,6c,00,65,00,73,00,25,00,5c,00,57,00,69,00,6e,00,64,00,6f,00,\ 77,00,73,00,20,00,50,00,68,00,6f,00,74,00,6f,00,20,00,56,00,69,00,65,00,77,\ 00,65,00,72,00,5c,00,50,00,68,00,6f,00,74,00,6f,00,56,00,69,00,65,00,77,00,\ 65,00,72,00,2e,00,64,00,6c,00,6c,00,2c,00,2d,00,33,00,30,00,35,00,35,00,00,\ 00 [HKEY_CLASSES_ROOT\PhotoViewer.FileAssoc.Jpeg\DefaultIcon] @="%SystemRoot%\\System32\\imageres.dll,-72" [HKEY_CLASSES_ROOT\PhotoViewer.FileAssoc.Jpeg\shell\open] "MuiVerb"=hex(2):40,00,25,00,50,00,72,00,6f,00,67,00,72,00,61,00,6d,00,46,00,\ 69,00,6c,00,65,00,73,00,25,00,5c,00,57,00,69,00,6e,00,64,00,6f,00,77,00,73,\ 00,20,00,50,00,68,00,6f,00,74,00,6f,00,20,00,56,00,69,00,65,00,77,00,65,00,\ 72,00,5c,00,70,00,68,00,6f,00,74,00,6f,00,76,00,69,00,65,00,77,00,65,00,72,\ 00,2e,00,64,00,6c,00,6c,00,2c,00,2d,00,33,00,30,00,34,00,33,00,00,00 [HKEY_CLASSES_ROOT\PhotoViewer.FileAssoc.Jpeg\shell\open\command] @=hex(2):25,00,53,00,79,00,73,00,74,00,65,00,6d,00,52,00,6f,00,6f,00,74,00,25,\ 00,5c,00,53,00,79,00,73,00,74,00,65,00,6d,00,33,00,32,00,5c,00,72,00,75,00,\ 6e,00,64,00,6c,00,6c,00,33,00,32,00,2e,00,65,00,78,00,65,00,20,00,22,00,25,\ 00,50,00,72,00,6f,00,67,00,72,00,61,00,6d,00,46,00,69,00,6c,00,65,00,73,00,\ 25,00,5c,00,57,00,69,00,6e,00,64,00,6f,00,77,00,73,00,20,00,50,00,68,00,6f,\ 00,74,00,6f,00,20,00,56,00,69,00,65,00,77,00,65,00,72,00,5c,00,50,00,68,00,\ 6f,00,74,00,6f,00,56,00,69,00,65,00,77,00,65,00,72,00,2e,00,64,00,6c,00,6c,\ 00,22,00,2c,00,20,00,49,00,6d,00,61,00,67,00,65,00,56,00,69,00,65,00,77,00,\ 5f,00,46,00,75,00,6c,00,6c,00,73,00,63,00,72,00,65,00,65,00,6e,00,20,00,25,\ 00,31,00,00,00 [HKEY_CLASSES_ROOT\PhotoViewer.FileAssoc.Jpeg\shell\open\DropTarget] "Clsid"="{FFE2A43C-56B9-4bf5-9A79-CC6D4285608A}" [HKEY_CLASSES_ROOT\PhotoViewer.FileAssoc.Gif] "ImageOptionFlags"=dword:00000001 "FriendlyTypeName"=hex(2):40,00,25,00,50,00,72,00,6f,00,67,00,72,00,61,00,6d,\ 00,46,00,69,00,6c,00,65,00,73,00,25,00,5c,00,57,00,69,00,6e,00,64,00,6f,00,\ 77,00,73,00,20,00,50,00,68,00,6f,00,74,00,6f,00,20,00,56,00,69,00,65,00,77,\ 00,65,00,72,00,5c,00,50,00,68,00,6f,00,74,00,6f,00,56,00,69,00,65,00,77,00,\ 65,00,72,00,2e,00,64,00,6c,00,6c,00,2c,00,2d,00,33,00,30,00,35,00,37,00,00,\ 00 [HKEY_CLASSES_ROOT\PhotoViewer.FileAssoc.Gif\DefaultIcon] @="%SystemRoot%\\System32\\imageres.dll,-83" [HKEY_CLASSES_ROOT\PhotoViewer.FileAssoc.Gif\shell\open\command] @=hex(2):25,00,53,00,79,00,73,00,74,00,65,00,6d,00,52,00,6f,00,6f,00,74,00,25,\ 00,5c,00,53,00,79,00,73,00,74,00,65,00,6d,00,33,00,32,00,5c,00,72,00,75,00,\ 6e,00,64,00,6c,00,6c,00,33,00,32,00,2e,00,65,00,78,00,65,00,20,00,22,00,25,\ 00,50,00,72,00,6f,00,67,00,72,00,61,00,6d,00,46,00,69,00,6c,00,65,00,73,00,\ 25,00,5c,00,57,00,69,00,6e,00,64,00,6f,00,77,00,73,00,20,00,50,00,68,00,6f,\ 00,74,00,6f,00,20,00,56,00,69,00,65,00,77,00,65,00,72,00,5c,00,50,00,68,00,\ 6f,00,74,00,6f,00,56,00,69,00,65,00,77,00,65,00,72,00,2e,00,64,00,6c,00,6c,\ 00,22,00,2c,00,20,00,49,00,6d,00,61,00,67,00,65,00,56,00,69,00,65,00,77,00,\ 5f,00,46,00,75,00,6c,00,6c,00,73,00,63,00,72,00,65,00,65,00,6e,00,20,00,25,\ 00,31,00,00,00 [HKEY_CLASSES_ROOT\PhotoViewer.FileAssoc.Gif\shell\open\DropTarget] "Clsid"="{FFE2A43C-56B9-4bf5-9A79-CC6D4285608A}" [HKEY_CLASSES_ROOT\PhotoViewer.FileAssoc.Png] "ImageOptionFlags"=dword:00000001 "FriendlyTypeName"=hex(2):40,00,25,00,50,00,72,00,6f,00,67,00,72,00,61,00,6d,\ 00,46,00,69,00,6c,00,65,00,73,00,25,00,5c,00,57,00,69,00,6e,00,64,00,6f,00,\ 77,00,73,00,20,00,50,00,68,00,6f,00,74,00,6f,00,20,00,56,00,69,00,65,00,77,\ 00,65,00,72,00,5c,00,50,00,68,00,6f,00,74,00,6f,00,56,00,69,00,65,00,77,00,\ 65,00,72,00,2e,00,64,00,6c,00,6c,00,2c,00,2d,00,33,00,30,00,35,00,37,00,00,\ 00 [HKEY_CLASSES_ROOT\PhotoViewer.FileAssoc.Png\DefaultIcon] @="%SystemRoot%\\System32\\imageres.dll,-71" [HKEY_CLASSES_ROOT\PhotoViewer.FileAssoc.Png\shell\open\command] @=hex(2):25,00,53,00,79,00,73,00,74,00,65,00,6d,00,52,00,6f,00,6f,00,74,00,25,\ 00,5c,00,53,00,79,00,73,00,74,00,65,00,6d,00,33,00,32,00,5c,00,72,00,75,00,\ 6e,00,64,00,6c,00,6c,00,33,00,32,00,2e,00,65,00,78,00,65,00,20,00,22,00,25,\ 00,50,00,72,00,6f,00,67,00,72,00,61,00,6d,00,46,00,69,00,6c,00,65,00,73,00,\ 25,00,5c,00,57,00,69,00,6e,00,64,00,6f,00,77,00,73,00,20,00,50,00,68,00,6f,\ 00,74,00,6f,00,20,00,56,00,69,00,65,00,77,00,65,00,72,00,5c,00,50,00,68,00,\ 6f,00,74,00,6f,00,56,00,69,00,65,00,77,00,65,00,72,00,2e,00,64,00,6c,00,6c,\ 00,22,00,2c,00,20,00,49,00,6d,00,61,00,67,00,65,00,56,00,69,00,65,00,77,00,\ 5f,00,46,00,75,00,6c,00,6c,00,73,00,63,00,72,00,65,00,65,00,6e,00,20,00,25,\ 00,31,00,00,00 [HKEY_CLASSES_ROOT\PhotoViewer.FileAssoc.Png\shell\open\DropTarget] "Clsid"="{FFE2A43C-56B9-4bf5-9A79-CC6D4285608A}" [HKEY_CLASSES_ROOT\PhotoViewer.FileAssoc.Wdp] "EditFlags"=dword:00010000 "ImageOptionFlags"=dword:00000001 [HKEY_CLASSES_ROOT\PhotoViewer.FileAssoc.Wdp\DefaultIcon] @="%SystemRoot%\\System32\\wmphoto.dll,-400" [HKEY_CLASSES_ROOT\PhotoViewer.FileAssoc.Wdp\shell\open] "MuiVerb"=hex(2):40,00,25,00,50,00,72,00,6f,00,67,00,72,00,61,00,6d,00,46,00,\ 69,00,6c,00,65,00,73,00,25,00,5c,00,57,00,69,00,6e,00,64,00,6f,00,77,00,73,\ 00,20,00,50,00,68,00,6f,00,74,00,6f,00,20,00,56,00,69,00,65,00,77,00,65,00,\ 72,00,5c,00,70,00,68,00,6f,00,74,00,6f,00,76,00,69,00,65,00,77,00,65,00,72,\ 00,2e,00,64,00,6c,00,6c,00,2c,00,2d,00,33,00,30,00,34,00,33,00,00,00 [HKEY_CLASSES_ROOT\PhotoViewer.FileAssoc.Wdp\shell\open\command] @=hex(2):25,00,53,00,79,00,73,00,74,00,65,00,6d,00,52,00,6f,00,6f,00,74,00,25,\ 00,5c,00,53,00,79,00,73,00,74,00,65,00,6d,00,33,00,32,00,5c,00,72,00,75,00,\ 6e,00,64,00,6c,00,6c,00,33,00,32,00,2e,00,65,00,78,00,65,00,20,00,22,00,25,\ 00,50,00,72,00,6f,00,67,00,72,00,61,00,6d,00,46,00,69,00,6c,00,65,00,73,00,\ 25,00,5c,00,57,00,69,00,6e,00,64,00,6f,00,77,00,73,00,20,00,50,00,68,00,6f,\ 00,74,00,6f,00,20,00,56,00,69,00,65,00,77,00,65,00,72,00,5c,00,50,00,68,00,\ 6f,00,74,00,6f,00,56,00,69,00,65,00,77,00,65,00,72,00,2e,00,64,00,6c,00,6c,\ 00,22,00,2c,00,20,00,49,00,6d,00,61,00,67,00,65,00,56,00,69,00,65,00,77,00,\ 5f,00,46,00,75,00,6c,00,6c,00,73,00,63,00,72,00,65,00,65,00,6e,00,20,00,25,\ 00,31,00,00,00 [HKEY_CLASSES_ROOT\PhotoViewer.FileAssoc.Wdp\shell\open\DropTarget] "Clsid"="{FFE2A43C-56B9-4bf5-9A79-CC6D4285608A}" [HKEY_CLASSES_ROOT\SystemFileAssociations\image\shell\Image Preview\command] @=hex(2):25,00,53,00,79,00,73,00,74,00,65,00,6d,00,52,00,6f,00,6f,00,74,00,25,\ 00,5c,00,53,00,79,00,73,00,74,00,65,00,6d,00,33,00,32,00,5c,00,72,00,75,00,\ 6e,00,64,00,6c,00,6c,00,33,00,32,00,2e,00,65,00,78,00,65,00,20,00,22,00,25,\ 00,50,00,72,00,6f,00,67,00,72,00,61,00,6d,00,46,00,69,00,6c,00,65,00,73,00,\ 25,00,5c,00,57,00,69,00,6e,00,64,00,6f,00,77,00,73,00,20,00,50,00,68,00,6f,\ 00,74,00,6f,00,20,00,56,00,69,00,65,00,77,00,65,00,72,00,5c,00,50,00,68,00,\ 6f,00,74,00,6f,00,56,00,69,00,65,00,77,00,65,00,72,00,2e,00,64,00,6c,00,6c,\ 00,22,00,2c,00,20,00,49,00,6d,00,61,00,67,00,65,00,56,00,69,00,65,00,77,00,\ 5f,00,46,00,75,00,6c,00,6c,00,73,00,63,00,72,00,65,00,65,00,6e,00,20,00,25,\ 00,31,00,00,00 [HKEY_CLASSES_ROOT\SystemFileAssociations\image\shell\Image Preview\DropTarget] "{FFE2A43C-56B9-4bf5-9A79-CC6D4285608A}"="" [HKEY_LOCAL_MACHINE\SOFTWARE\Microsoft\Windows Photo Viewer\Capabilities] "ApplicationDescription"="@%ProgramFiles%\\Windows Photo Viewer\\photoviewer.dll,-3069" "ApplicationName"="@%ProgramFiles%\\Windows Photo Viewer\\photoviewer.dll,-3009" [HKEY_LOCAL_MACHINE\SOFTWARE\Microsoft\Windows Photo Viewer\Capabilities\FileAssociations] ".cr2"="PhotoViewer.FileAssoc.Tiff" ".jpg"="PhotoViewer.FileAssoc.Jpeg" ".wdp"="PhotoViewer.FileAssoc.Wdp" ".jfif"="PhotoViewer.FileAssoc.JFIF" ".dib"="PhotoViewer.FileAssoc.Bitmap" ".png"="PhotoViewer.FileAssoc.Png" ".jxr"="PhotoViewer.FileAssoc.Wdp" ".bmp"="PhotoViewer.FileAssoc.Bitmap" ".jpe"="PhotoViewer.FileAssoc.Jpeg" ".jpeg"="PhotoViewer.FileAssoc.Jpeg" ".gif"="PhotoViewer.FileAssoc.Gif" ".tif"="PhotoViewer.FileAssoc.Tiff" ".tiff"="PhotoViewer.FileAssoc.Tiff"
Yup, that is a lot of keys and settings but you are almost done. Once you have pasted text into your new notepad document save it but as .REG, you can name it however you want but it has to be .REG extension. Once the file is saved double click on it to merge it into the Windows registry. You might need to turn off UAC for this operation (check our tutorial on this topic) and accept warning messages but once it is done you should now have an old photo viewer as a choice for your default viewing application. All you have to do now is to go to settings and go to default apps, under photo viewer you should see your current default viewing application, probably photos, click on it to see options and choose photo viewer and exit the Settings menu, and you're done.
Read More
Fix Sechost.dll missing error in Windows 10
If you are facing a missing sechost.dll error in your Windows 10, welcome, you have come to the right place to solve it and get back your computer in working order. Sechost.dll is a file that allows other programs to function and complete their tasks as well as control and change the behavior of other programs. The file is found in Windows subfolder System32, it is a completely safe file and should not be deleted. Sometimes however various other reasons can corrupt it or delete it. This guide will lead you to common solutions on how to get file back up and running.
  1. Update device driver

    Have you installed a new device and all of a sudden you get the error message that Sechost is missing? Update device driver, it is possible that the file has been corrupted or replaced with an older version and therefore reported as missing. Update device driver to lastest version and issue should run away.
  2. Re-register file via command prompt

    If Sechost got corrupted re-registering will solve the issue, press ⊞ WINDOWS + X and choose Command prompt (administrator), click on it. type regsvr32 sechost.dll and press ENTER Reboot your PC
  3. Reinstall application

    Usually, Sechost gone bad or missing is due to the installation of another application that corrupts the file. Reinstall the application to try to solve errors. In order to properly reinstall the application first use the control panel to remove it completely from the system and then install it again, hopefully, this time correct version of Sechost.dll will be installed in the system.
  4. Check your hard drive

    In some cases, a hard drive malfunction can cause several files to be corrupted or gone missing. To eliminate hard drive malfunction run check disk from Windows on C drive to check it and find if there are any errors.
  5. Uninstall Windows update

    Same as with some application, even Windows update could corrupt some files due to update not being properly downloaded. Try uninstalling the latest update and revert to the previous Windows state, then update it again.
Read More
How to game on a low budget

If you are following the latest gaming trends and spend a lot of time on social media, watching streams, etc. you might be under impression that gaming as a hobby is very expensive. If you plan to play the latest games on a very large screen in their highest setting that might be true but if you do not care about that you can still play games and spend much less money on them.

gaming on a budget

That being said we are here to share with you some tips and tactics on how to play good games with minimum money spent.

Do not buy games the moment when they are released

Buying a game on its launch date is maybe the worst and most expensive thing you can do. Games have their highest price on launch day but sadly with the current state of the industry, they are in their worst state as well. Games eventually became better over time after patches are released but so does their price drops after the hype has calmed down. So if you really must have some specific game on its launch day, go for it but know that by doing so you are getting the worst version of the game for its higher price.

Wishlist games and wait for the sale

All services today have a wishlist, very good and money-saving tactic is to wishlist interesting titles and wait for them to be on the sale. Services will usually have the option of sending you an email once your wishlist titles are on sale so you will be notified once they do. A good tactic as well is to wait for large sales like for example summer, winter, easter sales, or many other seasonal ones.

Get free games

Some online stores are offering free games from time to time and some are always offering some titles as gifts in order to get customers to their platform. EPIC has become famous for gifting some great titles over the past years completely for free and there are a lot of free-to-play games on each platform that you can play.

Get second-hand PC

Having a new computer is great but if your budget is tight you might consider getting your PC as a second hand instead of the new one. Hardcore games will switch components more frequently than your typical users and usually the components will be sold cheaper and be more affordable.

Play games on some older devices in general

Many games today are available on many platforms not only just on your typical PC. Same titles are available on your mobile phones, tablets, and even on your Android TV. Many titles will not even require the latest technology or monster of a computer in order to run them. You can also lower game settings and play many games on lower hardware if you do not mind not having top graphics settings.

Play over the cloud streaming

If you are very tight on budget but want to enjoy new games in their full glory there is always the option to play games via a cloud streaming service, it is not exactly a mega cheap option since it has a monthly fee but it is cheaper than some high-end gaming computer. If you combine this with the game pass you can enjoy the latest games with high-quality settings and pay it on a monthly basis.

Read More
5 ways to open task manager in Windows 11
Something we are used to doing in a certain way inside Windows 10 is slightly changed in Windows 11. One of those things is how you open task manager, well kind of. task manager
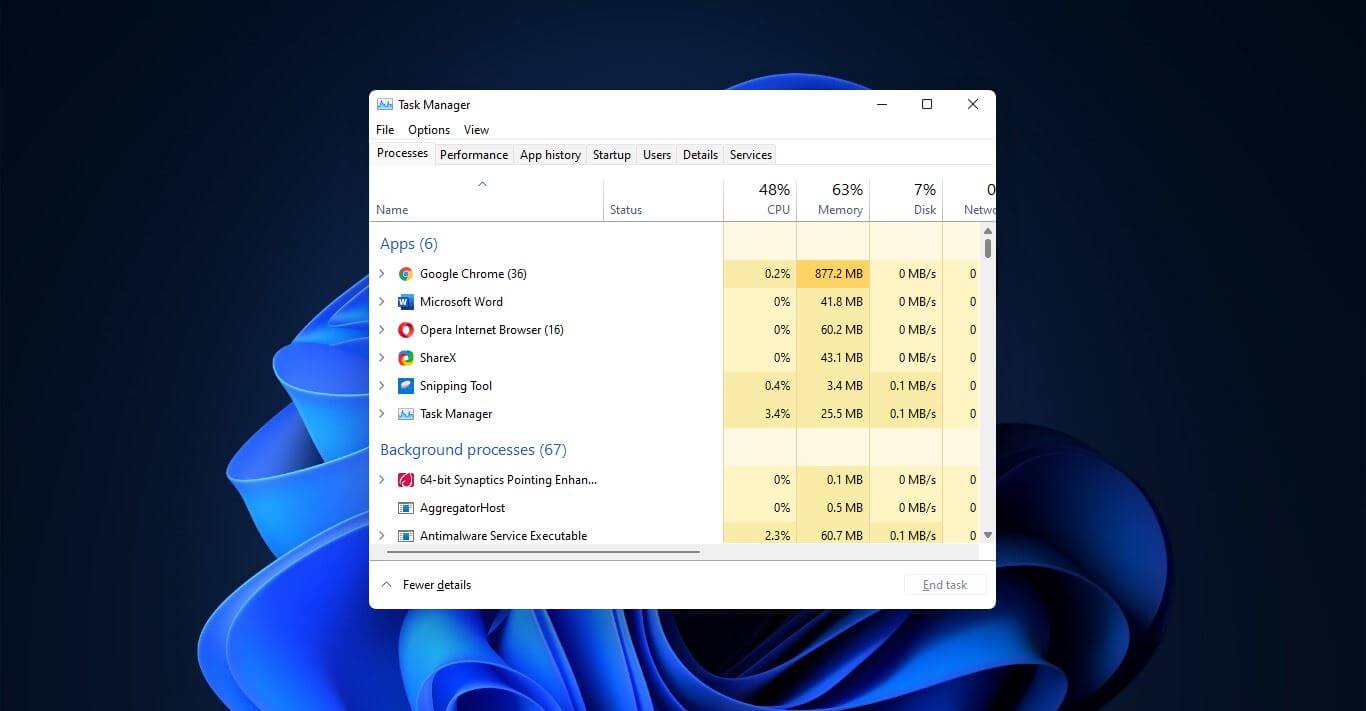
Option to right-click on the taskbar and launch task manager is gone but do not worry there are other same and simple ways you can launch it.
  1. Press CTRL + SHIFT + ESC or CTRL + ALT + DEL
  2. Right-click on the START button
  3. Type task manager in start search on top in the start menu
  4. Type taskmgr in command prompt
  5. Press ⊞ WINDOWS + R to open run dialog and type in taskmgr
And that’s it, now depending on your situation, you might use different methods to evoke task manager.
Read More
How to Remove MovieGoat - Malware Removal Guide

MovieGoat is a browser extension that allegedly lets you search for your favorite videos using its simple search engine. From the author:

Search for your favorite movies online, stay updated with the latest news and trends, and keep an eye on what’s up and coming in the world of cinema.

Simply type goat+ SpaceTab + query at the chrome search bar.
MovieGoat hijacks your browser, replacing your default search engine, displaying sponsored videos when you use its search and will display pop-up ads during your browsing experience. This extension has been detected as a Browser Hijacker by several anti-virus scanners and is not recommended to keep on your computer, especially because it serves no other purpose than to display pop-up ads and negatively impact your browsing experience.

About Browser Hijackers

Browser hijack is a common type of internet fraud where your internet browser configuration settings are modified to make it carry out things you never intend. There are numerous reasons why you may have an internet browser hijack; however commercial, advertising, and marketing are definitely the primary reasons for their creation. Usually, hijackers are made for the benefit of cyber hackers usually through income generation from forced ad clicks and site visits. Most people assume that these types of websites are legitimate and harmless but that is incorrect. Almost every browser hijacker poses an actual threat to your online safety and it’s important to categorize them under privacy risks. Some browser hijackers are designed to make particular modifications beyond the web browsers, like altering entries on the system registry and permitting other types of malware to further damage your PC.

How you can recognize a browser hijack

When your browser is hijacked, the following could happen: your homepage has been reset to some unfamiliar webpage; you find yourself regularly directed to some other site than the one you meant; The default search page of web browser is altered; you are finding new toolbars you have never witnessed before; you’ll notice random pop-ups start showing regularly; websites load very slowly and sometimes incomplete; Inability to navigate to particular websites, particularly anti-malware as well as other computer security software websites.

How it infects your computer

Browser hijackers can get into a computer in some way or other, for example via downloads, file sharing, and email too. They may also be deployed through the installation of a web browser toolbar, add-on, or extension. A browser hijacker can also come bundled up with some freeware which you unwittingly download and install the browser hijack, compromising your computer security. A good example of some infamous browser hijackers includes Anyprotect, Conduit, Babylon, SweetPage, DefaultTab, Delta Search, and RocketTab, however, the names are constantly changing. Browser hijacking can bring about severe privacy problems and even identity theft, affect your browsing experience by taking control over outbound traffic, substantially slows down your computer by consuming lots of resources, and cause system instability also.

Removal

One thing you could try to eliminate a browser hijacker is to locate the malicious software within the “Add or Remove Programs” list of the Windows Control Panel. It might or might not be there. If it is, uninstall it. But, most browser hijackers are hard to eliminate manually. Irrespective of how much you attempt to get rid of it, it could come back again and again. On top of that, manual removal demands you to carry out several time-consuming and complicated procedures which are very hard to complete for new computer users.

What you can do if Virus Prevents You From Downloading Or Installing Antivirus?

Malware can cause all sorts of damage if they invade your PC, ranging from stealing your personal information to erasing files on your computer. Some malware is created to restrict or block things that you want to do on your PC. It may not allow you to download anything from the net or it will prevent you from accessing a few or all of the internet sites, particularly the antivirus sites. If you’re reading this article, odds are you’re stuck with a virus infection that is preventing you to download or install Safebytes Anti-Malware software on your computer system. There are a few solutions you can attempt to get around with this particular obstacle.

Boot your computer in Safe Mode

If the malware is set to load automatically when Microsoft Windows starts, entering safe mode could block this attempt. Just the minimum required applications and services are loaded whenever you boot your computer or laptop in Safe Mode. Here are the steps you need to follow to boot into the Safe Mode of your Windows XP, Vista, or 7 computers (visit Microsoft site for directions on Windows 8 and 10 PCs). 1) At power on, hit the F8 key before the Windows splash screen begins to load. This would conjure up the Advanced Boot Options menu. 2) Select Safe Mode with Networking using arrow keys and hit Enter. 3) Once you get into this mode, you will have internet access once again. Now, obtain the malware removal program you want by using the internet browser. To install the software, follow the directions in the installation wizard. 4) Following installation, do a complete scan and allow the program to remove the threats it detects.

Use an alternate web browser to download security software

Malicious code could exploit vulnerabilities in a particular browser and block access to all antivirus software websites. If you are not able to download the anti-virus software program using Internet Explorer, it means malware may be targeting IE’s vulnerabilities. Here, you need to switch over to another web browser such as Chrome or Firefox to download Safebytes Anti-malware software.

Install and run anti-malware from a USB drive

Here’s yet another solution which is utilizing a portable USB antivirus software package that can check your computer for viruses without the need for installation. Follow these steps to use a USB flash drive to clean your corrupted computer system. 1) Download Safebytes Anti-Malware or Windows Defender Offline onto a clean PC. 2) Insert the USB drive into the clean computer. 3) Double-click the exe file to run the installation wizard. 4) When asked, choose the location of the USB drive as the place in which you would like to store the software files. Follow the on-screen instructions to complete the installation. 5) Disconnect the flash drive. You can now utilize this portable anti-malware on the affected computer system. 6) Double-click the antivirus program EXE file on the USB flash drive. 7) Hit the “Scan” button to run a full computer scan and remove viruses automatically.

Protect your PC from Malware With SafeBytes Security Suite

If you are looking to install anti-malware software for your computer, there are plenty of tools on the market to consider nonetheless, you should not trust blindly anyone, no matter whether it is a paid or free software. A few are good ones, some are ok types, and some are simply just bogus anti-malware applications that can damage your personal computer themselves! You need to pick one that is efficient, practical, and has a strong reputation for its malware protection. On the list of strongly recommended software by industry analysts is SafeBytes Anti-Malware, the safest program for Microsoft Windows. SafeBytes anti-malware is a trusted software that not only secures your computer permanently but is also very user-friendly for people of all ability levels. With its outstanding protection system, this tool will automatically detect and remove most of the security threats, including browser hijackers, viruses, adware, ransomware, PUPs, and trojans. SafeBytes possesses a plethora of amazing features that can help you protect your PC from malware attack and damage. Here are a few of the best ones: Most effective AntiMalware Protection: Using its enhanced and sophisticated algorithm, this malware removal tool can identify and eliminate the malware threats hiding within your computer system effectively. Active Protection: Malware programs trying to get into the system are identified and stopped as and when detected by the SafeBytes active protection shields. It will constantly monitor your laptop or computer for hacker activity and also gives users advanced firewall protection. Web Protection: SafeBytes checks and provides a unique safety rating to every single website you visit and block access to web pages considered to be phishing sites, thus safeguarding you against identity theft, or known to contain malware. High-Speed Malware Scanning Engine: This tool has got one of the fastest and most efficient virus scanning engines in the industry. The scans are very accurate and take a little time to complete. Lowest CPU and Memory Usage: SafeBytes is a lightweight tool. It consumes a very small amount of processing power as it operates in the background so you are free to use your Windows-based PC the way you really want. 24/7 Online Support: For any technical queries or product support, you can get 24/7 expert assistance through chat and e-mail.

Technical Details and Manual Removal (Advanced Users)

If you wish to manually remove MovieGoat without the use of an automated tool, it may be possible to do so by removing the program from the Windows Add/Remove Programs menu, or in cases of browser extensions, going to the browsers AddOn/Extension manager and removing it. You will likely also want to reset your browser. To ensure the complete removal, manually check your hard drive and registry for all of the following and remove or reset the values accordingly. Please note that this is for advanced users only and may be difficult, with incorrect file removal causing additional PC errors. In addition, some malware is capable of replicating or preventing deletion. Doing this in Safe Mode is advised.

The following files, folders, and registry entries are created or modified by MovieGoat

Files: %Documents and Settings%All UsersApplication DataMovie Goat virus %program files %internet explorer Movie Goat[random].mof %program files (x86)%common filesspeechengines %programData%suspicious folders %windows%system32drivermessy code.dll %AppData%[malware program name]toolbar uninstallStatIE.dat %app data% Movie Goat virus Registry: [HKEY_LOCAL_MACHINESOFTWAREMicrosoftMATSWindowsInstallerEAF386F0-7205-40F2-8DA6-1BABEEFCBE8914.07.30.07.52.18]”ProductName”=”Movie Goat” [HKEY_LOCAL_MACHINESOFTWAREWow6432NodeMicrosoftTracingMuvic_RASAPI32] [HKEY_LOCAL_MACHINESOFTWAREWow6432NodeMicrosoftTracingMuvic_RASMANCS] [HKEY_LOCAL_MACHINESOFTWAREWow6432NodeMicrosoftWindowsCurrentVersionUninstallEAF386F0-7205-40F2-8DA6-1BABEEFCBE89] “DisplayName”=”Movie Goat” [HKEY_USERSS-1-5-21-3825580999-3780825030-779906692-1001SoftwareMicrosoftWindowsCurrentVersionUninstall50f25211-852e-4d10-b6f5-50b1338a9271] “DisplayName”=”Movie Goat”
Read More
Intel i9 Alder Lake better than AMD Ryzen 9
Alder LakeIf we are to believe news from Intel, new series of processors based on Alder Lake architecture are about to be released somewhere in October. Alder Lake is the 12th Generation Core of Intel processors and it is meant to have all advantages of the current CPU structure. I9 is aimed to pack a punch against its competitors with technology including eight high-performance Golden Cove cores (P-cores) with Hyper-Threading and eight energy-efficient Goldmont (E-cores) equipped with a 30MB L3 cache and operating at high clock speeds. During the benchmark test, the new CPU outperformed all of Intel’s previous Rocket Lake structure processors which is logically expected but the big surprise came from results that indicate better performance than Apple’s new M1 processor even in single-threaded performance which is supposed to be best in that field. Another surprise was really beating AMD Ryzen 9 in each field. If we take into account that i9 has 16 cores in total and can process 24 threads against Ryzen 9 with 16 Cores and 32 threads this is an impressive feature. Now truth to be told Alder lake has massive L3 cache and microarchitectural advantages and consumes much more power but the results of performance are high. Also, note that this early CPU is not really a mass production one and maybe some things will still change but early results are very satisfactory. We will see what will price tag be since in this age of shortage and competition that will also play a big role in its overall success. Speaking of competition I eagerly await AMD’s response to this, in any way it seems that the CPU market is for some turbulence which is always a good thing for the final customer and I welcome it.
Read More
Fix error code 16 in Windows 10
Access denied error code 16 is tied to websites, it is an error which you will encounter when trying to visit some specific website or if you are unlucky on all of the websites. Lucky for us this error is fixable and in order for us to do this, follow this guide for possible solutions.
  1. Check Date and Time, Incorrect date and time can often interfere with services in your Windows, browsers are not different and this can cause some websites not to be shown. Check your date and time and set it correctly if needed.
  2. Try to access the website from another device. If you manage to open a website on another PC or some other device then keep reading in order to find the solution, if you can not, then the problem is on the website itself.
  3. Turn off Firewall or antivirus. New antivirus and firewall applications can sometimes mark certain websites as malicious and will cut contact with them rendering them unable to be accessed or opened. Try turning the firewall and antivirus temporarily off and then try to access the website.
  4. Try opening web site in another browser. To eliminate browser-specific issues and their configuration, try opening the website in another browser.
  5. Disable PROXI server. Some applications, especially malicious ones can change your proxi setting in LAN. go to your LAN settings and turn off proxi if it is enabled.
  6. Reset your Browser. If this issue is caused by bad data in your browser or by its settings and preferences, resetting the complete browser will solve the issue.
  7. Use VPN. Sometimes the reason for you was not able to access some website might be because the site is not available for your region, to bypass this issue use VPN and reroute your location.
Read More
Reset Windows computer without Settings app
As you know, the Settings app is a vital part of Windows 10 as it helps in fixing issues in the system and offers users access to various Troubleshooters, as well as the Reset function and many more. So if you want to Reset this PC or a Windows Store app, you need to use the Settings app to do so. However, one of the most annoying errors you can encounter when using the Settings app is that it crashes or sometimes does not open at all. Thus, if you are having issues with this app, worry not for there are alternative ways you can try to reset your Windows 10 PC. For you to reset your Windows 10 PC without using the Settings app, the main option you have is to use the Advanced Startup options and there are different methods by which it can be accessed. It can be accessed via Lockscreen, Command Prompt window, or via Start Menu.

Option 1 – Reset Windows 10 via Lockscreen

  • You need to first boot into the Advanced Startup options from the lock screen. If you’re already logged in to your account, you have to hit the Win + L keys to get on the lock screen.
  • Next, click on the Power button located at the bottom right corner of the screen.
  • After that, hold the Shift key and click on Restart to restart your computer into the Advanced Setup option mode. And from there, you can reset your Windows 10 computer.

Option 2 – Reset Windows 10 via Command Prompt

  • Search for “cmd” in the Cortana search box or hit the Win + R keys to open the Run box and type “cmd” in the field and hit Enter to open Command Prompt.
  • If a User Account Control or UAC prompt appears, click Yes to proceed in opening Command Prompt.
  • After that, type the following command and hit Enter to execute it:
shutdown /r /o /f /t 00
  • After you execute the command, it will restart your computer into the Advanced Startup options where you can reset your Windows 10 computer.

Option 3 – Reset Windows 10 via Start Menu

  • Tap the Win key or click on the Start button located in the Taskbar.
  • Then click on the Power button at the bottom right portion of the screen.
  • Next, press and hold the Shift key on your keyboard and then click on Restart. This will restart your Pc into the Advanced Startup options.
Note: Once you have access to the Advanced Startup options, you have to go to the setting which allows you to Reset your Windows 10 PC. All you have to do is select Troubleshoot > Reset this PC to reach the following screen Afterward, select either the “Keep my files” option or the “Remove everything” option depending on your preference, and then proceed to the next on-screen instructions that follow to reset your Windows 10 computer.
Read More
How to remove EasyDocMerge from your System

EasyDocMerge Toolbar is a Browser Hijacker for Google Chrome. Usually, such browser extensions are installed without your knowledge. These types of Browser Hijackers are often the cause of many problems while surfing the Internet. The most common problems are unwanted pop-ups, underlined words, additional ads, sponsored links, to generate web traffic and earn revenue of the advertising networks by gathering the users browsing data and sending it back to the Mindspark ads network.

When installed this extension will hijack your home page setting it to MyWay.com, it will also change your new tab page to EasyDocMerge (Powered by MyWay.com Search).

About Browser Hijackers

Browser hijacking is a form of an unwanted program, commonly a web browser add-on or extension, which then causes modifications in the browser’s settings. Browser hijacker malware is developed for a variety of reasons. It redirects you to the sponsored internet sites and inserts adverts on your browser that assist its creator to generate earnings. A lot of people think that the browser hijacker is only a harmless website but that is not the case. Nearly every browser hijacker poses an existent threat to your online safety and it’s important to classify them under privacy dangers. They don’t just mess up your browsers, but browser hijackers can even modify the computer registry, leaving your computer susceptible to various other types of attacks.

Key symptoms that your web browser has been hijacked

There are various signs of web browser hijacking: the home page of the web browser is changed unexpectedly; new bookmarks pointing to porn websites are added to your favorite pages; the essential web browser settings are modified and unwanted or insecure resources are added to the trusted sites list; you’ll see many toolbars on your web browser; you see a lot of pop-up ads on your computer screen; your web browser has become unstable or starts running sluggishly; Inability to navigate to particular sites, particularly anti-malware and other computer security software sites.

How they infect computers

Browser hijackers infect computer systems by numerous means, including via a file-share, a drive-by download, or an infected e-mail attachment. They can also originate from any BHO, extension, add-on, toolbar, or plug-in with malicious intent. A browser hijacker may also come bundled up with some free software that you unintentionally download to your computer, compromising your internet security. Typical examples of browser hijackers include CoolWebSearch, Conduit, Coupon Server, OneWebSearch, RocketTab, Searchult.com, Snap.do, and Delta Search. Browser hijackers may record user keystrokes to gather potentially important information that leads to privacy issues, cause instability on computers, drastically disrupt user’s browsing experience, and finally slow down the system to a point where it will become unusable.

Removal

Certain browser hijacking could be simply reversed by discovering and eliminating the corresponding malware software from your control panel. In some cases, it can be a difficult job to identify and eliminate the malicious component because the associated file might be running as part of the operating system process. You should consider carrying out manual fixes only if you are a tech-savvy person, as potential risks are associated with tinkering with the system registry and HOSTS file. Installing and running antivirus programs on the affected computer could automatically erase browser hijackers and other malicious applications. Safebytes Anti-Malware contains a state-of-the-art anti-malware engine to help you prevent browser hijacking in the first place, and clean up any pre-existing issues

What you can do if Virus Prevents You From Downloading Or Installing Anything?

Practically all malware is bad, but certain kinds of malware do a lot more damage to your computer than others. Some malware sits in between your computer and the internet connection and blocks a few or all internet sites that you would like to visit. It will also prevent you from adding anything to your PC, especially antivirus software. If you’re reading this now, you might have probably recognized that a malware infection is the real cause of your blocked web connectivity. So how to proceed if you need to install an antivirus application such as Safebytes? Although this kind of problem can be difficult to get around, there are a few steps you can take.

Eliminate viruses in Safe Mode

If any virus is set to run automatically when Microsoft Windows starts, stepping into Safe Mode could block this attempt. Only minimal required programs and services are loaded when you boot your laptop or computer in Safe Mode. You will need to do the following to eliminate malware in Safe mode. 1) At power on/start-up, hit the F8 key in 1-second intervals. This should bring up the Advanced Boot Options menu. 2) Select Safe Mode with Networking using arrow keys and press ENTER. 3) When this mode loads, you should have the internet. Now, utilize your browser normally and navigate to https://safebytes.com/products/anti-malware/ to download and install Safebytes Anti-Malware. 4) Once the software is installed, allow the diagnostic scan to run to eliminate viruses and other threats automatically.

Obtain the security program using an alternate web browser

Some malware might target vulnerabilities of a specific web browser that obstruct the downloading process. The best way to avoid this problem is to pick a web browser that is renowned for its security features. Firefox has built-in Phishing and Malware Protection to help keep you secure online.

Run anti-malware from your USB drive

To effectively get rid of the malware, you need to approach the problem of running antivirus software on the infected computer from a different angle. Abide by these steps to run the anti-virus on the affected computer. 1) On a virus-free PC, download and install Safebytes Anti-Malware. 2) Plug the Flash drive into the clean computer. 3) Double-click the Setup icon of the antivirus program to run the Installation Wizard. 4) Choose the flash drive as the destination for saving the file. Follow the on-screen instructions to finish the installation process. 5) Remove the pen drive. You can now utilize this portable anti-virus on the infected computer system. 6) Double-click the antivirus program EXE file on the USB flash drive. 7) Simply click “Scan Now” to run a complete scan on the affected computer for viruses.

Protect Your Computer Against Viruses and Malware With SafeBytes Security Suite

Today an anti-malware program can protect your laptop or computer from different types of internet threats. But how to select the best one amongst countless malware protection software that is available out there? As you might be aware, there are several anti-malware companies and tools for you to consider. A few are really worth your money, but many aren’t. You need to choose one that is dependable, practical, and has a strong reputation for its malware source protection. Among few good applications, SafeBytes Anti-Malware is the strongly recommended software program for the security-conscious user. SafeBytes anti-malware is a powerful, highly effective protection application made to help end-users of all levels of computer literacy in detecting and removing harmful threats from their computer. After you have installed this software, SafeByte's sophisticated protection system will ensure that no viruses or malicious software can seep through your personal computer.

SafeBytes has fantastic features when compared to various other anti-malware programs. Listed below are some of the great features included in the software.

Real-time Active Protection: SafeBytes gives you round-the-clock protection for your personal computer limiting malware intrusions instantly. It will examine your PC for suspicious activity at all times and safeguards your PC from illegal access. Antimalware Protection: Safebytes is made on the best virus engine in the industry. These engines can identify and get rid of threats even during the initial phases of a malware outbreak. “Fast Scan” Features: SafeBytes’s high-speed malware scanning engine minimizes scanning times and extends the life of the battery. Simultaneously, it will effectively find and get rid of infected files or any internet threat. Web Protection: SafeBytes checks and gives a unique safety rating to every website you visit and block access to webpages known to be phishing sites, thus protecting you against identity theft, or known to contain malicious software. Low CPU Usage: SafeBytes is a lightweight application. It consumes an extremely small amount of processing power as it runs in the background so you are free to use your Windows-based computer the way you want. 24/7 Premium Support: Professional technicians are at your disposal 24/7! They will immediately fix any technical issues you may be encountering with your security software. Simply put, SafeBytes has formulated a meaningful anti-malware solution that is aimed to protect your computer against various malware. Malware trouble will become a thing of the past once you put this software to use. For top protection and the best value for money, you can’t get better than SafeBytes Anti-Malware.

Technical Details and Manual Removal (Advanced Users)

If you want to manually remove EasyDocMerge without using an automated tool, it may be possible to do so by removing the application from the Microsoft Windows Add/Remove Programs menu, or in cases of browser plug-ins, going to the browsers AddOn/Extension manager and removing it. You’ll likely also want to totally reset your browser to its default configuration settings. To be certain of complete removal, find the following registry entries on your computer and remove them or reset the values appropriately. However, this is a tricky task and only computer experts can perform it safely. Moreover, some malicious programs are capable to defend against its removal. It is highly recommended that you do the removal process in Windows Safe Mode.
Files: %UserProfile%\Local Settings\Application Data\EasyDocMergeTooltab %LOCALAPPDATA%\Google\Chrome\User Data\Default\Extensions\mabloidgodmbnmnhoenmhlcjkfelomgp %UserProfile%\Local Settings\Application Data\Google\Chrome\User Data\Default\Extensions\mabloidgodmbnmnhoenmhlcjkfelomgp %PROGRAMFILES(x86)%\EasyDocMerge_ex %PROGRAMFILES%\EasyDocMerge_ex %USERPROFILE%\Application Data\EasyDocMerge_ex %USERPROFILE%\AppData\LocalLow\EasyDocMerge_ex %UserProfile%\Local Settings\Application Data\EasyDocMerge_ex Registry: HKEY_CURRENT_USER\Software\AppDataLow\Software\EasyDocMerge_ex HKEY_CURRENT_USER\Software\EasyDocMerge_ex HKEY_LOCAL_MACHINE\SOFTWARE\Wow6432Node\Microsoft\Internet Explorer\Low Rights\ElevationPolicy\5e3ee57e-7d53-458f-a124-16aab06de2d6 HKEY_LOCAL_MACHINE\SOFTWARE\Wow6432Node\Microsoft\Internet Explorer\Low Rights\ElevationPolicy\64366ff9-336f-4002-a665-406a1d259cd3 HKEY_LOCAL_MACHINE\SOFTWARE\Wow6432Node\Microsoft\Internet Explorer\Low Rights\ElevationPolicy\87008eb3-6282-4075-9889-62f381451926 HKEY_LOCAL_MACHINE\SOFTWARE\Wow6432Node\Microsoft\Internet Explorer\Low Rights\ElevationPolicy\96107269-cd2e-4175-a61a-5c2e8540e8a5 HKEY_LOCAL_MACHINE\SOFTWARE\Microsoft\Internet Explorer\Low Rights\ElevationPolicy\2741d16e-6298-4345-8988-7979ffd45266 HKEY_LOCAL_MACHINE\SOFTWARE\Microsoft\Internet Explorer\Low Rights\ElevationPolicy\5e3ee57e-7d53-458f-a124-16aab06de2d6 HKEY_LOCAL_MACHINE\SOFTWARE\Microsoft\Internet Explorer\Low Rights\ElevationPolicy\64366ff9-336f-4002-a665-406a1d259cd3 HKEY_LOCAL_MACHINE\SOFTWARE\Microsoft\Internet Explorer\Low Rights\ElevationPolicy\87008eb3-6282-4075-9889-62f381451926 HKEY_CURRENT_USER\Software\Microsoft\Internet Explorer\DOMStorage\easydocmerge.dl.tb.ask.com HKEY_CURRENT_USER\Software\Microsoft\Internet Explorer\SearchScopes\8bf0dd5e-ea06-48db-97a4-df286e054079 HKEY_CURRENT_USER\Software\Microsoft\Internet Explorer\Approved Extensions, value: 389672DB-CD13-4CF2-AED1-3170BC0DD6EC HKEY_LOCAL_MACHINE\SOFTWARE\Wow6432Node\Microsoft\Internet Explorer\SearchScopes\8bf0dd5e-ea06-48db-97a4-df286e054079 HKEY_CURRENT_USER\Software\EasyDocMerge HKEY_CURRENT_USER\Software\Microsoft\Internet Explorer\LowRegistry\DOMStorage\easydocmerge.dl.myway.com
Read More
How to Fix msrtn32.exe error or high CPU usage
If your Windows 10 computer slows down, the first thing you can do is to check the status of the resource usage in the Task Manager. In such cases, it shoots up to even 1000% which causes the system to either hang or freeze since some programs are using a major chunk of system resources. And this is the case with msrtn32.exe. Msrtn32.exe is a malicious file that may try to steal your digital currency. It can get installed on your computer when you install a browser plugin or extension that can modify the default settings of browsers, the content of web pages, search results, as well as display tons of intrusive ads. So if you see msrtn32.exe under the Processes tab of the Task Manager If you see msrtn32.exe under the Processes tab of your Task Manager, refer to the suggestions given below to get rid of it and restore your computer’s normal function. Before you proceed, take note that this executable file is found in the following location:
C:/Program Files(x86)msrtn32

Option 1 – Delete the folder where msrtn32.exe is located

The first thing you can do is to go to C:/Program Files(x86)/msrtn32. From there, look for the malicious executable file and delete its folder. If you are not able to delete the folder, make sure that you’re logged in as administrator and then try again.

Option 2 – Try scanning your computer using Windows Defender

Since you are dealing with a malicious file, if you weren’t able to delete the folder where the file is located, you can scan your computer using the built-in Windows Defender program and then eliminate the malicious file. Follow the steps below to do so:
  • Tap the Win + I keys to open Update & Security.
  • Then click on the Windows Security option and open Windows Defender Security Center.
  • Next, click on Virus & threat protection > Run a new advanced scan.
  • Now make sure that Full Scan is selected from the menu and then click the Scan Now button to get started.
Read More
1 2 3 171
Logo
Copyright © 2023, ErrorTools. All Rights Reserved
Trademark: Microsoft Windows logos are registered trademarks of Microsoft. Disclaimer: ErrorTools.com is not affiliated with Microsoft, nor claims direct affiliation.
The information on this page is provided for information purposes only.
DMCA.com Protection Status