Logo

There is insufficient disk space to ...

If you are trying to copy a folder or file in your Windows 10 computer but encountered an error that says, “There is insufficient disk space to complete operation”, then you’ve come to the right place as this post will walk you through how you can fix the error. This kind of problem could be due to lack of disk space, corrupted disk, and many more. In such cases, this error usually pops up when you move or copy a file or folder to a particular location.

There are several potential fixes you can check out to fix this error. You can try to run the Storage Sense or Disk Cleanup or try copying or moving the file in a Clean Boot State. You could also try formatting the given partition to NTFS. For more information, refer to each one of the options provided below.

Option 1 – Try to delete the temporary files

The error could be caused by some temporary or junk files in your computer and so you need to clear them up to fix the problem. You can achieve that using the Storage Sense feature.

  • Open Setting > System > Storage from the WinX Menu.
  • From there, you will see a list of all the local and connected storage devices along with the details on the free space. Make sure that Storage Sense is on.
  • Next, find a link that says “Free Up Space” and click it to open.
  • After that, a screen which is the built-in program in Windows 10 will appear and will scan your computer for the following junk files so you can free up disk space:
    • Windows Upgrade Log Files
    • The system created Windows Error Reporting Files
    • Thumbnails
    • Temporary Internet Files
    • Previous Windows Installation Files
    • Delivery Optimisation Files
    • DirectX Shader Cache
  • Choose the files you want to get rid of and then click on the remove files option. Note that you’ll have an idea of the total size as you select any of the junk files listed above.
  • Now go to the “Free Up Space Now” section and click the Clean now button. This will get rid of all the temporary or junk files in your computer and should hopefully fix the “There is insufficient disk space to complete operation” error.

Option 2 – Restart your computer in a Clean Boot State

If the first options didn’t work and you still see the “There is insufficient disk space to complete operation” error when you copy folder or files, you can try putting your computer in a Clean Boot State and then again.

  • Log onto your PC as an administrator.
  • Type in MSConfig in the Start Search to open the System Configuration utility.
  • From there, go to the General tab and click “Selective startup”.
  • Clear the “Load Startup items” check box and make sure that the “Load System Services” and “Use Original boot configuration” options are checked.
  • Next, click the Services tab and select the “Hide All Microsoft Services” check box.
  • Click Disable all.
  • Click on Apply/OK and restart your PC. (This will put your PC into a Clean Boot State. And configure Windows to use the usual startup, just simply undo the changes.)
  • Now try to connect copy the folder or file once more and check if the error is now gone.

Option 3 – Try formatting the given partition to NTFS

Even though this option may take a lot of your time, it is proven to fix the “There is insufficient disk space to complete operation” error as reported by many users who also went through the same dilemma. So if the removable disk is showing the same error message no matter which computer you insert it, you might have to format the drive with the help of Command Prompt. But before you do that, you must know that all the contents of your drive will be permanently deleted after you format it.

  • Tap Win + R to launch Run.
  • Type in cmd and then tap Enter or click OK to open the Command Prompt.
  • And in the elevated window of Command Prompt, type in the following command:

format F: /fs:ntfs

In the command given above, “F” is the drive letter and “NTFS” is the file system you want. Just remember to replace “F” with the drive letter you want to format as well as the file system you prefer. Brace yourself as this process might take quite a while even if you only have a 4 GB USB drive – so you must not close the window under any circumstances as the drive might get corrupted and wait for the process to finish.

Do You Need Help with Your Device?

Our Team of Experts May Help
Troubleshoot.Tech Experts are There for You!
Replace damaged files
Restore performance
Free disk space
Remove Malware
Protects WEB browser
Remove Viruses
Stop PC freezing
GET HELP
Troubleshoot.Tech experts work with all versions of Microsoft Windows including Windows 11, with Android, Mac, and more.

Share this article:

You might also like

Fix Windows Activation Error 0x80070005
Windows uses 2 types of keys for its activation, KMS or MAK. These keys should work without any issues since they are elevated with higher permissions but in some cases, they are by accident run without their proper permission, and then we have access denied error or error 0x80070005 To resolve this issue please first check if not by any chance your antivirus or firewall is preventing slmgr.bs file to access the right permissions, that being said if the previous solution is not working note that you have to be an administrator of the system or have administrator privileges. As an administrator, you will have to use Software Licencing Management Tool or short SLMGR.VBS, a VBS file in Windows used for its activation purposes. As an administrator, open Command prompt with admin permissions and then run slmgr.vbs This will make sure that activation goes through, make sure to use proper options like:
/ipk <ProductKey> or /ato [<Activation ID>]
Read More
Fix Windows Setup Error code 0x80070006
Windows 10 setup is a bit complicated which is why it’s uncommon to encounter errors along the way. One of these errors you can encounter when running Windows Setup is the error code 0x80070006. If you are trying to fix this error, you’ve come to the right place as this post will guide you on how to do so. When you get the error code 0x80070006, you will see the following error message:
“Windows cannot install required files. Network problems may be preventing Windows from accessing the file. Make sure the computer is connected to the network and restart the installation. Error code: 0x80070006.”
As stated in the error message, this kind of error in Windows Setup is due to an unstable or unreliable network connection. Such problems can also be triggered by network hardware which includes the network adapters and the network routers. To fix this error, you need to check your internet connection and router or run the built-in network troubleshooter. You could also try using a different USB port or recreate a bootable USB drive as well as get a new Windows image file.

Option 1 – Try checking your internet connection and router

As mentioned, this Windows 10 setup error could be due to an unstable internet connection. To fix it, the first thing you have to do is to check the status of your internet connection and see if it is stable and has enough speed to run the setup. If it’s slow, then it’s no wonder that the setup process failed. To fix that, you can try to reboot your router from its admin panel or you can just turn it off manually and then turn it back on after a couple of seconds. In addition, you also have to check if it’s plugged in properly.

Option 2 – Try to run the Network Adapter troubleshooter

The next thing you can do is to run the Network Adapter troubleshooter. This built-in troubleshooter can help resolve any network issues. It can reset the adapters, remove cached settings, and many more. To run it, follow these steps:
  • Go to Settings > Update & security and from there select Troubleshoot.
  • Next, scroll down and select the “Network Adapter” option from the right pane.
  • Then click on the Run Troubleshooter” button.
  • After that, your computer will check for any possible errors and will pinpoint the root cause of the problem if possible.

Option 3 – Try to use a different USB port

You might want to check the integrity of the USB port where connected the device if you are using a bootable USB storage device to run the setup for Windows 10. All you have to do is switch the USB port or try to use another bootable USB device and see if it fixes the problem.

Option 4 – Try recreating the Windows 10 installation USB

Recreating the Windows 10 installation USB might help in fixing the problem. You can use a USB drive to do so but make sure that it has a great read-write speed. Follow the steps below to recreate Windows 10 installation USB”
  • Click this link and then click the Download Tool Now button.
  • Next, click the “Use the tool to create installation media (USB flash drive, DVD, or ISO file)…” option and follow the next given instructions on the screen.
  • Now select the ISO file option in step 5.
  • After that, you should now have an ISO file.
  • Next, go to the location where you’ve downloaded the ISO file.
  • Then right-click on the Windows 10 ISO file and select the Open with option and then select File Explorer.
  • Now click on “setup.exe” and follow the next instructions that appear on the screen. When asked, you have to select either Nothing (clean install) or Keep personal files only option. Take note that you must not select the “Keep personal files, apps, and Windows settings since it doesn’t really work.

Option 5 – Try getting a new Windows image file

If none of the four given options above worked, you might want to get a newer installation image using the Windows Media Creation tool. After that, create the bootable USB drive and once completed and then try to run the Windows 10 setup again.
Read More
Fix DRIVER_POWER_STATE_FAILURE error
There are times when you suddenly encounter a Blue Screen error like DRIVER_POWER_STATE_FAILURE error when resuming from Sleep or right after you shut down or restart as well as switch from Hibernate mode. This kind of Blue Screen error is due to some issue with the driver state. Moreover, the bug check “0x0000009F” in the error also indicates that a driver is in an inconsistent or invalid power state. The DRIVER POWER STATE FAILURE Blue Screen error usually occurs during events that involve power state transitions like shutting down, moving in or out of standby mode, or hibernate mode. To resolve this error, you can check out the suggestions given below.

Option 1 – Update the Device drivers

The device driver installed in your computer might be incompatible with your operating system which is the reason why the DRIVER POWER STATE FAILURE Blue Screen error occurs. To fix that, you have to update your device drivers.
  • Reboot your computer into Safe Mode with networking support.
  • Tap the Win + R keys on your keyboard to open the Run dialog box.
  • After that, type “msc” in the field and hit Enter or click OK to open the Device Manager.
  • After opening the Device Manager, update all the outdated Device drivers on your computer.
  • Next, right-click on all the driver entries that are appropriately labeled, and then click the Update driver option.
  • Now restart your PC and check if the BSOD error is fixed or not.

Option 2 – Uninstall any faulty device drivers

  • Tap the Win + R keys on your keyboard to open the Run dialog box.
  • After that, type “msc” in the field and hit Enter or click OK to open the Device Manager.
  • From there, look for any device driver which has a yellow exclamation mark which indicates that something is wrong with them.
  • And then right-click on each one of them and click on Uninstall.
  • Once you’re done uninstalling the faulty drivers, restart your computer and allow your computer to reinstall the drivers you just uninstalled.

Option 3 – Run the Blue Screen Troubleshooter

The Blue Screen troubleshooter is a built-in tool in Windows 10 that helps users in fixing BSOD errors like rtwlane.sys Blue Screen error. It can be found on the Settings Troubleshooters page. To use it, refer to these steps:
  • Tap the Win + I keys to open the Settings panel.
  • Then go to Update & Security > Troubleshoot.
  • From there, look for the option called “Blue Screen” on your right-hand side and then click the “Run the troubleshooter” button to run the Blue Screen Troubleshooter and then follow the next on-screen options. Note that you might have to boot your PC into Safe Mode.

Option 4 – Try to remove external hardware

If there is any external hardware plugged into your computer especially the new ones, you can try removing it and then check if the Blue Screen error persists. If the problem gets solved, you might want to update the driver of that particular hardware. On the other hand, if you’re still getting the error, then proceed to the next given options below.

Option 5 – Try resetting Windows 10

To fix this BSOD error, you can try resetting Windows 10. Doing so won’t get rid of any file in your system – instead of erasing all your media files and documents, this reset option resets all the system settings and files.

Option 6 – Try running the System File Checker Scan

The SFC or System File Checker scan could detect and automatically repair damaged system files that could be causing the DRIVER POWER STATE FAILURE Blue Screen error. SFC is a built-in command utility that helps in restoring corrupted files as well as missing files. It replaces bad and corrupted system files to good system files. To run the SFC command, follow the steps given below.
  • Tap Win + R to launch Run.
  • Type in cmd in the field and tap Enter.
  • After opening Command Prompt, type in sfc /scannow
The command will start a system scan which will take a few whiles before it finishes. Once it’s done, you could get the following results:
  1. Windows Resource Protection did not find any integrity violations.
  2. Windows Resource Protection found corrupt files and successfully repaired them.
  3. Windows Resource Protection found corrupt files but was unable to fix some of them.
Read More
Blizzard caught destroying evidence
Blizzard employeesCalifornia's Department of Fair Employment & Housing has widened its anti-discrimination lawsuit against Activision Blizzard and claims the publisher has been shredding vital documents relevant to the ongoing investigation. A recent report from Kotaku described the department as offering poorly paid, highly insecure positions, with a culture of hostility towards LGBTQ+ testers. The DFEH's rewording of "employees" to "workers" now hopes to take these contractors' experiences into account. "As a contract employee, I feel there's a lot of pressure to excel, impress, and move through the ranks as fast as you can before your contract ends and you're forced to go 3 months without income or find another job," Axios reports one worker saying. "I take pride in what I do, but it feels like it's never enough." Activision's contentious hiring of union-busting third-party law firm WilmerHale "directly interferes" with its own investigation, it says. By going to WilmerHale, Activision appears to be claiming that all work related to the investigation is privileged and can't be shared with DFEH. The suit also claims that Activision HR shredded documents related to "investigations and complaints", against its legal obligation to retain them during the investigation. The relevant parts of the updated lawsuit were shared by Axios reporters Stephen Totilo and Megan Farokhmanesh, the former also noting that the DFEH "fixed their misspelling of Bill Cosby's name". "DFEH is also informed and aware that documents and records have not been maintained as required by law or by the DFEH's Document Retention Notice," the complaint reads, "including but not limited to documents related to investigations and complaints were shredded by human resource personnel and emails are deleted thirty days after an employees separation."

Speculation and answer from Activision Blizzard

Blizzard employee Jessica Gonzalez suspects that the costs of fines associated with destroying these documents may have been an easier blow for Blizzard to take than any penalties drawn from their existence in helping the lawsuit go through. In an email to Kotaku, Activision denied the shredding allegations and issued a statement outlining steps it had taken to improve company culture—including the ousting of high-level executives like Blizzard president J. Allen Brack. The full statement reads: "Throughout our engagement with the DFEH, we have complied with every proper request in support of its review even as we had been implementing reforms to ensure our workplaces are welcoming and safe for every employee. Those changes continue today, and include:
  •     Several high-level personnel changes
  •     Revamped hiring and recruiting practices requiring diverse interview panels
  •     Greater transparency on pay equity
  •     Expanded and improved training and investigative capabilities for human resource and compliance staff
  •     Created investigation teams outside of business units to support greater independence
  •     Restructured divisions to support greater accountability
  •     Enhanced review processes to include evaluation of managers by employees
  •     Clear boundaries on workplace behavior with a zero-tolerance approach to harassment and other actions that diminish or marginalize.
"We strive to be a company that recognizes and celebrates the diverse talents and perspectives that lead to the creation of great, globally appealing entertainment. We have provided the DFEH with clear evidence that we do not have gender pay or promotion disparities. Our senior leadership is increasingly diverse, with a growing number of women in key leadership roles across the company. "We share DFEH’s goal of a safe, inclusive workplace that rewards employees equitably and is committed to setting an example that others can follow."

California and RIOT

Beyond Activision Blizzard, California's DFEH has also probed into League of Legends creator Riot Games, accusing the studio of dragging its heels over sexual harassment allegations dating back to 2019. Riot denied the allegations, telling us that it "will never retaliate against anyone for talking to any government agency".
Read More
How to remove CyboScan PC Optimizer

CyboScan PC Optimizer is promoted as a useful program that helps you clean unnecessary files and registry entries on the Windows Operating System. When installed CyboScan PC Optimizer will automatically scan your computer for issues. Upon reviewing the scan results, it was discovered that most, if not all of these issues were exaggerated, and removing them will not give the promised speed boost. The CyboScan PC Optimizer program appears to scan the Registry for installed anti-virus and anti-spyware shields and may recommend users to install products from partners. This Potentially Unwanted Program comes bundled with other Potentially Unwanted Applications that may harm your Operating System or lead to information compromise.

CyboScan PC Optimizer is also known as MySoftScans PC Cleaner, none of these offer any details about the development company and users will end up paying a fee of up to 99.95USD every 3 months for using the program.

About Potentially Unwanted Applications

You have encountered it – you download a free application, then you discover some unwanted applications on your computer or discover a strange toolbar has been added to your web browser. You did not install them, so how did they appear? These unwanted programs, which are called Potentially Unwanted Programs, or PUPs in short, typically tag along as a software bundle when downloading the application and can result in major problems for computer users. The idea of PUP was actually coined to outline this crapware as something other than malicious software. This is because, the majority of PUPs get into a computer not because they slip via the security holes, for instance, but mainly because the users have installed them themselves – 100 % unintentionally needless to say. Even though a PUP isn’t really malware by definition, it could nevertheless be dangerous software that puts the computer at risk exactly the same way a virus does.

Exactly how do unwanted programs look like?

Unwanted programs can be found in many forms. Typically, they could be found in adware bundlers which are known to utilize aggressive and misleading advertising. The majority of bundlers install many adware applications from several companies, each of which has its own EULA policy. Safebytes Anti-malware completely eliminates this threat and protects your machine against PUP or adware infection. Also, the majority of free programs nowadays come with a few unwanted add-ons; in most cases a web browser toolbar or browser modification such as a homepage hijacker. They may track your online routines, redirect your search results to unsafe websites where viruses can be downloaded and installed, hijack your search page, and slow your browser down to a crawl. PUPs lie inside the gray part of the software spectrum. Some PUPs contain keyloggers, dialers, and other software to gather your individual information which often can lead to identity theft. These are software programs that don’t really do anything useful to you; in addition to taking over space on the hard disk, they also slow down your computer, often alter settings without your permission, and the list of bothersome features goes on and on.

How one can prevent PUPs

• Read carefully before agreeing to the license agreement as it might possess a clause about PUPs. • Always pick the custom if you’re provided a choice between Recommended and Custom Installations – never click Next, Next, Next blindly. • Install reputable antivirus software, just like Safebytes Anti-malware that offers real-time protection against PUPs. • Do not download free applications or shareware unless you actually need it. Disable or remove toolbars and browser extensions you don’t actually need. • Always download software from the original site. The majority of PUPs find their way onto your PC is via download portals, so steer clear of it entirely. Remember that although PUPs can cause damage and hinder the proper functioning of your computer, they can’t enter into your computer without your permission, so be watchful not to give it to them.

Malware Blocking Internet And All Anti-Malware Software? Do This!

Malware can cause all kinds of damage when they invade your system, starting from stealing sensitive details to erasing files on your computer. Some malware variants modify web browser settings by adding a proxy server or modify the computer’s DNS settings. In such cases, you will be unable to visit some or all of the internet sites, and therefore unable to download or install the necessary security software to get rid of the computer virus. If you’re reading this article, odds are you’re stuck with a virus infection that is preventing you to download and/or install the Safebytes Anti-Malware program on your PC. There are a few options you can try to get around with this issue.

Make use of Safe Mode to resolve the issue

Safe Mode is a unique, simplified version of Windows in which just essential services are loaded to stop malware and also other problematic applications from loading. In the event, the malware is set to load automatically when the computer boots, switching to this particular mode may well prevent it from doing so. To start the computer into Safe Mode, hit the “F8” key on your keyboard right before the Windows logo screen shows up; Or after normal Windows boot up, run MSConfig, check “Safe Boot” under Boot tab, and then click Apply. Once you’re in Safe Mode, you can try to download and install your antivirus software application without the hindrance of the malicious software. Right after installation, run the malware scanner to remove most standard infections.

Utilize an alternate internet browser to download antivirus software

Some malware only targets certain browsers. If this is your case, use another internet browser as it may circumvent the virus. If you’re not able to download the antivirus application using Internet Explorer, it means malware may be targeting IE’s vulnerabilities. Here, you should switch to an alternate web browser like Firefox or Chrome to download Safebytes software.

Create a portable antivirus for removing malware

Here’s another solution which is using portable USB anti-malware software that can scan your system for viruses without the need for installation. Abide by these steps to run the anti-virus on the affected computer system. 1) On a virus-free computer, install Safebytes Anti-Malware. 2) Plug the Flash drive into the uninfected computer. 3) Double click on the executable file to run the installation wizard. 4) Choose the USB stick as the location for saving the file. Follow activation instructions. 5) Transfer the thumb drive from the uninfected computer to the infected PC. 6) Run the Safebytes Anti-malware directly from the USB drive by double-clicking the icon. 7) Click on “Scan Now” to run a scan on the infected computer for malware.

Protect Your Personal Computer From Viruses and Malware With SafeBytes Security Suite

If you’re looking to install an anti-malware program for your computer, there are various tools on the market to consider but you should not trust blindly anyone, irrespective of whether it is a free or paid program. Some of them do a great job in eliminating threats while some will ruin your PC themselves. When searching for an antivirus program, pick one that provides solid, efficient, and comprehensive protection against all known viruses and malware. On the list of highly recommended software by industry leaders is SafeBytes Anti-Malware, popular security software for Windows computers. Safebytes is among the well-established PC solutions companies, which provide this all-inclusive anti-malware software program. With its most advanced virus detection and repair technology, this software will help you protect your PC against infections caused by different kinds of malware and other internet threats, including spyware, adware, viruses, worms, trojans, keyloggers, potentially unwanted program (PUPs), and ransomware.

SafeBytes anti-malware provides an array of enhanced features that sets it apart from all others. Here are some of the good ones:

Real-time Active Protection: SafeBytes gives complete and real-time security for your personal machine. It will constantly monitor your pc for hacker activity and also gives users superior firewall protection. Antimalware Protection: This deep-cleaning antimalware software program goes much deeper than most antivirus tools to clean out your computer. Its critically acclaimed virus engine detects and disables hard-to-remove malware that hides deep within your PC. Web Security: Safebytes allots all sites a unique safety ranking that helps you to get an idea of whether the webpage you’re going to visit is safe to view or known to be a phishing site. Extremely Speed Scanning: This software has got one of the quickest and most powerful virus scanning engines in the industry. The scans are extremely accurate and take a short amount of time to complete. Lightweight: SafeBytes is a lightweight and easy-to-use anti-virus and anti-malware solution. Since it utilizes low computer resources, this program leaves the computer power exactly where it belongs: with you. 24/7 Guidance: You can get 24/7 technical assistance to promptly resolve any concern with your security tool. On the whole, SafeBytes Anti-Malware is a solid program as it has lots of features and can detect and eliminate any potential threats. Once you have downloaded and installed this software, you will no longer have to worry about malware or any other security worries. If you need sophisticated forms of protection features & threat detections, buying SafeBytes Anti-Malware could be worth the dollars!

Technical Details and Manual Removal (Advanced Users)

If you wish to manually get rid of CyboScan PC Optimizer without the use of an automated tool, it might be possible to do so by removing the application from the Windows Add/Remove Programs menu, or in cases of browser plug-ins, going to the browsers AddOn/Extension manager and removing it. You will likely also want to reset your internet browser. In order to ensure the complete removal, manually check your hard disk and computer registry for all of the following and remove or reset the values accordingly. Having said that, editing the registry is actually a difficult task that only advanced users and professionals should try to fix the problem. Furthermore, certain malware keeps replicating which makes it tough to remove. You’re suggested to do this procedure in Safe Mode.
Files: %APPDATA%\Microsoft\Windows\Start Menu\Programs\Cyboscan PC Optimizer %ALLUSERSPROFILE%\Start Menu\Programs\Cyboscan PC Optimizer %PROGRAMFILES(x86)%\Cyboscan\Cyboscan PC Optimizer Registry: HKEY_LOCAL_MACHINE\Software\[APPLICATION]\Microsoft\Windows\CurrentVersion\Uninstall..Uninstaller E55FEFEA-F506-47DC-A76E-9F7668D6E5C9
Read More
Enable Touch Keyboard in Windows 11
Touch Keyboard
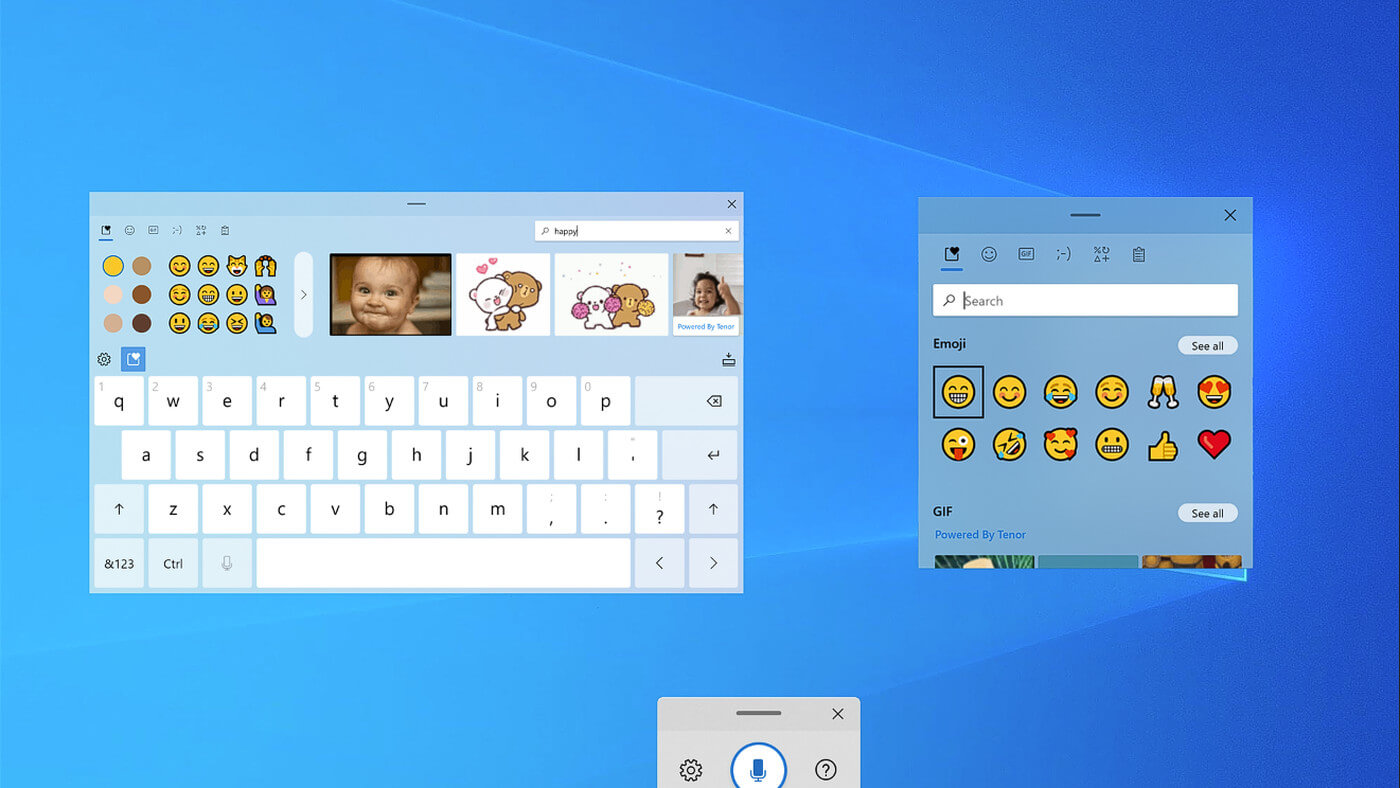
If by any chance you are working on a touchscreen PC, tablet, or any similar device and have no access to a hardware keyboard there is a way to place Touch Keyboard on your screen for easy typing, and you can enable icon on the taskbar for easy access.

Enabling the Touch Keyboard

  1. Right-click on the Taskbar
  2. Select Taskbar Settings
  3. Go to Personalization > Taskbar
  4. Click on Taskbar Corner Icons to expand it
  5. Click on the switch next to Touch Keyboard to turn it ON
  6. Close settings
The icon will immediately appear on the Taskbar in the lower right corner. Clicking the icon virtual keyboard will appear on the lower part of the screen. You can use this keyboard to type in applications the same as you were typing on hardware one. By taping on X in the upper right corner, you will hide the keyboard. Tap on the icon in Taskbar to bring it up again.

Hide the Taskbar icon

If you do not want to use Touch Keyboard anymore you can easily hide the icon:
  1. Right-click on the Taskbar
  2. Select Taskbar Settings
  3. Go to Personalization > Taskbar
  4. Click on Taskbar Corner Icons to expand it
  5. Click on the switch next to Touch Keyboard to turn it OFF
  6. Close settings
Read More
Fix Windows Update Error 0x80004005
As you know, Microsoft is consistent in pushing updates to its supported versions of the Windows operating systems in order to make it better and defend it from different kinds of vulnerabilities. And pushing billions of active Windows computers every now and then is really not an easy thing to do since it calls for a complex Windows Update delivery module. These complexities often give rise to various errors like the Windows Update error code 0x80004005. When you encounter this kind of Windows Update error, you will see the following error message on your screen:
“There were problems installing some updates, but we’ll try again later. If you keep seeing this and want to search the web or contact support for information, this may help 0x80004005.”
This kind of Windows Update error occurs due to an issue while either installing or downloading an update. There are several ways you can fix the problem. You can try to replace the dpcdll.dll file, reset the Windows Update-related services, run the Windows Update troubleshooter or manually install the Windows Updates. For more details, check out the options given below.

Option 1 – Try to replace the DLL file with a trusted source

The first thing you can do is to replace the dpcdll.dll file with a trusted source.
  • First, you need to get the new dpcdll.dll file from another computer with preferably the same file version number as your computer.
  • After that, you need to boot your PC into Safe Mode and navigate to the paths listed below and then replace the file using a USB drive or other external storage devices.
    • For x86: This PC > C:/Windows/System32
    • For x64: This PC > C:/Windows/SysWOW64
  • Next, type “cmd” in the Cortana search box and right-click on Command Prompt, and select “Run as administrator” to open it with administrator privileges.
  • Now type the “regsvr32 dpcdll.dll” command and hit Enter.
  • Restart your PC and check if the error is now fixed.

Option 2 – Try to reset the Windows Update components

If by any chance that the third option didn’t work, you can also try resetting the Windows Update components as it could also help you resolve the Windows Update error. How? Refer to the following steps:
  • Open Command Prompt with admin privileges.
  • After that, type each one of the following commands and hit Enter after you key in one after the other.
    • net stop wuauserv
    • net stop cryptsvc
    • net stop bits
    • net stop msiserver
Note: The commands you entered will stop the Windows Update components such as Windows Update service, Cryptographic services, BITS and MSI Installer.
  • After disabling WU components, you need to rename both the SoftwareDistribution and Catroot2 folders. To do that, type each one of the following commands below and don’t forget to hit Enter after you type one command after the other.
    • ren C:WindowsSoftwareDistribution SoftwareDistribution.old
    • ren C:WindowsSystem32catroot2 Catroot2.old
  • Next, restart the services you’ve stopped by entering another series of commands. Don’t forget to hit Enter after you key in one command after the other.
    • net start wuauserv
    • net start cryptsvc
    • net start bits
    • net start msiserver
  • Close Command Prompt and reboot your PC.

Option 3 – Run the Windows Update Troubleshooter

You might also want to run the Windows Update Troubleshooter as it could also help in fixing Windows Update error 0x80004005. To run it, go to Settings and then select Troubleshoot from the options. From there, click on Windows Update and then click the “Run the troubleshooter” button. After that, follow the next on-screen instructions and you should be good to go.

Option 4 – Try downloading and installing the Windows Updates manually

Windows Update Error 0x80004005 might be due to a Windows Update that has failed. So if it is not a feature update and only a cumulative update, you can download the Windows Update and install it manually. But first, you need to find out which update has failed, and to do so, refer to the following steps:
  • Go to Settings and from there go to Update and Security > View Update History.
  • Next, check which particular update has failed. Note that Updates that have failed to install will be displayed under the Status column which has a label of “Failed”.
  • After that, go to the Microsoft Download Center and look for that update using its KB number and once you find it, download and then install it manually.
Note: You can also use the Microsoft Update Catalog, a service from Microsoft that provides a list of software updates that can be distributed over a corporate network. With the help of this service, it can be easier for you to find Microsoft software updates, drivers as well as fixes.
Read More
Change Font Size in Sticky Notes in Windows
Sticky Notes is one of the useful programs and in the early days, the option is available for users to change the font size of the text a lot easier. However, for some unknown reason, Microsoft decided to get rid of this feature in the latest Windows Update. One would expect that the feature will be replaced by an even more useful feature but it’s not which makes the Sticky Notes app worse than before. Worry not though for it doesn’t have to stay that way as there is another thing you can try to change the font size in your Sticky Notes app and that’s what we’re going to cover in this post. As mentioned, Microsoft removing this font feature is quite strange and in the past, users asked for this feature and since it’s no longer available, you can try following the steps given below to bring it back. And for that, you need to go to the Ease of Access section in the Settings app. Refer to the steps given below for more instructions. Step 1: First, tap the Win + I keys to open Settings and then go to the Ease of Access section. Step 2: After going to the Ease of Access menu and select Display from the list of options. Step 3: From there, you should see an option that says “Make text bigger”. And then use your mouse to navigate to the slider to change the size of the font. Note: Take note that after doing all the steps above, it will change not just the Sticky Notes app but also everything in Windows 10. This method is actually the best since it only changes the size of the apps rather than a wholesale change in your Windows 10 computer. Step 4: Next, scroll under Display until you see the “Change the size of apps and text on the main display” option where you’ll see that the option is 100% but you’ll want to change that to 125%. Step 5: After that, click on the drop-down menu and select 125% and then restart your Windows 10 computer. Step 6: Now open the Sticky Notes app and check if you can now change the font size in the Sticky Notes app.
Read More
Instagram posts available now on computer
Instagram posting has been reserved for mobile phones for a very long time but in October 2021 that privilege has come to an end. Instagram added the long-awaited ability to post to Instagram from the website. You get nearly all of the same filters and editing tools that you can find in the iPhone and Android app, too. Instagram logoIn order to post via computer on your Instagram account all you need is a browser. The first step, of course, is to go to instagram.com and login into your account, if you do not have an account, you can make one for free. Next, click on the + icon in the upper right corner. Create a new post screen will open, in this screen click on the Select from computer blue button on the bottom. The file manager will open, choose your desired photo and confirm. After that, you will be presented will an adjustment screen for a photo, here you can crop the photo, zoom in, adjust the aspect ratio, or if you wish add more photos to create a slide show. Once you are done will all of these adjustments, click on Next in the upper right. From there you will be taken into a filter screen where you can apply one of many filters or if you want, you can adjust brightness, contrast, saturation, temperature, etc. just like in the application on your phone. Once you have the desired result, again click on Next in the upper right part of the screen. Lastly, you will be given an option to write a caption for the photo if you wish and add a location. Once this step is finished you can post the feed by clicking on share in the upper right part. That is all to it, just like in a mobile application you can now use your computer for Instagram posting.
Read More
Installing Wi-Fi drivers in Windows
If you don’t have the required drivers installed in your computer, the hardware that you try to connect to your computer will most likely fail. In order to keep the operating system running on your computer, manufacturers develop drivers that can work harmoniously with your devices and applications. However, internet Wi-Fi connections can fail if suitable drivers are not installed. Worry not though for this post will guide you in installing Wi-Fi drivers on your Windows 10 computer. As you know, a driver is an essential piece of software designed for a specific operating system like Windows 10, Linux, and many more. The operating system uses it to communicate with other hardware devices such as printers and mice. Most hardware manufacturers feature a support page of their own product where you can look for the necessary drivers available for download. You will see that the Windows operating system has a set of drivers that are already installed and you do not have to do anything except plug in the device. So if the driver is not locally available, it will pull it down from its web server and automatically install it for you after you connect the device. However, there are instances when you might encounter some issues while using your Wi-Fi and during these times, you might have to reinstall your Wi-Fi drivers so read on as this post will provide you guidelines in installing Wi-Fi drivers in Windows 10. Refer to the steps below to do so. Step 1: First, go to your manufacturer’s website and look for the right driver you want to install to download your Wi-Fi driver. Step 2: After that, you have to download the correct Wi-Fi driver if it’s available. You have to know the exact name and version of the driver so that you can download it and this information can be found from the Device Manager. Just make sure that you have the right wireless adapter driver downloaded. Step 3: Once done, open the setup of the new driver that you’ve downloaded earlier and run the file and then follow the next on-screen instructions that appear right after. Step 4: You’re not done yet as you need to verify if you have downloaded and installed the correct Wi-Fi driver. Refer to the sub-steps below to do so:
  • First, right-click on the Start button and select the Device Manager to open it.
  • From there, look for the Network Adapters and expand its category to make all the network adapters visible including the wireless adapter.
  • You can easily spot the wireless adapter as it has the “wireless” term in its entry.
  • Next, right-click on the wireless driver entry in the Device Manager and select Network adapters, and then click on Properties to check the version number of the driver.
  • Now select the Driver tab and view the details. If it looks well then it means that you have the right version of the driver installed.
Step 5: Restart your computer.
Read More
1 2 3 171
Logo
Copyright © 2023, ErrorTools. All Rights Reserved
Trademark: Microsoft Windows logos are registered trademarks of Microsoft. Disclaimer: ErrorTools.com is not affiliated with Microsoft, nor claims direct affiliation.
The information on this page is provided for information purposes only.
DMCA.com Protection Status