Logo

How to Fix Windows 10 Error Code 0x80070570

Error Code 0x80070570 - What is it?

Error Code 0x80070570 is a common Windows 10 error code that generally is seen by users who are attempting to install a new version of the operating system. While it is most often associated with Windows 10, variations on this same error code have been present in previous versions of the operating system, going all the way back to Windows 7.

Common symptoms include:

  • Inability to run through the installation process to completion when attempting to install a new version of the operating system
  • Error message regarding corrupt or missing files

While it is frustrating to encounter an error like Error Code 0x80070570 as you try to install a new operating system version on your device, there are several methods that can be used to try to resolve the issue. If you do not feel like you have the skill or knowledge necessary to successfully apply the steps below, be sure to get in touch with a trusted computer repair technician that is competent in the repair of Windows 10 errors.

Solution

Restoro box imageError Causes

In some cases, Error Code 0x80070570 arises erroneously when the system isn’t able to find a particular file that it needs. Other times, it happens when there is a conflict with the antivirus software that you are running and the installation software. Finally, there may be a faulty source of RAM in your computer that needs to be removed before the installation can be completed.

Regardless of what you believe to be the cause behind the error code, there are at least two different methods that you can use to try to resolve Error Code 0x80070570 on your device. The first is fairly simple and easy to follow, while the second requires a little bit more knowledge of your hardware in order to complete it successfully.

Further Information and Manual Repair

There are two common ways that users can attempt to get around Error Code 0x80070570 on their devices. Each requires a little more skill and technical knowledge than the last. If you don’t feel like you have the skill, time, or ability to invest in the methods below, be sure to get in touch with a Windows repair technician who can help you to complete the necessary steps in the right ways.

Here are the best ways to attempt to resolve Error Code 0x80070570 on your Windows device:

Method One:  Reattempt Installation

In some cases, when Error Code 0x80070570 appears on your computer, you can simply click on the OK button and then go back to the screen immediately proceeding where your installation has left off, choosing to restart the process of installation. For some users, repeating this method at least four times has allowed them to bypass the error without undertaking more serious and time-consuming methods to resolve the issue at hand.

Method Two:  Check Your Various Sources of RAM

If you have more than one source of RAM in your computer, first remove one of the sources, then re-attempt installation. If you are still encountering Error Code 0x80070570 after removing one of the sources, continue to remove each until you are down to a single source, then trade that last source for one of the ones that have been pulled.

If you have a bad source of RAM, this can help you to figure out which input is causing the error to appear and to address the problem appropriately. Once you have determined which specific source is causing the problem, you can reboot your computer and attempt to run the installation process one more time.

If your RAM sources are not specifically causing the issue, you may still need to run diagnostics tests on your hardware to identify the source of the problem at hand.

Method Three: Use An Automated Tool

If you wish to always have at your disposal a utility tool to fix these Windows 10 and other related issues when they do arise, download and install a powerful automated tool.

Do You Need Help with Your Device?

Our Team of Experts May Help
Troubleshoot.Tech Experts are There for You!
Replace damaged files
Restore performance
Free disk space
Remove Malware
Protects WEB browser
Remove Viruses
Stop PC freezing
GET HELP
Troubleshoot.Tech experts work with all versions of Microsoft Windows including Windows 11, with Android, Mac, and more.

Share this article:

You might also like

How to Fix Windows 10 Error 0x8007000d

Error Code 0x8007000d - What is it?

Error Code 0x8007000d is a common error code that can be found on the Windows 10 Operating system, although it can also appear in previous versions of the operating system, as well.

Common symptoms include:

  • Inability to download new updates.
  • Inability to run the Update tool through to completion.

There are four basic ways to try to resolve Error Code 0x8007000d on your Windows machine. Three of these are pretty simple for even the most basic users, while the final method requires some familiarity with running commands in the Command Prompt. If you don’t feel that you have the skill or confidence to complete the steps listed below, it is generally recommended that you get in touch with a qualified computer repair technician that can assist you in error resolution.

Error Causes

The main cause for the appearance of Error Code 0x8007000d on a Windows machine is that one of the files that the Update tool uses to run one or more updates cannot be found or has experienced damage. Fortunately, there are a few things that you can try on your machine that can be used to attempt to resolve the issues at hand.

Further Information and Manual Repair

Three primary methods exist for the resolution of Error Code 0x8007000d on a Windows machine. As mentioned above, two of these methods can usually be accomplished by basic users, while the third requires some degree of familiarity with the tools associated with the Command Prompt. If you don’t feel that you have the knowledge or skill necessary to follow these steps, contact a computer repair technician to aid you.

Here are the best ways to try to resolve Error Code 0x8007000d on your device:

Method One:  Use the Troubleshooting Tool from Windows Update

From the Windows Update tool, you can attempt to run a scan using the Windows Update Troubleshooter, which can try to identify the specific issue that is occurring and to fix it automatically.

Not only will this tool often fix the problem at hand, but it can also help you to avoid other errors that you may have encountered later on in the Update process. This tool should always be your starting point when you encounter an error as you attempt to download or install updates for your Windows machine.

After the tool has been run, restart your computer to apply any changes and then reopen the Update tool to reattempt installation.

Method Two:  Reset Your Computer

In some cases, the missing or corrupted files may be extensive enough that you need to restore your computer to an earlier point. If you create regular backups of your information or have a past version of the software that you can install, this can help you to resolve the issue. Otherwise, you may need to restore your device to its factory settings to resolve the error.

Always make sure to backup your important files and information before you perform a reset of your device, in order to ensure that you are able to return the computer to its original state when you have finished.

Method Three:  Use Command Line Tools to Resolve the Issue

One of the ways that you can try to resolve this particular error code is the use a DISM tool. This is accessed through the Command Prompt. In order to use this method, follow the steps below:

  • Step One: Open up the search bar in the Start Menu and type in the words “Command Prompt,” selecting it and choosing to run it as an administrator.
  • Step Two: Enter each of the commands below, hitting the “Enter” key when you finish each one:
    • exe /Online /Cleanup-image /Scanhealth
    • exe /Online /Clean-upimage /Restorehealth
    • Exit
  • Step Three: Attempt to run the Update program again. In some cases, you may want to restart your computer before you attempt to run the Update tool again.

If you have not been able to resolve the error code using the steps above or if you are unsure of your ability to follow these steps on your own, get in touch with a trusted computer repair professional that is familiar with the Update process and the errors associated with it.

Read More
Samsung Odyssey Neo G9 monitor review
samsung Odyssey Neo G9Odyssey Neo G9 is a successor to Odyssey G9 curved gaming monitor and it is aimed again at the gaming community with its specifications but of course, it can be used for work as well. Gapping at a stunning $2500 USD price it is not really a cheap piece of hardware so it is normal to see what do you get for this kind of price and do features justify it, so let’s dive in.

Size and resolution

The first thing that you can notice about the screen is that it is big and curved, 49 inches big which is pretty big, and with it, I believe you can forget about using 2 or 3 screens because this single one will cover everything you need really. Going as far as 5120 X 1440 resolution is the strange definition, basically, this is 5K which is kind of nice but I do not see the advantage. Sure it is larger than 4K, but for the price of $2500 I expected an 8K monstrosity so if the resolution is not the main price justification then what is? Let’s move on and find out.

Odyssey tech specs

The monitor comes with HDR and 240Hz refresh rate which is very nice and coupled with 1ms pixel response time, adaptive sync, and Variable Refresh Rate you get pretty good other tech specs. All of this is very nice but the monitor's strongest selling point is Mini Led tech. Mini Led is a next-gen tech currently found only in high-end TVs. With this technology, monitors can produce truer blacks sort of speak thanks to a greater number of dimming zones. Odyssey Neo G9 is rated at 2000 nits in the brightness values and local dimming zones go to stunning 2048. It comes also with Quantum HDR that supports 10+, Freesync, and G-Sync capability. In connection, the department monitor comes with a single display 1.4 port and two HDMI 2.1 ports. It also includes a headphone jack along with two USB 3.0 ports.

Conclusion

While the resolution of the monitor is nothing impressive for the given price, its size and the rest of the tech specs surely are. Now I will not lie, the price is still a little too high but if you could afford it easily I think you should.
Read More
Make AI images on your local PC

Stable Diffusion is a machine learning model developed by Stability AI to generate digital images from natural language descriptions. The model can be used for different tasks like generating image-to-image translations guided by text prompts and upscaling images.

Unlike competing models like DALL-E, Stable Diffusion is open source and does not artificially limit the images it produces. Stable diffusion was trained on a subset of the LAION-Aesthetics V2 data set. It can run on most consumer hardware equipped with a modest GPU and was hailed by PC World as "the next killer app for your PC".

stable diffusion

Since Stable Diffusion is run locally and not in the cloud, as mentioned there is no limit to the number of images that you can produce but in order to use it you will have to get down a little dirty with setting your PC environment for it since it is not really an application, it is a command line text based descriptor that will use python to generate your images, so there is no install nor GUI.

In this guide, we will show you how to both install and run Stable Diffusion on your local PC so you can start producing some cool images all by yourself.

Hardware and software requirements

Make no mistake, Stable Diffusion will not run on a potato PC, in order to harvest the power of AI-generated imagery this is what you will need:

  • A GPU with at least 4GB of VRAM
  • 10GB of hard disk space
  • Python and libraries (Miniconda3 installer will install everything you need)
  • The Stable Diffusion files
  • Git
  • Any OS (Windows, Linux, macOS)

Installing components

For this tutorial, we are covering the installation and running of Stable Diffusion on Windows PC. The steps presented here are presented in a way that installation can be performed on any operating system but precise instructions will be for Windows OS.

GIT

The first thing to do is to install GIT. It is a tool that will let you easily maintain and install repos from the internet. to install it go to: https://git-scm.com/ and click on download. Follow the instructions for your version of the operating system. If you are a developer you are familiar with GIT and if you already have it installed you can skip this step.

One thing that is important when installing GIT locally is to select to use it via the command line (the second option that says "Git from the command line and also from 3rd-party software").

Miniconda3

Now when we have GIT installed, next thing is to use Miniconda3 to install python and all required libraries that are needed. Get the installer at: https://docs.conda.io/en/latest/miniconda.html

Miniconda3 is basically an easy installer so you do not have to install tons of stuff manually from different websites and sources, it is nicely packaged in the installer that will take care of everything.

Stable Diffusion

After the previous two steps, we are ready now to actually install Stable Diffusion. Go to https://huggingface.co/CompVis/stable-diffusion#model-access and install the latest library (as of the writing of this article currently it is stable-diffusion-v1-4-original, the last one on the right), the library is almost 5GB in size so be prepared for big download.

After installing stable diffusion's latest library it is time to update it to the newest version. You can download ZIP from GIT HUB https://github.com/CompVis/stable-diffusion

Once downloaded click on the Windows start button and type in Miniconda3 and click on open. Create a folder and name it how you want on a drive of your choice. For this example, we will install it all in disk C under folder AI_art, follow the instructions below but use your own names and destination instead. Do not close Minicoda3 after typing commands!!!

cd c:/
mkdir AI_art
cd AI_art 

Extract GitHub files that you have downloaded into your new folder and get back to Minicoda3 and type the next commands:

cd C:\AI_art\stable-diffusion-main
conda env create -f environment.yaml
conda activate ldm
mkdir models\ldm\stable-diffusion-v1

Let the whole process finish, some files are large and it might take a while. After the whole process is finished and completed, copy the checkpoint file that you have downloaded into: C:\AI_art\stable-diffusion-main\models\ldm\stable-diffusion-v1

After the file is copied rename it to model.ckpt and you are finished.

Running Stable Diffusion

The created environment is needed in order to actually use Stable Diffusion to create images. Each time you want to use it you will have to run it, so go into Miniconda3, and inside it type:

conda activate ldm
cd C:\AI_art\stable-diffusion-main

after we are inside the folder call the script with the parameters:

python scripts/txt2img.py --prompt "TXT DESCRIPTION OF IMAGE THAT YOU WANT TO CREATE" --plms --n_iter 5 --n_samples 1

and that's it, your image is created and it is located in C:\AI_art\stable-diffusion-main\outputs\txt2img-samples\samples

Read More
Touchpad Set user settings to driver failed
One of the useful things you can use on your laptop is touchpads. They help users in achieving tasks through the gestures and multi-finger tap or touch support it brings in the scope for various shortcuts. However, not all times touchpad brings productivity as it can also encounter some issue every now and then. One of these issues has been reported on a couple of Lenovo laptops that use touchpad drivers from the Alps Pointing Device. According to the reports, an error saying, “Set user settings to driver failed” when they use the touchpad. This type of error on the touchpad usually occurs when a computer boots up and it could be caused by a faulty update on the Alps pointing device driver which is being installed in the background. To fix this error on the touchpad, you could try to disable the Alps pointing device entry from the MSConfig or you could try to get the latest version of the driver or uninstall the driver altogether. Before you proceed with the troubleshooting tips given below, make sure that you create a System Restore point first. Once you have that covered, proceed to the following options.

Option 1 – Try disabling the entry of the Alps pointing device from MSConfig

This first given option was able to fix the problem for many users so to get started, follow these steps:
  • In the Start Search box, type “MSConfig” and select System Configuration from the search results.
  • Next, go to the Services tab and look for the Alps pointing device entry from the list that appears, and uncheck it.
  • Then click the Apply and OK buttons to save the changes made.
  • Now restart your computer and see if the error in the touchpad is now fixed.

Option 2 – Try to download and install the latest version of the driver

The next option you can check out to fix the error is to download and install the latest version of the driver from the official website of Lenovo support. Note that an updated version of the touchpad driver will most likely get rid of the error. However, you have to make sure that the version you’re going to get is compatible with your existing Windows version.

Option 3 – Try to uninstall the Alps Pointing device driver

If the first two given options didn’t work, you can try uninstalling the Alps Pointing-device driver instead. You can do this under the Mice and other pointing devices section. After you uninstall the driver, restart your computer and delete the driver’s leftover folder inside this location in File Explorer (C:/Program Files). Once you’re done, restart your computer and check if the error is now gone. Keep in mind that after you’ve uninstalled the driver, any extra configuration features that Lenovo drivers offered before the uninstallation will no longer be available.
Read More
Fix Minecraft Realms Internal Server Error 500
Many Minecraft players are experiencing Realms internal server error 500, luckily for all of that players, we are offering you solutions.

Preliminary Fixes

Before heading towards the fixes here it is suggested to try some quick tweaks that might work in your case to fix Minecraft Internal Server Error 500. Restart your PC – Very first it is suggested to shut down your computer and after that restart the system. This worked for many players to get rid of the server outages issue. Update your Windows version – Check if you are running an outdated Windows version then make sure to install the latest Windows update and then run the game. Update Your Game Version – Also make sure you are running an updated version of Minecraft Realms. Installing the latest updates not only makes the game more stable but also helps you to solve common glitches and issues with the game. So, check if any recent updates are available to make sure to download and install them Modify the Game Settings – Check if you have tweaked some of the game settings then this might be the reason for the problem. So try to reconfigure the settings to default. This may work for you. Now after following the preliminary solutions check if the Minecraft Realms Internal Server Error 500 is resolved or else head to the next solution.

Check your Internet Connection

As said above if the internet connection is not working properly or it is preventing you from accessing the servers, then this can also cause the Internal Server Error 500 in the Minecraft server. So, very first make sure your internet connection is stable and working properly. Also if you are using Wi-Fi then use a wired connection to get a stable network. Moreover, if your internet connection is working fine then there is a possibility that your internet connection is causing interruption and preventing you from accessing the Minecraft Realms server. So, if this is the case then here it is suggested to use a VPN connection to get exceptionally fast & reliable speeds without getting detected.

Check for the Minecraft Server Outage

Well, there is a possibility the Minecraft servers are down and if this is the case then you don’t have any other option than just waiting for the servers to get restarted and the service becomes available again. Also, the service outages can affect the ability of the game and as a result, you are unable to play the game. Additionally, you can also inquire about Minecraft’s server status by visiting the Downdetector website. But if you find the services are running fine then the issue is from your side.

Disable Background Applications

If you are still getting the Minecraft Realms Internal Server Error 500, then there are chances that other applications running in the background are causing a limit to your internet bandwidth. It is suggested to disable the internet-connected apps and after that try connecting to Microsoft Realms again.
  • Hit CTRL + SHIFT + ESC keys > to open the Task Manager.
  • Then under the Process tab,> right-click on unwanted background process, > click on the End Task 
After disabling the applications running in the background, relaunch Minecraft and check if the internal server error 500 still appears or not.

Delete UUID Files in Minecraft

If you are still getting the Minecraft Realms Internal Server Error 500 then here it is suggested to delete the UUID files in Minecraft.
  • First, visit the website by clicking the https://mcuuid.net/ and enter all the credentials to get the player’s UUID
  • Then login to the server > proceed to server files > head to the world
  • Here locate the PlayerData folder > click to open it.
  • And from here choose the file containing the same name like the player’s Username or UUID > after that hit the Delete
  • Lastly, restart your server to save the changes

Remove Resource Packs & Mods

If you are getting the Minecraft realms internal server error 500 after the installation of a particular mod or the resource pack then this is what causing the issue while playing the realm. So, here it is suggested to delete it immediately, also uninstall the mod as well as the resource pack you installed recently. It is estimated this works for you but if you have a doubt related to any specific mod or the resource pack causing an error you should uninstall then also and check if the Minecraft internal error 500 is fixed.

Disable the Plugins

If you are still encountering the error then check for the plugins installed on your PC. Many times the installed plugin starts causing issues with the game as they are not compatible with the game version. So here it is recommended to try disabling the plugins on the PC and check if this works for you.
  • On your system > open the plugin window > rename the plugins files from “[plugin name].jar to [plugin name].jar.disabled”.
  • Next restart the server and check if the Minecraft Realms Internal Server Error 500 problem is resolved or not.

Uninstall & Reinstall Minecraft

If none of the above-given solutions works for you then here it is suggested to uninstall and reinstall Minecraft. Well, it is suggested to uninstall the game using the third-party uninstaller. Manually uninstalling the program won’t remove it completely, some of its registry entries, junk files are left behind and causes interruption when the next time you install it. If you are looking to uninstall it manually then follow the steps given:
  • Hit Window + R key > to open the Run box
  • And in the run box type appwiz.cpl command > hit Enter
  • Now the application manager window pops up on your screen > locate the Minecraft application > right-click to Uninstall
And as the uninstalling process is completed > head to the Minecraft official website and tries downloading and installing the game. Check if the Minecraft Realms Internal Server Error 500 is resolved or not.

Contact Support Center

If after trying all the solutions given you are still unable to fix the error then the only option left is to contact the Customer Support Center and fill the form in the link and describe the problem in a detailed way. And within few days you will get feedback from them to fix Minecraft Realms internal error 500.
Read More
A Quick Guide to Fixing Error Code 7

Error Code 7 - What is it?

This is a typical system error that occurs during Windows setup. To be precise, this error may pop on your computer screen during the text mode portion of Windows setup. The setup hangs and stops responding and the error message is displayed in either one of the following formats:
‘The file I386Ntkrnlmp.exe could not be loaded. The error code is 7.’ or ‘The file I386L_intl.nlf could not be loaded. The error code is 7.’

Solution

Restoro box imageError Causes

Error 7 may be triggered due to several reasons but the 2 most common causes for this error code are:
  • Incorrect settings of the BIOS
  • Faulty RAM modules
  • Registry corruption

Further Information and Manual Repair

To resolve this error on your system, here are some easy and effective DIY methods that you can try.

Method 1 - Change Back the BIOS to its Default Settings

If the underlying cause of error code 7 is related to incorrect BIOS settings, then it is recommended to restore default settings to resolve. You can reset your computer’s BIOS (basic input and output system) settings to factory defaults by selecting the restore defaults option within BIOS or by removing CMOS ( Complementary Metal Oxide Semi-Conductor) battery from your unplugged computer for about five minutes. The battery removal method requires opening the computer case, so only attempt it if you are unable to access BIOS. To reset BIOS follow these steps, reboot your PC and then press the key assigned to loading BIOS during your computer boot splash screen. The key assigned to load and access BIOS varies from manufacturer to manufacturer but usually, it's F1, F2, or F12. Once you enter the BIOS, select the ‘Restore Defaults’ option listed in the menu.  I t may be a keyboard shortcut or be under the Advanced settings menu. Confirm settings and then exit BIOS. Hopefully, this will resolve Error 7.

Method 2 - Remove the Faulty RAM

When error code 7 is triggered by faulty RAM modules, then to resolve it simply remove the memory modules that are installed in the computer. If the error code is displayed again after you remove the memory module, remove a different memory module. This procedure requires you to reboot your PC several times to identify the specific memory module that is not working properly.

Method 3 - Repair the Corrupted Registry

Error code 7 is sometimes also linked with registry issues. If the reason for the error occurrence is a damaged or corrupted registry, then simply download Restoro. This is a powerful PC Fixer embedded with a registry cleaner. It is easy to operate and user-friendly. The registry cleaner detects and removes all errors in seconds. It cleans the registry and repairs the damages in no time. Click here to download Restoro.
Read More
How to Fix Windows 10 Error 0xC1900200, 0x20008

Error Code 0xC1900200, 0x20008 (Code 0xC1900202 – 0x20008)   – What is it?

Error Code 0xC1900200, 0x20008 (Code 0xC1900202 – 0x20008)  is an error that occurs when you attempt to upgrade to Microsoft Windows 10, but the minimum requirements have not been met by your computer. You will therefore be unable to upgrade to Microsoft Windows 10 until your computer is updated or upgraded to meet those requirements. Common symptoms include:
  • When attempting to upgrade a dialog box with Code 0xC1900200 – 0x20008 (Code 0xC1900202 – 0x20008) is displayed.
  • Your computer is unable to begin the Microsoft Windows 10 upgrade process.

Solution

Restoro box imageError Causes

Error Code 0xC1900200 – 0x20008 (Code 0xC1900202 – 0x20008)  occurs when you are unable to begin the Microsoft Windows 10 upgrade because your computer does not meet the minimum requirements to run Microsoft Windows 10.
  • You are unable to begin the upgrade because your computer does not meet the required system or hardware specifications.
  • You are not running the correct version of Microsoft Windows to be able to begin the upgrade.
  • You are not running the latest updated version of Microsoft Windows 7 SP1 or Microsoft Windows 8.1.
Error Code 0xC1900200 – 0x20008 (Code 0xC1900202 – 0x20008) as stated, simply means your computer does not meet the requirements to update and does not indicate a permanent problem or inability to continue to use your computer. This error only means that you will not be able to upgrade to Microsoft Windows 10 until your computer is made to meet these requirements.

Further Information and Manual Repair

There are several solutions that the user can complete at home that should fix the problem resulting in a manifestation of Error Code 0xC1900200 – 0x20008 (Code 0xC1900202 – 0x20008). Below are several options that should resolve this error.

Method 1:

Verify what version of Microsoft Windows you are currently running, older, outdated, or no longer supported versions of Microsoft Windows are not able to upgrade to Microsoft Windows 10. If you are not running one of the following versions you will have to update before being able to upgrade.
  • The most current version of Microsoft Windows 7 SP1
  • The most current version of Microsoft Windows 8.1

Method 2:

Your computer's system specifications do not meet the requirements to be able to upgrade to and run Microsoft Windows 10. To check your system specifications do the following.
  1. Click on the start button in the bottom left corner, then locate the control panel on the menu, click on it to open.
  2. Once it opens, locate system and security on the menu and click to open, click on system and this will show you your amount of RAM and processor speed.
  3. Find device manager on the left-hand side click this then select display adapter, and it will show you your current video card.
  4. Click on the start button again, then click on the computer in the menu, this will show you your hard drive size, and available space.
If you have the option available you can simply run the get Microsoft Windows 10 app to check compatibility. Once you have your system specs make sure they meet or exceed the following.
  • 1 GHz or higher processor or SoC
  • 1 gig of RAM for 32 bit and 2 gigs of RAM for 64 bit
  • 16 GB available hard drive space for 32 bit, 20 GB for 64 bit
  • Minimum of DirectX9 that has 1.0 WDDM
  • At least an 800x600display
If your computer does not meet these minimum requirements, upgrade the components necessary to meet them. If you do not possess the technical expertise required to accomplish this yourself or do not feel comfortable doing so, download and install a powerful automated tool to get the job done.

Method 3:

Your computer might not meet the aforementioned requirements to make an upgrade because of insufficient hard drive space or resources. Learn how to create or make space on your computer here.

Method 4:

Many people hold on to and use the same computer for a very long time. It is possible that your computer cannot be upgraded to meet the requirements, or that the cost to do so would be so high that a new computer would be cheaper. If that is the case, your only option may be to replace your computer.
Read More
Using ???? and other emoji in Windows
Did you know you can use emoji in file names inside Windows 10? It is no secret that emojis are basically everywhere and Microsoft has seen this and integrated them into Windows itself, so you can name files using emojis or combine them with text. Placing emojis in file names or in the text is extremely easy, all you have to do is press ⊞ WINDOWS + . and the emoji dialog will open from where you can find which emoji you would like to use. And that's it, you just used emoji for the file naming.

!!!NOTE!!!

In theory, some applications may not like these emojis if they don’t support Unicode characters. However, modern applications are designed to work with a broad set of languages that should properly support emojis. For example, the classic Windows Command Prompt can’t see emoji characters in file names properly, but both PowerShell and Microsoft’s new Windows Terminal can display them properly. If you do run into a problem, you can always open File Explorer and rename the affected files and folders to remove the emoji characters. You can then use those files in applications that don’t properly support emoji file names.
Read More
UEFI Firmware settings goes missing
When it comes to booting an operating system on a computer, one of the most essential pieces of software you can use is the UEFI. In fact, a lot of users now prefer to use UEFI instead of BIOS. It also depends on whether the UEFI or the BIOS is supported on the motherboard. Recently, a number of users reported an issue with UEFI where they were unable to find it under the Advanced Options screen where it’s supposed to be located. The missing UEFI Firmware settings in the Advanced Options could be caused by several reasons. It is possible that the access to the UEFI menu is blocked or it could also be due to the Extra Fast Startup feature being enabled. It is also possible that the operating system is installed in Legacy mode. There are several options to try to fix this issue. You need to check if your computer supports UEFI or you could also try to disable Fast Startup or bypass the Extra Fast Startup feature. You can also use a boot to UEFI shortcut as well as check the CMOS battery.

Option 1 – Try checking if your computer supports UEFI

The first thing you have to do is to verify if your computer supports UEFI. If your computer does not support UEFI, then it’s no wonder why you don’t see the UEFI Firmware settings in the Advanced Options.

Option 2 – Try turning off Fast Startup

  • First, boot your computer in Safe Mode.
  • Once your computer is booted in Safe Mode, tap the Win + R keys to open the Run dialog box and type in “control” to open the Control Panel.
  • Next, click on the Hardware and Sound section and click on Power Options.
  • Afterward, select the “Choose what the power buttons do” option from the left side menu pane.
  • Now click on Change settings that are currently unavailable and uncheck the entry that says, “Turn on fast startup (Recommended)”.
  • Then click on Save Changes and restart your computer and see if it has fixed the problem or not.

Option 3 – Try bypassing the Extra Fast Startup feature

As mentioned, the missing UEFI Firmware settings could be due to the Extra Fast Startup feature. To fix it, you have to disable this feature. All you have to do is tap and hold the Shift key and click on the Shutdown button from the Start button. This will boot your PC with the UEFI booting from the beginning and then use the hotkey for your motherboard to boot into the UEFI setup.

Option 4 – Try using a boot to UEFI shortcut

  • Right-click on any empty space on your Desktop and select New > Shortcut.
  • This will open a new mini window. And here, you have to type this in the text field: shutdown /r /fw
  • After that, click on Next and name the desktop shortcut and then click on Finish.
  • Next, right-click on the newly created shortcut and select Properties.
  • Click on the Advanced button and select the “Run as administrator” option.
  • Now click OK to save the changes made. Each time you execute this shortcut, your computer will automatically be booted to the UEFI Firmware Settings.

Option 5 – Try to check the CMOS battery

Another thing you can do is check the CMOS battery physically on the motherboard and see if it has to be replaced since a damaged CMOS battery can also cause the issue with the missing UEFI Firmware settings.

Option 6 – Set your computer from Legacy to UEFI

If applicable, you can try to set your computer from Legacy to UEFI to resolve the problem.
  • In the Windows Search box, type “command prompt” and from the search results that appear, right-click on Command Prompt and select the “Run as administrator” option.
  • After that, execute this command: mbr2gpt.exe /convert /allowfullOS
  • Now, wait until the process is completed since you can track its process on your screen.
  • Once it’s done, go to Settings > Update & Security > Advanced Startup options and from there, click on Restart Now. This will restart your computer and give you advanced options.
  • Next, select Troubleshoot > Advanced Options where you will see further options including System Restore, Startup Repair, Go back to the previous version, Command Prompt, System Image Recovery, and UEFI Firmware Settings.
  • Now select the UEFI Firmware Settings. This will take you to the BIOS. Boot Mode is typically available under Boot > Boot Configuration. Once you’re there, set it to UEFI and then save the changes you’ve made. After that, your computer will restart.
Read More
5 ways to open task manager in Windows 11
Something we are used to doing in a certain way inside Windows 10 is slightly changed in Windows 11. One of those things is how you open task manager, well kind of. task manager
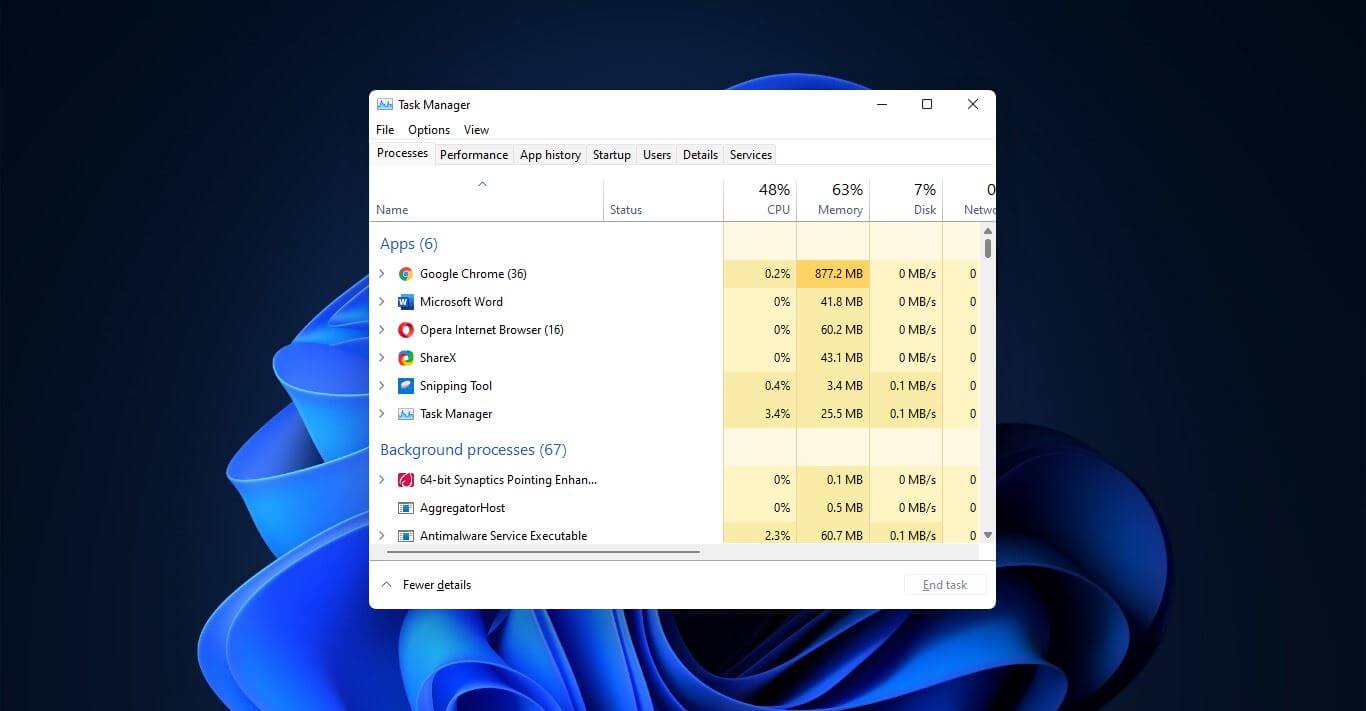
Option to right-click on the taskbar and launch task manager is gone but do not worry there are other same and simple ways you can launch it.
  1. Press CTRL + SHIFT + ESC or CTRL + ALT + DEL
  2. Right-click on the START button
  3. Type task manager in start search on top in the start menu
  4. Type taskmgr in command prompt
  5. Press ⊞ WINDOWS + R to open run dialog and type in taskmgr
And that’s it, now depending on your situation, you might use different methods to evoke task manager.
Read More
1 2 3 171
Logo
Copyright © 2023, ErrorTools. All Rights Reserved
Trademark: Microsoft Windows logos are registered trademarks of Microsoft. Disclaimer: ErrorTools.com is not affiliated with Microsoft, nor claims direct affiliation.
The information on this page is provided for information purposes only.
DMCA.com Protection Status