Lately on EA forums question has appeared on what to do when Origin client does not load library. It seems that the latest update for the Origin client has brought some issues as not properly showing one library which appears empty.
Do not worry, we have a solution for you, several to be precise and it will fix the issue guaranteed. It is advisable to try solutions in order how they are presented since they go from the most simple and fastest and most common ones.
Delete the cache
Close origin client completely
Press ⊞ WINDOWS + R to bring the run dialog
In the run dialog type in %ProgramData%/Origin and press ENTER
Go into the Origin folder
Delete all files and folders except the LocalContent folder
Press ⊞ WINDOWS + R to bring the run dialog
In the run dialog type in %AppData% and press ENTER
Delete the Origin folder
In the address bar click on AppData
Go into the local folder
Delete Origin folder Reboot your PC
Clear the temporary files
Press ⊞ WINDOWS + R to bring the run dialog
In the run dialog type in %AppData% and press ENTER
Go into the roaming folder
Delete Origin folder
Go to the AppData folder and delete the Origin folder from there also Reboot system
Try Windows built-in tools to check compatibility
Locate where Origin is installed and right-click on the executable file
Click on properties
Go to the compatibility tab
Click on Run the compatibility troubleshooter and follow on-screen instructions
Update Origin
Rarely this is the case but check manually to see if you can update your Origin client. Sometimes due to network issues client does not update automatically and can cause this strange behavior.
Add origin as an exception to antivirus and firewall
Not rarely game clients can be detected as some form of malicious software and antivirus along with firewall can automatically block it. Go to your security software settings and add it as the exception.
Reinstall Origin
If everything else fails, reinstall the Origin client
0x8007005 is a Windows Error Code. You may come across this error if you don’t have the appropriate permission to install a particular Windows update. It is prompted as ‘Access Denied’ error message.
Solution
Error Causes
The error code 0x80070005 usually triggered because of 2 reasons:
Some updates require administrative permissions to be installed
Due to malware and viruses
Further Information and Manual Repair
If you face this error while installing Windows updates on your PC, it is advisable to fix it immediately.
By taking timely actions, you can update your PC easily and in case if the cause of the error code 0x80070005 is malware or some virus, you can stop it from causing more and serious damage to your system. Sometimes malware and viruses can lead to data loss.
To avoid such damages here’s what you need to do:
Cause: Updates require administrative permission
Quick Fix: If the 0x8007005 error occurs on your system due to administrative permission issues, then the best way to fix this error right away is to log on as an administrator.
If there are many user accounts on your PC, then to resolve this error, make sure you log on using the user account that has administrator permissions on the computer.
Once you log on as an administrator, now try to install the updates again.
Cause: Malware and Viruses
Quick Fix: If the error 0x80070005 occurs because of malware infection, the best way to resolve this error would then be to open your antivirus software and run a scan to detect the malware.
However, if you don’t have antivirus software installed on your system, then it is advisable to download the software immediately.
Download antivirus software. To be on the safe side download Microsoft Safety Scanner.
Click on the run when prompted. Once the scanner is installed on your PC create a shortcut to Safety Scanner on your computer desktop so that it is easily accessible.
Now double click on the icon and click on the full scan tab to start scanning for malware and viruses on your system. After the scan is complete, you will see a list of viruses on your PC.
Now remove them all by hitting the delete tab and then repair. Now try installing the updates again.
By following these quick-fix techniques, you can easily resolve the error 0x80070005 on your system by yourself, without calling an IT professional.
If your printer has been working just fine and you suddenly get an error message saying, Printer not activated, error code 30”, then something is definitely wrong and it’s not good especially if you have lots of things to do. Worry not, as this post will help you resolve the printer issue. Simply follow each one of the given options below carefully.
Option 1 – Try running the Printer Troubleshooter
The first thing you can to resolve the printer issue is running the Printer Troubleshooter. This built-in troubleshooter can detect and automatically fix the problem for you. To use it, follow these steps:
Tap the Win + R keys to open the Run dialog box.
Next, type “msdt.exe /id PrinterDiagnostic” in the field and click OK or hit Enter to open the Printer Troubleshooter.
Then click the Next button and follow the next on-screen instructions to fix the issue with the printer.
Option 2 – Check if the concerned printer is set as the default one
It could be that the printer you are trying to use is not set as the default printer. This is mostly the case so to fix the issue, you need to set the concerned printer as default. To do that, follow the steps below.
Tap the Win + I keys to open the Settings app.
After opening Settings, select Devices from the menu and then click the Printers and scanners option.
From there, look for the printer you are using among the list of options. After you find it, click on it and select the Manage option.
Now click on the “Set as Default” option to set the printer as default.
Option 3 – Try updating the driver for USB Composite Device
The problem with your printer might also be caused by the USB Composite Device. It could be that the USB Composite Device is acting up. Thus, you need to remove and reinstall it. How? Follow the steps below.
First, click the Start button and type “device manager”.
Then click on the “Device Manager” from the search results to open it.
From there, look for the USB Composite Device option and right-click on it, and select the Update Driver from the options.
Restart your PC and then click the “Search automatically for updated driver software” option.
Now uninstall and remove the printer driver software and reinstall it then refresh.
Option 4 – Try updating all the drivers for your Printer
Tap the Win + R keys to launch Run.
Type in devmgmt.msc into the box and tap Enter or click OK to open the Device Manager.
After that, a list of device drivers will be displayed. Look for Print queues from the list of drivers displayed and click on it to see all the Printer drivers.
Next, right-click on each one of the drivers and select “Update driver” to update the driver. Do it for all the Printer drivers
After that, select the “Search automatically for updated driver software” option and then follow the instructions to complete the process.
Restart your PC and try printing a document again and see if the “Printer not activated, error code -30” no longer pops up.
Note: You also have the option to go directly to the website of your printer manufacturer and check if there’s a new update – if there is, download it.
Hello and welcome to errortools another tutorial which aims to make your computer life easier and more relaxed. This time we will be talking about how to switch sound output devices in Windows 10 in a matter of seconds between Headphones and external speakers, Between 2 different speakers, or any other audio output device in general.
Windows 10 with its updates has really gone from OK to one of the greats, little hacks and shortcuts which every update has introduced have really made life easier.
Now, your typical switching from one audio output device to another can be accomplished with your standard go to settings, go to devices, choose audio, pick one which you prefer and click on OK. This way altho nothing wrong with it is a little slow and if you need to switch your output devices several times in a single day often it can be time-consuming as well. Lucky for you we have a quick solution for you.
Switching guide
All right, now in order to be able to actually switch between your audio output devices make sure that all of them are working and that they are plugged in. For example, make sure that both of your headphones and speakers are turned ON and plugged in. Once you have confirmed that everything is in working order:
Click with a left mouse button on a speaker icon located on the right part of your taskbar next to the clock
Click on the small up arrow on the right next to your current audio output device.
The list will open, choose, and left click with the mouse button on your choice.
And that's it, you have changed your default audio output device in a matter of seconds.
The good thing about this method is that Windows will remember output audio levels for each device.
Potential issue
If by any chance when switching your audio devices this way freezes volume control just go to the task manager and restart Windows Explorer.
To restart Windows explorer:
High Efficiency Image File Format (HEIF) is a container format for individual images and image sequences. The standard covers multimedia files that can also include other media streams, such as timed text, audio, and video. A HEIF image using High-Efficiency Video Coding, HEVC, requires only about half the storage space as the equivalent quality JPEG. HEIF also supports animation and is capable of storing more information than an animated GIF or APNG at a small fraction of the size.
HEIF files are a special case of the ISO Base Media File Format (ISOBMFF, ISO/IEC 14496-12), first defined in 2001 as a shared part of MP4 and JPEG 2000. Introduced in 2015, it was developed by the Moving Picture Experts Group (MPEG) and is defined as Part 12 within the MPEG-H media suite (ISO/IEC 23008-12).
HEIF was adopted by Apple in 2017 with the introduction of iOS 11, and support on other platforms is growing.
HEIF files can store the following types of data:
Image items
Storage of individual images, image properties, and thumbnails.
Image derivations
Derived images enable non-destructive image editing and are created on the fly by the rendering software using editing instructions stored separately in the HEIF file. These instructions (rectangular cropping, rotation by one, two or three quarter-turns, timed graphic overlays, etc.) and images are stored separately in the HEIF file, and describe specific transformations to be applied to the input images. The storage overhead of derived images is small.
Image sequences
Storage of multiple time-related and/or temporally predicted images (like a burst-photo shot or cinemagraph animation), their properties, and thumbnails. Different prediction options can be used in order to exploit the temporal and spatial similarities between the images. Hence, file sizes can be drastically reduced when many images are stored in the same HEIF file.
Auxiliary image items
Storage of image data, such as an alpha plane or a depth map, which complements another image item. These data are not displayed as such but used in various forms to complement another image item.
Image metadata
Storage of EXIF, XMP and similar metadata which accompany the images stored in the HEIF file.
Windows Terminal is a new free Microsoft terminal sort of application. When you open either Power Shell or Command Prompt in Windows they will be opened in different windows, and if you want several of each you will have several windows of each on your screen.
Windows Terminal fixes this by opening each of the Instances of Command Prompt and Power Shell as separate tabs inside itself making it much easier to manage multiple instances of named applications.
You can also run both Power Shell and Command prompt tabs in the same Windows Terminal. Luckily running command prompt and power shell in different tabs is not the only thing you can do. Windows Terminal lets you choose your own theme, it has emoji support, GPU rendering, split panes, and many more customizable options.
Windows 11 will have Terminal as the default command-line environment for opening Power Shell or Command prompt, even Windows Subsystem for Linux (WSL)
Setting Windows Terminal as the default application
If I was successful I have managed to show you that Windows Terminal is something that you should use even if you do not or cannot upgrade to Windows 11. You can use it inside Windows 10 also.
First thing is to download and install it. You can get Windows Terminal from the official Microsoft website here: Windows Terminal page
After download and installation are completed, open the Terminal app and select the down arrow menu, click Settings. Alternatively, you can use CTRL + + shortcut.
Inside Settings by default Default Terminal application would be set to Windows Console Host
Click on the Default Terminal application to bring a drop-down menu and choose Windows Terminal from the list.
Now by default once opened Windows Terminal will use Power Shell as the default profile, however, you can change this by clicking on the drop-down for the default profile where you can choose between Command Prompt, Power Shell, Windows Power Shell, or Azure Cloud Shell. Pick one that you prefer, click on Save and it will be opened as default on the next run.
USB devices are one of the commonly used devices every day – from plugging mobile devices for charging using pen drives, you are making use of USB drives. However, there are times when you might encounter an error message saying, “Unknown USB Device” as you plug your USB device on your Windows 10 computer. So if you encounter this kind of error message followed by either of the following explanations, read on as this post will give you a couple of suggestions you can check out to resolve the issue.
Device Descriptor Request Failed
Port reset failed
The device failed enumeration
Set address failed
Error code 43
You can fix this error using several ways. You can try changing the Power Options, update or roll back the USB drivers, turn off Fast Startup, or run the USB troubleshooter. Follow the options given below for more details.
Option 1 – Try to change the Power Options
Tap the Win + R keys to open the Run utility.
Then type “powercfg.cpl” and tap Enter to open the Power Options window.
Next, go to your selected power plan and click the “Change plan settings” option to open a new page.
From there, click on the “Change advanced power settings” option. This will open a new window where you can see various power consumption options.
Now look for the USB Settings option and expand it.
Then set the USB selective suspend setting to “Disabled” for both scenarios: On Battery and Plugged in.
After that, click on OK and restart your computer to apply the changes made.
Option 2 – Update or reinstall the Universal Serial Bus Controller driver
Since it could be a driver issue, you can try to update or reinstall the Universal Serial Bus Controller drivers using the Device Manager. Refer to the following steps:
First, click the Start button and type “device manager”.
Then click on the “Device Manager” from the search results to open it.
From there, look for the “Universal Serial Bus controllers” option and then right-click on each one of the USB drivers and select the Update Driver from the menu.
Note: If it is a regular USB drive, then it will be listed as a USB Mass Storage Device but if you have a USB 3.0 device, then look for a USB 3.0 Extensible Host Controller.
Restart your PC and then click the “Search automatically for updated driver software” option.
Note: If updating the USB Controller drivers didn’t work, you can try to reinstall them instead.
Option 3 – Try turning off Fast Startup
Tap the Win + R keys to open the Run dialog box and type in “control” to open the Control Panel.
Next, click on the Hardware and Sound section and click on Power Options.
Afterwards, select the “Choose what the power buttons do” option from the left side menu pane.
Now click on Change settings that are currently unavailable and uncheck the entry that says, “Turn on fast startup (Recommended).
Then click on Save Changes and restart your computer and see if it has fixed the problem or not.
Option 4 – Run the Hardware and Devices Troubleshooters
The first thing you need to do is click on Start and then on the gear-like icon to pull up the window for Settings.
After opening Settings, look for the Update and Security option and select it.
From there, go to the Troubleshoot option located on the left-hand side of the list.
Next, select Hardware and Devices from the list and open the Troubleshooter and run it. Once it is doing its job, wait for it to complete the process and then restart the system.
After the system restarts, check if the problem’s now fixed. If not, refer to the next option given below.
The first major update for Windows 11, 22000.65 has brought some bug fixes and some new features. The previous update was just a bunch of small fixes but this time Microsoft has brought much more with this one.
Bug and security fixes:
Patch for the PrintNightmare vulnerability.
Taskbar icons not displaying after you rotate the screen back and forth.
Date and time not following format settings.
Contrast issues with File Explorer title bar
Search dropping the first keystroke when you press the Windows key and type
Blurry windows in ALT + Tab
Besides bug and security fixed newest update has also brought us some functional changes:
The start menu can no longer be moved from center
A search box appears at the top of the Start menu.
Taskbar appears on secondary monitors.
The refresh option appears on the jump list when you right-click the desktop. It was on the "Show more options" list before.
New look for certain dialog boxes such as "battery low" or "display change"
New snap layouts for portrait mode screens.
Option to troubleshoot sound problems when you right-click the volume icon.
Power mode settings on Power & battery settings menu.
Right-clicking .ps1 files offers a "Run with PowerShell" option.
New GIFs in the emoji panel in China
Honestly, I really like a search box on top of the start menu but really dislike the option to move it to left, I am sure that there are a lot of users who would feel more like at home if they could still move and set Windows to function and work how they want.
It is very strange to me that Windows 10 was made to be so user-focused and been able to be user specific and Windows 1 takes most of these things away. I am not sure why Microsoft is going this way but I cannot really see how moving the taskbar on left is a programming issue or why it is wrong for example.
Krita Desktop is a free and open-source painting application. Krita is a full-featured free digital painting studio for artists who want to create professional work from start to end. Krita is used by comic book artists, illustrators, concept artists, matte and texture painters, and in the digital VFX industry. Krita has been in development for over 10 years and has had an explosion in growth recently. It offers many common and innovative features to help the amateur and professional alike.
Krita has a user-friendly interface. The dockers and panels can be moved and customized for your specific workflow. Once you have your setup, you can save it as your own workspace. You can also create your own shortcuts for commonly used tools.
In addition to painting, Krita comes with vector, filter, group, and file layers. Combine, order, and flatten layers to help your artwork stay organized. There are also three different views on how to see the layers.
Krita supports full color management through LCMS for ICC and OpenColor IO for EXR, allowing you to incorporate Krita into your existing color management pipeline.
Open PSD files that even Photoshop cannot open. Load and save to PSD when you need to take your artwork across different programs.
Krita is the only dedicated painting application that lets you open, save, edit and author HDR and scene-referred images. Furthermore, with OCIO and OpenEXR support, you can manipulate the view to examine HDR images, and use it in the most cutting-edge workflows from the film and visual effects industries.
Disk partitioning is a concept that’s been around for so long, but is still only familiar to few. If done right, it can help get your computer in perfect order.
Today we bring you a simple definition of disk partitioning, its pros and cons, and a quick tip on how to do it properly to reap its full benefit!
Definition and purpose
The simplest way to define disk partitioning would be: it’s exactly what it sounds like. It means taking a hard disk drive and separating it into different segments. These segments are called partitions. You can visualize it as cutting a cake into smaller pieces - not necessarily of the same size, though.
So what is the purpose of these pieces?
Well, when you first get a hard drive, it’s basically just a bunch of unallocated storage space. Until there’s at least one partition, this space is unusable to your operating system. Once you create a partition, your OS will recognize it as usable storage space.
You can choose to create a single partition and use it for all your files, from program files to personal data. A lot of off-the-shelf computers come with one primary partition like this and a small secondary one reserved for recovery purposes.
Whether or not you want to split your disk into more than one segment is up to you. We would generally recommend it, though. The whole point of partitioning is for each segment to have its own purpose.
So treating all your storage space as a single unit containing different file types would be like constructing an office building with only one massive room for everything - day-to-day work, conferences, interviews, etc. And all of this for different departments of the company. You can see how this might get a little messy.
Creating multiple partitions eliminates the task of running several different types of files from the same place. This takes a heavy load off the entire process of accessing data.
Disk partitioning also brings a ton of other benefits to the table. An important disclaimer, though: there are disadvantages too. We will walk you through both sides to help you get an objective idea and make an informed decision.
Source: Kina on Unsplash
What are the benefits of disk partitioning?
1. Better file organization
This is the most obvious and perhaps the biggest advantage of partitioning your hard drive.
As we already mentioned, partitioning allows you to create separate segments for different file and data types. You wouldn’t want to use the same partition for your system files and for games, would you?
If organization and time management are important to you, then multiple partitions are the right solution. Searching for specific files will be much easier overall. Say you have one hard drive, but three partitions: C for the system files alone, D for multimedia files and documents, and E for games and apps. Your computer loads the system from C without interference from the other two, and you know exactly where to look when searching for a file.
2. Easy reinstallation
File management isn’t the only thing made faster and simpler thanks to partitioning. If you opt for creating multiple segments on your drive, reinstalling Windows will be easy peasy.
That’s because all you need to do is format the partition your system is on. Then you reinstall the OS on it, and there you go. Now you have a clean installation, with all your files saved on other partitions intact. You can even make a copy of your system partition, so you can revisit the exact same installation in the future if you want. And the whole time your pictures, music, documents stay exactly where you left them.
Source: Andrew M on Unsplash
3. Possibility of using multiple file systems
By now you’ve understood that partitions function completely separately. This means that, if for some reason you need multiple file system capabilities, partitioning will allow that.
One segment could be used for, say, an NTFS file system, while another could run ext or APFS.
4. Running different OSes
You’re an avid Windows user but need to use Linux on the side? No problem. You don’t need to buy a separate computer or anything. The possibility of running different file systems also means you can use partitioning to run multiple operating systems.
Doesn’t that sound enticing? One machine for multiple totally different uses!
5. Backup and recovery made simple
Data loss can happen on any disk, partitioned or not. However, it’s much easier to get it back on a partitioned one. You know where you stored what, and each partition can be backed up exactly as it is. It’s also a lot faster to back up single partitions than entire hard drives.
Ultimately this also means a faster path to recovery. If you lose or accidentally delete important files and data, you might want to use a recovery tool like Recuva to scan for them and get them back. Recuva is even powerful enough to recover data from damaged hard drives. But no matter how powerful, scanning a whole drive is strenuous for any recovery tool. Scanning independent partitions is a lot more convenient than that, and will get you to your goal more efficiently.
6. Optimized performance
Now, let’s keep in mind that computer performance is influenced by a number of factors. Partitioning alone isn’t what makes it better or worse. However, it can contribute to optimization. It’s easier for your computer to scan, say, a 40 GB partition to fetch the system file it needs than scanning the entire capacity of your drive.
7. Improved security (possibly*)
Separate partitions can help make your system more secure. Firstly, they minimize file corruption. If one partition gets corrupted, the others should remain unaffected. And keeping in mind the previous point about backup and recovery, ‘fixing’ the damaged partition would be much easier than fixing the entire hard drive.
Partitioning also improves security in terms of malware protection. A malicious attack on one partition is easier to deal with than malware on the whole drive. If your system partition gets infected, you can simply reinstall your OS and that should do the trick.
*Do keep in mind that partitioning can’t defend you against more advanced attacks. So make sure not to give in to a false sense of security.
What are the disadvantages of partitioning?
1. Data is still vulnerable
Yes, it’s easier to back up and recover data from independent partitions. And yes, partitioning may help protect separated files and data to a higher degree. But remember: everything is still on a single physical drive. So while digital errors and issues may be easier to deal with on partitioned drives, physical damage obviously won’t be.
If your hard drive is destroyed in some way, all data on it will be gone. That’s why, if you have crucial files on your PC, it’s important to give them the proper backup treatment before it’s too late.
2. Disbalance of space
Allocating storage space on separate partitions may be a little more tricky than you think. You may fill up one partition a lot faster than another. So on one side you’re struggling with space, and on another you have too much of it to spare. Imagine nearly filling up your system partition and then it turns out you need a lot more space for its updates than you thought.
That’s why you really have to be sure you actually have enough files of different types that you need help managing efficiently. Otherwise you’ll just create a struggle and disbalance in terms of storage.
3. Increased risk of error
If done incorrectly, partitioning can lead to more harm than good. Aside from space disbalance, there is an increased risk of incorrect partition sizes and formatting. Plus, human error is also a factor: in a moment of distraction, you may erase one partition when you meant another. Undoing such mistakes will definitely be tedious and time-consuming.
4. SSDs eliminate the need of partitioning
SSDs (solid-state drives) don’t function in the same way that HDDs do. They have faster read times and can organize files on their own. This quite literally eliminates the need for organization on your part.
Partitioning: yes or no?
The bottom line is that multiple partitions might not be necessary for the average user. But if you’re planning on storing many file types or different file and operating systems on the same PC, then you should give it a shot. It’s also an excellent solution for businesses, of course.
And if our pros and cons list isn’t enough to help you decide, you can always send us a message and we’ll help you make the right choice.
Decided to partition your hard drive?
If you’ve decided to give it a go, you definitely should make sure to do it right.
The two most effective and reliable ways to partition are using the built-in options on Windows or investing in a dedicated partitioning tool, like the EaseUS Partition Master. Which one you'll opt for depends on your specific needs.
Option 1 may be more suitable for users with at least some level of experience. In this case, you’d have to know exactly which steps to take without making errors. This is done in Disk Management on Windows 10/11. From there, you can select the partitions you’d like to split into different volumes of selected sizes.
If this is your first time partitioning, we highly suggest you either consult professionals for this or move on to option 2. The EaseUS partitioning software is specifically designed for beginners, with an intuitive interface helping you succeed in the process. All you need to do is pick the Partition Master package tailored to your needs and follow their guide.
Each package offers technical support as well, and even free upgrades (to varying degrees based on your subscription). Plus, all of this is valid for not one, but two PCs.
It’s the perfect solution for a smooth and error-free partitioning process. If you want to organize your hard drives efficiently and make the most of all your space without doing irreparable damage, it’s definitely worth the investment.
Kernel Mode Heap Corruption is the error message that the Windows operating system throws when it encounters a blue screen of death or BSOD error during PC startup or launching specific programs such as video games. It is mainly caused due to software conflicts, driver issues (especially graphics card driver), and computer hardware malfunctioning.
The good news is that this error is easily fixable.
Follow the next steps in order to fix the error:
Rollback graphic card driver
Press ⊞ WINDOWS + X to open Windows secret menu and click on device manager
Expand Display adapters section
Right-click on your GPU and choose properties
In properties window go to the driver tab and click on Roll back driver
Select the reason for operation and click on YESReboot your PC
Update corrupted and outdated drivers
How is this error mostly driver issue, updating and fixing bad drivers can fix it very easily. As in the previous step, you will need to open the device manager and go through all drivers and manually check for updates for each one, update as necessary or reinstall ones you might think have gone rogue. If you are not experienced enough with this kind of task install some automatic solution for this task like DriverFix
Check for software issues
If this error started happening after the installation of new software it is very likely that the application is causing problems. Try uninstalling or disabling the application to see if it will fix the issue. You can also boot Windows in safe mode to see if the error will happen there, if Windows is working fine in safe mode, it is likely that issue is on the software side.
Run SFC scan
Press ⊞ WINDOWS + X and choose Command prompt (admin)
In command prompt type in sfc /scannow and press ENTERWait for the process to be finished and Reboot the system

 Error Causes
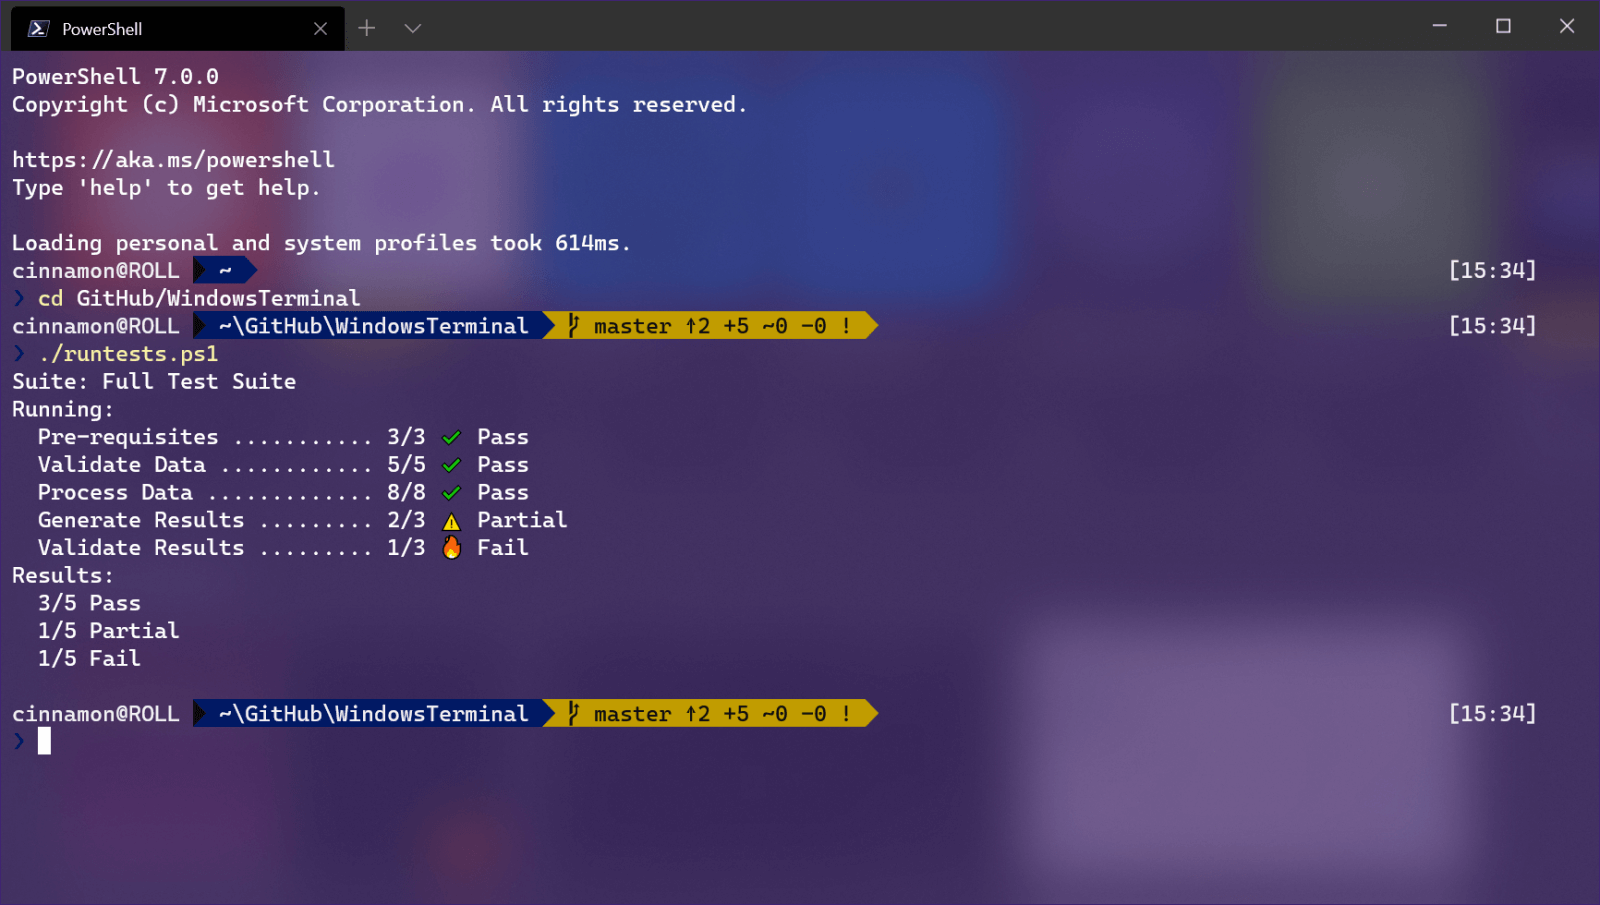 Windows Terminal is a new free Microsoft terminal sort of application. When you open either Power Shell or Command Prompt in Windows they will be opened in different windows, and if you want several of each you will have several windows of each on your screen.
Windows Terminal fixes this by opening each of the Instances of Command Prompt and Power Shell as separate tabs inside itself making it much easier to manage multiple instances of named applications.
You can also run both Power Shell and Command prompt tabs in the same Windows Terminal. Luckily running command prompt and power shell in different tabs is not the only thing you can do. Windows Terminal lets you choose your own theme, it has emoji support, GPU rendering, split panes, and many more customizable options.
Windows 11 will have Terminal as the default command-line environment for opening Power Shell or Command prompt, even Windows Subsystem for Linux (WSL)
Windows Terminal is a new free Microsoft terminal sort of application. When you open either Power Shell or Command Prompt in Windows they will be opened in different windows, and if you want several of each you will have several windows of each on your screen.
Windows Terminal fixes this by opening each of the Instances of Command Prompt and Power Shell as separate tabs inside itself making it much easier to manage multiple instances of named applications.
You can also run both Power Shell and Command prompt tabs in the same Windows Terminal. Luckily running command prompt and power shell in different tabs is not the only thing you can do. Windows Terminal lets you choose your own theme, it has emoji support, GPU rendering, split panes, and many more customizable options.
Windows 11 will have Terminal as the default command-line environment for opening Power Shell or Command prompt, even Windows Subsystem for Linux (WSL)
 Bug and security fixes:
