Can not open and run EXE file in Windows is not a new issue and sadly it can still happen from time to time, luckily this step by step solution will help you to resolve this problem fast and effective in no time.
Try the below solutions in no particular order and I hope that you will solve the issue fast and be able to return to using the computer like it never happened
Run SFC scan
As the EXE file not opening issue lies in the Windows OS, the SFC tool will be able to identify the cause and fix this issue.
Press ⊞ WINDOWS + X and choose command prompt (admin)
in command prompt type: sfc /scannow
Press ENTER
Check registry and modify if needed
Sometimes value in the registry key is wrong and can cause this error, in order to check if this is the case, we will open the registry editor and find out
Press ⊞ WINDOWS + R to bring run dialog up
type in it: RegEdit and press ENTER In the left pane of the Registry Editor window, click on the HKEY_CLASSES_ROOT to expand the section
Scroll down to find out the .exe registry and click on it
Go to the right pane of the window and double-click on the Default and set the Value Data as exefile
Click on the OK button
Next, located the given in the window: HKEY_CLASSES_ROOT>exefile>shell>open>command Click on the “Command” in the left pane of the window In the right pane of the window double-click on the Default and set Value Data as “%1” %* Click on the OK button Restart your computer and check if the issue persists
Turn off Firewall and defender
If you have a firewall and antivirus active there might be a chance of a conflict and that firewall or antivirus is preventing the EXE file from starting, disable your firewall and anti-virus and try again to open the EXE file.
Turn off user account control
User account control can also like a firewall prevent some files from executing, go into accounts and turn off user account control to see if this might be an issue preventing you from opening the file.
If your Windows 10 laptop suddenly turns off when you unplug its power cord, then you’ve come to the right place as this post will guide you on how you can fix this issue.
One of the most common causes for this kind of issue is that there is some problem with your laptop’s battery. It is possible that it might have gone bad or has been damaged. However, this couldn’t be the case especially if the laptop is new. The problem could have something to do with the system settings, connections, laptop hardware, and so on. To fix it, there are various suggestions you can check out such as follows:
Option 1 – Perform a hard reset on your laptop
This option works in most cases when the laptop with a removable battery is charging slowly as it is plugged in constantly. Refer to the steps below to do a hard reset on your laptop.
Switch off the power of your laptop.
Disconnect your laptop’s charger and then remove the battery.
Tap and hold the power button for at least 30 seconds – doing so will discharge the capacitors of the motherboard and reset the memory chips that were active constantly.
Plug the battery back and then charge the laptop again.
Check if the problem is fixed, if not, proceed to the next option below.
Option 2 – Try to change the Power Options
Tap the Win + R keys to open the Run utility.
Then type “powercfg.cpl” and tap Enter to open the Power Options window.
Next, go to your selected power plan and click the “Change plan settings” option to open a new page.
From there, click on the “Change advanced power settings” option. This will open a new window where you can see various power consumption options.
Now on the next window that appears, click on “Change advanced power settings”. This will open another window where you have to expand the Processor power management > Maximum processor state.
Then change the value for On battery mode to 25% and enable Adaptive brightness.
Now shut down your computer and try to boot it with the power cord unplugged.
Option 3 – Try to run the Power troubleshooter
The next thing you can do is to run the Power troubleshooter. To do so, follow these steps:
Go to Settings and navigate to Update & Security > Troubleshoot.
After that, look for the “Power” option from the given list of built-in troubleshooters and click on it.
Next, click on the “Run the troubleshooter” button to run the Power troubleshooter.
Once the troubleshooter is done identifying the problems, follow the next on-screen instructions to resolve the problem.
Option 4 – Try to run the Power Efficiency Diagnostics Report
You could also try to run the Power Efficiency Diagnostics Report to fix the problem. This tool is helpful and will help you analyze the status of the battery but note that this can be quite overwhelming especially if you’re not well-versed in this matter.
Option 5 – Try to uninstall or reinstall the Battery driver
You might also want to uninstall or reinstall the battery driver as it can also resolve the problem. But before you start, you have to shut down your computer and remove the power chord as well as the battery. Once you’re done, follow these steps:
Plug the power cord and restart your computer.
Once your computer has restarted, tap the Win + R keys to open the Run utility and type “devmgmt.msc” in the field and tap Enter to open the Device Manager.
After that, look for the “Batteries” driver from the list of drivers and expand it.
Then right-click on the “Microsoft ACPI-Compliant System” driver and click on the “Uninstall device” option.
Once it’s done, restart shut down your computer and remove the power cord and then attach the battery.
Now attach the power chord again and restart your computer to automatically install the driver.
Option 6 – Try to update the BIOS
Updating the BIOS can help you fix the problem but as you know, BIOS is a sensitive part of a computer. Even though it is a software component, the functioning of the hardware depends on it largely. Thus, you must be careful when modifying something in the BIOS. So if you don’t know much about it, it’s best if you skip on this option and try the other ones instead. However, if you are well-versed in navigating the BIOS, then follow the steps below.
Tap the Win + R keys to open the Run dialog box.
Next, type “msinfo32” in the field and press Enter to open System Information.
From there, you should find a search field on the bottom where you have to search for the BIOS version and then press Enter.
After that, you should see the developer and version of the BIOS installed on your PC.
Go to your manufacturer’s website and then download the latest version of BIOS on your computer.
If you are using a laptop, make sure that you keep it plugged in until you have updated the BIOS.
Now double click on the downloaded file and install the new BIOS version on your computer.
Now restart your computer to apply the changes made.
Note: If updating the BIOS didn’t help, you might want to consider resetting it instead.
One of the most interesting innovations that were released by Microsoft is the Surface Dial. This only goes to show that Microsoft is very competent not just in hardware but in overall innovation. Although it’s quite a piece of technology and as far as the consensus is concerned, it works pretty well, there are still some issues encountered by users. One of the particular issues experienced by users is that the Surface Dial fails to pair with every Windows 10 PC.
At a time of writing, it is still not clear what the cause of the problem really is. However, their possible solutions are provided in this post that might help you resolve the problem. Before you get started troubleshooting the problem, make sure that there are two AAA batteries fitted inside properly.
Option 1 – Check if your PC supports Bluetooth 4.0 LE
In case you don’t know, the Surface Dial only works with the Windows 10 Anniversary Update and later PCs that support Bluetooth 4.0 LE. Thus, you have to check if this is supported or not before you troubleshoot further.
Tap the Win + R keys on your keyboard to open the Run dialog box.
Next, type “devmgmt.msc” in the field and hit Enter to open the Device Manager.
From there, click on Bluetooth and select “Microsoft Bluetooth LE Enumerator” from the drop-down menu. However, if it is not there, then it simply means that your computer does not support this standard which is most likely why you were unable to pair with other Windows 10 PCs. On the other hand, if you were able to see it, then proceed to the next troubleshooting steps below.
Option 2 – Check if Bluetooth is on
The next thing you have to do is to check if Bluetooth is turned on. As you know, the Surface Dial connects to your computer using Bluetooth and so you need to check if it’s really on or not. Aside from that, you also have to verify pairing.
Tap the Win + I keys to open Windows Settings.
Next, select Devices from the menu and click on Bluetooth.
After that, make sure that the toggle switch for Bluetooth is turned on.
Now all you have to do is to verify pairing by pressing and holding the pairing button located beside the batteries and then wait for a few seconds until the Bluetooth light begins to flash.
Then go back to the Bluetooth section and click on Bluetooth or other devices.
From there, click on Add Bluetooth and select Surface Dial.
Follow the next instructions on the screen and click on Done once everything is completed. That should fix the problem.
Option 3 – Check if Surface Dial is connected to another PC
If you think that connecting a Bluetooth device to two different PCs at the same time is wise, then think again as it does not really bode well for the overall user experience. Thus, you need to disconnect the Surface Dial from the system that you are currently using.
On the other hand, if everything fails, then it’s most likely that the Bluetooth adapter is the one at fault. So you may have to get a third-party device that connects to your system via USB and then see if it works or not.
SD memory cards have surfaced as standard cards for digital cameras and microSD as phone standard memory cards. Most people have and use at least one daily, so naturally copying files and even formatting SD cards is a natural thing to do, but what if you cannot copy files or format SD cards?
Fear not because we had this issue and tried several things in order to overcome the problem and after some time here is a list of what can you do if you are facing this exact issue. The list is written from most simple solutions to more complex ones and it is advisable to follow it as presented. That being said, let's dive into solving the problem.
1. Remove Write Protection on SD card
First and in my experience the most usual thing preventing deleting, copying files, and formating SD card is due to write protection. Take an SD card out of the laptop, camera, or card reader and visually inspect it. On side of almost every SD card, there is a hardware lock switch and mark where it needs to be positioned in order to be locked. Even if the switch is positioned on unlocked state, switch it to locked and then back to unlocked. Sometimes this easy moving of switch can resolve some contact issues and the card will start working normally.
Another type of lock that could be turned ON is a software one. If for any kind of reason data protection has been turned ON, you will need to turn it off in order to be able to format an SD card. In order to do this follow this guide:
Press ⊞ WINDOWS + R to open the Run dialog
In run dialog type in diskpart and press ENTER
Once diskpart is opened in command prompt type in: list disk and press ENTER
Locate your SD card and type in select disk x, where x is disk number followed by ENTER
After the SD card is selected type in: attributes disk clear read-only and press ENTER
This process will clear the software lock on the SD card, after following this method try to format the card again, if the problem still exists go to the next solution.
2. Format SD card using Command prompt
Command prompt is a great tool and can perform some commands that are not been able to be completed using file explorer or another tool inside Windows.
In the taskbar search box, search for cmd and select the Command prompt
On the right part select run as administrator
If needed click on YES on UAC prompt
Inside command prompt type in diskpart and press ENTER
type in list disk followed by ENTER
Select your SD card by locating its number in the list and typing select disk X, where is X SD cards number in list and press ENTER
Once SD card is selected type in format fs=ntfs quick and press ENTER
This should format SD card but if for reason even this step is provided as unproductive, go to the next solution.
3. Format your card with the Disk Management tool
Go into the taskbar and search for Disk Management and open it
Select SD card partition that you wish to format
Right-click on the partition and select format
After the format is done, enter the volume label, file system, and allocation unit size. Confirm with OK
Press OK again to confirm the formatting process.
If you have not managed to format your SD card even with this method go to the next solution.
4. Repartition card with Disk part
If all previous solutions have failed there is a chance that the SD card has bad sectors on it. If this is the case that we will need to partition cards in order to isolate bad sectors and use healthy ones.
Press ⊞ WINDOWS + R to open the Run dialog
In run dialog type in diskpart and press ENTER
Once diskpart is opened in command prompt type in: list disk and press ENTER
Locate your SD card and type in select disk x, where x is disk number followed by ENTER
Type in Clean and press ENTER
Type in Create partition primary and press ENTER
To select a new partition type select partition 1 followed by ENTER
Make partition active by typing active and pressing ENTER
Format the drive by typing format fs=ntfs label=SDCard quick followed with ENTER
Assign a letter to drive by typing assign letter=h followed with ENTER
Type exit to close Command prompt followed again by ENTER and open File Explorer to check if the drive is active
5. Try a dedicated SD card formating fool
If anything failed so far, one last thing you could do is to download and try a dedicated SD card formatting tool. One that I would recommend is SD Memory Card Formatter, which is free software make specifically for formatting SD memory cards.
Microsoft has started building a unified store with Windows 8 and later with Windows 10 in order to make it easier for users to get safer and more modern applications for their Windows 10 devices. This unified store is called the Microsoft Store which is tied up with the Windows Update. The delivery for them both are quite similar which is why they also have some common errors as well as fixes for them. So in this post, you will be guided on how you can fix error 0x80246019 for both Microsoft Store and Windows Update in your Windows 10 computer.
The error 0x80246019 might be caused by corrupted system files or missing ones or be due to some glitch in the component services and other possible causes but whatever the cause is, you can fix it with the help of the following fixes, make sure to follow each one of them carefully.
Option 1 – Reset Windows Update components
Open Command Prompt with admin privileges.
After that, type each one of the following commands and hit Enter after you key in one after the other.
net stop wuauserv
net stop cryptsvc
net stop bits
net stop msiserver
Note: The commands you entered will stop the Windows Update components such as Windows Update service, Cryptographic services, BITS, and MSI Installer.
After disabling WU components, you need to rename both the SoftwareDistribution and Catroot2 folders. To do that, type each one of the following commands below, and don’t forget to hit Enter after you type one command after the other.
Next, restart the services you’ve stopped by entering another series of commands. Don’t forget to hit Enter after you key in one command after the other.
net start wuauserv
net start cryptsvc
net start bits
net start msiserver
Close Command Prompt and reboot your PC.
Option 2 – Toggle the Windows Insider Program settings
This option is only applicable to you if you are a part of the Windows Insider Program. If you are, then follow the steps below.
First, you have to open Settings and go to the Update & Security section.
From there select the Windows Insider Program.
After that, select the “Stop Insider Preview builds” option and then restart your computer.
Now open the Windows Insider Program again and check if it fixes error 0x80246019 or not.
Option 3 – Run the System File Checker Scan
System File Checker or SFC is a built-in command utility that helps in restoring corrupted files as well as missing files. It replaces bad and corrupted system files with good system files that might be the cause why you’re getting error 0x80246019. To run the SFC command, follow the steps given below.
Tap Win + R to launch Run.
Type in cmd in the field and tap Enter.
After opening Command Prompt, type in sfc /scannow
The command will start a system scan which will take a few whiles before it finishes. Once it’s done, you could get the following results:
Windows Resource Protection did not find any integrity violations.
Windows Resource Protection found corrupt files and successfully repaired them.
Windows Resource Protection found corrupt files but was unable to fix some of them.
Reboot your computer.
Option 4 – Run the DISM tool
You can also run the DISM Tool as it helps in repairing the Windows System Image as well as the Windows Component Store in Windows 10. Using this built-in tool, you have various options such as the “/ScanHealth”, “/CheckHealth”, and “/RestoreHealth” which could help in fixing error 0x80246019.
Open the Command Prompt with admin privileges.
Then type in the following commands and make sure to hit Enter right after you type each one of them:
Dism /Online /Cleanup-Image /CheckHealth
Dism /Online /Cleanup-Image /ScanHealth
exe /Online /Cleanup-image /Restorehealth
Do not close the window if the process takes a while as it will probably take a few minutes to finish.
Option 5 – Try to reset the Microsoft Store cache
Just like browsers, Microsoft Store also caches as you view apps and games so it is most likely that the cache is no longer valid and must be removed. To do so, follow the steps below.
Right-click on the start button and click on Command Prompt (administrator).
Next, type in the command, “wsreset.exe” and tap Enter. Once you do, the command will clear the cache for the Windows Store app.
Now restart your PC and afterward, try opening Microsoft Store again and then try to install your app or update your computer again.
Option 6 – Run the Windows Update Troubleshooter
You might also want to run the Windows Update Troubleshooter as it could also help in fixing error 0x80246019. To run it, go to Settings and then select Troubleshoot from the options. From there, click on Windows Update and then click the “Run the troubleshooter” button. After that, follow the next on-screen instructions and you should be good to go.
Where all have been there, we are downloading something and for any kind of reason chrome closes, internet breaks, etc. And our download is interrupted and gone forever, and we need to start again.
You will be glad to hear that chrome has side a download manager which tracks each download you made and you can use this manager to resume interrupted downloads.
Please note that some websites have certain scripts that will prevent you to resume interrupted downloads, in this case, using chrome's download manager will not work and you will have to start the download again.
All of this being said, if your download has been interrupted, and went away, pin Chrome press CTRL + J to open download manager, find your interrupted download, and press the resume button.
That's it, you have successfully resumed your download.
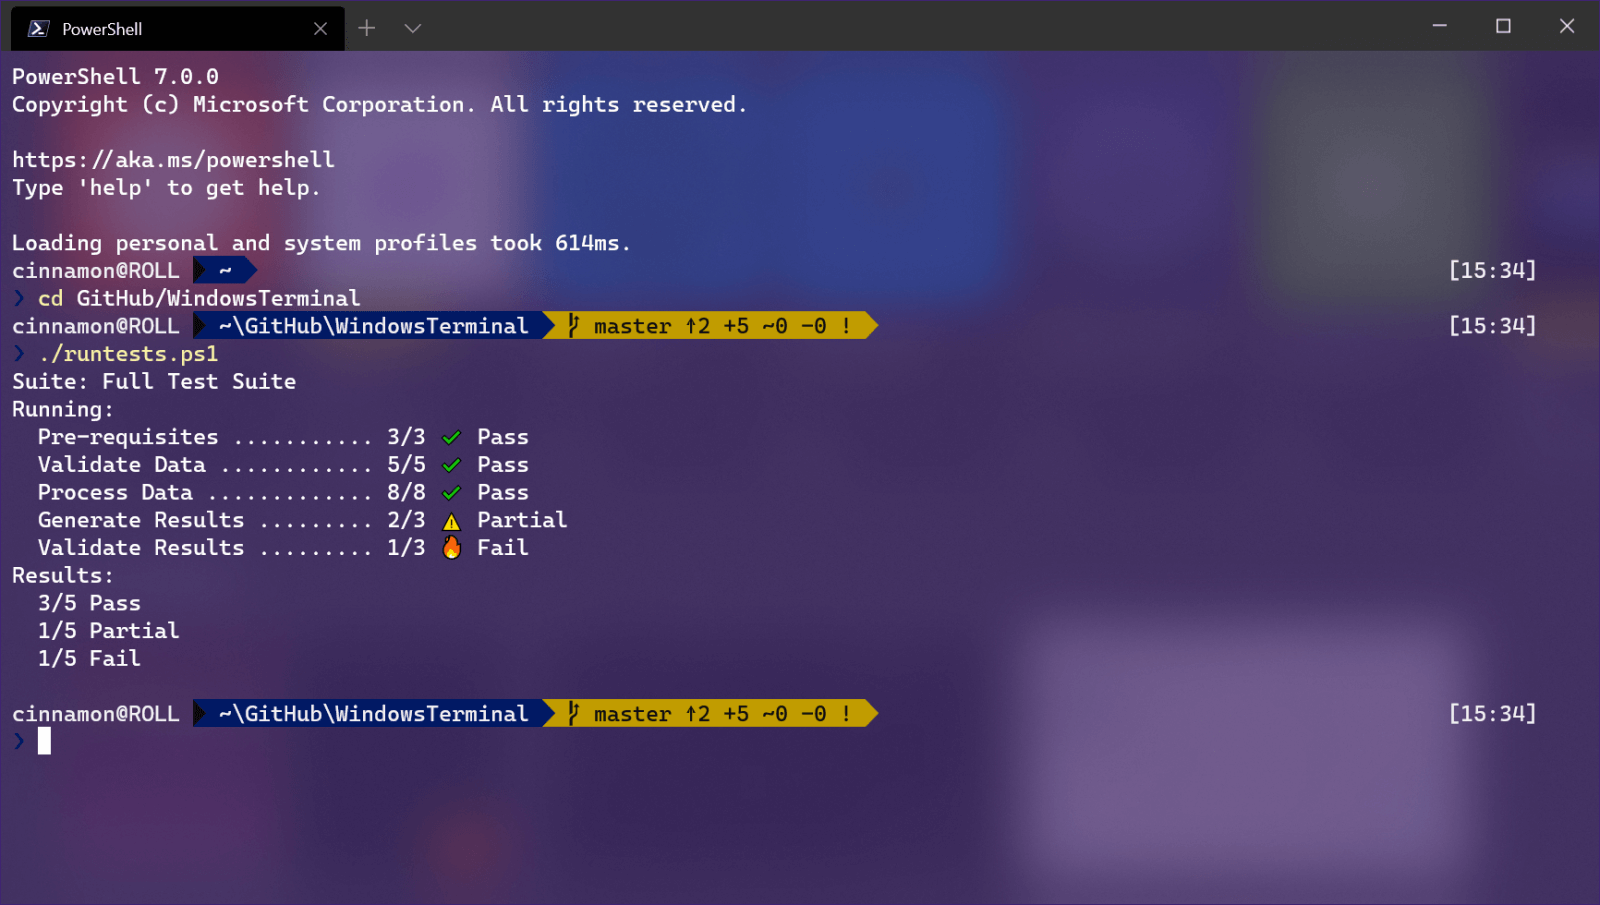
Windows Terminal is a new free Microsoft terminal sort of application. When you open either Power Shell or Command Prompt in Windows they will be opened in different windows, and if you want several of each you will have several windows of each on your screen.
Windows Terminal fixes this by opening each of the Instances of Command Prompt and Power Shell as separate tabs inside itself making it much easier to manage multiple instances of named applications.
You can also run both Power Shell and Command prompt tabs in the same Windows Terminal. Luckily running command prompt and power shell in different tabs is not the only thing you can do. Windows Terminal lets you choose your own theme, it has emoji support, GPU rendering, split panes, and many more customizable options.
Windows 11 will have Terminal as the default command-line environment for opening Power Shell or Command prompt, even Windows Subsystem for Linux (WSL)
Setting Windows Terminal as the default application
If I was successful I have managed to show you that Windows Terminal is something that you should use even if you do not or cannot upgrade to Windows 11. You can use it inside Windows 10 also.
First thing is to download and install it. You can get Windows Terminal from the official Microsoft website here: Windows Terminal page
After download and installation are completed, open the Terminal app and select the down arrow menu, click Settings. Alternatively, you can use CTRL + + shortcut.
Inside Settings by default Default Terminal application would be set to Windows Console Host
Click on the Default Terminal application to bring a drop-down menu and choose Windows Terminal from the list.
Now by default once opened Windows Terminal will use Power Shell as the default profile, however, you can change this by clicking on the drop-down for the default profile where you can choose between Command Prompt, Power Shell, Windows Power Shell, or Azure Cloud Shell. Pick one that you prefer, click on Save and it will be opened as default on the next run.
Upgrading your Windows 10 computer does not always go smoothly and you often encounter not just one but various errors so, in this post, we are going to cover several Windows 10 upgrade errors such as 80240020, 8007002C, 80246007, 80070004. All these upgrade errors are related to the Windows Update folder. Thus, you need to clear the Software Distribution folder, repair the System Image and fix System Health in order to resolve all these Windows 10 Upgrade errors.
Before you get started on the steps to resolve these tons of errors, you have to disable your security program for the meantime, disconnect your peripherals, remove USBs connected to your PC and then make sure that your PC is connected to the main power supply. Once you have everything covered, carefully follow the options given below.
Option 1 – Delete Windows 10 Update Files in the SoftwareDistribution folder
The Software Distribution folder in the Windows operating system is a folder that can be found in the Windows directory and is used to store files temporarily which might be required to install the Windows Update on your PC. Thus, it is required by the Windows Update and maintained by WUAgent. A lot of users tried deleting the files in this folder to fix the problem and so far it has worked. Like them, you can try clearing the Windows Update cache by simply deleting the contents of the folder named “SoftwareDistribution” since Windows apparently can’t clear and re-download the update contents once they are corrupted. Thus, deleting the contents of this folder will make Windows download the contents again which will fix the problem. To do that, follow the steps below.
Open the WinX Menu.
From there, open Command Prompt as admin.
Then type in the following command – don’t forget to hit Enter right after typing each one of them.
net stop wuauservnet stop bits
After entering these commands, it will stop the Windows Update Service and the Background Intelligent Transfer Service.
Next, go to the C:\Windows\SoftwareDistribution folder and get rid of all the folders and files thereby tapping the Ctrl + A keys to select them all and then click on Delete. Note that if the files are in use, you won’t be able to delete them.
Once all the contents in the Software Distribution folder are deleted, restart your PC and then go back to Command Prompt and input the following commands again.
net start wuauservnet start bits
Since the folder has already been flushed, it will be populated afresh the instant your restart your computer and open Windows Update.
Now Open Settings and check for Windows Updates. Windows 10 should begin the download right away.
Option 2 – Try using the DISM tool
Running the DISM Tool helps in repairing the Windows System Image as well as the Windows Component Store in Windows 10. Using this built-in tool, you have various options such as the “/ScanHealth”, “/CheckHealth”, and “/RestoreHealth”.
Open the Command Prompt with admin privileges.
Then type in the following commands and make sure to hit Enter right after you type each one of them:
Dism /Online /Cleanup-Image /CheckHealth
Dism /Online /Cleanup-Image /ScanHealth
exe /Online /Cleanup-image /Restorehealth
Do not close the window if the process takes a while as it will probably take a few minutes to finish.
Note: If it happens that the Windows Update client is broken, you need to run the following command to repair it then restart your PC and click on Update once again.
Note: The Windows Upgrade error, with error code 80240020 is an expected error message that happens when the upgrade requires customer user action. Thus, you need to do the following steps to resolve this particular Windows Upgrade error.
Tap the Win + R keys to open the Run dialog box.
Then type “regedit” in the field and hit Enter to open the Registry Editor.
After that, navigate to this registry key: HKEY_LOCAL_MACHINESOFTWAREMicrosoftWindowsCurrentVersionWindowsUpdate
Now right click on WindowsUpdate located in the left pane and then create a new key and name it as “OSUpgrade”
Next, right-click in an empty space in the left pane and create a new DWORD and name it “AllowOSUpgrade” and enter “1” as its value.
Option 3 – Try running the Windows Update in a Clean Boot State.
Putting your PC in a Clean Boot state can also help you install Windows Updates or Upgrades without any trouble because, during this state, you can start the system with a minimum number of drivers and startup programs that will surely help you in isolating the root cause of the issue.
Log onto your PC as an administrator.
Type in MSConfig in the Start Search to open the System Configuration utility.
From there, go to the General tab and click “Selective startup”.
Clear the “Load Startup items” checkbox and make sure that the “Load System Services” and “Use Original boot configuration” options are checked.
Next, click the Services tab and select the “Hide All Microsoft Services” checkbox.
Click Disable all.
Click on Apply/OK and restart your PC. (This will put your PC into a Clean Boot State. And configure Windows to use the usual startup, just simply undo the changes.)
After that, try to install the Windows Updates or upgrade again.
Still sitting on the fence about upgrading to Windows 11 because you don’t know what to expect? Interestingly, the new edition somehow manages to be both a total revamp and still very similar to its predecessor in many ways. It’s really something to experience for yourself.
We do want to give you a sneak peek, though. So here’s an overview of the biggest changes Windows 11 brings to the table.
What’s different in Windows 11?
1. Visual changes
The first thing anyone will notice after switching to Windows 11 is the striking visual difference. The entire interface is smoother, cleaner and more minimalistic than on Windows 10, even resembling the macOS in some instances. Perhaps the most obvious change in appearance is the Start menu and Taskbar location, which is now at the bottom center. It’s actually very neat, but if you’re someone who loves familiarity, don’t worry, you can move it back to the left.
Centralized Taskbar and Start menu
Moreover, you’ll notice that the Taskbar includes a Microsoft Teams icon by default (which you can, of course, remove) and that Live Tiles are gone. The News and Interests section has also been removed - or, shall we say, replaced. As opposed to Windows 10, news, weather forecasts and other information are now displayed as widgets.
To add to the cleanliness of the UI, Microsoft also enhanced the ‘Snap Layouts’ feature to help you better organize your windows and maximize screen real estate. It’s similar to app grouping on your smartphone. In Windows 10 this feature is slightly restricted, as it requires some manual resizing and dragging. In Windows 11, you can just hover over the minimize/maximize option on a window, select a layout and throw the windows in there.
Snap Layouts
2. New accessibility features
Microsoft has certainly paid attention to accessibility with Windows 10, but Windows 11 takes this to a whole new level.
One of the ways Windows 11 has taken things up a notch is by adding the long-awaited ‘Live Captions’ feature and advanced Narrator options.
Live Captions apply both to media played on your PC as well as your own speech when you’re using the microphone. Keep in mind that, as with almost all kinds of subtitles, you have to be prepared for a potential delay. However, it’s barely noticeable and doesn’t take away from the usefulness of this awesome new feature whatsoever.
As for the Narrator, there are three new voice packs to choose from. Microsoft has tried to put emphasis on a more natural voice than we are used to. So, now you can choose between Aria, Jenny and Guy, who will read pretty much anything off your screen out loud. Aside from this, Microsoft has also expanded the list of braille displays supported by the Narrator feature. For users with anxiety or trouble concentrating, a welcomed addition is the Focus app, which is no longer part of the Clock app. It’s now separate and called ‘Focus Sessions’, automatically triggering the Do Not Disturb mode when activated. It blocks all pop-ups and flashes and lets you work in peace until you’re ready to switch it off.
3. Android apps
Android users may rejoice! Windows 11 supports the use of your favorite applications now.
Microsoft has done this by integrating the Amazon Appstore to the Windows 11 Microsoft Store. From there, you can download your favorite Android apps and use them on your PC in a smartphone-like window.
Unfortunately not too many apps are supported at this time, but Microsoft is working on making the emulation possible for many more. Also, the option is only available in specific regions at this moment - check out if you’re one of the lucky ones.
4. Improved gaming performance
Avid gamers will be happy to hear that Microsoft has put some effort into streamlining Windows 11 for their gaming needs.
To give gamers a supreme visual experience, Windows 11 offers the ‘Auto HDR’ feature. As long as your monitor is HDR-compatible, this feature will automatically adjust the colors, brightness and contrast of games without any input from you.
Another update is DirectStorage, which we were introduced to in Windows 10 already. In Windows 11, it’s been improved to tweak loading times and overall gaming performance efficiency even better. The predisposition for it to work optimally is that your device has an NVMe SSD.
The Xbox Game Bar also helps gamers towards a smoother experience. It allows in-game screenshots, viewing processes that are running (similar to the Task Manager), monitoring the CPU and GPU performance and frame rate, integrating the Xbox App and more. There’s also a number of widgets you can now use with the Game Bar, for example the Spotify widget.
Xbox Game Bar
Another cool addition is the Xbox Game Pass, which unlocks hundreds of games to play on your Xbox App, with new additions coming in every month.
5. Smart App Control
Aside from a sleek new look and better accessibility for all users, Windows 11 also comes with a security power-up. Bear in mind that this feature is only available on clean Windows 11 installs.
Smart App Control (SAC) is an AI-powered new feature designed to protect your PC from potential threats. It blocks untrustworthy apps and adware and helps detect potentially unwanted apps, maintaining your PC’s performance and keeping your system safe.
It comes with an ‘Evaluation’ mode, which you should definitely select when running SAC for the first time. That way, the app monitors your usage and assesses whether you’re a candidate for SAC. Some users need it to be on all the time, for others it might be too distracting. Evaluation mode will turn SAC on or off based on your usage.
Don’t disable SAC again unless you’re absolutely sure you don’t need it, since reenabling it will require a fresh install. We recommend you don’t turn it off, as it is a neat feature protecting your data and files from malware at all times.
Summary
Have we piqued your interest in trying Microsoft’s latest OS? It’s a pretty exciting new iteration, but we’ll let you find out for yourself. We hope you like it!
The previous Windows versions all came with Microsoft's browser Internet Explorer. A lot of users love it because not only that it is easy to use. It is also very fast. Users didn’t have to worry about compatibility because it is almost always compatible with its Windows Version.
When they introduced Windows 10, they changed the name of the browser from Internet Explorer to Microsoft Edge. It is faster and more user-friendly compared to its predecessors. But after the Creator Update, some experienced receiving the inet_e_resource_not_found error code.
In contrary to what everyone expects, you actually don’t have to uninstall and reinstall the Microsoft Edge App. What you can do is reset the browser in your Apps & Features Settings in your Microsoft Settings.
To reset the browser you can follow the steps below:
Click on the Windows icon and go to settings.
Click on Apps and this will bring you to the Apps & Features page. Look for Microsoft Edge from the list of Apps and click on it.
Choose Advance Option
Scroll down then Under Reset, click on repair or reset. When you repair it will fix the existing problem but the data that caused the problem may still be present and can still cause problems. If you click on reset, it will delete all the cache and cookies that are installed in your browser but it will save your Favorites as well as your bookmarks.
Another way to resolve this is by disabling the feature TCP Fast Open on Microsoft Edge. To disable this, go ahead and follow the steps below:
Open the Microsoft Edge browser.
Type in about: flags on the Address (URL) bar.
Under Networking, uncheck the Enable TCP Fast Open.
Close your Microsoft Edge browser and open a new one.
Flushing the DNS also worked for other Users. Sometimes, the error code the inet_e_resource_not_found is caused by a corrupted DNS cache. There are 2 ways to flush your DNS. The first option is to use the command prompt to run the command.
To access the Command prompt or CMD, you can search for it on Cortana or you can click on the Windows icon to access the Programs, scroll down to the Windows System folder and click on it.
A drop-down menu will show up, click on Command Prompt which is the first on the list.
Type in the code ipconfig /flushdns and press enter.
There will be a message that will show that says Windows IP configuration successfully flushed the DNS Resolver Cache
Exit the CMD by typing exit and press enter.
The easiest way to do this is to Press the keys Window + R on your keyboard. Type in ipconfig /flushdns in the search box and hit enter or click on OK.
These are only some of the ways to resolve the inet_e_resource_not_found. There are other ways to further troubleshoot this issue such as reinstalling your Wifi Adapter Driver or adjusting the DNS Server Address. But most of the time, users are able to resolve the issue with the steps provided above.
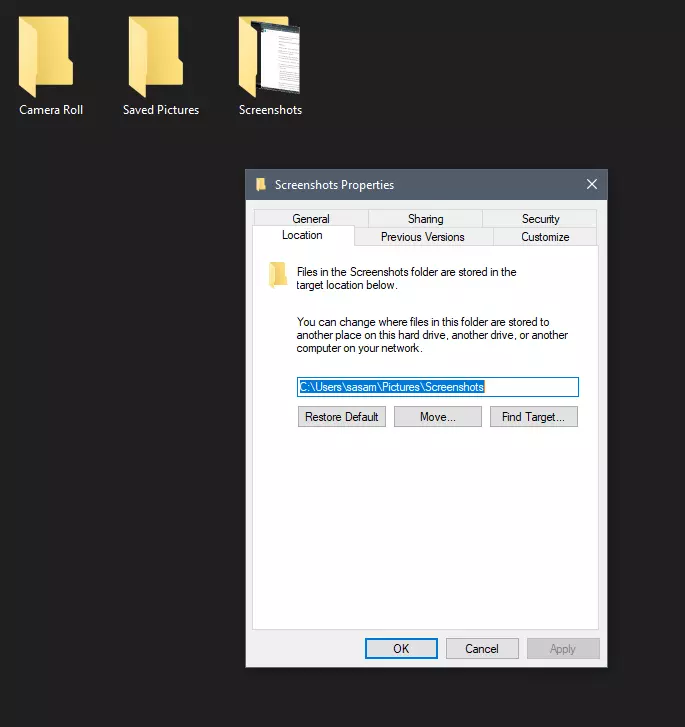
Each time when you press WINDOWS + PrtScn key on your keyboard a screenshot is taken and saved on your Hard drive, to be more precise, it is saved in a specific folder which is in c:\Users\Your user name\Pictures\Screenshots. Now, this specific location is not anything that's bad but it is a little deep and not so user-friendly for quick access.
Luckily this default location can be changed into any folder that you like.
Changing location
First thing is to open File Explorer and then navigate to your PC. Once you go to your PC, go to Pictures, and inside right-click on the Screenshots folder. If there is no screenshots folder inside, this means that since Windows was installed no screenshots were taken with WINDOWS + PrtScn key combination. Please note that just by pressing PrtScn you will create a screenshot but you will place it inside the clipboard ready to be pasted somewhere, with WINDOWS + PrtScn you are saving the screenshot directly in a file on your hard drive.
So once you clicked on the Screenshots folder, go to the bottom and click on properties. Inside properties go to the Location tab. In the location, tab clicks on MOVE and browse to your new location where you would like screenshots to be saved. Once you select the folder for screenshots, click on the Select Folder button and confirm with OK. After this, Windows will ask you would you like to move existing screenshots into the chosen folder. Click YES or NO, depending on your preference.
After this easy setup, all of your new screenshots will be placed now inside the chosen folder.
Thank you for reading and I hope to see you tomorrow. Take care.

 Fear not because we had this issue and tried several things in order to overcome the problem and after some time here is a list of what can you do if you are facing this exact issue. The list is written from most simple solutions to more complex ones and it is advisable to follow it as presented. That being said, let's dive into solving the problem.
 Windows Terminal is a new free Microsoft terminal sort of application. When you open either Power Shell or Command Prompt in Windows they will be opened in different windows, and if you want several of each you will have several windows of each on your screen.
Windows Terminal fixes this by opening each of the Instances of Command Prompt and Power Shell as separate tabs inside itself making it much easier to manage multiple instances of named applications.
You can also run both Power Shell and Command prompt tabs in the same Windows Terminal. Luckily running command prompt and power shell in different tabs is not the only thing you can do. Windows Terminal lets you choose your own theme, it has emoji support, GPU rendering, split panes, and many more customizable options.
Windows 11 will have Terminal as the default command-line environment for opening Power Shell or Command prompt, even Windows Subsystem for Linux (WSL)
Windows Terminal is a new free Microsoft terminal sort of application. When you open either Power Shell or Command Prompt in Windows they will be opened in different windows, and if you want several of each you will have several windows of each on your screen.
Windows Terminal fixes this by opening each of the Instances of Command Prompt and Power Shell as separate tabs inside itself making it much easier to manage multiple instances of named applications.
You can also run both Power Shell and Command prompt tabs in the same Windows Terminal. Luckily running command prompt and power shell in different tabs is not the only thing you can do. Windows Terminal lets you choose your own theme, it has emoji support, GPU rendering, split panes, and many more customizable options.
Windows 11 will have Terminal as the default command-line environment for opening Power Shell or Command prompt, even Windows Subsystem for Linux (WSL)