 In today's world any professional, whatever be design, print, web design or similar is using one or more Adobe programs. Adobe has cemented itself as a must-have software for any kind of serious and even amateur work. Sadly in the latest Windows 11 adobe software in some instances can slow down your computer and put some hard load on the CPU. If you are one of these unfortunate users, keep reading because we have a few things you can do to solve this.
SFC scan is a built-in Windows tool aimed at diagnosing and repairing system files inside Windows itself. Running an SFC scan usually solves most issues of these kinds so we will try that one first.
Windows updates are designed to fix issues and solve problems, check to see if a new update is available to install.
Antivirus and firewall can interfere with adobe applications and background services, try turning your preferred protection software temporarily off and check if your CPU is still under high load.
Uninstall and install a clean version of the adobe creative suite or individual applications that you are using. Check your CPU load after reinstallation.
This is not a really advisable course of action but if non of the previous solutions have produced results then this might be the only option if you would like to keep using the software. Open File Explorer and paste the following line in the path box on top: C\:Program Files>Adobe Systems>Adobe CEF Helper or Adobe Creative Cloud >Adobe CEF Helper_uninstall.exe. Double click on the file and uninstall the CFT helper.

“0xC1900209, Incompatible software is blocking the upgrade process. Uninstall the application and try the upgrade again.”This error message comes under the umbrella of the Windows 10 pre-upgrade validation using Setup.exe. And for you to identify the incompatible app, you need to grab a Windows 10 install image using the Windows Media Creation tool to download the suitable Windows 10 version and mount it. After that, execute the setup.exe file that’s located in the root folder of the Windows 10 install image. Once you execute the setup file, the upgrade wizard will give you a list of incompatible apps. Once you have determined which software is not compatible with the Windows Update, there are two options you can try to resolve the Windows Update error 0xC1900209 – you can either try to update the conflicting software or uninstall it. For more details, follow the given options below.
net stop wuauserv net start cryptSvc net start bits net start msiserver
net start wuauserv net start cryptSvc net start bits net start msiserver
“An internal error has occurred: The specified resource name cannot be found in the image file. (0x90070716).”You can also encounter this error when you run the System Image Backup function. As mentioned, you can resolve this error using two potential fixes namely checking the status of the Windows Backup Service and checking the settings in the Windows Registry. For more details, refer to the instructions provided below but before you proceed, it would be better if you create a System Restore point first.
GameGuard Execute Error: 115 ‘There are multiple events of game execution or GameGuard is already running. Close the game then try again.’
 Error Causes
Sometimes, some applications after they are installed will put their shortcut in the context menu (right-click on desktop) for easy access, most of the time these are some system tied applications like AMD and Nvidia control panels or archives like WinRAR or 7ZIP but it can happen even for some usual application to do this.
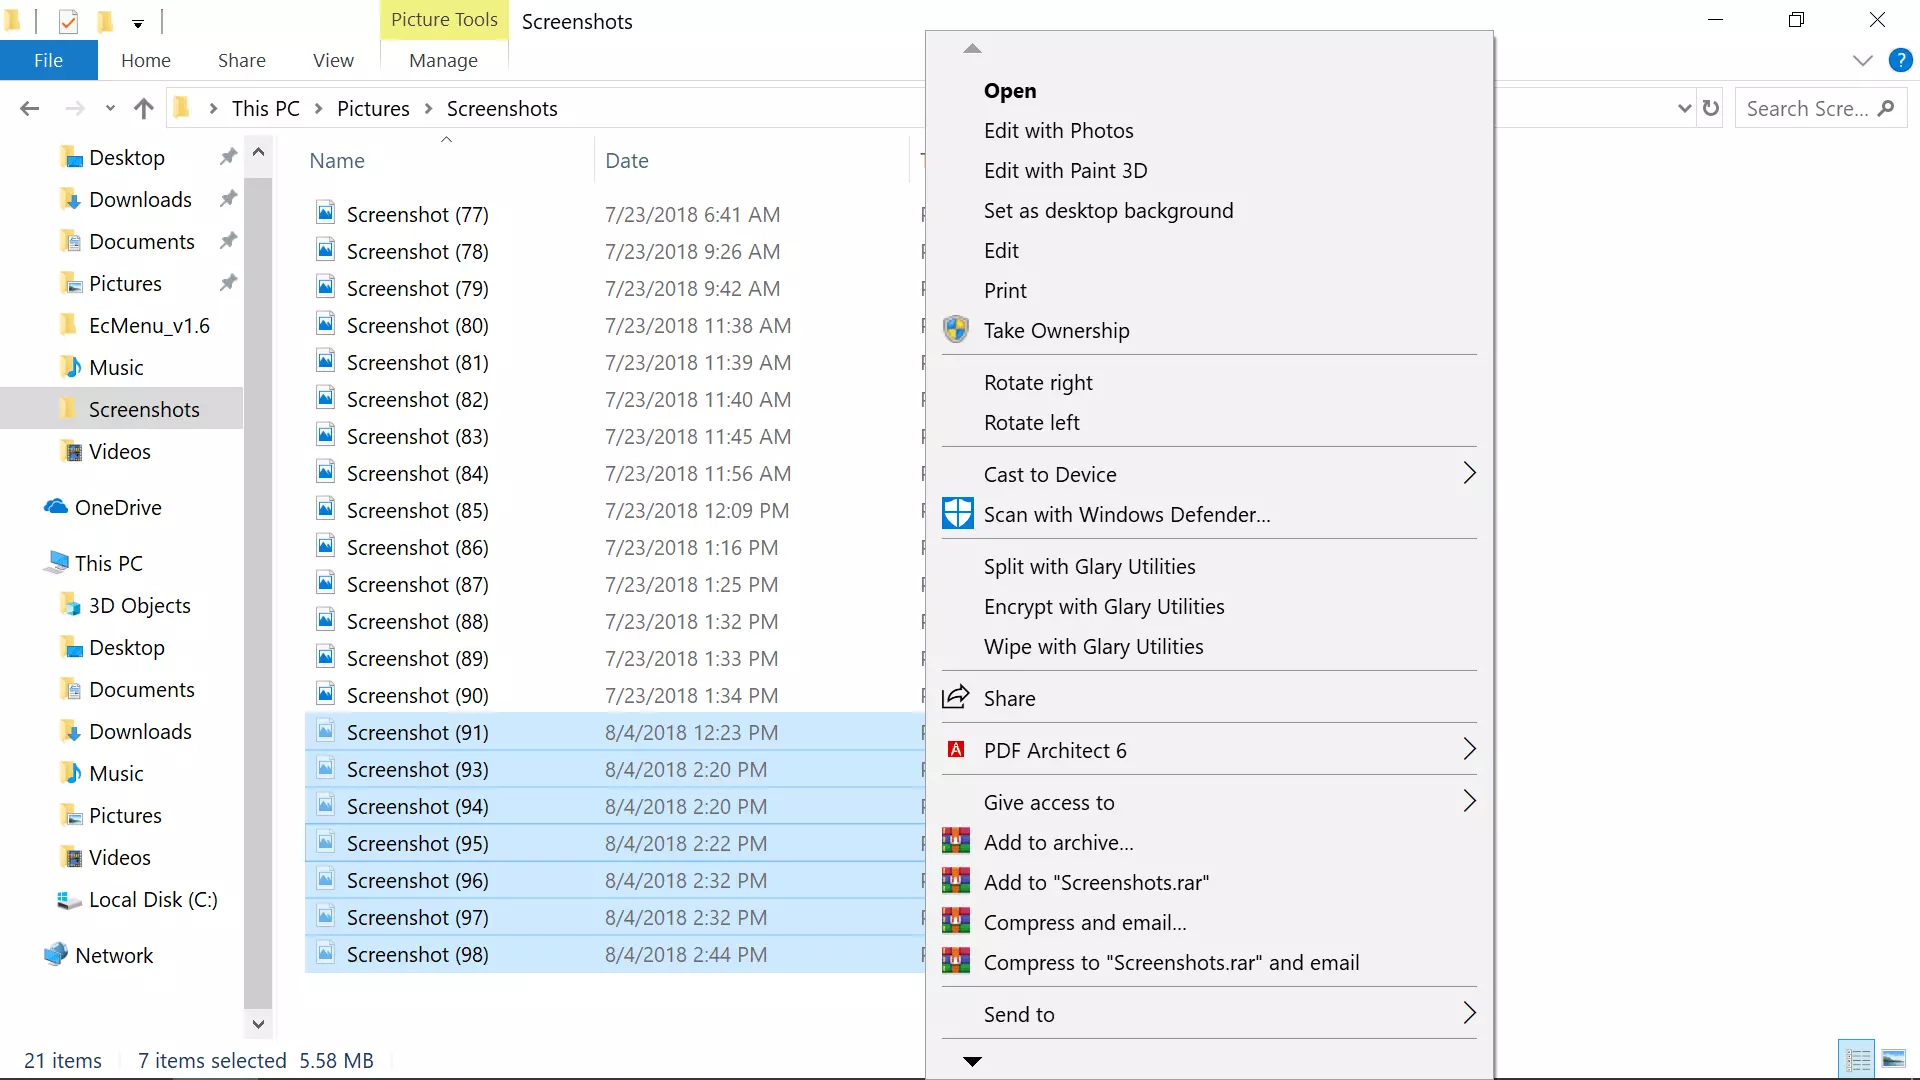
There are some applications that you use frequently and they could be worth putting in the context menu, if you want to avoid clutter on the desktop or in the taskbar this is the third place that you should consider placing shortcuts.
Doing this will require some playing and tweaking in the Windows registry editor so be careful when editing the registry since bad entries can lead to system crash or instability. Follow step-by-step instructions.
Open the registry editor by searching Regedit and pressing enter than inside of the registry editor search for the next key:
HKEY_CLASSES_ROOT\Directory\Background\shell
Select shell and right-click on it, hover over New and in the submenu click on Key. In the next step, you need to name a key, this name will be the thing that will be shown in the context menu when you right-click on a desktop so type in the name that you would like or the name of the application that you wish to add to the menu.
If you wish you can even add a keyboard shortcut to launch this specific application. To do this select entry that you have created and edit the default value, inside the edit string in the Value data field type first & and after that key that you would like as a shortcut. Now after right click if you hit your shortcut key app will be launched right away.
The next task is to create a command key that will actually hold the command to launch the application. Right-click on the entry that you have created, hover over New, and click on Key.
Next, you’ll need to create the command key that will actually hold the command used to launch the application. Right-click on the new Notepad key, and then choose New \ Key from the menu. Name this key 'command', all in lower case and without hyphens.
Now in order to finish setting the launcher, you need the full path of the file that you would like to run. Locate your file in file explorer or in another tool and copy its path by SHIFT + right-clicking on the file itself and choosing copy as path option.
Now click on the command key and double click on the default key on right to edit it, inside the field value data paste your path to executable. close and save the registry and you are done.
 Steam has cemented itself as the largest digital game shop in the World. First, release all the way back on September 12th, 2003, it was meant to be a standalone software client aimed to deliver updates to Valve’s games. It was soon expanded to include titles from third parties.
The greatest Steam expansion and its popularity started in 2004 with the release of Half-life 2. Steam allowed prepurchased editions to be downloaded before the official release of the game making it available for play the moment it was officially out.
Very soon after Steam gained its popularity, Valve has opened doors to other developers and offered them to use Steam as means for a digital distribution platform. Today it hosts over 30000 different game titles, not including DLC or applications.
And how soon Valve’s steam deck is coming out soon we would like to share some great tips and tricks about Steam itself for easy everyday gaming.
Steam has cemented itself as the largest digital game shop in the World. First, release all the way back on September 12th, 2003, it was meant to be a standalone software client aimed to deliver updates to Valve’s games. It was soon expanded to include titles from third parties.
The greatest Steam expansion and its popularity started in 2004 with the release of Half-life 2. Steam allowed prepurchased editions to be downloaded before the official release of the game making it available for play the moment it was officially out.
Very soon after Steam gained its popularity, Valve has opened doors to other developers and offered them to use Steam as means for a digital distribution platform. Today it hosts over 30000 different game titles, not including DLC or applications.
And how soon Valve’s steam deck is coming out soon we would like to share some great tips and tricks about Steam itself for easy everyday gaming.