Logo

A Quick Guide to Resolving Error 2738

Error 2738 - What is it?

The error code 2738 typically occurs either when you attempt to install a program or uninstall it on Windows Vista and 7. The error message is displayed in the following format:

“Error 2738. Could not access VBScript run time for custom action.”

It is a type of runtime error associated with VB (Visual Basic) Script. It indicates that the VB script engine is not correctly registered on your computer.

Solution

Restoro box imageError Causes

The error 2738 may occur due to multiple reasons. These include:

  • Windows VB Script engine is not properly installed or is disabled on your PC
  • Registry keys are incorrect
  • Corrupt registry entries
  • Poor PC maintenance

As this error code may be generated due to registry issues, it is advisable to fix it immediately as it may pose serious threats to your system like system failure, crash and valuable data loss. And complete data retrieval is often the hardest task.

Further Information and Manual Repair

To avoid such threats and to resolve the error 2738 on your PC immediately, here are some solutions that you can try:

Register the VB Script Engine Correctly on Your PC

This can be done by running the command prompt as administrator:-

  • Simply go to the start menu, click all programs, and select accessories.
  • Right-click on Command Prompt and select ‘run as Administrator’.
  • Navigate to the folder that contains the DLL. If you are using Windows 32 bit version, then type cd %windir%system32 into the Command Prompt and then press enter.

Nonetheless, if you are using 64-bit version Windows then type the following command: regsvr32 vbscript.dll and then press enter. This will help you register the VB script engine correctly and resolve the issue.

Download and Run Restoro

If the error still persists, then this means the underlying cause of the error 2738 could be invalid and corrupt registry keys. To resolve either of the causes in seconds, it is advisable to install and run Restoro.

Restoro is an advanced, innovative, and multi-functional PC Fixer. This tool is embedded with multiple utilities including a powerful registry cleaner, an antivirus and a system optimizer.  The registry cleaner is a powerful utility that instantly detects all registry issues and resolves them right away.

The registry saves all activities performed on the PC. It stores all types of files including invalid registry keys, cookies, internet history, junk files and temporary files.

If these unnecessary files are not removed and cleared from the PC, it not only takes a lot of disk space but also damages the registry and dll files.

The registry cleaning utility detects all such files and removes them. It wipes out all invalid registry entries and bad keys clean the registry and restores it.

In addition to this, this tool can also be used to remove viruses and optimize the system speed. It is a user-friendly and highly functional PC repair tool. It is compatible with all Windows versions

Click here to download Restoro on your PC and resolve error 2738 right away!

Do You Need Help with Your Device?

Our Team of Experts May Help
Troubleshoot.Tech Experts are There for You!
Replace damaged files
Restore performance
Free disk space
Remove Malware
Protects WEB browser
Remove Viruses
Stop PC freezing
GET HELP
Troubleshoot.Tech experts work with all versions of Microsoft Windows including Windows 11, with Android, Mac, and more.

Share this article:

You might also like

NVIDIA Control Panel is not opening
Users who constantly use graphic-intensive applications like games or any video-rendering software need to control how their graphics card is used. There are some who always toggle their Graphic Quality settings to get the Frames Per Second or FPS up. While some tend to adjust the size, orientation, scaling, and other display settings in order to use their PCs in a more efficient way or to simply work better. And in all of that, that’s where the NVIDIA Graphics Card comes into the picture. Take note that this software only works on PCs which has NVIDIA Graphics Card attached to them. Thus, if you use another Graphics Card then this post is not for you, otherwise, proceed reading to know what you can do if the NVIDIA Control Panel is not opening on your Windows 10 PC. Here are a couple of things you can try if the NVIDIA Control Panel is not opening, not responding, or not working:
  • Restart the process of the NVIDIA Control Panel
  • Restart the NVIDIA Display Driver Service
  • Update your NVIDIA Display Drivers
For more details, refer to the instructions provided below.

Option 1: Restart the process of the NVIDIA Control Panel.

  • Tap the Ctrl + Shift + Esc keys to open the Task Manager.
  • After opening the Task Manager, look for the process named NVIDIA Control Panel Application.
  • Once you found it, expand it and right-click on the NVIDIA Control Panel sub-process, and click on End Task.
  • Now try opening the NVIDIA Control Panel from the Start Menu and see if it now works fine or not.

Option 2: Restart the NVIDIA Display Driver Service

  • Tap the Win + R keys to open the Run dialog box.
  • Then type “services.msc” in the field and hit Enter to open the Windows Services Manager.
  • After opening the Services window, you will see a list of services. From there, look for services named “NVIDIA Display Container LS” and double click on it to open its Properties.
  • Now make sure that the service is Started. If it isn’t, you need to start it, otherwise, you need to Stop it and Start It again. You also have to make sure that the Startup Type is set to Automatic.
  • Do the same for the NVIDIA LocalSystem Container service.
  • Restart your computer and check if the problem’s fixed.

Option 3: Try updating the drivers from the official site of NVIDIA

If both the first and second given options didn’t work, you can also try updating the drivers from the official NVIDIA website. And in case you don’t know the type of Nvidia graphics card that your computer is on, follow the steps below:
  • Tap the Win + R keys to open the Run dialog box.
  • Next type in “dxdiag” in the field and click OK or hit Enter to open the DirectX Diagnostic Tool.
  • From there, you can see what type of Nvidia graphics card that your system is on.
  • Take note of your graphics card information and then look for the best drivers for your operating system. Once you’ve downloaded and installed the file, restart your PC.
Read More
How to remove "program" from startup

Instaling and removing applications from your Windows can sometimes leave some traces that are unpleasant and can cause annoyances. One of these annoyances is the program in the startup section of the task manager.

If you ever opened task manager and went into the startup section trying to disable some of the startup items on your Windows boot there might be a chance that you have experienced and seen a program without any icon or information about it just sitting there.

Program inside task manager

This is due to some applications being removed from the system but for some reason, it still shows itself in startup and it is quite annoying. So here we will show you how to get rid of this annoyance so your startup is clean again without junk in it.

Removing a program from startup

Locating the source of the issue

The first thing of course is to open the task manager itself and navigate to the startup tab. Inside the startup tab right-click on the column header and tick or enable Startup type and command line. Now you will see the location of the supposed file (that is missing or you could just go there by right-clicking on the item, but here it is greyed).

program in task manager with details

99% of the time startup type will be registry since the file is missing, if it was a file fix would be just to simply delete the file in the folder but since it was installed and not properly removed registry key is still present but the file cannot be found. After confirmation that the file is indeed missing and that the startup type is registry open the registry editor by typing Regedit in search and pressing enter.

Removing the key from registry

Inside Registry editor navigate to: HKEY_CURRENT_USER\SOFTWARE\Microsoft\Windows\CurrentVersion\Run. Inside on right part, you will see all auto-start entries added by installed applications.

regirsty editor

Locate one that is causing issues by comparing its path with the path inside the task manager command line and delete the key. Once the key is deleted right-click on RUN on the left part and choose HKEY_LOCAL_MACHINE to quickly jump on that key location and repeat the process of key deletion if needed. HKEY_LOCAL_MACHINE will delete startup entry for all users and sometimes entry will not be present here since the application is not installed for all users or there are no other users on the machine.

After the procedure is finished, reboot your systems in order to apply changes.

Read More
Turn off or on Mobile Hotspot remotely
In case you don’t know, new support has been added by Microsoft to Windows 10 that now allows users to turn off or on the Mobile Hotspot remotely. The Mobile Hotspot feature, known earlier as “Virtual Networks”, was first introduced with the initial release of Windows 10. With this new feature to remotely turn on or off the Mobile Hotspot in Windows 10, users can just use the Bluetooth on their mobile phones to turn off or on the Mobile Hotspot even when their Windows 10 computers are out of their reach. To turn off or on the Mobile Hotspot feature in your Windows 10 computer remotely, there are two options you can try. First, you can do it using the Windows 10 settings app or using the Registry Editor. To get started, refer to the following options.

Option 1 – Turn off or on the Mobile Hotspot remotely via Windows 10 Settings app

  • First, you need to open the Windows 10 Settings app and from there go to Network & Internet and then go to the Mobile Hotspot section.
  • After that, scroll down to the “Turn on remotely” section.
  • Once done, make sure that the toggle button is set to ON and that the Bluetooth of both devices is turned on and paired as well. This should enable the feature to turn on or off the mobile hotspot remotely.

Option 2 – Turn off or on the Mobile Hotspot remotely via Registry Editor

Before you get started with the second option, make sure that you create a System Restore point first. Once done, proceed to the following steps:
  • Tap the Win + R keys to open the Run dialog box and type “Regedit” in the field and then hit Enter to open the Registry Editor.
  • Next, navigate to this registry path: ComputerHKEY_LOCAL_MACHINESOFTWAREMicrosoftWcmSvcTethering
  • From there, look for the DWORD named “RemoteStartupDisabled” and set its Value data to be “0”. This will enable the feature that will allow you to remotely turn on or off the mobile hotspot in your Windows 10 computer. To disable it, just set its Value data to “1”.
Read More
Make START menu full screen in Windows 10
Hello and welcome to another great tutorial from errortools.com. Today we will be making Windows START menu full screen. First introduced in Windows 8.1, the start menu has been shifted from full screen to gadget like in Windows 10 but if you prefer to have it over the entire screen with all of its glory and large icons you can do so and we will be happy to show you how. Press ⊞ WINDOWS and choose settings. Windows 10 Star menu with marked settings iconFrom the settings screen, choose Personalization. Windows 10 settings menu with marked Personalization groupUnder personalization options click on START. windows settings start screen sectionAnd then on the right part click on the button under Use Start full screen to turn it ON windows settings start screen switch for full screenThat's it, your start menu is now full screen.
Read More
Fix The driver detected a controller error
One of the worst problems users can encounter on their computers is Blue Screen of Death errors as some of them are quite hard to fix. One of them is the “The driver detected a controller error” Blue Screen error. It could be followed by “DeviceIdeIdeport0 OR”, “on deviceharddisk0dr0”, or “DR3” or the name of the drive or port that’s causing the problem. If you are one of the users who encountered this error, then the suggestions provided in this post would definitely help you in fixing the problem.

Option 1 – Try to disconnect and reconnect all hardware and cables

A lot of users reported that they were able to fix the problem by disconnecting and reconnecting cables and hardware like scanners, printers, cameras can help in fixing the problem. In addition, you can also boot your computer in a Clean Boot State so that you can find the problematic hardware by hit and trial method. Refer to the steps below to do so:
  • Log onto your PC as an administrator.
  • Type in MSConfig in the Start Search to open the System Configuration utility.
  • From there, go to the General tab and click “Selective startup”.
  • Clear the “Load Startup items” check box and make sure that the “Load System Services” and “Use Original boot configuration” options are checked.
  • Next, click the Services tab and select the “Hide All Microsoft Services” check box.
  • Click Disable all.
  • Click on Apply/OK and restart your PC. (This will put your PC into a Clean Boot State. And configure Windows to use the usual startup, just simply undo the changes.)

Option 2 – Update the device drivers

Updating the outdated device drivers in your computer can also help in fixing the problem. To do so, refer to these steps:
  • First, boot your computer into Safe Mode.
  • After that, tap the Win + R keys to launch Run.
  • Type in devmgmt.msc into the box and tap Enter or click OK to open the Device Manager.
  • After that, a list of device drivers will be displayed. From there, look for any outdated device drivers and click on each one of them.
  • After that, right-click on each entry of the device drivers and select the “Uninstall Device” option from the menu.
  • Now restart your computer.
  • After restarting your computer, go to the Settings app and Check for Updates in the Windows Update section.

Option 3 – Try to update the BIOS

Updating the BIOS can help you fix the ATTEMPTED_WRITE_TO_READONLY_MEMORY BSOD error but as you know, BIOS is a sensitive part of a computer. Even though it is a software component, the functioning of the hardware depends on it largely. Thus, you must be careful when modifying something in the BIOS. So if you don’t know much about it, it’s best if you skip on this option and try the other ones instead. However, if you are well-versed in navigating the BIOS, then follow the steps below.
  • Tap the Win + R keys to open the Run dialog box.
  • Next, type “msinfo32” in the field and press Enter to open System Information.
  • From there, you should find a search field on the bottom where you have to search for the BIOS version and then press Enter.
  • After that, you should see the developer and version of the BIOS installed on your PC.
  • Go to your manufacturer’s website and then download the latest version of BIOS on your computer.
  • If you are using a laptop, make sure that you keep it plugged in until you have updated the BIOS.
  • Now double click on the downloaded file and install the new BIOS version on your computer.
  • Now restart your computer to apply the changes made.

Option 4 – Try running the Blue Screen Troubleshooter

You might also want to run the Blue Screen troubleshooter. It is one of the built-in tools in Windows 10 that helps users in fixing system issues including Blue Screen errors. It can be found in the Settings Troubleshooters page. To use it, refer to these steps:
  • Tap the Win + I keys to open the Settings panel.
  • Then go to Update & Security > Troubleshoot.
  • From there, look for the option called “Blue Screen” on your right-hand side and then click the “Run the troubleshooter” button to run the Blue Screen Troubleshooter and then follow the next on-screen options. Note that you might have to boot your PC into Safe Mode.

Option 5 – Try running the Memory Diagnostic Tool

The Memory Diagnostic tool in windows can help resolve the “The driver detected a controller error” Blue Screen error by checking and automatically fixing any memory-based issues. To run it, refer to these steps:
  • Tap the Win + R keys to open Run and type mdsched.exe and hit Enter to open the Windows Memory Diagnostic Tool.
  • After that, it will give two options such as:
    • Restart now and check for problems (Recommended)
    • Check for problems the next time I start my computer
  • Once your computer has restarted, perform a basic scan or you could also go for the “Advanced” options such as “Test mix” or “Pass count”. Simply tap the F10 key to start the test.
Note: After you select your preferred option, your computer will restart and check for memory-based issues. If it finds any issues, it will automatically fix them and if there’s no issue found, then it’s most likely not a memory-based issue so you should try the other options given below.

Option 6 – Replace your motherboard

If your computer is still under warranty, you should consider replacing your computer’s motherboard in case the options given above failed to work in fixing the Blue Screen error.
Read More
How To Easily Fix Unresponsive Script
This Unresponsive Script problem information is most frequent on Firefox, which is among the top browsers worldwide. Firefox might show you these errors with the information, "Warning: Unresponsive Script". It is going to subsequently inform you that software to the web page you're trying to open is unresponsive, or has quit reacting. This means that the script has ceased functioning and may freeze or hang Firefox if not immediately resolved. You can easily solve this problem.

Solution

Restoro box imageError Causes

Before you can fix this error, you need to understand its primary cause. The biggest risk is that if left unchecked, Unresponsive Scripts will hang your browser and to an extension of your computer thus limiting your productivity. You may have to uninstall and re-install Firefox if the problem persists. Listed here are several of the very most typical reasons for unresponsive script:
  • Programming Errors
  • Interference by other Softwares
  • Using an older outdated version of the program.

Further Information and Manual Repair

Most times, you have to do very little to fix this problem. Furthermore, a lot of the remedies supplied here do not require the assistance of a qualified professional technician. You can easily perform them and completely solve the error.
  • If you wish to stop the error, keep your browser and add-ons up to date.

It's easy to update your browser and any add-ons therein. In most cases it's free. By upgrading your browser and add-ons frequently, you are effectively eliminating the risk of Unresponsive Script occurring and interfering with your work.
  • unresponsive script in firefox warning dialogCheck for a poorly functioning background process

The sorts of background procedures that might result in the Unresponsive Software error include Javascript code, media plugin, and browser extension. You can stop the script from running while using Firefox thus eliminating the Unresponsive script error. Shutting the dialog box is just another easy way of eliminating the unresponsive script error information. Firefox offers you two choices in case of this malfunction. Either "Continue" or "Stop Script". Whatever alternative you pick, you can be certain the dialog box shuts, thus allowing you to continue browsing. firefox home screenThe final solution. Contact Firefox about these errors on your browser. Oftentimes, these errors occur when you attempt to visit particular websites. Mark the offending websites' URLs and include them in your communications with Firefox. Sometimes you can also contact the website owner yourself and request them to check their website's code. Following are additional measures you can take to resolve the Unresponsive Script error.
  • Waiting longer for the error to resolve itself automatically
  • Blocking the offending script
  • Yanking the guilty add-ons
  • Disabling the hardware acceleration tool.
With one of these few steps, you won't have to worry about the Unresponsive Script error, can continue enjoying your browsing activities on Firefox.
Read More
Microsoft blocking Office users
Microsoft Office 365 baner
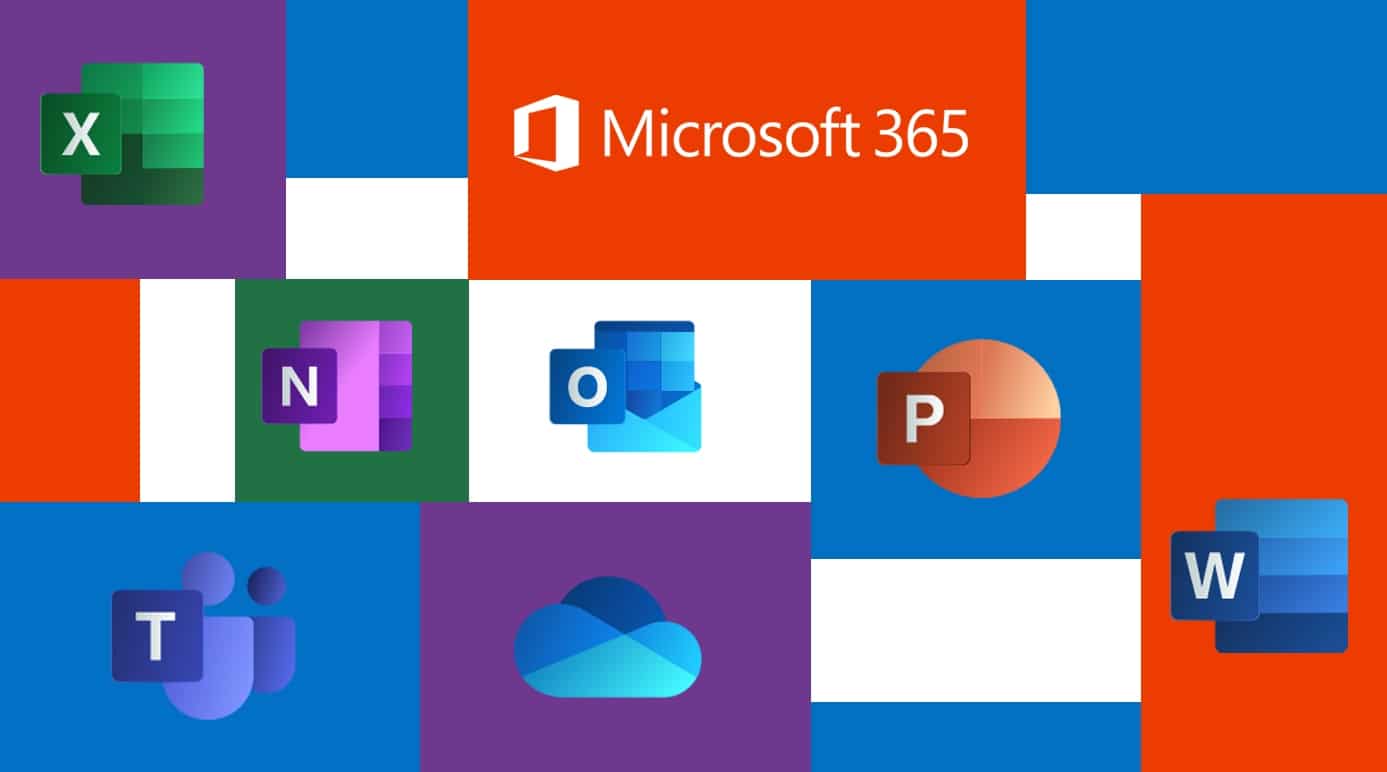
Microsoft starting as of today will block its Office 365 users if they are using Internet Explorer or early versions of Edge browsers. So if you are using older non Chromium Edge versions of Microsoft browsers you can no longer access Office services until you switch. Now normally I would fully support this kind of decision since Internet explorer is a slow and vulnerable browser and the edge is similar in that regard. The new edge browser is great and it should be used but the issue I have is that Office 365 is not free, it is a premium feature and I am wondering how Microsoft plans to deal with people that have already paid for service but suddenly cannot access it anymore.
Read More
Fix update failed to install error 0xca00a000
This post will show you how to fix the Windows update error 0xca00a000 which you can encounter during the installation of Windows updates. Here’s the full error message of this Windows Update error:
“Updates failed There were problems installing some updates, but we’ll try again later. If you keep seeing this and want to search the web or contact support for information, this may help: 2018-07 Cumulative Update for Windows 10 Version 1803 for x64-based Systems (KB4345421) – Error 0xca00a000”
This kind of Windows Update error pops up when Windows has missed installing one of the cumulative updates needed or when there is some problem with the driver that won’t let the installation of the updates push through. There are also instances when the system files are modified with incorrect permission that may result in the Windows update error 0xca00a000. Thus, you need to fix the trusted installer permission as well as resolve the issue with the driver. To do these things, you need to follow the options laid out below.

Option 1 – Run the Windows Module Installer

The Windows Module Installer is a built-in service in the Windows operating system that could help you resolve the Windows update error 0xca00a000. You need to make sure that this service is Started and that its Startup type is set to Automatic – you can do this via Services Manager or by executing the command given below in an elevated Command Prompt.
  • Tap the Win + R keys to open the Run dialog box.
  • Then type “command prompt” in the field and hit Enter to open Command Prompt.
  • And in the elevated Command Prompt type in the following command and hit Enter:
SC config trustedinstaller start=auto
  • After executing the command successfully, you should see the “[SC] ChangeServiceConfig SUCCESS” message on the Command Prompt window.

Option 2 – Try manually installing the updates

As mentioned, the error might be because Windows missed installing a particular update which is why you are not able to proceed with the current update. So to resolve the issue, you need to install the update that wasn’t installed by downloading it from the Microsoft Update Catalog website. You also have to make sure that you didn’t turn off the Windows update or have it delayed.

Option 3 – Delete the files from the Software Distribution folder

The Software Distribution folder in the Windows operating system is a folder that can be found in the Windows directory and is used to store files temporarily which might be required to install the Windows Update on your PC. Thus, it is required by the Windows Update and maintained by WUAgent. A lot of users tried deleting the files in this folder to fix the problem and so far it has worked. Like them, you can try clearing the Windows Update cache by simply deleting the contents of the folder named “SoftwareDistribution” since Windows apparently can’t clear and re-download the update contents once they are corrupted. Thus, deleting the contents of this folder will make Windows download the contents again which will fix the problem. To do that, follow the steps below.
  • Open the WinX Menu.
  • From there, open Command Prompt as admin.
  • Then type in the following command – don’t forget to hit Enter right after typing each one of them.
net stop wuauserv net stop bits
  • After entering these commands, it will stop the Windows Update Service and the Background Intelligent Transfer Service.
  • Next, go to the C:/Windows/SoftwareDistribution folder and get rid of all the folders and files thereby tapping the Ctrl + A keys to select them all and then click on Delete. Note that if the files are in use, you won’t be able to delete them.
  • Once all the contents in the Software Distribution folder are deleted, restart your PC and then go back to Command Prompt and input the following commands again.
net start wuauserv net start bits
Since the folder has already been flushed, it will be populated afresh the instant your restart your computer and open Windows Update.
  • Now Open Settings and check for Windows Updates. Windows 10 should begin the download right away.

Option 4 – Install the updates in a Clean Boot State

You might want to try putting your computer in a Clean Boot state and then install Windows Updates again without any trouble. During this state, you can start the system with a minimum number of drivers and startup programs that will surely help you in isolating the root cause of the issue.
  • Log onto your PC as an administrator.
  • Type in MSConfig in the Start Search to open the System Configuration utility.
  • From there, go to the General tab and click “Selective startup”.
  • Clear the “Load Startup items” checkbox and make sure that the “Load System Services” and “Use Original boot configuration” options are checked.
  • Next, click the Services tab and select the “Hide All Microsoft Services” checkbox.
  • Click Disable all.
  • Click on Apply/OK and restart your PC. (This will put your PC into a Clean Boot State. And configure Windows to use the usual startup, just simply undo the changes.)
  • After that, try to install the Windows Updates or upgrade again.

Option 5 – Run the Windows Update Troubleshooter

Running the built-in Windows Update troubleshooter could also help you resolve the Windows update error 0xca00a000. To run it, go to Settings and then select Troubleshoot from the options. From there, click on Windows Update and then click the “Run the troubleshooter” button. After that, follow the next on-screen instructions and you should be good to go.

Option 6 – Run Microsoft’s online troubleshooter

Running Microsoft’s online troubleshooter might also help you fix the Windows update error 0xca00a000. This online troubleshooter is known to help in fixing Windows Update errors, it scans your computer for issues that might be causing the problem and then fixes them automatically.
Read More
Fix Mfplat.dll missing on Windows 10
Recently, a number of users reported that they were not able to run PLEX and other similar streaming services ever since a Windows Update was automatically installed in the system. The error in these streaming services has something to do with a missing Mfplat.dll DLL file from the Windows Media Feature Pack. On the other hand, some users also reported that the mfplat.dll error occurred on several games as well which used the Media Feature Pack. Usually, the mfplat.dll error is caused by the missing Media Feature Pack in Windows 10. Although most of the time the Media Feature Pack is installed by the application that needs it or through Windows Update automatically, there are just certain installers that do not have it. It could be that the Media Playback service was disabled by a particular Windows Update. Aside from that, the error might be because your computer is using Windows 10 N – a Windows 10 version that does not include the Media Feature Pack by default. Whatever the cause may be, you can troubleshoot the problem with the help of the options given below. But before you go on, keep in mind that downloading the missing DLL file and copying it to the folder of the program where you encounter the error won’t really help and will only make things even more complicated.

Option 1 – Install the Media Feature Pack for Windows 10 N version

As mentioned, the Windows 10 N version does not come with Windows Media Player. Meaning to say, the Media Feature Pack is also not installed by default or won’t be updated by the Windows Update component. So if you are not quite sure what Windows 10 version you currently have installed, refer to these steps:
  • Tap the Windows key + S and then type “about” in the search box.
  • From the search results, click on the “About your PC” to open the About tab of the Settings app.
  • Afterward, scroll down to the Windows specifications and check your Windows version under Edition.
Note: If you’ve determined that your computer is using the Windows 10 N version, you need to install the appropriate Media Feature Pack for your computer. How? Refer to the steps below:
  • Click this link to download and install the Media Feature Pack from Microsoft’s official website.
  • Upon installation, select the edition you want to install using the drop-down menu and then click on Confirm. Take note that there are few reasons why you’d want to install the older version since most streaming services like PLEX and most games usually require version 1803.
  • After that, wait until the request is validated. The download should begin in a few minutes automatically.
  • Once the download is completed, open the installation executable file and follow the next on-screen instructions to install the Media Feature Pack on your computer.
  • Restart your computer. After your computer has rebooted, open the application where you’re getting the mfplat.dll missing error and then check if the problem is now fixed.

Option 2 – Enable Media Playback via Command Prompt

If you encounter the mfplat.dll missing error when you attempt to run PLEX or other similar streaming service and you’ve already verified that the Media Feature Pack is indeed installed, you might want to try enabling it using an elevated Command Prompt. There are cases when a particular Windows Update ends up disabling the feature and creates the grounds which results in the mfplat.dll missing error. Thus, you can have to enable the feature via Command Prompt.
  • Tap the Win + R keys to open the Run dialog box.
  • Then type “cmd” in the field and hit Enter to open an elevated Command Prompt.
  • Next, click on Yes if a User Account Control prompt pops up.
  • After opening Command Prompt, copy and paste the following command and hit Enter to execute it:
dism /online /enable-feature /featurename:MediaPlayback
  • Close Command Prompt and then open the app once again to check if the problem is now fixed.

Option 3 – Try extracting a copy of the mfplat.dll file from the windows.old directory

If you encounter the error shortly after you just upgraded to Windows 10 from an older version, the best thing you can do to resolve the problem is to use windows.old directory to fetch an old copy of the mfplat.dll file. To do so, follow the steps below.
  • Go to the Windows drive and then look for the windows.old directory where it preserves a copy of your old operating system as well as associated files in case something goes out of hand during the upgrade process.
  • After that, open the windows.old folder and then go to the syswow64 folder.
  • Next, from the syswow64 folder, copy the mfplat.dll file and paste it to C: windows syswow64.
  • Restart your computer and check if the error is now resolved or not.
Read More
Malware Guide: How to Remove Bandoo

What is Bandoo?

Bandoo application, specifically product version 5.0.2.4762, is a bundled program. What does this mean? Simply, Bandoo, upon installation, installs additional programs, extensions, and add-ons to a computer and computer’s browser, without the knowledge of the user. This version of Bandoo concentrates on providing features for entertainment and also functionality/tools for backing up your computer files. Once executed, the file installs the iLivid Download Manager Software. Additional tools installed within the bundle include a Movie Toolbar and the thriving search engine ‘Ask.com.’ Technical details about Bandoo include: 
Digital Signature/Publisher:  Bandoo Media, Inc. Product Version: 5.0.2.4762 Entry Point:  0x000038AF

Assessment of Bandoo Potentially Unwanted Program

Interestingly, before the installation of Bandoo product version 5.0.2.4762 was complete, Spyhunter detected that the software was a PUP. After the installation was complete, product version 5.0.2.4762 of Bandoo added add-ons and extensions to both Internet Explorer and Chrome Browsers (these were the only 2 browsers used within the assessment). These appeared in the form of a Movie toolbar, providing quick access to movie trailers, reviews, ratings, and other video functionality, and ‘Ask’ (Ask.com) search engine.

Areas of Infiltration by Bandoo

Bandoo product version 5.0.2.4762 infiltrated several areas of the computer system. After installation, folders were neatly placed as files within all programs. Within “All Programs” there were 3 newly added programs. These included:
  • iLivid
  • Movies Search App for Chrome
  • Movies Search App for Internet Explorer
The iLiVid application seems to be the main offer while the others, namely Movies App for Internet Explorer by Ask was featured as promotions or advertisements. Additionally, just below the 'END USER LICENSE AGREEMENT AND PRIVACY POLICY' a request was made that the user set Ask.com as both their homepage, new tab, and default search engine. This is just another well-concocted plan to get Internet users onto the 'Ask.com' search engine. Along with the 3 programs installed as a bundle,  a new folder was found within the computer's local drive. This program was termed OLBPre.

What is OLBPre?

OLBPre.exe is reputed as dangerous adware that weakens the security settings of a computer system. It's also covertly used for dropping files on a targeted computer, often without the user's consent or knowledge.

Manual Steps for Removal of Movie Search Apps

I found this removal pretty simple. Depending on your Operating System, there will be slight discrepancies in the manual removal steps. Using the Windows 8 (8.1) OS on your computer:
  • Step 1: from your desktop, right-click on the ‘Start Button’.  A menu box will then appear.
  • Step 2: from the menu box, click ‘Search’.
  • Step 3: enter “Programs and Features” within the Input Box.
  • Step 4: locate the installed apps. You should be able to see “Movies Search App for Chrome” & “Movies Search App for Internet Explorer”.
  • Step 5: right-click on the names of the Apps (the ones you want to remove) when you’ve located them.
  • Note: you will have to remove the apps one after the other.
  • Step 6: after right-clicking the app, click the uninstall option (probably the only option available anyway).
  • Note: If a box appears asking If you wish to ‘block’ or ‘allow’, select the allow option. That’s just the Publisher’s way to annoy you out of uninstalling the app.
  • Step 7: follow instructions until the app is fully removed.
  • Step 8: Repeat steps for the other app.
Since Bandoo also changed your search engine, you’ll have to reset that manually for Internet Explorer and Chrome. Follow the steps below:
  • Step 1: Open your Internet Explorer browser.
  • Step 2: Click the tool option located in the top right-hand corner of the page.
  • Step 3: Click the “Internet Options” option.
  • Step 4: Under the “General” tab, you’ll be able to see approximately 3 buttons. Click the button labeled ‘Use Default”.
  • Step 5: At the bottom right-hand corner of the pop-up menu, select the “Apply” button and “OK”. That should do the trick.

Removal for Chrome Extension

This removal is simple.
  • Step 1: Open your Chrome browser.
  • Step 2: A pop-up box will be visible.
  • Step 3: Click the “Remove from Chrome” option.
After removing the extensions/add-ons, perform another scan with Spyhunter. You’ll pick up a few threats. The second scan should clear up everything. To completely remove Bandoo from your computer, click here to download and install Spyhunter.
Read More
1 2 3 171
Logo
Copyright © 2023, ErrorTools. All Rights Reserved
Trademark: Microsoft Windows logos are registered trademarks of Microsoft. Disclaimer: ErrorTools.com is not affiliated with Microsoft, nor claims direct affiliation.
The information on this page is provided for information purposes only.
DMCA.com Protection Status