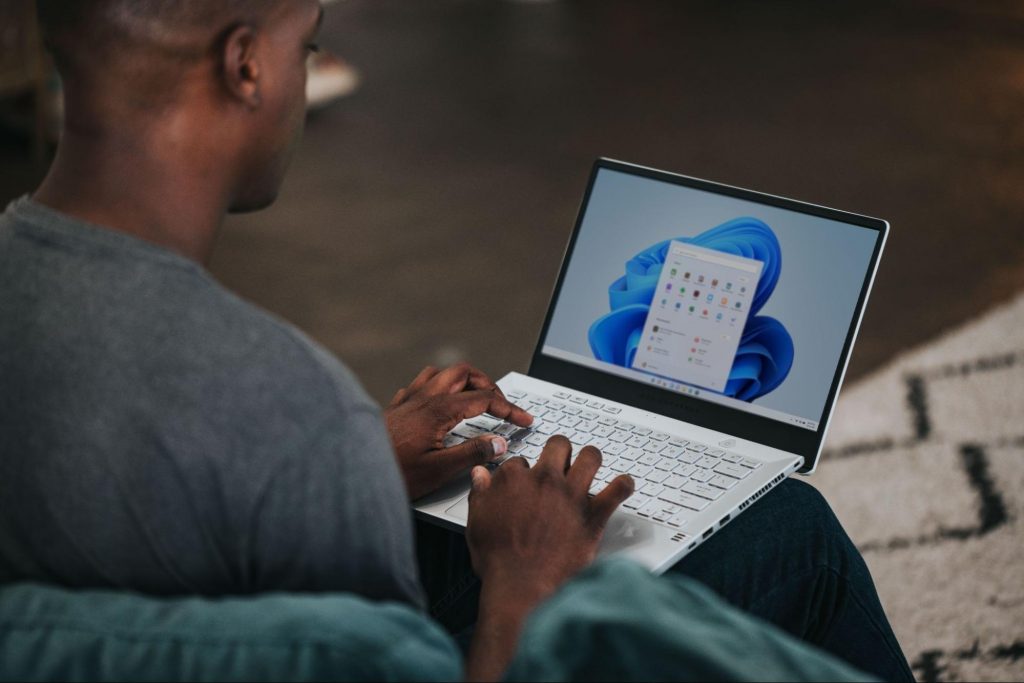
You can prevent starting of app installations files if they have not come from the MS store inside Windows 11.
This can make your PC more secure because all apps in the store will have to be digitally signed and overall it can provide you with more control over what will be installed.
Follow the guide below to find out how can you easily turn this feature ON.
Press ⊞ WINDOWS + I to open Windows settings
Select Apps and then choose Apps & Features
Click on Choose where to get apps to bring a drop-down menu
Select The Microsoft Store only (Recommended)
Close settings
Settings will apply changes immediately and you continue using Windows right away.
With these settings turned ON if you want to install a downloaded application or run the installer you will not be able to, and message The app you’re trying to install isn’t a Microsoft-verified app will show on your screen.
You can always reverse this setting by choosing Anywhere in settings instead of Microsoft store only.
Today most users have an SSD drive, times have changed and SSD has become your typical computer equipment.
A lot of time has passed from the first SSD hard drives up to today and technology has evolved and improved but still, there are some cool tricks and tips to speed up and extend the lifespan of your SSD hard drive.
That being said let us dive right into what I would like to call the essentials of having an SSD hard drive.
Keep your SSD firmware up to date.
This one really is a no-brainer, keeping your firmware updated at all times will ensure longer life and SSD stability. The trick here is that each SSD manufacturer has its own ways of updating firmware so this is not something universal, you will have to go to the official website of your SSD manufacturer and get firmware updates and instructions from them directly.
Enable ACHI.
Advanced controller host interface or short ACHI is a feature that will ensure that your Windows will support all of the features that come with running SSD on your computer. It controls the TRIM feature which is crucial in helping Windows itself in its garbage collection on your hard drive. In order to enable ACHI, you will have to do it from your BIOS and it would be very good if the feature is enabled before Windows itself is installed so it can take full advantage of it.
Enable TRIM.
TRIM feature is vital in extending your SSD lifespan and it should be enabled by default in Windows but you can never be too cautious and double-check and enable if needed. To make sure it is enabled, open your command prompt and type in: fsutil behavior set disabledeletenotify 0
Make sure your system restore is enabled.
In the first SSD days, system restore was really a feature that you wanted to be disabled in order to prevent and extend the life span of your SSD drive, but we came a long way from there and today there is no reason to keep this feature turned off since it can be helping many ways with both your system and SSD.
Disable Indexing in Windows.
A large portion of the speed of your SSD drive is used for indexing files in Windows. Of course, the indexing feature is great if you store everything on your SSD drive but if by any chance you have another drive for your backup, pictures, music, etc. it would be highly beneficial for you to turn it off on your SSD. To turn indexing off click on your start menu, click on the computer. Right-click on your SSD and then click on properties. De-select boxthat says: Allow files to have contents indexed in addition to file properties and click OK. Once you do this the operating system will apply this to all the files and folders on the drive. If you see a dialog telling you that it couldn’t remove a file from the index, click Ignore All.
Keep Windows defrag ON.
This also was the option in early SSD days which was better to be OFF, but as said before since technology has been making progress and Windows has been improved and made aware of SSD drives, defrag has evolved as well, and now it is more of optimization tool then defragmenter which was once.
Disable Prefetch and Superfetch.
Windows is placing information in both physical and virtual memory for applications that you are not currently using but they are used often in order to speed their response time. If you are running low on space or having struggles with virtual memory it would be best to turn them both off. Go to registry manager and find: HKEY_LOCAL_MACHINE\SYSTEM\CurrentControlSet\Control\Session Manager\Memory Management\PrefetchParameters, there you have 2 values: EnablePrefetcher and EnableSuperfetch, set both values to 0.
Disable Search and Superfetch services.
Disabling Superfetch in the registry is not all work, Press WINDOWS + R to bring run dialog, type in it services.msc, Find both Search and Superfetch and disable them.
Configure Write Caching.
Write caching can be enabled and disabled in the device manager by expanding disk drives, right-clicking on SSD, then click properties, select the policies tab. In the tab, there is the option to Enable write caching on the device. Now trick in this is that you will need to try and benchmark your SSD with both options turned ON and OFF since different manufacturers have different performances with this option being ON or OFF.
Disable CleanPageFileAtShutdown and LargeSystemCache.
Page file and a large cache of page files are not something that we longer need, since SSD writes with great speed in its flash memory both of these options can be disabled and you will both speed up shut down the process of your system and save some SSD life since page files will not be written. Find both options in the registry under the key: Computer\HKEY_LOCAL_MACHINE\SYSTEM\CurrentControlSet\Control\Session Manager\Memory Management set both to 0
Set high performance in Power options.
This option in power management will prevent your SSD from constantly shutting down and bringing it up increasing speed without sacrificing its life span.
These are tips and tricks for having great and longer life as well as speed for your SSD drive. We hope that you have found them useful and that you will come again to check new articles published daily for easier IT life.
A surprisingly large amount of things present at your home can and do interfere with your wi-fi signal making it weak so devices are dropping it, having trouble connecting, or being slow.
Hello and welcome to our latest article where we will take a look at all things that are present in a lot of homes but are very bad for your WI-Fi signal.
Bad router placement
Having a router in a bad position can have some really large effects on WI-Fi signal strength and its availability. Usually, we do not give great attention to where we are placing our router but it has been proved over and over again that being close to certain objects does indeed have a great influence on the wireless signal strength and performance.
So, what are these objects and bad positions where we could place the router and effectively kill his Wi-Fi capabilities?
Fish Tanks
Water will block all radio waves including Wi-FI signals and waves themselves, so having a router next to the aquarium or any large source of water is a bad idea. You should always look at water as something bad for your Wi-Fi and move your router away from it as far as possible.
Bookshelves
Paper is another story and example of the dampening effect on radio waves. Did you know that various patterns of paper are used in silent rooms and recording studios in order to eliminate sound reflection from surfaces? Well besides absorbing sound waves, the paper also absorbs Wi-Fi signals and if you have a large bookshelf with a lot of books packed one beside another you just have a great wall of signal absorbing.
Mirrors
The problem with mirrors is in their coating that goes over the glass in order to turn it into the mirror, that coating is metal and as such, it is absorbing signals in large amounts. If you have an old or high-quality mirror that has a silver coating things are even worse since silver will absorb even more waves than modern cheap ones.
TV
Yup, TV is also on this list and for a similar reason as a mirror, although TV does not have coatings of metal, they have something even worse: a large metal plating on the back. Metal plating is there to produce structural integrity of the TV set and provide it with shielding from electromagnetic waves and as such it will prevent Wi-Fi waves as well. Do not place the router behind your TV.
Things that influence signals in homes
Any kind of metal decoration
Now when we covered mirrors and TV because of the metal they have, we must take a look at the metal itself. Any kind of metal stuff that you might have like baskets, figures, statues, frames, etc will effectively block your signal.
Kitchen appliances and Home utilities
Kitchen appliances like refrigerators, microwaves, ovens, stoves, etc. along with home appliances and utilities like dishwashers, washing machines, dryers, etc are large metal objects enclosed in a metal cage that will block signals from spreading further and it is no secret that most kitchens have weaker Wi-Fi because of this reason.
Home gyms
This is a logical conclusion as to everything explained so far if you have a workout room or small gym at home it is probably filled with weights that are metal and have mirrors inside, all of that will interfere and block signals.
Things blocking your Wi-Fi that you have no easy control over
Walls
Thick walls will dampen signals, thick walls from bricks will dampen even more and concrete walls will kill it almost completely. Any kind of metal reinforcement wiring inside walls will reduce and kill signals as well.
Floors and ceiling
This is somewhat important if you have a floor beneath or under the room where is your router located, but for the same reason how walls are blocking your signal floor and ceiling can do it as well, especially since most of the time they are made of some stronger material like concrete with metal fence inside.
Heating systems
If you have a heating system that is composed of metal radiators with water inside, then in terms of Wi-Fi signal strength you have an aquarium but in a metal box, and as such it will greatly reduce signal strength.
Loving Windows 11 so far? We sure are. Microsoft has clearly decided to take its OS to the next level and keeps showing it through every update. It makes you wonder what’s next - and today, you’ll find out!
Tons of new features have been leaked, and we can probably expect them with the 23H2 update. Here’s everything you need to know so far.
What’s Windows 11 23H2 bringing?
Credit: Windows on Unsplash
There are plenty of new features already confirmed for Windows 11. The only issue is we don’t know for sure if they’re coming with the 23H2 update or separately, at a different time. Whatever the case, a lot of them are pretty exciting.
Here’s an overview of what we might be getting this fall.
Windows Copilot. Microsoft wants to add this AI-powered feature based on chatbots like Bing Chat and ChatGPT to assist users with all kinds of actions and tasks on the platform. As part of this development, the integration of first- and third-party plugins and the Bing Chat AI will be enhanced. This is a pretty amazing addition to look forward to, if you ask us.
Dynamic Lighting. RGB lovers will rejoice upon this one! Dynamic Lighting will allow you to control your RGB-powered components directly through the Windows Settings, allowing smooth integration of your favorite peripherals with your OS. No need for third-party software anymore!
Taskbar enhancements. Microsoft has announced some neat improvements to the Windows 11 taskbar. For one, we’ll be able to hide the Time and Date now, which is extremely useful for focus, but also for clean screenshots. Another change is the ability to shut down programs directly from the Taskbar, without having to run the Task Manager.
Expanding native support for archive formats 7-zip, rar, gz and others on the libarchive open-source projects.
Microsoft Store AI features. The theme of AI power is clearly being taken up a notch, because the Microsoft Store seems to be getting several awesome features in this regard. One of them is AI hub, which “curate the best AI experiences built by the developer community and Microsoft” (Windows Developer Blog). We’re not sure what that means exactly, but we sure can’t wait to see.
Another is AI-generated keywords, designed to improve the discoverability of apps you’re searching for. Moreover, the AI-generated review summary is designed to give us a simpler experience looking at reviews. Huge numbers of reviews will be compiled into a summary that’s easy to scan and lets us discover new content faster.
Other Microsoft Store improvements. Business owners will be happy to hear that Microsoft Store ads will now reach 150+ regions worldwide, significantly increasing the audiences they can target. Furthermore, there will be enhancements to the Backup and Restore functionality to give users a more seamless experience in case they switch devices.
File Explorer changes. Rumor has it that Microsoft is working on a Gallery to be embedded within the File Explorer. The addition of a Recommended section might be on the horizon as well.
Widget Panel update. The introduction of the Widget Panel in itself was exciting for many. As a next step in the development of this feature, Microsoft is planning to make it possible to pin widgets to the desktop.
Presence sensor. You might actually already have this one, as it was rolled out as part of Moment 3 for compatible devices. With the Presence sensing app, found in the Privacy settings, you can decide which (if any) apps use APIs to detect the state of your activity on Windows. This can significantly enhance privacy and security, as you can have apps containing sensitive data lock automatically when unattended. If you’re a laptop user, it can also be beneficial to your battery life.
Bluetooth LE. Microsoft is adding support for Bluetooth Low Energy, a functionality that allows reduced battery consumption when devices are connected.
Adding more languages to the Live Captions feature. This specification is only as powerful as the languages it supports. Microsoft is reportedly working on expanding the list with 10 more languages.
Summary
We’ve got some interesting stuff to look forward to with the next major Windows 11 update. And these are just the things the Internet’s actually heard of, so who knows what else Microsoft might be planning? It remains to be seen, hopefully just a few months from now. 23H2 has been released on October 31st.
If you have the HP printer, then you may come across this error. HP Printer Spooler not running errors does not mean there is anything wrong with your printer. It indicates printer driver issues.
Solution
Error Causes
There can be multiple causes behind the HP printer Spooler not running error code such as:
The poor or unsuccessful printer driver installation
Invalid registry entries
Though this is not a critical error code as it does not pose serious damage threats to your PC, however, it is advisable to resolve it as it can cause you a great deal of inconvenience especially if you want to take out printouts every now and then.
Further Information and Manual Repair
Here are some ways you can try to resolve HP Printer Spooler Not Running Error on your system:
1. Reinstall the HP Printer driver on Your System
Simply go to the control panel and then click on the Device Manager option
Once you click it you will see details pane with a list of devices. Now simply click on the printer, to reinstall the driver software.
Double click on it to open the properties dialog box
After that click on the driver tab and then click update driver
Once you update the driver, try using the Printer to see if it works. Sometimes you may come across a pop-up displaying the following message: ‘Driver installed correctly, Device is ready to use however, you may not see the printer under the printer’s pane. This triggers registry issues.
2. To resolve registry issues, install Restoro on your system.
This is a highly functional registry cleaner integrated with a powerful antivirus. It helps resolve registry issues, malware, and guarantees system optimization. This feature-filled tool is the answer to all your PC-related issues.
Restoro is a next-generation PC repair software that extends outstanding usability and helps PC users resolve errors efficiently.
Its simple navigation and user-friendly interface make it so easy to use that even novice users can also work around it and repair issues without any hassle or difficulty.
It’s a smart and intuitive in-built registry cleaner that wipes out all the unnecessary and obsolete files on your hard disk. This includes junk files, internet history, invalid registry keys, and files from the uninstalled old program versions.
Sometimes the files from the uninstalled programs hamper your ability to update new program versions thus leading to unsuccessful driver installation. Nonetheless, all such files are removed in seconds with this helper and you are then ready to reinstall the driver.
This registry cleaner cleans the clutter from your hard disk and optimizes your system's speed, lowering your PC boot time significantly. Total System Care can be used on all Windows versions
To fix the HP printer spooler not running error on your computer, simply click here to install Restoro. Run it to scan for the error and fix it in seconds. Once the issue is resolved, update the printer driver. You’ll see the driver will be updated successfully and the HP printer will also appear in the printer’s panel.
By installing Restoro on your system, you can also resolve several other issues like privacy errors triggered by malware and virus infections. With this tool, you will not have to download and run a separate anti-virus on your system.
Error Code 44 is a device driver error that users encounter when using Windows 2000 operating system and later versions.
It is when the peripheral device that is connected to the computer, such as a printer or a fax machine, cannot be accessed as the programs required for operation interfere with other software on the computer. The error code will pop up with the following message:
“An application or service has shut down this hardware device. (Code 44)”
Solution
Error Causes
Error Code 44 is caused when the program that you are using shuts down the peripheral device installed on your system. It is triggered by the following:
Corrupted system registry entries
Device driver files are outdated
Device driver files are missing
It is critical to fix the Error Code 44 as it can pose serious risks to the wellbeing of your PC.
Further Information and Manual Repair
While bothersome, like other error codes, error code 44 to is relatively easy to fix. Here are ways to help resolve the error.
Method 1 – Restart your PC
The easiest method you can use to solve your PC error code is to simply run a restart of your Windows system. It may be that the error prompted upon connecting the device you have connected is merely a temporary problem, and upon restart, will resume functioning smoothly.
Method 2 – Run the Troubleshooting Wizard
If restarting your PC does not help, you will have to find the exact nature of the problem by running the troubleshooting wizard for the device and address the problem accordingly. To do this, proceed with the following steps:
Run Device Manager on your PC
Click on the program under the installed programs that are creating problems for you
Click on the ‘General’ Tab
Click ‘Troubleshoot’
Upon opening, the Troubleshooting Wizard will ask a series of questions regarding the error. Answer the questions and follow its directions for solving the error code.
After following the directions of the Troubleshooting wizard, make sure to restart your PC for the changes to take effect. Then check if your device is still causing problems.
Method 3 – Manually uninstall and reinstall the device driver
If troubleshooting does not work, you may have to resort to manually uninstalling and then reinstalling the device driver causing the problem.
This would be necessary since the remaining incomplete files due to a partial removal or installation of programs is what contributes to the error code. A fresh install, after uninstallation of the previous drivers, would lead to the completion of the files.
You can do this by firstly logging in as Administrator and opening Device Manager. Select the device that is causing the problem and double click it and make sure that the peripheral is connected properly to the PC.
Upon opening, click on the ‘Driver’ tab and then select ‘Update Driver’. Make sure to refer to the system documentation that you received with your PC or computer to check for the motherboard details and driver specifics.
Method 4 – Use software to automatically download the driver
Manually uninstalling and reinstalling the driver will do the trick, however, it may be time-consuming especially when you would have to resort to your hardware user manual.
Therefore, using a program such as DriverFIX can save you a lot of time and frustration in having your device work properly on your computer.
Driver Assist, with its user-friendly approach to help you fix your PC issues, comes with an integrated database that detects which drivers you need to reconfigure within just a few seconds and downloads it automatically.
It further ensures that your drivers are installed in their entirety leaving no room for any incomplete files to remain that create Error Code 38.
It also has the added advantage of being able to backup and restores your files should there be the slightest possibility of system file damage. DriverFIX is the answer to fixing your PC error codes accurately and quickly.
Click here to download DriverFIX to fix Error Code 44 quickly and effectively!
If you are trying to upgrade your computer but encounter the Windows Update Error 0x800F081F – 0x20003 instead, then read on as this post will guide you in fixing this Windows Update error. This kind of error is commonly encountered when upgrading your copy of Windows 10 and is caused by errors with various developer-related settings that are being enabled in the system.
When you encounter Windows Update Error 0x800F081F – 0x20003, you will see either of these error messages:
“We couldn’t install Windows 10. The installation failed in the SAFE_OS phase with an error during INSTALL_UPDATES operation: Error 0x800F081F”“The installation failed in the Safe_OS phase with an error during apply_image operation: Error: 0x800f081f – 0x20003”
To fix this kind of Windows Update error, you need not use external programs but you can try to disable the Developer Mode, run the Windows Update troubleshooter or restart all the Windows Update-related services and components. For more details, refer to the options provided below.
Option 1 – Try to disable Developer Mode
You might have to disable Developer Mode to fix the Windows Update Error 0x800F081F – 0x20003. How? Refer to these steps:
Tap the Win + I keys on your keyboard to open the Settings app.
Next, go to Update & Security > For Developers.
From there, select the toggle for Sideload apps or Microsoft Store apps located on the right-side panel.
If you get any prompt, just click on Yes.
After that, navigate to Apps > Apps & features and then click on Optional features on the right-side panel.
Then scroll down to locate the Windows Developer Mode entry and select it and click on Uninstall.
Once you’re done uninstalling the Windows Developer Mode component, close the Settings app and restart your computer to apply the changes made.
Option 2 – Try to run the Windows Update Troubleshooter
You should also try to run the built-in Windows Update troubleshooter as it could help you resolve the Windows Update Error 0x800F081F – 0x20003. To run it, go to Settings and then select Troubleshoot from the options. From there, click on Windows Update and then click the “Run the troubleshooter” button. After that, follow the next on-screen instructions and you should be good to go.
Option 3 – Try restarting various Windows Update-related services and components
Tap the Win + X key combination and select Command Prompt (Admin) to open Command Prompt with admin privileges.
After opening Command Prompt, copy and paste each one of the commands listed below one by one and tap Enter right after you enter each command.
Once you’ve entered all the commands given above, they will stop all the Windows Update services that are running on your computer as well as clear the SoftwareDistribution folder, and reset the Catroot2 folder. Now you have to start all these Windows Update services you’ve just stopped by executing the following commands:
net start wuauserv
net start bits
net start appidsvc
net start cryptsvc
After that, restart your computer and try to run the setup again, and see if the error is now fixed.
Many Windows 10 users often change the IP addresses of their computers’ network adapter in order to connect to the internet or network they belong to in times when there is no automatic connection for their computers. In most cases, access to modifying this setting is restricted for some odd reason even if you are an administrator. So if you are one of the users whose Windows 10 VPN IPv4 Properties are not working, this post can help you remedy that so that you can open and edit the IPv4 Properties on your Windows 10 PC.
The common way to change IP settings is by going to Settings > Network and then to Internet > Change adapter options > Select Network adapter > right click and open Properties. From there, you can select TCP/IP 4 and modify it. If you aren’t able to do this, refer to the instructions laid out below to troubleshoot the problem in accessing the IPv4 Properties.
Option 1 – Try using PowerShell to manually set the IPv4 properties
As you are not able to set it using the interface, you can do so using PowerShell instead. Note that this option will only work for you if you run PowerShell with administrator privileges.
After opening PowerShell, according to many users, you have to run the this command – set-DnsClientServerAddress -InterfaceAlias “Ethernet” -ServerAddresses xxx.xx.xxx.xxx,x.x.x.x,xxx.xx.xxx.xxx,x.x.x.x
Usually, Ethernet is the name of your network adapter which is set by default. If you want to see the actual name of your network adapter, you can just type this command and tap Enter after doing so – Get-NetAdapter -physical | where status -eq 'up'
After entering the given command, you will see a list of active Ethernet adapter in your computer as you can see on the image above. Note that the 4 sets of X like the one on the image below should match with the sequence:
Option 2 – Try editing the rasphone.pbk files
The rasphone.pbk files stores property for the connections and since you are not able to access the IPv4 properties, it is most likely that it has been disabled here. The good thing is that you can open these files and edit them using Notepad. Refer to the steps below to do so.
Open the Windows Explorer and then enable the show hidden files option.
After that, look for the files at this location – C:Users <username>AppDataRoamingMicrosoftNetworkConnectionsPbk_hiddenPbkrasphone.pbk
Then right-click on it and select the “Open with” option and choose the Notepad app.
After opening the file, look for “IpPrioritizeRemote” from the long list.
Once you found it, set its value from “1” to “0”.
After that, look for “IPInterfaceMetric” and set its value to “1” and tap Ctrl + S to save the changes you’ve made, and then exit and try accessing the IPv4 properties again. It should work, but if you’re still unable to access it, try the next option below.
Option 3 – Enable the Split Tunneling if you use VPN
All data goes back and forth when you are using a VPN service on your computer. And since you are using VPN, it could be that it disables the IPv4 interface. If that’s the case, you need to stay connected with both the local network and VPN and to do so, you have to enable Split Tunneling. How? Follow these steps:
Open PowerShell with administrator privileges.
Next, type in “Get-VpnConnection” and tap Enter. After doing so, it will give you the exact name of your VPN.
After that, type in “Set-VpnConnection -Name “yourVPNName” -SplitTunneling $True” and tap Enter. Once you enter the command, it will free your IPv5 settings so that you can change it to connect with your local network if you prefer it to.
Error code 0xC004E003 almost always appears when there are damaged files in the Windows operating system. These files could be corrupt for a number of reasons and are usually a serious danger to the life of the computer system. These file errors may be caused by a number of things. Incomplete installation setup, incorrect deletion of hardware or utilities, or an unfinished file erasure. The trigger might also be in the event that the computer system is contaminated with a virus or adware or spyware, or even by the improper shut down of the computer. Any of these scenarios have the possibility to result in the removal or corruption of data of the Windows system data files.
The data system files that are damaged will give linked data and archives that are missing or wrongly linked. These are needed for the proper functioning of the software. This can also happen when or after installing third-party software that might have changed the system files. If it is suspected that a program installation will need to be stopped, it is best to let it run through the setup and then delete it later. While it installs, it is altering program files, and likely rearranging them. Stopping this in the middle can scramble files associated with the program and files vital to the usage of the computer.
Solution
Error Causes
This error will pop up after installing third-party software that has changed the system files. These system files are necessary to finish the activation process. A restore point will be necessary if it is ultimately determined that a system restore is necessary, to bring the computer back to the state it was in previous to the failed installation.
Error code “0xC004E003” appears and does not allow the system to continue the install.
The computer will not allow any further access or installation of the program.
The computer may crash.
The third-party program will not have installed completely or successfully.
The system will not start up correctly.
Personal files are corrupt or missing.
Further Information and Manual Repair
There are several steps that can be taken when the error code 0xC004E003 appears. It is helpful to know that this can occur from trying to install third party software. Going forward, do not attempt to install third-party software that is not trusted, and does not attempt to abruptly stop the third-party software from installing. This may cause the program to corrupt the files or delete important files. Recovering from this error can be easy if there is a recent restore point already backed up in the recovery portion of the system's files.
Method One
Run an error scan. The problem should be resolved after rebooting the computer once these steps have been completed.
Download and save an error code fix utility.
Setup the program and then click the Scan button.
Click the Repair Errors button when the diagnostic has been completed successfully.
Reboot the computer.
Method Two
Best when utilized by an expert.
Start the system up and sign in as the admin.
Click on Get Started, then select Programs, Accessories, Tools, and then System Restore.
On the next screen, click on Restore my PC to an Earlier Period, and then click Next.
Select the most recent system restore date within the drop-down menu of “select restore point”.
Click Next.
Click Next on the confirmation window.
Reboot the system after the system has finished restoring.
Method Three
Another option for restoring. This method can be used by a novice.
Right-click on the Start button, then select Control Panel.
Look for the Control Panel for Recovery.
Select Recovery, then Open System Restore, then Next.
Choose the restore point right before the problematic installation.
Click Next, click Finish.
NOTE: If there are no restore points available, the system recovery may not be turned on. To check this, go to Control Panel, and select Recovery. Configure System Restore, Configure. Then, select Turn on system protection. Having a current restore point for a computer ensures the ease of recovery if any problems with the computer arise.
If you wish to always have at your disposal a utility tool to fix these Windows 10 and other related issues when they do arise, download and install a powerful automated tool.
If you encounter the “Diskpart failed to clear disk attributes” error when you try to change the read-only state of a storage device using the Diskpart application and the request is denied, worry not for this post will give you a couple of fixes to resolve the problem. As you know, Diskpart is used for resolving read-only storage devices by changing their attribute via the command line. So if it is not able to change the attribute of the storage device, then you will most likely encounter an error such as this one. This kind of error is not uncommon and as long as there are no damaged physical attributes, you can resolve it right away.
There are tons of reasons why you’re getting this error while using Diskpart, it could be that the storage device has a physical write-protected switch or the disk is hidden or has bad sectors. It could also be because the storage drive might be in RAW format or that you are running the Diskpart application without admin privileges. Whatever the cause may be, here are some options you can try to fix the problem but before you proceed, make sure that you log on to your PC as an administrator.
Option 1 – Check if there is a physical switch on the storage device
There are some USB devices and SD card readers that have a write-protected physical switch that disables all the writable options on the storage device and so if it is turned on, Diskpart won’t be able to change the disk attribute to writable. To check, simply look for the physical switch on both sides of the device and once you found it, make sure that it is toggled off and then plug the storage device back in then try running Diskpart once again.
Option 2 – Modify the WriteProtected key in the Registry Editor
Before you proceed, you have to create a System Restore Point first.
Tap the Win + R keys to open Run and type “Regedit” in the field and hit Enter to open the Registry Editor.
After that, look for the “WriteProtect” registry entry which is located on the left side of the window, and then double click on it.
Change its value to “0” and click OK to save the changes made and exit the Registry Editor.
Option 3 – Run CHKDSK to check the drive for errors
When it comes to some issues concerning the hard drive or removable devices, there is a utility in Windows that might help which is called “chkdsk”. This error check utility can help with several issues in the system including the “Diskpart failed to clear disk attributes” error.
Tap the Win + S keys to open the Search box.
Then type “command prompt” in the field and from the search results that appear, right-click on Command Prompt and select “Run as administrator”.
After opening an elevated command prompt, copy and paste the following command and hit Enter:
Note: In the command given above, “[/F]” will try to fix the system errors while “[/R]” will be the one to fix the bad sectors.
Now if you are prompted to run CHKDSK after your reboot your PC, just tap Y and reboot your PC.
If CHKDSK is not able to find any errors, tap the Win + E keys and navigate the access window. From there, right-click on the concerned drive and click on Properties.
After opening Properties, click on the tab Tools and then click on the “Check” button under the Error-checking section.
Wait until the process is completed and then restart your computer.
Option 4 – Clear the attributes on RAW
Tap the Win + S keys then type “diskpart” in the field.
Click the Diskpart application and if a User Account Control dialog box pops up, click Yes to proceed.
After opening an elevated Command Prompt, type in the commands listed below and make sure to tap Enter right after you key in one command after the other.
list volume
select volume‘n’ (In this command, you have to replace ‘n’ with the volume number of the drive)
format fs=fat32 quick (In this command you also have the flexibility to change the format to ‘ntfs’ or ‘exfat’)
After executing the commands given, unplug the removable storage device and wait for a couple of seconds and then plug it back in.
Now try any normal write operations and see if the error no longer appears.
Option 5 – Try checking the hardware components
On the other hand, it is also possible that the issue has something to do with a hardware problem and so you need to check the hardware components on your computer to determine that.
When you encounter an error message that says, Chassis Intruded…Fatal Error…System Halted on your monitor then it indicates that the Chassis or the cabinet that holds the CPU, GPU, motherboard, and many more is open. It is a security feature offered by OEMs wherein a connector that is found in the motherboard can detect if the chassis component has been replaced or removed. There are a few OEMs that offer onboard speaker or PC chassis speaker which goes off in this kind of situation.
Obviously, the problem has something to do with the hardware and in most cases, you have to put the jumper back on the motherboard with the pin-labeled chassis signal and ground. There are times when some OEMs offer a simple switch that is armed automatically when you properly close the chassis. Thus, you need to check if this switch has something to do with the error. If there is no switch or if it doesn’t resolve the issue, although you may be able to get into Windows with a warm boot, the normal Windows boot won’t really work unless you fix the problem. It is rather false positive and has something to do with the RTC RAM state or the BIOS. You might need to completely disable the Chassis intrusion feature to fix the error.
Refer to the suggestions given below to try and fix the “Chassis Intruded, Fatal Error … System Halted” error.
Option 1 – Try to clear CMOS
You can easily clear CMOS by shorting two pins which can be found side by side on the motherboard. Keep in mind that it may vary from OEM to OEM although the basics are still the same to clear CMOS. In addition, you might also have to download the manual from the OEM’s website so that you’ll know its exact location.
Option 2 – Try booting into the BIOS
You can also try booting into the BIOS. All you have to do is tap either the DEL or F2 keys to get there. Note that everything will be set back to their default setting after you reset the CMOS.
Option 3 – Try disabling Chassis intrusion
In this option, you have to look for the Chassis intrusion feature in your BIOS. It might be located under security. From there, disable it and check if the problem’s fixed.
Option 4 – Try to reconfigure the BIOS
Once you have disabled the Chassis feature, you need to reconfigure the BIOS the way you expect it to be or to what it was before the reset.
 You can prevent starting of app installations files if they have not come from the MS store inside Windows 11.