Logo

Alt-tab that is broken with KB5005033 update

Alt-tabLately, Microsoft has trying to fix Print Nightmare with various methods and patches. The last patch has seemingly fixed Print Nightmare but it has broken the Alt-tab key combination.

It has been reported that the latest patch has broken famous key combinations for quickly switching from window to window. It seems that combination is not working or it is switching to desktop, even going to blank screen if switching from the full-screen game.

Fixing the issue

Luckily this issue is easily fixable.

The first and easier fix for this issue is surprising to turn off the news and info widget, right-click on it and choose News and interests and then click on turn off.

The second solution would be to uninstall the update. Go to Settings, then to Update & Security, and from there view Update History and remove the update.

Do You Need Help with Your Device?

Our Team of Experts May Help
Troubleshoot.Tech Experts are There for You!
Replace damaged files
Restore performance
Free disk space
Remove Malware
Protects WEB browser
Remove Viruses
Stop PC freezing
GET HELP
Troubleshoot.Tech experts work with all versions of Microsoft Windows including Windows 11, with Android, Mac, and more.

Share this article:

You might also like

Fix the HTTP Error 304 Not modified
When you get the “HTTP Error 304 Not modified” error in Google Chrome, Mozilla Firefox, or Microsoft Edge, there can be lots of reasons why you’re getting this error. The HTTP Error code 304 means redirection, technically. It could be that the DNS has some issues or the cache is already reusing the existing information to look for a website or it could also be that your browser might be infected. In this post, we will show you what you can do to fix the “HTTP Error 304 Not modified” error when you are not able to open a website on your browser. Here are the exact details of the error message:
“This status code is returned if the client has already downloaded resources since the last visit and is displayed to notify the client browser that the requested resources is already stored in the browser cache which hasn’t been modified.”
Follow each one of the given fixes below to resolve the issue.

Option 1 – Clear the browsing data on your browsers

The first thing you can try is clearing the browsing data on your browsers.

Microsoft Edge:

  • Open Microsoft Edge.
  • Then click on the three horizontal dots to open the menu.
  • From there, click on Settings. And under Settings, click the “Choose what to clear” button under the Clear browsing data section.
  • Next, check all the checkboxes and then click the Clear button to clear the browsing data in the Edge browser.
  • Restart Edge.

Google Chrome:

  • Open Chrome and then click on the three vertical dots located at the top of the window.
  • Then click on Settings.
  • After that, click on Advanced. And from the Privacy and Security section, click on the “Clear browsing data” option.
  • Now click on the CLEAR DATA button.
  • Restart Chrome.

Mozilla Firefox:

  • Open Firefox and then click on the three horizontal lines to open the menu.
  • From there, click on Options.
  • Next, select Privacy & Security.
  • After that, click on the Clear Now button under the Cached Web Content section and then click the Clear All Data button under the Site Data section.
  • Restart Firefox.

Option 2 – Flush DNS and reset the TCP/IP

There are some websites that don’t resolve since the DNS in your computer still remembers that old IP address. And so you need to flush the DNS as well as reset the TCP/IP on your computer.
  • Click the Start button and type in “command prompt” in the field.
  • From the search results that appear, right-click on Command Prompt and select the “Run as administrator” option.
  • After opening Command Prompt, you have to type each one of the commands listed below. Just make sure that after you type each command, you hit Enter
    • ipconfig /release
    • ipconfig /all
    • ipconfig /flushdns
    • ipconfig /renew
    • netsh int ip set dns
After you key in the commands listed above, the DNS cache will be flushed and the TCP/IP will reset.

Option 3 – Try using the Google Public DNS

Changing your DNS to Google Public DNS might also help you in fixing the “HTTP Error 304 Not modified” error. To do so, follow the steps below.
  • The first thing you have to do is right-click on the network icon in the Taskbar and select Network and Sharing Center.
  • Next, click on the “Change Adapter Settings” option.
  • After that, search for the network connection that you are using to connect to the internet. Note that the option might be “Wireless Connection” or “Local Area Connection”.
  • Right-click on your network connection and click on Properties.
  • Then select the new window to choose the “Internet Protocol 4 (TCP/IPv4)” option.
  • After that, click on the Properties button and click the checkbox in the new window for the option “Use the following DNS server addresses”.
  • Type in “8.8.8.8” and “8.8.4.4” and click OK and exit.

Option 4 – Run Cleanup Tool and disable Extensions

You might also want to run the Cleanup Tool in Chrome if you are using this browser as well as disable all the extensions as some of them, if not all, might be the reason why you’re getting the “HTTP Error 304 Not modified” error.
Read More
How to block websites in Windows
There are a lot of reasons to ban or block different websites in your Windows. From wanting to limit yourself from distraction to block certain sites for sake of kids not going into them. Whatever your reason might be, keep reading in order to find out how you can block any website inside Windows for all browsers. The technique I am going to share with you is universal and not tied to Windows versions, they will work in any Windows from XP onward. Also, the technique will block desired websites on any browser, already installed or even ones that will be installed after doing the trick. And we will also be looking at applications that can help you in this task if you do not wish to do it manually.

Block websites using dedicated software

A small free application called Focal Filter which can be found here: https://www.focalfilter.com/ is a software solution for your needs. It is a pretty straightforward and easy-to-understand application and not really much can be said here about it. You simply download and install it, set your websites, and you are done, the app does rest.

Blocking manually via host file

Another method besides mentioned one using the dedicating application is to manually set site addresses inside the Windows host file. The first thing, of course, is to open the host file, run a notepad with administrator privileges, go to file open, and navigate to c:\windows\system32\drivers\etc\hosts. Once the file is opened go all the way down and add: 127.0.0.1 SITENAME For example: 127.0.0.1 www.youtube.com or 127.0.0.1 www.facebook.com This way each time user on a PC tries to access a listed website computer will reroute it to the given address which is your PC's local address and asked website will not be able to load.
Read More
Best Free Stock Photo WEB sites of 2021
The Internet has become an essential human right as stated in many countries around the world. Among many benefits that the internet offers are various sites selling Stock photographs for all of your needs. No matter are you working in the design industry or just want to make something for yourself there is a high chance that you will eventually need some photos for your work. Stock photo workIn this article we are going to go through the best Stock Photo sites BUT, we will focus on ones that give you royalty-free Photos, so no paying stuff here, just the best of the free world.

Adobe Stock free collection

https://tracker.tradedoubler.com In the last year of 2020, Adobe has made more than 70000 photos, videos, illustrations, and templates completely free. You are free to use provided material for personal, commercial, and creative work. Since this is adobe’s collection, well part of it, all of the given material is of high quality. You can also upload pictures to do a visual search to find similar ones.

Unsplash

https://unsplash.com/ Unsplash is a place where you will go if you want to find free-quality pictures. Since a lot of photographers are donating their selected work there you will find always consistently high-quality work there. Unsplash also has applications for Android and iOS so you can go through their stock on your mobile device as well. Photos are organized into categories that make searching much easier.

Pixabay

https://pixabay.com/ Pixabay is maybe well known due to its huge collection of both images and illustrations. There are tons and tons of stuff in there all royalty-free for use. The bad side is due to its strongest one, since there are so many images on its site, quality is not always top-notch like on Unsplash for comparison but you might find stuff here that you will not be able to do it anywhere else.

Pexels

https://www.pexels.com/ This is a great choice for web or app developers since you can find various UI ideas and designs on it. Many UI ideas ready for implementation will be found here and a decent amount of photos as well. The overall site is great for that purpose but please do read the license on each image since some of them are limited in use and cannot be used in commercial projects.

Pikwizard Stock

https://www.pikwizard.com/ Stock photography from Pikwizard is a place where you will go if you need high-quality pictures of people. There are a lot of images of people in natural poses doing things, nothing cheesy or unnatural, just pure and great-looking ones. Among other things is also a vast selection of cityscapes. Sadly as in the case of Pexels, not all pictures have the the same license so make sure to check terms of use before using one.

Gratisography Stock photos

http://gratisography.com/ Last on our list is a Stock site with a strange name and if you visit it you will see that it is not just the name that is strange. Gratisography is a stock site that aims to provide you with high-quality photographs but in different take from another site. These images are more artistic and surreal than other competitor sites. Images are uploaded almost on daily basis but since thematic is somewhat niche collection itself is relatively small.

Conclusion

That’s it, we hope that we have helped you in any way to find some material for your next project and I hope to see you soon back on errortools.com. Take care and all the best.
Read More
Steam beta introduces no rollback game updates
The latest steam beta update has introduced code that will prevent downloading and installing previous game versions via the steam client. steamFor many people that are playing online games, this is not such a big deal since they always must have the latest version in order to play their games but for other ones, this has arrived as a bit of a problem. Many people preferred older game versions since often updates can change certain mechanics inside the game making it different as an experience or introduce some elements that not everyone likes. So far, people could use the steamDB site to find depo of the game versions you would like to play and download it but if this beta code goes live that will not be an option anymore. Now, playing old games without updates could also be used for nostalgic reasons and these people have also been cut off with this update. It is important to point that update is still in beta client only but users have already started to voice their opinions asking Valve not to place it live. In the end, it will all depend on Valve’s decision will they listen to their customers or decide to push updates on live service.
Read More
What to do if you cannot switch between Programs on Taskbar in Windows 10
It is common to run multiple programs and applications at the same time and it’s important to be able to switch between them using their Taskbar icons or using the usual Alt + Tab shortcut. However, there are times when you might suddenly find that neither of the aforementioned methods worked and you will no longer be able to switch between programs in the Windows Taskbar. To fix this issue, refer to the options given in this post. For instance, when you have multiple instances of Microsoft Edge running and every time you press the Alt + Tab combo nothing happens so you are left with no choice but to minimize everything and then hover your mouse on the icon and switch between the instances of Edge. You will also notice that the right-click on the taskbar won’t respond back and will only keep on showing the loading circle icon. Here are a few tips you can follow to fix the issue with the Windows 10 Taskbar.

Option 1 – Try to restart the Windows Explorer

This is one of the basic things you can try as restarting Windows Explorer helps in refreshing the user interface and makes most of the things work in relation to the user interface.
  • To get started, tap the Alt + Ctrl + Del keys to pull up the Windows Task Manager.
  • After opening Task Manager, look for “explorer.exe” under the list of programs.
  • Once you find the explorer.exe, right-click on it and click Restart.

Option 2 – Try changing the Foreground Lock Time

Aside from restarting Windows Explorer, you could also try changing the Foreground Lock Time to fix the issue with the Taskbar.
  • Tap the Win + R keys to open the Run dialog box.
  • Then type in regedit in the field and tap Enter to open the Registry Editor.
  • Next, go to this registry key – HKEY_CURRENT_USERControl PanelDesktop
  • Next, change the ForegroundLockTimeout value from200000 to 0. After that, it will make sure that no other application will take away the focus from your current program or application. It could be that some other application has taken away the focus and even when you try to actually switch, the focus gets back to the old one. Anyhow, since you already changed the value of ForegroundLockTimeout, it will ensure that the focus is not switched.
Note: If you are running some Full-Screen applications there are some devices especially the gaming ones, disable the Windows key to make sure that you won’t be able to switch. If this is the case, you need to make some modifications to the Full-Screen games.
Read More
IW Unicorn and Scorpion PC Chair cockpits
Recently on errortools.com, we were talking about Cooler Master’s Orb X gaming chair that is an absolute beast and an amazing product. One downside of Orb X is its price. IW product line is somewhat competing with Orb X with a much more affordable price aiming to probably take customer base with lower income but offering them a great experience as well. The first thing you will notice is a different design and somewhat feeling of cheaper quality if you compare it to Orb X but that is quite reasonable considering the chair itself is around 3.5 times cheaper than Orb X which really puts it in range of everyone can get it. But does a much cheaper price means low quality? Let’s explore.

IW Unicorn

IW unicornThe 2021 CLUVENS BRAND newly issued model UNICORN has fully electrical tilting capabilities to 160 degrees, Reading light-two LED & RGB illumination lighting, manual open/close keyboard tray, and armrests. This model is suitable for home and office, and also gaming computer work environments. It offers functions that enable the user to experience unprecedented comfort and quasi total immersion through strategically positioned 1-3 monitors, audio systems, and accessories. The result is a complete computer office, ergonomically optimized, with a minimal footprint that improves overall performance and productivity and health and comfort. Sitting on a chair can help a lot for relieving health problems like lower back pain, herniated discs, sciatica, and neck pain and also enhance performance and viewing effects.

More Luxury and More comfortable:

Equipped with Luxury feeling reclining Gaming chair made with high-density Mold Shaping Foam and superior quality PU leather with very comfortable texture, electrical recline to 128 degrees, and more to 160 degrees for the flat position for the user.

More High-End Setting and more High-tech:

Manual push for open / close of big sized (87x34cm) Self-Balancing Keyboard tray, adjustable with 20cm distance range with Electrical control for the height of roof arm & monitors. Electrical control for reclining Zero Gravity position or even flat position, Manual adjusted Feet pedal for a more comfortable position for feet. Using a High-Quality PU leather Gaming chair that has Heat/Massage functions with it! The IW-Unicorn monitor mounts allow the use of a single monitor up to Ultra-wide 49” or 43” in size or triple monitor setups up to 3 x 29” other monitors configurations are available upon request. (VESA standard)

IW Scorpion

IW scorpionScorpion is basically a premium version of Unicorn with being able to hold more weight, having cup holders on the armrest, etc. The look is also similar with Scorpion being more sinister-looking but overall Steel frame and chair are the same.

Conclusion

Sadly I have not personally experienced neither of these products including Orb X but from all information I have found and looked over, I would say these products are not trying to compete with each other. Although Products are similar in nature, Orb X is aimed at hi end-users focusing on privacy and robustness while IW is filling the gap of users that would like an advanced chair but are not willing or ready to shell hi amount of money for it offering advanced chairs with advanced features in somewhat affordable price.
Read More
How to turn the game mode off in Windows 11
Among other things and innovations, Windows 11 brings to the table is the game mode. The game mode is a system designed to release some resources and optimize your system when Windows 11 detects that you are playing games. It also turns off automatic updates while the game is active. game mode in Windows 11
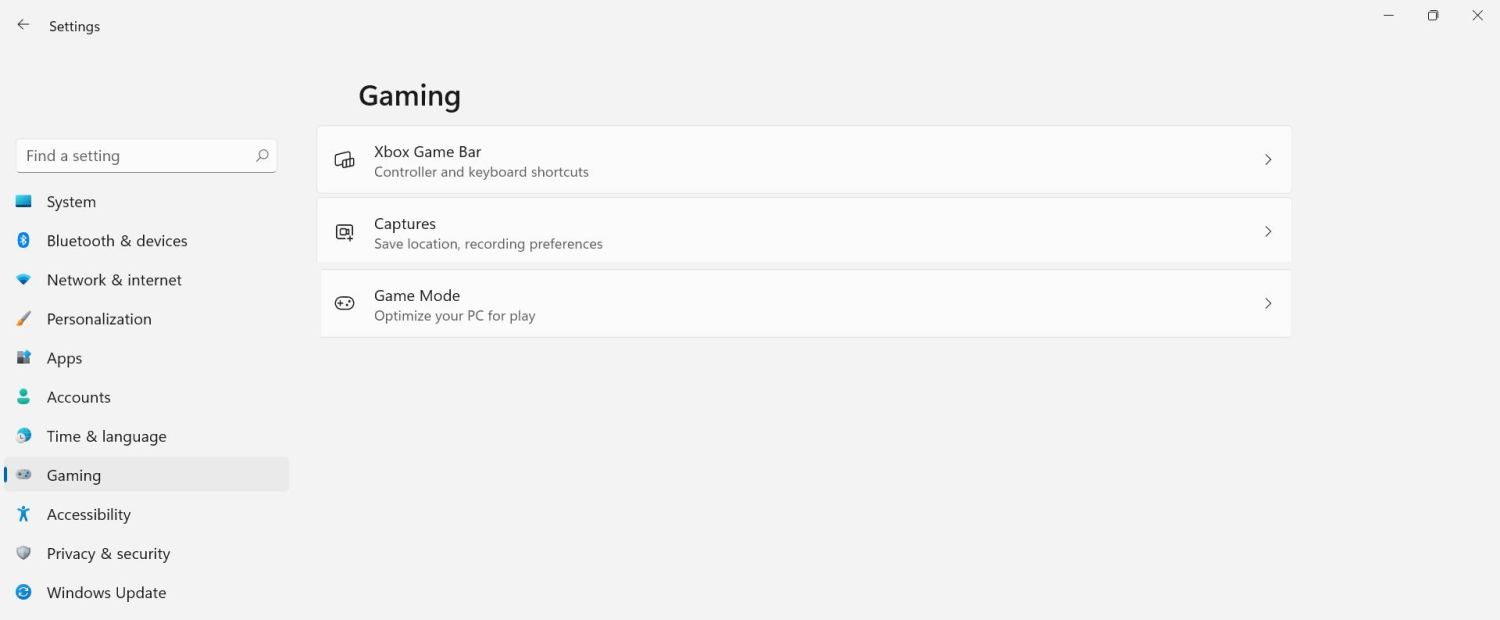
The game mode is active at all times and usually, everything works great but in some instances, it can sadly cause some performance issues. If you are one of these unlucky people where game mode is not working as supposed to do, don’t panic, we have a quick guide for you on how to turn it off.
  1. Press ⊞ WINDOWS + I to open settings
  2. Inside click on Gaming
  3. Select Game mode
  4. Click switch beside Game mode to turn it off
  5. Close settings
Everything will be automatically saved and applied and you should not have any issues from now on. If for any reason you wish to turn game mode back ON, just follow the same steps and turn the switch to ON.
Read More
Fix user account is not authorized
If you encounter an error message saying, “The connection was denied because the user account is not authorized for remote login” when you try to establish a remote connection, read on as this post will help you resolve the problem. This kind of error occurs when the targeted host does not allow you to access that system remotely. Based on the error, you are not authorized to log in remotely which means that you need to obtain the correct permission. There are several potential fixes you can try for this error. You can try to check the Remote Desktop Users group or add users to the Security group or check the Remote Desktop Service itself. Refer to the options provided below for more detailed instructions to fix the “The connection was denied because the user account is not authorized for remote login” error.

Option 1 – Try checking the Remote Desktop Users group

You can encounter this error when the Remote Desktop Users group does not have any permission for your user account that you are using to establish a remote connection. Thus, you need to make sure that your user account is a member of the Remote Desktop Users group. How? Refer to these steps:
  • Tap the Win + R keys on your keyboard and then type “cmd” in the field and tap Enter or click OK to open Command Prompt.
  • After opening Command Prompt, type the “lusrmgr.msc” command and tap Enter to execute it.
  • Alternatively, you can also search for “lusrmgr.msc” in the Start Search and once you’ve opened it, select Users and then double click on your user name to open its Properties.
  • From there, switch from the “General” tab to the “Member Of” tab.
  • Next, if you can’t see any Remote Desktop Users group under the Administrator, you have to add it. To do that, just click on the Add button.
  • After that, on the newly opened window, click on the Advanced and Find Now buttons, respectively.
  • And in the Search results box, double click on Remote Desktop Users.
  • Now click on the OK button to save the changes made and check if you can now connect to a remote host or not.

Option 2 – Try to add a user to the Security group

You can actually block or allow a user from logging on through the Remote Desktop Services. However, if you do not have the right setting, you won’t be able to use this functionality. Thus, you need to confirm this setting. To do that, follow the steps below.
  • In the Start Search, type “secpol.msc” in the field and tap Enter to open the Local Security Policy panel.
  • From there, go to User Rights Assignment.
  • Next, look for a policy named “Allow log on through Remote Desktop Services” located on your right-hand side and then double click on it to open its Properties.
  • If you were not able to find the Remote Desktop Users under Administrator, then you have to add it by simply clicking on the Add User or Group button.
  • After that, enter “Remote Desktop Users” in the blank field and click the OK button to save the changes made.
  • Now restart your computer and try connecting again to the remote host.

Option 3 – Try checking the Remote Desktop Users group

There is a service that’s supposed to be running and needs to be set up correctly for you to connect to the remote host. And so you need to ensure that this service is up and running. To do so, follow these steps:
  • Tap the Win + R keys to launch the Run utility.
  • Then type “services.msc” in the field and hit Enter or click OK to open the Services Manager.
  • Next, look for the Remote Desktop Services and double click on it to open its Properties.
  • After that, go to the “Log On” tab and select the “This account” option and then click on the Browse button.
  • On the next screen that appears, look for the Advanced button and click on it and use the Find Now button to search.
  • You will see “NETWORK SERVICE”. Double click on it and then save the changes you’ve made to the settings.
  • Finally, restart your PC and see if the problem is now fixed.
Read More
Media Player cannot burn some of the files
If you encounter an error while trying to burn files to a CD or disk on your Windows 10 computer, stating, “Windows Media Player cannot burn some of the files”, read on as this post will guide you in fixing the error. Here’s the complete error message:
“Windows Media Player cannot burn some of the files. To investigate the problem, click the icon next to the files in the burn list.”
As you know, the Windows Media Player helps you burn songs or audio files to CD or disk but it does not always end up successfully as you could encounter some setbacks such as this particular error. Usually, this kind of issue occurs if an audio file does not comply with some restrictions so the Windows Media Player pops up this error instead. You can encounter this error message if:
  • You include a file that’s not an audio file.
  • If the total time limit exceeds 80 minutes (even though a CD has 700 MB storage capacity, you can’t burn audio of more than 80 minutes long)
To resolve the error, you have to remove the unsupported files from the burning list, change the burning speed or execute some tweaks in the Privacy settings. For more details, refer to the instructions provided below.

Option 1 – Get rid of the unsupported files from the burning list

You must get rid of the unsupported files from the list of files to burn. This list can be found on the right-hand side of the Windows Media Player. One of the indications that a file is causing problems is when there is a white cross in a red circle next to the file. You can simply click on that icon to remove the file from the burning list. Once you’ve gotten rid of all the unsupported files, try to burn your files to the CD or disk once more.

Option 2 – Try to modify the Privacy settings

In case you don’t know, the Windows Media Player comes with privacy settings that help you in various situations. However, on rare occasions, those settings could also trigger errors and this might be the one that’s causing the “Windows Media Player cannot burn some of the files” to pop up. Thus, you can try disabling these options to resolve the error. How? Refer to these steps:
  • Open the Windows Media Player.
  • Then go to Tools > Options. If you aren’t able to find the Tools menu, just tap the Ctrl + M keys. On the other hand, you can also tap the Alt key to display the menu options.
  • Once you’ve opened the Options window, go to the Privacy tab where you can the “Enhanced Playback and Device Experience” section.
  • In this section, you can find the following options. Make sure to disable them all.
    • Display media information from the Internet
    • Update music files by retrieving media info from the Internet
    • Download usage rights automatically when I play or sync a file
    • Automatically check if protected files need to be refreshed
    • Set clock on devices automatically
  • After you disable the options listed above, click on the Apply and OK buttons to save the changes made and then try to burn the files again.

Option 3 – Try to change the burning speed

Since the burning speed is set to fastest by default, you can try to change the burning speed to resolve the problem. All you have to do is open the Options window and then go to the Burn tab. From there, select either Medium or Slow burning speed and save the changes made. Now try to burn your files to the CD or disk once again.
Read More
Fix Windows 11 not using the whole RAM
It has been reported that there are systems out there with Windows 11 operating systems that do not use the whole RAM memory installed in the system. If by any chance you are one of the unfortunate users that has encountered this issue, fear not, we have a solution for you.

RAM memoryRun the Windows Memory Diagnostic tool

  1. Press ⊞ WINDOWS + S to open the search menu
  2. Type in Windows Memory Diagnostic tool
  3. Click on the found app
  4. Select Restart now and check for problems
  5. Wait for the tool to finish
Memory Diagnostic tool is a built-in tool in Windows, it was designed to automatically find and repair memory issues and should be your first step toward resolving this issue.

Check page file

  1. Press ⊞ WINDOWS + S to open the search menu
  2. Type in View advanced system settings
  3. Click on the search result
  4. Click on settings under performance
  5. Click on the Advanced tab
  6. Click on Change under Virtual memory
  7. Uncheck the box for Automatically manage paging file size for all drives
  8. Then select the drive and check the No paging file option
  9. Click on Set
  10. Repeat for all drives on the system
  11. Reboot the system for changes to take effect
If after reboot system still does not see and use whole available RAM, repeat this process and turn back ON paging. After you are done move to the next solution.

Modify usable RAM

  1. Press ⊞ WINDOWS + S to open the search menu
  2. Type in System configuration
  3. Click on the search result
  4. Go to the Boot tab and click on Advanced options
  5. Check the box for Maximum memory
  6. Enter the installed RAM on your system in the field box and click on OK
  7. Confirm once again on the OK and close the System configuration window
  8. Restart the system
If the provided solution has not worked, uncheck the Maximum memory checkbox and save the changes. Move to the next solution.

Change and modify the registry

  1. Press ⊞ WINDOWS + R to open the run menu
  2. Type in Regedit and press the OK button or hit ENTER
  3. Click on YES if prompted by UAC
  4. Locate the HKEY_LOCAL_MACHINE\SYSTEM\CurrentControlSet\Control\Session Manager\Memory
  5. On the right side find and double click on the ClearPageFileAtShutdown DWORD
  6. Enter 1 under Value data and click on OK to save the changes
  7. Close the registry and reboot the system

Enable memory remapping inside BIOS

In order to do this fix, you will need to enter BIOS on your system. How entering BIOS is different from system to system depending on your manufacturer, especially if it is a laptop this step you will have to do alone. Go to your motherboard manufacturer or laptop manufacturer and see how to enter BIOS.
  1. Enter BIOS (80% of the time this can be done by pressing DEL or F12 while the system is turned ON)
  2. Locate System Agent Configuration option
  3. Select Memory Remap Feature and Enable it
Your BIOS might be different from ours and you might not have the System Agent Configuration option, in this case, go through the setting and try to locate Memory Remap Feature. If this feature is missing as well move to the next step.

Rearrange RAM modules on the motherboard

Sometimes RAM memory cannot be slotted properly or just purely switching them in slots can solve the issue. Take RAM out, clean memory slots, clean motherboard connectors for them, and place them back in a different order. If by any chance none of the methods worked, then the issue might be in the hardware itself, either memory banks themselves, motherboard, power supply, etc. If this is sadly the case, you will have to locate the issue and replace the faulty part. If you are not technical enough for this adventure, the best solution is to take a PC to a computer repair shop.
Read More
1 2 3 171
Logo
Copyright © 2023, ErrorTools. All Rights Reserved
Trademark: Microsoft Windows logos are registered trademarks of Microsoft. Disclaimer: ErrorTools.com is not affiliated with Microsoft, nor claims direct affiliation.
The information on this page is provided for information purposes only.
DMCA.com Protection Status