Logo

Different types of computer viruses

Computer viruses are malicious applications that have the ability to self replicate and spread over the system and various devices, just like viruses in organisms. We all know that computer viruses are bad and that you should avoid them however you can. So in this spirit, we are taking a deeper dive into what kind of viruses exist and how they function.

viruses types1. File-infecting Virus

A virus that attached itself to an executable program. It is also called a parasitic virus which typically infects files with .exe or .com extensions. Some file infectors can overwrite host files and others can damage your hard drive’s formatting.

2. Macro Virus

This type of virus is commonly found in programs such as Microsoft Word or Excel. These viruses are usually stored as part of a document and can spread when the files are transmitted to other computers, often through email attachments.

3. Browser Hijacker

This virus targets and alters your browser setting. It is often called a browser redirect virus because it redirects your browser to other malicious websites that you don’t have any intention of visiting. This virus can pose other threats such as changing the default home page of your browser.

4. Web Scripting Virus

A very sneaky virus that targets popular websites. What this virus does is overwrite code on a website and insert links that can install malicious software on your device. Web scripting viruses can steal your cookies and use the information to post on your behalf on the infected website.

5. Boot Sector Virus

These viruses are once common back when computers are booted from floppy disks. Today, these viruses are found distributed in forms of physical media such as external hard drives or USB. If the computer is infected with a boot sector virus, it automatically loads into the memory enabling control of your computer.

6. Polymorphic Virus

This virus has the capability to evade anti-virus programs since it can change codes every time an infected file is performed.

7. Resident Virus

A resident virus stores itself on your computer’s memory which allows it to infect files on your computer. This virus can interfere with your operating system leading to file and program corruption.

8. Multipartite Virus

A type of virus that is very infectious and can easily spread on your computer system. It can infect multiple parts of a system including memory, files, and boot sector which makes it difficult to contain.

Do You Need Help with Your Device?

Our Team of Experts May Help
Troubleshoot.Tech Experts are There for You!
Replace damaged files
Restore performance
Free disk space
Remove Malware
Protects WEB browser
Remove Viruses
Stop PC freezing
GET HELP
Troubleshoot.Tech experts work with all versions of Microsoft Windows including Windows 11, with Android, Mac, and more.

Share this article:

You might also like

An Easy Guide to Repairing Error Code 0x000000A5

0x000000A5 - What is this Error Code?

0x000000A5 is a stop error code also referred to as a blue screen of death error code. It is related to Advanced Configuration and Power Interface basic input/output system in Windows. It often leads to a sudden system shut down or your system may restart unexpectedly. Blue error codes like 0x000000A5 are the most severe and dangerous types of errors Windows can encounter. Ignoring 0x000000A5 error pop-ups and not repairing it timely can result in system crashes, valuable data loss and system failure.

Solution

Restoro box imageError Causes

The 0x000000A5 error code occurs particularly because of the ACPI BIOS error. This error message on your computer screen indicates that the Advanced Configuration and Power Interface (ACPI) BIOS of the computer is not compatible with your Windows system and is not fully compliant with the ACPI specifications. BIOS is a set of software. Through this software, the operating system communicates with the computer’s hardware devices. The ACPI is a part of BIOS and the Windows operating system. It is the standard for the way BIOS works. The presence of ACPI in the BIOS on a given Windows system determines whether the system can make full use of features such as Power Management or Plug and Play. Here’s what happens: traditionally, ACPI BIOS implementation tries to manipulate hardware resources directly through BIOS code for hardware functionality nonetheless if the ACPI-based BIOS is not compliant with the ACPI standard on your system, it may not support workable communication between the operating system and the hardware. This results in imbalance as the operations cannot be synchronized which results in system shut down, system instability, and machine failure. As a warning stop error 0x0000000A5 is displayed on the screen.

Further Information and Manual Repair

To fix the error message 0x0000005A on your PC you don’t need any professional assistance. Solving such blue screen errors in just a couple of clicks is not possible with Restoro This is a multi-functional and feature-filled registry cleaner and system optimizer that helps PC users resolve practically every type of system instability issues and registry errors including BSoD errors like 0x000000A5. It offers a comprehensive suite of utilities including registry cleaning, privacy issue detection and repair, system stability error identification, and Active X and Class issues detection. This innovative and advanced PC fixer is designed to ensure and deliver optimum system performance. It scans and detects causes for 0x000000A5 error code and repairs them in seconds. It has a neat and intuitive layout and easy navigation which makes this repair tool extremely user-friendly. Users of all levels are it novice or experienced can use it with ease and fix all types of PC-related errors like 0x000000A5 right away with no hassle. ACPI BIOS Error can be quickly resolved with this tool. This error tool offers outstanding compatibility. It is practically compatible with all Windows versions.

Restoro download

To get started all you have to do is click here to install the Restoro on your computer. Once it is installed, run it to scan for 0x000000A5 error code. After scanning is complete, click the repair button to repair this issue immediately. For user safety and data security, Restoro also creates backup files. This ensures that no valuable data is lost during system repair. So, don’t delay in resolving error 0x000000A5 error code; install Restoro on your system today!
Read More
Specified service does not exist, 0x80070424
Every now and then, the Windows Installer can also encounter some problems or glitches. One of these problems is where the Windows Update Standalone Installer, Windows Defender as well as Windows Firewall throws an error message that says, “The specified service does not exist as an installed service, 0x80070424”. This type of error can actually affect various applications on your computer so you have to fix it as soon as you can. Although there is no clear reason for what really causes this error, there are various suggestions you can try to fix it.

Option 1 – Try to run the Windows Update troubleshooter

Windows 10 have various troubleshooters that can help you resolve many system issues. So if you’re dealing with errors “The specified service does not exist as an installed service, 0x80070424”, you can run the Windows Update troubleshooter to resolve it. To run it, go to Settings and then select Troubleshoot from the options. From there, click on Windows Update and then click the “Run the troubleshooter” button. After that, follow the next on-screen instructions and you should be good to go.

Option 2 – Try to reconfigure the Windows Time Service

  • In the Start Search, type “command prompt” and right-click on Command Prompt from the search results.
  • Then click on the “Run as administrator” option to open Command Prompt with admin privileges.
  • Now execute each one of the given commands sequentially and hit Enter right after you type each one of them.
    • net stop W32time
    • exe /unregister
    • exe /register
    • net start W32time
  • After executing the given commands above, wait until it says, “W32Time successfully registered”.

Option 3 – Try to restart related Windows services

  • First, type “command prompt” in the Start Search and right-click on Command Prompt from the search results.
  • Then click on the “Run as administrator” option to open Command Prompt with admin privileges.
  • Now execute each one of the given commands sequentially and hit Enter right after you type each one of them.
    • SC config wuauserv start= auto
    • SC config bits start= auto
    • SC config cryptsvc start= auto
    • SC config trustedinstaller start= auto
Note: The commands you’ve just executed will make sure that the required Windows services are available.

Option 4 – Try to download and install the Windows Update Agent

You might also want to download and install the latest Windows Update Agent as it could also help you resolve the “The specified service does not exist as an installed service, 0x80070424” error.

Option 5 – Try to reset the Windows Update components

If by any chance that the second option didn’t work, resetting the Windows Update components could also help you resolve the problem. How? Refer to the following steps:
  • Open Command Prompt with admin privileges.
  • After that, type each one of the following commands and hit Enter after you key in one after the other.
    • net stop wuauserv
    • net stop cryptsvc
    • net stop bits
    • net stop msiserver
Note: The commands you entered will stop the Windows Update components such as Windows Update service, Cryptographic services, BITS, and MSI Installer.
  • After disabling WU components, you need to rename both the SoftwareDistribution and Catroot2 folders. To do that, type each one of the following commands below, and don’t forget to hit Enter after you type one command after the other.
    • ren C:WindowsSoftwareDistribution SoftwareDistribution.old
    • ren C:WindowsSystem32catroot2 Catroot2.old
  • Next, restart the services you’ve stopped by entering another series of commands. Don’t forget to hit Enter after you key in one command after the other.
    • net start wuauserv
    • net start cryptsvc
    • net start bits
    • net start msiserver
  • Close Command Prompt and reboot your PC and then check for updates on your computer and see if the error is resolved.

Option 6 – Try running the Windows Firewall troubleshooter

You could also try to run the Windows Firewall troubleshooter as it might also help you fix the problem. This could help in repairing and fixing Windows Firewall issues automatically. Check if it’s available for your Windows.
Read More
Software and hardware cleaning tips
Spring is almost here and with spring comes work, nature wakes up, people wake up, no more heating bills, time to start working, and time to start cleaning your PC. Good day everyone and welcome to another tip & trick for your PC. This time we are talking about cleaning your PC and keeping it up to software tight so you are ready for the upcoming spring season. Thank you for being with us and let's start:

Uninstall applications that you are not using

The unused applications can cause many issues for PC, from taking unnecessary disk space to even causing slower boot times if they have active services that require to be all-time up and running. They could slow down other applications like file explorer if they have extensions installed into them and can take RAM space with their background processes. If you are not using a particular application anymore or do not plan to use it soon it is always best practice to delete it from the system and thus removing all services and processes that go with it freeing so much-needed RAM and disc space.

Remove browser extensions you do not need

Browser extensions like applications can cause some issues with PC performance. if you spend a lot of time on the internet browser extensions can slow down browser and page loadings, they can make browsers take up more RAM memory and if they are outdated they could even present a serious security threat. Best practices are to keep only the extensions that you need all time, maybe some password managers or similar, extensions that you use on a daily basis, the rest should be uninstalled.

Remove things from the startup

Many services are booted along with Windows itself, some of them are crucial to the system even working, some not so. By eliminating not-needed services from the startup menu you will make sure that your boot times and overall performance of the system are in healthy form and that your PC is more responsive.

Organize files, folders, and desktop

The speeding of computer is not the only thing that you need to take care of, in order to be prepared and have maximum efficiency you will need to organize your files and folders as well. In a working environment, we often tend to save and place files all over the place, and in time they clog up desktop and hard drives. If the files are not well organized we will lose precious time trying to find anything that we need and require, so instead of wasting your time in locating files, why not organize them for easy and logical search so you can access them easily when needed.

Clean taskbar and start menu

Taskbar and start menu as well can be clogged with icons and non-organized application shortcuts and document shortcuts. Remove everything you do not need for that tidy and easily accessible access.

Sort bookmarks

It is very likely that you have plenty of bookmarks saved in our browser. It is also very likely that these bookmarks are not sorted and organized and now would be a great time to do it. Like files bookmarks also can cause you a lot of time loss if you need to find a specific one in a sea of many.

Run disc cleanup

Built-in disc cleanup utility will find temporary files, unused ones, and plenty of other junk on your hard drive. Now would be a great time to run it and get rid of junk files from your system.

Physically clean your computer

Now when we have taken care of the software part of our computer and system, it is time to clean up the computer itself. Unplug your computer and clean it, we will not go into details of this procedure, there is already an article on our site which deals with this part in detail so look it up if you need assistance with this part.

Clean your peripherals

Besides the computer for effective and pleasant work take care of your screen, keyboard, mouse, printer, etc. All of these devices need to be dust-free and clean if you expect them to behave on top of their game. If you would like to read more helpful articles and tips about various software and hardware visit errortools.com daily.
Read More
Windows 10 won't upgrade to a newer version
If when hovering over the upgrade icon on the taskbar you get:
Your version of Windows 10 would reach the end of service soon, Click to download a newer version of Windows 10 to stay supported. or An unsupported version of Windows will no longer receive software updates from Windows Update. These updates include security updates that can help protect your PC from harmful viruses, spyware, and other malicious software which can steal your personal information. Windows Update also installs the latest software updates to improve the reliability of Windows—such as new drivers for your hardware.
and you are unable to perform updates then this guide is for you. There are several things you can do to fix this issue presented here, it is advisable to follow them in a way how they are presented for best performance and system safety.
  1. Run setupdiag

    Download and run Setupdiag from the official MICROSOFT website. SetupDiag is a standalone diagnostic tool that can be used to obtain details about why a Windows 10 upgrade was unsuccessful. It works by examining Windows Setup log files to determine the root cause of a failure to update or upgrade the computer. Once the scan is completed, check the generated log files. The SetupDiagResults.log will be generated and saved in the same folder where you downloaded Setupdiag. Open SetupDiagResults.log using Notepad. You may need to take a look at these folders:
    • \Windows\Panther
    • \$Windows.~bt\sources\panther
    • \$Windows.~bt\Sources\Rollback
    • \Windows\Panther\NewOS
    If there are any issues or conditions that are blocking the upgrade, they will be listed here.
  2. Edit TargetReleaseVersionInfo Registry key

    Press ⊞ WINDOWS + R to open the run dialog In run dialog type Regedit and press ENTER Locate: HKLM\SOFTWARE\Policies\Microsoft\Windows\WindowsUpdate Locate two DWORD files, if they do not exist, create them as: TargetReleaseVersion TargetReleaseVersionInfo Set the value of TargetReleaseVersion to 1 If you are stuck on Windows 10 1909 and want to upgrade to Windows 10 20H2 now, you need to set the value for TargetReleaseVersionInfo to 20H2 Reboot the computer
  3. Use Windows 10 update assistant

    Visit Microsoft.com and hit the ‘Update now’ button visible on the page Download tool and run it Click on Update now to start the upgrade process
Read More
Software review series: BitWarden
BitWardenMany times we were talking and writing here on Errortools.com about security, privacy, hacking, identity theft, etc. We tried to raise important security questions and I hope I have managed to at least shed some light and change maybe some bad behaviors for some, helping them embrace better routines about their security on their PC. 
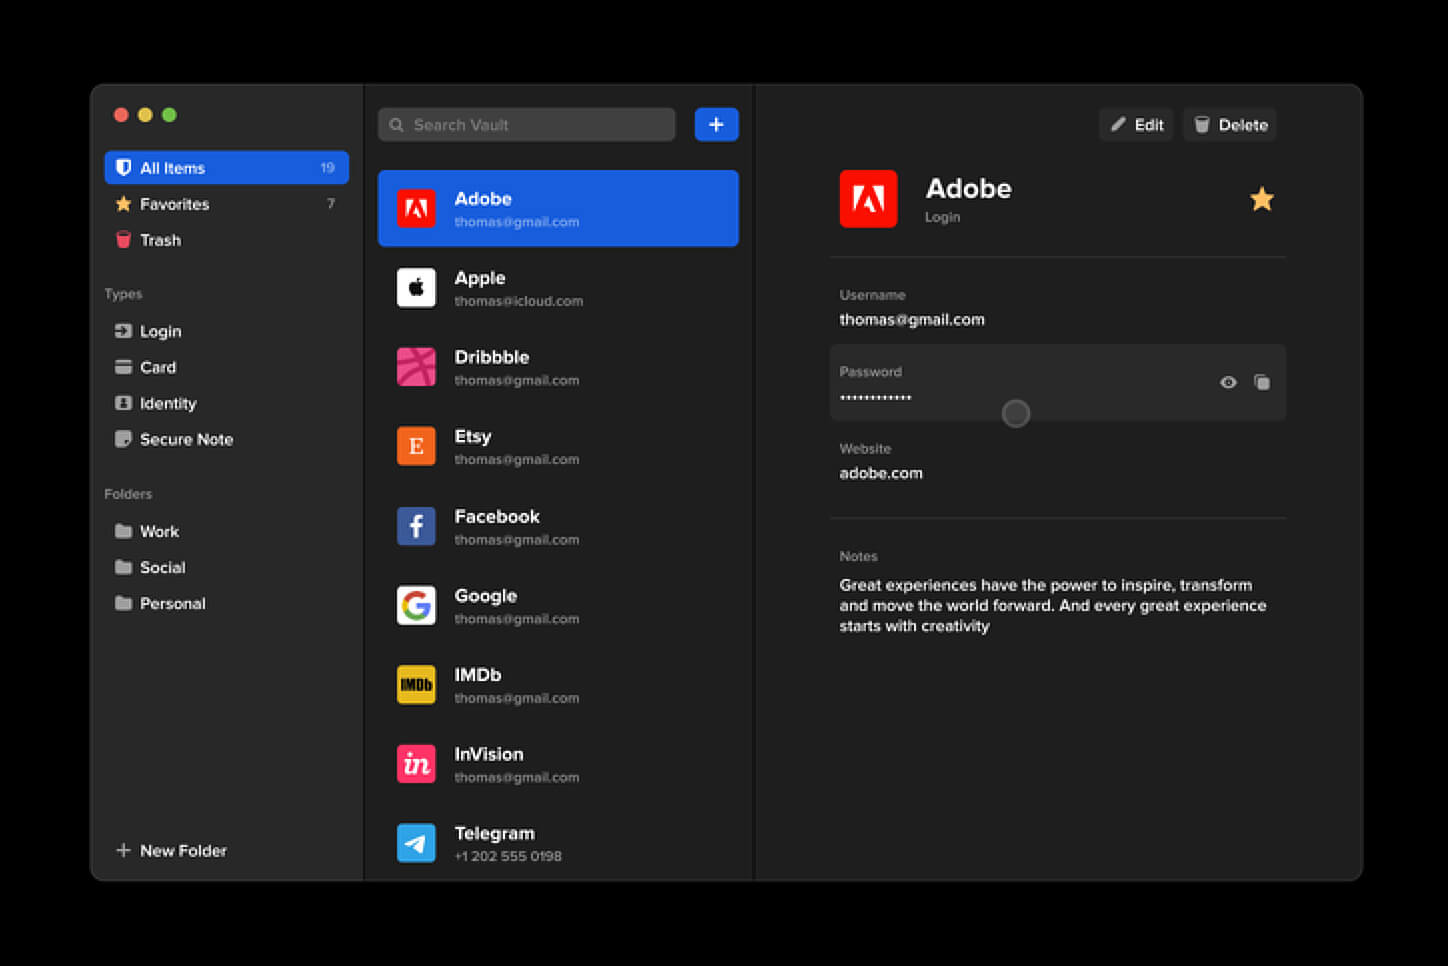
In this light, I will today present you with one neat and awesome piece of software, a password manager worth your time and money (if you want premium features): BitWarden.

What BitWarden offers?

The first thing that it offers is the completely free basic plan, granted BitWarden is not an open-source project nor completely free but it has an unlimited free basic plan that will cover 90% of user needs. There is also a free basic unlimited plan for Organizations letting you and one more user share files and other stuff via BitWarden making it a cool option if you need it. Premium features offer you encrypted sharing of files, two-step login, 1GB file attachments (encrypted), Bitwarden Authenticator (TOTP), Vault Health Reports, Emergency Access, and Priority Support. The cost for all of these additional features is 10 USD per year for an individual plan or 40 USD per year for organizations where you will get an increase of maximum users from 2 to 6. Yes, you read that correctly, only 10 USD per YEAR for the whole set of features. Granted if you do not need any of them, enjoy the free version forever. Besides very low premium cost BitWarden will offer you compatibility with all major browsers and devices including both Android and iOS platforms making it a great cross-platform solution to login and maintain your passwords anywhere with just one click. Once installed all you need to do is set one master password and be very careful not to lose or forget this one, if you do all of your other generated passwords will be lost forever.

Features

Secure Password Sharing

Share your encrypted data quickly and easily, and only with the users or teams who need access

Cross-Platform Accessibility

Access critical data in your Bitwarden vault from any location, browser, and device

Cloud-Based or Self-Host

Get up and running in minutes in the cloud or you can self-host Bitwarden for complete data control

Security Audit & Compliance

Open source and third-party audited, Bitwarden complies with Privacy Shield, GDPR, CCPA regulations

Vault Health Reports

Access insightful reports to reveal weak, reused passwords, and other helpful data security metrics

Directory Sync

Our powerful Directory Connector streamlines user and group onboarding and keeps them in sync

Always-On Support

Our Customer Success agents are available to support you around the clock

Detailed Event Logs

Bitwarden creates audit trails to help you keep track of user and group access to sensitive data

Flexible Integrations

Unite your existing systems with Bitwarden using SSO authentication, Directory services, or powerful APIs

Conclusion

There are many password managers out there but via recommendation I have tried BitWarden and truth to be told, I really never felt the need to try anything else, it is great at what it does and it is moving forward with features and it is constantly updated and maintained.
Read More
Productivity tips for Google Chrome
Chrome logoIf your browser of choice is Google Chrome then sit back and enjoy the ride as we are going through some great productivity tips for it. So without further talking let's dive right into them.

Browsing using tabs groups in Chrome

If you have plenty of tabs opened during your browsing session clogging your screen then you will be happy to know that it is possible to group tabs under, well tabs groups. The good part is that you can name groups however you wish and even code them with color if you wish so. Right-click a tab for a website you want to put into a group. Select Add tab to the new group, then type in a name for the group and choose a color. Create as many groups as you want in this way. To put a tab into an existing group, right-click the tab, select Add tab to group, and select the group to which you want to add the tab. To remove a tab from a group, right-click it and select remove from group.

Send a highlighted text to another Chrome user

If you want to send some text or article you stumbled upon while surfing the internet, there is an easy way to do it providing that the target user is also on Google chrome. Highlight the text you want to share, then right-click it and select Copy link to highlight. That creates the link and puts it into your clipboard. Copy the link from your clipboard and send it to someone. When they click on it, they’ll be sent to the section of the web page with the text you want to share, and the text will be highlighted in yellow.

Sync Google Chrome via the account on multiple devices

If you use multiple devices there is an option to sync Chrome through all of these devices and get all of your bookmarks, history, etc. All you have to do is click on three dots in the upper right corner and click on synchronize. Take note that you will need a Google account in order to sync accounts and you will need to be logged in on all devices you are syncing.

Use multiple search engines

If you need or want to use multiple search engines inside Chrome like BING, DuckDuckGo, etc. now you can and you can do it very easily. Click the three-dot menu icon at the top right of Chrome and select Settings, Search engine, Manage search engines. Under the Default search engines section toward the top of the page, you’ll see a list of search engines you can search through without having to navigate to their sites. To perform a search using any of these engines, such as Bing.com, type bing.com into the address bar and press the Tab key. The leftmost part of the address bar changes, it will read Search Bing or whatever search engine you’ve typed in. Now just type in your search term and press Enter, and you’ll do a search with that search engine.

Search similar websites in content

When you are searching for content on google there is a very easy and quick way to find similar content on the internet. For example, if you want to find more sites similar to the searched site just type in the address bar in front of address related: For example, if you want sites similar to Microsoft, you would type related:www.microsoft.com

Open specific set of websites on Chrome startup

If you need and want to open a specific set of pages each time Chrome is booted know that you can. Click the three, dot icon at the top right of Chrome and select Settings, You and Google, then scroll to the On startup section at the bottom of the screen. Select Open a specific page or set of pages, then click Add a new page, type or paste in the page’s URL and click Add. Add as many pages as you want this way. That’s it for now on Google Chrome tips for better productivity, tune-up again to errortools.com for more articles.
Read More
Installation failed in the SAFE_OS phase
If you are trying to install a Windows 10 upgrade but was interrupted with an error saying, “0x80070003 – 0x2000D, The installation failed in the SAFE_OS phase with an error during MIGRATE_DATA operation”, then you’ve come to the right place as this post will help you sort this problem out. When you get this kind of error while trying to upgrade your computer, although there could be various reasons for this, the primary one is that when you upgrade from one update to another, something stopped the upgrade process to migrate the user data. To fix this error, you can try to run both the DISM tool and the System File Checker to automatically repair any corrupted system files. You could also try checking the free storage space of your primary drive and if you have any file lock apps like BitLocker, consider disabling them for they could also be the reason why you’re getting the error.

Option 1 – Run the DISM tool

Running the DISM Tool helps in repairing the Windows System Image as well as the Windows Component Store in Windows 10 which might be the reason behind the Windows Upgrade error 0x80070003 – 0x2000D. Using this built-in tool, you have various options such as the “/ScanHealth”, “/CheckHealth”, and “/RestoreHealth”.
  • Open the Command Prompt as admin.
  • Then type in this command: exe /Online /Cleanup-image /Restorehealth
  • Do not close the window if the process takes a while as it will probably take a few minutes to finish.
  • Once it’s done, restart your computer and then check if the issue is resolved or not on the next startup.

Option 2 – Run the SFC scan

The SFC or System File Checker scan could detect and automatically repair damaged system files that could be causing the Windows Upgrade error to appear. SFC is a built-in command utility that helps in restoring corrupted files as well as missing files. It replaces bad and corrupted system files to good system files. To run the SFC command, follow the steps given below.
  • Tap Win + R to launch Run.
  • Type in cmd in the field and tap Enter.
  • After opening Command Prompt, type in sfc /scannow and hit Enter.
The command will start a system scan which will take a few whiles before it finishes. Once it’s done, you could get the following results:
  1. Windows Resource Protection did not find any integrity violations.
  2. Windows Resource Protection found corrupt files and successfully repaired them.
  3. Windows Resource Protection found corrupt files but was unable to fix some of them.
  • Reboot your PC.

Option 3 – Try checking the free storage space on your primary drive

The next option you can try to resolve the error is to see if you have enough free storage space on the primary drive because if you don’t then it’s probably the reason why you’re getting this error. To fix it, you need to free up some storage space by following these steps:
  • Open Setting > System > Storage from the WinX Menu.
  • From there, you will see a list of all the local and connected storage devices along with the details on the free space.
  • Now make sure that the Storage Sense feature is turned On then go find a link that says “Free Up Space” and click it to open.
  • After that, a screen which is the built-in program in Windows 10 will appear and will scan your computer for the following junk files so you can free up disk space:
  • Windows Upgrade Log Files
  • System created Windows Error Reporting Files
  • Thumbnails
  • Temporary Internet Files
  • Previous Windows Installation Files
  • Delivery Optimisation Files
  • DirectX Shader Cache
Note: Once you’re done freeing up space on your drive, try to run the setup file again.

Option 4 – Try disabling BitLocker and other file lock apps

If you are using BitLocker or other file lock apps, then it could be the reason why you’re getting the error. Usually, file lock apps don’t cause any kind of issue, however, if you have something that works on file level like BitLocker, you can try to disable it. Once you’ve disabled it, try to install the Windows 10 Upgrade again and after you do, enable BitLocker again. This should fix the problem.
Read More
Fix Error 1310, Error writing to file
If you were trying to install a program on your Windows 10 computer but encounter an error instead that says, “Error 1310, Error writing to file: <PATH>, Verify that you have access to that directory” then read on as this post will guide you on how you can fix it. This kind is a fairly common type of error encountered by many Windows users. You can get this error when you try to install certain programs like Excel, AutoCAD, Adobe Photoshop, and some other Adobe products on Windows. One of the most likely causes for this error is that the required files or location is already used by some other software which means that Windows finds that you are trying to overwrite a software that is already installed. Aside from that, it could also occur if the program installer does not have access to write to that directory. To fix Error 1310, here are some potential fixes that could help.

Option 1 – Clear up temporary or junk files

The error could be caused by some temporary or junk files in your computer and so you need to clear them up to fix the problem. You can achieve that using the Storage Sense feature.
  • Open Setting > System > Storage from the WinX Menu.
  • From there, you will see a list of all the local and connected storage devices along with the details on the free space. Make sure that Storage Sense is on.
  • Next, find a link that says “Free Up Space” and click it to open.
  • After that, a screen which is the built-in program in Windows 10 will appear and will scan your computer for the following junk files so you can free up disk space:
    • Windows Upgrade Log Files
    • The system created Windows Error Reporting Files
    • Thumbnails
    • Temporary Internet Files
    • Previous Windows Installation Files
    • Delivery Optimisation Files
    • DirectX Shader Cache
  • Choose the files you want to get rid of and then click on the remove files option. Note that you’ll have an idea of the total size as you select any of the junk files listed above.
  • Now go to the “Free Up Space Now” section and click the Clean Now button. This will get rid of all the temporary or junk files in your computer and should hopefully fix Error 1310.

Option 2 – Reinstall the program in a Clean Boot State

You can also troubleshoot Error 1310 in a Clean Boot state. It could be that there are some third-party applications in your computer that's preventing the program from getting installed and to isolate this possibility, you need to boot your computer in a Clean Boot State and then try installing the program again. Putting your computer in this state can help you identify which program is the culprit and thus isolates the problem. In a Clean Boot state, your computer will start using only the pre-selected minimal set of drivers and startup programs. Note that you have to disable and enable one process at a time.
  • Log onto your PC as an administrator.
  • Type in MSConfig in the Start Search to open the System Configuration utility.
  • From there, go to the General tab and click “Selective startup”.
  • Clear the “Load Startup items” check box and make sure that the “Load System Services” and “Use Original boot configuration” options are checked.
  • Next, click the Services tab and select the “Hide All Microsoft Services” check box.
  • Click Disable all.
  • Click on Apply/OK and restart your PC. (This will put your PC into a Clean Boot State. And configure Windows to use the usual startup, just simply undo the changes.)
  • After you’ve set your computer into a Clean Boot State, make sure that you’re signed in as administrator and then try to install the program again.

Option 3 – Try to unregister and re-register the Windows Installer Module

  • Tap the Win + R keys to open the Run dialog box.
  • Then type the “msiexec /unregister” command and hit Enter to unregister the Windows Installer Module.
  • Next, type the “msiexec /regserver” command and hit Enter to re-register the Windows Installer Module.
  • Now restart your computer and see if un-registering and re-registering the Windows Installer Module fixed the problem or not.

Option 4 – Take ownership of the location where you want to install the app

The next thing you can try to do is to take ownership of the particular folder as this worked for some users who experienced the same problem. But before you do that, you have to create a System Restore Point first, once that’s done, proceed to the given steps below.
  • First, locate the concerned folder and right-click on it then select Properties.
  • Next, click on the Edit button in the Properties window and click OK to confirm if you got a User Account Control elevation request.
  • After that, select user/group from the permission windows or click on the Add button to add another user or group. It would be best if you add “Everyone” to give permission.
  • Then check “Full Control” under the “Allow” column to assign full access rights control permissions.
  • Now edit the permission to Full Control for “Everyone”.
  • Click OK to save the changes made and then exit.
  • Finally, try to install the application again.
Read More
Fix Error 0x8024a11a or 0x8024a112
What is Error 0x8024a11a or 0x8024a112 ? If you are trying to update your Windows 10 computer and just when you were done downloading the feature update and about to install it, you encounter an error message saying:
“We’re having trouble restarting to finish the install, Error 0x8024a11a, 0x8024a112, 0x80070005 or 0x80070032”
And so to fix this problem, this post will give you a couple of possible solutions. Refer to the options given below to get started.

Option 1 – Restart your computer many times

This is the first thing you can try since there are instances when the Windows Update process gets stuck for a minor thing and restarting the computer usually helps in resolving the issue. All you have to do is click the Restart now button. However, if it does not work, you can use the Power buttons from the Start Menu or WinX Menu. Aside from that, you can also use your power buttons such as Alt + Ctrl + Del to restart your computer. And during the boot process, it is recommended that you restart your computer in Safe Mode or even in a Clean Boot State. After that, you can restart your computer in normal mode. This will make sure that no third-party processes will be able to interfere with the Windows Update process. To put your PC in a Clean Boot State, here’s what you have to do:
  • Log onto your PC as an administrator.
  • Type in MSConfig in the Start Search to open the System Configuration utility.
  • From there, go to the General tab and click “Selective startup”.
  • Clear the “Load Startup items” check box and make sure that the “Load System Services” and “Use Original boot configuration” options are checked.
  • Next, click the Services tab and select the “Hide All Microsoft Services” check box.
  • Click Disable all.
  • Click on Apply/OK and restart your PC. (This will put your PC into a Clean Boot State. And configure Windows to use the usual startup, just simply undo the changes.)
  • After that, try to install the Windows Updates or upgrade again.

Option 2 – Try running the Windows Module Installer

The Windows Module Installer is a built-in service in the Windows operating system that could help you resolve the Windows update error 0x8024a11a or 0x8024a112. You need to make sure that this service is Started and that its Startup type is set to Automatic – you can do this via Services Manager or by executing the command given below in an elevated Command Prompt.
  • Tap the Win + R keys to open the Run dialog box.
  • Then type “command prompt” in the field and hit Enter to open Command Prompt.
  • And in the elevated Command Prompt type in the following command and hit Enter:
SC config trustedinstaller start=auto
  • After executing the command successfully, you should see the “[SC] ChangeServiceConfig SUCCESS” message on the Command Prompt window.

Option 3 – Run the DISM tool

You can also run the DISM Tool as it helps in repairing the Windows System Image as well as the Windows Component Store in Windows 10. Using this built-in tool, you have various options such as the “/ScanHealth”, “/CheckHealth”, and “/RestoreHealth” which could help in fixing the Windows update error 0x8024a11a or 0x8024a112.
  • Open the Command Prompt with admin privileges.
  • Then type in the following commands and make sure to hit Enter right after you type each one of them:
    • Dism /Online /Cleanup-Image /CheckHealth
    • Dism /Online /Cleanup-Image /ScanHealth
    • exe /Online /Cleanup-image /Restorehealth
  • Do not close the window if the process takes a while as it will probably take a few minutes to finish.

Option 4 – Run the System File Checker

System File Checker or SFC is a built-in command utility that helps in restoring corrupted files as well as missing files. It replaces bad and corrupted system files to good system files that might be the cause why you’re getting the errors 0x8024a11a and 0x8024a112. To run the SFC command, follow the steps given below.
  • Tap Win + R to launch Run.
  • Type in cmd in the field and tap Enter.
  • After opening Command Prompt, type in sfc /scannow
The command will start a system scan which will take a few whiles before it finishes. Once it’s done, you could get the following results:
  1. Windows Resource Protection did not find any integrity violations.
  2. Windows Resource Protection found corrupt files and successfully repaired them.
  3. Windows Resource Protection found corrupt files but was unable to fix some of them.

Option 5 – Run the Windows Update Troubleshooter

Running the built-in Windows Update troubleshooter could also help you resolve the Windows update error 0xca00a000. To run it, go to Settings and then select Troubleshoot from the options. From there, click on Windows Update and then click the “Run the troubleshooter” button. After that, follow the next on-screen instructions and you should be good to go.

Option 6 – Run Microsoft’s online troubleshooter

Running Microsoft’s online troubleshooter might also help you fix the Windows update error 0x8024a11a or 0x8024a112. This online troubleshooter is known to help in fixing Windows Update errors, it scans your computer for issues that might be causing the problem and then fixes them automatically.
Read More
Five Ways of Fixing Error Code 37

What is Error Code 37?

Error Code 37 is a Device Manager Error Code that you may come across when you are unable to use an installed hardware device on your PC. It will pop up on your screen with the following display:

“Windows cannot initialize the device driver for this hardware. (Code 37)”

If you receive the above message, it means that your operating system was unable to acknowledge the drivers for a particular peripheral device.

Solution

driverfix boxError Causes

Error Code 37 mainly occurs due to device driver corruption. However, there are other factors that can trigger this error code, some of which are the following:

  • Missing device drivers
  • Out-of-date device drivers
  • Presence of malware or spyware in the system
  • The particular device is not compatible with your PC

Device driver corruption or other data corruption is not uncommon and part of everyday PC use.

From an installation gone wrong to an unexpected shutdown, commonly generated data errors are considered the main culprit behind error codes.

Further Information and Manual Repair

Just like most PC error codes, Error Code 37 isn’t that difficult to get rid of. There are many DIY methods you can try to have your PC running smoothly in no time. Here are a few methods to resolve this issue:

Method 1: Restart your PC

It is possible that the display of the error code is merely due to a temporary issue with your peripheral device and not anything serious.

Therefore, the quickest and easiest method to solve the error code 37 is to simply restart your PC.

Method 2: Scan for Viruses

If restarting does not do the trick, a quick scan for viruses and removing them is another simple method you can follow to fix your PC.

Since the error code is due to corruption of data, viruses such as malware or spyware create error in your PC’s registry and eliminating them can help restore some of the corrupt data, which also speeds up your PC.

Method 3: Undo recent changes

A possible explanation for the error code may be the recent changes in your Device Manager or due to the peripheral device installation. You can thus undo the changes by either:

  • Remove or change settings of the installed peripheral device
  • Roll back the version of the driver to the one before the update.
  • Use System Restore to reverse the changes made in the Device Manager

Method 4: Manually uninstall and reinstall the drivers

If the above stated methods do not help in speeding up your PC and is still giving you an error code, you may want to manually uninstall and reinstall the corrupt or missing drivers. Here are the following steps:

  • Double-check if the installed external device is properly connected and working smoothly
  • Open Device Manager and double click on the device that is causing problems
  • When it opens, click on the ‘Driver’ tab and click ‘Update Driver’

Method 5: Use DriverFIX

However, updating the missing or corrupt drivers can be time consuming and may also require having a hardware documentation ready that contains specific details about the driver that you should download.

To avoid this time-consuming process, you can use DriverFIX software.

DriverFIX will help you to download the required driver without you having to waste your precious time and effort looking it up in a user manual. This latest software technology is embedded with its own database that tracks the missing or corrupt driver according to your PC’s motherboard version and specific details.

It is user-friendly, which means that it will relieve you from the frustration of such PC error codes appearing from time to time and enable your PC to work efficiently in no time.

Click here to download DriverFIX to resolve Device Manager error code 37 today!

Read More
1 2 3 171
Logo
Copyright © 2023, ErrorTools. All Rights Reserved
Trademark: Microsoft Windows logos are registered trademarks of Microsoft. Disclaimer: ErrorTools.com is not affiliated with Microsoft, nor claims direct affiliation.
The information on this page is provided for information purposes only.
DMCA.com Protection Status