Logo

A Guide to Fixing Error 0x80004005

Error 0x80004005 - What is it?

Error 0x80004005 is a typical Outlook error. This error code occurs either when sending emails or receiving them. The error message may be displayed in either of the following formats:

‘Sending and receiving reported error "0x80004005": The operation failed.’

‘This message could not be sent. Try sending the message again or contact your network administrator. The client operation failed. Error is [OX80004005- 0X0004B9-OXOO501].’

Error Causes

There are several causes for the error 0x80004005 such as:

  • The Script Blocking Feature Enabled While Using Norton Antivirus
  • Spyware
  • Viruses
  • Registry problems-Missing or corrupt registry keys

It is advisable to repair and resolve error 0x80004005 immediately as it may cause a great deal of inconvenience to you.

This error may hamper your ability to receive and send emails from your Outlook account and lower your productivity too as you may be unable to communicate with your peers.

Further Information and Manual Repair

To fix error 0x80004005, you don’t have to wait for the network personnel or be a technical expert yourself. This may be a critical error but the good news is that it is easy to resolve.

Here are some effective methods and quick fixes to resolve the error 0x80004005 instantly.

Method 1: Disable Script Blocking Feature in Norton Antivirus

After installing Norton Antivirus on your PC, if you start experiencing the Outlook error 0x80004005, then the best way to resolve it is to simply disable the script blocking feature.

However, the downside of this is that by disabling this feature your PC will become vulnerable to viruses and malware.

Method 2: Disable the New-Mail Notification Feature in MS Outlook

If you don’t have Norton Antivirus downloaded on your PC, then try method 2. This method involves disabling the new-mail notification feature in MS Outlook. The error code 0x80004005 is often resolved by switching off this feature. Try it to see if it works.

To disable the new-mail feature all you have to do is open your Outlook account and then go to the Tools menu, then go to Options and then select the ‘Preferences’ tab.

After that click on the ‘Emails Options’ tab and then simply uncheck the check-box against ‘Display a notification message when new mail arrives’.

To confirm changes press OK.

Method 3: Scan for Viruses

The error 0x80004005 may also be triggered due to viral infection or spyware. Such malicious software enters your PC through phishing emails and while downloading files and attachments. You may not be aware of this but your PC may be infected by viruses.

It is important you remove them immediately as they can expose you to serious risks including privacy issues, identity thefts, data breaches, and more.

Do You Need Help with Your Device?

Our Team of Experts May Help
Troubleshoot.Tech Experts are There for You!
Replace damaged files
Restore performance
Free disk space
Remove Malware
Protects WEB browser
Remove Viruses
Stop PC freezing
GET HELP
Troubleshoot.Tech experts work with all versions of Microsoft Windows including Windows 11, with Android, Mac, and more.

Share this article:

You might also like

How to Fix Error 0x0000605 in Windows
Recently, some users reported not being able to boot up their Windows 10 computers. And during the startup phase, at some time, the bootup sequence is halted with a Recovery error along with an error message saying, “Your PC/Device needs to be repaired” with an error code of 0x0000605. This kind of error message indicates that Windows was not able to verify the digital signature for the file as the signing certificate or it could be that it has expired. To resolve this error, you can follow the potential fixes given below and see if you stumble upon a fix that might work out for you.

Option 1 – Change the Date & Time settings in the BIOS

Some users reported that they were able to fix the error by changing the Date & Time settings in the BIOS. Upon checking, they saw that in their BIOS settings, the date was off several years. As a result, the incorrect date and time settings end up ticking the system into believing that the Windows build has expired long before the actual expiration date. You can check if the error pops up due to the same reasons by accessing the BIOS settings. To do so, you have to tap the Boot key that’s associated with your motherboard manufacturer during the initial startup phase. After that, you can search for a particular boot key online or you can also tap keys like F2, F4, F8, F10, F12, and the Delete key. Once you’re able to access the BIOS settings, locate the Date & time or anything similar, and then check if the date is correct or not. If not, you need to change the date to the actual date and then save the changes made and restart your computer and then check if the issue is now fixed or not. Just remember that if the actual date is past the expiration date of the build you have, you need to change it to an older date. If your Windows 10 PC is able to boot back up, you have to update it to a stable Windows build and then go back to the BIOS settings and change the date to the current one else you will definitely encounter Windows update errors in the future as well as security alerts.

Option 2 – Perform a clean install of a stable Windows 10 build

If every system boot fails accompanied by a BSOD error with error code 0x0000605 “A component of the operating system has expired” and you’ve already followed every instruction on option 1, then it’s most likely that your current Windows build has already expired. Remember that almost all the Windows 10 Insider Preview builds (98xx) are created along with an expiration date and when your computer reaches the expiration date, you won’t be able to boot your computer up. Note that the exact expiration date varies based on the build number. And prior to the expiration date, the operating system will start to display some error warnings telling you that the build will expire and urge you to update the most recent build available. And so once the computer reaches its expiration date, it will begin to reboot every three hours until it no longer boots up which is about 2 weeks approximately after the license has expired. Once the expiration date is up and your computer no longer boots up, you need to perform a clean install and then install the latest Windows 10 build to resolve the issue once and for all.
Read More
How to Fix ‘Your Computer is Low on Memory’ Error
Low on Memory is a Windows PC memory leak error. You may come across it out of the blue however, there are various underlying reasons for this PC error. It is like a warning sign that indicates memory/RAM issues on your system. The ‘Your Computer is Low on Memory’ error means that your PC does not have enough memory space for all the activities you are trying to perform. Due to this error, your Windows and programs can also stop working. If this error is not fixed timely it can lead to serious PC threats like valuable data loss and hard disk corruption. Along with this memory error, you may also come to experience other types of signs including PC poor performance, speed issues, out-of-memory notifications, and display problems.

Solution

Restoro box imageError Causes

The ultimate and the underlying cause of low memory error is data overload in the RAM which triggers registry issues. To understand this better, here is a comprehensive explanation. The computer has 2 types of memory, RAM (Random Access Memory) and virtual memory. All programs and activities that you do on your computer are saved by the registry in the RAM. This includes obsolete and unnecessary files too like junk files, cookies, internet history, temporary files, invalid registry entries, and bad registry keys. Due to poor PC maintenance practices, these files accumulate in the RAM, thereby overloading it. Also, all programs on the PC use RAM to run. So, when there isn’t enough RAM for the program you are trying to run on your system, Windows temporarily moves information that would normally be stored in RAM to a file called a paging file which is also referred to as the virtual memory. By moving the information to and from the paging file- the virtual memory, Windows temporarily frees up enough RAM for programs to run smoothly. However, when you start running more programs than the RAM installed on your PC can support, low memory errors begin to occur. It triggers that the computer is out of RAM and is also low on virtual memory.

Further Information and Manual Repair

PC users should know that this is a critical error therefore it is advisable to fix it immediately before the damage sets in. Here are some of the best solutions that you can try to resolve Your computer is low on memory and similar memory leak errors on your system.

1. Run Few Programs at a Time

This is a temporary solution to prevent low memory problems.  By running a few programs at one time you can easily keep this memory error away from popping on your computer screen. However, this can cause you inconvenience if you run several programs together to perform different tasks simultaneously.

2. Increase the Virtual Memory Size

Though Windows automatically attempts to augment the virtual memory size the first time you experience ‘low on memory issues; however this again is a temporary way out of this problem. But if you are looking for a solution that can resolve these memory issues for a long time, then you can try manually increasing your PC’s memory size. Increase it up to a maximum size this is by the way determined by the amount of RAM installed on your system. Nonetheless, the drawback of this solution is that increasing the paging file size can reduce your PC performance. It can make your programs run more slowly.

3. Install More RAM

Another solution to resolve low on memory issues is to install more RAM. To do this first check your system properties to see the size of the RAM already installed on your PC. To do this press the Windows key+ Pause/Break key this will open system properties. If the RAM size is lower than 2 GB then you need to install more RAM. But if it is more then you should look for two things one check the piece of software that is causing the problem and secondly you need to clean the registry and remove the unnecessary files from your RAM and hard disk. This would free up space dramatically and resolve the low memory issue right away.

4. Download and Run Restoro, Registry Cleaner on your System

To clean the registry and wipe out unnecessary and obsolete files overloading your RAM and disk space, you should download Restoro. Restoro is a next-generation and highly functional error cleaner. By running this error cleaner on your system, you can easily scan for junk stored in your RAM and hard disk and remove it in seconds, clearing up ample disk space. This will resolve all your PC memory-related issues. Furthermore, it repairs the damaged files and restores the registry too. It spares you from the hassle of installing more RAM or virtual memory. Since this PC repair tool also functions as a system optimizer, it simultaneously boosts the speed of your system thus resolving speed issues too, all in one go. Restoro is a bug-free and efficient tool. It has a user-friendly interface making it easy for all levels of users to operate and run it on their systems. Furthermore, it is compatible with all Windows versions including Windows 7, 8, XP,  Vista & 10. Click here to download Restoro to resolve Low on Memory issues on your PC in seconds!
Read More
How to get rid of DailyProductivityTools

The DailyProductivityTools Toolbar is packed as a browser extension that claims to increase your productivity with access to free online tools and developed by Mindspark Inc. This extension may seem handy at first, however, while browsing the internet with it active you will experience additional ads, sponsored content, and pop-up ads throughout your browsing sessions and search results.

When installed DailyProductivityTools changed your default new tab page to Search.MyWay.com disguising as a ‘Enhanced Google Search Engine’. This extension monitors your browsing activity, visited websites and links, then uses this information to better target Ads.

DailyProductivityTools has been marked as a Potentially Unwanted Program, and is recommended for removal by many anti-virus applications.

About Browser Hijackers

Browser hijacking is a type of unwanted software, often a web browser add-on or extension, which causes modifications in the browser’s settings. Browser hijacker malware is designed for a variety of reasons. Generally, the idea is to force users visit certain sites that are aiming to increase their site visitor traffic and produce higher ad revenue. Many people believe that the browser hijacker is only a harmless website but that is incorrect. Almost every browser hijacker pose an actual threat to your on-line safety and it is important to classify them under privacy risks. What’s more, hijackers can make the entire infected system vulnerable – other harmful malware and viruses will grab these opportunities to intrude into your computer system very easily.

How one can identify a browser hijack

The following are some symptoms that suggest you have been hijacked: you find unauthorized modifications to your internet browser’s homepage; your internet browser is constantly being redirected to adult sites; the default web browser configurations have been modified and/or your default search engine is altered; you find many toolbars on the web browser; you see lots of pop-ups on your computer screen; your browser has become unstable or starts running slowly; you’re blocked to access those sites of antivirus solution providers.

So how does a PC get infected with a browser hijacker?

A browser hijacker can be installed on your computer if you check out an infected site, click on an email attachment, or download something from a file-sharing site. They could also come from add-on programs, also known as browser helper objects (BHO), browser plug-ins, or toolbars. Browser hijackers sneak into your pc along with free software downloads also that you unwittingly install alongside the original. Examples of popular browser hijackers are Fireball, Ask Toolbar, GoSave, CoolWebSearch, RocketTab and Babylon Toolbar. Browser hijacking can lead to severe privacy problems and even identity theft, disrupt your browsing experience by taking control of outbound traffic, considerably slows down your PC by consuming lots of resources, and lead to system instability also.

Browser Hijacker Malware – Removal

Certain browser hijacking can be easily corrected by finding and removing the corresponding malware program through your control panel. But, many hijackers will be more difficult to locate or remove since it might get itself connected with certain important computer files that enable it to operate as a necessary operating system process. Novice PC users shouldn’t ever attempt for the manual form of removal, as it demands comprehensive system knowledge to do repairs on the system registry and HOSTS file. Professionals always recommend users remove any malicious software including browser hijacker by using an automatic malware removal tool, which is better, safer, and faster than the manual removal method. Among the best tools for repairing browser hijacker malware is SafeBytes Anti-Malware. It can help you eliminate any pre-existing malware on your computer and provides you real-time monitoring and protection against new internet threats. Along with anti-virus software, a system optimizer program, similar to Total System Care, can help you repair Windows registry errors, eliminate unwanted toolbars, secure your internet privacy, and stabilize software programs installed on your computer.

Malware Blocking Access To Safebytes Site And Anti-Malware Downloads - What To Do?

Malware can cause many kinds of damage to computer systems, networks, and data. Some malware types modify internet browser settings by including a proxy server or modify the PC’s DNS settings. In such cases, you’ll be unable to visit certain or all of the websites, and therefore unable to download or install the necessary security software to eliminate the malware. If you are reading this article, chances are you’re stuck with a virus infection that is preventing you to download and install Safebytes Anti-Malware program on your PC. Although this kind of issue will be tougher to get around, there are a few actions you can take.

Install in Safe Mode

In the event the malware is set to run at Windows start-up, then booting in Safe Mode should prevent it. Since only the minimum applications and services start-up in safe mode, there are hardly any reasons for conflicts to take place. The following are the steps you should follow to remove viruses in Safemode. 1) After switching on the computer, hit the F8 key while the Windows splash screen begins to load. This would invoke the “Advanced Boot Options” menu. 2) Select Safe Mode with Networking with arrow keys and press ENTER. 3) When this mode loads, you should have the internet. Now, utilize your internet browser normally and go to https://safebytes.com/products/anti-malware/ to download Safebytes Anti-Malware. 4) Immediately after installation, run a full scan and allow the software to get rid of the threats it detects.

Switch over to an alternate internet browser

Certain viruses may target vulnerabilities of a specific browser that block the downloading process. In case you suspect that your Internet Explorer has been hijacked by a virus or otherwise compromised by online hackers, the best course of action is to switch over to a different web browser like Firefox, Chrome, or Safari to download your favorite security software – Safebytes Anti-Malware.

Run anti-malware from your USB drive

Here’s yet another solution which is using a portable USB antivirus software that can scan your system for malicious software without needing installation. Follow these steps to run the anti-malware on the infected computer. 1) On a clean computer, download and install Safebytes Anti-Malware. 2) Plug in the USB flash drive to a USB slot on the clean computer. 3) Run the setup program by double-clicking the executable file of the downloaded application, with an .exe file extension. 4) When asked, choose the location of the USB drive as the place where you would like to store the software files. Follow the instructions on the screen to finish off the installation process. 5) Now, transfer the flash drive to the infected PC. 6) Run the Safebytes Anti-malware directly from the pen drive by double-clicking the icon. 7) Run Full System Scan to detect and clean-up up all kinds of malware.

SafeBytes Anti-Malware: Light-weight Malware Protection for Windows Computer

Nowadays, anti-malware software can protect your computer from different types of online threats. But how to select the best one amongst many malware protection application that’s available in the market? Perhaps you might be aware, there are many anti-malware companies and tools for you to consider. Some of them are good, some are ok types, while some will affect your PC themselves! It is important to choose a company that creates industry-best anti-malware and it has attained a reputation as reliable. On the list of highly recommended software programs is SafeBytes Anti-Malware. SafeBytes carries a superb reputation for quality service, and clients seem to be happy with it. SafeBytes antimalware is a highly effective and user-friendly protection tool which is suitable for users of all levels of computer literacy. Using its cutting-edge technology, this software will help you eradicate several types of malware including computer viruses, PUPs, trojans, worms, adware, ransomware, and browser hijackers.

SafeBytes has got a variety of wonderful features that can help you protect your PC from malware attack and damage. Some of them are listed as below:

Antimalware Protection: This deep-cleaning antimalware software goes much deeper than most antivirus tools to clean your computer system. Its critically acclaimed virus engine finds and disables hard to remove malware that hides deep inside your personal computer. Real-time Active Protection: SafeBytes gives round the clock protection for your computer restricting the malware attacks instantly. This software will continuously monitor your PC for suspicious activity and updates itself continuously to keep current with the latest threats. Web Filtering: SafeBytes gives instant safety rating about the pages you’re going to check out, automatically blocking harmful sites and make sure that you’re certain of your online safety while browsing the internet. Low CPU Usage: SafeBytes is well known for its low influence on computer resources and great detection rate of diverse threats. It runs silently and efficiently in the background so you are free to use your computer at full power all the time. 24/7 Customer Support: SafeBytes provides you with 24/7 technical support, automatic maintenance and updates for best user experience. SafeBytes has come up with a wonderful anti-malware solution that can help you conquer the latest computer threats and virus attacks. There is no doubt that your computer system will be protected in real-time as soon as you put this software to use. So if you’re searching for the very best malware removal application out there, and if you don’t mind paying out some dollars for it, opt for SafeBytes Anti-Malware.

Technical Details and Manual Removal (Advanced Users)

If you’d like to carry out the removal of DailyProductivityTools manually instead of using an automated tool, you may follow these simple steps: Navigate to the Windows Control Panel, click the “Add/Remove Programs” and there, choose the offending program to uninstall. In case of suspicious versions of web browser plug-ins, you can actually get rid of it through your web browser’s extension manager. You will likely also want to reset your internet browser. If you opt to manually delete the system files and Windows registry entries, utilize the following checklist to make sure you know exactly what files to remove before carrying out any actions. But bear in mind, this can be a difficult task and only computer experts can perform it safely. Furthermore, certain malicious programs have the capability to defend against its removal. It is advisable that you carry out the removal procedure in Safe Mode.
Files: %UserProfile%\Local Settings\Application Data\DailyProductivityToolsTooltab %LOCALAPPDATA%\DailyProductivityToolsTooltab %UserProfile%\Local Settings\Application Data\Google\Chrome\User Data\Default\Sync Extension Settings\difcnlhbpohkmlhkpkimihocbagbijii %LOCALAPPDATA%\Google\Chrome\User Data\Default\Sync Extension Settings\difcnlhbpohkmlhkpkimihocbagbijii %UserProfile%\Local Settings\Application Data\Google\Chrome\User Data\Default\Local Extension Settings\difcnlhbpohkmlhkpkimihocbagbijii %LOCALAPPDATA%\Google\Chrome\User Data\Default\Extensions\difcnlhbpohkmlhkpkimihocbagbijii Registry: HKEY_LOCAL_MACHINESoftware\Wow6432Node\DailyProductivityTools HKEY_LOCAL_MACHINESoftware\DailyProductivityTools HKEY_LOCAL_MACHINESoftware\Microsoft\Internet Explorer\DOMStorage\dailyproductivitytools.dl.myway.com HKEY_LOCAL_MACHINE\Software\[APPLICATION]\Microsoft\Windows\CurrentVersion\Uninstall..Uninstaller DailyProductivityToolsTooltab Uninstall Internet Explorer
Read More
How to turn the game mode off in Windows 11
Among other things and innovations, Windows 11 brings to the table is the game mode. The game mode is a system designed to release some resources and optimize your system when Windows 11 detects that you are playing games. It also turns off automatic updates while the game is active. game mode in Windows 11
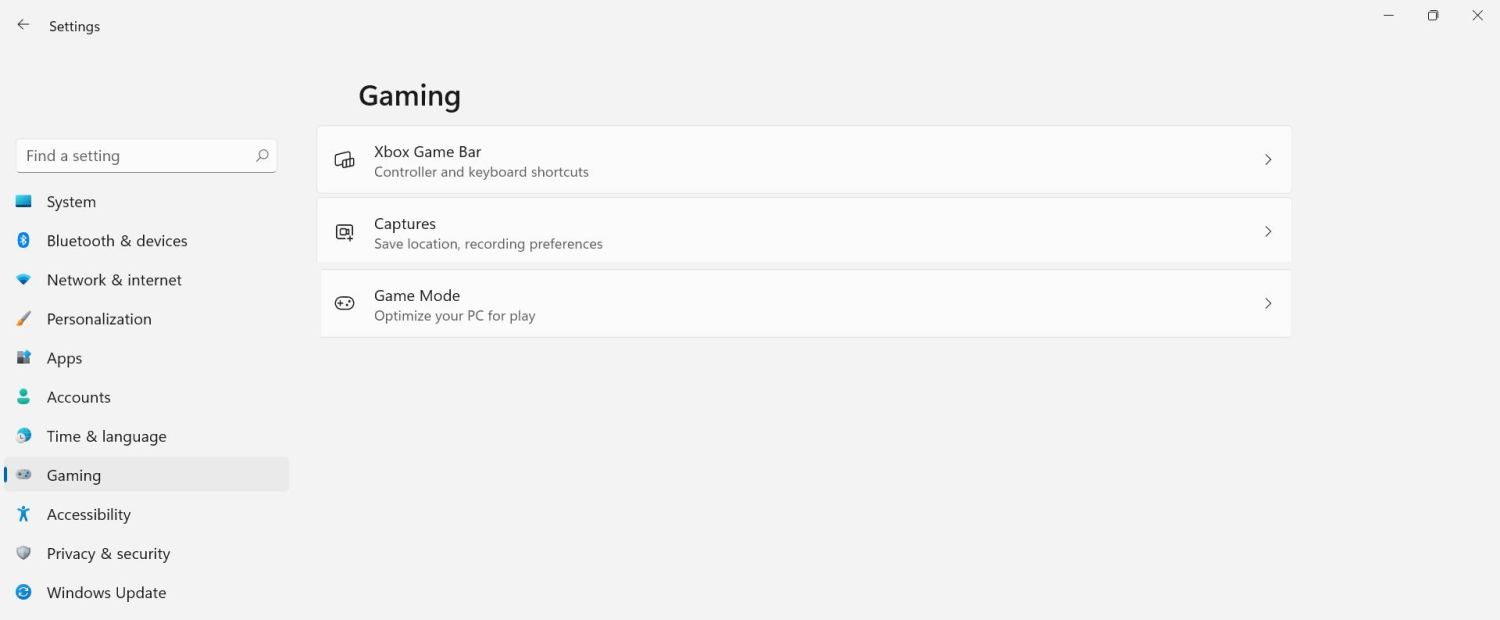
The game mode is active at all times and usually, everything works great but in some instances, it can sadly cause some performance issues. If you are one of these unlucky people where game mode is not working as supposed to do, don’t panic, we have a quick guide for you on how to turn it off.
  1. Press ⊞ WINDOWS + I to open settings
  2. Inside click on Gaming
  3. Select Game mode
  4. Click switch beside Game mode to turn it off
  5. Close settings
Everything will be automatically saved and applied and you should not have any issues from now on. If for any reason you wish to turn game mode back ON, just follow the same steps and turn the switch to ON.
Read More
How to start Windows 10 in safe mode
Booting Windows 10 in safe mode can solve many issues with your computer since Windows will boot just in its basic core and you can safely maintain it, find a solution for issues, etc. Before, entering safe mode was easy and pretty straightforward, during Windows evolution, entering safe mode was somewhat complicated and not being made so directly like once it was but do not worry. Starting Windows in safe mode today is even maybe easier than it was before, it is just not so obvious as it once was. In this article, we will go through several ways how you can boot up Windows in safe mode in order to solve whatever issue is troubling you.
  1. Start safe mode from settings

    Open Settings by pressing the ⊞ WINDOWS + I or by just clicking on the Start button and clicking Settings. Go to Update & Security, then Recovery. In Advanced startup, click Restart now. Once your PC reboots, click Troubleshoot, then Advanced options. Select Startup Settings then Restart.
  2. Go to safe screen from Sign-in screen

    Click the Shift on your keyboard while clicking on the Power button on the bottom right corner of the screen. Once your PC restarts, click on Troubleshoot, then Advanced options. Select Startup Settings then Restart. After the reboot, select or the F4 on your keyboard to run in Safe Mode. If you choose to use Safe Mode with Networking, select or F5.
  3. Start Windows recovery Environment

    Go to the Windows Recovery Environment by doing the following steps: Press on the power button to turn off your device. Press on the button again to turn it on. Once Windows starts, press the power button again for 10 seconds to turn it off. Then press it on again. Upon the reboot, hold on to the power button for 10 seconds to turn it off, then turn it on again. Because you've repeatedly turned on and off your PC, you will be redirected to Windows Recovery Environment. On the pop-up window, click on Troubleshoot, then Advanced options. Select Startup Settings, then Restart. After the reboot, select or the F4 on your keyboard to run in Safe Mode. If you choose to use Safe Mode with Networking, select or F5.
  4. Hold SHIFT while pressing RESTART on the start menu

    On the Windows 10 sign-in screen, hold on the SHIFT on your keyboard. While pressing on the key, click on the Power button, then choose Restart on the pop-up menu. Once your PC restarts, click on Troubleshoot, then Advanced options. Select Startup Settings then Restart. After the reboot, select or the F4 on your keyboard to run in Safe Mode. If you choose to use Safe Mode with Networking, select or F5
  5. Boot from installation media and choose it in the command prompt

    Create a Windows 10 bootable installation media on any external storage media. Once you do this step, wait for the installation to load. Select your preferred language and click on Next. Click on Repair your computer at the bottom left of the menu. Click on Troubleshoot, then Advanced options. Select Command Prompt - Use the Command Prompt for advanced troubleshooting options. Type in the following command on the prompt: bcdedit /set {default} safeboot minimal Hit Enter and wait for it to tell you that "The operation completed successfully". Exit Command Prompt and click on Continue.
  6. Use system configuration tool

    In the Search bar, type in msconfig. Select the Boot tab and under the Boot options, put a check beside Safe boot. Click OK. Reboot PC
  7. Press SHIFT + F8

    Press SHIFT + F8 when turning on Windows. This redirects you to Advanced Boot Options Window, then choose to run Windows on Safe Mode
There you have it, 7 different ways to enter safe mode in Windows 10, we hope that any of these tips proved helpful and that you managed to enter the safe mode and fix your Windows issues.
Read More
Fix Remote Desktop: Your credentials ...
Experiencing issues while using Remote Desktop connections is not uncommon. One of the issues that users encountered recently while trying to connect to their Remote Desktop network is the error saying, “Your credentials did not work, The login attempt failed”. If you are one of these users, then you’ve come to the right place as this post will walk you through fixing the problem. When facing this kind of problem, the first thing you can try before you do some troubleshooting steps is to verify the credentials. But if you are certain that you’ve entered the correct credentials just like what other users reported, then it’s completely a different matter. Based on the reports, this error is common on newly installed versions of Windows 10 or after reinstalling the operating system which could mean that the problem might be due to the Windows security policies or the username might have been recently modified. The latter case is a possibility especially if you’ve reinstalled Windows 10 and had entered a new username. In such a case, you will really have a difficult time connecting to your Remote Desktop connection since its credentials do not really automatically change. If you’ve verified that your credentials are correct, then now’s the time you troubleshoot the problem with the help of the potential fixes provided below. Just make sure that you follow each one of them in sequence.

Option 1 –Try to run the Network Adapter troubleshooter

To run the Network Troubleshooter, refer to these steps:
  • Open the Search bar on your computer and type in “troubleshoot” to open the Troubleshoot settings.
  • Next, scroll down and select the “Network Adapter” option from the right pane.
  • Then click on the Run Troubleshooter” button.
  • After that, your computer will check for any possible errors and will pinpoint the root cause of the problem if possible.
  • Restart your computer.

Option 2 – Try to change the network profile from public to private

According to some reports, this error occurs on systems where the network profile was set to public. Thus, you need to change the network profile to private to resolve the problem. How? Refer to these steps:
  • Go to Start and from there click on Settings > Network & Internet > Status.
  • Next, click on the “Change connection properties” option.
  • After that, set the radio button of Network Profile from Public to Private.
  • Wait for a couple of seconds until the system is done applying the changes you’ve made and then see if you can now connect to the Remote Desktop connection.

Option 3 – Try changing the account username

As mentioned, one of the possible causes for this error is the reinstallation of the operating system. You might have changed the username for the system but it does not really change the username of the Remote Desktop connection as well. Thus, you have to change the username back to what it was before you’ve reinstalled Windows 10.

Option 4 – Try modifying the Windows Security Policy

You can also try to edit the Windows Security Policy as it could help in resolving the error. This Windows Security Policy, when enabled, will not allow non-admin users to log on to the Remote Desktop connection. So if you want to allow non-admin users to use the Remote Desktop connection, then you need to modify this policy. Note that you can only do that if you are the admin of the system yourself.
  • Tap the Win + R keys to open the Run utility.
  • Then type “secpol.msc” in the field and tap Enter or click OK to open the Local Security Policy.
  • After opening the Local Security Policy window, select Local Policies > User Rights Agreement located on the left pane.
  • Next, double click on “Allow log on through Remote Desktop Services” located in the right pane.
  • And in the next window that appears, select Add user or group.
  • After that, type in the username of the intended non-admin user under the “Enter the object names to select” column.
  • Once done, click on the Check Names button to fix the username and then click OK to save the changes made.
  • Restart your computer.

Option 5 – Use the Group Policy Editor

  • Tap the Win + R keys to open the Run dialog box and then type “gpedit.msc” in the field and tap Enter to open the Group Policy Editor.
  • Next, navigate to this path: Computer Configuration > Administrative Templates > System > Credentials Delegation.
  • Double click on the “Allow delegating default credentials with NTLM-only server authentication” policy setting located on the right pane to edit it.
  • After that, shift its radio button to Enabled and click on Show.
  • Then type “TERMSRV/*” in the Value box and click OK.
  • Now repeat the same for the following policy settings:
    • “Allow delegating default credentials”
    • “Allow delegating saved credentials”
    • “Allow delegating saved credentials with NTLM-only server authentication”
  • Once you’re done, restart your computer and see if the problem is fixed.
Read More
Fix Origin Not Loading in Windows 10
Lately on EA forums question has appeared on what to do when Origin client does not load library. It seems that the latest update for the Origin client has brought some issues as not properly showing one library which appears empty. Do not worry, we have a solution for you, several to be precise and it will fix the issue guaranteed. It is advisable to try solutions in order how they are presented since they go from the most simple and fastest and most common ones.
  1. Delete the cache

    Close origin client completely Press ⊞ WINDOWS + R to bring the run dialog In the run dialog type in %ProgramData%/Origin and press ENTER Go into the Origin folder Delete all files and folders except the LocalContent folder Press ⊞ WINDOWS + R to bring the run dialog In the run dialog type in %AppData% and press ENTER Delete the Origin folder In the address bar click on AppData Go into the local folder Delete Origin folder Reboot your PC
  2. Clear the temporary files

    Press ⊞ WINDOWS + R to bring the run dialog In the run dialog type in %AppData% and press ENTER Go into the roaming folder Delete Origin folder Go to the AppData folder and delete the Origin folder from there also Reboot system
  3. Try Windows built-in tools to check compatibility

    Locate where Origin is installed and right-click on the executable file Click on properties Go to the compatibility tab Click on Run the compatibility troubleshooter and follow on-screen instructions
  4. Update Origin

    Rarely this is the case but check manually to see if you can update your Origin client. Sometimes due to network issues client does not update automatically and can cause this strange behavior.
  5. Add origin as an exception to antivirus and firewall

    Not rarely game clients can be detected as some form of malicious software and antivirus along with firewall can automatically block it. Go to your security software settings and add it as the exception.
  6. Reinstall Origin

    If everything else fails, reinstall the Origin client
Read More
Taskbar has disappeared from the Desktop
As you know, the Taskbar is one of the integral parts of the Windows desktop and it has been there since the release of Windows 1.0 and up until now with Windows 10. Since then, Microsoft has been modifying the Taskbar with a new design which makes it a home for new features such as Windows Search, Task View, and many more. However, there are times when you may that the Taskbar has disappeared or has stopped responding. If you experience either one of these scenarios, read on as this post will walk you through what you can do to resolve the problem. Here are some suggestions you can check out to resolve the issue with the Taskbar in Windows 10 but before you proceed, make sure that you create a System Restore point first. To do that, follow these steps:
  • In the Start search, type in “create a restore point” and click the entry “System Properties”.
  • Next, select the main system drive under Protection Settings and click on the Configure button.
  • After that, select the “Turn on system protection” option and then click on the Apply and OK buttons to save the changes made.
Once you’ve created a System Restore point, refer to the troubleshooting steps below to fix the Taskbar in Windows 10.

Option 1 – Try to restart the Explorer process

This may sound really basic but it actually is a proven method to fix the Taskbar issue. So if anything gets stuck on the system tray or the Taskbar, you can always fix it by restarting the explorer.exe. How? Refer to these steps:
  • First, right-click on the Taskbar and select the Task Manager.
  • After opening the Task Manager, go to the Processes tab and look for the process named “Windows Explorer”.
  • Then right-click on that process and select the option to Restart. Afterward, you should now be seeing the Taskbar as this will reload the whole Windows Shell.

Option 2 – Unhide the Taskbar using the Settings app

It is possible that the Taskbar could be hidden so you can try to unhide it using the Settings app.
  • Tap the Win + I keys to open Settings.
  • After that, go to Personalization > Taskbar.
  • From the main section, make sure that the “Automatically hide the task in desktop mode” is toggled to the off position. However, if it’s already off then proceed to the next options below.

Option 3 – Make sure that you are not in Tablet Mode

Since Windows 10 is designed to work on both desktop and mobile devices, it could be that your computer has slipped into Tablet Mode which explains why you’re not seeing the Taskbar. To check if your computer is really in Tablet Mode, follow these steps:
  • Go to the Start menu and select Settings.
  • Next, select the System setting and from the left pane select the Tablet Mode.
  • From there, make sure that the buttons next to the options given below are set to the off position:
    • Hide app icons on the taskbar in tablet mode
    • Automatically hide the taskbar in tablet mode

Option 4 – Try to check the Projection Settings

You might also want to check the Projection settings as it could be the reason why Taskbar has disappeared.
  • Tap the Win + P keys to open the Windows Projection settings.
  • Next, make sure that you select the “PC screen only” option and then check if your Taskbar has now appeared or not.
Read More
How to Fix Windows 10 Error 0x80072efe

Error Code 0x80072efe - What is it?

Error Code 0x80072efe is a fairly common error code that generally occurs in Windows 10. It is most often associated with the process of performing updates using the Windows Update tool.

Common symptoms include:

  • Inability to install or complete updates on your Windows machine
  • Computer freezing as programs are run or started
  • Inability to perform installations of downloaded programs
  • Programs crashing or failing to work properly

While Error Code 0x80072efe can cause a number of frustrating issues on your device, the good news is that there are several methods that can be used to fix this error. The two most common methods are actually fairly easy to perform and do not require advanced tools or knowledge. However, if you don’t feel like you will be able to perform the necessary steps on your own, be sure to get in touch with a qualified computer repair technician to help you in the resolution of this particular error.

Solution

Restoro box imageError Causes

Two things are generally behind the appearance of Error Code 0x80072efe on a Windows device. The first is that one or more of your registry keys are not available, have been corrupted, or are not installed properly. The second is that necessary DLL files aren’t working properly within your machine.

However, other things can mimic these causes, which is why the two methods listed below will resolve the issue in most cases.

Further Information and Manual Repair

Fortunately, there are two resolution methods that can be used quickly and easily when Error Code 0x80072efe arises on your Windows computer. Neither of these requires advanced knowledge or skill, but if you don’t feel comfortable with performing these steps on your own, it is recommended that you contact a qualified computer repair technician in order to get assistance.

Here are the best ways to resolve Error Code 0x80072efe on your computer:

Method One:  Check Your Time and Date Settings for Accuracy

If your time or date has been set incorrectly, it can make your system logs appear to have incorrect information, which can lead to the appearance of Error Code 0x80072efe. Because this is the easiest thing to fix if it is indeed the problem that is making the error code appear, this should always be the first thing that you try when this error code arises.

In order to check your time and date settings, follow these simple steps:

  • Step One: Make sure that you are logged into your computer as an administrator.
  • Step Two: Click on the time and date listed on the lower right edge of your screen. If the settings are not correct, choose the option to change the time and date.

If method one has not successfully resolved Error Code 0x80072efe, you may need to attempt method two.

Method Two:  Check Your Firewall Settings During Updates

In some cases, your firewall can prevent your machine from accessing the information that it needs in order for the installation or update to go through correctly. If that is the case, you can follow a few simple steps to turn off your firewall, just while you install the update, and then turn it back on.

In order to do so, follow these steps:

  • Step One: In the Start menu, choose the option to open the Control Panel.
  • Step Two: Select the option for System and Security, looking for and clicking on Windows Firewall.
  • Step Three: Turn off any private network firewalls.
  • Step Four: Reboot your computer to apply the changes that you have made.
  • Step Five: Re-attempt to run your Windows Update.

Note that if this method allows you to successfully bypass the error code, you’ll need to make sure to turn the firewall back on when you are finished. Even though it can interfere with the Update process, your firewall is still very important to your computer.

Method Three: Use An Automated Tool

If you wish to always have at your disposal a utility tool to fix these Windows 10 and other related issues when they do arise, download and install a powerful automated tool.

Read More
Fix Windows Activation Error 0xC004F211
If you got an Activation Error 0xC004F211 after having installed or upgraded your Windows 10 PC, then this indicates that some hardware in your computer has changed which’s causing the error to pop up. Windows might not be able to determine if the key is used on a new computer or if it’s still the same one if you have just removed or upgraded old hardware. But worry not for this post will guide you in fixing the Windows Activation Error 0xC004F211 on your Windows 10 computer. When you encounter this error, you will see the following error message on your screen:
“Cannot activate Windows 10. Try activating again later. If that doesn’t work, contact support. Error code: 0xC004F211.”
Note that although hardware changes cause this error, the minor ones don’t really cause any issues with activation, however, if you have made any significant hardware change such as replacing your motherboard, it will most likely cause the activation error. In such cases, the Windows Activation system will treat this as new hardware and you will need a new license for that. Even if your Windows 10 computer has a genuine key, it might still fail to get activated which results in the Windows Activation Error 0xC004F211. Thus, before you do other troubleshooting steps, you need to run the Windows 10 Activation Troubleshooter first. To do so, follow these steps:
  • Go to Settings and then select Activation.
  • After that, click on the Windows Activation and then troubleshoot. This will help you address most of the commonly found activation issues in Windows devices.
In addition, there is an exception offered by Microsoft – if you are connected to a Microsoft account prior to the hardware change, then you can most certainly use the same license key to reactivate Windows 10 again. Microsoft calls this an “Exception path” which should be fixed easily by the Windows Activation Troubleshooter as pointed out earlier. However, if the Windows Activation Troubleshooter isn’t able to resolve the error you can try purchasing a new license. In such rate case, even if you do have a Microsoft account available on your Windows 10 computer, and if Windows was never activated, this solution will not work. And if you haven’t connected your Microsoft account with your Windows 10 computer prior to the major hardware change, then your only option left is to purchase a new license. For you to do that here are some steps you can follow.
  • To purchase a new Windows license, the first thing you have to do is click on the Start button > Settings > Update & Security.
  • From there, go to Activation and select the “Go to Microsoft Store” option.
  • After receiving your new license, you need to go back to Update & Security then go to Activation and select the “Change product key” option.
  • Now update your Windows 10 computer using the new key and it should automatically activate your computer.
  • Next, you have to create a Microsoft account or connect your existing local account to your online account.
  • Once the system links the key and the account, you need not buy a new license in case something like this happens again.
Note: If you are an IT administrator, you need to keep in mind that there is a limit to the number of times you can reactivate Windows on your computer. Moreover, if you don’t see any option to reactivate the license, and it is a work computer, you need to contact your organization’s tech support.
Read More
1 2 3 171
Logo
Copyright © 2023, ErrorTools. All Rights Reserved
Trademark: Microsoft Windows logos are registered trademarks of Microsoft. Disclaimer: ErrorTools.com is not affiliated with Microsoft, nor claims direct affiliation.
The information on this page is provided for information purposes only.
DMCA.com Protection Status