Due to the latest android malware security analyst, there are alarmingly 5.8 million downloads of applications that will steal your Facebook data, your Facebook login credentials!
Russian anti-malware company Dr.Web has found Trojan apps that steal your Facebook login credentials by tricking users into entering their private information in order to eliminate in-app ads.
All of the applications have been removed from the play store and cannot be installed anymore but please do check your phone in order to remove them from your phone as well.
List of malware applications:
If by any chance you have any application from this list, consider uninstalling it from your phone for security reasons.
PIP Photo
Processing Photo
Rubbish Cleaner
Inwell Fitness
Horoscope Daily
App Lock Keep
Lockit Master
Horoscope Pi
App Lock Manager
During the investigation, Dr.Web analysts found an additional Trojan app that had previously made its way onto the Google Play Store. Image editing software app EditorPhotoPip had already been removed but could be downloaded through aggregator websites.
So far we probably all know what are good new and exciting features that W11 is bringing to the table, let’s talk now about features that will be removed and are not there but we had them in W10
Taskbar, do not worry, it is still there but it will be locked hard only to the bottom, people is removed, applications cannot customize areas and some icons will not appear in the system tray.
Start Menu, No more named groups, cannot be resized, live tiles are history and pinned apps and sites will not migrate
Tablet mode is completely removed
Touch keyboard will not dock or undock on screen sizes bigger than 18 inches
The timeline feature is no more
The wallet is also removed
Cortana is not active on first boot experience and it is no longer pinned to the taskbar
Desktop wallpapers are not synched anymore when using an MS account
IE is disabled, IE mode in edge here to fill the gap
Math panel is removed with math recognizer as separate install on demand
News and interests are now Windows Widgets
Quick status is no longer on the lock screen nor in the settings
S Mode exclusive only to Windows 11 home edition
Snipping Tool continues to be available but functionality has been replaced with the Snip & Sketch tool functionality.3D Viewer, OneNote for Windows 10, Paint 3D, and Skype won't be installed anymore on new systems. They remain available when systems are upgraded.
In previous versions of Windows changing the system, the font was a pretty straightforward process, but it seems Microsoft did not want this feature to keep for whatever reason and there is no option as of the time of the writing of this article to do it in standard options in Windows 10.
But do not worry, you are still able to customize your Windows and choose which font would you like to see inside it in all of its dialogs. You can choose whichever font you desire, the only prerequisite is it to be installed on your system.
This guide will require you to change values in the registry of Windows itself so please follow step-by-step instructions and always make a backup of the registry before changing it in order to prevent some permanent Windows issues.
All of that being said, let's start.
Setting new font
First thing is to open notepad, in the notepad paste the next block of code:
Windows Registry Editor Version 5.00[HKEY_LOCAL_MACHINE\SOFTWARE\Microsoft\Windows NT\CurrentVersion\Fonts]"Segoe UI (TrueType)"="""Segoe UI Bold (TrueType)"="""Segoe UI Bold Italic (TrueType)"="""Segoe UI Italic (TrueType)"="""Segoe UI Light (TrueType)"="""Segoe UI Semibold (TrueType)"="""Segoe UI Symbol (TrueType)"=""[HKEY_LOCAL_MACHINE\SOFTWARE\Microsoft\Windows NT\CurrentVersion\FontSubstitutes]"Segoe UI"="NEW_FONT"
Where in "Segoe UI"="NEW_FONT" instead of NEW_FONT you need to write the exact name of the font that you wish to use as a system font.
Once you have replaced the default system font with your desired one, go to File and save as, from file type drop-down menu, choose all files and save this file as .REG type giving it whatever name you wish.
When the file is saved, close notepad, right-click on the saved file and choose the merge option. Confirm with YES and click on OK. Reboot your system and your Windows will now use the font of your choice as its default system font.
Restoring default font
If you wish to return the old default system font as it was, follow the same steps but in your notepad paste this code:
In today's modern world many households have internet access, most of the connection nowadays is done via Wi-Fi or wireless but there is a high probability that you have also a few devices connected via cable. There are of course many disadvantages and advantages between cable connection and wireless connection.
The main advantages of a hard cable connection are of course faster speed and stability compared to Wi-Fi. But if we look into the cables themselves there is also a big difference between them. Not all cables are the same and quality as well as speed vary a lot between them. Choosing the right cable is essential in order to make a maximum of your internet and we have some great tips and explanations of what cables do so you can make the right choice and enjoy your full internet potential.
Not all cables are the same
Cheap cables and expensive ones are not the same no matter what everyone tells you. The old proverb you get what you pay is true and more expensive cables will be made from better materials and will have a higher transfer rate.
Quality network cables are separated into different categories with proper markings and when buying one you should always look for these markings on the cables themselves, do not buy cables that do not have markings since they will often provide lower transfer rates or will not be shielded from outside influences resulting in packet drops and instability in a network.
Categories and what they mean are:
Cat-5 with a maximum speed of 100Mbps, typically unshielded.
Cat-5e with a maximum speed of 1Gbps, available in both shielded and unshielded varieties.
Cat-6 with a maximum speed of 10Gbps for runs under 55 meters (around 180ft), available in both shielded and unshielded varieties.
Cat-6a with a maximum speed of 10Gbps, shielded.
Cat-7 uses a proprietary GG45 connector rather than the standard RJ-45 connector seen on other cables for speeds of 10Gbps, shielded.
Cat-8 with a maximum speed of 25Gbps (Cat-8.1) or 40Gbps (Cat-8.2) at a distance of around 30 meters (around 100ft), shielded.
Unless stated, these standards are typically rated at their quoted speeds for a run of around 100 meters (around 330 ft) and use a standard RJ-45 Ethernet connector. Each generation of cable is designed to be compatible with the generations that came before it, so it’s possible (for example) to use a Cat-6a cable with a router that only supports speeds of 1Gbps.
Shielded cables
When purchasing higher quality cable you might not be able to choose if you have shielding or not since some standards like Cat-6a, Cat-7, and Cat-8 are always shielded. But if you do not have the need for these and you are satisfied with Cat-5e for example you can choose.
Shielded cables are a little more expensive but they will provide you with a coating that will eliminate interference from outside waves making cables more reliable. Of course, if the cable will go through a room that does not have many radio waves or some other interferences then buying a shielded cable is a waste of money.
Cable platings
Usually, there are two types of connector platings on connectors, silver, and gold, and people usually think that gold is much better but there are major differences between silver and gold platings and truth to be told there is no better one, both are different and should be considered depending on your need.
Silver plating will provide you with faster speed since its conductivity is larger than gold, but gold is slower on the oxidation front so its life span is longer. On the other hand, if your cables are always connecting and disconnecting gold will be first to be scrubbed off from the surface since the gold coating is much thinner.
Overall if you would only connect cable once and have slower internet than cable capacity gold is the way to go, in another case if you would use the cable as always connecting and switching and your internet plan is the same as cable transfer capacity you might want to go with silver one.
Cable material quality
Network cables are made from copper, your standard conduction material but even here there are differences in quality and therefore the chance of pocket losses over it. More quality less loss and more stable connection and this will depend on the purity of copper that is used in the cable itself. More purity in copper, more stability, simple as that.
Conclusion
So as you can see, there are a lot of different things that will influence your pick of proper network cable but the overall best advice is to get one that will fit well into your needs and setup. pair it up with your router and your internet plan since just simply buying something that you can not use is really a waste of money.
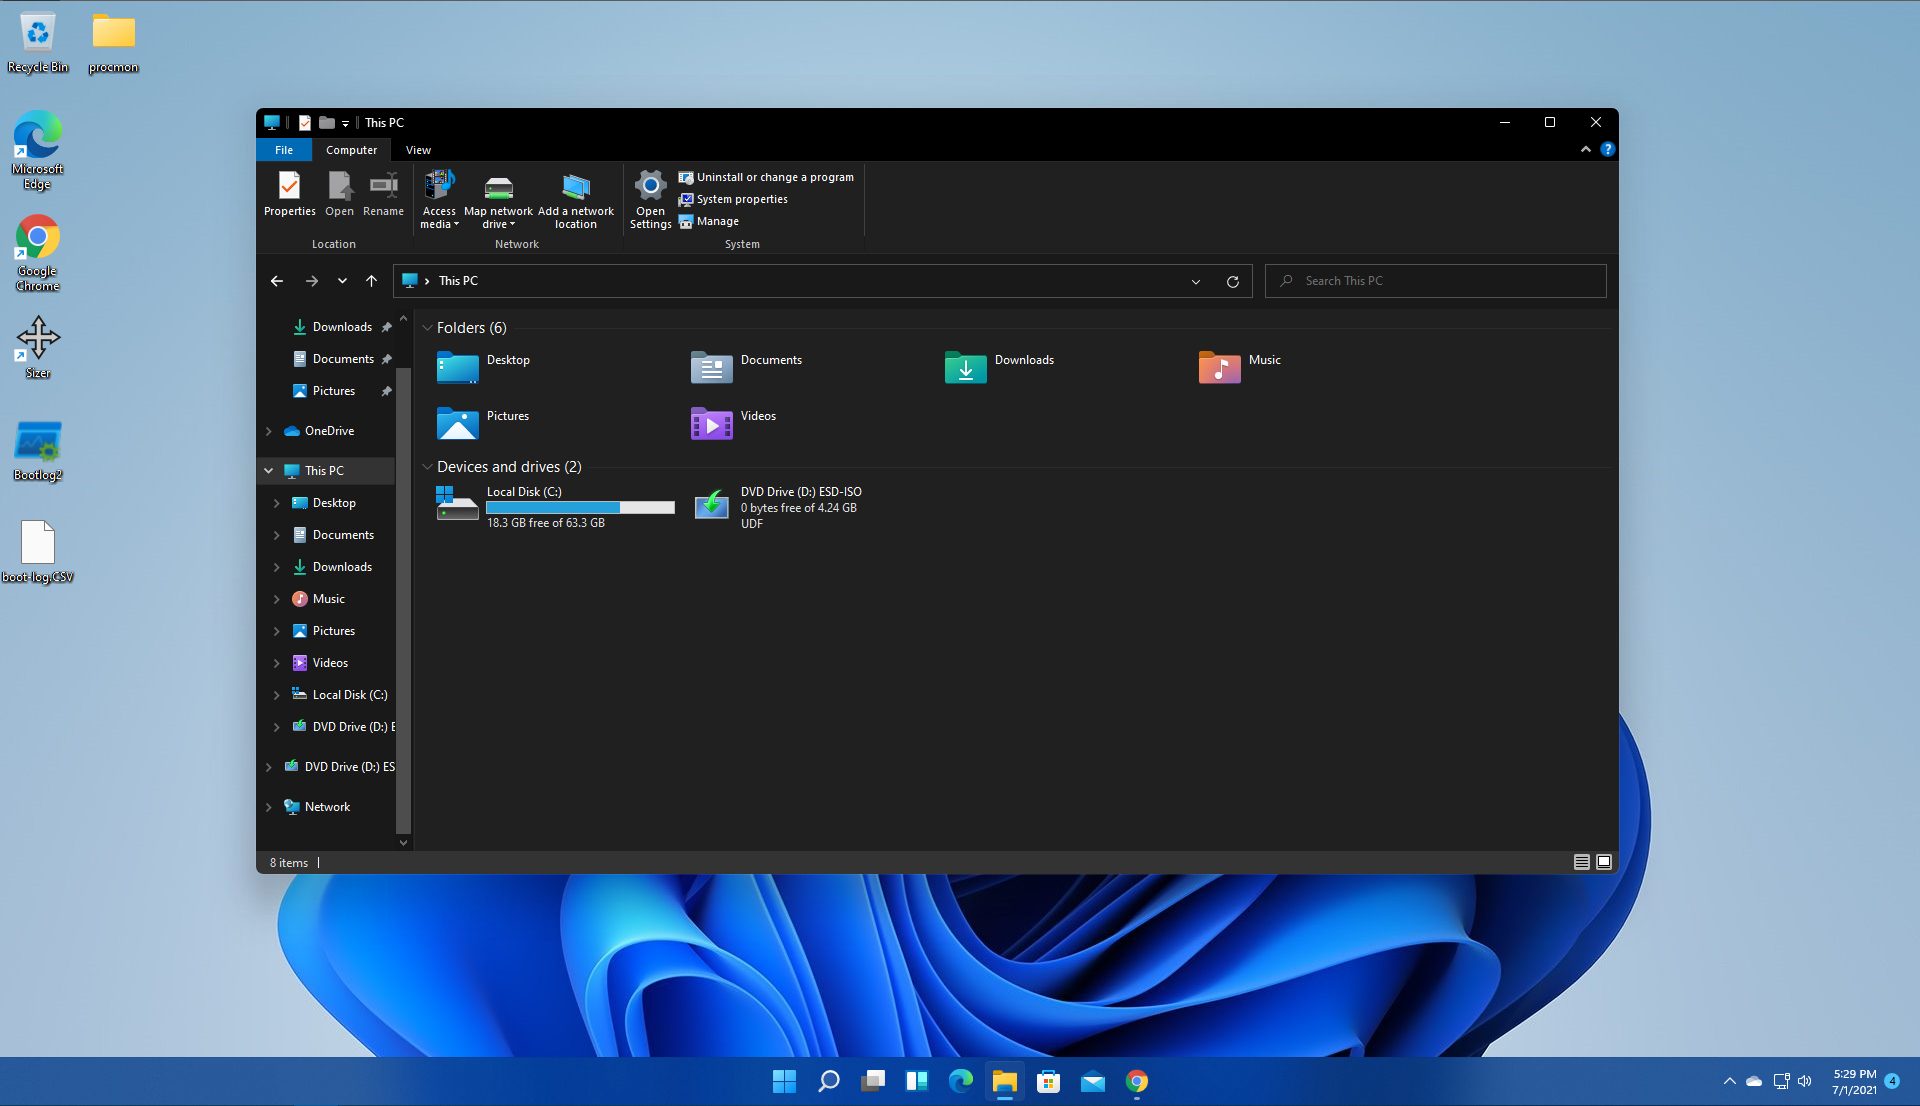
By default inside Windows 11 in File Explorer, once the file is selected, the small check box will appear beside it on left indicating visually that the file is selected. Older users will remember this feature from old Windows Vista and the feature itself is great if you are on some sort of touch device and need to select multiple files.
However, if you are working on a computer with a keyboard and mouse this feature might annoy you and seem like something that is not needed. Like many things inside Windows 11 this feature also can be customized and turned OFF if you do not want it.
In this guide, we will see how to turn these boxes off. Microsoft has somewhat hidden this feature but luckily it is not difficult to find it if you know where to look.
Turning check boxes OFF
Open File Explorer (if you do not have an icon on your Taskbar, right-click on the Start button and select File Explorer from the menu)
Click on View on the top toolbar
Select Show
Uncheck Item Check Boxes
That is everything that needs to be done, after the checkbox is unchecked all check boxes from File Explorer will disappear. If you wish to turn boxes back ON, just follow the steps and check the box beside Item Check Boxes.
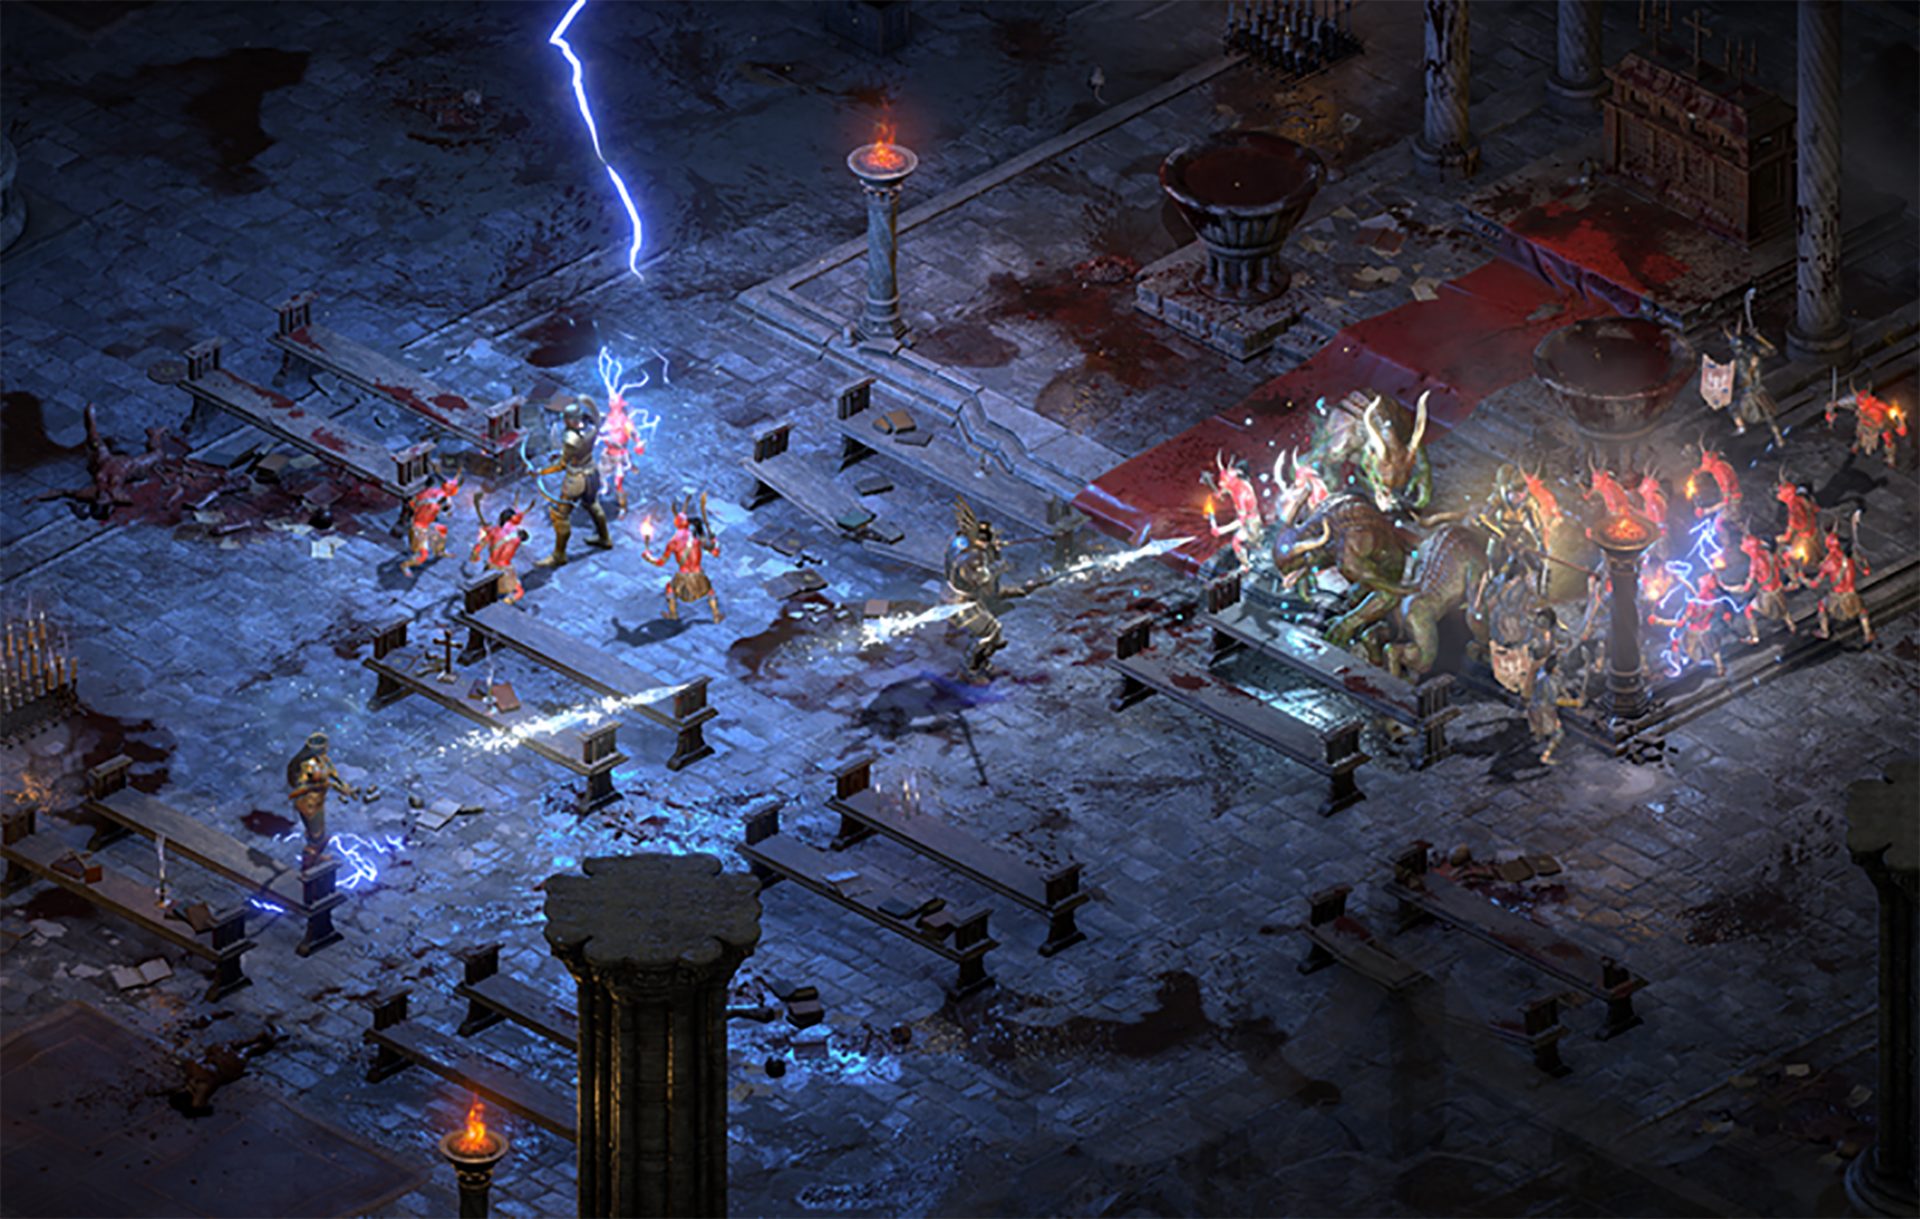
Diablo 2 resurrected has hit official release and servers seem to be finally taken care of and everything seems to be running smoothly now. The game also received great praise from gamers and attracted old players of the original Diablo 2 game.
Speaking of old players of old Diablo 2, they can transfer their old characters into remaster and continue playing them within this new great HD environment. There are some steps and requirements but we are here to help and transferred characters will bring full stash, inventory, and equipped items with them.
Requirements
There are not many requirements for this transfer to occur but they must be respected in order to be successful. The first thing is a minor requirement and somewhat annoying but it needs to be done, firstly fire up Diablo 2 resurrected and create a character, any kind of character with any kind of name, any kind of class. This strange requirement is to actually create a character folder and register it inside D2 resurrected so we can copy old ones there.
The second requirement will be that characters that you wish to be transferred must be offline characters. Old battle net online characters cannot be transferred at this moment and probably will not be in the future as well. So for all of you that wish to transfer online characters, bad luck, for the rest of us casuals playing offline single-player mode, we can enjoy our characters.
Process of diablo 2 character trasfer
The process itself of transferring characters when previously mentioned requirements are met is just a simple and copy operation. If you have somewhere backed your characters go into your backup folder and copy files in c:\users\*current user*\saved games\*diablo 2 resurrected folder*
If you do not have characters backed up and just have old Diablo 2 installed and playing it, you can go to c:\users\*current user*\saved games\*diablo 2 folder* and just copy all characters files into c:\users\*current user*\saved games\*diablo 2 resurrected folder*
Your old characters end with .d2s extension, grab all that you want to transfer, and copy them into D2R. Take note that copied characters cannot be brought back into Diablo 2, once they are copied into Diablo 2 resurrected all further progress on them will be tied to the new game.
Conclusion
That’s it about the transfer process and requirements for it. Fire up the new game version and enjoy.
The “Unknown Hard” error that keeps on appearing in Windows 10 can put users in an unpleasant situation. This kind of error leads to the freezing of the taskbar, blackening of the screen, and sudden disappearance of the icons on the Desktop. And each time you try to open Windows, the system will only give you an error message saying that it’s a critical error and some applications like Start and Cortana won’t work.
Upon analysis, it seems that the “sihost.exe” is not responding and that it is the one that’s causing the c000021a Unknown Hard error to pop up. Sihost.exe files represent the Shell Infrastructure Host which is an essential component in the Windows operating system. The Windows Shell Infrastructure Host is primarily responsible for handling some graphical elements of the operating system interface such as the Start menu and the taskbar transparency. And so if the Shell Infrastructure or Sihost.exe has stopped, has been removed, or corrupted, you will most likely have issues with the overall functionality of the Windows operating system and you’ll get the Unknown Hard error
In addition, the ctfmom.exe Unknown Hard error may also occur due to incompatible drivers installed on your PC. Ctfmom is a process that identifies inputs such as handwriting, languages, and many more. It’s the one that controls the functions of background behavior. To resolve this issue, you need to first try to identify which application is the one that’s running the sihost.exe file. And if needed, you need to either update or reinstall or completely uninstall the problematic application.
Option 1 – Try to run the System File Checker
The SFC Scan or System File Checker, us a built-in utility in Microsoft Windows that can be found in the C:\Windows\System32 folder. This tool allows users to scan and restore any corrupted system files in Windows that might be causing the Unknown Hard error to appear. Before you use this tool, make sure to find out whether the sihost.exe on your computer is a Trojan that you have to remove or if it’s a file that belongs to a trusted Windows application. Once you have that sorted out, follow the steps below.
Tap Win + R to launch Run.
Type in cmd in the field and tap Enter.
After opening Command Prompt, type in sfc /scannow
The command will start a system scan which will take a few whiles before it finishes. Once it’s done, you could get the following results:
Windows Resource Protection did not find any integrity violations.
Windows Resource Protection found corrupt files and successfully repaired them.
Windows Resource Protection found corrupt files but was unable to fix some of them.
Option 2 – Try to use System Restore
You can also try using System Restore. This is one of the ways you can use it to back up your PC. Since restore points are created automatically each week by System Restore, you can use System Restore to restore your computer back to an earlier good point in time.
Option 3 – Try to troubleshoot the error in a Clean Boot State
Putting your PC in a Clean Boot state can help you diagnose and troubleshoot the issues in your system. During this state, you can start the system with a minimum number of drivers and startup programs that will surely help you in isolating the root cause of the Unknown Hard Error.
Log onto your PC as an administrator.
Type in MSConfig in the Start Search to open the System Configuration utility.
From there, go to the General tab and click “Selective startup”.
Clear the “Load Startup items” checkbox and make sure that the “Load System Services” and “Use Original boot configuration” options are checked.
Next, click the Services tab and select the “Hide All Microsoft Services” checkbox.
Click Disable all.
Click on Apply/OK and restart your PC. (This will put your PC into a Clean Boot State. And configure Windows to use the usual startup, just simply undo the changes.)
After putting your PC in a Clean Boot State, try creating a system restore point and see if the problem still occurs. Clean Boot troubleshooting is designed to help you isolate the problem. For you to execute a clean boot troubleshooting, you must do a couple of actions (the steps are given above) and then restart your PC after every action. You might have to disable one third-party app after the other to really isolate the issue. And once you’ve narrowed down the problem, you can either disable the third-party app that’s causing the problem or remove it. Note that you must switch your PC back into the Normal Startup mode after you’re done troubleshooting the problem. Here’s how you can do it:
From the “Start” menu, go to System Configuration.
After that, switch to the General tab and click the option for “Normal Startup”.
Next, go to the Services tab and clear the checkbox for “Hide all Microsoft services”.
Then find and click “Enable all” and if prompted, you have to confirm.
Afterward, go to the Task Manager and enable all the Startup programs and confirm the action.
Often when we connect to the internet were browsing indexed pages through some well-known search engine, usually Google. But beneath the so-called normal internet lurks deep and dark web. You might have heard of the deep web and dark web if you have some geeky friends and we are here to explain what exactly is the deep and dark web.
The first thing to know is that the deep and dark web is not the same thing and they coexist separately from one another, you could say that beneath the deep web lies the dark web, yet another layer of the internet.
So let us explore first the deep web. What is exactly a deep web?
Deep web, hidden web, or invisible web
as sometimes referenced are part of worldwide web not indexed by search engines, meaning that engines do not basically see and index content of deep web sites.
The content of the deep web is hidden behind HTTP forms and includes many very common uses such as webmail, online banking, private or otherwise restricted access social-media pages and profiles, some web forums that require registration for viewing content, and services that users must pay for, and which are protected by paywalls, such as video on demand and some online magazines and newspapers.
The content of the deep web can be located and accessed by a direct URL or IP address but may require a password or other security access to get past public website pages.
While it is not always possible to directly discover a specific web server's content so that it may be indexed, a site potentially can be accessed indirectly (due to computer vulnerabilities).
To discover content on the web, search engines use web crawlers that follow hyperlinks through known protocol virtual port numbers. This technique is ideal for discovering content on the surface web but is often ineffective at finding deep web content. For example, these crawlers do not attempt to find dynamic pages that are the result of database queries due to the indeterminate number of queries that are possible. It has been noted that this can be (partially) overcome by providing links to query results, but this could unintentionally inflate the popularity of a member of the deep web.
Dark WEB
The dark web is the World Wide Web content that exists on darknets: overlay networks that use the Internet but require specific software, configurations, or authorization to access. Through the dark web, private computer networks can communicate and conduct business anonymously without divulging identifying information, such as a user's location. The dark web forms a small part of the deep web, the part of the Web not indexed by web search engines, although sometimes the term deep web is mistakenly used to refer specifically to the dark web.
The darknets which constitute the dark web include small, friend-to-friend peer-to-peer networks, as well as large, popular networks such as Tor, Freenet, I2P, and Riffle operated by public organizations and individuals. Users of the dark web refer to the regular web as Clearnet due to its unencrypted nature. The Tor dark web or Onionland uses the traffic anonymization technique of onion routing under the network's top-level domain suffix .onion.
Dark & Deep WEB difference
The dark web has often been conflated with the deep web, the parts of the web not indexed (searchable) by search engines. The dark web forms a small part of the deep web but requires custom software in order to access its content. This confusion dates back to at least 2009. Since then, especially in reporting on Silk Road, the two terms have often been conflated, despite recommendations that they should be distinguished.
Darknet websites are accessible only through networks such as Tor ("The Onion Routing" project) and I2P ("Invisible Internet Project"). Tor browser and Tor-accessible sites are widely used among darknet users and can be identified by the domain ".onion". While Tor focuses on providing anonymous access to the Internet, I2P specializes in allowing anonymous hosting of websites. Identities and locations of darknet users stay anonymous and cannot be tracked due to the layered encryption system. The darknet encryption technology routes users' data through a large number of intermediate servers, which protects the users' identity and guarantees anonymity. The transmitted information can be decrypted only by a subsequent node in the scheme, which leads to the exit node. The complicated system makes it almost impossible to reproduce the node path and decrypt the information layer by layer. Due to the high level of encryption, websites are not able to track the geolocation and IP of their users, and users are not able to get this information about the host. Thus, communication between darknet users is highly encrypted allowing users to talk, blog, and share files confidentially.
Darknet
The darknet is also used for illegal activity such as illegal trade, forums, and media exchange for pedophiles and terrorists. At the same time, traditional websites have created alternative accessibility for the Tor browser in an effort to connect with their users. ProPublica, for example, launched a new version of its website available exclusively to Tor users.
If when hovering over the upgrade icon on the taskbar you get:
Your version of Windows 10 would reach the end of service soon, Click to download a newer version of Windows 10 to stay supported.orAn unsupported version of Windows will no longer receive software updates from Windows Update. These updates include security updates that can help protect your PC from harmful viruses, spyware, and other malicious software which can steal your personal information. Windows Update also installs the latest software updates to improve the reliability of Windows—such as new drivers for your hardware.
and you are unable to perform updates then this guide is for you. There are several things you can do to fix this issue presented here, it is advisable to follow them in a way how they are presented for best performance and system safety.
Run setupdiag
Download and run Setupdiag from the official MICROSOFT website. SetupDiag is a standalone diagnostic tool that can be used to obtain details about why a Windows 10 upgrade was unsuccessful. It works by examining Windows Setup log files to determine the root cause of a failure to update or upgrade the computer. Once the scan is completed, check the generated log files. The SetupDiagResults.log will be generated and saved in the same folder where you downloaded Setupdiag. Open SetupDiagResults.log using Notepad. You may need to take a look at these folders:
\Windows\Panther
\$Windows.~bt\sources\panther
\$Windows.~bt\Sources\Rollback
\Windows\Panther\NewOS
If there are any issues or conditions that are blocking the upgrade, they will be listed here.
Edit TargetReleaseVersionInfo Registry key
Press ⊞ WINDOWS + R to open the run dialog
In run dialog type Regedit and press ENTER
Locate: HKLM\SOFTWARE\Policies\Microsoft\Windows\WindowsUpdate
Locate two DWORD files, if they do not exist, create them as:
TargetReleaseVersionTargetReleaseVersionInfo
Set the value of TargetReleaseVersion to 1
If you are stuck on Windows 10 1909 and want to upgrade to Windows 10 20H2 now, you need to set the value for TargetReleaseVersionInfo to 20H2Reboot the computer
Use Windows 10 update assistant
Visit Microsoft.com and hit the ‘Update now’ button visible on the page
Download tool and run it
Click on Update now to start the upgrade process
Today most users have an SSD drive, times have changed and SSD has become your typical computer equipment.
A lot of time has passed from the first SSD hard drives up to today and technology has evolved and improved but still, there are some cool tricks and tips to speed up and extend the lifespan of your SSD hard drive.
That being said let us dive right into what I would like to call the essentials of having an SSD hard drive.
Keep your SSD firmware up to date.
This one really is a no-brainer, keeping your firmware updated at all times will ensure longer life and SSD stability. The trick here is that each SSD manufacturer has its own ways of updating firmware so this is not something universal, you will have to go to the official website of your SSD manufacturer and get firmware updates and instructions from them directly.
Enable ACHI.
Advanced controller host interface or short ACHI is a feature that will ensure that your Windows will support all of the features that come with running SSD on your computer. It controls the TRIM feature which is crucial in helping Windows itself in its garbage collection on your hard drive. In order to enable ACHI, you will have to do it from your BIOS and it would be very good if the feature is enabled before Windows itself is installed so it can take full advantage of it.
Enable TRIM.
TRIM feature is vital in extending your SSD lifespan and it should be enabled by default in Windows but you can never be too cautious and double-check and enable if needed. To make sure it is enabled, open your command prompt and type in: fsutil behavior set disabledeletenotify 0
Make sure your system restore is enabled.
In the first SSD days, system restore was really a feature that you wanted to be disabled in order to prevent and extend the life span of your SSD drive, but we came a long way from there and today there is no reason to keep this feature turned off since it can be helping many ways with both your system and SSD.
Disable Indexing in Windows.
A large portion of the speed of your SSD drive is used for indexing files in Windows. Of course, the indexing feature is great if you store everything on your SSD drive but if by any chance you have another drive for your backup, pictures, music, etc. it would be highly beneficial for you to turn it off on your SSD. To turn indexing off click on your start menu, click on the computer. Right-click on your SSD and then click on properties. De-select boxthat says: Allow files to have contents indexed in addition to file properties and click OK. Once you do this the operating system will apply this to all the files and folders on the drive. If you see a dialog telling you that it couldn’t remove a file from the index, click Ignore All.
Keep Windows defrag ON.
This also was the option in early SSD days which was better to be OFF, but as said before since technology has been making progress and Windows has been improved and made aware of SSD drives, defrag has evolved as well, and now it is more of optimization tool then defragmenter which was once.
Disable Prefetch and Superfetch.
Windows is placing information in both physical and virtual memory for applications that you are not currently using but they are used often in order to speed their response time. If you are running low on space or having struggles with virtual memory it would be best to turn them both off. Go to registry manager and find: HKEY_LOCAL_MACHINE\SYSTEM\CurrentControlSet\Control\Session Manager\Memory Management\PrefetchParameters, there you have 2 values: EnablePrefetcher and EnableSuperfetch, set both values to 0.
Disable Search and Superfetch services.
Disabling Superfetch in the registry is not all work, Press WINDOWS + R to bring run dialog, type in it services.msc, Find both Search and Superfetch and disable them.
Configure Write Caching.
Write caching can be enabled and disabled in the device manager by expanding disk drives, right-clicking on SSD, then click properties, select the policies tab. In the tab, there is the option to Enable write caching on the device. Now trick in this is that you will need to try and benchmark your SSD with both options turned ON and OFF since different manufacturers have different performances with this option being ON or OFF.
Disable CleanPageFileAtShutdown and LargeSystemCache.
Page file and a large cache of page files are not something that we longer need, since SSD writes with great speed in its flash memory both of these options can be disabled and you will both speed up shut down the process of your system and save some SSD life since page files will not be written. Find both options in the registry under the key: Computer\HKEY_LOCAL_MACHINE\SYSTEM\CurrentControlSet\Control\Session Manager\Memory Management set both to 0
Set high performance in Power options.
This option in power management will prevent your SSD from constantly shutting down and bringing it up increasing speed without sacrificing its life span.
These are tips and tricks for having great and longer life as well as speed for your SSD drive. We hope that you have found them useful and that you will come again to check new articles published daily for easier IT life.
One of the most important components of a computer in the network. The network, with the help of network devices, makes it possible for all kinds of devices to exchange information. One of the files associated with the network driver is the netio.sys file. It is a system file used by third-party programs to interact with the devices on the network.
If you encounter a Blue Screen of Death error that’s related to the netio.sys file then you’ve come to the right place as this post will guide you in fixing it. Here are some of the Blue Screen errors related to the netio.sys file:
KMODE EXCEPTION NOT HANDLED
PAGE FAULT IN A NONPAGED AREA
IRQL NOT LESS EQUAL
SYSTEM_SERVICE_EXCEPTION
DRIVER IRQL NOT LESS OR EQUAL
SYSTEM THREAD EXCEPTION NOT HANDLED
To fix the netio.sys Blue Screen errors on your Windows 10 computer, you can check out each one of the following suggestions.
Option 1 – Try to use the System File Checker
One of the built-in tools in Windows that you can use to fix Blue Screen errors is the System File Checker. This built-in command utility can help you restore corrupted or missing files as well as replace bad and corrupted system files. Chances are, the netio.sys file might be corrupted so to fix it, use System File Checker.
First, right-click on the Start button and click on the “Command Prompt (Admin) option.
Next, type in the sfc /scannow command and hit Enter to execute it.
The command will start a system scan which will take a few whiles before it finishes. Once it’s done, you could get the following results:
Windows Resource Protection did not find any integrity violations.
Windows Resource Protection found corrupt files and successfully repaired them.
Windows Resource Protection found corrupt files but was unable to fix some of them.
Finally, restart your computer.
Option 2 – Try checking the Memory for any errors
The first thing you can do to check the memory for errors is to run the CHKDSK utility. The CHKDSK utility repairs hard drive errors that might be causing the problem.
You need to open “This PC” first.
And then right-click on your operating system partition for Windows.
Next, click on Properties and navigate to the Tools tab.
After that, click on the Check button under the Error Checking section.
A new mini window will appear and from there, click on Scan drive.
Now let it scan your disk drive partition to check for errors and then restart your computer.
After running the CHKDSK utility, it’s now time to fix issues with your RAM by running the Memory Diagnostic tool. This tool in windows can help resolve the Blue Screen errors related to the netio.sys file by checking and automatically fixing any memory-based issues. To run it, refer to these steps:
Tap the Win + R keys to open Run and type mdsched.exe and hit Enter to open the Windows Memory Diagnostic Tool.
After that, it will give two options such as:
Restart now and check for problems (Recommended)
Check for problems the next time I start my computer
Once your computer has restarted, perform a basic scan or you could also go for the “Advanced” options such as “Test mix” or “Pass count”. Simply tap the F10 key to start the test.
Note: After you select your preferred option, your computer will restart and check for memory-based issues. If it finds any issues, it will automatically fix them and if there’s no issue found, then it’s most likely not a memory-based issue so you should try the other options given below.
Option 3 – Try to update or rollback or disable Network drivers
You might also want to update, roll back or disable your Network drivers to resolve the netio.sys Blue Screen errors.
Tap the Win + R keys to launch the Run window and then type in the “mdsched.msc” command and hit Enter to open the Device Manager window.
Under the Device Manager, you will see a list of drivers. From there, look for the Network Adapters and expand it.
Then right-click on each one of the Network drivers and depending on your preference, you can either select “Update driver”, “Disable device” or “Uninstall device”.
After that, restart your PC and see if it helped in fixing the netio.sys Blue Screen error.
Option 4 – Perform System Restore
Performing System Restore can also help fix BSOD errors, including the ones related to the netio.sys file. To run System Restore, follow the steps below.
First, tap the Win + R keys to open the Run dialog box.
After that, type in “sysdm.cpl” in the field and tap Enter.
Next, go to the System Protection tab then click the System Restore button. This will open a new window where you have to select your preferred System Restore point.
After that, follow the on-screen instructions to finish the process and then restart your computer and check if the problem is fixed or not.
Option 5 – Run the Blue Screen Troubleshooter
Troubleshooting Blue Screen of Death errors wouldn’t be complete without the Blue Screen troubleshooter. As you know, it is a built-in tool in Windows 10 that helps users in fixing BSOD errors like Storport.sys. It can be found on the Settings Troubleshooters page. To use it, refer to these steps:
Tap the Win + I keys to open the Settings panel.
Then go to Update & Security > Troubleshoot.
From there, look for the option called “Blue Screen” on your right-hand side and then click the “Run the troubleshooter” button to run the Blue Screen Troubleshooter and then follow the next on-screen options. Note that you might have to boot your PC into Safe Mode.

 So far we probably all know what are good new and exciting features that W11 is bringing to the table, let’s talk now about features that will be removed and are not there but we had them in W10

 However, if you are working on a computer with a keyboard and mouse this feature might annoy you and seem like something that is not needed. Like many things inside Windows 11 this feature also can be customized and turned OFF if you do not want it.
In this guide, we will see how to turn these boxes off. Microsoft has somewhat hidden this feature but luckily it is not difficult to find it if you know where to look.
However, if you are working on a computer with a keyboard and mouse this feature might annoy you and seem like something that is not needed. Like many things inside Windows 11 this feature also can be customized and turned OFF if you do not want it.
In this guide, we will see how to turn these boxes off. Microsoft has somewhat hidden this feature but luckily it is not difficult to find it if you know where to look.
 Speaking of old players of old Diablo 2, they can transfer their old characters into remaster and continue playing them within this new great HD environment. There are some steps and requirements but we are here to help and transferred characters will bring full stash, inventory, and equipped items with them.