Logo

How to Fix the Sysfader iexplore.exe Application Error

The Sysfader iexplore.exe Application Error - What is it?

To understand Sysfader iexplore.exe application error, first, it is important to learn what is Sysfade.exe file.

Sysfader.exe is basically an IE (Internet Explorer) application file that provides cool animation effects. These animation effects include fading menus in and out, animated windows and etc. It is responsible for the graphical enhancements for animated pages.

The Sysfader iexplore.exe application error occurs when this file fails to execute properly and open animated websites on Internet Explorer.

The error code is displayed in the following format:

“SysFader: iexplore.exe – Application Error
The instruction at “0×00000000″ referenced memory at “0×00000000″. The memory could not be “read”.”

Solution

Restoro box imageError Causes

The Sysfader iexplorer.exe application error may be triggered due to many causes. These include:

  • Sysfader.exe file corrupted by malware and spyware
  • Recently upgraded Internet Explorer which resulted in the Sysfader iexplorer.exe application error due to incompatibility issues with the system program.
  • Issues with IE configuration
  • Damaged registry files
  • Damaged DLL files
  • Obsolete and bad registry entries

Due to Sysfader iexplorer.exe application error, your Internet Explorer browser may crash. Furthermore if the error is not fixed timely, it may result in even more severe PC problems like system slowdown, system crash and failure.

This happens especially when Sysfader iexplorer.exe application error is related to the registry.

The registry saves all the activities performed on the computer. This also includes junk files, invalid registry entries, bad registry keys, cookies, temporary internet files, and files of the programs uninstalled.

If the registry is not cleaned frequently, these obsolete files overload the RAM causing great deal of damage to the registry. When you try to upgrade your browser, the installation fails and results in browser incompatibility issues because of the previous files of the uninstalled program saved in the registry.

Furthermore, the error code may also pop up due to the Sysfader.exe file corrupted by malicious software like spyware and adware on your system if you don’t run an antivirus on your system regularly.

Further Information and Manual Repair

To prevent IE web browser and your PC from coming crashing, here are some solutions that you can try to resolve the Sysfader iexplorer.exe application error:

  1. Repair and restore the registry by changing the configuration settings in the Registry Editor Window. This is accessible by typing ‘Regedit’ in the Run window. However, to edit the configuration settings manually and restore the registry, you should be technically sound. If not then making the changes would be slightly complex and time-consuming for you.
  2. However, another alternative to this is to download Restoro. Restoro is a powerful, advanced, and highly functional PC repair tool that includes multiple utilities such as a registry cleaner and a system optimizer. The registry cleaning feature scans your entire PC for registry issues triggering error codes like Sysfader iexplorer.exe.It wipes out all the unnecessary and obsolete files and fixes the damaged dll files thus simultaneously restoring the registry. The antivirus utility scans for and removes viruses and spyware from your PC which as we explained earlier could be the reason for Sysfader error code.

With Restoro, it takes only a few seconds to resolve this error and repair the registry. If you have system slowdown issues, it takes care of that too.

It has simple navigations and a user-friendly interface which makes it very easy to operate even if you are not technically sound. It is safe, efficient, and compatible on all Windows versions including Vista, XP, Windows 7, 8, 8.1, and 10.

Click here to download Restoro and resolve Sysfader iexplorer.exe application error on your PC today!

Do You Need Help with Your Device?

Our Team of Experts May Help
Troubleshoot.Tech Experts are There for You!
Replace damaged files
Restore performance
Free disk space
Remove Malware
Protects WEB browser
Remove Viruses
Stop PC freezing
GET HELP
Troubleshoot.Tech experts work with all versions of Microsoft Windows including Windows 11, with Android, Mac, and more.

Share this article:

You might also like

Fix Logitech Blue Yeti mic not working in W11
Blue Yeti has gained popularity among streamers and users that want a high-quality mic for their setup. Without going into details of the hardware itself I will say it is a pretty good mic. Now the issues that have been reported with it are that Windows 11 can have issues with it resulting in the microphone not being recognized by the operating system. If you are one of the unfortunate Blue Yeti users and have this issue, do not despair because we have a solution for you, several to be more precise so you can easily fix the issue and get back to talking.

logitech blue yetiCheck cables

Sometimes it is not a software problem at all. First thing is to check if by any chance cable of the mic is disconnected, damaged, or similar. If the cable seems fine next step is to plug in the mic into another port in order to eliminate faulty jack on the computer. If nothing happened the last thing to try is to connect the mic to another computer so we can be sure that the mic itself is in working order so we can focus on software. If by any chance mic is not working on another computer that some hardware inspection of it will be required.

Set Blue Yeti as a default device

There is a chance that Windows 11 has not set Blue Yeti as a default audio device for recording and therefore you can not use it. In order to eliminate and fix this issue, right-click on the speaker icon on the taskbar in the far-right part of it and choose sound settings. Go down to the input section and pick Blue Yeti beside Choose device for speaking or recording.

Update driver

More often than not device not working is tied to malfunctioning or a bad driver. In order to eliminate and resolve this issue right click on the Start icon and choose device manager. Inside device manager expand the Sound, video and game controllers section. Right-click on each device in the section and choose update driver. Wait for the update to complete and restart your system.

Run the troubleshooter

Press ⊞ WINDOWS + I to open Windows settings. Go to System in the left pane and click on it. In the right panel choose and click on troubleshoot. Inside troubleshoot click on Other. Scroll down and locate the Recording Audio troubleshooter and then click on Run next to it. Wait for the troubleshooter to finish and follow on-screen instructions to resolve the issue.

Check Blue Yeti microphone privacy setting

Not very often, but sometimes privacy settings can be the issue even when everything else is working perfectly. In order to check privacy settings press ⊞ WINDOWS + I to open Windows settings and go to Privacy & Security on the left panel and click on it. On the right panel click on the microphone. Make sure that toggle next to Let apps access your microphone is ON.
Read More
Display isn't compatible with Windows Error
Upgrading your computer from Windows 7 or Windows 8 to Windows 10 or even upgrading Windows 10 to a new version is not that simple. The setup initially checks for all the drivers and other software utilities installed on your computer and verifies and blockages or upgrade or upgrade blocks with respect to any of those drivers or any of those software utilities regardless if you use the Windows 10 ISO or the Windows 10 Upgrade Assistant. One of these common errors, when you upgrade or update your computer, is the “The Display is not compatible with Windows 10” error. This kind of Windows Upgrade error is related to the compatibility of the Graphics Driver installed in your computer. But worry not for this post will guide you in fixing this problem. The “The display is not compatible with Windows 10” error has the same workarounds as the following errors:
  • These devices aren’t fully compatible with Windows 10.
  • The display is not compatible with Windows 10. Check with the manufacturer for support.
  • The display manufacturer hasn’t made your display compatible with Windows 10. Check with the manufacturer for support.
To resolve this Windows Upgrade error, here are some suggestions that could help:

Option 1 – Check for incompatible drivers in your computer

  • Open the Device Manager from the WinX Menu.
  • Then expand the list for Display Adapters.
  • Next, right-click on the NVIDIA Graphics Card list and select Enable.
  • After that, right-click on it again and click on the “Update Driver Software…” option.
  • After doing so, a new window will appear and from there, click on the “Search automatically for updated driver software” option.
  • Then check if Windows is now able to detect your Graphics Card as well as the latest driver for it. If not, proceed to the next step.
  • Right-click on the driver again and click on the “Update Driver Software…” option.
  • Now click on the Browse my computer for driver software option and then click on Let me pick from a list of device drivers on my computer.
  • Afterward, select a compatible driver for your computer named NVIDIA Graphics Card and then proceed.
  • Wait for the whole process to be completed and restart your computer to successfully apply the changes made.

Option 2 – Get the latest version of Graphics drivers from the manufacturer’s website

In case you don’t know the manufacturer of the Graphics Processing Unit or GPU of your computer, you need to check first. They’re usually NVIDIA, Intel, or AMD. So if your computer’s Graphics Processing Unit is manufactured by NVIDIA, you need to get the latest version from their official website.

Option 3 – Try to install the latest Graphics driver in Compatibility Mode

If you’re not able to install the Graphics drivers you’ve downloaded, you can try installing them again but this time using Compatibility mode. Follow the steps below to do so:
  • You need to download the driver and place it on your desktop.
  • After that, right-click on it and select Properties.
  • Next, switch to the Compatibility tab where you should see two options:
    • Compatibility troubleshooter, and let Windows figure out what works best for you. If it fails, follow the next.
    • Manually choose the version of Windows it was correctly working.
  • You also have the option to change the DPI settings and see if that helps. Then click the Apply and OK buttons.
  • Now right-click on the file and select the “Run as administrator” option to install. After that, you should now be able to change your screen aspect ratio to what you were using early on.
Note: If you have other programs that won’t work on the existing version of Windows, then make sure to run the program in a Compatibility mode.

Option 4 – Try to run the Program Compatibility Troubleshooter

You might also want to run the Program Compatibility Troubleshooter. This built-in troubleshooter is available in the Windows Update & Security section. From there, select Troubleshoot. This will find a list of programs for you and since you have already downloaded the driver files, just click on Not Listed located at the top of the program list. After that, browse and select the driver files and then let the program do its job.
Read More
Fix 0x0000007c (ERROR_INVALID_LEVEL) in W11
0x0000007c error inside Windows 11 is a printer error that is manifested when Windows users are trying to connect to a shared network remote printer. Error is displayed by the message:
Windows cannot connect to the printer. Operation failed with error 0x0000007c.
If you are experiencing this type of annoyance, fear now we are providing you with several solutions to this problem.

0x0000007c (ERROR_INVALID_LEVEL)Update Windows 11

  1. Open the Start menu, click on the settings app
  2. Select Windows update tab
  3. Click on Check for updates
  4. Click on Advanced options
  5. Inside select Optional updates
  6. If there are optional updates click on Download & Install

Run the printer troubleshooter

  1. Press ⊞ WINDOWS + I to open settings
  2. Click on Troubleshoot navigation on the system tab
  3. Select Other trouble-shooters
  4. Click on the Run for printer troubleshooter
  5. If the error is found click on Apply this fix

Restart the Print Spooler Service

  1. Right-click on the Start button
  2. Click on RUN
  3. Type in services.msc and press OK
  4. Right-click on Printer Spooler service and select Restart

Clear the Print Spooler

  1. Open services like in the previous step
  2. Right-click Print Spooler and select STOP
  3. Open File explorer
  4. Navigate to: C:\Windows\System32\spool\drivers\x64\3 (64-bit Platform) C:\Windows\System32\spool\drivers\W32X86\3 (32-bit Platform)
  5. Delete everything inside folders
  6. Go back to services, right-click on Print Spooler and select RESTART

Reinstall Driver for printer

  1. Right-click on Start and select device manager
  2. Double click on the Print queues category
  3. Right-click on the printer and select Uninstall device
  4. Click on Uninstall on prompt
  5. Right-click on the Print queues category and select Scan for hardware Changes
Read More
Expand right-click menu in Windows 11
Windows 11 brought with it a simplified right-click menu that has limited options. If you would like to bring the old Windows 10 right-click menu you will have to do some registry tweaking but it is doable. right click menu
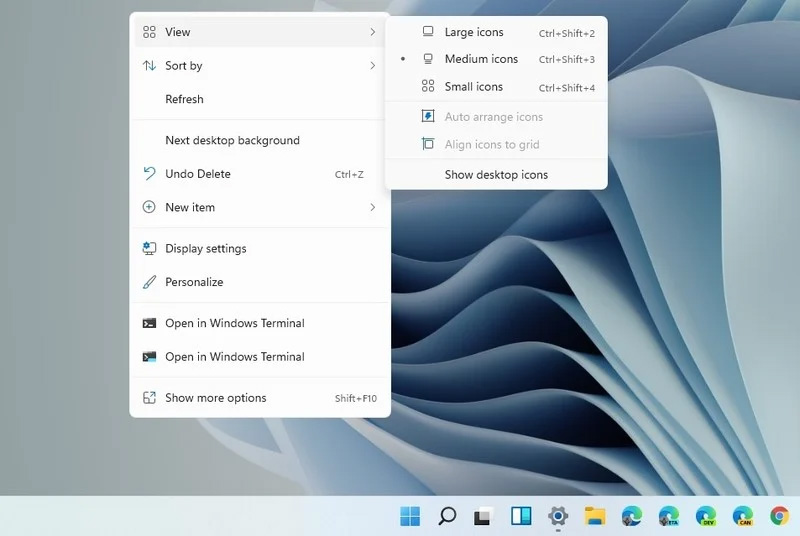
Since this requires registry tweak, please follow given solution step by step
  1. Press Start and type RegEdit
  2. Click on Registry Editor
  3. Inside registry editor find next key: Computer\H_KEY_CURRENT_USER\SOFTWARE\CLASSES\CLSID\
  4. Right click in the right part of editor window and select New > Key
  5. Type in as a name: {86ca1aa0-34aa-4e8b-a509-50c905bae2a2}
  6. Right click on {86ca1aa0-34aa-4e8b-a509-50c905bae2a2} key and select New > Key again to create new key inside this one
  7. Name inside key InprocServer32
  8. Double click the “(Default)” key in InprocServer32 to open it
  9. When the Default key opens close it without making any changes by clicking on OK. This will make its value property Blank instead of value not set
  10. Close Registry Editor
  11. Restart your PC
Once the system is up if the followed solution is applied you will now have an old school menu once right-click is used.
Read More
Fix Google Chrome error “He’s dead, Jim!”
If you always use the Google Chrome browser in browsing the internet, then you might have come across an error message saying, “He’s dead, Jim!” along with a funny looking face that’s peeking its tongue out and another detailed message saying, “Either Chrome Ran out of memory or process for the webpage has terminated for some other reason. To continue, reload the webpage or go to another page”. This error message in Google Chrome is actually quite famous and it appears for various reasons but it may have something to do with a memory issue. The Google Chrome browser is known to consume a lot of memory and the more web pages you open and load, it takes up more resources. Thus, the first thing you need to do when you encounter this error is to simply click the Reload button to continue browsing the internet or close the browser and then open it again. On the other hand, if you keep seeing this error message, then that’s a whole different story as you have to take some action to prevent it from popping up again, for good. Follow the instructions given below to fix the error in Chrome.

Option 1 – Reduce Google Chrome’s memory usage

The first thing you can try is reducing the memory usage of the Chrome browser. However, this option has a bit of a disadvantage. If a website crashes, all the instances of that website will also crash although other open tabs and websites won’t be affected. This process is referred to as “Process-per-site” mode which you will have to launch Chrome within this parameter.

Option 2 – Run Google Chrome with Strict Site Isolation

Aside from reducing Chrome’s memory usage, you can also run the browser with the Strict Site Isolation which makes sure that the crashing of one tab in the browser won’t affect the entire Windows as this feature will run every website you open on its own isolated process.

Option 3 – Run the built-in Malware Scanner and Cleanup tool in Chrome

In case you don’t know, there is actually a built-in malware scanner and cleanup tool in Chrome that helps you get rid of any unwanted ads, pop-ups, and even malware, as well as unusual startup pages, toolbars, and other things that could affect the performance of the browser.

Option 4 – Reset Google Chrome

Resetting Chrome can also help you get rid of the “He’s dead, Jim!” error message for good. Resetting Chrome means restoring its default settings, disabling all the extensions, add-ons, and themes. Aside from that, the content settings will be reset as well and the cookies, cache, and site data will also be deleted. To reset Chrome, here’s what you have to do:
  • Open Google Chrome, then tap the Alt + F keys.
  • After that, click on Settings.
  • Next, scroll down until you see the Advanced option, once you see it, click on it.
  • After clicking the Advanced option, go to the “Restore and clean up the option and click on the “Restore settings to their original defaults” option to reset Google Chrome.
  • Now restart Google Chrome.

Option 5 – Perform a clean reinstall on the Chrome browser

Although reinstalling any program is easy, not so much for Google Chrome as you need to make sure that the User Data folder is deleted before you reinstall it.
  • Tap the Win + R keys to open the Run prompt.
  • Then type %LOCALAPPDATA%GoogleChromeUser Data in the field and hit Enter.
  • Next, rename the “Default” folder inside the path you were redirected to. For instance, you can rename it to “Default-old”.
  • After that, install the Chrome browser again.

Option 6 – Try to flush the DNS and reset the TCP/IP

There are instances when a network goes into haywire because of a bad DNS. Thus, a bad DNS might be the one that’s causing this headache so it’s time for you to reset the entire network to resolve the issue. To reset the network, here’s what you have to do:
  • Click the Start button and type in “command prompt” in the field.
  • From the search results that appear, right-click on Command Prompt and select the “Run as administrator” option.
  • After opening Command Prompt, you have to type each one of the commands listed below. Just make sure that after you type each command, you hit Enter
    • ipconfig /release
    • ipconfig /all
    • ipconfig /flushdns
    • ipconfig /renew
    • netsh int ip set dns
    • netsh winsock reset
After you key in the commands listed above, the DNS cache will be flushed and the Winsock, as well as the TCP/IP, will reset.
  • Now restart your computer and open Google Chrome then try opening the website you were trying to open earlier.
Note: You can also try changing the DNS server to the Google Server, i.e. 8.8.8.8, and then see if it works for you or not.

Option 7 – Disable both the antivirus and firewall temporarily

As you know, both the firewall and antivirus programs are there to protect the operating system from any malicious threats. So if they find that there is some malicious content in a website you are visiting, they will block the site right away. Thus, it could also be the reason why you’re getting the “He’s dead, Jim!” error so you need to disable both the firewall and antivirus program temporarily and then try opening the website again. If you are able to open the website, you need to add this site as an exception and then enable the firewall and antivirus program back.
Read More
Change screenshot location

Each time when you press WINDOWS + PrtScn key on your keyboard a screenshot is taken and saved on your Hard drive, to be more precise, it is saved in a specific folder which is in c:\Users\Your user name\Pictures\Screenshots. Now, this specific location is not anything that's bad but it is a little deep and not so user-friendly for quick access.

screenshot properties

Luckily this default location can be changed into any folder that you like.

Changing location

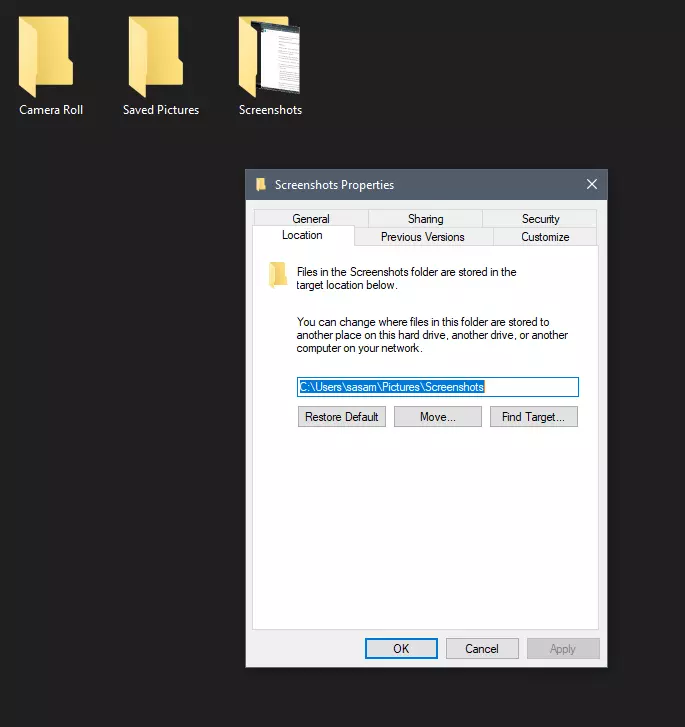
First thing is to open File Explorer and then navigate to your PC. Once you go to your PC, go to Pictures, and inside right-click on the Screenshots folder. If there is no screenshots folder inside, this means that since Windows was installed no screenshots were taken with WINDOWS + PrtScn key combination. Please note that just by pressing PrtScn you will create a screenshot but you will place it inside the clipboard ready to be pasted somewhere, with WINDOWS + PrtScn you are saving the screenshot directly in a file on your hard drive.

So once you clicked on the Screenshots folder, go to the bottom and click on properties. Inside properties go to the Location tab. In the location, tab clicks on MOVE and browse to your new location where you would like screenshots to be saved. Once you select the folder for screenshots, click on the Select Folder button and confirm with OK. After this, Windows will ask you would you like to move existing screenshots into the chosen folder. Click YES or NO, depending on your preference.

After this easy setup, all of your new screenshots will be placed now inside the chosen folder.

Thank you for reading and I hope to see you tomorrow. Take care.

Read More
Windows 11 23H2 Update Details Revealed

Loving Windows 11 so far? We sure are. Microsoft has clearly decided to take its OS to the next level and keeps showing it through every update. It makes you wonder what’s next - and today, you’ll find out!

Tons of new features have been leaked, and we can probably expect them with the 23H2 update. Here’s everything you need to know so far.

What’s Windows 11 23H2 bringing?

Windows 11
Credit: Windows on Unsplash

There are plenty of new features already confirmed for Windows 11. The only issue is we don’t know for sure if they’re coming with the 23H2 update or separately, at a different time. Whatever the case, a lot of them are pretty exciting.

Here’s an overview of what we might be getting this fall.

  • Windows Copilot. Microsoft wants to add this AI-powered feature based on chatbots like Bing Chat and ChatGPT to assist users with all kinds of actions and tasks on the platform. As part of this development, the integration of first- and third-party plugins and the Bing Chat AI will be enhanced. This is a pretty amazing addition to look forward to, if you ask us.
  • Dynamic Lighting. RGB lovers will rejoice upon this one! Dynamic Lighting will allow you to control your RGB-powered components directly through the Windows Settings, allowing smooth integration of your favorite peripherals with your OS. No need for third-party software anymore!
  • Taskbar enhancements. Microsoft has announced some neat improvements to the Windows 11 taskbar. For one, we’ll be able to hide the Time and Date now, which is extremely useful for focus, but also for clean screenshots. Another change is the ability to shut down programs directly from the Taskbar, without having to run the Task Manager.
  • Expanding native support for archive formats 7-zip, rar, gz and others on the libarchive open-source projects.
  • Microsoft Store AI features. The theme of AI power is clearly being taken up a notch, because the Microsoft Store seems to be getting several awesome features in this regard. One of them is AI hub, which “curate the best AI experiences built by the developer community and Microsoft” (Windows Developer Blog). We’re not sure what that means exactly, but we sure can’t wait to see.

Another is AI-generated keywords, designed to improve the discoverability of apps you’re searching for. Moreover, the AI-generated review summary is designed to give us a simpler experience looking at reviews. Huge numbers of reviews will be compiled into a summary that’s easy to scan and lets us discover new content faster.

  • Other Microsoft Store improvements. Business owners will be happy to hear that Microsoft Store ads will now reach 150+ regions worldwide, significantly increasing the audiences they can target. Furthermore, there will be enhancements to the Backup and Restore functionality to give users a more seamless experience in case they switch devices. 
  • File Explorer changes. Rumor has it that Microsoft is working on a Gallery to be embedded within the File Explorer. The addition of a Recommended section might be on the horizon as well. 
  • Widget Panel update. The introduction of the Widget Panel in itself was exciting for many. As a next step in the development of this feature, Microsoft is planning to make it possible to pin widgets to the desktop. 
  • Presence sensor. You might actually already have this one, as it was rolled out as part of Moment 3 for compatible devices. With the Presence sensing app, found in the Privacy settings, you can decide which (if any) apps use APIs to detect the state of your activity on Windows. This can significantly enhance privacy and security, as you can have apps containing sensitive data lock automatically when unattended. If you’re a laptop user, it can also be beneficial to your battery life.
  • Bluetooth LE. Microsoft is adding support for Bluetooth Low Energy, a functionality that allows reduced battery consumption when devices are connected.
  • Adding more languages to the Live Captions feature. This specification is only as powerful as the languages it supports. Microsoft is reportedly working on expanding the list with 10 more languages.

Summary

We’ve got some interesting stuff to look forward to with the next major Windows 11 update. And these are just the things the Internet’s actually heard of, so who knows what else Microsoft might be planning? It remains to be seen, hopefully just a few months from now. 23H2 has been released on October 31st.

Read More
Fix Could not find the Recovery Environment
If you suddenly find the Windows Recovery Environment not working and you see an error message saying, “Could not find the recovery environment”, then you’ve come to the right place as this post will guide you on how you can fix it. In times when you can’t boot into the Windows Recovery Environment, there could be several reasons behind it. However, have you ever wondered where exactly the Windows Recovery Environment is in your computer? Windows initially places the Windows RE Image file in the installation partition during Windows Setup so if you have installed Windows in the C drive, you can find the Windows RE at the C:/Windows/System32/Recovery or C:/Recovery folder. Keep in mind that this folder is hidden and later on, the system copies the image file into the recovery tools partition to make sure that one can boot into recovery if there are any issues with the drive partition. The “Could not find the recovery environment” error mostly occurs if the Windows Recovery Environment is disabled or if the “Winre.wim” file is corrupted. Thus, to fix this error, you need to refer to the given suggestions below.

Option 1 – Try to enable Windows Recovery Environment

  • In the Windows Start Search, type “PowerShell” and from the search results that appear, right-click on Windows PowerShell and then select the “Run as administrator” option to open it with admin privileges.
  • Next, type the “reagentc /info” command and tap Enter to execute it.
  • After that, if the output states that Status is enabled, then you’re all set.
  • Now type the “reagentc /enable” command and tap Enter to enable the Windows Recovery Environment. You will see a success message at the end signifying that Windows RE is available.

Option 2 – Try to fix the corrupted or missing “Winre.wim” file

If the Winre.wim file is either corrupted or missing, you need to get a new copy of this file from another computer where the Windows RE is working. Once you’re able to get a new copy of the Winre.wim file, you have to set the image path to a new location. For more details, refer to these steps:
  • First, type “Powershell” in Windows Start Search and right-click on Windows PowerShell from the results, and select Run as administrator.
  • Next, execute the given command below to change the path of the WIM file to the new location. Note that the steps should be used when the file path of the Windows Recovery Environment is different from the usual spot.
Reagentc /setreimage /path C:RecoveryWindowsRE
  • As mentioned, if the file is corrupted, you just have to get a new copy from another PC but before you do that, make sure that the WINRE on that computer is disabled (just enable it later on) and then place it in the C:/Recovery path and then set its path again using the command given above and then verify its path by executing the following command.
reagentc /info command
Note: Since the Recovery folder is hidden as well as the WINRE folder in it and you won’t be able to access them using the Windows File Explorer, you need to use the Windows PowerShell or Command Prompt so that you can access them.

Option 3 – Try checking and fixing the WinRE Reference in the Windows Boot Loader

The Windows Boot Loader is the one that determines if it has to load the Windows Recovery Environment. It could be that the boot loader is pointing to an incorrect location which is why you’re getting the error. To resolve it, you have to check and fix the WinRE Reference in the boot loader. How? Follow these steps:
  • In the Windows Start Search, type “PowerShell” and from the search results that appear, right-click on Windows PowerShell and then select the “Run as administrator” option to open it with admin privileges.
  • After that, execute the “bcdedit /enum all” command.
  • Next, look for an entry in the Windows Boot Loader identifier set as Current and look for “recoverysequence” in that section and take note of the GUID.
  • Ensure that the device and the osdevice items show the path for the Winre.wim file and that they are the same. If not, you need to point the current identifier to the one which has the same.
  • Once you’ve found the new GUID, execute this command: bcdedit /set {current} recoverysequence {GUID_which_has_same_path_of_device_and_device}
  • Now check if the error in the Recovery Environment is fixed or not.

Option 4 – Try creating a Recovery Media

You could also try creating a Recovery Media to resolve the error in the Windows RE. All you have to do is download the Windows 10 ISO file using the Media Creation tool and then create a recovery drive. Once you’re done, check if it fixes the problem or not.
Read More
Fix HIDCLASS.sys failed Blue Screen Error
If you were trying to print some documents but encounter the HIDCLASS.SYS Blue Screen error instead, then you’ve come to the right place as this post will guide you in fixing any Blue Screen errors related to the HIDCLASS.SYS file. HIDCLASS.SYS is a Windows operating system driver file. HID or Human Interface Device includes Keyboards, mice, and other input devices. HIDCLASS.SYS is a critical system driver file that is responsible for connecting different kinds of devices all over the system, including the functionality where a Word Processor can access the printer to print documents. This file comes under the category of kernel-mode device drivers and if the driver fails, it can result in a Stop Error. There are a lot of Stop errors related to the HIDCLASS.SYS file, such as:
  • KMODE EXCEPTION NOT HANDLED
  • SYSTEM SERVICE EXCEPTION
  • DRIVER POWER STATE FAILURE
  • PAGE FAULT IN A NONPAGED AREA
  • SYSTEM THREAD EXCEPTION NOT HANDLED
  • DRIVER VERIFIER IOMANAGER VIOLATION
  • IRQL NOT LESS EQUAL
The fixes for the Blue Screen errors related to the HIDCLASS.SYS files are pretty simple but before you troubleshoot the problem using these fixes, make sure that you boot your computer into Safe Mode with Networking first. After that, get started on these tips:

Option 1 – Update or rollback or disable concerned device drivers

To fix the HIDCLASS.SYS error, you can also try to roll back, or update, or disable the concerned device drivers.
  • Open the Devices Manager from the Win X Menu.
  • Then locate the device drivers particularly the ones that are under the sections of Keyboard, Mouse, USB, and HID Drivers.
  • Next, right-click on them to open the Properties.
  • After that, switch to the Driver tab and click on the Uninstall Device button.
  • Follow the screen option to completely uninstall it.
  • Finally, restart your computer. It will just reinstall the device drivers automatically.
Note: You can install a dedicated driver on your computer in case you have it or you could also look for it directly from the website of the manufacturer. On the other hand, if you have just updated your device drivers then you need to roll back the drivers to their previous versions or disable them.

Option 2 – Check for any incompatible devices

The next thing you can do to troubleshoot the HIDCLASS.SYS Stop error is to plug in and out each one of the different hardware that is connected to your computer. Doing so will help you determine which one of the hardware is the one that’s triggering the error to pop up. You will also know what hardware drivers or anything else that could be causing this error which includes external devices like mouse, keyboard, printer, as well as internally attached components like the Graphics card and so on.

Option 3 – Try running the ChkDsk utility

Running the ChkDsk utility can also help you resolve any Blue Screen errors related to the HIDCLASS.SYS file. To run this tool, refer to these steps:
  • First, open This PC and right-click on your operating system partition for Windows.
  • Next, click on Properties and navigate to the Tools tab.
  • Then click on Check under the Error Checking section.
  • After that, a new mini window will be opened and from there click on Scan drive and let it scan your disk drive partition for any errors and then restart your computer.

Option 4 – Try checking the Memory for any errors

  • Tap the Win + R keys to open Run and type exe and hit Enter to open the Windows Memory Diagnostic Tool.
  • After that, it will give two options such as:
    • Restart now and check for problems (Recommended)
    • Check for problems the next time I start my computer
  • Once your computer has restarted, perform a basic scan or you could also go for the “Advanced” options such as “Test mix” or “Pass count”. Simply tap the F10 key to start the test.
Note: After you select the option, your PC will restart and check for memory-based issues. If it finds any issues, it will automatically fix them.

Option 5 – Run the System File Checker

System File Checker or SFC is a built-in command utility that helps in restoring corrupted files as well as missing files. It replaces bad and corrupted system files with good system files. To run the SFC command, follow the steps given below.
  • Type “cmd” in the Start search and then right-click on the appropriate search result.
  • Next, select “Run as administrator” to open Command Prompt with admin privileges.
  • After opening Command Prompt, type in sfc /scannow
The command will start a system scan which will take a few whiles before it finishes. Once it’s done, you could get the following results:
  1. Windows Resource Protection did not find any integrity violations.
  2. Windows Resource Protection found corrupt files and successfully repaired them.
  3. Windows Resource Protection found corrupt files but was unable to fix some of them.
  • Now restart your computer and see if the Blue Screen error is fixed or not.
Read More
How to Delete your data from the internet
The Internet has come a long way from its infant stages and has become so large and huge that it has gained the status of basic human rights. There are very useful information and a lot of great content on it and among them, there are social media websites and other types of websites where you have, most likely placed some personal pictures or other information. One day you might want to cancel some of the services or you would like to take a break from it all. In this guide we will show you how to do exactly that, to delete and remove your data from the internet.

How to Delete Your Google Account

Google is arguably one of the most visited places on the Web. It stores a huge amount of data for delivering personalized content. It saves personal information, web searches, watched videos, location data, etc. You can view a summary of the data saved by different Google services by visiting your Google Dashboard.
To delete personal data from Google, go to myactivity.google.com. Select the Delete activity by from the left menu to start deleting activities.
Select All time to delete all of your activities from different Google services. You can also delete files saved to Google services, such as Google Photos, Google Drive, and Keep. Just visit the site, select the files, and delete them. Note that Google retains some information even after you delete all data. They do this to meet business needs and legal requirements. These will be deleted when you delete your Google account altogether.

How to Delete Your Facebook Account

Facebook stores a huge amount of data for each user. Some of the personal information stored in Facebook’s databases includes name and email, check-ins, location, images, videos, events, etc. You can view and download all of your personal data using Facebook’s information download tool. However, you will need to delete your account altogether for removing your personal data from Facebook. Follow the below steps to delete your Facebook account.
  1. Log in to your Facebook account and go to Settings & privacy > Setttings.
  2. Select Your Facebook Information.
  3. Select Deactivation and Deletion.
  4. Select Delete Account.
  5. Select Continue to Account Deletion.
  6. Select Delete Account.
  7. Enter your password and click Continue.
It can take up to 90 days for Facebook to delete your personal data from the Internet. You will not be able to access any of the data once the deletion starts. However, you can cancel this within the first 30 days.

How to Delete Your Twitter Account

Twitter has also followed in the footsteps of Facebook when it comes to harvesting your personal data. It utilizes this information for delivering personalized ads and tweets. You can download an archive of all of your personal data from Twitter. It makes it easy to monitor what information is available to the platform. Click the More button from the left menu and head over to Settings and privacy. Follow the below steps to download your personal information.
  1. Select Download an archive of your data from the Your Account section.
  2. Select Request archive from under the Twitter data section. Enter your password when prompted.
  3. It will take some time for Twitter to make the data available to you. You’ll receive an email once the data is ready to be downloaded.
It would be best if you also restrict data sharing and off-site activities. Head over to Privacy and safety and inspect the options under the Data sharing and off-Twitter activity section.
Look in the Interests and Your advertiser list sections from the Ads preferences tab. You can disable Twitter from tracking you in the Off-Twitter activity tab. Uncheck the options from the Data sharing with business partners and Location information tabs.
Finally, you need to deactivate your account for deleting all personal information from Twitter. You’ll have 30 days to reactivate the account. After that, Twitter will begin erasing your information from its systems. Note that they can still retain some information subjected to platform regulations.

How to Delete Your Instagram Account

Instagram has risen to prominence in the last couple of years. The company collects a huge amount of personal information from its users, including media, name, email, and much more. You’ll need to deactivate your account altogether if you want to delete everything Instagram knows about you.
Head over to the Delete your account page and select the reason you want to delete it. Enter your Instagram password to verify your identity, then click on the Delete button. Instagram will hide your account details for the next 30 days and delete all personal data after the given period.

How to Delete Your TikTok Account

TikTok is another emerging platform that has become quite popular among millennials. Users share a lot of personal information through personalized music videos. You need to delete your TikTok account permanently to remove all personal data from TikTok.
To do this, head over to Me, then tap on the icon in the top-right corner of the window. Select Delete account from under the Manage Account section. Follow the instructions provided there to continue deactivating your account. Like Instagram, TikTok also offers a 30-day time period to allow users to change their minds. It will delete your personal data from the Internet after this period.

How to Delete Your Snapchat Account

  1. Go to Snapchat’s Accounts Portal and log in with your name and password.
  2. Select the Delete My Account option.
  3. You’ll be taken to the Delete Account page directly.
  4. Retype your password once more.
  5. Click on the yellow Continue button.
Do keep in mind that Snapchat will hold on to your data for another 30 days, just in case you change your mind and decide to return. If you do decide to come back, all you need to do is visit the Accounts Portal again and log in to your account. This will reactivate your account. While your account is in this deactivated phase, your friends will not be able to contact you or interact with you in any manner on Snapchat. After the 30-day period has elapsed, your account will be permanently deleted.
Read More
1 2 3 171
Logo
Copyright © 2023, ErrorTools. All Rights Reserved
Trademark: Microsoft Windows logos are registered trademarks of Microsoft. Disclaimer: ErrorTools.com is not affiliated with Microsoft, nor claims direct affiliation.
The information on this page is provided for information purposes only.
DMCA.com Protection Status