Logo

A Simple Guide to Fixing Error Code 0x80070424

Error Code 0x80070424 - What is it?

The error code 0x80070424 is a Windows PC error. It may occur when using Windows Update, Microsoft Update or while trying to change Windows Firewall settings. This error does not allow you to enable or disable the Firewall on your PC. It is quite common on Windows 7 and Vista.

Symptoms of error code 0x80070424 include Windows Firewall may not be listed on Services.msc, inability to change Windows Firewall settings and you may come across this error message when restarting your PC, “Base Filtering Engine Service could not be found in the system”.

Solution

Restoro box imageError Causes

Some of the common causes of the error code 0x80070424 include:

  • Base Filtering Engine Service file corruption
  • Registry issues

When you encounter this error code on your system, it is recommended to fix it immediately as this error can lead to serious PC damages.

Further Information and Manual Repair

To resolve the error code 0x80070424 here are some of the best DIY solutions for you. By following these solutions, you can fix the error all by yourself.

These are simple, easy, and quick PC fixers that require no technical expertise. Just follow the simple steps and the error will be resolved in the shortest time.

Re-Install Windows Firewall & Filtering Engine

If the underlying cause of the error 0x80070424 is Base Filtering Engine Service file corruption, then the best way to resolve it is to download the Firewall and register file from a reliable website. Once you download it extract the zip on your desktop.

  • Double click on both files one by one to confirm their installation on your PC. Once installed, restart your PC and click on the start button. Search file type and run and then press enter.
  • When the Run window opens, type REGEDIT and click OK. After that, from the left sidebar navigate to HKEY_LOCAL_MACHINESYSTEMCurrentControlSetservicesBFE.
  • Now simply right-click on BFE folder and choose permission. Once that’s done, click on add button and type everyone then press OK to confirm settings.  Here you will see the ‘everyone’ added field.
  • After that in the below permission panel, tick the box that says Full Control and confirm. Now close the window and go to the menu and type services MSC.

This will open the service window. From the list search for ‘Base Filtering engine file’ right-click on it. Now search for Windows Firewall and see if you can change the settings. This procedure is most likely to resolve the error code 0x80070424 on your PC. It is time-consuming but worth it.

Use a Registry Cleaner

None the less, if the error is triggered by registry issues, then it is advisable to download Restoro. This is an advanced and highly functional PC fixer integrated with multiple utilities including a powerful registry cleaner.

The registry cleaner utility detects all registry issues on your system and fixes them in seconds. It wipes out the excess, unnecessary, and obsolete registry entries and files corrupting your system cleans, and restores the registry.

It is user-friendly and compatible with all Windows versions. So whether you are using Windows 7, 8, XP or Vista, you can run it on all versions with ease and resolve the error code 0x80070424 generated by registry issues.

This software also includes other functional and value-added features like antivirus and a system optimizer.

Click here to download Restoro and resolve error code 0x80070424  on your PC today!

Do You Need Help with Your Device?

Our Team of Experts May Help
Troubleshoot.Tech Experts are There for You!
Replace damaged files
Restore performance
Free disk space
Remove Malware
Protects WEB browser
Remove Viruses
Stop PC freezing
GET HELP
Troubleshoot.Tech experts work with all versions of Microsoft Windows including Windows 11, with Android, Mac, and more.

Share this article:

You might also like

Disable Taskbar on the second display
If you have a dual monitor setup on your Windows 10 computer and you mostly use the second screen when you are presenting something, this makes the Taskbar completely unnecessary and is not really required. So if you are using your computer generally and do not want the taskbar on your second screen, read on as this post will guide you in disabling Taskbar on your second display. The good thing is, Windows comes with a built-in feature to disable Taskbar on your second screen or projector connected to your computer. In this post, you will be guided on how you can hide or disable the Taskbar from the second monitor in Windows 10. This post is coming in handy especially if you are using projectors or multiple displays. Refer to the steps given below to disable Taskbar on the second display in Windows 10. Step 1: Go to Settings and click on Taskbar from the left menu. Step 2: After that, scroll down to lo look for Multiple Displays. Step 3: Next, turn off the toggle labeled, “Show taskbar on all displays”. Note: After completing the steps given above, it will disable the Taskbar on all the secondary displays. Bear in mind that these settings will work only if you are running a second screen in Extended mode. Contrariwise, if you are in the Duplicate mode, this setting will not work but you can always set your Taskbar to Autohide so that it won’t be displayed.

On the other hand, if you are facing some issues in finding which screen is primary and which one is secondary, refer to these steps:

Step 1: Go to Settings and select System. Step 2: Next, from the left menu open Display. Step 3: From there, select the desired display and make it the primary one as required by your setup.
Read More
Why ActiveX Control May Damage Your Personal Computer
ActiveX Controls are plugins you may constantly come across when working with Internet Explorer. An illustration of these kinds of control is the MICROSOFT IE Flash Player. They frequently result into significant problems for the Computer, yet they're vital for IE to operate correctly. You shouldn't ever overlook that after you install Active Controls in your Personal Computer, you effectively provide them with access to other areas of your PC. The ActiveX Controls not only tracks your search routines, but in addition puts malicious software, which might possibly be hazardous to your Computer.

Solution

Restoro box imageError Causes

ActiveX Controls make your Internet Explorer work as required and are usually great and beneficial to your own Computer. Yet, they can function as a source of problems because of the following factors.
  • You should stop installing  ActiveX Controls from Un Trustworthy Resources
In the event they are installed by you from un trustworthy resources new threats are likely introduced by ActiveX Controls to your PC. One of the more regular types of ActiveX Controls worth necessary for installation is Flash Player. Yet, never be in a hurry to install these Controls from resources that you don't trust.
  • Limit The Number of ActiveX Controls You Install on your PC
Prevent installing java/oracle ActiveX controls, because of its weak security measures which could make your Personal Computer and any additional information there in, open to attacks. Limit to the variety of ActiveX Controls that you install on your PC as these could increase the vulnerability canvas on your computer.

Further Information and Manual Repair

You can manually fix any malfunction that springs up from ActiveX Controls. Yet, more than mending the harm, produce the setting that ensures you never have troubles from them to start with. Just how do you do that?

a) Stop installing or downloading ActiveX Controls from Un Trustworthy Sources

This has been mentioned above, but it's worth repeating because it's the most common reason behind ActiveX Controls malfunctions. You might anticipate that for this kind of obvious reason for ActiveX Controls malfunctions, PC consumers would be extra cautious, however that is never true.

b) Limit ActiveX Controls Softwares

You can restrict ActiveX controls from running automatically on your PC. To limit them, head to Tools in Internet Explorer, and choose Internet Options. Proceed to the Security tab, and select Customs level Browse completely down before you get to the area designated "ActiveX". Subsequently, mark "Prompt" under every choice that you encounter. But don't mark the choice indicated "Run ActiveX Controls and Plug-Ins", together with, "Script ActiveX Controls Marked Safe for Scripting". By performing the measures emphasized above, you happen to be in substance stating that, you will not permit any installation of ActiveX Controls, without express authorization by you. In this manner, you have better control over different forms of ActiveX Controls you permit to be installed, therefore reducing potential threats to your PC.
Read More
Prevent screen from shutting down in Windows
You left your computer to go to the bathroom or to fetch something to eat, maybe you have to answer the phone or open door to a friend and after some time you get back to your computer see the black screen, you move the mouse and it starts to come from sleep slowly. I am the kind of person who gets annoyed by this kind of behavior, I like my PC to be ON all time when I want it to be ON and my power plan on best performance so naturally, I have turned this sleep feature OFF. If you are interested to see how you to can turn off your screen sleeping follow this easy guide.
  1. Press ⊞ WINDOWS to open the start menu and click on the settings Windows 10 Start menu with marked settings icon
  2. On settings, screen click on system Windows settings with System section selected
  3. When the system dialog opens go to Power & Sleep and on the right side change all values to never. windows settings power and sleep
Please note that after each update Windows tend to reset these settings so you will sadly have to return to this after each major update.
Read More
Change position of Taskbar in Windows 10
Changing Taskbar location in your Windows 10 is an easy task but lately, Microsoft has removed the option to just drag it to one side of the screen and place it there, now in order to change location we need to do a little more work but do not worry it is not difficult at all. Right-click on the taskbar to open its properties menu taskbar settings menuin the menu, on the bottom choose taskbar settings. Once the settings dialog opens, on the right side locate the taskbar location on screen. taskbar location chooserClick on the dropdown menu and choose the desired location for the taskbar.
Read More
How to see your Wi-Fi password in Windows 11
Each time you connect to a Wi-Fi network your PC saves that network password. If for any reason you need to see this password or passwords there are ways you can do it and we are here to show you how. Wi-Fi passwordHello and welcome to error tools where we aim to help you with all of your Windows problems and issues, where we offer our insight on various topics and sometimes go offroad and write something crazy. This time we will offer you a way on how to easily and quickly see how can you find out your memorized Wi-Fi password.

Find your W-Fi password

  1. Make sure that you are connected to the Wi-Fi network you wish to find out the password of
  2. Open Windows Settings app by pressing ⊞ WINDOWS + I
  3. On the left side choose Network & Internet and click on it
  4. Click on Advanced Network Settings
  5. Inside Advanced Network Settings go to Related Settings
  6. Select More Network Adapted Options
  7. Right-click on your adapter and select Status
  8. Click on Wireless Properties
  9. Click on the Security tab
  10. Click on enable on Show Character box beneath Network Security key to reveal Wi-Fi password
Read More
Parallels Desktop 17 brings Windows 11 to MAC
Parallels Desktop 17Parallels is an application developer for MAC OS mostly known for its PC virtualization software Parallels Desktop, a PC virtualization software running on Macs enabling running Windows and Linux with respective software on your MAC. With its latest Desktop 17 version, the software can run natively on both Intel-based and M1-based MACs. Thanks to this feature MAC users will be able to benefit from various speed improvements while running both Windows 10 or Windows 11 preview. On both Intel and M1 setups, Parallels resumes Windows and Linux up to 38% faster, provides an up to 25% bump in 2D graphics and a six-time increase in OpenGL graphics processing. M1-centric stats include 33% faster Windows start-up times, up to 28% faster DirectX 11 performance, and up to 20% better disk performance on Windows 10 Insider Preview. Parallels Desktop 17 delivers a set of fresh features including a new video driver that enhances video and game playback and boosts Windows UI responsiveness. An improved Coherence mode lets users run Windows apps within the Mac environment, cutting down on distracting changes in appearance during Windows sign-in, shut down, and software updates. Drag-and-drop operations are also improved, with support for text and graphics between Mac and Windows applications. This function works well with MAC OS Monterey's Quick Note feature, which can accept content from any Windows app. USB support, disk management, copy and paste unformatted text, and automatic virtual machine optimization also receive upgrades.
Read More
Fix Err_Connection_Closed in Windows
If you suddenly encounter an error message that says, “This webpage is not available, Err_Connection_Closed” while browsing the internet or visiting a website and the website fails to load, then it means that there is some problem with your network connection. Similarly, you may also get other error messages like “Err_Network_Changed”, “Err_Connection_Reset” and “Err_Internet_Disconnected” errors in different browsers like Chrome, Firefox, and Edge. The problem lies in your Windows 10 computer and your internet connection since this is a network issue. So before you troubleshoot the problem using the suggestions given below, you need to refresh your browser first or you could also tap Ctrl + F5 on your keyboard to hard reload the webpage. If you’re still getting the same error message, then proceed to the guide below.

Option 1 – Try removing the Proxy

Removing the Proxy might also help you in fixing the “This webpage is not available, Err_Connection_Closed” error. Here’s how you can do it:
  • Tap the Win + R keys to open the Run dialog box.
  • Then type “inetcpl.cpl” in the field and hit Enter to pull up the Internet Properties.
  • After that, go to the Connections tab and select the LAN settings.
  • From there. Uncheck the “Use a Proxy Server” option for your LAN and then make sure that the “Automatically detect settings” option is checked.
  • Now click the OK and the Apply buttons.
  • Restart your PC.
Note: If you are using a third-party proxy service, you have to disable it.

Option 2 – Try using Google Public DNS

If the first option didn’t resolve the issue, you can try to use the Public DNS by Google and see if it can help fix the problem. You have to modify the DNS settings in your system explicitly and use the DNS IP addresses.
  • The first thing you have to do is right-click on the network icon in the Taskbar and select Network and Sharing Center.
  • Next, click on the “Change Adapter Settings” option.
  • After that, search for the network connection that you are using to connect to the internet. Note that the option might be “Wireless Connection” or “Local Area Connection”.
  • Right-click on your network connection and click on Properties.
  • Then select the new window to choose the “Internet Protocol 4 (TCP/IPv4)” option.
  • After that, click on the Properties button and click the checkbox in the new window for the option “Use the following DNS server addresses”.
  • Type in “8.8.8.8” and “8.8.4.4” and click OK and exit.

Option 3 – Reset Winsock, TCP/IP & Flush DNS

Resetting Winsock, TCP/IP, and flushing DNS might help you resolve the Err_Connection_Closed error. To do so, follow these steps:
  • Right-click on the Start button and click on Command Prompt (administrator) so you can pull up an elevated Command Prompt.
  • After that, execute each one of the commands listed below. And after you typed in one after the other, you have to hit Enter.
  1. netsh winsock reset – type in this command to reset Winsock
  2. netsh int ip reset resettcpip.txt – type in this command to reset TCP/IP
  3. ipconfig /flushdns – type in this command to flush the DNS cache
  • Next, restart your PC and check if the problem’s fixed.

Option 4 – Disable both the Antivirus program and Firewall temporarily

There are times when antivirus programs and the firewall blocks a website that they consider to be malicious or even because of false-positive effects which is why you have to disable these programs temporarily as it might be the reason why you’re getting the “This webpage is not available, Err_Connection_Closed” error when trying to browse the internet.

Option 5 – Try to check the network cables and then restart your router

The most obvious thing you can do first is to try checking if the network cables connected to your computer or router are properly connected or not. If it turns out that some network cables are not connected properly, then it’s probably why you’re getting this error.

Option 6 –Try a Network Reset

When all else fails, you might have to consider resetting your entire network settings. Simply follow the steps below to do so.
  • Click on the Start button and then click on the gear-like icon for Settings to open it.
  • Next, select Network and Internet.
  • Then scroll down and look for “Network Reset” – click on it and then click on the Reset now button.
Read More
Fix Error 0x8004230F when creating Restore
Creating a System Restore point is definitely a must especially when you are about to make some changes to your computer. This will help make sure that the system settings and files can go back to an earlier point, should something go wrong, without affecting any personal files. However, there are cases when creating a System Restore Point does not go smoothly and you encounter an error that says, “The shadow copy provider had an unexpected error while trying to process the specified operation ( ox8004230F )”. Aside from creating System Restore Point, you can also encounter this error when you create a system image or backup. According to reports, this error pops up when the required services are not running or not properly responding. And to fix it, there are several recommendations that will be provided in this post to fix the Error 0x8004230F when creating System Restore point in Windows 10. You can try to check the Volume Shadow Copy Services status or run the VSSADMIN tool. You could also check the status of the Microsoft Software Shadow Copy Provider Service or create System Restore Point in a Clean Boot State. For more details, refer to the provided options below.

Option 1 – Try checking the status of the Volume Shadow Copy Service

  • Tap the Win + R keys to launch the Run utility and type “services.msc” in the field and hit Enter to open the Windows Services Manager.
  • From the list of services, look for the Volume Shadow Copy service and double-click on it.
  • After that, this will open the Properties where you have to make sure that the Startup type is set to Automatic (Delayed Start) and then click on the Start button underneath it.
  • Once done, click on Apply and then OK to save the changes made.
  • Now try creating a System Restore Point again and see if the error is already fixed or not.

Option 2 – Try to run the VSSADMIN tool

In case you don’t know, the shadow copy provider is sensitive and some other backup, disk cloning, etc. can make it malfunction. To fix this, you can run the VSSADMIN tool by following these steps:
  • Tap the Win + R keys to open the Run dialog box and type “cmd” and hit Enter to open Command Prompt.
  • Next, execute this command to check if you have other third party VSS admin providers: vssadmin list providers
  • After that, if it finds any, you need to disable them but if it does not find anything, then proceed.

Option 3 – Try to check the Microsoft Software Shadow Copy Provider Service status

  • Tap the Win + R keys to launch the Run utility and type “services.msc” in the field and hit Enter to open the Windows Services Manager.
  • From the list of services, look for the Microsoft Software Shadow Copy Provider Service and double click on it.
  • After that, this will open the Properties where you have to make sure that the Startup type is set to Automatic (Delayed Start).
  • Once done, click Apply and OK to save the changes and then try creating System Restore Point again.

Option 4 – Troubleshot the problem in a Clean Boot State

It is possible that some third-party program installed in your computer might be the one that’s causing the ox8004230F when you try to create a System Restore point. Thus, you can try to boot your computer in a Clean Boot State and then try to perform the task again.
  • Log onto your PC as an administrator.
  • Type in MSConfig in the Start Search to open the System Configuration utility.
  • From there, go to the General tab and click “Selective startup”.
  • Clear the “Load Startup items” check box and make sure that the “Load System Services” and “Use Original boot configuration” options are checked.
  • Next, click the Services tab and select “Hide All Microsoft Services” check box.
  • Click Disable all.
  • Click on Apply/OK and restart your PC. (This will put your PC into a Clean Boot State. And to configure Windows to use the usual startup, just simply undo the changes.)
  • Once your computer has restarted try to create a System Restore Point again and if it now works, start to isolate the problem by checking which one of the programs you installed recently is the root cause of the problem.
Read More
Adobe Express review

Social media is here to stay it seems, from Facebook, Instagram, Twitter, etc each site has its users and its rules. Companies, bloggers, public figures, and people, in general, are using them on a daily basis and some are posting cool ads, nice graphics, videos, and many more in order to gain followers or just to share something that they think is worth.

adobe express

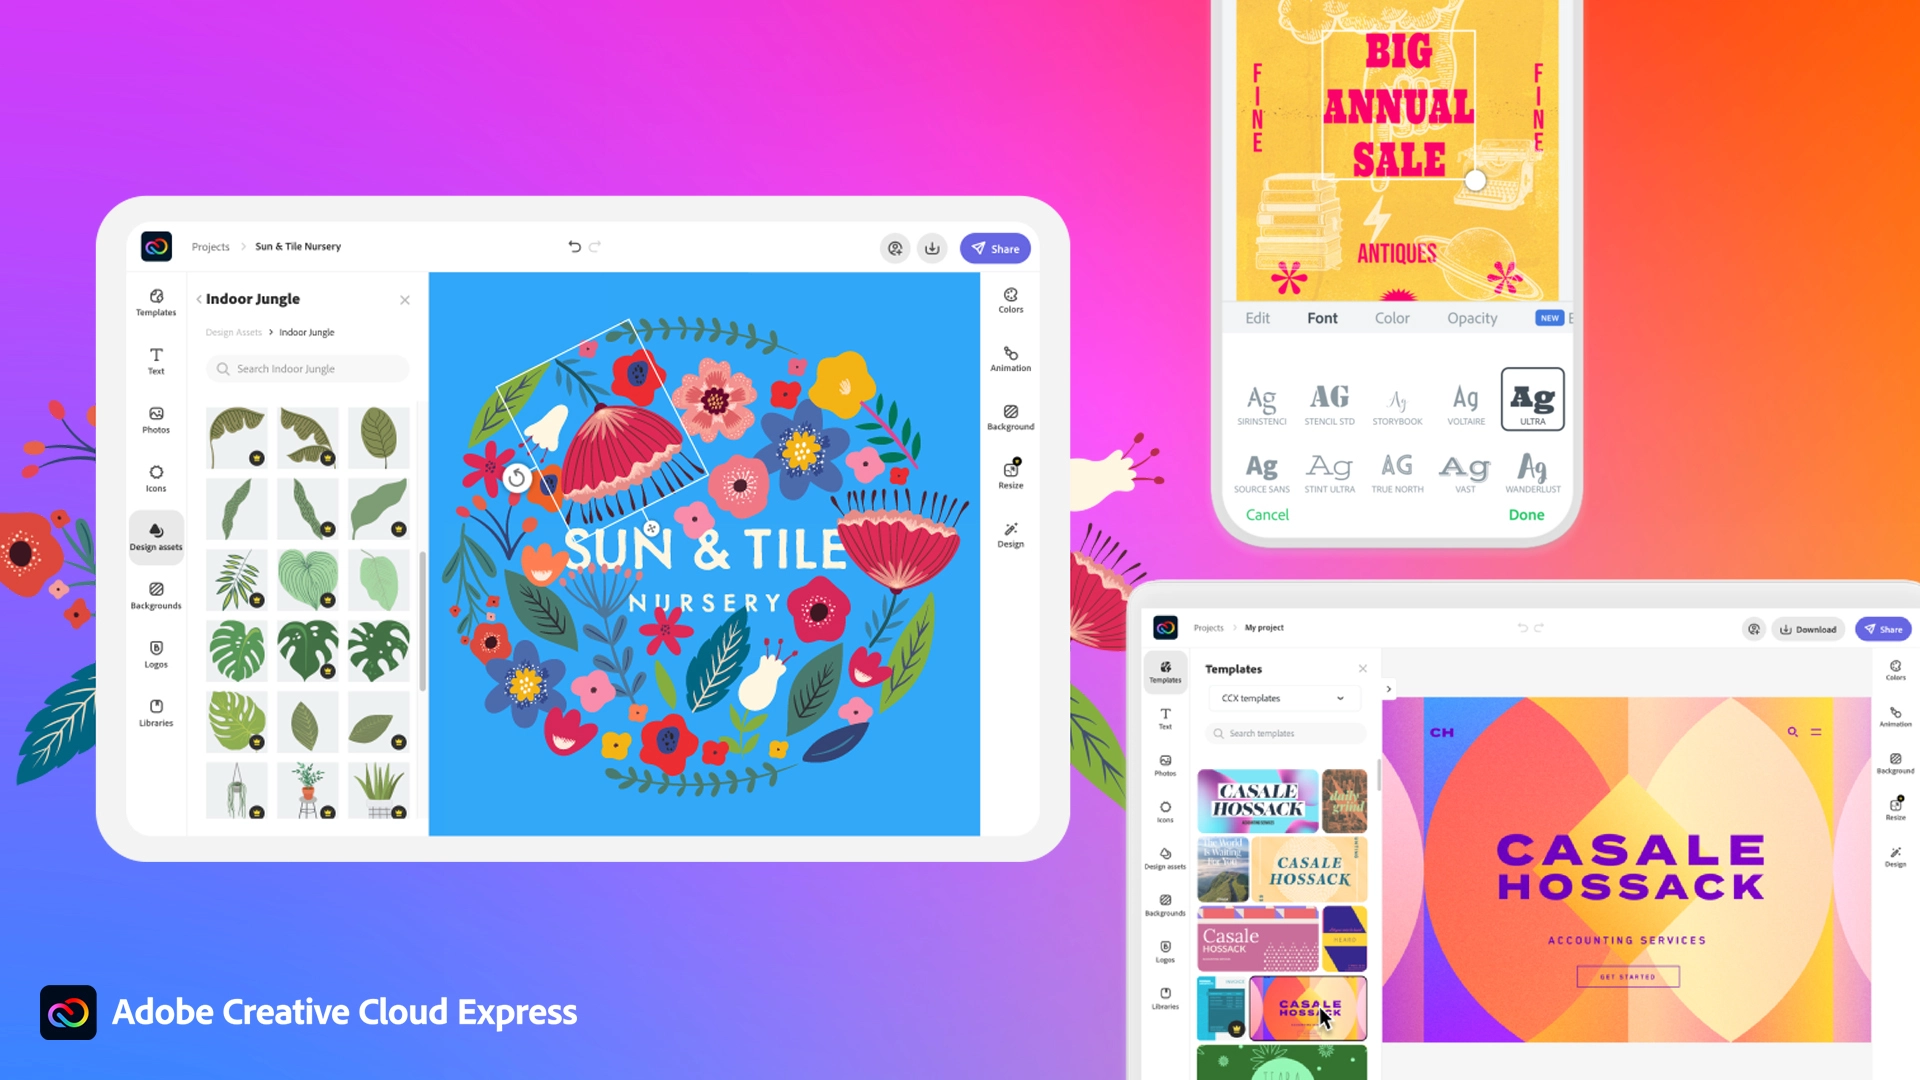
Making your post look good is somewhat essential if you plan on reaching a larger audience and Adobe's Express aims to fill that gap. It is the latest Adobe product that is purposely made for graphic and video creation for social media.

Adobe is well known in the world of professional design in all spheres like print, web, and motion, with this application, they want to take over social media design with Express. The direct competitor to Spark and canva, Express is filled with high-quality adobe templates and some great stuff found in photoshop like automatic background removal which gives it an edge over other applications.

The good thing about Express is that there is a completely free version and premium, like its competitors but with some benefits that clearly show that Adobe is determined to place its application on top of the game. The free plan includes:

  • Thousands of unique templates, design assets, and Adobe Fonts.
  • A limited collection of royalty-free Adobe Stock-free collection photos.
  • Basic editing and photo effects including remove background and animate.
  • Create on both web and mobile.
  • 2GB of storage.

For 10 USD per month of 100 USD prepaid annual fee, you get a premium plan that includes:

  • All premium templates and design assets.
  • The entire collection of over 160 million royalty-free Adobe Stock collection* photos.
  • Over 20,000 licensed Adobe Fonts, curved type, grids, and font pairs.
  • Premium features like refine cutout, resize, and graphic groups.
  • Plan, schedule, and publish social media content across multiple channels.
  • Add your branding, logo, colors, and fonts in one tap.
  • Convert & export to and from PDFs and other file types.
  • Create, manage, and share your templates and assets with Creative Cloud Libraries.
  • Create on both web and mobile.
  • 100GB of storage.

The application itself is incredibly easy to learn and to work with and literally, anyone can pick it up and start creating immediately. No matter are you just starting with social media or using Canva or Spark, give Express a go, make a free account and try it, I guarantee that you will find some features amazing, and its ease of use relaxing.

Read More
Fix Windows Update Error 0x80071a91
Windows Update Error 0x80071a91, what it is? As you know, Windows Updates are very essential to the operating system since they push with them the important security updates that are crucial to the system. And if a Windows Update is delayed, it can the system vulnerable to potential threats. Thus, this kind of issue must be resolved right away. One of the errors that you can encounter while updating your computer is the Windows Update Error 0x80071a91. The error code 0x80071a91 occurs when the “Transaction support within the specified file system resource manager is not started or was shut down due to an error”. This happens when a service called “File System Resource Manager” or FSRM does not function due to some reason. To fix the Windows Update Error 0x80071a91, here are some suggestions that could help.

Option 1 – Run the Windows Update Troubleshooter

Running the built-in Windows Update troubleshooter could also help you resolve the Windows Update Error 0x80071a91. To run it, go to Settings and then select Troubleshoot from the options. From there, click on Windows Update and then click the “Run the troubleshooter” button. After that, follow the next on-screen instructions and you should be good to go.

Option 2 – Disable the antivirus program temporarily

There are times when the antivirus program installed in your computer blocks file access and even disk access. Thus, disabling the antivirus program or any security software installed in your computer is always a good idea you can try when the Windows Update process does not go smoothly. So before you try updating your computer again, make sure to disable the antivirus or security program and once the Windows Update is done, don’t forget to enable the antivirus program back again.

Option 3 – Try resetting the File System Resource Manager

As pointed out earlier, the error 0x80071a91 pops up when the FSRM service suddenly stops working and so resetting this service via Command Prompt might resolve the problem. To do so, follow the steps below.
  • In the Windows Search box, type “command prompt” and hit Enter.
  • Then right-click on Command Prompt from the related search results and click the “Run as administrator” option.
  • After opening Command Prompt as admin, type the following command and hit Enter:
resource setautoreset true C:
  • After that, exit Command Prompt and restart your computer and then check if the problem’s fixed by running Windows Update again.

Option 4 – Flush the contents of the SoftwareDistribution folder

You have to stop a couple of services such as BITS, Cryptographic, MSI Installer, and Windows Update Services. And to do that, you need to flush the contents in the SoftwareDistribution folder. The Software Distribution folder in the Windows operating system is a folder that can be found in the Windows directory and is used to store files temporarily which might be required to install the Windows Update on your PC. Thus, it is required by the Windows Update and maintained by WUAgent. Aside from that, it also contains all the Windows Update History files and once you delete them, you will most likely lose the Update history. As a result, the next time you run the Windows Update, it may result in a longer detection time.
  • Open the WinX Menu.
  • From there, open Command Prompt as admin.
  • Then type in the following command – don’t forget to hit Enter right after typing each one of them.
net stop wuauserv net start cryptSvc net start bits net start msiserver
  • After entering these commands, it will stop the Windows Update Service, Background Intelligent Transfer Service (BITS), Cryptographic, and the MSI Installer
  • Next, go to the C:/Windows/SoftwareDistribution folder and get rid of all the folders and files thereby tapping the Ctrl + A keys to select them all and then click on Delete. Note that if the files are in use, you won’t be able to delete them.
  • Once all the contents in the Software Distribution folder are deleted, restart your PC and then go back to Command Prompt and input the following commands again.
net start wuauserv net start bits

Option 5 – Delete the Common Log File System transaction logs

You might also want to delete the Common Log File System or CLFS transaction logs to fix the Windows Update Error 0x80071a91.
  • Open an elevated Command Prompt.
  • Then type each of the commands listed below and press Enter after you type each one of them.
    • cd /d %SystemRoot%System32SMIStoreMachine
    • attrib -s -h *
    • del *.blf
    • del *.regtrans-ms
  • After you’ve executed the commands given above, restart your computer and try to update Windows 10 again.
Read More
1 2 3 171
Logo
Copyright © 2023, ErrorTools. All Rights Reserved
Trademark: Microsoft Windows logos are registered trademarks of Microsoft. Disclaimer: ErrorTools.com is not affiliated with Microsoft, nor claims direct affiliation.
The information on this page is provided for information purposes only.
DMCA.com Protection Status