Error Code 52 is a device driver problem that users experience on any Windows 2000 operating system and later Windows systems.
The error occurs when the operating system prevents the peripheral device connected to the computer from functioning properly and is usually displayed by the following message:
“Windows cannot verify the digital signature for the drivers required for this device. A recent hardware or software change might have installed a file that is signed incorrectly or damaged, or that might be malicious software from an unknown source. (Code 52)”
Solution
Error Causes
Error Code 52 is triggered by the following factors:
An incomplete program uninstallation
An incomplete program installation
Hardware is not removed properly
System recovery from viruses
An improper system shut down
Further Information and Manual Repair
Error Code 52 can pose severe risks to the overall health of your PC and any negligence in fixing it can be disastrous for your computer.
However, since the error code is like other device driver errors, resolving the error is relatively straightforward. Here are a few methods to resolve the error code.
Method 1 – Use System Restore
You can use system restore to roll back the system to a time when there was no error to eliminate the problem. Here is how you can use it:
Log in using an Administrator account
Click ‘Start’ button and select All Programs > Accessories > System Tools > System Restore
Click ‘Restore my computer to an earlier time’ and click ‘Next’
Select the last Windows restore point from the ‘On this list, click a restore point’ list, and click ‘Next’
Click ‘Next’ on the confirmation window to proceed
Restart your PC after restoration is complete
By restoring the system via a last saved system checkpoint, you can obtain undamaged Windows system registry files that can help avert the error code.
Method 2 – Run the Troubleshooting Wizard
If restarting your PC does not help, you will have to find the exact nature of the problem by running the troubleshooting wizard for the device and address the problem accordingly. To do this, proceed with the following steps:
Run Device Manager on your PC
Click on the program under the installed programs that are creating problems for you
Click on the ‘General’ Tab
Click ‘Troubleshoot’
Upon opening, the Troubleshooting Wizard will ask a series of questions regarding the error. Answer the questions and follow its directions for solving the error code.
After following the directions of the Troubleshooting wizard, make sure to restart your PC for the changes to take effect. Then check if your device is still causing problems.
Method 3 – Manually uninstall and reinstall the device driver
Uninstalling and then reinstalling the device driver can help solve the error.
You can do this by firstly logging in as Administrator and open Device Manager. Select the device that is causing the problem and double click it and make sure that the peripheral is connected properly to the PC.
Upon opening, click on the ‘Driver’ tab and then select ‘Update Driver’. Make sure to refer to the system documentation that you received with your PC or computer to check for the motherboard details and driver specifics.
Method 4 – Use software to automatically download the driver
Manually uninstalling and reinstalling the driver will do the trick, however, it may be time-consuming especially when you would have to resort to your hardware user manual.
Therefore, using a program such as DriverFIX can save you a lot of time and frustration in having your device work properly on your computer.
DriverFIX, with its user-friendly approach to help you fix your PC issues, comes with an integrated database that detects which drivers you need to reconfigure within just a few seconds and downloads it automatically.
It further ensures that your drivers are installed in their entirety leaving no room for any incomplete files to remain that create Error Code 52.
It also has the added advantage of being able to backup and restores your files should there be the slightest possibility of system file damage. DriverFIX is the answer to fixing your PC error codes accurately and quickly.
Click here to download DriverFIX to fix Error Code 52 quickly and effectively!
Mapi32.dll is a Windows Messaging Application Programming Interface that enables Windows to perform various email functions and launch messaging programs like Microsoft Outlook and Microsoft Office. The inability of the interface to execute email functions properly results in the Mapi32.dll Outlook Error.
This error occurs mostly when you are attempting to upgrade the operating system to a new version.
Solution
Error Causes
The common causes of the Mapi32.dll Outlook Error during the OS upgrade are:
Damaged or Corrupt Outlook user profile
The software is overwritten by some other program
Outlook PST file corruption
The Mapi32.dll Outlook Error message is displayed in either of the following forms:
Mapi32.dll is missing
Cannot start Microsoft Office Outlook. Mapi32.dll is corrupt or the wrong version.
Mapi32.dll was not found
Mail is not installed
Further Information and Manual Repair
So, what if you experience this issue and how do you fix it? Well, first there is no need to panic as Microsoft has recognized this issue and provided adequate solutions to fix this problem in no time.
However, to ensure the Mapi32.dll Outlook error is a quick fix, you must first understand the cause of the issue and the message displayed on the screen.
Let’s say the errors occur because your Outlook profile is corrupt. In this scenario, the best solution is to create a new Outlook profile. Regardless of whether you have Windows Vista or XP, to create your new Outlook profile, first, you will have to click on the Control Panel, then User Account, and then Mail. Once you click on the Mail tab, the mail set up dialog box will open. In this dialog box there will be a ‘Show Profiles’ tab, click and then click the Add tab that appears next. Now type the name for your new Outlook profile and then click ‘OK’. After that, add an email account to go with the profile.
If Mapi32.dll is missing or corrupt, you will have to run ‘Fixmapi.exe’ to resolve the problem. It is located in the System32 folder inside the Windows directory in Windows Explorer.
Therefore, first start Windows Explorer and then locate the following folder on your computer: C: /Program Files/Common Files/System/Msmapi1033
Now find Fixmapi.exe and double click it
After that locate the Mapi32.dll file and rename it to MSmapi32.old and press enter.
Restart your computer when finished.
A word of advice for computer users is to scan for viruses with an antivirus program or a registry cleaner regularly to prevent the Mapi32.dll Outlook error from occurring in the first place. Viruses often latch onto .dll files and corrupt them.
It’s always best to have a forward-looking approach.
As you know, each one of the applications that you use in your Windows 10 computer has its own set of permissions by default. These applications either allows or denies the interactions between a few other applications, depending on their own needs. This is why you might suddenly encounter a message that says,
“This app wants to access your pictures”or“This app wants to access your account info”
both of which are followed by two buttons that will ask you to Allow or Deny the action. You can always click on any of the given options. This will determine the permission of the application.
Users in Windows 10 are given the option to either allow or deny applications in accessing their account information like name, picture and other account information. Thus, in this post, you will be guided on how you can change the Privacy settings of these apps to allow or deny them permission to access not just your account info but for all users, as well as specific apps in Windows 10.
The user account information is part of the Privacy data in Windows 10 that you can control easily using the Settings app. In fact, you can revoke or grant access permission for your account information, all the users and specific applications to do that, follow each one of the instructions provided below carefully.
Allow or deny apps permission to account info for yourself:
Step_1: The first thing you have to do is open Settings. From there, select Privacy.
Step_2: After that, scroll and look for Account info and select it.
Step_3: Now turn off the toggle button for the “Allow apps to access your account info” option if you want to deny apps permission to your account info. But if you want to allow them access, simply turn the toggle button on. Keep in mind that when you allow access or permission, you can select which apps can access your picture, name, and other account info by simply using the settings on the page you’re currently in.
Now if you want to allow or deny apps to access your account info for all the users, here’s what you have to do:
Step_1: First, open Settings and click on the icon for Privacy.
Step_2: Next, scroll down until you see the Account info located on the left side and then click on it.
Step_3: After that, click on the Change button under the “Allow access to account info on this device” section. If you want to deny account info access for all other users, then turn the toggle button off. Doing so will automatically disable not just the account info access for all users but also for all the apps as well.
On the other hand, if you want to allow or deny account info access to specific apps, you can do so by following these steps:
Step_1: As you did earlier, go to Settings and click on the Privacy icon.
Step_2: After that, scroll down and select Account info located on the left side.
Step_3: Now turn on or off the toggle button under the “Choose which apps can access your account info” section if you want to deny or allow specific apps permission to access Account Info. If you’ve turned on the toggle button under the “Allow apps to access your account info”, all the apps get access permissions by default.
The World of Superhero movies has gone through some interesting variations, from good ones to bad ones, from big-budget ones to small ventures, even from large well-known characters to niche ones.
No matter what you think of some of them no one would disagree that since the release of Iron Man and starting Marvel cinematic universe superheroes movies exploded in popularity.
Following the Superhero craze, let’s see what is coming up in comic books transferred to big screens with their release dates.
List of upcoming movies
Shang-Chi and the Legend of the Ten Rings, Sept. 3, 2021Trailer
Venom: Let There Be Carnage, Oct. 15, 2021Trailer
Eternals, Nov. 5, 2021Trailer
Spider-Man: No Way Home, Dec. 17, 2021Trailer
Morbius, Jan. 28, 2022Trailer
The Batman, March 4, 2022Trailer
Doctor Strange in the Multiverse of Madness, March 25, 2022
Thor: Love and Thunder, May 6, 2022
DC League of Super-Pets, May 22, 2022
Black Panther: Wakanda Forever, July 8, 2022
Black Adam, July 29, 2022Trailer
Spider-Man: Into the Spider-Verse 2, Oct. 7, 2022
The Flash, Nov. 4, 2022
The Marvels, Nov. 11, 2022
Aquaman and the Lost Kingdom, Dec. 16, 2022
Error 0xe06d7363 is displayed when a process or an operation is not launched, or completed by an application.
This error can prevent the user from performing some operations. It might close the application unconditionally. Sometimes a ‘GetLastError()’, a ‘GetExceptionCode()’, or a ‘GetExceptionInformation()’ is displayed with this error.
Error Causes
Error 0xe06d7363 can occur for a number of reasons. Damaged, corrupted, or missing files in the registry database are the main reasons why the error might occur. Another reason is when the system files are not configured correctly, thus they corrupt system files in applications. They can also affect the hardware devices.
All code-generated exceptions in the Microsoft Visual C + + compiler will contain this error. As this error is compiler-generated, the code will not be listed in Win32 API header files. This code is a cryptic device, with ‘e’ for exception while the final 3 bytes represent ‘msc’ ASCII values.
Further Information and Manual Repair
To resolve this error, you will have to debug an application. While using Microsoft Visual Studio, you can stop the program when the error 0xe06d7363 occurs. To start debugging, follow these steps:
Start debugging application
From Debug menu, click on Exceptions
In the Exceptions window, select error 0xe06d7363
In Action, Change to Stop always from Stop if not handled
Another fix for this issue is reverting back to an earlier copy or the last update of the same Windows. Error 0xe06d7363 can occur is when you try running a client application using Microsoft.SqlServer.Types.dll component on your computer that has Microsoft SQL Server 2008 Server Pack 2 installed. With the error, the following text can be seen:
“unable to load DLL ‘SqlServerSpatial.dll’ Exception from HRESULT 0xe06d7363".
A Cumulative Update 7 was initially released for SQL Server 2008 Service Pack 2 in order to fix this issue. Since the builds are cumulative, every new fix released contains hotfixes and all security fixes which were also included in the previous SQL Server 2008 fix release. This error can be found in all Microsoft products that are listed in the Applies to Category.
Microsoft SQL Server 2008 hotfixes are created to resolve errors like 0xe06d7363 on specific SQL Server service packs. This error is by design and has commonly occurred in the previous versions of Windows before Windows 7.
Congratulations, you have just fixed Error 0xe06d7363 in Windows 10 all by yourself. If you would like to read more helpful articles and tips about various software and hardware visit errortools.com daily.
Now that’s how you fix Error 0xe06d7363 in Windows 10 on a computer. On the other hand, if your computer is going through some system-related issues that have to get fixed, there is a one-click solution known as Restoro you could check out to resolve them. This program is a useful tool that could repair corrupted registries and optimize your PC’s overall performance. Aside from that, it also cleans out your computer for any junk or corrupted files that help you eliminate any unwanted files from your system. This is basically a solution that’s within your grasp with just a click. It’s easy to use as it is user-friendly. For a complete set of instructions in downloading and using it, refer to the steps below
Perform a full system scan using Restoro. To do so, follow the instructions below.
Download and install Restoro from the official site.
Once the installation process is completed, run Restoro to perform a full system scan.
After the scan is completed click the “Start Repair” button.
Many Minecraft players are experiencing Realms internal server error 500, luckily for all of that players, we are offering you solutions.
Preliminary Fixes
Before heading towards the fixes here it is suggested to try some quick tweaks that might work in your case to fix Minecraft Internal Server Error 500.
Restart your PC – Very first it is suggested to shut down your computer and after that restart the system. This worked for many players to get rid of the server outages issue.
Update your Windowsversion – Check if you are running an outdated Windows version then make sure to install the latest Windows update and then run the game.
Update Your Game Version – Also make sure you are running an updated version of Minecraft Realms. Installing the latest updates not only makes the game more stable but also helps you to solve common glitches and issues with the game. So, check if any recent updates are available to make sure to download and install them
Modify the Game Settings – Check if you have tweaked some of the game settings then this might be the reason for the problem. So try to reconfigure the settings to default. This may work for you.
Now after following the preliminary solutions check if the Minecraft Realms Internal Server Error 500 is resolved or else head to the next solution.
Check your Internet Connection
As said above if the internet connection is not working properly or it is preventing you from accessing the servers, then this can also cause the Internal Server Error 500 in the Minecraft server.
So, very first make sure your internet connection is stable and working properly. Also if you are using Wi-Fi then use a wired connection to get a stable network.
Moreover, if your internet connection is working fine then there is a possibility that your internet connection is causing interruption and preventing you from accessing the Minecraft Realms server.
So, if this is the case then here it is suggested to use a VPN connection to get exceptionally fast & reliable speeds without getting detected.
Check for the Minecraft Server Outage
Well, there is a possibility the Minecraft servers are down and if this is the case then you don’t have any other option than just waiting for the servers to get restarted and the service becomes available again.
Also, the service outages can affect the ability of the game and as a result, you are unable to play the game. Additionally, you can also inquire about Minecraft’s server status by visiting the Downdetector website.
But if you find the services are running fine then the issue is from your side.
Disable Background Applications
If you are still getting the Minecraft Realms Internal Server Error 500, then there are chances that other applications running in the background are causing a limit to your internet bandwidth.
It is suggested to disable the internet-connected apps and after that try connecting to Microsoft Realms again.
Hit CTRL + SHIFT + ESC keys > to open the Task Manager.
Then under the Process tab,> right-click on unwanted background process, > click on the End Task
After disabling the applications running in the background, relaunch Minecraft and check if the internal server error 500 still appears or not.
Delete UUID Files in Minecraft
If you are still getting the Minecraft Realms Internal Server Error 500 then here it is suggested to delete the UUID files in Minecraft.
First, visit the website by clicking the https://mcuuid.net/ and enter all the credentials to get the player’s UUID
Then login to the server > proceed to server files > head to the world
Here locate the PlayerData folder > click to open it.
And from here choose the file containing the same name like the player’s Username or UUID > after that hit the Delete
Lastly, restart your server to save the changes
Remove Resource Packs & Mods
If you are getting the Minecraft realms internal server error 500 after the installation of a particular mod or the resource pack then this is what causing the issue while playing the realm.
So, here it is suggested to delete it immediately, also uninstall the mod as well as the resource pack you installed recently.
It is estimated this works for you but if you have a doubt related to any specific mod or the resource pack causing an error you should uninstall then also and check if the Minecraft internal error 500 is fixed.
Disable the Plugins
If you are still encountering the error then check for the plugins installed on your PC. Many times the installed plugin starts causing issues with the game as they are not compatible with the game version.
So here it is recommended to try disabling the plugins on the PC and check if this works for you.
On your system > open the plugin window > rename the plugins files from “[plugin name].jar to [plugin name].jar.disabled”.
Next restart the server and check if the Minecraft Realms Internal Server Error 500 problem is resolved or not.
Uninstall & Reinstall Minecraft
If none of the above-given solutions works for you then here it is suggested to uninstall and reinstall Minecraft.
Well, it is suggested to uninstall the game using the third-party uninstaller. Manually uninstalling the program won’t remove it completely, some of its registry entries, junk files are left behind and causes interruption when the next time you install it.
If you are looking to uninstall it manually then follow the steps given:
Hit Window + R key > to open the Run box
And in the run box type appwiz.cpl command > hit Enter
Now the application manager window pops up on your screen > locate the Minecraft application > right-click to Uninstall
And as the uninstalling process is completed > head to the Minecraft official website and tries downloading and installing the game.
Check if the Minecraft Realms Internal Server Error 500 is resolved or not.
Contact Support Center
If after trying all the solutions given you are still unable to fix the error then the only option left is to contact the Customer Support Center and fill the form in the link and describe the problem in a detailed way.
And within few days you will get feedback from them to fix Minecraft Realms internal error 500.
Have you ever deleted a file by mistake? Do not feel bad, we all have, but what if you deleted the file by mistake and then you went to Recycle bin to restore it only to find out that the bin is empty?
If you experienced this kind of issue then you know how unpleasant and frustrating it is but do not worry, we are here to help and provide you with solutions to this problem and hopefully get your file back.
Follow the next steps from first to last since they are organized in a way to minimalize the permanent deletion of lost files.
Refresh Recycle bin view
If you spend any amount of time on this site reading through articles, you know I am a big fan of simple and effective solutions and there is nothing simpler than a single press of a button. Open your recycle bin and press F5 to refresh view or right-click anywhere inside and choose refresh. If your file does not appear with this method go to the next step.
Set Windows to show hidden system files
In order for this to work first, you will need to open File Explorer by pressing ⊞ WINDOWS + EWhen File Explorer opens go to VIEW > OPTIONS. Inside options select “Show hidden files, folders, and drives”, uncheck “Hide protected operating system files (Recommended)”, and click APPLY > OK
Go to the recycle bin and check to see if files have managed to show up.
Check if Don't move the file to the recycle bin is enabled
Right-click on recycle bin and choose properties, under properties, there is the option that says Don’t move files to the Recycle Bin, Remove files immediately when deleted. This option is not selected by default, but it could be turned on by someone else or by mistake. If you see that this option is enabled sadly your file is gone and you will have to get the file back by using some third-party undelete application, uncheck this option to prevent future deletion of files by mistake.
Increase recycle bin size
This will not help you to get your file back sadly but it will help you in storing more files in recycle bin. This is helpful since if you reach your recycle bin limit all further files will be permanently deleted and not been able to get them back. So by increasing bin size you will have more space for deleted files to be saved. To do that, right-click on Recycle Bin, select Properties. Now, increase the Maximum size from the Custom size option, and click Apply and OK.
Reset recycle bin
To reset and fix corrupted recycle bin do the following:
Press ⊞ WINDOWS + X to open the secret Windows menu and click on command prompt (admin)In the command prompt type in the following: rd /s /q C:\$Recycle.binReboot your system
Still sitting on the fence about upgrading to Windows 11 because you don’t know what to expect? Interestingly, the new edition somehow manages to be both a total revamp and still very similar to its predecessor in many ways. It’s really something to experience for yourself.
We do want to give you a sneak peek, though. So here’s an overview of the biggest changes Windows 11 brings to the table.
What’s different in Windows 11?
1. Visual changes
The first thing anyone will notice after switching to Windows 11 is the striking visual difference. The entire interface is smoother, cleaner and more minimalistic than on Windows 10, even resembling the macOS in some instances. Perhaps the most obvious change in appearance is the Start menu and Taskbar location, which is now at the bottom center. It’s actually very neat, but if you’re someone who loves familiarity, don’t worry, you can move it back to the left.
Centralized Taskbar and Start menu
Moreover, you’ll notice that the Taskbar includes a Microsoft Teams icon by default (which you can, of course, remove) and that Live Tiles are gone. The News and Interests section has also been removed - or, shall we say, replaced. As opposed to Windows 10, news, weather forecasts and other information are now displayed as widgets.
To add to the cleanliness of the UI, Microsoft also enhanced the ‘Snap Layouts’ feature to help you better organize your windows and maximize screen real estate. It’s similar to app grouping on your smartphone. In Windows 10 this feature is slightly restricted, as it requires some manual resizing and dragging. In Windows 11, you can just hover over the minimize/maximize option on a window, select a layout and throw the windows in there.
Snap Layouts
2. New accessibility features
Microsoft has certainly paid attention to accessibility with Windows 10, but Windows 11 takes this to a whole new level.
One of the ways Windows 11 has taken things up a notch is by adding the long-awaited ‘Live Captions’ feature and advanced Narrator options.
Live Captions apply both to media played on your PC as well as your own speech when you’re using the microphone. Keep in mind that, as with almost all kinds of subtitles, you have to be prepared for a potential delay. However, it’s barely noticeable and doesn’t take away from the usefulness of this awesome new feature whatsoever.
As for the Narrator, there are three new voice packs to choose from. Microsoft has tried to put emphasis on a more natural voice than we are used to. So, now you can choose between Aria, Jenny and Guy, who will read pretty much anything off your screen out loud. Aside from this, Microsoft has also expanded the list of braille displays supported by the Narrator feature. For users with anxiety or trouble concentrating, a welcomed addition is the Focus app, which is no longer part of the Clock app. It’s now separate and called ‘Focus Sessions’, automatically triggering the Do Not Disturb mode when activated. It blocks all pop-ups and flashes and lets you work in peace until you’re ready to switch it off.
3. Android apps
Android users may rejoice! Windows 11 supports the use of your favorite applications now.
Microsoft has done this by integrating the Amazon Appstore to the Windows 11 Microsoft Store. From there, you can download your favorite Android apps and use them on your PC in a smartphone-like window.
Unfortunately not too many apps are supported at this time, but Microsoft is working on making the emulation possible for many more. Also, the option is only available in specific regions at this moment - check out if you’re one of the lucky ones.
4. Improved gaming performance
Avid gamers will be happy to hear that Microsoft has put some effort into streamlining Windows 11 for their gaming needs.
To give gamers a supreme visual experience, Windows 11 offers the ‘Auto HDR’ feature. As long as your monitor is HDR-compatible, this feature will automatically adjust the colors, brightness and contrast of games without any input from you.
Another update is DirectStorage, which we were introduced to in Windows 10 already. In Windows 11, it’s been improved to tweak loading times and overall gaming performance efficiency even better. The predisposition for it to work optimally is that your device has an NVMe SSD.
The Xbox Game Bar also helps gamers towards a smoother experience. It allows in-game screenshots, viewing processes that are running (similar to the Task Manager), monitoring the CPU and GPU performance and frame rate, integrating the Xbox App and more. There’s also a number of widgets you can now use with the Game Bar, for example the Spotify widget.
Xbox Game Bar
Another cool addition is the Xbox Game Pass, which unlocks hundreds of games to play on your Xbox App, with new additions coming in every month.
5. Smart App Control
Aside from a sleek new look and better accessibility for all users, Windows 11 also comes with a security power-up. Bear in mind that this feature is only available on clean Windows 11 installs.
Smart App Control (SAC) is an AI-powered new feature designed to protect your PC from potential threats. It blocks untrustworthy apps and adware and helps detect potentially unwanted apps, maintaining your PC’s performance and keeping your system safe.
It comes with an ‘Evaluation’ mode, which you should definitely select when running SAC for the first time. That way, the app monitors your usage and assesses whether you’re a candidate for SAC. Some users need it to be on all the time, for others it might be too distracting. Evaluation mode will turn SAC on or off based on your usage.
Don’t disable SAC again unless you’re absolutely sure you don’t need it, since reenabling it will require a fresh install. We recommend you don’t turn it off, as it is a neat feature protecting your data and files from malware at all times.
Summary
Have we piqued your interest in trying Microsoft’s latest OS? It’s a pretty exciting new iteration, but we’ll let you find out for yourself. We hope you like it!
Error code 0x80240017 is associated with installing or updating a Windows Store app. This error is more common in Windows 8 and Windows 8.1. It appears due to missing certain system files and also corrupt registry.
Common symptoms
When you try to install a Windows Store app on a PC running Windows RT 8.1, Windows 8.1, or Windows Server 2012 R2, the installation fails and you receive an error message: 0x80240017
Certain apps may become unresponsive.
You may not be able to download apps or Windows update
You may have difficulty updating or installing and uninstalling other built-in programs inside Windows 8 and Windows 8.1.
When you have multiple applications running, you may experience crashes and freezes.
Solution
Error Causes
The error code 0x80240017 in Windows 8.1 or Windows 8 usually appears due to the fact that your system has changed after you installed a third-party application. It might also appear if registry entry has changed after a reboot of the operating system and you do not have the required permissions. Other causes may be due to:
Corrupted, broken, or missing system files.
Malware/spyware infection or virus attack
Hardware/RAM decline
Fragmented file
Unnecessary or redundant program installations
Further Information and Manual Repair
Repairing Error Code 0x80240017 in Windows 8/Windows 8.1
Method 1:
Resetting Windows Store app:
Press and hold the Windows key and press R. This will open up the Run command
Now, type exe and hit Enter
Just wait for it to finish and it will re-launch Windows Store. Now, try and install the app you were trying to install which was previously showing an error.
This basic solution will delete the cache and reset Windows Store.
Method 2:
Using Windows troubleshooter:
Click on Search on the Charm bar and type Troubleshooting. Click on the very first option.
A new window will open. Click View all from the left pane.
Scroll down to the bottom and click on Windows update.
Troubleshooter window for Windows update will pop up. Click on NEXT. It may ask you for administrative permission.
The troubleshooter will automatically detect problems and fix them.
Now, close this window and try download/install the app which was previously showing an error.
Method 3:
Disable Proxy Settings:
Disable proxy server on Internet Explorer
Press the Windows + R Run window will appear.
Type cpl and hit Enter
Click the Connections tab and click LAN settings
Under proxy server uncheck “Use a proxy server for your LAN”
Click OK
Now try to install apps from Windows Store.
Method 4:
Boot in Safe Mode:
Open Run command as previously described
Type MSConfig
Click on the Boot tab
Tick Safe boot in Boot option
Select Network
Click Apply and OK
Reboot your system
Your system will boot in Safe mode with Networking. You may now try and open Windows Store and should not see any errors.
Method 5:
Note: It is recommended that you back up your files and folders before attempting this step:
Move the mouse cursor over to the upper right side of the screen.
A menu will pop up on the left. Click on the “Settings” feature on the menu.
On the Settings window, click on the “Change PC settings.”
Now, left-click on the “Update and recovery” feature.
For the next step, left-click on the “Recovery” feature.
There is an option here saying “Refresh your PC without affecting your files.” There, left-click on the “Get started” button.
Now, follow the instructions on the screen to finish the Refresh process.
After the Refresh process has finished restart your Windows 8.1 or Windows 8 device.
Check again to see if the error 0x80240017 has been fixed.
If you do not possess the technical expertise required to accomplish this yourself or do not feel comfortable doing so, download and install a powerful automated tool to get the job done.
There are times when you encounter some issues while your Windows 10 computer. One of the errors you can encounter in the update process is the “Something went wrong, error code 0x8007042B”. This kind of error might be caused by several reasons and it could also pop up in lots of cases like upgrading to a new feature update or a new build using the Media Creation tool or Windows Update Assistant.
There are times when the Windows Update error code 0x8007042B is followed by another error code like 0x2000d. Whatever the extra error code that follows, the core issue still remains the same. To resolve the problem, here are some options that could help. And while going over these troubleshooting tips, you have to keep clicking the Update button right after you carry out a troubleshooting option.
Option 1 – Try to restart the Background Intelligent Transfer Service
The Background Intelligent Transfer Service or BITS is a part of the Windows Update service and is the one that manages the background download of Windows Update, as well as scans for new updates and so on. And if Windows Update is experiencing some problems, you can try restarting BITS but make sure that you have admin privileges to do so.
Tap the Win + R keys to open the Run dialog box.
Next, type “services.msc” in the field and hit Enter to open Windows Services.
From the list of Services, look for the Background Intelligent Transfer Service and double-click on it to open Properties.
After that, you need to set the Startup type to “Automatic (Delayed Start) and click on Apply.
Now click the Stop button to stop BITS and then click the Start button to restart the service.
Click OK to save the changes made and then restart your PC.
Option 2 – Try creating Windows 10 ISO media
In this option, you will have to create a Windows 10 bootable media and use it to install the latest Windows 10 version. The most user reported that this option works and the reason why it does have something to do with the Windows Update client since the Windows Updates downloaded from the regular Windows Update client seems to create issues such as the Windows Update error code 0x8007042B. However, issues like this one don’t occur when the very same Windows Updates are downloaded and installed via an ISO file. Take note that when using a Windows ISO file, you will be asked to choose what you want to do with the previous settings and apps. A lot of users opted for the “Not to keep the old Windows settings” option which has resolved the issue. So if you want to keep the previous settings then you must try to update Windows first while keeping the old settings. However, if it doesn’t work, you have to try installing the latest version of Windows without keeping the previous settings.
Click this link and then click the Download Tool Now button.
Next, click the “Use the tool to create installation media (USB flash drive, DVD, or ISO file)…” option and follow the next given instructions on the screen.
Now select the ISO file option in step 5.
After that, you should now have an ISO file.
Next, go to the location where you’ve downloaded the ISO file.
Then right-click on the Windows 10 ISO file and select the Open with option and then select File Explorer.
Now click on “setup.exe” and follow the next instructions that appear on the screen. When asked, you have to select either the Nothing (clean install) or the Keep personal files only option. Take note that you must not select the “Keep personal files, apps, and Windows settings since it doesn’t really work.
Option 3 – Run the DISM tool
You can run the DISM tool as well to help fix the error code 0x8007042B during Windows Update. Using this built-in tool, you have various options such as the “/ScanHealth”, “/CheckHealth”, and “/RestoreHealth”.
Open the Command Prompt with admin privileges.
Then type in the following commands and make sure to hit Enter right after you type each one of them:
Dism /Online /Cleanup-Image /CheckHealth
Dism /Online /Cleanup-Image /ScanHealth
exe /Online /Cleanup-image /Restorehealth
Do not close the window if the process takes a while as it will probably take a few minutes to finish.
Option 4 – Perform a System File Checker scan
The SFC or System File Checker scan could detect and automatically repair damaged system files that could be causing the Windows Update Error 0x8007042B to appear. SFC is a built-in command utility that helps in restoring corrupted files as well as missing files. It replaces bad and corrupted system files with good system files. To run the SFC command, follow the steps given below.
Tap Win + R to launch Run.
Type in cmd in the field and tap Enter.
After opening Command Prompt, type in sfc /scannow and hit Enter.
The command will start a system scan which will take a few whiles before it finishes. Once it’s done, you could get the following results:
Windows Resource Protection did not find any integrity violations.
Windows Resource Protection found corrupt files and successfully repaired them.
Windows Resource Protection found corrupt files but was unable to fix some of them.
Option 5 – Run the Windows Update Troubleshooter
You might also want to run the Windows Update Troubleshooter as it could also help in fixing Windows Update Error 0x8007042B. To run it, go to Settings and then select Troubleshoot from the options. From there, click on Windows Update and then click the “Run the troubleshooter” button. After that, follow the next on-screen instructions and you should be good to go.
Option 6 – Contact Microsoft Support for assistance
If you’re at your wits’ end in trying to update your Windows 10 computer, you should consider contacting Microsoft Support for help as they can offer you various options that would make fixing Windows Update Error 0x8007042B a lot easier and faster.
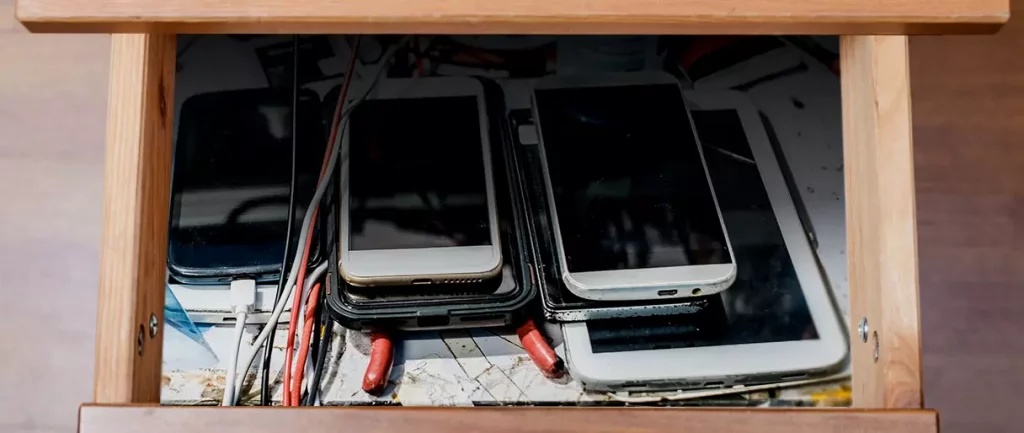
Hello all the wonderful people and welcome to our new article where we take a little different turn than usual and discuss why keeping old electronics around the house is not such a good idea. We all have some drawer or in some bag around the house and in the end of the day if that electronic has battery inside it is probably not the smart thing to keep it.
So naturally, the question comes why it is a bad idea to have old electronics with batteries in them? Well unlike a battery failure with, say, some AA batteries jammed in the back of an old toy, the risk with a lithium-ion battery failing isn’t just some leaking and corrosion in the battery compartment, it’s a potential fire as the battery swells up and the gases (combined with the stored energy) turn the battery into a potential fire hazard.
Good thing is that the battery will not explode just like that, it will swallow over time and get bigger and bigger until the breaking point is reached and all the fire breaks lose. So if by any chance you have some old gadgets lying around you can check up on them and see if has swelling process started, if yes, dispose properly of that piece of the old device immediately.
How to keep old electronics
If you’re not ready to get rid of the gadget then it’s best to charge it properly for storage. Proper charging keeps the battery cells and circuits in optimum health.
While recommendations vary by manufacturer and application, the general consensus is that lithium-ion batteries should be charged to approximately 40%. (Some manufacturers recommend charging 50% or 60% instead.)
Really, the important part here isn’t the exact percentage. What’s important is ensuring that the battery is charged to roughly half capacity and not stored with a completely discharged or completely full battery.
Discharge rates on lithium-ion batteries in completely powered-off devices are very slow, but you should still plan to top off the charge every 12-18 months or so to keep it around 50%.
If you wanted to go above and beyond, a metal storage container with a snug lid on a basement shelf with a desiccant pack inside to control the moisture would offer optimum conditions.


 Error Causes
 The World of Superhero movies has gone through some interesting variations, from good ones to bad ones, from big-budget ones to small ventures, even from large well-known characters to niche ones.
No matter what you think of some of them no one would disagree that since the release of Iron Man and starting Marvel cinematic universe superheroes movies exploded in popularity.
Following the Superhero craze, let’s see what is coming up in comic books transferred to big screens with their release dates.
The World of Superhero movies has gone through some interesting variations, from good ones to bad ones, from big-budget ones to small ventures, even from large well-known characters to niche ones.
No matter what you think of some of them no one would disagree that since the release of Iron Man and starting Marvel cinematic universe superheroes movies exploded in popularity.
Following the Superhero craze, let’s see what is coming up in comic books transferred to big screens with their release dates.


 When File Explorer opens go to VIEW > OPTIONS. Inside options select “Show hidden files, folders, and drives”, uncheck “Hide protected operating system files (Recommended)”, and click APPLY > OK
Go to the recycle bin and check to see if files have managed to show up.
When File Explorer opens go to VIEW > OPTIONS. Inside options select “Show hidden files, folders, and drives”, uncheck “Hide protected operating system files (Recommended)”, and click APPLY > OK
Go to the recycle bin and check to see if files have managed to show up. In the command prompt type in the following: rd /s /q C:\$Recycle.bin
Reboot your system
In the command prompt type in the following: rd /s /q C:\$Recycle.bin
Reboot your system