Logo

Fix Generic PnP monitor driver issue

Universal PnP or plug-and-play monitors use a generic PnP Windows driver.

Whenever a user plugs a USB device or monitor into a PC the system will automatically identify the device and it will install the proper driver for smooth running.

Generic PnP Monitor in Windows 10 means that Windows 10 installed a monitor driver as the PNP did not recognize the device. This generic PnP monitor driver may not work perfectly like the manufacturer’s one.

It can lead to issues like unable to set the best monitor resolution and the screen refresh rate. Therefore, it is important to fix this issue.

All of that being said let us fix your PnP display driver issue.

  1. Reconnect monitor

    Always try this first, just by unplugging the monitor and then plugging it back may resolve the issue, if the monitor was not detected properly the first time, there are very high chances that this method will resolve the issue.

  2. Check if the Device Manager is reporting an error and update the driver

    If the hardware is functioning properly then the issue might be in Windows not detecting device or driver malfunction. In any case, the Device Manager will be the one who will report this problem. In order to check to see if the driver is properly working press ⊞ WINDOWS + X to open the hidden start menu.
    keyboard with windows and x marked
    Once it opens, click on Device Manager to open it,
    If you have a driver device error inside Windows, you should see it immediately when entering the Device Manager, it will have a yellow exclamation mark beside it. Right-click on it and choose update driver.

  3. Reinstall driver

    If driver update failed or you already have the latest drivers, reinstalling them could fix the issue since drivers might have corrupted during installation of some update or application. Follow steps from point 3 to get to the driver in Device Manager, then right-click on it but instead of update choose to uninstall. Reboot Windows once the driver is uninstalled and Windows will install a new one automatically. If you do not want to update drivers automatically install the latest driver for your device, then reboot.

  4. Check Windows update

    Check to see if the latest Windows update is installed, update your Windows if needed

  5. Fix driver issue with DRIVERFIX

    If everything else fails, get DRIVERFIX, a premium solution for your PC issues, and fix driver errors.

Do You Need Help with Your Device?

Our Team of Experts May Help
Troubleshoot.Tech Experts are There for You!
Replace damaged files
Restore performance
Free disk space
Remove Malware
Protects WEB browser
Remove Viruses
Stop PC freezing
GET HELP
Troubleshoot.Tech experts work with all versions of Microsoft Windows including Windows 11, with Android, Mac, and more.

Share this article:

You might also like

Choose what application will load on startup
Hello everyone and welcome to another great tutorial from errortools.com I hope everyone is feeling great and that you are prepared to boost the performance of your computer. This time we will speed up Windows startup time and overall performance by eliminating startup programs that we don't need and do not use. Microsoft itself and some application developers tend to have some applications or some services always active and set to be loaded on Windows startup. If you want to change which of these applications are starting up with your Windows and change them, follow this easy guide and you will be speeding up your Windows in no time. First thing is to open a task manager, fastest and most direct way of doing this is with a keyboard combination of CTRL + SHIFT + ESC keyboard with ctrl shift and esc markedWhen Task Manager opens, click on the startup tab on top. task manager startup tabOnce you click on startup you will get a list of applications that are set to be started when Windows is booted. startup applicationsYou can now click on the application and then click on disable on the bottom button, the application status will update in task manager to disabled and it will not be booted anymore when Windows starts. In this same manner, you can enable back some applications if you changed your mind about them. Please note that some applications are using some services and must have them running or they will not work properly. The best practice is to disable applications you are positive you will not use or use rarely so you do not want them to slow down Windows.
Read More
Should you use the Faraday bag

Faraday bag is a new take on security and privacy for people using a lot of electronic devices and credit cards. So what is exactly a Faraday bag?

faraday bag

Faraday bag explained

Faraday bag is designed in the same manner as the Faraday cage which was invented by Michael Faraday, who was an English scientist who contributed to the study of electromagnetism and electrochemistry. His main discoveries include the principles underlying electromagnetic induction, diamagnetism, and electrolysis.

The idea of the Faraday cage is that anything inside a cage that is made of specific grid size is completely isolated from outside current and magnetic fields since the cage itself will pick up everything upon itself. This means that for example, a human could be inside a cage that is struck by lightning and be perfectly safe and fine.

This idea led to the Faraday bag design, which takes this concept and places a wiring pattern inside clothing in order to isolate all magnetic fields from the outside so your devices and cards are completely cut off from any kind of influence and electromagnetic waves. If the pattern and quality of material for the bag are good, you have a fully safe placeholder for your stuff.

Advantages of Faraday bag

The main advantages, of course, are the privacy and safety of mobile phones and credit cards from outside influences and this is why this bag has been designed in the first place. If the bag is designed properly your phone would not be able to be hacked nor accessed from any outside source, GPS tracking will also be disabled and your phone location will not be visible. Credit cards will also be completely safe from any malicious attack via wi-fi signals.

Disadvantages of bag

Well, the disadvantage of using this bag is a very simple one, since your phone is isolated from outside influence that will also mean that you will not be able to take messages or calls on it while it is in the bag. Notifications from the internet would also be disabled so it is security vs usability deal.

Read More
The Extended Attributes Are Inconsistent Error
One of the most critical errors inside your Windows operating system is The Extended Attributes Are Inconsistent error. This error means that your operating system has been corrupted and it may produce many annoying issues like for example time lags, random crashes, and even freezing of the system when running multiple applications. There are a lot of reasons for this error, from the registry to faulty application installations to sometimes even hardware issues like bad RAM memory or bad hard drive. Mostly issue is due to corrupted files inside Windows and most often people only think that resetting the PC or complete reinstallation is the only way to fix this problem. Although reinstalling the system or resetting the PC will solve this error for sure there are other less time-consuming ways to fix this error. The Extended Attributes Are Inconsistent Error
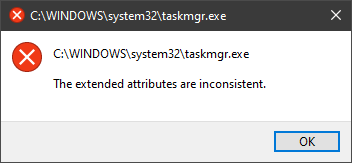
In this guide, we will show you common ways in fixing Extended Attributes are inconsistent errors inside your Windows that are easy to do and less time-consuming than complete reinstallation of the system.

Fixing Extended Attributes Are Inconsistent error

Run SFC scan

  1. Press ⊞ WINDOWS + X to open the hidden menu
  2. Click on command prompt (admin)
  3. In command prompt type in SFC /scannow and press ENTER
  4. Wait for the operation to complete
  5. Reboot your PC

Use System Image Repair Tool

  1. Press ⊞ WINDOWS + X to open the hidden menu
  2. Click on command prompt (admin)
  3. In command prompt type in Dism /Online /Cleanup-Image /RestoreHealth and press ENTER
  4. Wait for the operation to complete
  5. Reboot your PC

Change all user accounts to the administrator

  1. Press ⊞ WINDOWS + R to open the run dialog
  2. Type in netplwiz and press ENTER
  3. Select a first user account and click on Properties
  4. Click on the Group Membership tab
  5. Choose Others from the options
  6. Select administrator (if all accounts are already administrators change all to users)
  7. Repeat process for all other accounts
  8. Click OK to save settings

Change Windows Sound scheme to default

  1. Right-click on the sound icon in the taskbar
  2. Click on Sound options
  3. Go to the Sounds tab
  4. In Sound Scheme click and choose Windows Default
  5. Under Program Events choose Windows User Account Control
  6. Click on the drop-down menu and choose None
  7. Click on Apply
  8. Click on OK

Downgrade the Sound driver

  1. Press ⊞ WINDOWS + X to open the hidden menu
  2. Click on Device Manager
  3. Find your Audio driver and right-click on it
  4. Click on uninstall and then on OK
  5. Reboot your system

Do System Restore

If none of the provided solutions have worked, perform a system restore to the last point where everything was working fine.

Reset PC

If even system restore has not solved the issue or you do not have valid point in system restore time, perform Reset this PC and hopefully, the error will be finally fixed.

Conclusion

If all of the provided methods have not managed to repair this error that checks your hardware, your computer might have some faulty components if after complete PC reset error persists.
Read More
Quick Fix Guide to Error 2032

What Is Error 2032?

Error 2032 is essentially the hexadecimal format of the error caused. This error code is actually a code format used by the Windows operating system. Manufacturers use this code to determine the cause behind the problem. This error is usually the result of the issues that arise with different applications. When this error occurs, individuals are not able to view multimedia content on their PC. They may also experience system crashes and this makes it crucial to resolve it.

Solution

Restoro box imageError Causes

Error 2032 is caused by problems in Windows system files. Improper registry entries may also cause this problem. Some of the common causes that trigger Error 2032 are improper deletion of hardware or applications. Similarly, incomplete hardware or application installations or uninstallations may also cause issues. These file errors are actually caused when a computer has recently been attacked by a virus, spyware, or malware or if the system is trying to recover from an unanticipated shutdown. Such activities often result in the corruption or deletion of registry entries in Windows system files. The corrupt files will obviously cause problems and the application will fail to perform correctly.

Further Information and Manual Repair

While there are several ways to solve this problem, some of the most useful and practical solutions are listed below as follows.
  • If you are an advanced user, this workaround is for you. First and foremost, restart your computer and log on to it as the administrator. Now click on the ‘Start’ button.  Now follow this path: All programs ->Accessories-> System Tools->System Restore. Once you choose to perform System Restore, you will come across options where you can select to ‘Restore your computer to an earlier time’. This option will appear in a new window. Click on it and then click Next. Click on the Next button again that appears in the confirmation window. Restart your computer after the restoration is finished. You have just resolved the error.
  • Another easier alternative to fix Error 2032 is for novice users. Download an Error 2032 repair utility. Install this program as you are most likely to come across a Scan button. If there is an option to fix and repair an error, select it after the scan is complete. You can then restart your computer again. Look for the error and you will realize that it has disappeared and that your system is now ready to use.
Read More
Upcoming Windows 11 features

22H2 update for Windows 11 will arrive later this year and although Microsoft is not releasing anything big there will be some interesting improvements and fixes. We take a look at some that caught our attention.

windows 11 new fetures full screen widgets

Phishing protection

One of the most interesting upcoming features is enhanced phishing protection. Microsoft Defender SmartScreen will be upgraded to alert users when they try to store passwords in plain text files and also if they accidentally type in a Microsoft account password on phishing sites.

"These enhancements will make Windows the world's first operating system with phishing safeguards built directly into the platform and shipped out of the box to help users stay productive and secure without having to learn to be their own IT department,"

Microsoft

File Explorer gets tabs, a modern sidebar, and contextual suggestions

Finally, Windows File explorer is getting tabs that will allow much easier management of folders and files inside it.

It is confirmed that Microsoft is also working on a new 'HOME' sidebar that should be modern in design and in features including OneDrive so you can find everything in one place.

Pinning of favorite files was also mentioned so you can easily pin favorites for quick access.

Full-screen widgets

Windows 11 has brought back widgets in a new way and from all the feedback users are loving them. Currently, you have a widget sidebar on the left part of the screen where you have your chosen store widgets but from the Microsoft teaser, we will have soon the option to have them in full screen.

If you are using a widget for reading news, blogs, etc. this feature will be very good since you will be able to use your whole screen for information and not just a part of it.

Suggested actions

Another new feature is 'suggested actions' which is going to be particularly useful in apps like Microsoft Teams. With this new feature, you can highlight a date in a Teams message and Windows will suggest actions.

For example, if you highlight a date, you'll see a recommendation to create an event in Microsoft Calendar for that day.

Read More
Installing Windows 11 on Raspberry Pi 4
A lot of controversies and mixed emotions have come from statements about Windows 11 minimum system requirements, especially ones linked to TPM. Naturally, each time some software company giant announces how things are must have there are people who go out and prove them wrong. This time Raspberry Pi community was one which demonstrated that not only Raspberry Pi does not have a TPM module, it can run the full desktop version of Windows 11

Windows 11 on Raspberry Pi 4
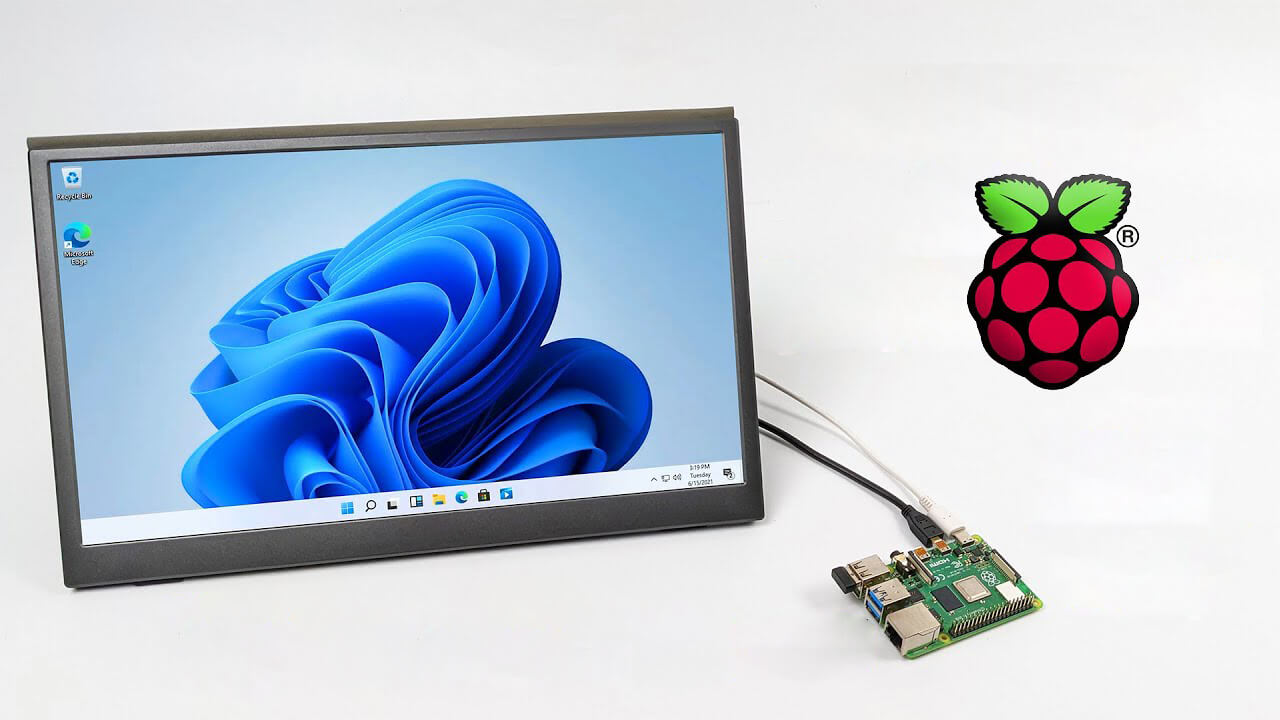
Raspberry Pi 4 and things you need for Windows 11 installation
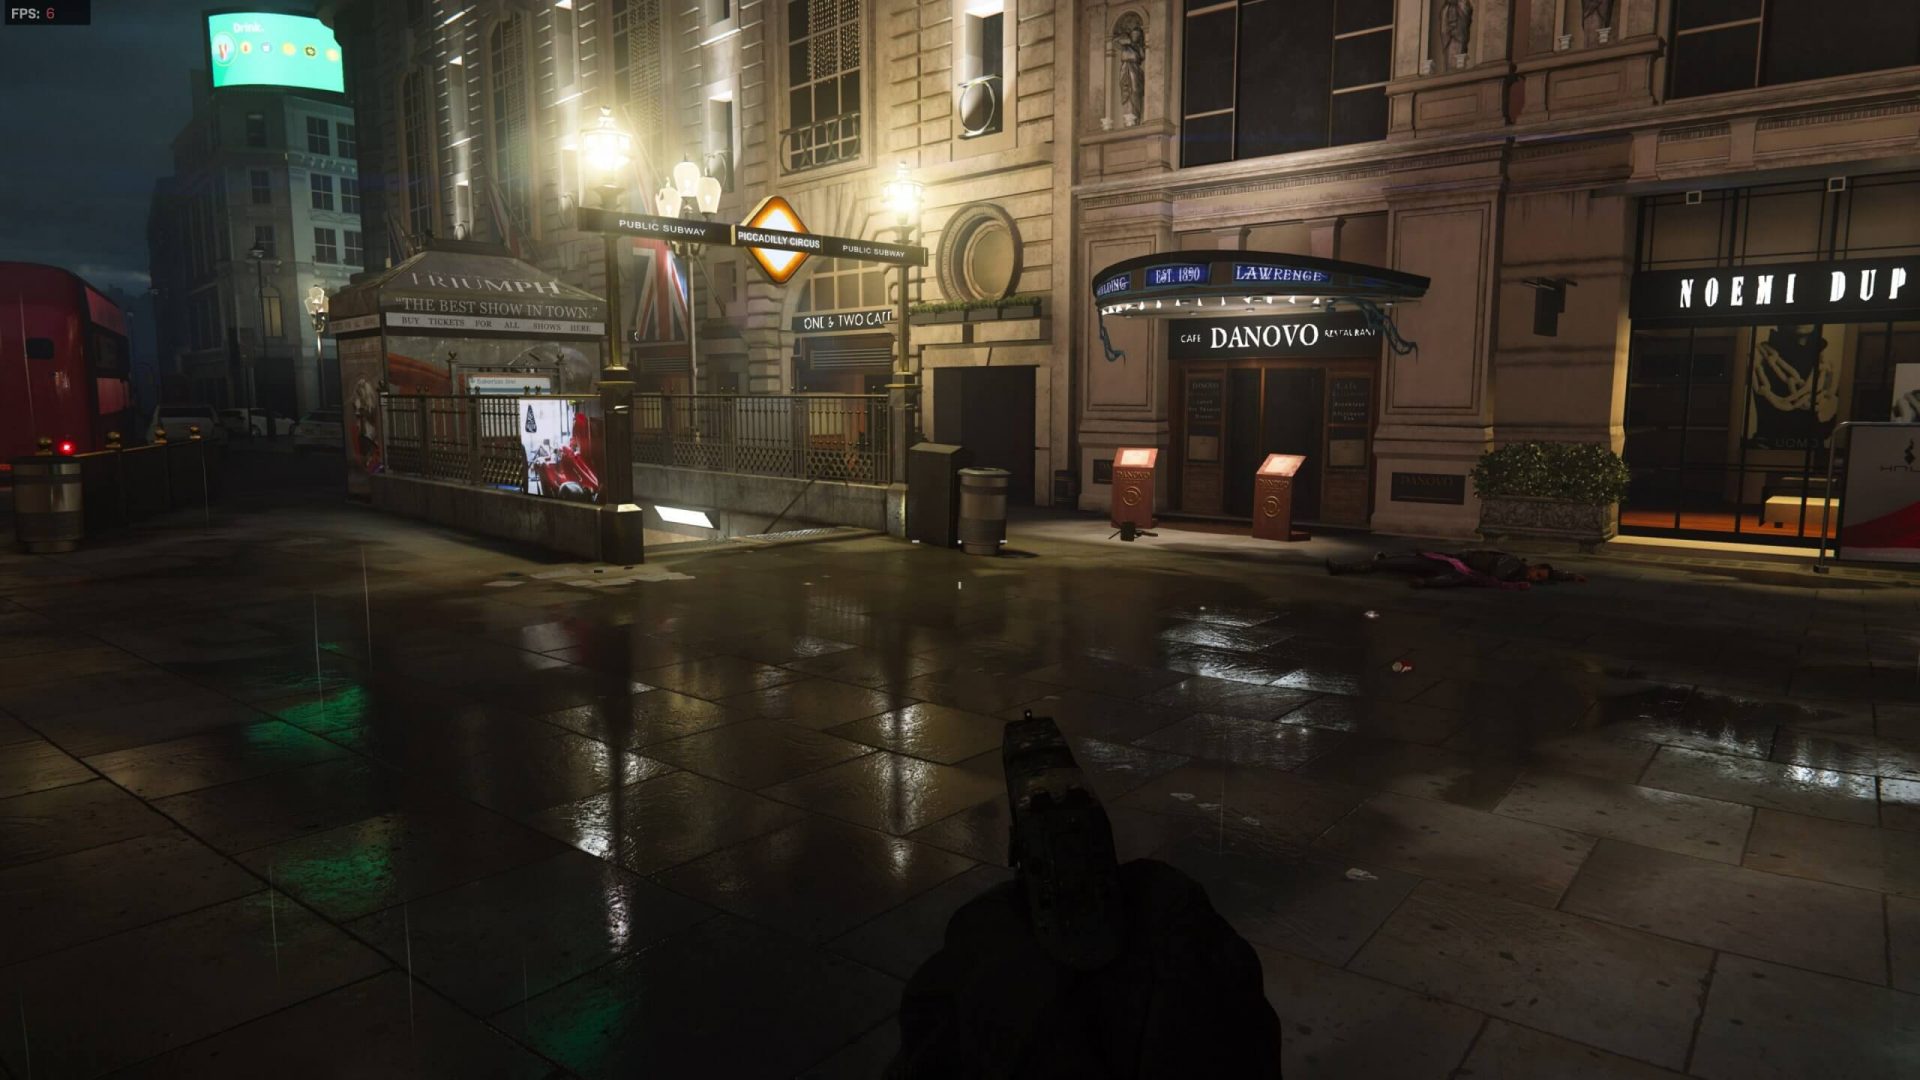
In order to actually install Windows 11 on your Pi, there are certain things that you will need. Check out the below list and prepare everything.
  • Raspberry Pi 4 4GB or 8GB
  • A 32GB or larger SSD via a USB 3 caddy. Best for performance or 16GB or larger microSD card
  • USB boot enabled, see below.
  • A micro SD card with the latest Raspberry Pi OS
  • Windows 10 PC
  • USB to Ethernet or WiFi dongle
  • Bluetooth dongle (if you want Bluetooth)
  • Keyboard, mouse, HDMI, and power for your Raspberry Pi

Configuring Pi to boot from SSD

In order to boot from SSD be sure that firmware and bootloader are up to date on the latest version and upgrade if needed. Be aware that this firmware update can only be performed using the official Raspberry Pi OS. Also if you are eager and want to use a standard microSSD card instead of an SSD to run Windows 11 feel free to skip this entire section.
  1. Boot from microSSD with the latest Raspberry Pi OS on it.
  2. Update firmware and OS using the terminal by typing sudo apt update sudo apt full-upgrade sudo rpi-update
  3. Reboot your Pi
  4. Install the latest version of bootloader again using the terminal with the command sudo rpi-eeprom-update -d – a
  5. Reboot Pi
  6. Launch raspi-config on your Pi via terminal with sudo raspi-config
  7. Select option 3 (Boot options – Configure options for start-up) from boot options
  8. Select Boot ROM version and press ENTER
  9. Select latest and then OK
  10. Select NO when prompted to reset boot ROM to defaults on the latest version boot ROM selected screen. Press OK
  11. Select Boot order and press ENTER
  12. Select USB Boot and click on OK and remove microSD card from Pi
  13. Select Finish and click on NO when prompted to reboot

Creating Windows 11 installation image for Pi 4

In order to install Windows 11 on our Pi, we must create an installation image, follow the steps below explaining the process.
  1. Go to https://uupdump.net/
  2. Search for Windows 11 Arm
  3. Select the latest build for arm64
  4. Select Language on which you would like installer and Windows
  5. Pick Windows edition you would like
  6. Set download method to Download and convert to ISO and click on Create download package
  7. Extract downloaded content into win11 folder and go into it
  8. Double click on uup_download_windows.cmd
  9. On the security warning screen click on More info and then on Run anyway
  10. Wait for the process to finish completely
  11. Once the process is finished, press 0 to close the prompt

Installing image on microSSD or SSD

If previous steps of instruction were follower precisely you now have an ISO image that can be installed onto microSSD or SSD
  1. Connect SSD or insert microSSD card into your PC
  2. Go to https://www.worproject.ml/downloads
  3. Download Windows on Raspberry imager and extract it into the win11 folder
  4. Open Imager and allow it to make changes to your computer, set your language, and click on next
  5. Select storage drive where you would like to install Windows
  6. Set device type and click on next
  7. Select our Windows 11 ISO image we created and click on next
  8. On the drivers screen select Use the latest driver package available on the server
  9. On UEFI firmware select screen choose Use the latest firmware available on the server
  10. On configuration screen click on next
  11. Check your setting on the installation overview and if everything is ok click on install
  12. Wait for the whole process to be finished
  13. Once the process is completed, close Windows on Raspberry imager, take out SSD or microSSD card from PC and connect it on your Pi along with Pi peripherals.

Setting Windows 11 on Pi

In order to actually use Windows 11 on our Raspberry Pi we now have to set up the Windows 11 install using the standard post-installation setup sequence.
  1. Power up Pi and press ESC when prompted
  2. Go to Device manager and press ENTER
  3. Select Raspberry Pi Configuration
  4. Select Advanced configuration
  5. Set Limit RAM to 3GB to a disabled state, press F10 to save, and ESC to exit.
  6. Select Display configuration
  7. Set the resolution to desired option and press ENTER, F10 to save, and ESC to exit
  8. Go to CPU configuration
  9. Check if the CPU clock is set to default, if not set it
  10. Press ESC to go back all the way to the main menu
  11. Select Continue to exit BIOS and boot your Raspberry Pi with Windows 11 on it
And there you have it, fully working Windows 11 OS on Raspberry Pi despite what Microsoft says Note that due to lack of some drivers performance can be less than optimal, for example, full HD videos will not work since there are no compatible graphic drivers for Pi and some other stuff like Wi-Fi will also cause some issues but overall Windows 11 is working pretty well.
Read More
Microsoft Surface Go 2 review

The new upgraded Surface Laptop Go 2 is the new iteration of the affordable original Surface Laptop Go aimed to offer good performance at a lower price of under $1000. The new version is not anything vastly different from the original but it comes with much-needed upgrades.

microsoft surface go 2 laptop

The biggest and main upgrade is the CPU, the Surface Laptop Go 2 is packing now Intel Core i5 1135G7, an Intels 11th generation CPU that should increase battery life. The laptop is also coming with an improved WEB camera and the cheapest one comes now with 128GB of storage instead of 64GB. Price went up from $550 to $599 which is not a big increase considering what was upgraded.

The bad news of new models is that sadly they are still packing only 4GB of RAM, that's really not enough for most applications released in 2022 and the screen is having a relatively low resolution of 1536 X 1024.

Microsoft is still offering all the color variations as in its first offering but added as well a new Sage color that is muted green in tint.

When we look at hardware it seems a little weak but for this price, there is not much competition in the field, and after all this line of models is aimed to provide good performance for an affordable price. If you really need something better you will go with a standard Surface or MAC book instead.

The new laptops are available to pre-order at Best Buy and Microsoft’s online store, and they’ll start shipping on June 7.

Read More
List of games that support Nvidia RTX tech

RTX nvidiaWhat is RTX

Nvidia GeForce RTX is a high-end professional visual computing platform created by Nvidia, primarily used for designing complex large-scale models in architecture and product design, scientific visualization, energy exploration, and film and video production. Nvidia RTX enables real-time ray tracing. Historically, ray tracing had been reserved for non-real-time applications (like CGI in visual effects for movies and in photorealistic renderings), with video games having to rely on direct lighting and precalculated indirect contribution for their rendering. RTX facilitates a new development in computer graphics of generating interactive images that react to lighting, shadows, and reflections. RTX runs on Nvidia Volta-, Turing- and Ampere-based GPUs, specifically utilizing the Tensor cores (and new RT cores on Turing and successors) on the architectures for ray-tracing acceleration.

Advantage in games

With incredible lighting and shadows, reflection, better smoke, and water effects, and more, RTX has managed to place awesome real-time effects on your desktop all that’s to Nvidia technology behind it. Of course, in order to harvest this kind of technology and features game itself needs to support and have RTX in it, you can not turn RTX in just any game, the game itself must have technology build in it. Therefore we are bringing you the list of all RTX games you can find currently on the market so you can enjoy at the moment best graphics a PC can offer

List of games supporting the technology

  • Amid Evil
  • The Ascent
  • Battlefield V
  • Call of Duty: Black Ops Cold War
  • Call of Duty: Modern Warfare
  • Control
  • Cyberpunk 2077
  • Deliver Us the Moon
  • Doom Eternal
  • Dirt 5
  • Fortnite
  • Ghostrunner
  • Justice Online
  • Weibo
  • JX3
  • Lego Builder’s Journey
  • Mechwarrior 5: Mercenaries
  • The Medium
  • Metro Exodus (and The Two Colonels DLC)
  • Minecraft
  • Moonlight Blade
  • Mortal Shell
  • Observer: System Redux
  • Pumpkin Jack
  • Quake II RTX
  • Ring of Elysium
  • Shadow of the Tomb Raider
  • Stay in the Light
  • Watch Dogs: Legion
  • Wolfenstein: Youngblood
  • World of Warcraft: Shadowlands
  • Xuan-Yuan Sword VII

Upcoming games that will support RTX

  • Atomic Heart
  • Boundary
  • Bright Memory: Infinite
  • Convallaria
  • Dying Light 2
  • F.I.S.T.: Forged in Shadow Torch
  • Five Nights at Freddy’s: Security Breach
  • Grimmstar
  • Maneater
  • Project X
  • Sword and Fairy 7
  • Synced: Off Planet
  • Vampire: The Masquerade — Bloodlines 2
  • The Witcher 3: Complete Edition
Read More
Fix Windows Cannot Find a System Image
If you have encountered the “Windows Cannot Find a System Image on This Computer” error while you are trying to restore a system image, then read on as this post will guide you in resolving this problem. A system image is basically a backup of your whole data in the system. For instance, it can be the backup data of your hard disk or the whole hard disk itself, or one of the volumes. This is really useful in some cases like when you are not able to get back into your system for some reason or when your system has been corrupted. In such cases, you can utilize this feature and get going safe and sound. However, not all things go the way as expected like when you make a system image of a drive for instance, or use that backup to restore data and you suddenly encounter the “Windows Cannot Find a System Image on This Computer” error. This kind of error occurs due to a number of reasons but worry not for your data is safe and you can fix this error easily. This error is most likely triggered by changing the name of the “WindowsImageBackup” folder. Renaming this folder will certainly be an issue since it is the one that stores all your data. Aside from renaming the WindowsImageBackup folder, renaming the sub-folders can also cause this error which means that renaming the sub-folders of the WindowsImageBackup folder can trigger the error. To fix this error, here are some suggestions that might help:

Option 1 – Try putting the WindowsImageBackup folder in the Root directory

Windows will have issues finding the WindowsImageBackup folder if it isn’t in the root directory of the drive so if it is not there, the “Windows Cannot Find a System Image on This Computer” error will pop up. When a folder is in a root directory, it means that it shouldn’t be stored within a folder but in the main directory instead.  Thus, you need to put the WindowsImageBackup folder in the root directory to fix the error.

Option 2 – Don’t add any sub-folders in the WindowsImageBackup folder

Another cause of the error is when you add sub-folders in the WindowsImage Backup folder. Adding any sub-folders in this folder will only trigger the error so you should leave the folder as it is and you must not make any modifications to it. So if you have added sub-folders in it, make sure to remove them right away.

Option 3 – Make sure that there is one system image per USB drive

The error can also appear if you’ve stored multiple images inside a single USB drive as it could confuse Windows and will trigger the “Windows Cannot Find a System Image on This Computer” error. Note that storing system images of different volumes of your hard disk in a single USB will prevent you from restoring your data.

Option 4 – Try renaming the System Image folder

If you’ve just changed the name of the System Image folder after you store it on a USB stick or other external device, then it’s no wonder why you’re getting the “Windows Cannot Find a System Image on This Computer” error. Windows search for the default name, “WindowsImage Backup” folder when restoring your data so if it is not able to find it, it throws up this error instead. To fix the error, you need to change the folder back to its default name which is “WindowsImageBackup”.

Option 5 – Check the WindowsImageBackup sub-folders

As mentioned earlier, renaming sub-folders in the WindowsImageBackup folder can trigger the error so if you have renamed sub-folders in this folder, you need to change them back to their default names so that you can restore your data peacefully.
Read More
How to Fix Can’t start your Camera, 0xa00f429f
If you are using the Camera app on your Windows 10 computer but encountered an error code 0xa00f429f with an error message that says, “Can’t start your camera”, read on as this post will guide you in fixing this problem. This kind of error in the Camera app could be due to a recent update gone wrong or it could also be due to a corrupted driver. If you are certain that the camera is connected and is properly installed, you can try to check for updated drivers. The error code signifies that the drivers have to be updated. However, that isn’t always the case sometimes as the problem could also have something to do with corruption in the driver. The effective ways to troubleshoot this problem would be trying to reinstall or reset the Windows Camera app, or update, rollback or uninstall some device drivers as well as use the Registry Editor. Before you proceed with the instructions provided below, make sure that you have admin privileges and don’t forget to create a System Restore point.

Option 1 – Try to reset or reinstall the Windows Camera app

As pointed out earlier, you can also reset the Camera app to fix the error. To do so, follow the steps below.
  • The first thing you have to do is go to the My Pictures folder under the C: drive of the File Explorer and then delete the Camera Roll folder.
  • Once you’re done, right-click on an empty area on your screen and create a new folder and name it “Camera Roll”.
  • Then from the Start menu open the Settings app and select System.
  • From there, navigate to the Apps and features section.
  • Now go to Camera and click on the Advanced Options and click the Reset button.

Option 2 – Try to reinstall the Camera app

If resetting the Camera app didn’t help, you might want to reinstall it by following these steps:
  • Tap the Win + X keys and select the “Windows PowerShell (Admin)” option from the menu to open Windows PowerShell as admin.
  • Next, type this command to uninstall the Camera app: Get-AppxPackage *camera* | Remove-AppxPackage
  • Once done, exit the Windows PowerShell and restart your computer and then try to install the latest version of the Camera app from Microsoft Store.

Option 3 – Try to rollback, update or disable drivers

The next thing you can do to fix the error code 0xa00f429f in the Camera app is to roll back, or update, or disable device drivers. It is most likely that after you updated your Windows computer that your driver also needs a refresh. On the other hand, if you have just updated your device drivers then you need to roll back the drivers to their previous versions. Whichever applies to you, refer to the steps below.
  • Open the Devices Manager from the Win X Menu.
  • After opening the Device Manager, look for the device drivers which have a yellow exclamation mark.
  • Then right-click on each one of them. If you haven’t updated this driver in a while, select the “Update Driver” option. On the other hand, if you’ve just updated this driver, then select the Uninstall Device option.
  • Next, follow the screen option to update or uninstall it.
  • Finally, restart your computer. It will just reinstall the device drivers automatically if you have chosen to uninstall them.
Note: You can install a dedicated driver on your computer in case you have it or you could also look for it directly from the website of the manufacturer.

Option 4 – Try to use the Registry Editor

  • Tap the Win + R keys to open the Run dialog box and type “Regedit” in the field and then hit Enter to open the Registry Editor.
  • Next, navigate to this registry key: ComputerHKEY_LOCAL_MACHINESOFTWAREWOW6432NodeMicrosoftWindows Media FoundationPlatform
  • From there, right-click on any empty space on the right side part of the window and select New > DWORD (32-bit) Value.
  • Then name it as “EnableFrameServerMode” and double click on it.
  • Now set its value data to “0” and its base value as Hexadecimal and then click on OK.
  • After that, restart your computer and see if it helped in fixing the problem or not.
Read More
1 2 3 171
Logo
Copyright © 2023, ErrorTools. All Rights Reserved
Trademark: Microsoft Windows logos are registered trademarks of Microsoft. Disclaimer: ErrorTools.com is not affiliated with Microsoft, nor claims direct affiliation.
The information on this page is provided for information purposes only.
DMCA.com Protection Status