Logo

Should you use the Faraday bag

Faraday bag is a new take on security and privacy for people using a lot of electronic devices and credit cards. So what is exactly a Faraday bag?

faraday bag

Faraday bag explained

Faraday bag is designed in the same manner as the Faraday cage which was invented by Michael Faraday, who was an English scientist who contributed to the study of electromagnetism and electrochemistry. His main discoveries include the principles underlying electromagnetic induction, diamagnetism, and electrolysis.

The idea of the Faraday cage is that anything inside a cage that is made of specific grid size is completely isolated from outside current and magnetic fields since the cage itself will pick up everything upon itself. This means that for example, a human could be inside a cage that is struck by lightning and be perfectly safe and fine.

This idea led to the Faraday bag design, which takes this concept and places a wiring pattern inside clothing in order to isolate all magnetic fields from the outside so your devices and cards are completely cut off from any kind of influence and electromagnetic waves. If the pattern and quality of material for the bag are good, you have a fully safe placeholder for your stuff.

Advantages of Faraday bag

The main advantages, of course, are the privacy and safety of mobile phones and credit cards from outside influences and this is why this bag has been designed in the first place. If the bag is designed properly your phone would not be able to be hacked nor accessed from any outside source, GPS tracking will also be disabled and your phone location will not be visible. Credit cards will also be completely safe from any malicious attack via wi-fi signals.

Disadvantages of bag

Well, the disadvantage of using this bag is a very simple one, since your phone is isolated from outside influence that will also mean that you will not be able to take messages or calls on it while it is in the bag. Notifications from the internet would also be disabled so it is security vs usability deal.

Do You Need Help with Your Device?

Our Team of Experts May Help
Troubleshoot.Tech Experts are There for You!
Replace damaged files
Restore performance
Free disk space
Remove Malware
Protects WEB browser
Remove Viruses
Stop PC freezing
GET HELP
Troubleshoot.Tech experts work with all versions of Microsoft Windows including Windows 11, with Android, Mac, and more.

Share this article:

You might also like

How to Fix ‘Your Computer is Low on Memory’ Error
Low on Memory is a Windows PC memory leak error. You may come across it out of the blue however, there are various underlying reasons for this PC error. It is like a warning sign that indicates memory/RAM issues on your system. The ‘Your Computer is Low on Memory’ error means that your PC does not have enough memory space for all the activities you are trying to perform. Due to this error, your Windows and programs can also stop working. If this error is not fixed timely it can lead to serious PC threats like valuable data loss and hard disk corruption. Along with this memory error, you may also come to experience other types of signs including PC poor performance, speed issues, out-of-memory notifications, and display problems.

Solution

Restoro box imageError Causes

The ultimate and the underlying cause of low memory error is data overload in the RAM which triggers registry issues. To understand this better, here is a comprehensive explanation. The computer has 2 types of memory, RAM (Random Access Memory) and virtual memory. All programs and activities that you do on your computer are saved by the registry in the RAM. This includes obsolete and unnecessary files too like junk files, cookies, internet history, temporary files, invalid registry entries, and bad registry keys. Due to poor PC maintenance practices, these files accumulate in the RAM, thereby overloading it. Also, all programs on the PC use RAM to run. So, when there isn’t enough RAM for the program you are trying to run on your system, Windows temporarily moves information that would normally be stored in RAM to a file called a paging file which is also referred to as the virtual memory. By moving the information to and from the paging file- the virtual memory, Windows temporarily frees up enough RAM for programs to run smoothly. However, when you start running more programs than the RAM installed on your PC can support, low memory errors begin to occur. It triggers that the computer is out of RAM and is also low on virtual memory.

Further Information and Manual Repair

PC users should know that this is a critical error therefore it is advisable to fix it immediately before the damage sets in. Here are some of the best solutions that you can try to resolve Your computer is low on memory and similar memory leak errors on your system.

1. Run Few Programs at a Time

This is a temporary solution to prevent low memory problems.  By running a few programs at one time you can easily keep this memory error away from popping on your computer screen. However, this can cause you inconvenience if you run several programs together to perform different tasks simultaneously.

2. Increase the Virtual Memory Size

Though Windows automatically attempts to augment the virtual memory size the first time you experience ‘low on memory issues; however this again is a temporary way out of this problem. But if you are looking for a solution that can resolve these memory issues for a long time, then you can try manually increasing your PC’s memory size. Increase it up to a maximum size this is by the way determined by the amount of RAM installed on your system. Nonetheless, the drawback of this solution is that increasing the paging file size can reduce your PC performance. It can make your programs run more slowly.

3. Install More RAM

Another solution to resolve low on memory issues is to install more RAM. To do this first check your system properties to see the size of the RAM already installed on your PC. To do this press the Windows key+ Pause/Break key this will open system properties. If the RAM size is lower than 2 GB then you need to install more RAM. But if it is more then you should look for two things one check the piece of software that is causing the problem and secondly you need to clean the registry and remove the unnecessary files from your RAM and hard disk. This would free up space dramatically and resolve the low memory issue right away.

4. Download and Run Restoro, Registry Cleaner on your System

To clean the registry and wipe out unnecessary and obsolete files overloading your RAM and disk space, you should download Restoro. Restoro is a next-generation and highly functional error cleaner. By running this error cleaner on your system, you can easily scan for junk stored in your RAM and hard disk and remove it in seconds, clearing up ample disk space. This will resolve all your PC memory-related issues. Furthermore, it repairs the damaged files and restores the registry too. It spares you from the hassle of installing more RAM or virtual memory. Since this PC repair tool also functions as a system optimizer, it simultaneously boosts the speed of your system thus resolving speed issues too, all in one go. Restoro is a bug-free and efficient tool. It has a user-friendly interface making it easy for all levels of users to operate and run it on their systems. Furthermore, it is compatible with all Windows versions including Windows 7, 8, XP,  Vista & 10. Click here to download Restoro to resolve Low on Memory issues on your PC in seconds!
Read More
Fix UTCSVC high CPU and Disk usage in Windows
There is a lot of high resource utilization by any process that slows down a Windows operating system and one of the services that could cause such a thing is the utcsvc.exe process. This particular process at times can cause high CPU and disk usage. So if you are currently facing this problem, read on as this post will guide you on how you can resolve the problem. UTC which stands for Universal Telemetry Client is a software that runs a service named Diagnostic Tracking Service or DiagTrak. This service is used by Microsoft to collect customer feedback, analyze customer’s problems, and push resolution via updates in order to make the Windows 10 operating system better. This service is an executable file that could be translated to Service Host and even though the process does not usually cause problems, there are actually times when it does especially if it results in high resource utilization. In such cases, you might want to consider disabling it to fix its high CPU and disk usage.

According to Microsoft:

“We collect information about you, your devices, applications and networks, and your use of those devices, applications, and networks. Examples of data we collect include your name, email address, preferences, and interests; browsing, search and file history; phone call and SMS data; device configuration and sensor data; and application usage.”
There are several ways you can disable the utcsvc.exe process. You can disable it using the Service Manager, Registry Editor, and Group Policy Editor. For more details, refer to the instructions laid out below.

Option 1 – Disable the Connected User Experience & Telemetry Service via Service Manager

Note that this option is for standalone systems, so if you’re not using one, refer to the next given options below.
  • Tap the Win + R keys to open the Run dialog box.
  • Then type “services.msc” in the field and tap Enter or click OK to open the Services Manager.
  • From the given list of services, look for the Connected User Experience service. Once you found it, click on it and you’ll see its description which states:
“The Connected User Experiences and Telemetry service enables features that support in-application and connected user experiences. Additionally, this service manages the event-driven collection and transmission of diagnostic and usage information (used to improve the experience and quality of the Windows Platform) when the diagnostics and usage privacy option settings are enabled under Feedback and Diagnostics.”
  • Next, right-click on it and select Properties.
  • Now, change its Startup Type to Disabled and click on the Apply and OK buttons to save the changes made.

Option 2 – Disable the Connected User Experience & Telemetry Service via Registry Editor

  • Tap the Win + R keys to launch the Run utility and type “Regedit” in the field and click OK to open the Registry Editor.
  • Next, navigate to this registry path: HKEY_LOCAL_MACHINESOFTWAREPoliciesMicrosoftWindowsDataCollection
  • After that, right-click on the folder named “DataCollection” and select New > DWORD (32-bit) Value.
  • Now name the new value “AllowTelemetry” and make sure that its Value data is “0” and then click on OK to save the changes made.
  • Restart your computer.

Option 3 – Disable the Connected User Experience & Telemetry Service via Group Policy Editor

If you have to disable the service related to the Universal Telemetry Client for company-managed systems, then you can do that using the Group Policy Editor.
  • Tap the Win + R keys to open the Run utility and type “gpedit.msc” in the field and hit Enter to open the Group Policy Editor.
  • Next, navigate to this path: Computer Configuration > Administrative Templates > Windows Components> Data Collection and Preview Build
  • After that, double-click on Data Collection and Preview Build to open its settings.
  • From there, look for the “Allow Telemetry” item and double click on it to open its Properties.
  • Next, set the radio button to Disabled and then click on the Apply button to save the changes made.
  • Restart your computer.

Option 4 – Run the Hardware and Devices Troubleshooter or the Performance Troubleshooter

Hardware and Devices Troubleshooter:

  • The first thing you need to do is click on Start and then on the gear-like icon to pull up the window for Settings.
  • After opening Settings, look for the Update and Security option and select it.
  • From there, go to the Troubleshoot option located on the left-hand side of the list.
  • Next, select Hardware and Devices from the list and open the Troubleshooter and run it. Once it is doing its job, wait for it to complete the process and then restart the system.
  • After the system restarts, check if the problem’s now fixed. If not, refer to the next option given below.

Performance Troubleshooter:

  • Tap the Win + R keys to open the Run dialog box.
  • Type “exe /id PerformanceDiagnostic” in the field and hit Enter to open the Performance troubleshooter.
  • Then click on Next to get started. Wait until the process is completed.
Read More
Configuring Snapping feature in Windows 11
The Snapping feature was introduced as an essential part of Windows 11 and I like it very much, it lets you organize your opened windows much faster and with more control. However, some people do not like the feature, worry not because you can turn it off, or if you prefer you can just remove the showing layout option that is shown when hovering over Minimize/Maximize button.

Snapping feature windows 11Removing options all together

To completely turn off Snap layout in Windows 11 follow these steps
  1. Open Windows 11 settings by pressing ⊞ Windows + I
  2. Select System on the left part of the screen
  3. In System options select Multitasking
  4. At the top of Multitasking Click on the switch next to Snap Windows
  5. Close settings
Changes will be automatically applied and you will no longer have Snap layout functionality.

Removing layout graphic from Snapping feature

If you like the snap Layouts feature but are not very fond of the layout graphic that is popping up each time you hover over Minimize/Maximize button do not worry, there is an option to turn just that off and keep the feature itself.
  1. Open Windows 11 settings by pressing ⊞ Windows + I
  2. Select System on the left part of the screen
  3. In System options select Multitasking
  4. Click on the Snap Windows menu
  5. Deactivate Show Snap Layouts When I Hover over a Window’s Maximize button
  6. Close settings
Now you will be able to use the Snap Layout feature without layout graphics showing. If you want to reverse any of these options and go back to standard-setting, just follow the steps and turn features ON.
Read More
Fix INVALID_POINTER_READ_c0000005 atidxx64.dll
If your Microsoft Edge browser encountered a Stop Error that says, “INVALID_POINTER_READ_c0000005 (atidxx64.dll)” in your Windows 10 computer, then this indicates that your Graphics card driver is outdated. According to security experts, Microsoft has already acknowledged the problem and stated that this issue exists with Windows 10 v1809, Windows Server 2019, and Windows Server version 1809. Although there is no direct way to resolve the problem, there are still some workarounds you can try. If you are using a RadeonHD2000 or HD4000 series video card, the update will be blocked for you. Some users also claim to experience performance issues with the lock screen or the ShellExperienceHost. However, if you are using AMD, the problem is that it no longer supports Radeon HD2000 and HD4000 series graphics processing units or GPUs. Even though Microsoft is already working for a way to resolve the problem, here are some alternative solutions you can check out:

Option 1 – Update your Graphics card drivers

  • First, boot your computer into Safe Mode.
  • After that, tap the Win + R keys to launch Run.
  • Type in devmgmt.msc into the box and tap Enter or click OK to open the Device Manager.
  • After that, a list of device drivers will be displayed. From there, look for the Display Adapters and click on them.
  • After that, right-click on each entry under the Display Adapters and select the “Uninstall Device” option from the menu.
  • Now restart your computer.
  • After restarting your computer, go to the Settings app and Check for Updates in the Windows Update section.
Note: You also have the option to go directly to the website of your graphics card manufacturers like NVIDIA, Intel or AMD and go to the section called Drivers then check if there’s a new available update – if there is, download and install it.

Option 2 – Try removing AMD Radeon HD2000 and HD4000 drivers

Although this is not exactly a perfect solution, removing AMD drivers will make the operating system fall back to the default GPU available on your motherboard. You also have the option to completely disable the hardware.
  • Tap the Win + X + M keys to open the Device Manager.
  • Next, look for your Graphics card drive, and under Display Adapters, right click on them and click Uninstall device or Disable device.
  • After that, restart your computer. This will disable the AMD drivers so you won’t be able to find them. It will also release the Windows 10 v1809 update on your computer and in case your operating system tries to prompt you with the “New Device found” message, simply ignore it.

Option 3 – Try to use another browser

You might want to use another browser especially when you already updated your computer and Microsoft Edge still keeps on crashing. You can use Google Chrome, Mozilla Firefox, and other browsers as alternatives until you sort out the problem.

Option 4 – Try to remove the Graphics card physically

You might also want to try removing both AMD Radeon HD2000 and HD4000 as they are very old graphics cards. And since AMD is not going to roll out anything, at least on its own if your motherboard has an onboard GPU, it would be best to get rid of the cards. After that, install the Windows v1809 update and then put them back in. You also have the option to install the driver but just don’t use Microsoft Edge.
Read More
Desk365 Complete Removal - PUP Removal Guide

What is Desk365?

Desk 365 is a program developed by 337 Technology Limited and is classified as a potentially unwanted application by a number of Antiviruses. While not technically malware, for many users it is unwanted as it is often distributed as a bundle with other downloads. It allows a fast way to access your shortcuts and applications. Upon installation this program will insert itself into the system registry, adding startup strings to allow it to automatically start every time your system is restarted. The software adds a scheduled windows task to allow it to reopen itself even when closed. The applications also access the internet and add firewall rules to your system, that allow it to access anything without restrictions.

The main executable file for this application is Dock365.exe. It is possible to delete this file preventing the application to run, but its monitoring services and registry entities remain hidden inside your computer.

The software sends browsing information back to its ad servers, displaying custom ads and sponsored products instead of the usual search results. And the app itself pins itself to the start menu and cannot be removed.

About Potentially Unwanted Applications

Have you ever discovered an unwanted program on your PC that you didn’t consciously download and never gave authorization to be installed? Potentially Unwanted Programs (PUP), also referred to as Potentially Unwanted Applications (PUA), are applications that you never wanted in the first place and often come bundled with freeware. Once installed, the majority of these applications can be difficult to eliminate and become much more of an annoyance rather than a necessity. PUPs did not actually constitute pure “malware” in the strict sense of the definition. What normally makes a PUP different from malicious software is that whenever you download one, you’re doing it with your consent – though in many instances unconsciously and unwillingly. A PUP may not be regarded as malicious or unsafe yet still, it’s a common cause of clunky OS’s; some PUPs are a lot more aggressive by intentionally slowing down your computer or laptop.

Exactly how do unwanted programs look like?

Potentially Unwanted Programs can be found in different forms and varieties, but in the majority of cases, these are typically adware programs that exhibit irritating pop-up adverts and advertisements on websites you check out. They even come in the form of browser extension toolbars and add-ons. Not only they needlessly take up space on your screen, but toolbars can also manipulate search engine results, keep an eye on your surfing activities, decrease your internet browser’s efficiency, and slow down your internet connection to a crawl. PUPs load up a dangerous bite if left unchecked. They could include keyloggers, dialers, and other program built into them which could track you or send your sensitive information to third parties. Typically, such software will disable security protections and configuration settings to take control over your computer or laptop, leaving that PC vulnerable to online hackers and data fraud. At a minimum, PUPs slow your computer down with every added program.

Tips on how to prevent PUPs

• Read the fine print so that the end-user license agreement (EULA) you are accepting is only for the software you primarily intend to download. • Choose the “custom” install whenever installing an application. Especially, look closely at those small boxes which have been checked as default, where you may ‘agree’ to receive promotions or install software bundlers. • Use an anti-PUP program. Security applications such as Safebytes Anti-Malware gives the very best real-time protection against PUPs and also other malware. • Be alert if you download and install freeware, open-source programs, or shareware. Nowadays ‘freeware’ isn’t actually freeware – but “crapware” bundling nonsense. • Always download software from trustworthy sources like official websites rather than untrustworthy sharing space. Avoid file-hosting sites where/when possible.

What To Do If You Cannot Download Safebytes Anti-Malware?

Every malware is detrimental and the level of the damage can vary greatly according to the type of infection. Some malware is designed to restrict or prevent things that you wish to do on your PC. It may well not permit you to download anything from the web or prevent you from accessing some or all internet sites, in particular the antivirus sites. If you are reading this, chances are you’re stuck with a virus infection that is preventing you to download or install Safebytes Anti-Malware software on your computer system. There are a few fixes you could try to get around with this particular problem. Download the software in Safe Mode with Networking The Windows-based PC comes with a special mode known as “Safe Mode” in which just the minimum required programs and services are loaded. If the malicious software is set to load immediately when PC boots, shifting into this mode may well prevent it from doing so. To get into Safe Mode or Safe Mode with Networking, press the F8 key while the system is starting up or run MSCONFIG and look for the “Safe Boot” options in the “Boot” tab. After you restart the PC into Safe Mode with Networking, you can download, install, and update the anti-malware program from there. At this point, you could run the anti-virus scan to eliminate viruses and malware without any hindrance from another malicious application.

Switch over to an alternate web browser

Some malware mainly targets specific internet browsers. If this sounds like your situation, use another internet browser as it might circumvent the malware. If you are not able to download the anti-virus software using Internet Explorer, it means the virus could be targeting IE’s vulnerabilities. Here, you need to switch to a different internet browser such as Chrome or Firefox to download Safebytes Anti-malware software.

Install and run anti-virus from your flash drive

Another option would be to create a portable anti-malware program on your USB stick. To run antivirus from a thumb drive, follow these simple steps: 1) Make use of another virus-free computer to download Safebytes Anti-Malware. 2) Plug in the pen drive to a USB port on the uninfected computer. 3) Double-click the Setup icon of the antivirus software package to run the Installation Wizard. 4) When asked, choose the location of the USB drive as the place in which you want to put the software files. Follow activation instructions. 5) Now, insert the USB drive into the infected PC. 6) Run the Safebytes Anti-malware directly from the flash drive by double-clicking the icon. 7) Run Full System Scan to detect and clean-up up all kinds of malware. If all the above approaches fail to help you in downloading the anti-malware, then you’ve no alternative but to reinstall the computer’s operating system to wipe out all the data, including the malicious programs which are obstructing the anti-malware installation. If you are already our customer, technical help for Malware Removal is just a phone call away. Call 1-844-377-4107 to speak to our expert technicians and get assistance remotely.

Let's Talk About SafeBytes Anti-Malware!

To help protect your computer from many different internet-based threats, it’s very important to install anti-malware software on your personal computer. But with so many antimalware companies out there, nowadays it’s tough to decide which one you should obtain for your PC. A few are good ones, some are decent, and some are merely fake anti-malware programs that will harm your PC themselves! You need to be very careful not to pick the wrong product, especially if you buy a paid program. On the list of the highly recommended tools by industry experts is SafeBytes Anti-Malware, well-known security software for Windows computers. Safebytes is among the well-established computer solutions firms, which offer this comprehensive anti-malware software program. Using its outstanding protection system, this utility will quickly detect and eliminate the majority of the security threats, including viruses, adware, browser hijackers, ransomware, PUPs, and trojans. SafeBytes anti-malware offers an array of advanced features which sets it apart from all others. Listed below are some of the highlighted features included in the tool. Real-time Threat Response: SafeBytes delivers complete and real-time security for your PC. It will inspect your computer for suspicious activity continuously and shields your personal computer from unauthorized access. Optimum AntiMalware Protection: This deep-cleaning anti-malware software goes much deeper than most antivirus tools to clean your computer. Its critically acclaimed virus engine finds and disables hard-to-remove malware that conceals deep within your computer. Web Filtering: SafeBytes gives an instant safety rating about the web pages you’re about to visit, automatically blocking harmful sites and ensuring that you are certain of your online safety while browsing the net. Light-weight: This software program is not “heavy” on your computer’s resources, so you will not notice any performance issues when SafeBytes is working in the background. 24/7 Online Support: You can obtain high levels of support round the clock if you’re using their paid version. Overall, SafeBytes Anti-Malware is a solid program since it has plenty of features and can identify and remove any potential threats. You can rest assured that your computer will be protected in real-time once you put this tool to use. For optimum protection and the best bang for your buck, you can’t get better than SafeBytes Anti-Malware.

Technical Details and Manual Removal (Advanced Users)

If you wish to manually remove Desk365 without the use of an automated tool, it may be possible to do so by removing the program from the Windows Add/Remove Programs menu, or in cases of browser extensions, going to the browsers AddOn/Extension manager and removing it. You will likely also want to reset your browser. To ensure the complete removal, manually check your hard drive and registry for all of the following and remove or reset the values accordingly. Please note that this is for advanced users only and may be difficult, with incorrect file removal causing additional PC errors. In addition, some malware is capable of replicating or preventing deletion. Doing this in Safe Mode is advised. The following files, folders, and registry entries are created or modified by Desk365
Files: File $APPDATACheckRun22find.exe. File $APPDATADesk 365accelerate. File $APPDATADesk 365desk_bkg_list.xml. File $APPDATADesk 365desk_list.xml. File $APPDATADesk 365desk_settings.ini. File $APPDATADesk 365firstrun. File $APPDATADesk 365process_mgr.xml. File $APPDATADesk 365promote.xml. File $APPDATAeDownloadfindhpnt_v2.exe. File $APPDATAMicrosoftInternet ExplorerQuick Launchfind.lnk. File $COMMONPROGRAMSDesk 365Desk 365.lnk. File $COMMONPROGRAMSDesk 365eUninstall.lnk. File $DESKTOPfind.lnk. File $LOCALAPPDATAGoogleChromeUser DataDefaultExtensionsnewtab.crx. File $LOCALSETTINGSTempV9Zip_003Desk365.exe. File $PROGRAMFILESDesk 365desk_bkg_list.xml. File $PROGRAMFILESDesk 365desk_list.xml. File $PROGRAMFILESDesk 365desk_settings.ini. File $PROGRAMFILESDesk 365desk365.exe. File $PROGRAMFILESDesk 365deskSvc.exe. File $PROGRAMFILESDesk 365ebase.dll. File $PROGRAMFILESDesk 365edeskcmn.dll. File $PROGRAMFILESDesk 365eDhelper.exe. File $PROGRAMFILESDesk 365eDhelper64.exe. File $PROGRAMFILESDesk 365edis.dll. File $PROGRAMFILESDesk 365edis64.dll. File $PROGRAMFILESDesk 365ElexDbg.dll. File $PROGRAMFILESDesk 365eUninstall.exe. File $PROGRAMFILESDesk 365libpng.dll. File $PROGRAMFILESDesk 365main. File $PROGRAMFILESDesk 365ouilibnl.dll. File $PROGRAMFILESDesk 365process_mgr.xml. File $PROGRAMFILESDesk 365promote.xml. File $PROGRAMFILESDesk 365recent.xml. File $PROGRAMFILESDesk 365sqlite3.dll. File $PROGRAMFILESDesk 365svc.conf. File $PROGRAMFILESDesk 365TrayDownloader.exe. File $PROGRAMFILESDesk 365zlib1.dll. File $PROGRAMFILESMozilla Firefoxsearchpluginsfind.xml. File $SENDTODesk 365.lnk. Directory $APPDATADesk 365. Directory $APPDATAeDownload. Directory $COMMONPROGRAMFILES7. Directory $COMMONPROGRAMSDesk 365. Directory $LOCALSETTINGSTempDesk365. Directory $LOCALSETTINGSTempV9Zip_003. Directory $PROGRAMFILESDesk 365. Registry: Key 33BB0A4E-99AF-4226-BDF6-49120163DE86 at HKEY_CURRENT_USERSoftwareMicrosoftInternet ExplorerSearchScopes. Key deskSvc at HKEY_LOCAL_MACHINESOFTWARE. Key desksvc at HKEY_LOCAL_MACHINESYSTEMControlSet001Services. Key desksvc at HKEY_LOCAL_MACHINESYSTEMControlSet001ServicesEventlogApplication. Key desksvc at HKEY_LOCAL_MACHINESYSTEMCurrentControlSetServices. Key desksvc at HKEY_LOCAL_MACHINESYSTEMCurrentControlSetServicesEventlogApplication. Key findSoftware at HKEY_LOCAL_MACHINESOFTWARE. Key ijblflkdjdopkpdgllkmlbgcffjbnfda at HKEY_LOCAL_MACHINESOFTWAREGoogleChromeExtensions. Key lnkguard at HKEY_CURRENT_USERSoftware. Key V9 at HKEY_LOCAL_MACHINESOFTWARE.
Read More
Change position of Taskbar in Windows 10
Changing Taskbar location in your Windows 10 is an easy task but lately, Microsoft has removed the option to just drag it to one side of the screen and place it there, now in order to change location we need to do a little more work but do not worry it is not difficult at all. Right-click on the taskbar to open its properties menu taskbar settings menu
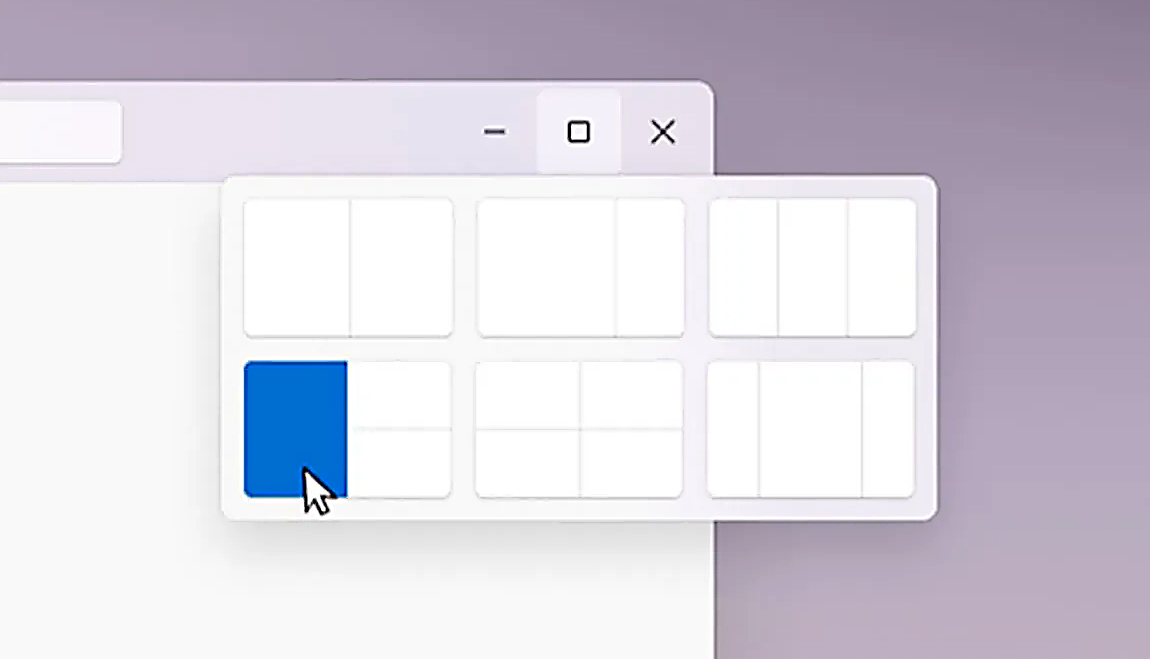
in the menu, on the bottom choose taskbar settings. Once the settings dialog opens, on the right side locate the taskbar location on screen. taskbar location chooserClick on the dropdown menu and choose the desired location for the taskbar.
Read More
Logitech lift ergonomic mouse

Recently Logitech has released a new line of ergonomic mouse products on market, strangely shaped and lifted on a vertical axis Logitech claims that these devices will fix your issues and ease your hand pains for prolonged use of the computer.

Logitech ergonomic vertical mouse

The first time I saw this mouse I was not really impressed with its looks and somehow I thought it will not feel good. This all changed when I actually started using it, surprisingly altho strange in looks it does feel much more natural and much less stressful on hand. Also, it felt like I have used it before, personally, I did not need any adjustment period in order to use it fully.

All of that being said I will admit that using it for gaming is still not an option for me, someone might find it ok, especially if they play some games that do not need to be responsive like strategies or similar but for RTS and FPS I will still stick to the typically shaped mouse. This might be just a habit for me but somehow I feel more responsive with the typical mouse, but for anything else, this is the mouse that will keep your hands stress-free.

Now in order to get the mouse to be really recommended it needs to have some good technical specifications as well, looks are not all. The less important detail is that the mouse comes in 3 different colors: Black, white and pink, and its technical specifications are:

Specs & Details

Dimensions

Height: 71 mmWidth: 70 mmDepth: 108 mmWeight: 125 g

Technical Specifications

Sensor technology
  • Sensor type: Logitech Advanced Optical Tracking
  • Dpi range: 400-4000 dpi (Fully adjustable with 100DPI increments)
  • Nominal value: 1000 dpi
Buttons
  • Number of buttons: 6 (Left/Right-click, Back/Forward, Middle button, Scroll-wheel with a middle click)
Battery
  • Battery type: 1x AA battery (included)
  • Battery life: up to 24- months Battery life may vary based on user and computing conditions.
Connection type support
  • Logi Bolt USB receiver (included)
  • Bluetooth® Low Energy Technology
Wireless range
  • 10-m wireless range

Personally, I would recommend this mouse for anyone who does work in front of the computer during the whole workday since it really does loosen grip and strain on hands.

Read More
Fix Boot Device Not Found Error in Windows
If you encounter an error saying, “Boot Device Not Found” when you turn on your Windows 10 computer, then you’ve come to the right place as this post will guide you on how you can fix this problem. Apart from the error message, you will also see a message that states, “Please install an operating system on your hard disk, Hard Disk<xxx>”. You will then be asked to tap the F2 key to initiate the System Diagnostics. If you install the Windows operating system, it becomes the boot device, and when your computer boots, the UEFI or the BIOS looks for the operating installed on your drive and continues the process. So when you encounter the “Boot Device Not Found” error, this means that the UEFI or the BIOS wasn’t able to locate the drive where it can boot. There are several suggestions you can check out to resolve this error. You can try checking the connection with your boot drive or change the boot order. You can also fix the Boot Record from Recovery and see if the primary partition is active or not. But before you troubleshoot the problem, make sure that you have a bootable Windows USB drive ready since two of the options provided below will require you to boot into the Advanced Recovery mode. Once you have this covered, proceed to each one of the following options.

Option 1 – Try checking the connection with the boot drive

If you have a custom computer that comes with a cabinet, you might want to open it and remove any connected power supply, and then check the wires. As you know, drives are connected with the motherboard using a cable. So all you have to do is check if both ends are connected properly and make sure that the connection is not loose. You could also try to unplug the cable and plug it back in.

Option 2 – Try changing the boot order

You might also want to try changing the boot order of your computer. Each time a computer boots, the BIOS or the UEFI follows a boot order. It is the one that tells where to first look for the boot drive and if for some reason, a USB is connected to your computer and the first boot device found in the USB, then you have resolved the problem. All you have to do is to remove the USB device and boot or go into the BIOS and change the boot order yourself.

Option 3 – Try to rebuild the BCD files

The next thing you can do to resolve the issue is to Rebuild Boot Configuration Data or BCD files.
  • You can start by booting into the installation environment for Windows 10 from an installation media.
  • After that, click on Repair your computer and on the blue screen, select Troubleshoot and then select the Advanced options menu.
  • From there, select Command Prompt and once you open it, enter each one of the commands given below by sequence.
    • bootrec /FixMbr
    • bootrec /FixBoot
    • bootrec /ScanOS
    • bootrec /RebuildBcd
  • Once you’re done executing the commands given above, type “exit” to close the Command Prompt window and then restart your computer and see if it fixed the “Boot Device Not Found” error.

Option 4 – Try setting the System Partition to Active

Like the first given option, you also have to make sure that you have a bootable Windows 10 USB drive before you proceed to set the System Partition to Active. Once you have it covered, refer to these steps:
  • Boot your computer using the bootable Windows 10 USB drive.
  • Next, click Next when you get to the Welcome Screen.
  • Then click on Repair your computer located at the bottom left part of the window and select Troubleshoot > Advanced Options > Command Prompt.
  • After opening Command Prompt, type the following command and hit Enter to start the Diskpart utility. It is a command line-based utility just like Command Prompt but has a UAC prompt once you provoke it. So if you encounter a UAC prompt, just click on Yes to proceed.
diskpart
  • Now type the following command:
list disk
  • From there, select your primary disk by typing the following command:
select disk number
  • After that, list all the partitions on the selected disk by entering the following command:
list partition
  • The command you just entered will list all the partitions created on your PC including both types of partitions that are visible to a normal user in the File Explorer as well as the ones created by Windows 10 by default which helps it in storing the boot files and other important system files.
  • Now type the following command to select the partition that is usually around 100 MB in size:
select partition number
  • Finally, type the following command to mark the partition active:
active
  • Then type the “exit” command to exit the disk part utility.
Once it’s done, the primary drive should now be active and you should now be able to boot into your computer without the “Boot Device Not Found” error.
Read More
Computer won’t upload Pictures to websites
Windows 10 is undeniably one of the great operating systems and the same thing can be said about a lot of computers that are running it. However, there are instances when things don’t go as you expect them to be. One of the many issues you might face when using Windows 10 is the inability to upload any pictures over the web. If you are facing this issue right now, you are not alone for a lot of users have suffered from the same problem at least once. Even though it might seem like a minor problem, some users find it inconvenient especially the ones who often upload pictures online. Worry not though for this post will guide you on what you can do if you aren’t able to upload any images to websites on your Windows 10 computer. To get started in troubleshooting the problem, here are some suggestions that might help:

Option 1 – Try to clear browser cache and try downloading again

There are times when some data in the browser is conflicting with the loading of the website and triggers some problems like not being able to upload pictures to websites. And so you can try to clear your browser’s data. This might be a very basic solution but oftentimes it works in fixing this kind of odd problem in your browser.

Option 2 – Open your browser in Incognito Mode

The next thing you can do to fix the problem is to try opening the web page in Incognito Mode. When your browser is in this mode, it will work without extensions. This would help in fixing the problem especially if it was caused by some extension or toolbar in your browser. All you have to do is open any web page in Chrome and tap the Ctrl + Shift + N key combination to open a window in Incognito Mode.

Option 3 – Try to disable and get rid of the problematic extension

The next thing you can do after trying the Incognito mode in your browser is to see if a browser extension is the one that’s causing the problem. And if you have installed a lot of browser extensions, then identifying which one is the culprit may take a while but not too long. Once you’ve identified the culprit, you can get rid of that browser extension and see if you can now upload pictures on websites.

Option 4 – Try to reset your browser

You might also want to reset your browser as it could also help in resolving the issue. To reset your browser, here’s what you have to do:

Google Chrome

  • Open Google Chrome, then tap the Alt + F keys.
  • After that, click on Settings.
  • Next, scroll down until you see the Advanced option, once you see it, click on it.
  • After clicking the Advanced option, go to the “Restore and clean up option and click on the “Restore settings to their original defaults” option to reset Google Chrome.
  • Now restart Google Chrome.

Mozilla Firefox

  • Open Mozilla Firefox and tap Ctrl + Shift + A to access the Add-ons Manager.
  • In the Extensions, menu Remove the unwanted extension.
  • Restart the browser and tap keys Alt + T.
  • Select Options and then move to the General menu.
  • Overwrite the URL in the Home Page section and then restart the browser.

Internet Explorer

  • Launch Internet Explorer.
  • Next, click the wrench icon for Settings.
  • Then click Internet Options.
  • After that, go to the Advanced tab.
  • From there, click the Reset button. This will reset Internet Explorer’s settings to their default condition.
  • Now click OK to save the changes made.
  • Restart your computer.

Option 5 – Update your browser or switch to another one

The last option you can try is to update your browser. You can do it by checking for any available updates from its official site and then install it. However, if updating the browser did not help, you might want to consider switching to another browser.
Read More
MS Store and Electron Bot

So, what is Electron bot, and why it even matters if it is in the MS store. Electron bot is malware that somehow found its way inside MS Store via game clones of popular games temple run and subway surfer. This infiltration led to the infection of around 5000 systems over the globe in a very short period of time.

electron bot malware

This malware is a backdoor that gives complete system control to the attacker. Any type of execution can be performed remotely in real-time. Usually, this kind of attack was aimed at a spread of click fraud over popular social media like Facebook, google, youtube, etc.

Primary goal

Electron Bot's primary goals in the ongoing campaign analyzed by researchers are:

  • SEO poisoning – Create malware-dropping sites that rank high on Google Search results.
  • Ad clicking – Connect to remote sites in the background and click on non-viewable advertisements.
  • Social media account promotion – Direct traffic to specific content on social media platforms.
  • Online product promotion – Increase store rating by clicking on its advertisements.

These functions are offered as services to those who want to increase their online profits illegitimately, so the gains for the malware operators are indirect.

Publishers that contain malware

For now, users may take note of the publishers who released confirmed malicious game apps using the following names:

  • Lupy games
  • Crazy 4 games
  • Jeuxjeuxkeux games
  • Akshi games
  • Goo Games
  • Bizzon Case
Read More
1 2 3 171
Logo
Copyright © 2023, ErrorTools. All Rights Reserved
Trademark: Microsoft Windows logos are registered trademarks of Microsoft. Disclaimer: ErrorTools.com is not affiliated with Microsoft, nor claims direct affiliation.
The information on this page is provided for information purposes only.
DMCA.com Protection Status